
Classic Peanut Butter Blossoms
My sister LOVES peanut butter, so this year I made a double batch of my Peanut Butter Blossom cookies to munch on when my family celebrates Christmas with us. I know this classic recipe isn't exactly revolutionary, but I do have a handful of tips for you that I learned over the years - to help you make them look picture-perfect!
Servings: 3 dozen
Ingredients
- 1 ½ cups all-purpose flour
- ½ teaspoon baking soda
- ¼ teaspoon salt
- ⅓ cup butter softened
- ½ cup granulated sugar
- ½ cup brown sugar packed
- 1 large egg
- ¾ cup creamy peanut butter
- 1 teaspoon pure vanilla extract
For rolling:
- ¼ cup granulated sugar
For topping:
- 36 chocolate kisses
Instructions
- Prep: Heat oven to 375°F and line a few baking sheets.
- Make cookie dough: Combine flour, baking soda and salt in a medium bowl. Set aside. Cream butter, both sugars, egg, peanut butter and vanilla with a hand mixer until beaten. Beat in flour mix on low speed JUST until combined into a crumbly cookie dough. Do not overmix or the cookies will not turn out soft.
- Shape and bake cookies: Roll dough into 1 inch balls, then roll the balls in granulated sugar. Set 2 inches apart on lined baking sheets and bake, one tray at a time, for 8-10 minutes or until lightly golden on the bottom (do not overbake or they will turn out like rocks).
- Decorate: Immediately after baking, press a chocolate kiss into the center of each cookie (see tips to make them look perfect!). Cool on the baking sheet for 5 minutes, then carefully transfer to cooling racks to cool completely.
Notes
Step by Step Photos and Baking Tips:
When beating the wet ingredients, it's important to beat them until well combined and creamy, but don't overbeat or your cookies could turn out tougher than you want them to be.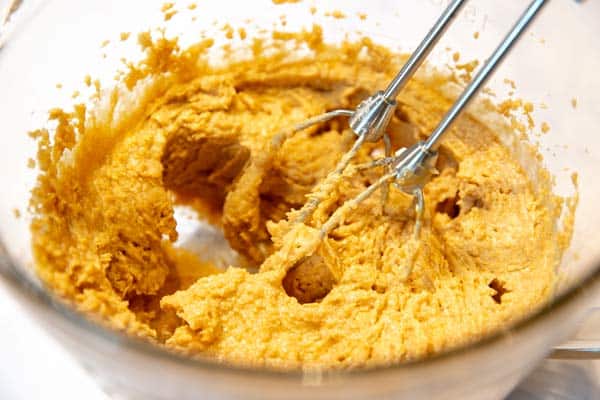 You may feel like the dough is going to be too dry when you start adding the flour (the mix can look very crumbly at first).
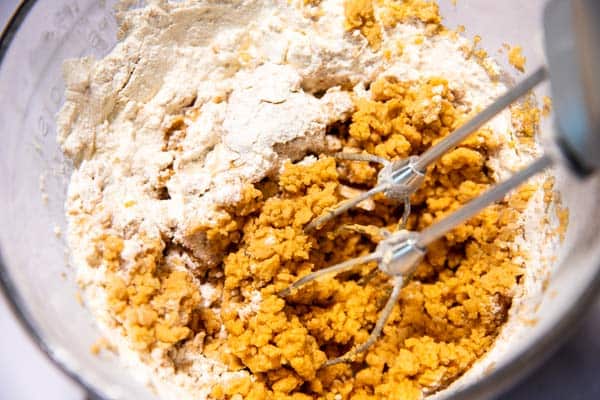 Just keep going on low speed until all the flour is incorporated, and you should end up with a soft cookie dough that doesn't crack when rolling into balls.
Note: Measure the flour correctly! Spoon the flour into the measuring cup to fluff it up, then level with the back of a knife. Don't scoop it with the cup, or you may use too much flour and end up with dry and crumbly dough.
How to fix dry cookie dough: If this happens, add a teaspoon of neutral vegetable oil and combine slowly. Add a little more oil if necessary until your dough is soft and pliable.
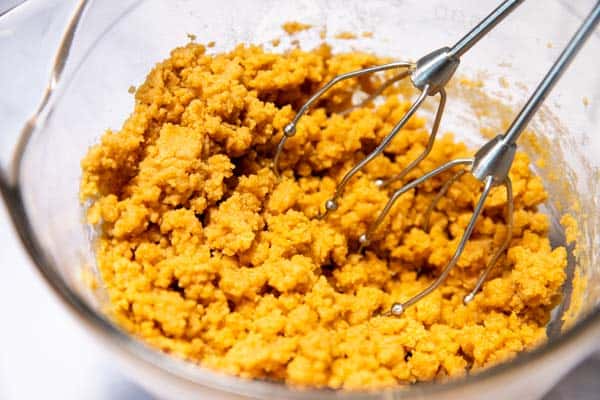
Just keep going on low speed until all the flour is incorporated, and you should end up with a soft cookie dough that doesn't crack when rolling into balls.
Note: Measure the flour correctly! Spoon the flour into the measuring cup to fluff it up, then level with the back of a knife. Don't scoop it with the cup, or you may use too much flour and end up with dry and crumbly dough.
How to fix dry cookie dough: If this happens, add a teaspoon of neutral vegetable oil and combine slowly. Add a little more oil if necessary until your dough is soft and pliable.
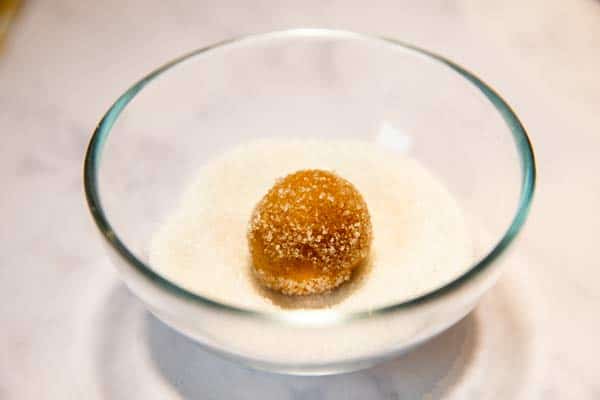
 I use a small bowl to roll the dough balls in sugar, I find it sticks easier that way vs when the sugar is all spread out in a larger bowl.
 Do be fast when adding the chocolate after baking - otherwise it won't stick as well. See my notes below this image for more tips to get this kiss thing down perfectly ;-)
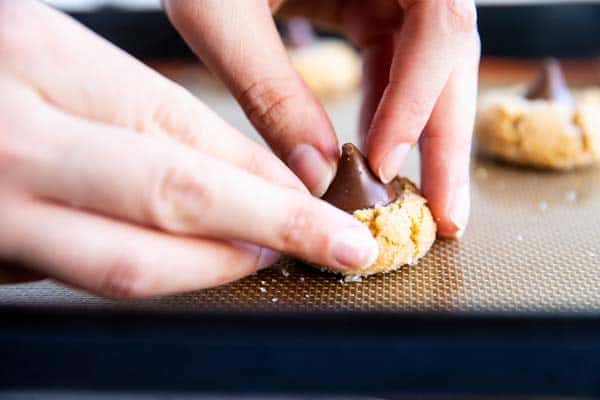
To place the chocolate kiss perfectly on your cookies:
- do not overbake the cookies, take them out right as the top starts looking dry and the bottom is very lightly browned
- add the kiss RIGHT after baking, wear rubber gloves if the heat is too much for your fingers
- place the kiss with two fingers of one hand, while holding the cookie together with all your other fingers (see the image above) - that ways pressing down the chocolate will not completely flatten/break the cookie!!
- do NOT touch the chocolate for at least a couple of hours, until it has set again (the chocolate will melt but hold its shape, if you touch it it will look messy). If it's cold outside where you are, you can place them out for a bit to make the chocolate firm up faster. However, do not place the hot cookies in your freezer like some recipes suggest - adding hot food to a freezer is not considered safe because it can heat up and spoil other food in there.