

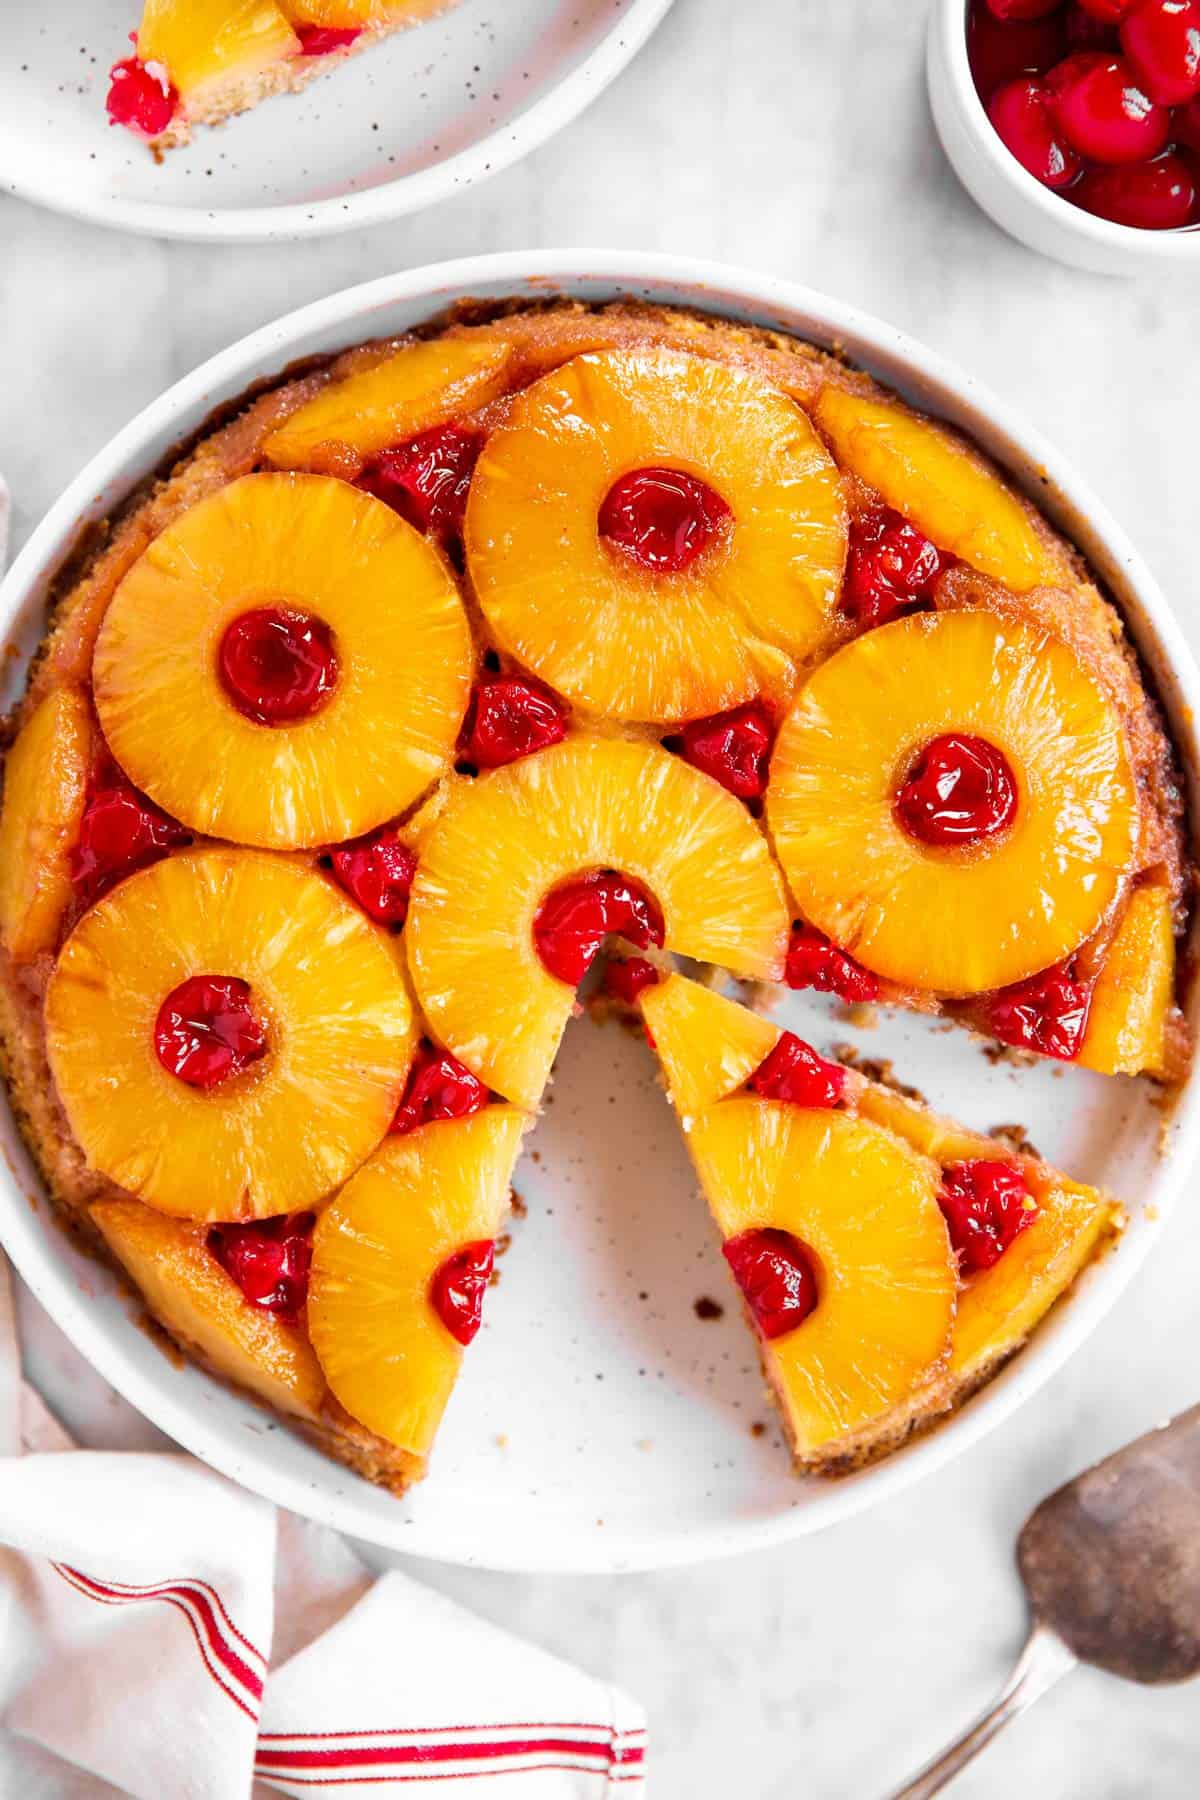
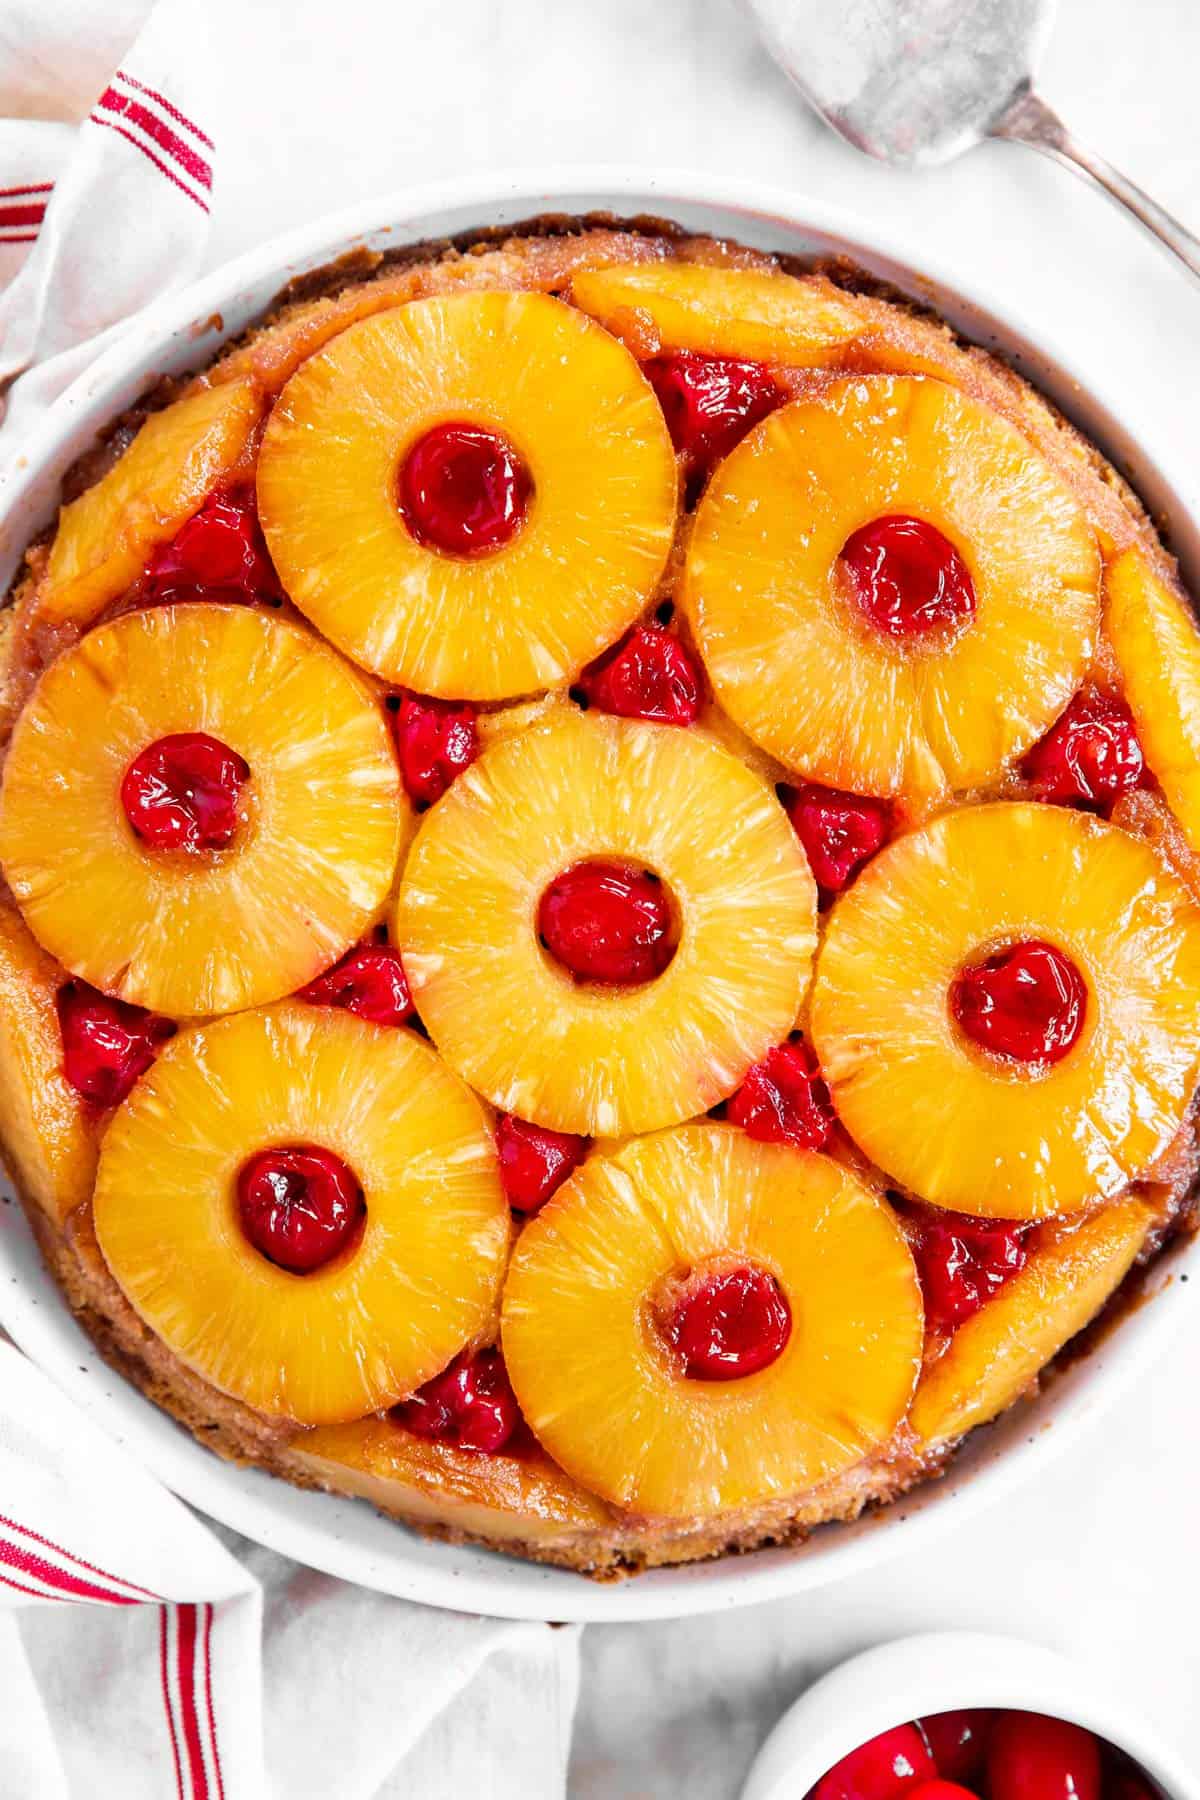
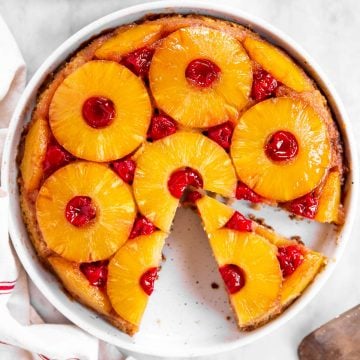
A classic Pineapple Upside Down Cake is one of the best desserts out there. It is a simple recipe, yet yields such a beautifully impressive and absolutely delicious cake.
This is a retro favorite you will be making again and again – it’s great for company but easy enough to surprise your family with any day of the week.
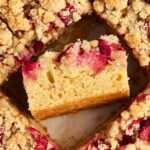
The best Pineapple Upside Down Cake recipe
I sincerely hope you grew up eating Pineapple Upside Down Cake, too. Otherwise I’ll feel very old right now ? This is such a retro cake (I mean, even these photos look like they came straight out of the 80s), but it deserves to be called a classic.
- This is a very simple cake to bake, yet it comes out so beautiful and impressive. And you don’t even need any cake decorating skills!
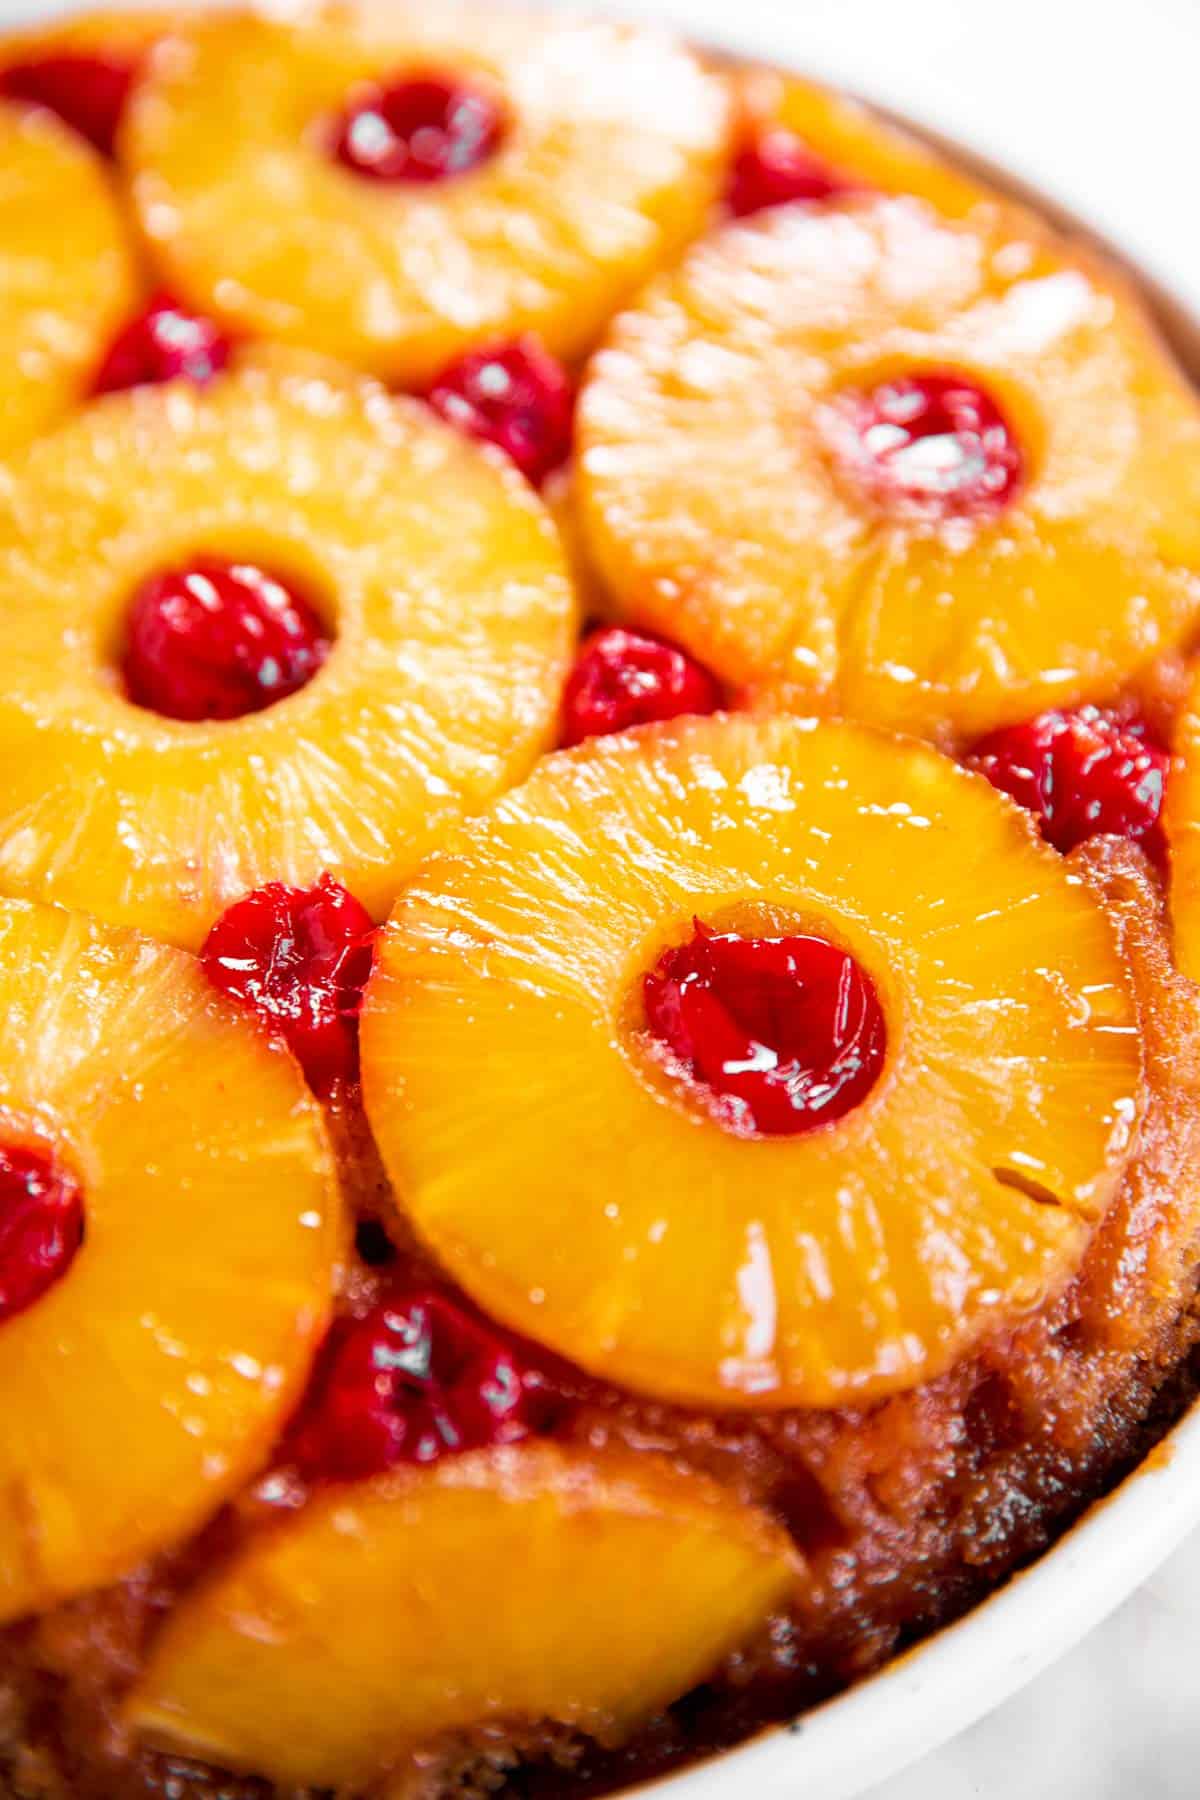
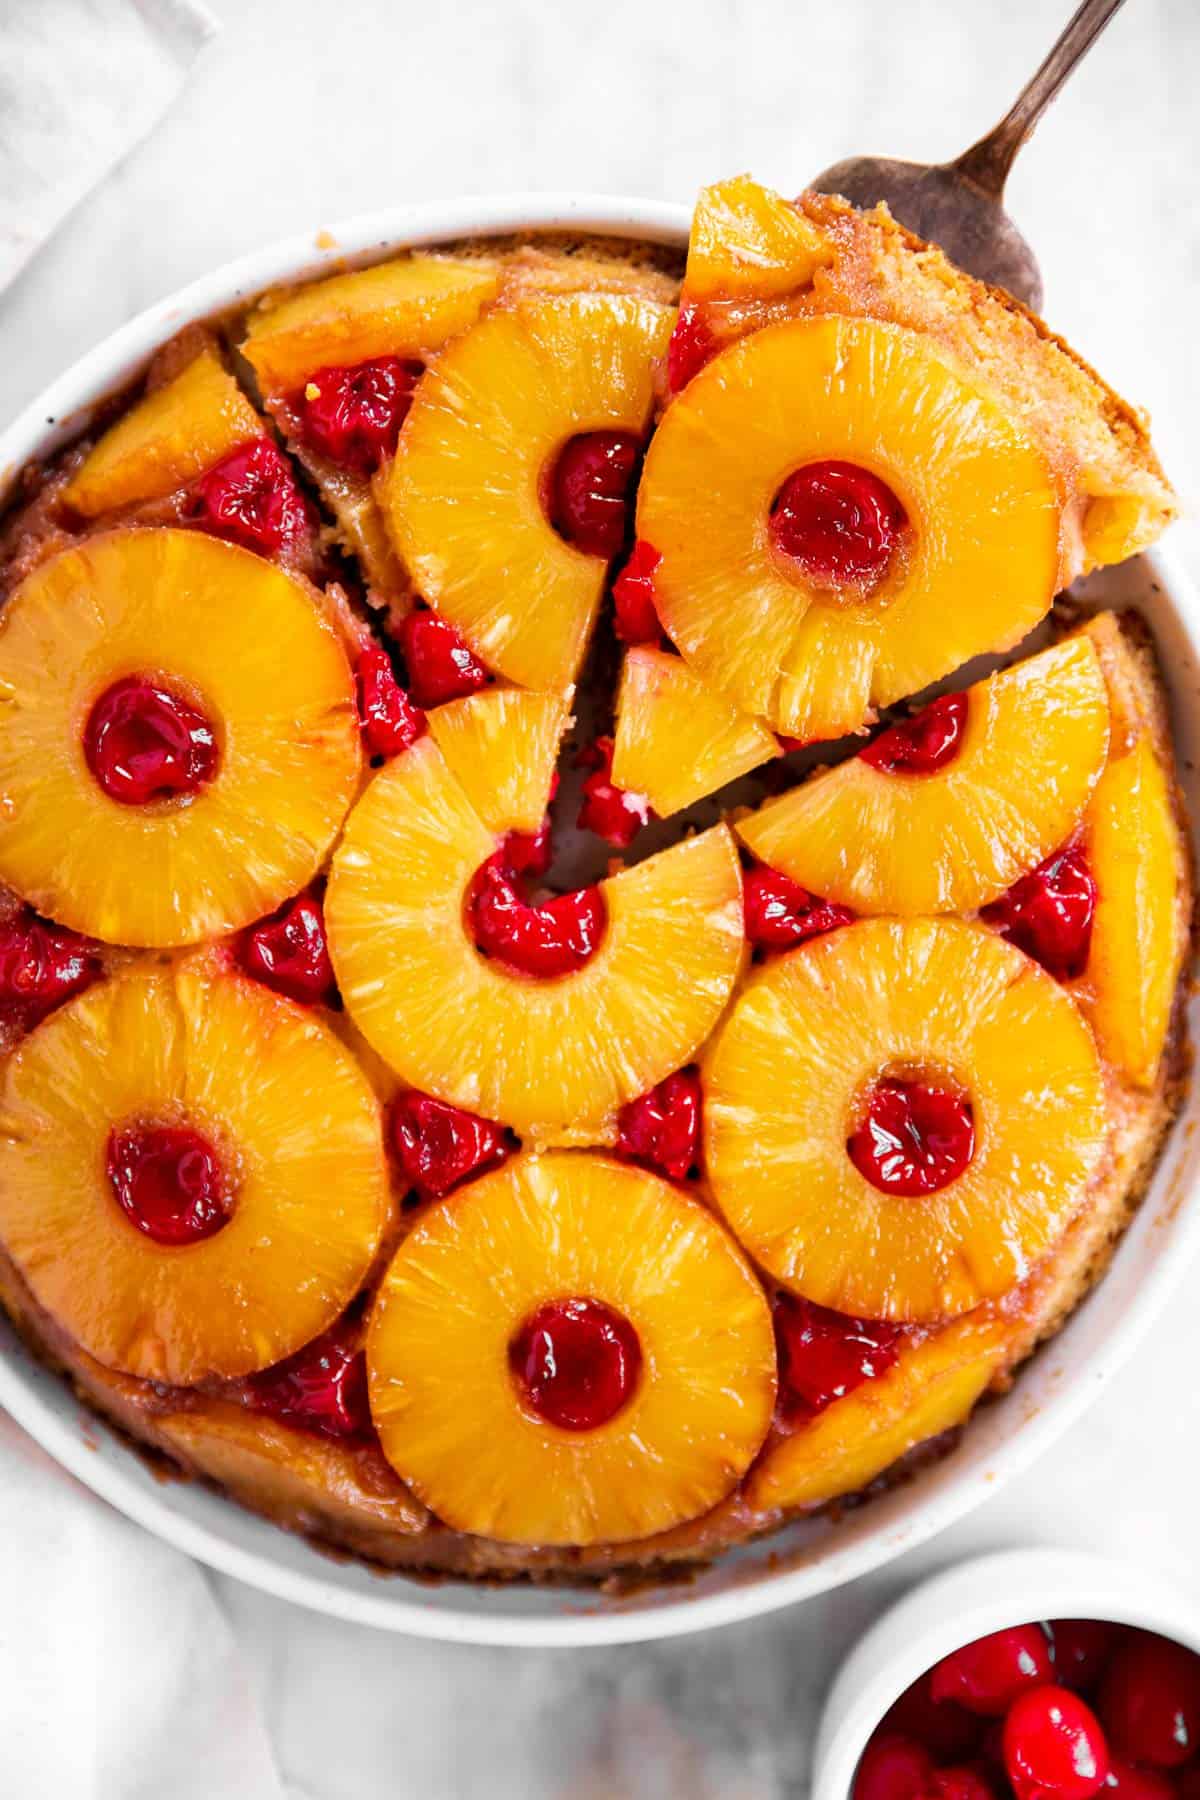
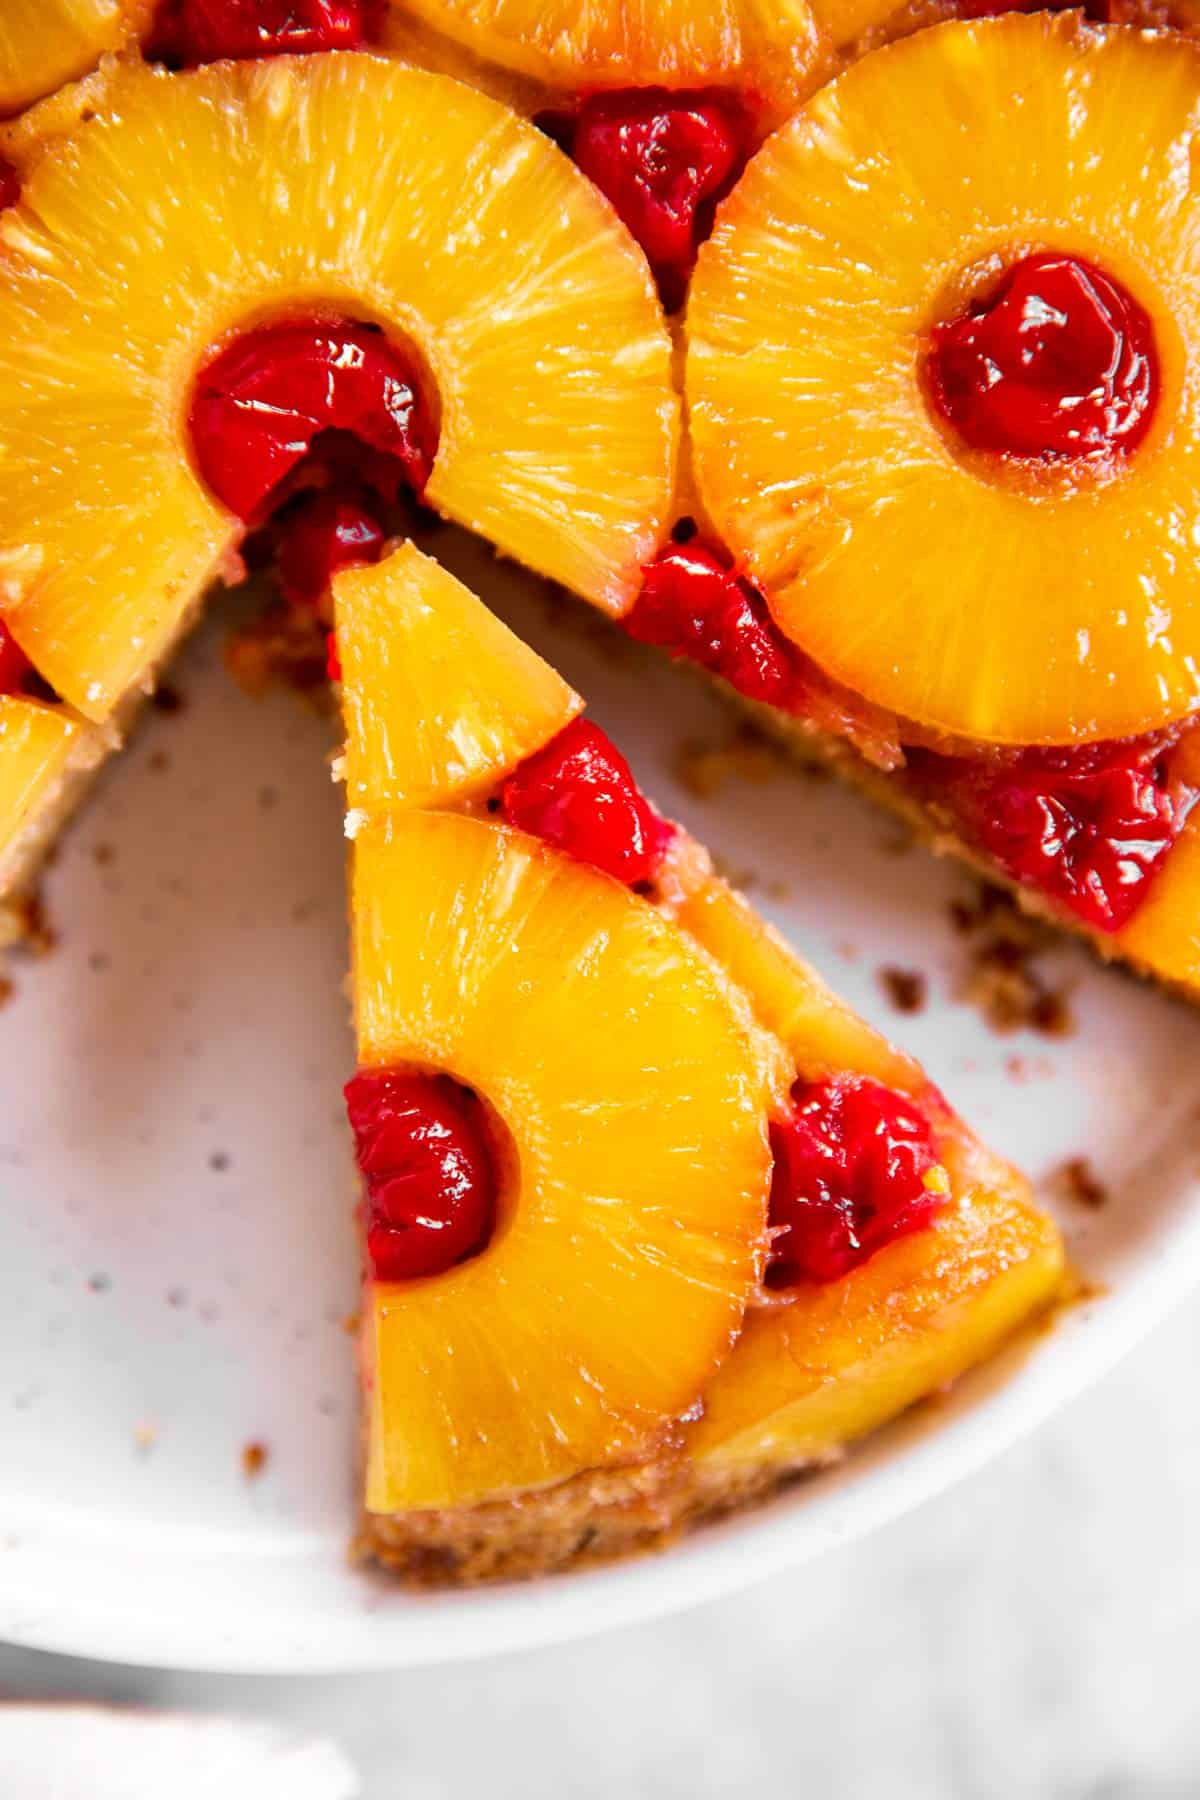
- The cake portion is light and fluffy, yet sturdy enough to carry the weight of the pineapple. The top and sides get all caramelized from the topping, while the inside is nice and fluffy. A special dessert for sure!
- The hardest part of the recipe is flipping the cake. But as long as you catch it at the right time (5 minutes after taking it out of the oven is pretty much the sweet spot) and use the right flipping technique (more on that later) – it’s really not that intimidating anymore.
Ingredients you’ll need
Here is a visual overview of the ingredients in the recipe. Scroll down to the printable recipe card at the bottom of this post for quantities!
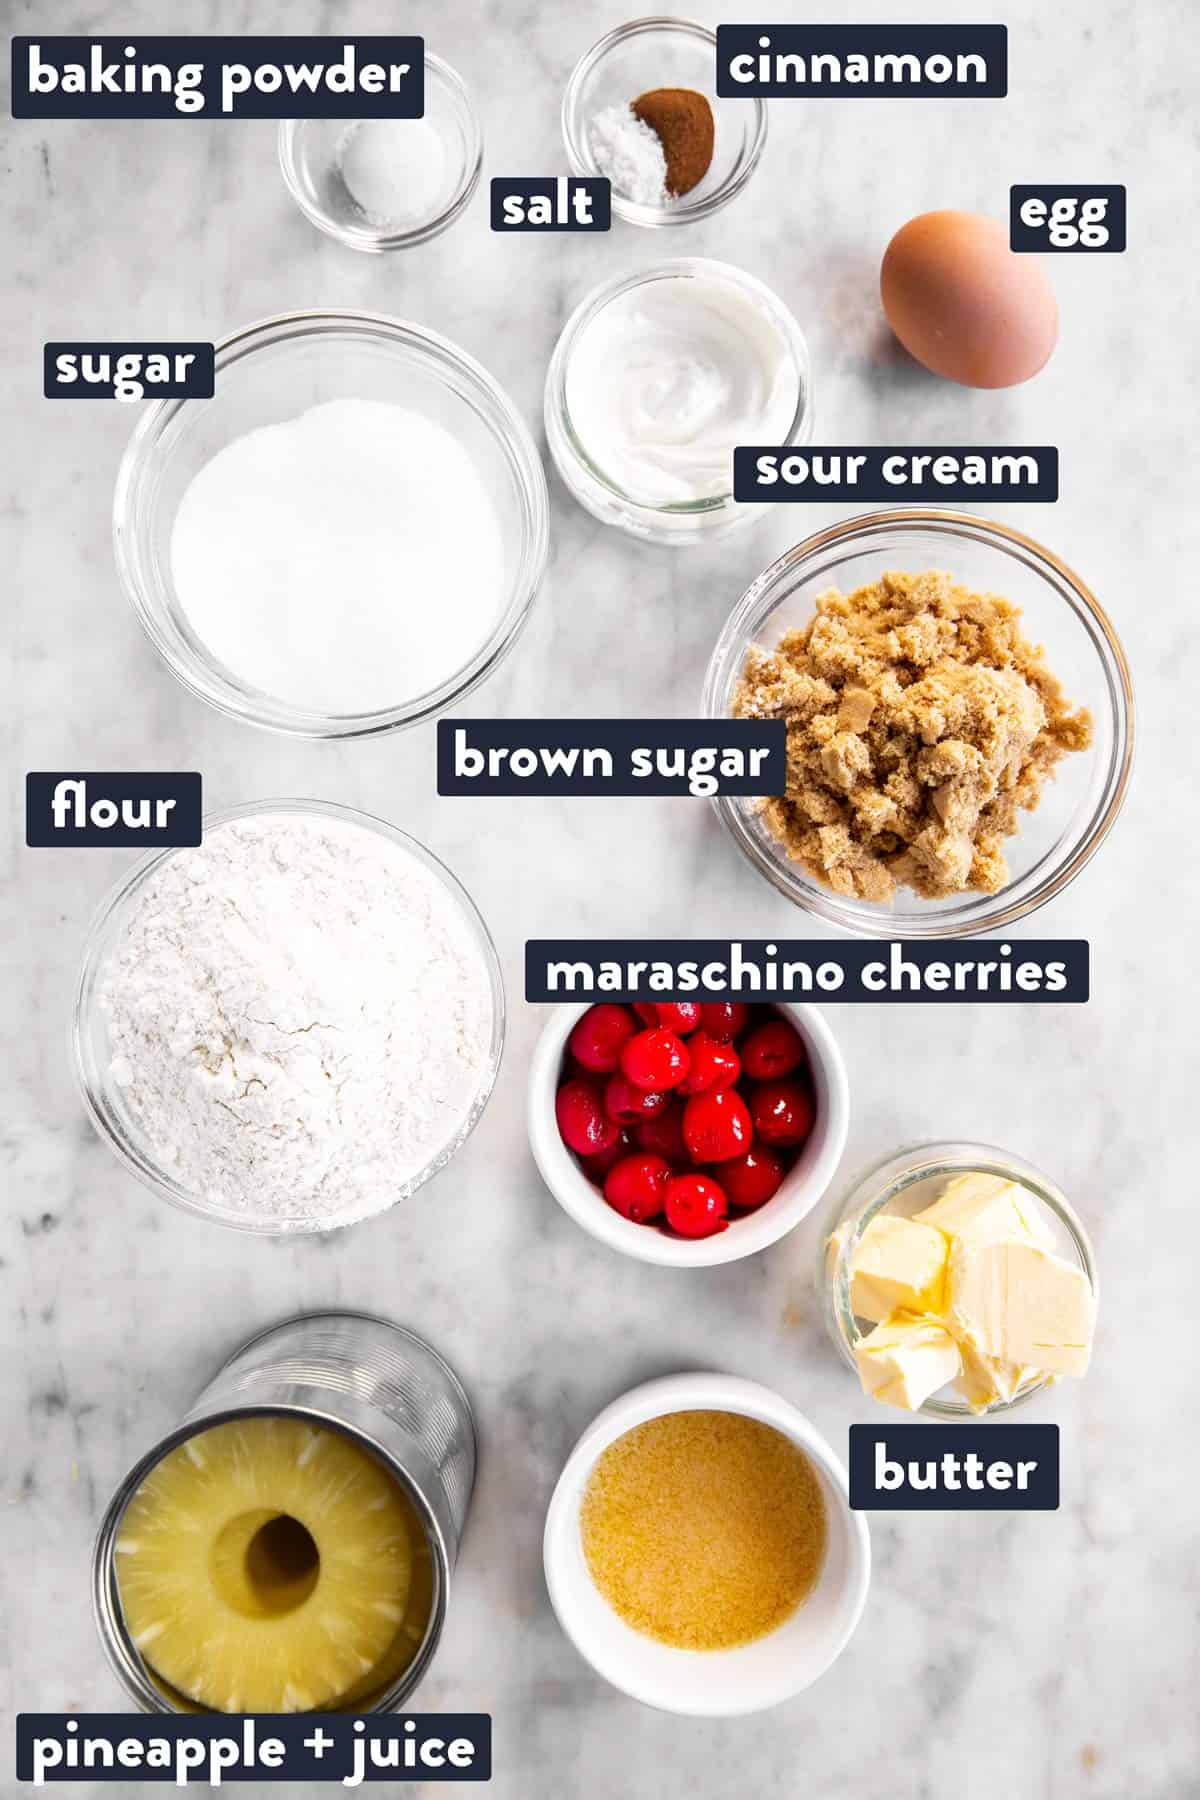
Ingredient notes
- Pineapple: Use pineapple canned in juice, not syrup. You need the juice to flavor the cake, and you already use a lot of sugar and butter in the topping, so you really do not need any more.
- Butter: If you need to use margarine in place of the butter, please make sure to only use stick margarine for the topping part. A spreadable margarine will not work so well in the topping. A baking spread can be used in place of the softened butter in the cake.
- Maraschino cherries: Make sure to use maraschino cherries in this cake, they cannot be substituted with fresh cherries.
- Brown sugar: Light brown sugar works best in this recipe. I would not recommend using dark brown, as it tends to overpower the cake.
- Sour cream: Feel freer to use Greek Yogurt in place of the sour cream.
- Baking powder: Do not use baking soda in place of the baking powder, they are not the same.
- Ground cinnamon: Very little pineapple upside down cakes include a spice in the cake, but I personally love it. I have always used Pumpkin Spice in my Pineapple Upside Down Cupcakes, but people were so enraged over it (why?? I really don’t know), I decided to only use cinnamon here, but to add this little note. I personally adore what the warm spices in pumpkin pie spice add to the pineapple – they really are magical together. So if you are brave, use half ground cinnamon and half pumpkin spice mix. If you prefer a non-spiced cake, omit the cinnamon altogether. There really is no right or wrong here, it’s just a matter of taste.
How to make a Pineapple Upside Down Cake
This is a walk-through of the recipe with step photos. Skip to the printable recipe card at the bottom for exact times and temperatures.
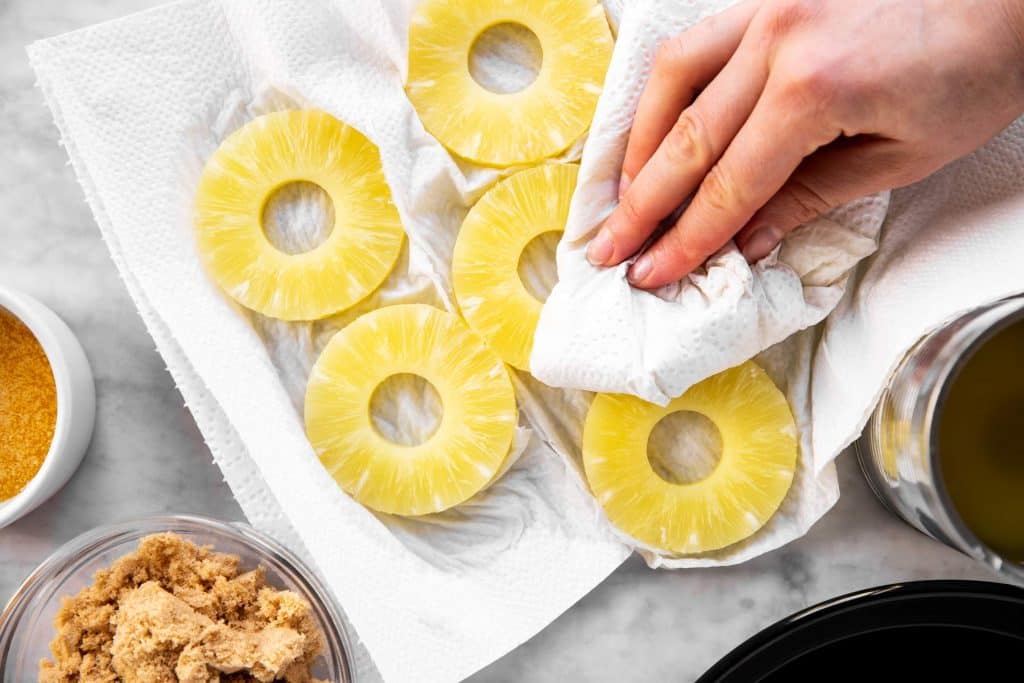
1. To prepare the pineapple rings, place them on a few layers of paper towels, then pat them dry with more paper towels.
Note: Remember to save your pineapple juice from the can! You will need ½ cup for the cake batter.
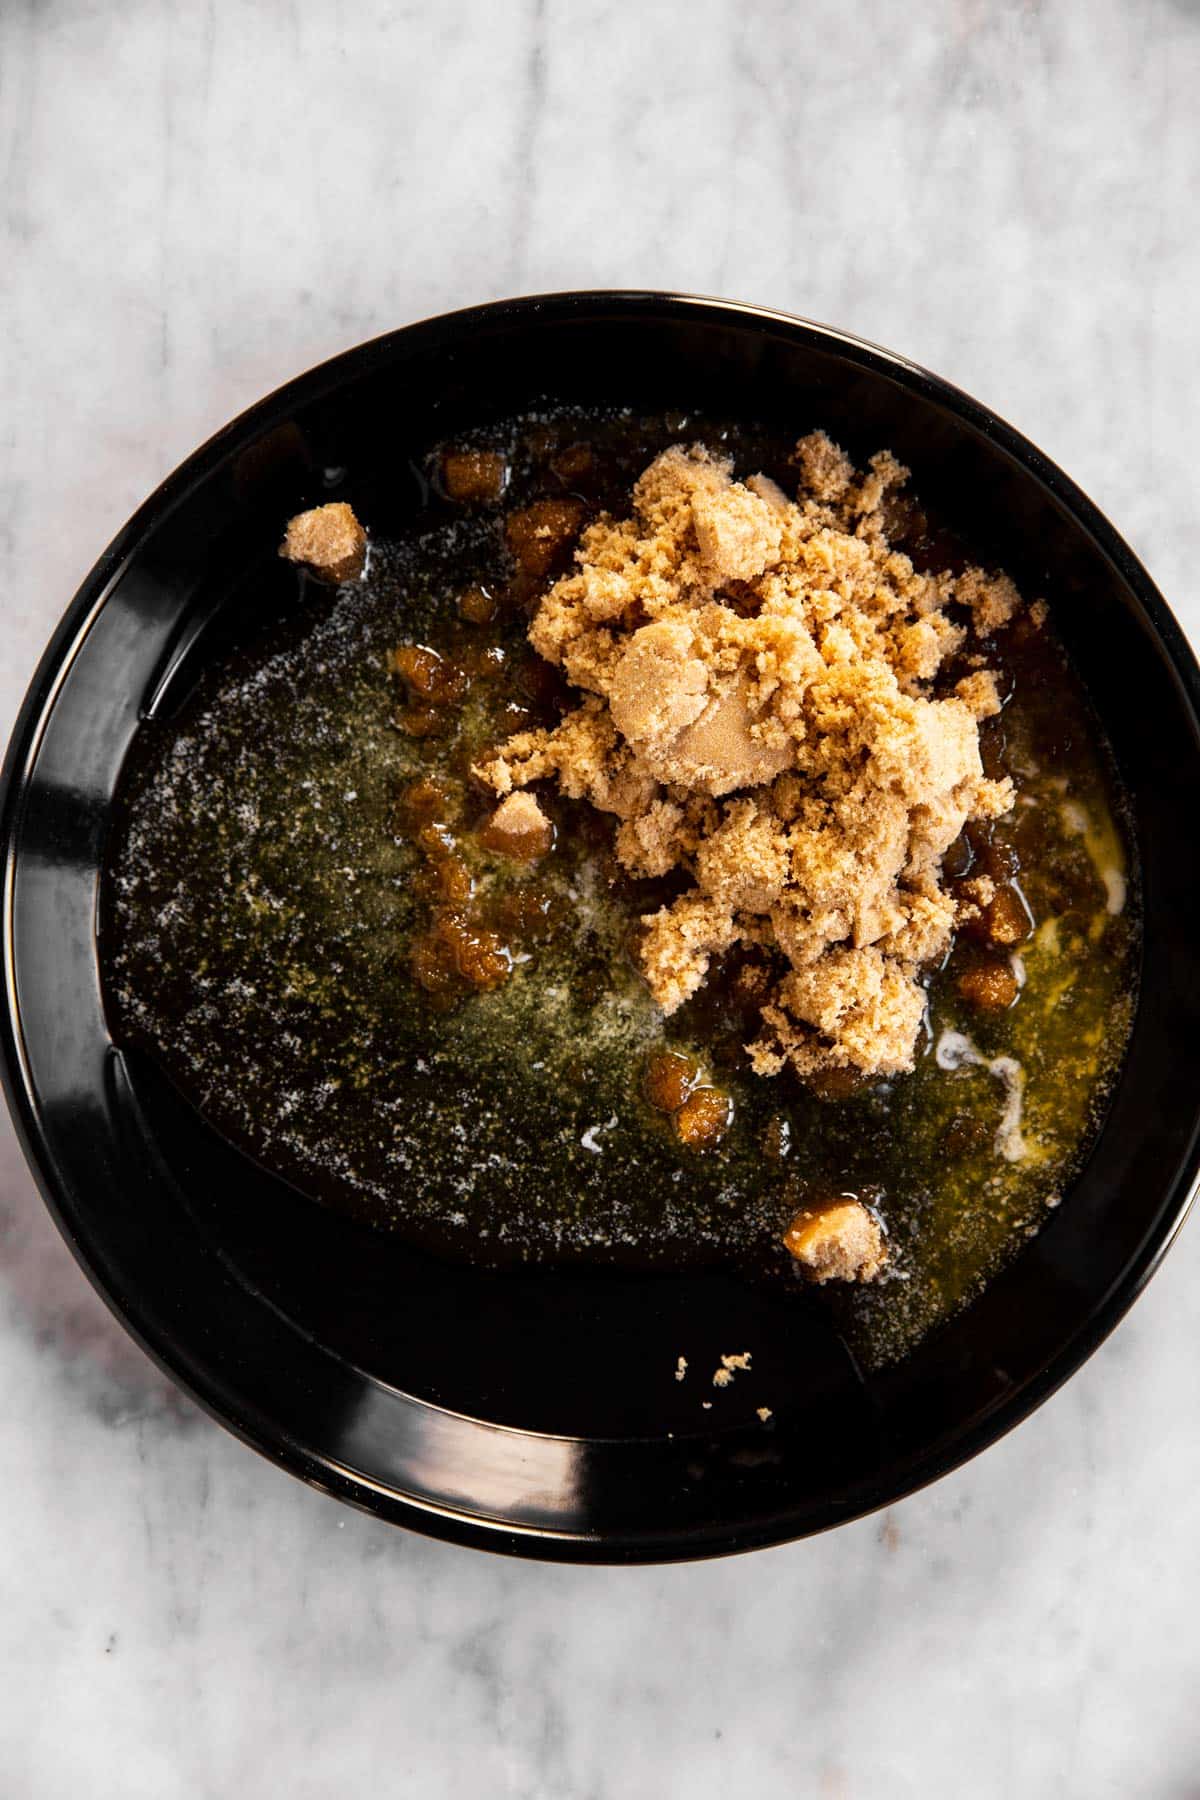
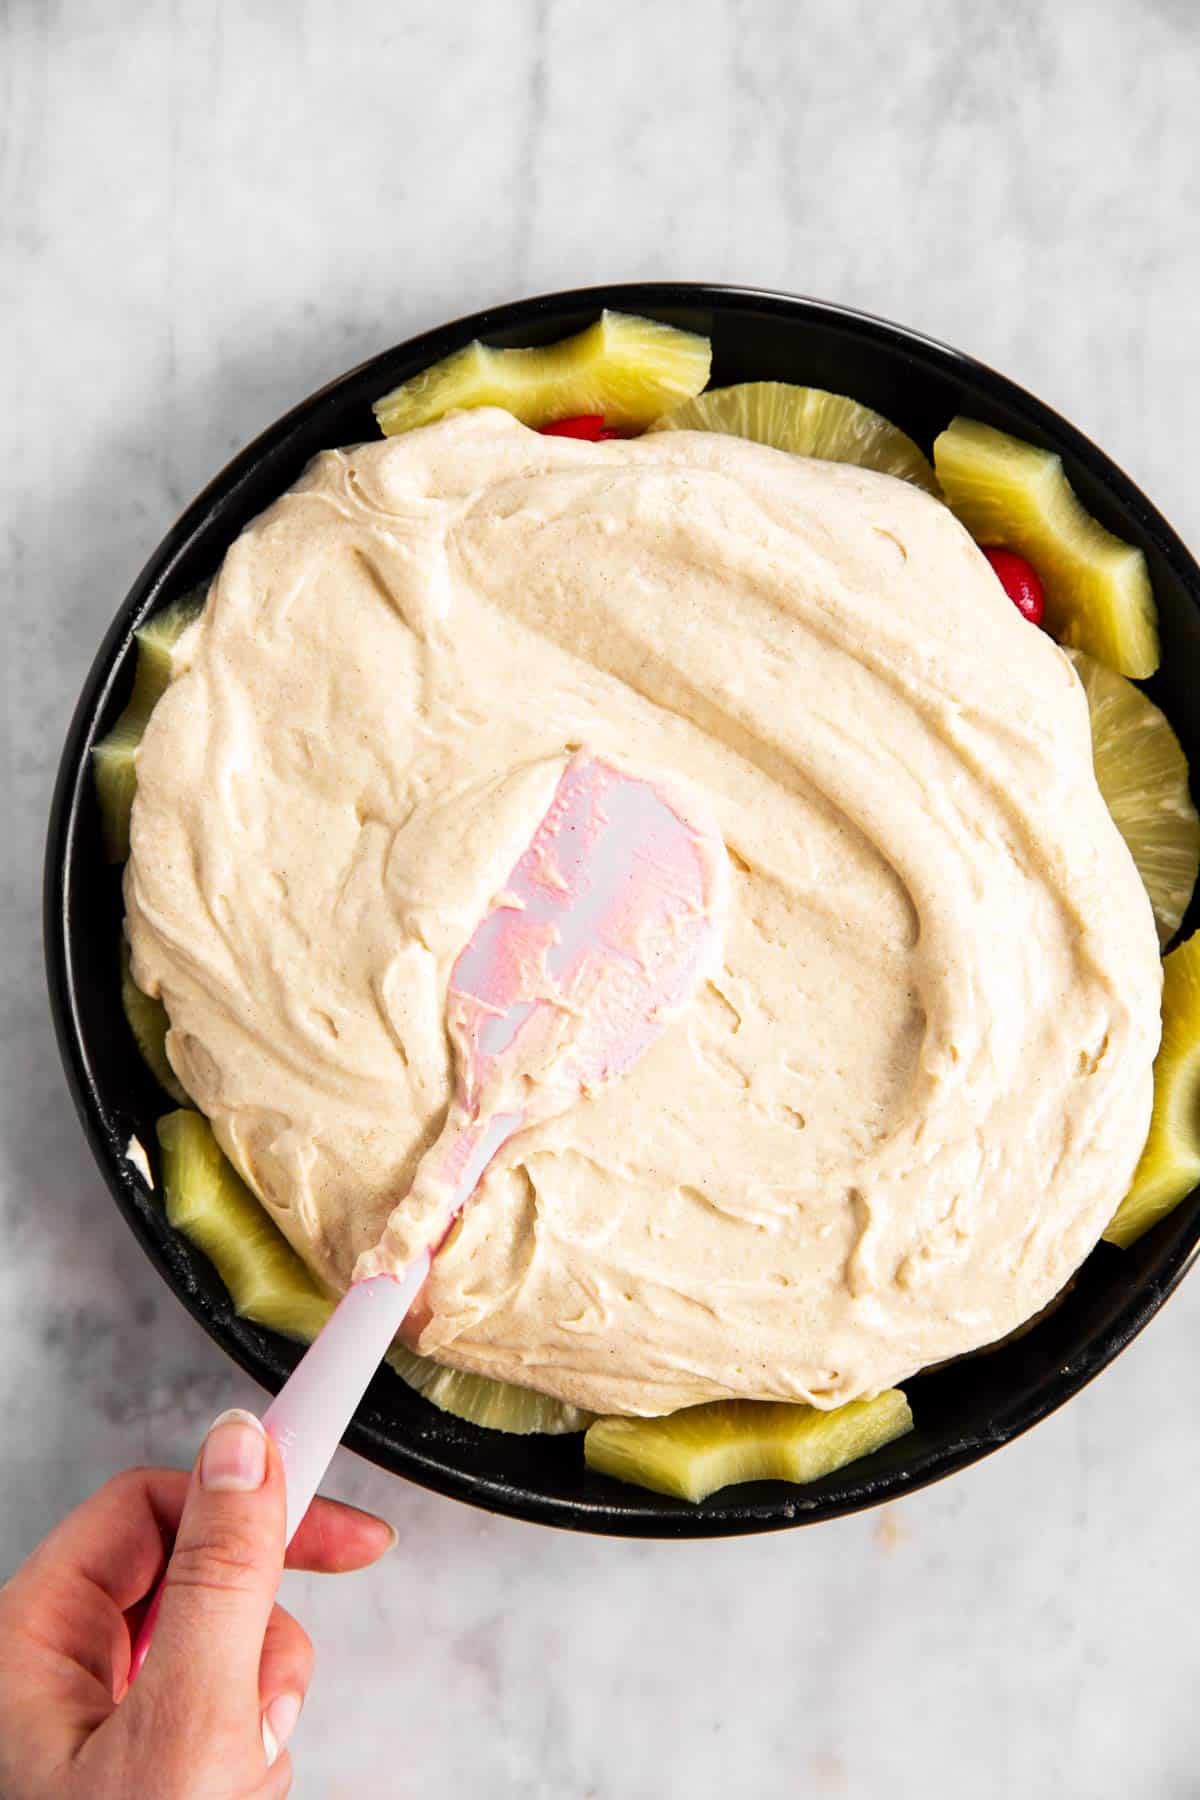
2. To prep your 9-inch cake pan: Pour in the melted butter, then lightly brush it up the sides. Add the brown sugar for the topping and stir until you have an even paste.
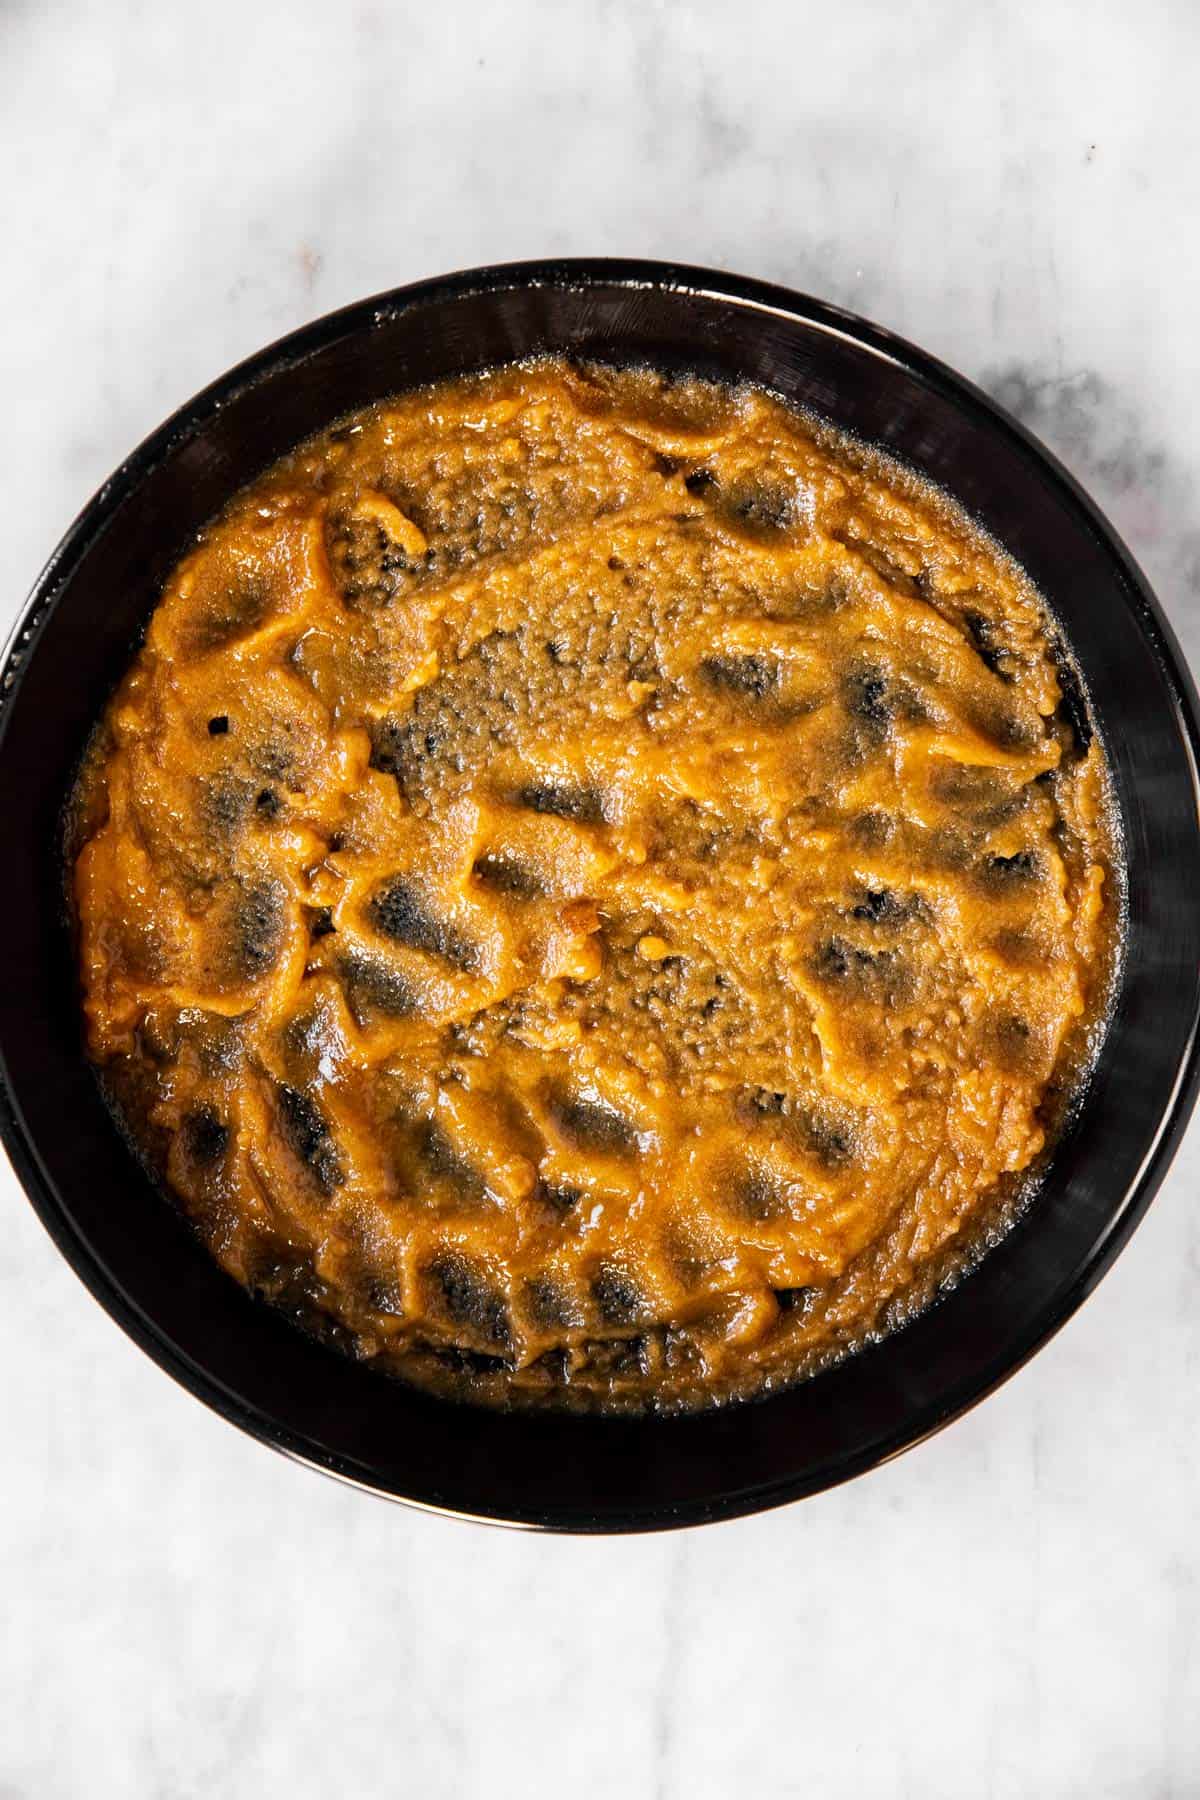
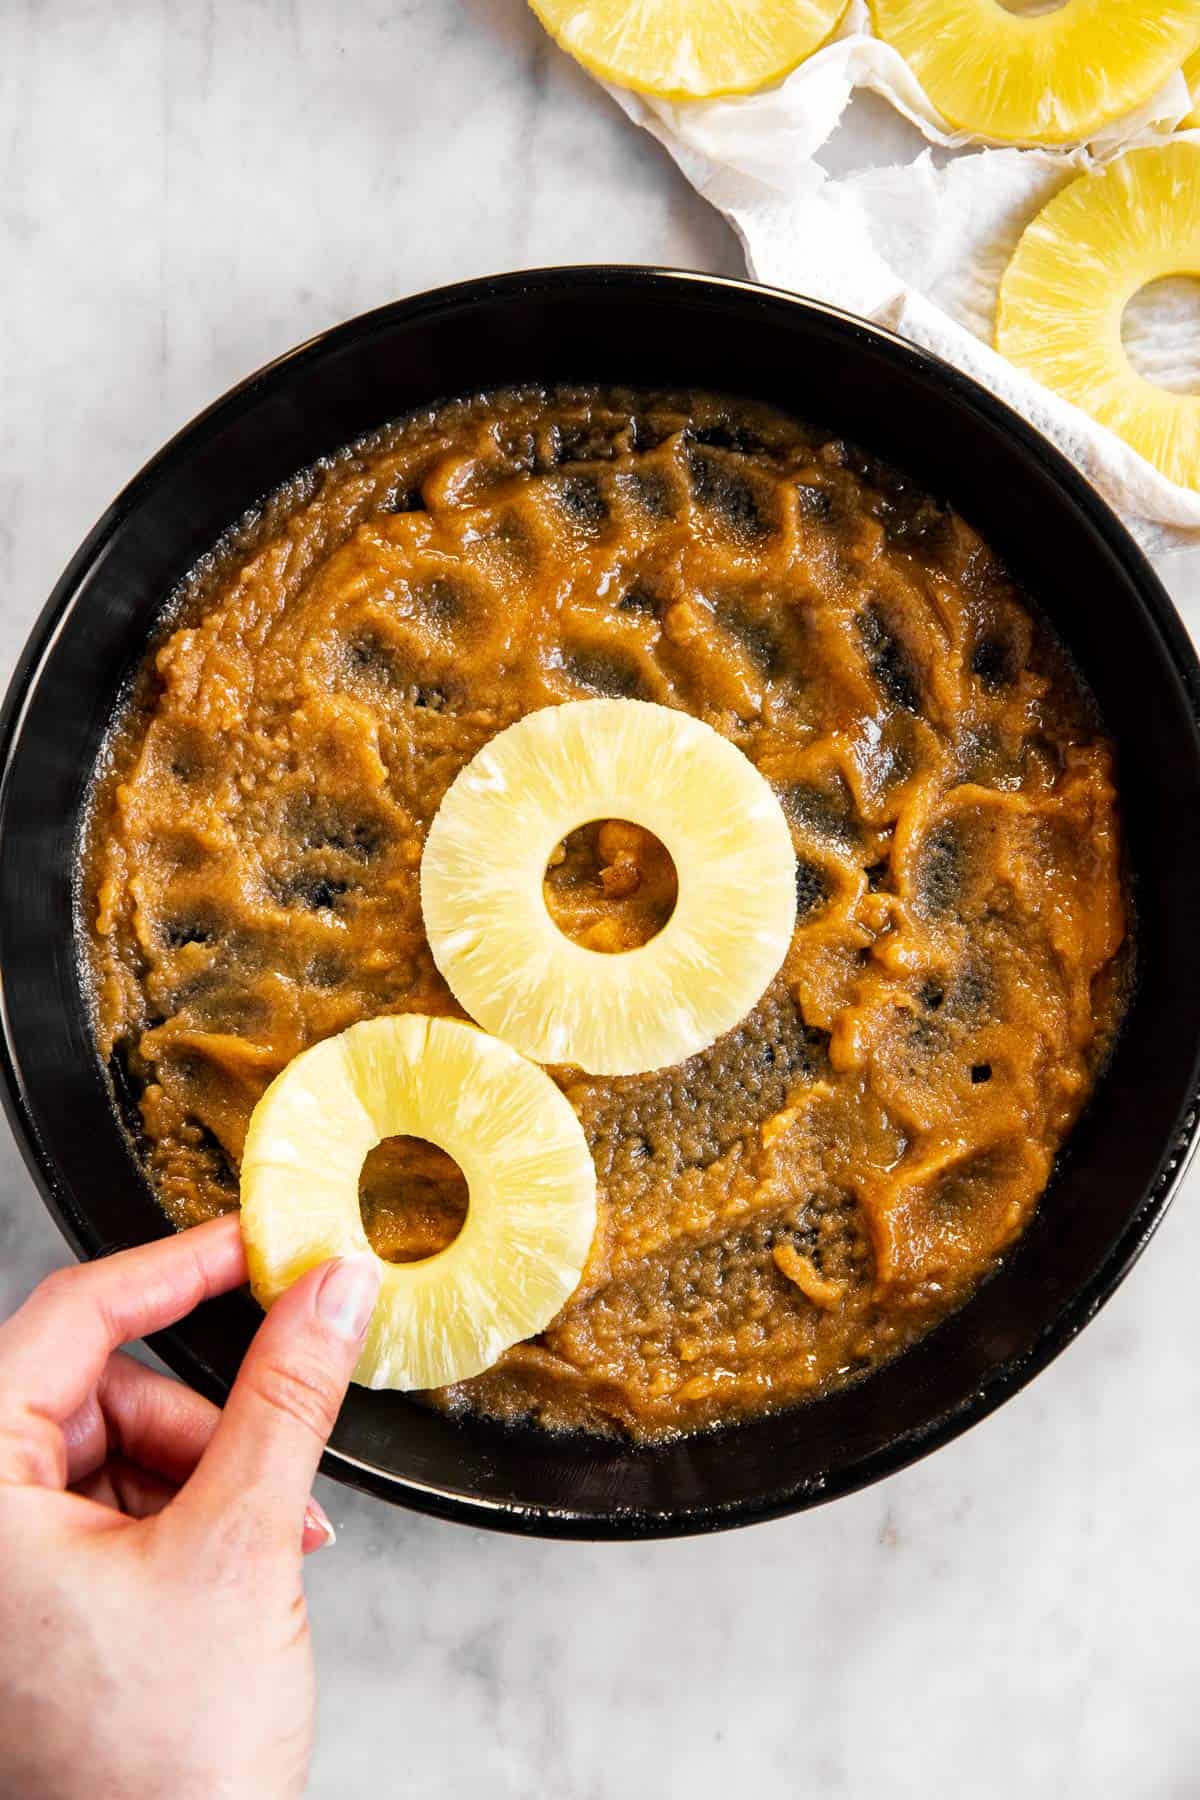
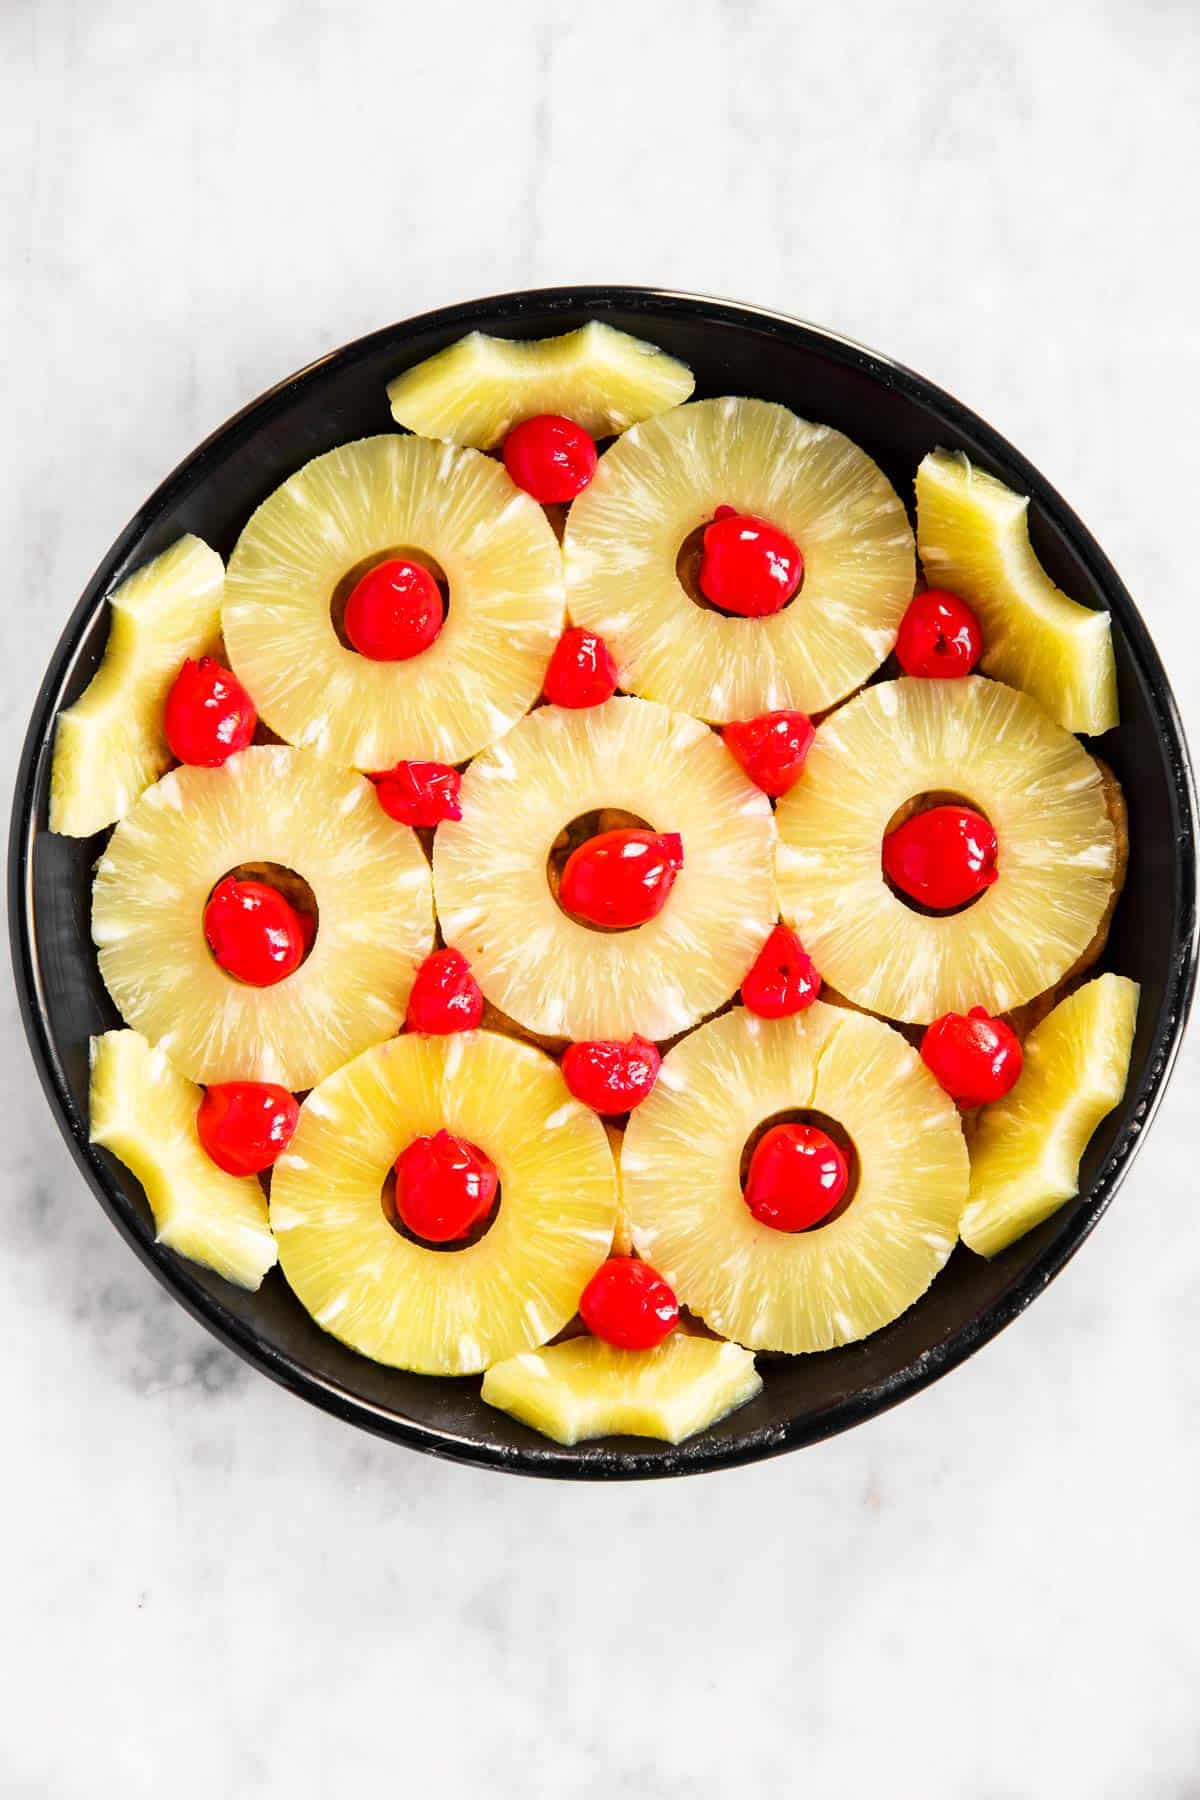
Spread this paste evenly in the pan and top with pineapple and cherries. For the sides, I cut 2 pineapple rings into thirds. This is not mandatory (you can leave the sides without pineapple), but does make the cake look more finished in the end.
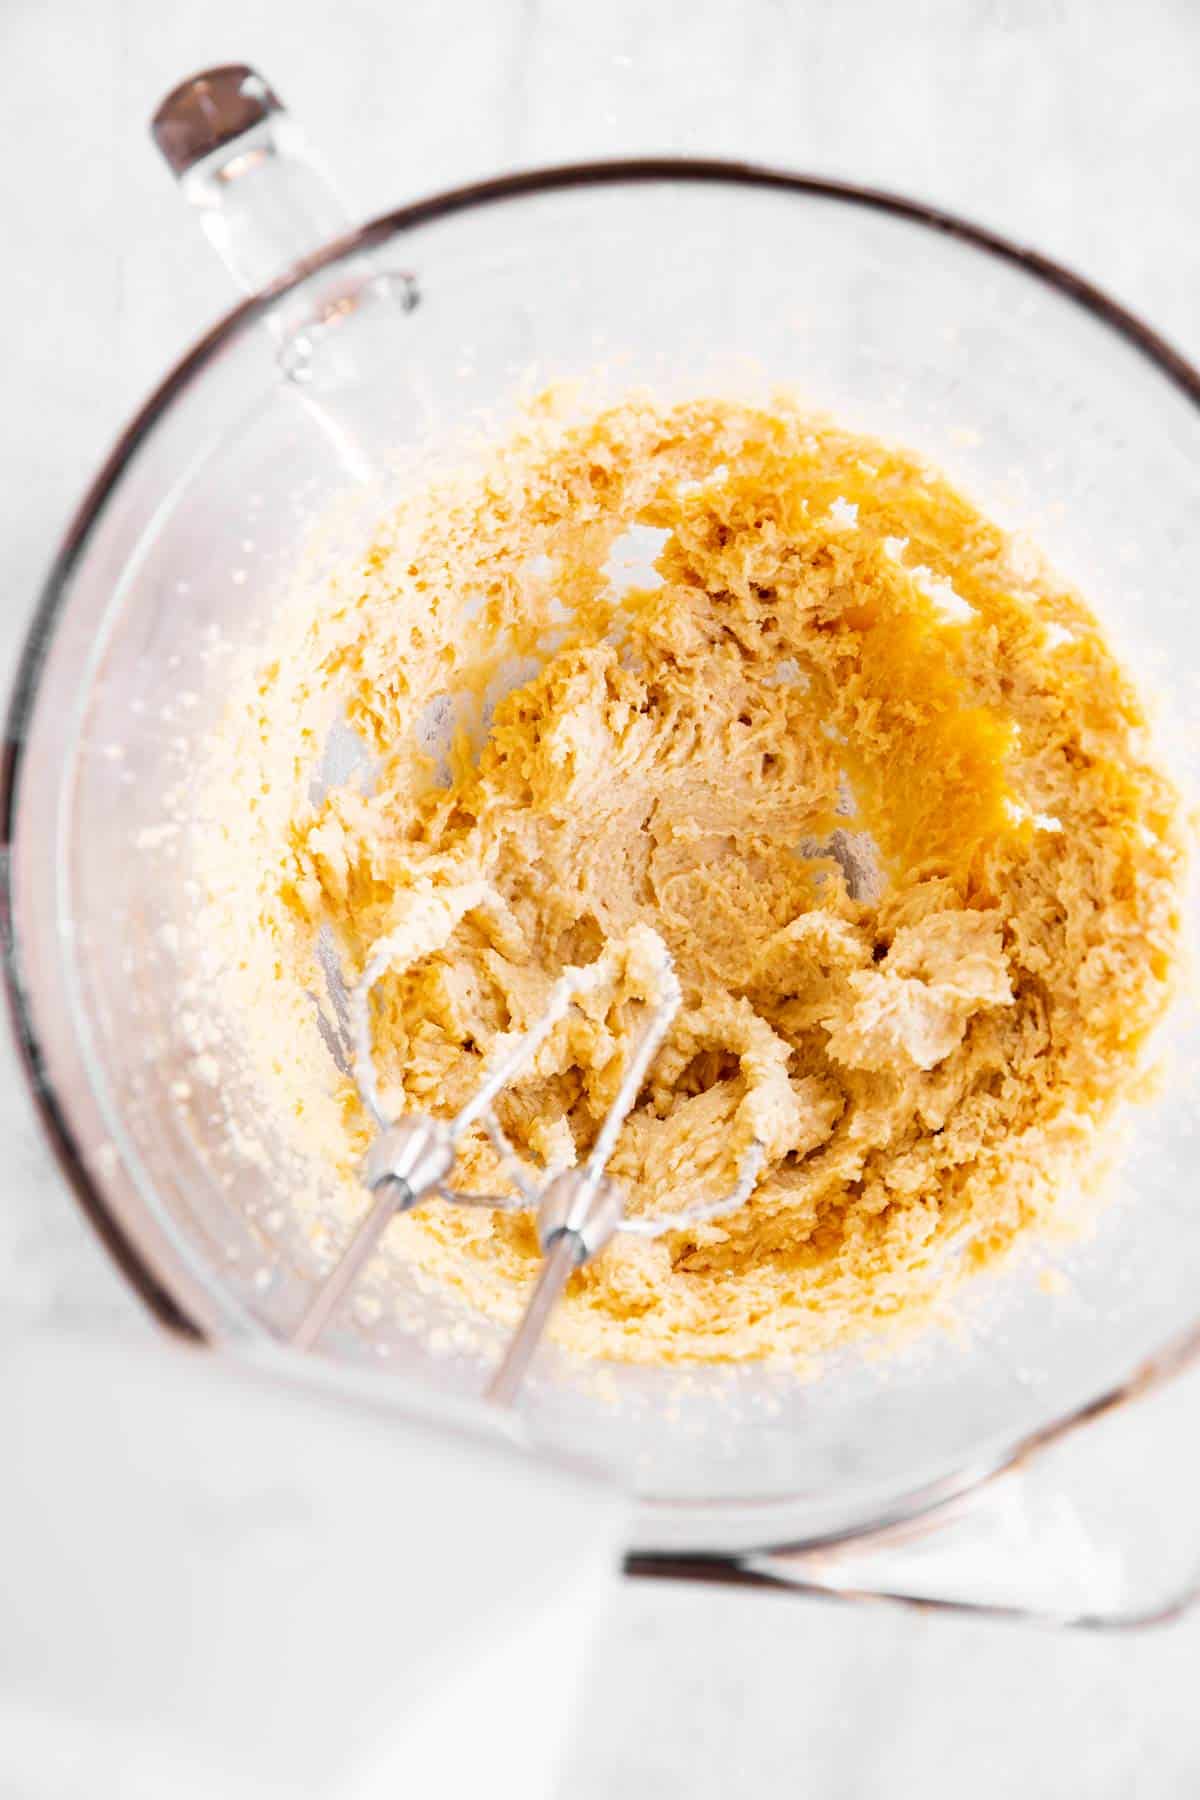
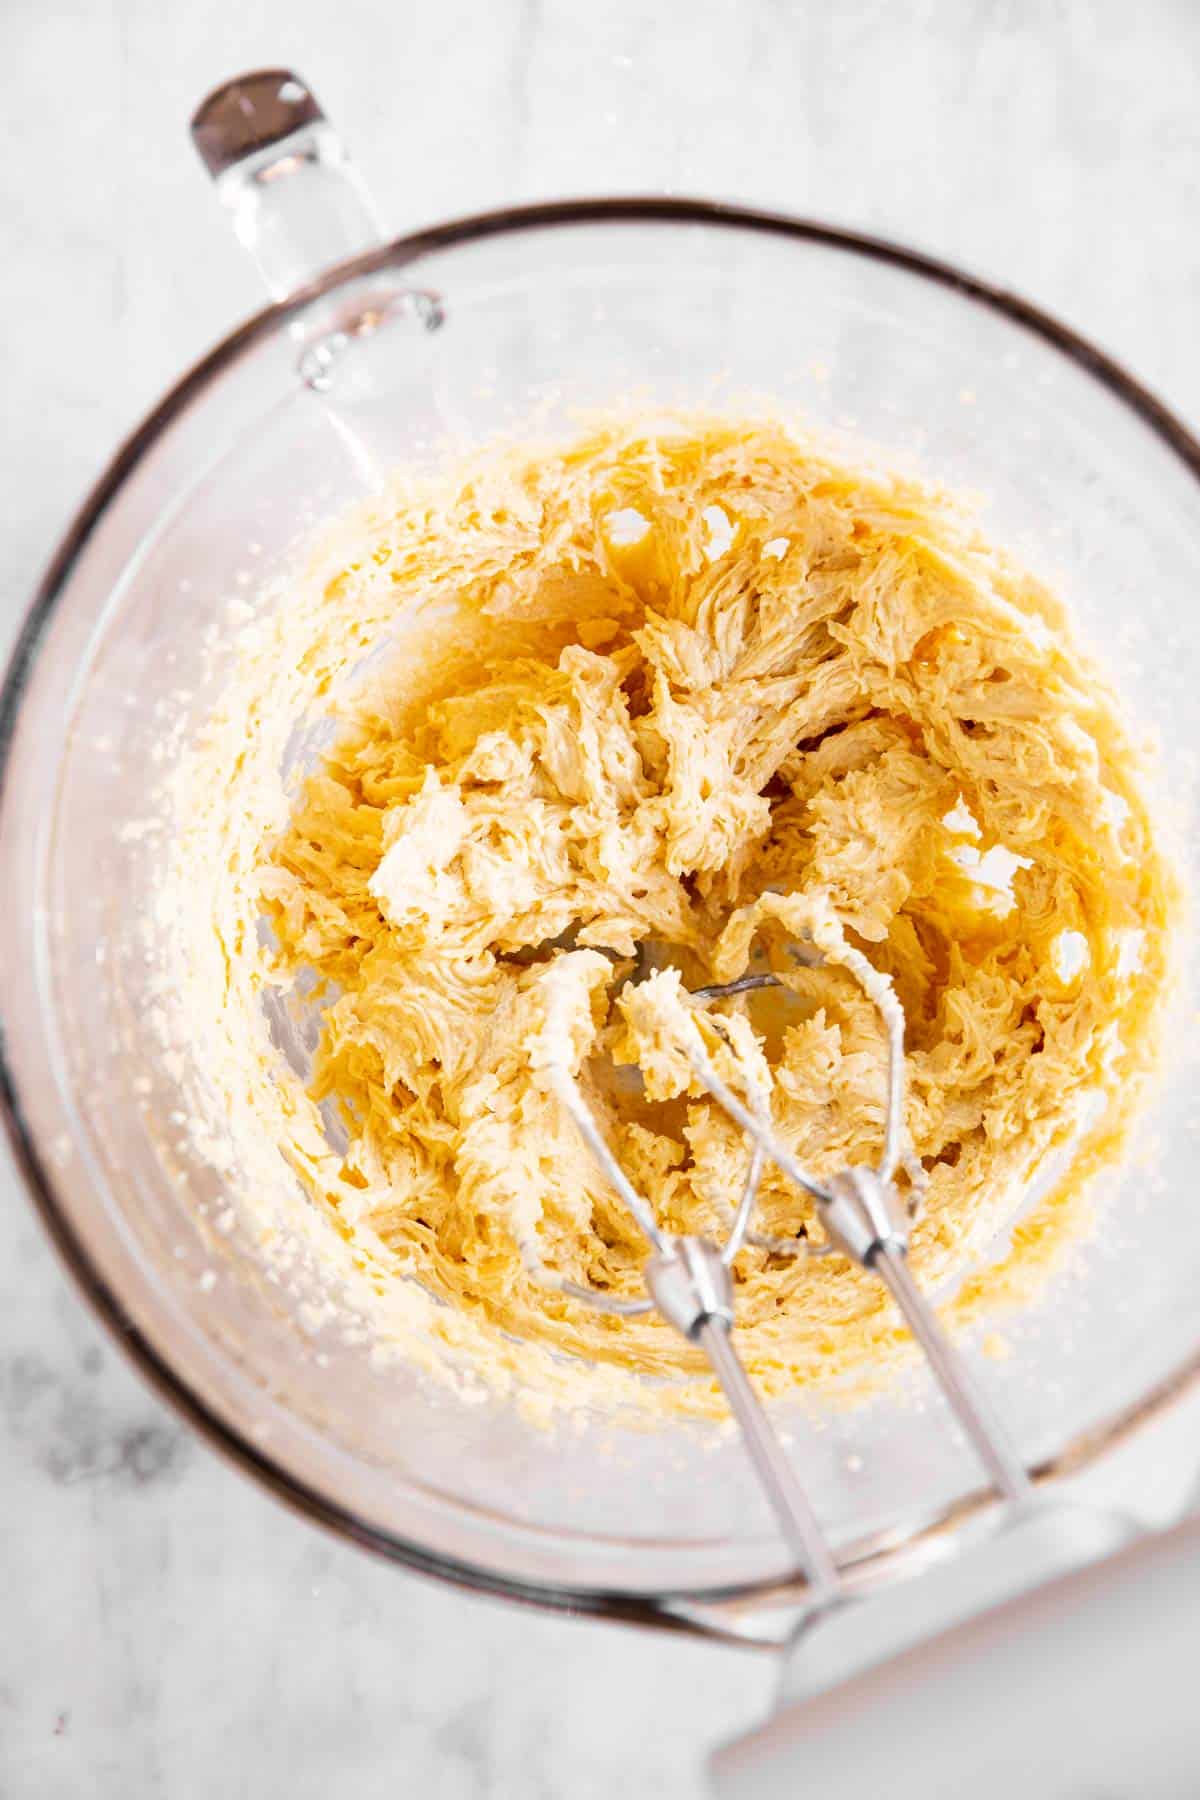
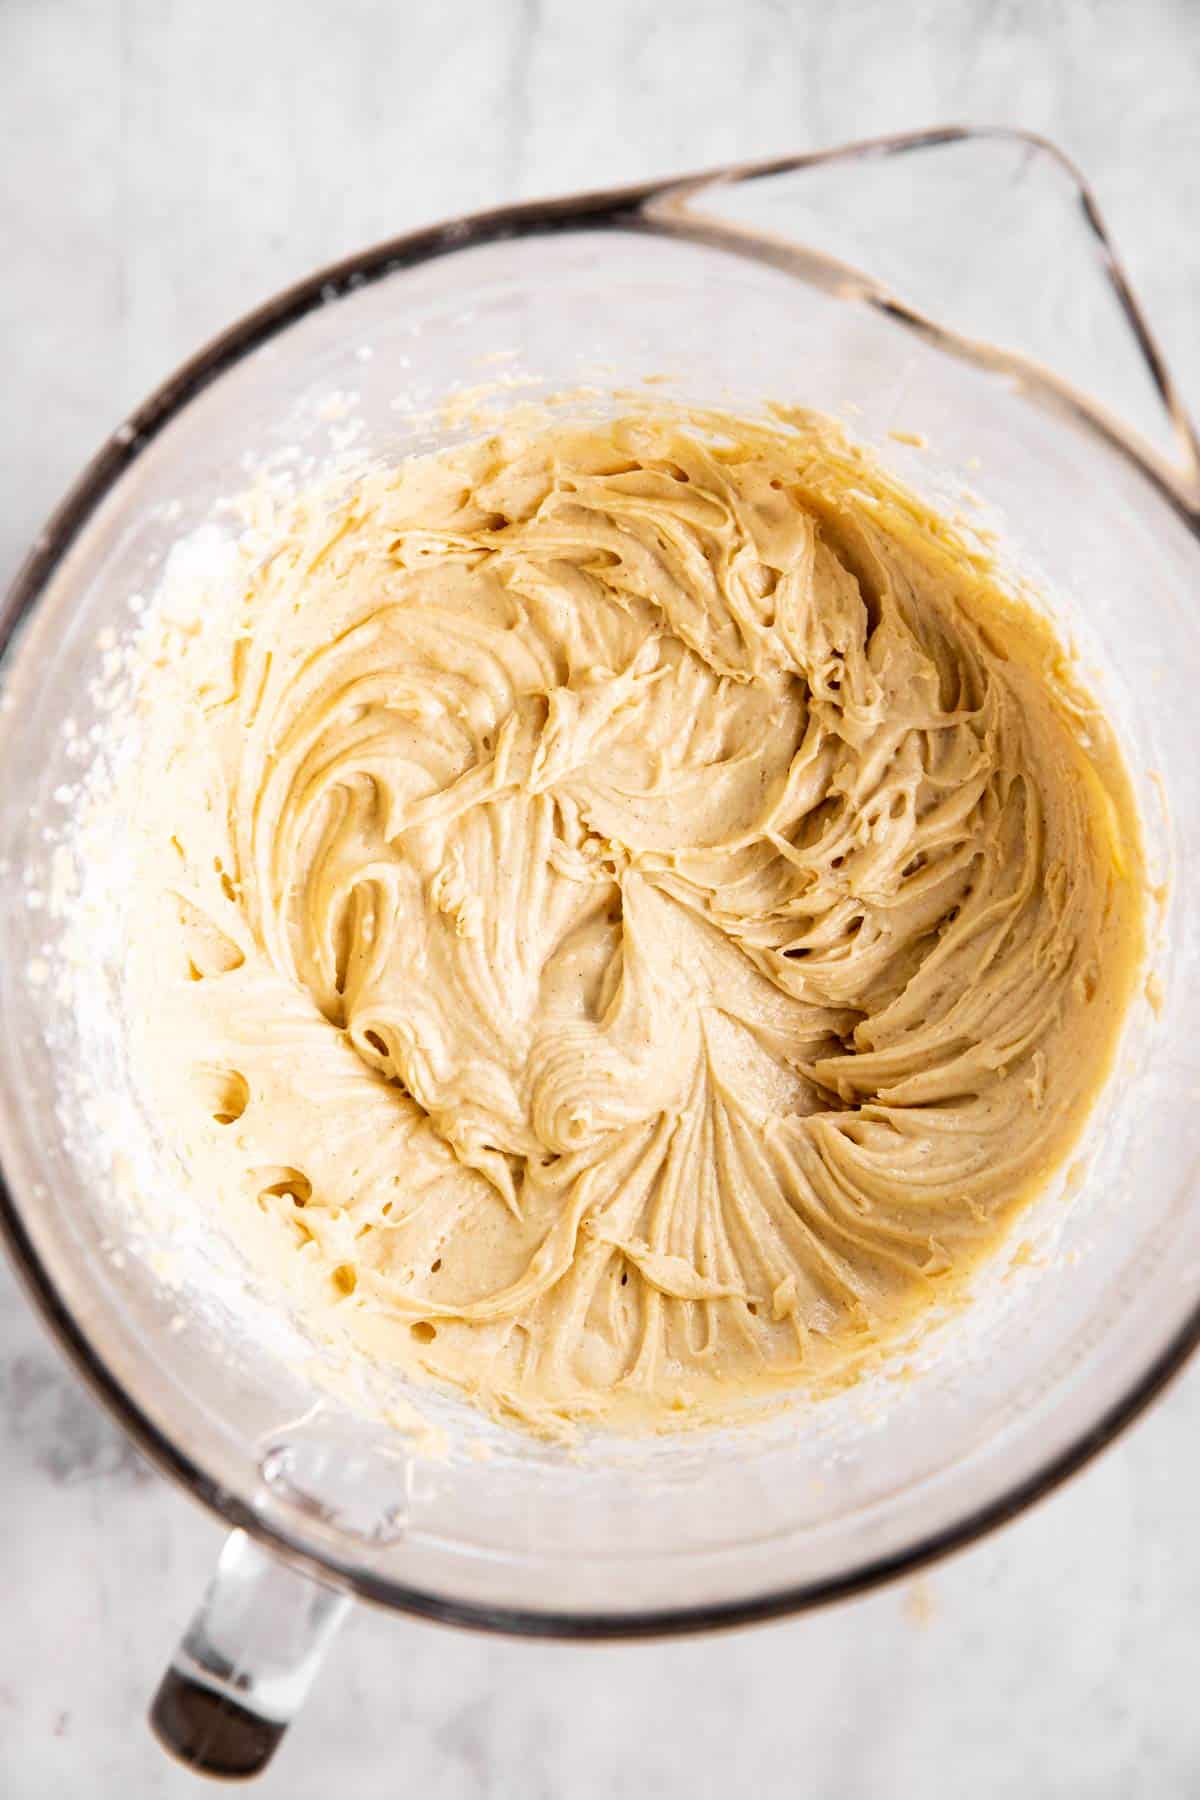
3. To start the cake batter, beat both sugars and the butter for the cake mixture until creamy. It will start out looking very crumbly, but you must keep beating on medium-high speed until it is creamy (first photo in the gallery below). This will take 3-5 minutes, but be patient – it’s a crucial step!
Next, beat in the egg until light and fluffy. This will take 1-2 minutes.
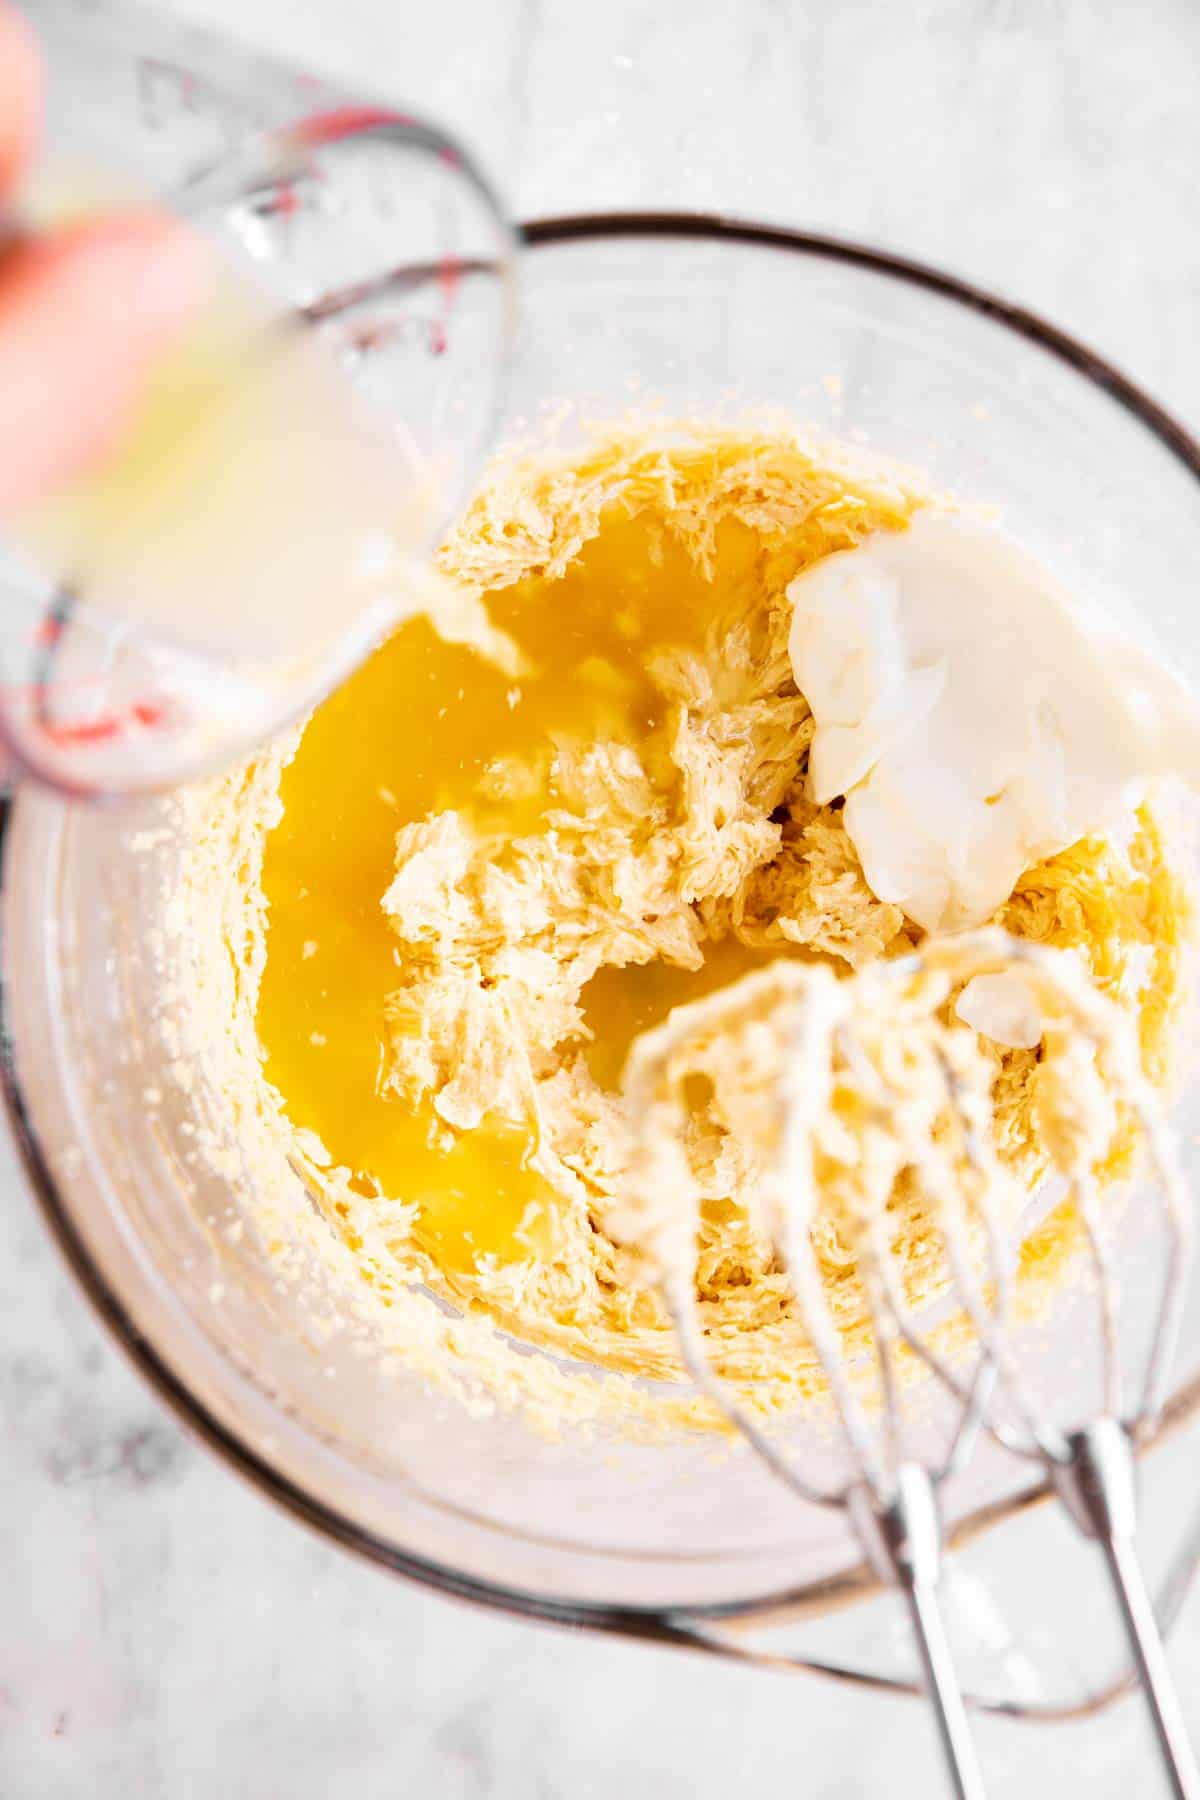
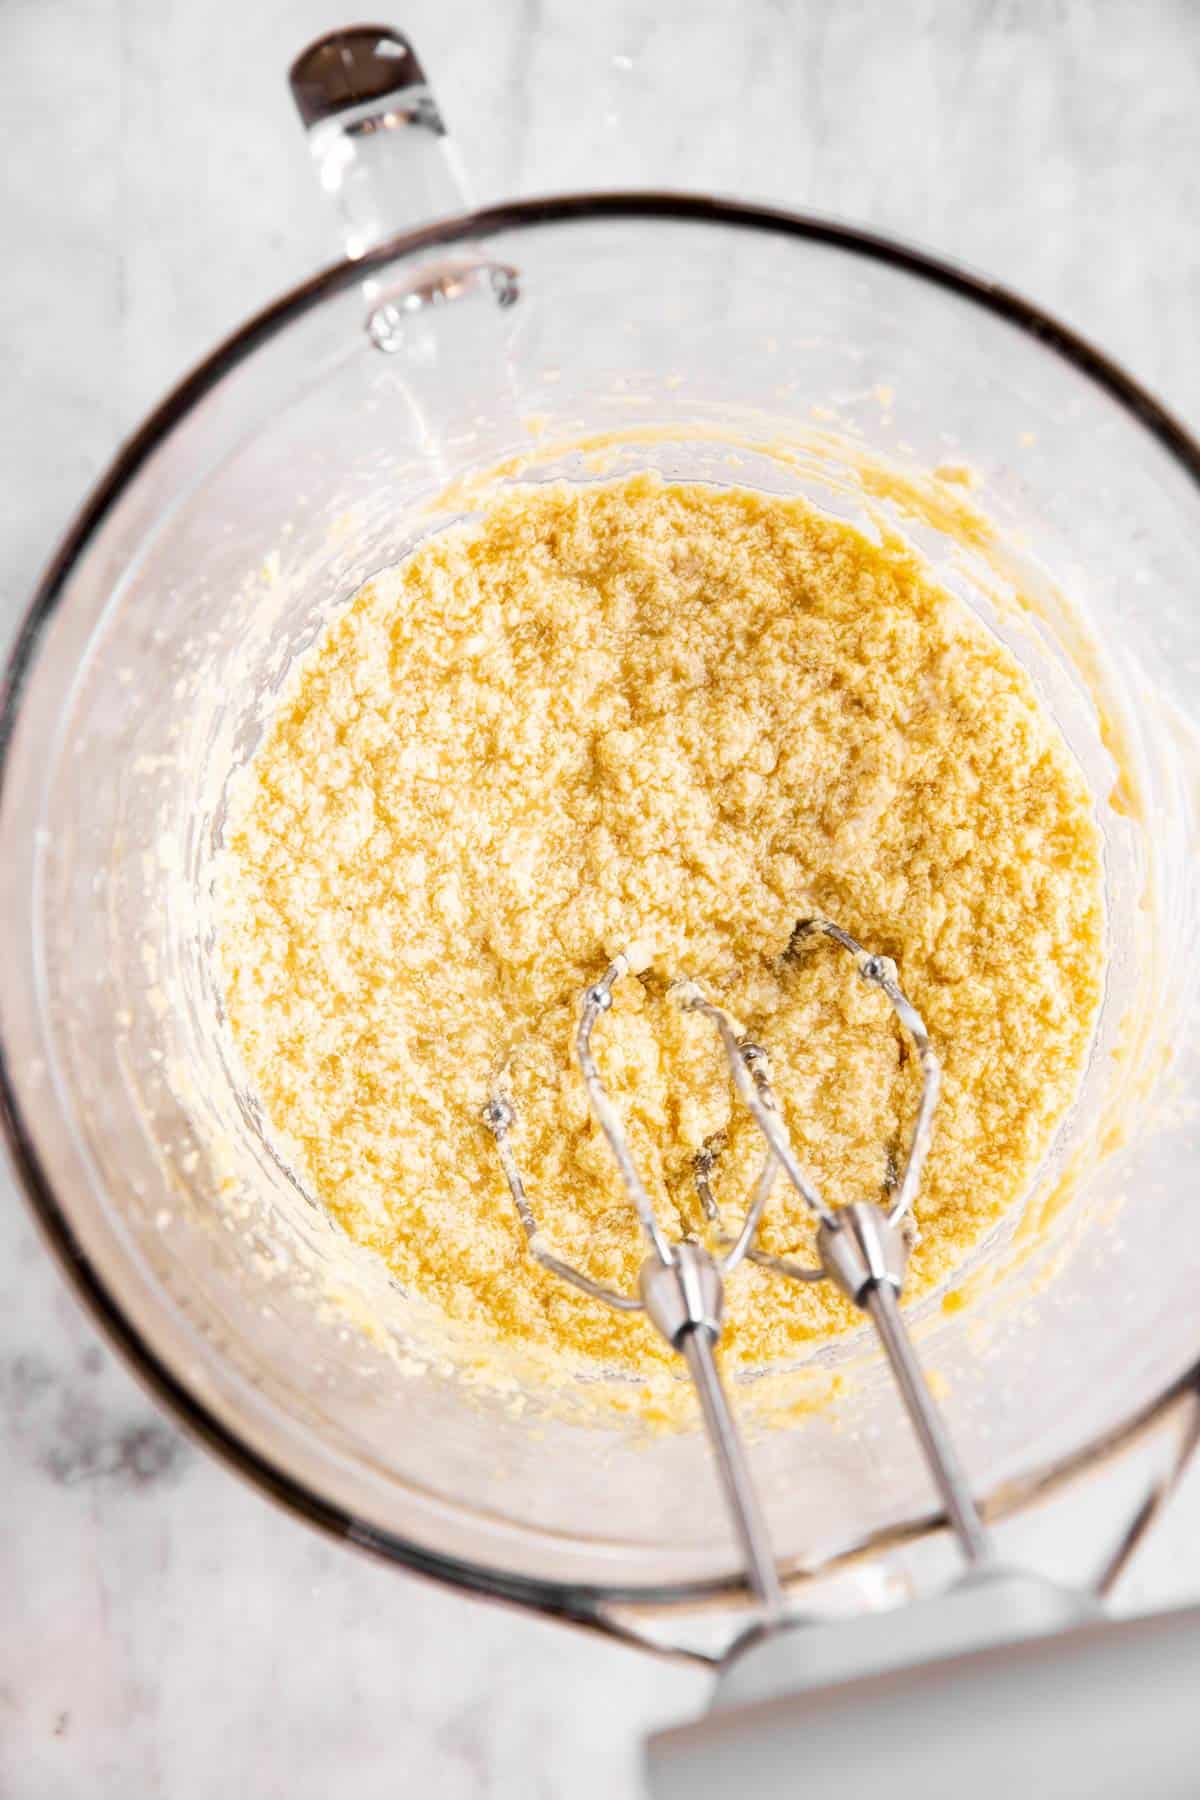
Finally, add the sour cream and pineapple juice and beat until combined. Your mix will look curdled, that’s fine.
Note: If you want to be professional about this, don’t add all of the pineapple juice at once – instead, alternate between a few tablespoons of pineapple juice and a few tablespoons of the dry ingredient mixture in the next step.
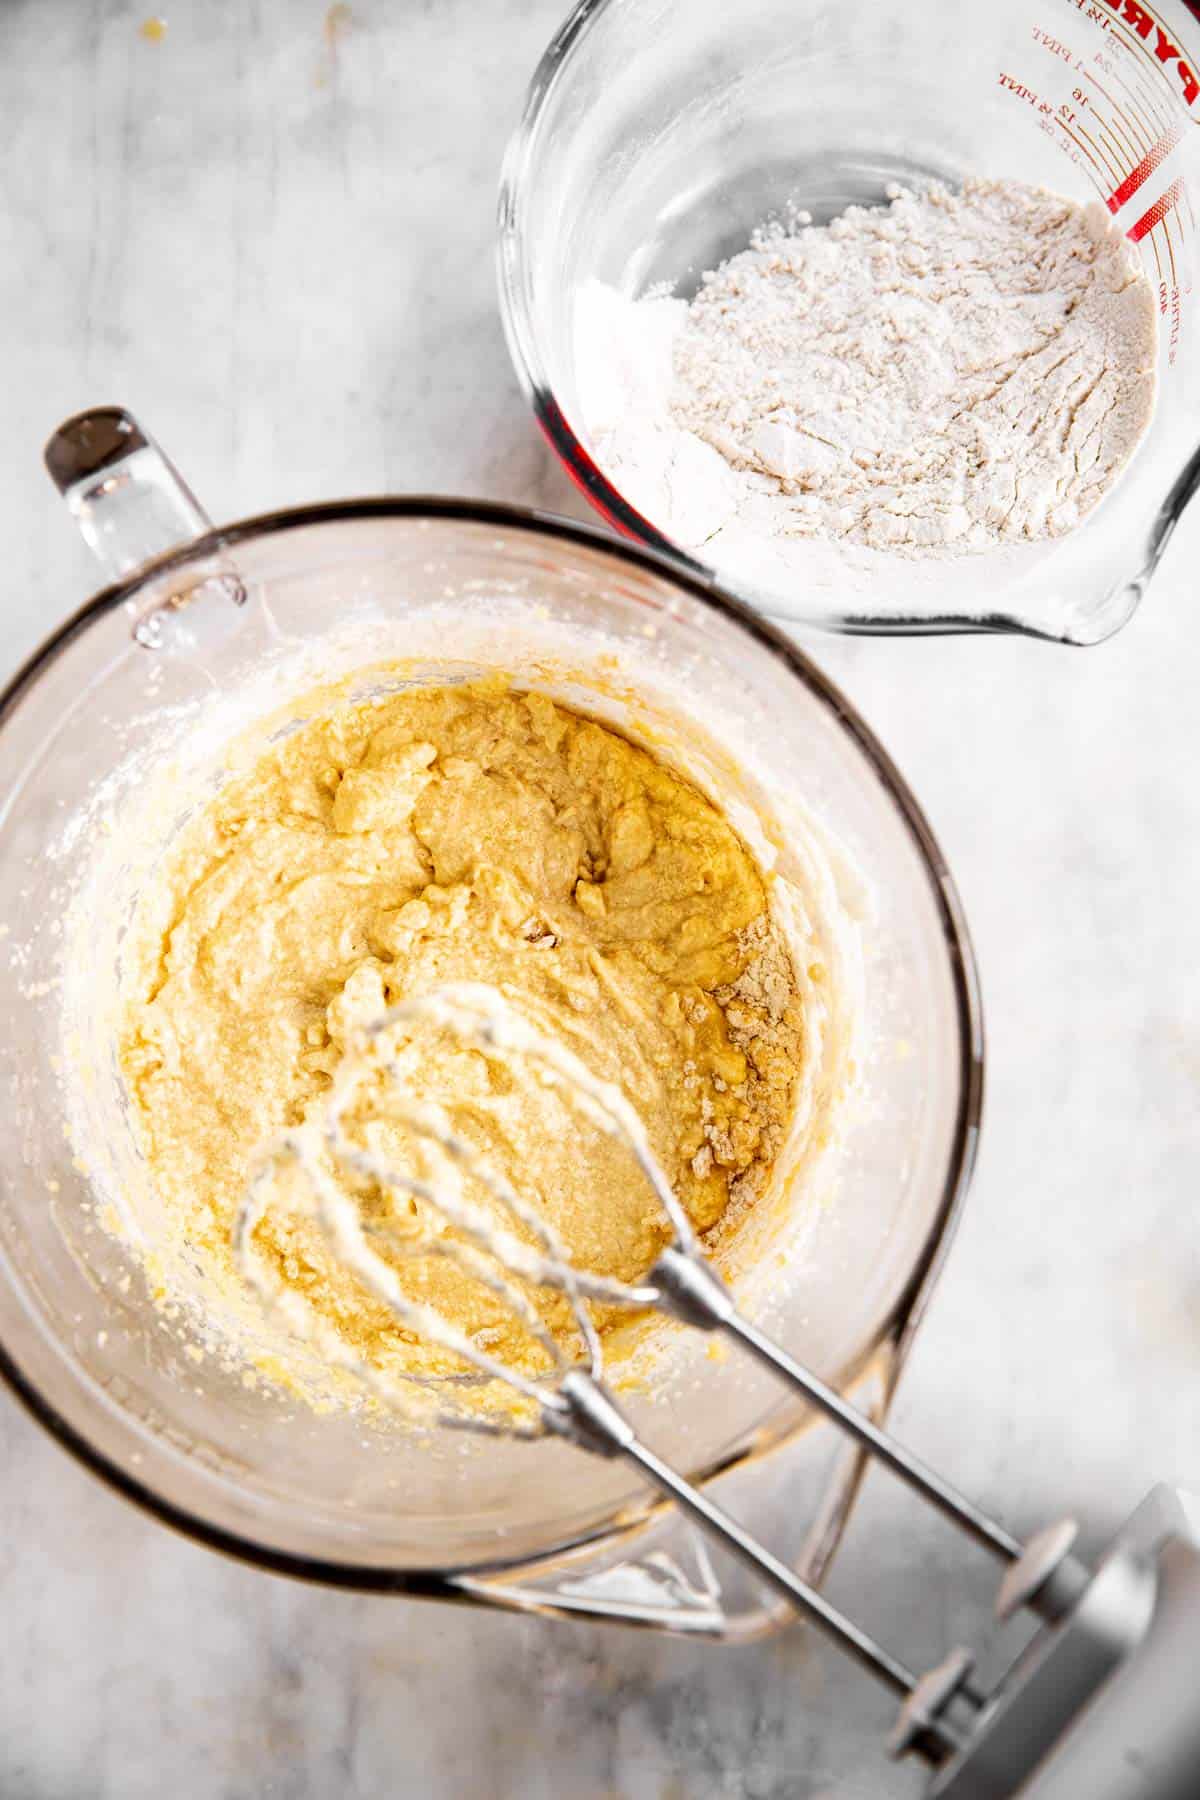
4. To finish, combine the dry ingredients in a medium bowl, then gradually add to the bowl with the creamed ingredients while beating on low speed until you have a creamy batter.
You do not want to over-mix the batter at this point, but make sure to beat long enough to fully incorporate the flour (no lumps!). Only use low speed to avoid over-mixing.
5. Now carefully spread the batter over the pineapples and cherries in your pan. I don’t know why my pan looks so shallow in the photos, make sure to use a pan that is at least 2 inches deep or your cake will overflow!
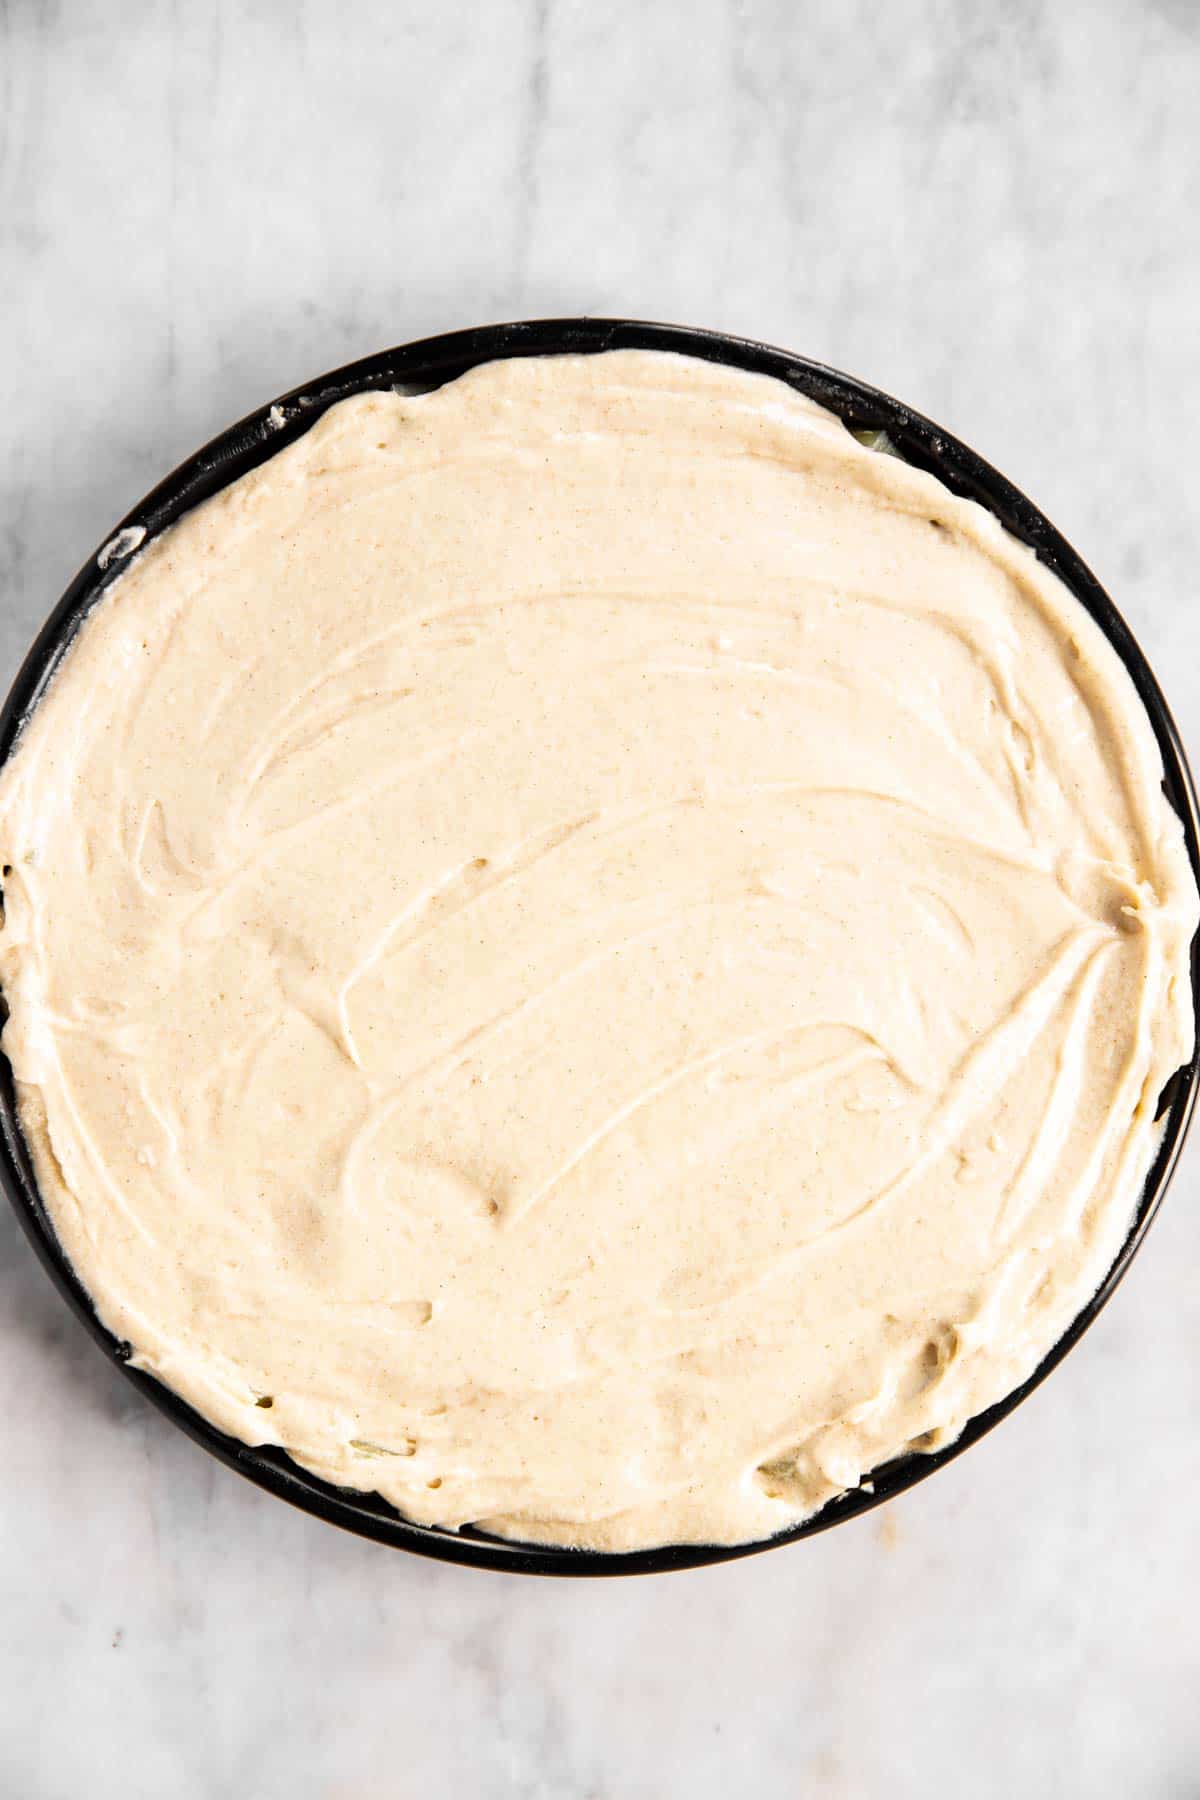
6. Bake the cake until the middle is fully set and a toothpick inserted into the middle will come out without any liquid cake batter stuck to it (fully baked cake crumbs on the toothpick are fine). This will take 50-60 minutes, depending on your exact pan and your oven.
I recommend you keep checking on your cake after 40 minutes of baking time. Different pans really can affect the baking time. Do not overbake your cake, or the caramel on the bottom will scorch and burn, which makes it bitter.
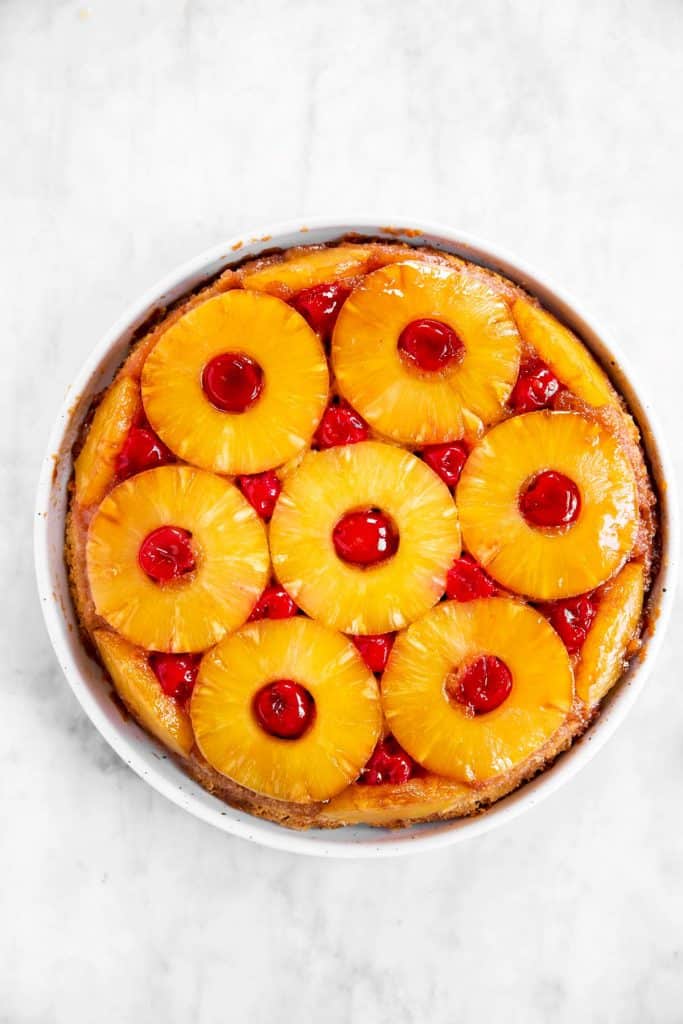
7. Once done, allow the cake to cool in the pan on a cooling rack on your counter for 5-8 minutes. Then, invert on a large serving plate:

- Make sure you have oven gloves ready (one of mine was crocheted by my 85 year old grandmother for me! I love it, so that’s why I have an old lady oven “glove”).
- Place a large serving plate over your cake (it must be larger than the cake pan!).
- Grab the whole thing as shown in the photo on the left above (make sure you have a good grip on everything, you must be pressing the cake pan and plate together firmly).
- Flip the whole thing, keeping the pan and plate firmly pressed together at all time.
- Set the plate on your counter and then carefully and slowly lift off the cake pan, making sure no pineapple or cherries stay stuck to the pan.
Then allow your cake to cool on the plate on a cooling rack before slicing to serve.
Recipe tips
- Make sure to use a 9-inch pan that is at least 2 inches deep, better 2.5 to 3 inches. Otherwise, your cake will spill over. Do not use a springform pan! A springform pan will leak and you will lose the caramel.
- Do not skip brushing the sides of your pan with melted butter before adding the brown sugar, otherwise the cake may get stuck later.
- You do not need to use any baking parchment or cake pan liner for this recipe.
- Be sure to fill all the gaps between the pineapple rings with maraschino cherries (as shown in the photos), to keep too much cake batter from dropping down.
- Do beat the butter and sugars until they are fully creamy, do not shortcut this. The mixture will look dry and crumbly for the first 1-2 minutes of beating, but keep persisting until your mix is creamy and fluffy.
- Do not skip combining the dry ingredients in a separate bowl; even if it means dirtying another dish. This ensures you will get an even distribution of baking powder and the cake rises evenly.
- Make sure to allow the cake to fully bake in the middle. The cake will have a deep brown color when it’s done, not a light golden one. Do not worry about a dark auburn color on it, this really is a cake with plenty of color on top and not a light-colored one when bake. It’s very important you allow the cake to fully bake! If you remove it from the oven too soon, your cake will drop in the centre.
- Do not let the cake cool for more than 5-8 minutes before inverting it on a plate. Otherwise the caramel will cool and firm up, and your cake will get stuck to the pan.
Storage tips
While a Pineapple Upside Down Cake does not necessarily need to be refrigerated (it will keep well-covered with aluminium foil or plastic wrap on the counter for 2 days), I actually like it a lot when refrigerated.
Well-wrapped, it keeps for 3 days in the fridge.
Serving tips
In my husband’s family, one must serve cake with whipped cream, so that’s what we do ? It’s also great with a scoop of vanilla ice cream, or just by itself.
The cake is delicious both slightly warm but also fully cooled.

PS If you try this recipe, please leave a review in the comment section and add a star rating in the recipe card – I appreciate your feedback! Follow along on Pinterest, Facebook or Instagram.
Pineapple Upside Down Cake
Recipe details
Ingredients
Topping
- ¼ cup butter melted
- ½ cup light brown sugar
- 1 (20-oz) can pineapple slices packed in juice reserve ½ cup juice
- 19 maraschino cherries
Cake
Wet ingredients
- 6 tablespoons butter softened
- ½ cup sugar
- ¼ cup light brown sugar packed
- 1 large egg
- 4 tablespoons sour cream OR Greek yogurt
- ½ cup pineapple juice reserved from can
Dry Ingredients
- 1 ½ cups all purpose flour
- 1 teaspoon baking powder
- ½ teaspoon ground cinnamon see notes for tips
- ½ teaspoon salt
Instructions
- Prep: Preheat oven to 350°F.
- Make topping: Place melted butter in unlined 9-inch cake pan and lightly brush up the sides. Add brown sugar and stir to combine into a paste. Evenly distribute paste over bottom of pan and arrange pineapple slices on top and along sides (slice rings into ⅓ to line the side). Fill pineapple ring holes and gaps between pineapples with maraschino cherries. Set aside.
- Cream wet cake ingredients: Place butter and both sugars for cake in large mixing bowl. Using an electric mixer, beat until creamy and fluffy; about 4-5 minutes. Add egg and beat until fully combined and fluffy. Finally, beat in sour cream and reserved pineapple juice.
- Make cake batter: Combine dry cake ingredients in medium bowl. Gradually add to creamed mixture while beating on low speed until a smooth cake batter forms.
- Assemble and bake: Spread cake batter evenly over pineapples and cherries in pan. Bake in hot oven for 45-55 minutes, until middle is fully baked. Cake will be a deep caramelized brown when ready, do not remove from oven too early, or middle will collapse!
- Cool and invert: Remove cake from oven and allow to cool in pan on cooling rack for 5-8 minutes (no longer, or cake will get stuck!). Carefully invert on a large serving plate (see notes for tips). Place plate on cooling rack to cool.
Notes
Ingredient notes
- Pineapple: Use pineapple canned in juice, not syrup.
- Butter: Stick margarine works in place of the butter, a spreadable margarine will not work.
- Baking powder: Do not use baking soda in place of the baking powder, they are not the same.
Recipe tips
- Make sure to use a 9-inch pan that is at least 2 inches deep, better 2.5 to 3 inches. Otherwise, your cake will spill over. Do not use a springform pan! A springform pan will leak and you will lose the caramel.
- It’s very important you allow the cake to fully bake! If you remove it from the oven too soon, your cake will drop in the centre. It will be a deep brown color when done.
Tips to invert the cake:
- Place a large serving plate over your cake pan (it must be larger than the cake pan).
- Using oven mitts, press the cake pan and plate together firmly.
- Invert, keeping the pan and plate firmly pressed together at all time.
- Set the plate on your counter and then carefully and slowly lift off the cake pan.


Sarah J. says
Excellent recipe! No fiddling around with a springform pan. I used a glass deep dish pie plate. Ran a knife carefully around the outside to loosen it (just in case). Anxious about the “flip over” but all came out well! Will make again!
Barbara says
best recipe for pineapple upside down cake ive made – great flavor and texture and easy to follow. thank u for sharing
Nora says
I’m so glad, Barbara!
Al says
Made this for my wife who is currently pregnant on bedrest and had mad cravings after seeing this cake online. Took some time to prep but wasn’t difficult, step photos helped a lot. Thanks for a great recipe, wife and 3 year old loved it.
Nora says
Al, that is just the sweetest gesture! I’m so glad your family enjoyed the cake. And I hope your wife has a safe rest of her pregnancy. Thank you so much for making my recipe for her, what an honor for my cake.
Susan says
This was my childhood favorite! I always asked for this on my birthday, although my dear mother used to make a boxed mix (it was back in the 70ies). just made your recipe for my husband and I and oh my word, is it ever delicious. we ate way too much of it, but it was too good to leave.
Nora says
I’m so glad, Susan! I always eat way too much of this cake, too. But it really tastes way too good to pass up!