

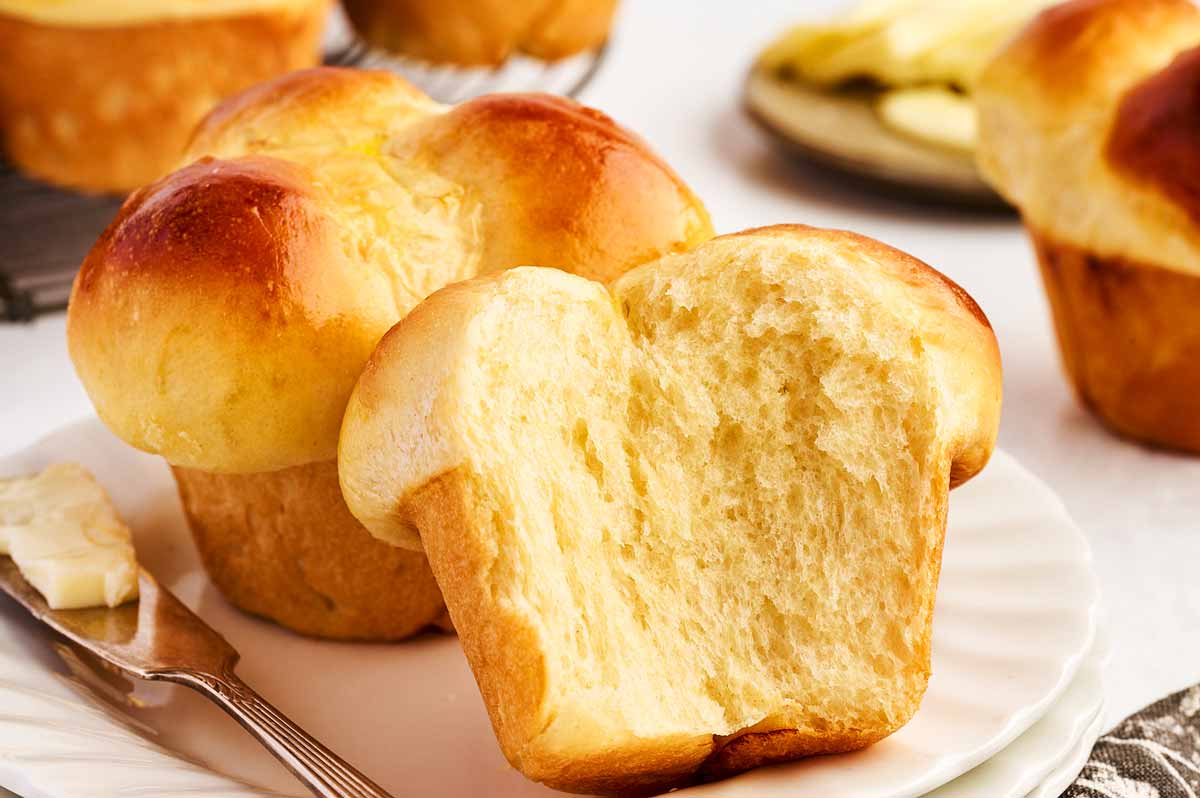
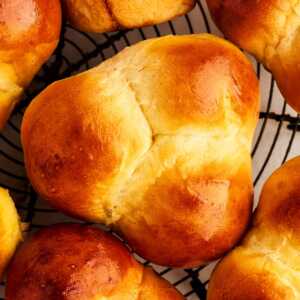
If you want that “wow” factor on your dinner table without spending hours on complicated shaping, these Cloverleaf Rolls are your new best friend. They are soft, golden, and surprisingly easy to pull off!
What makes this recipe great
There is something about pulling warm, buttery bread apart that just makes a meal feel like a “real” Sunday dinner. These are a staple at our house for holidays, but they’re simple enough that I’ll whip them up on a random Tuesday if I ran out of bread!
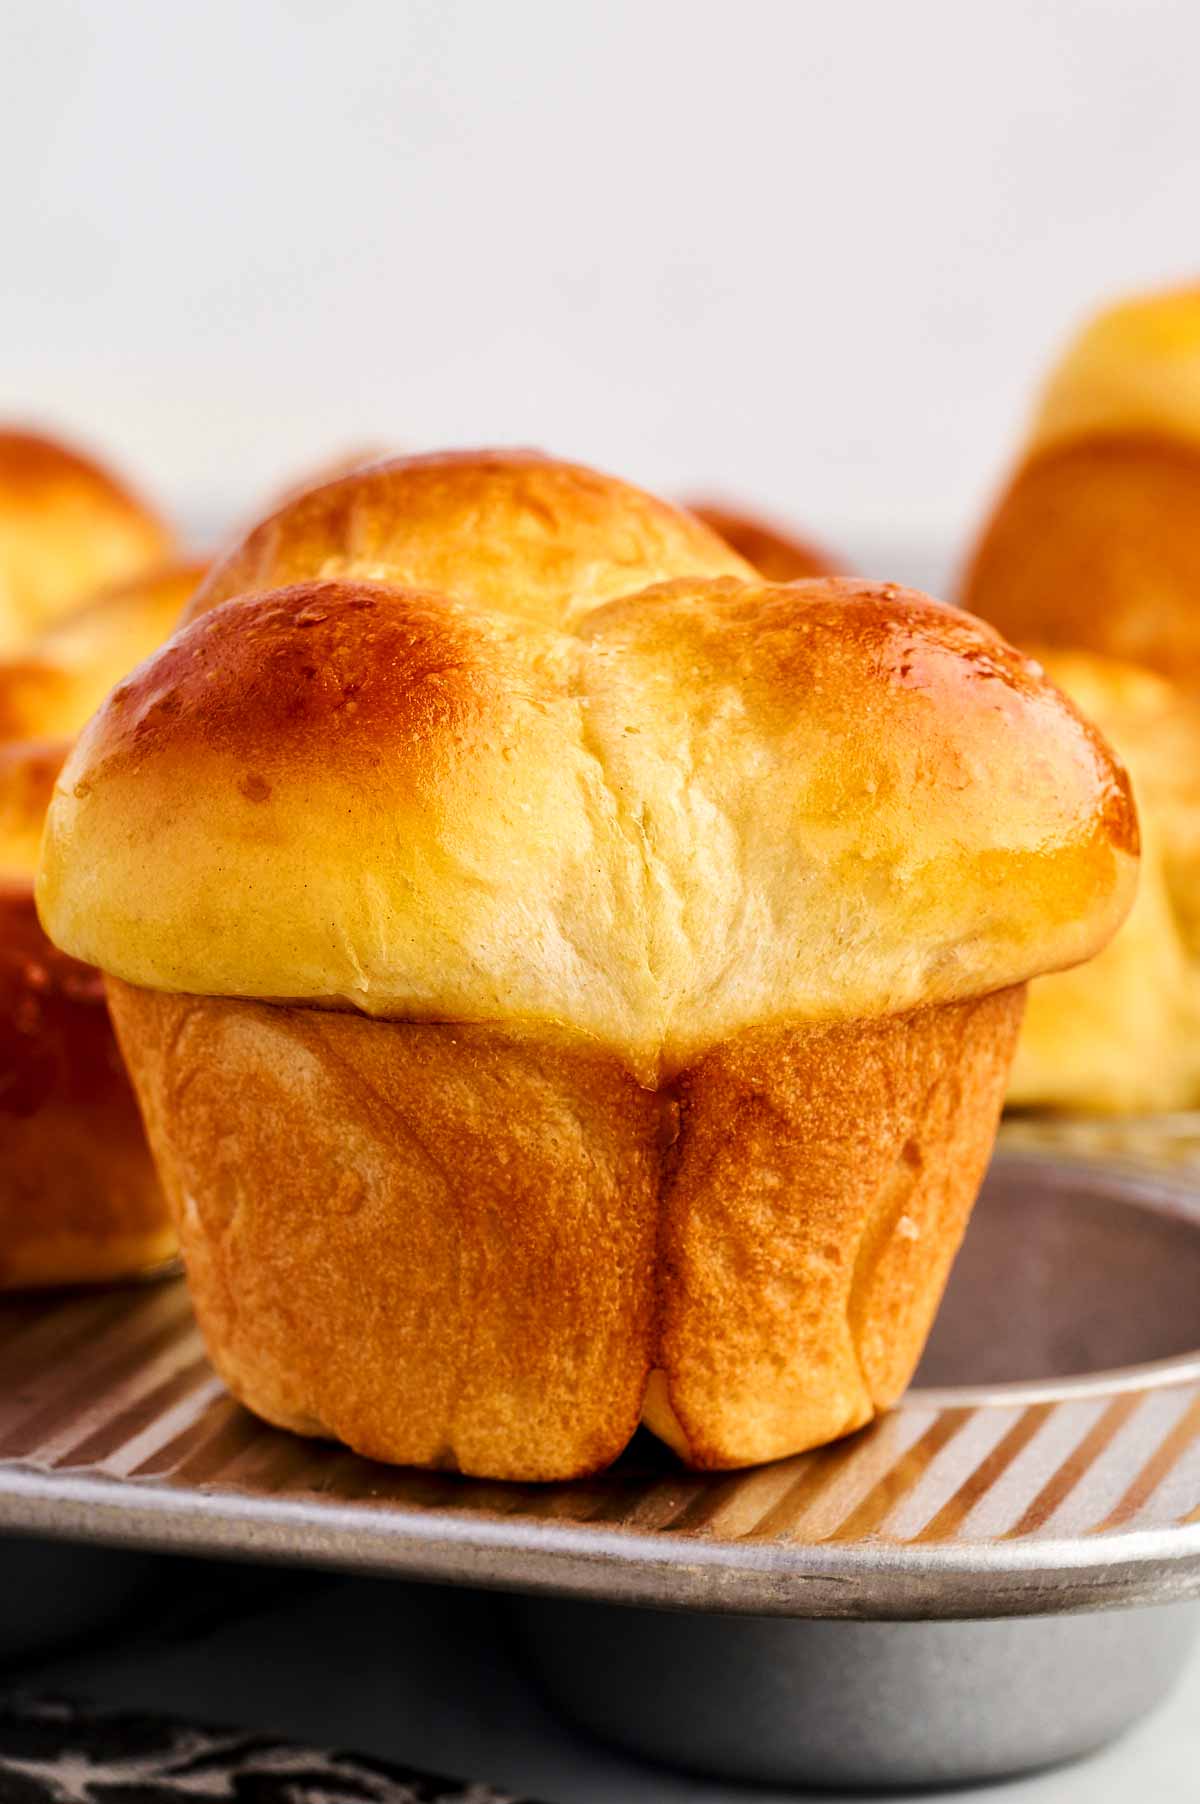
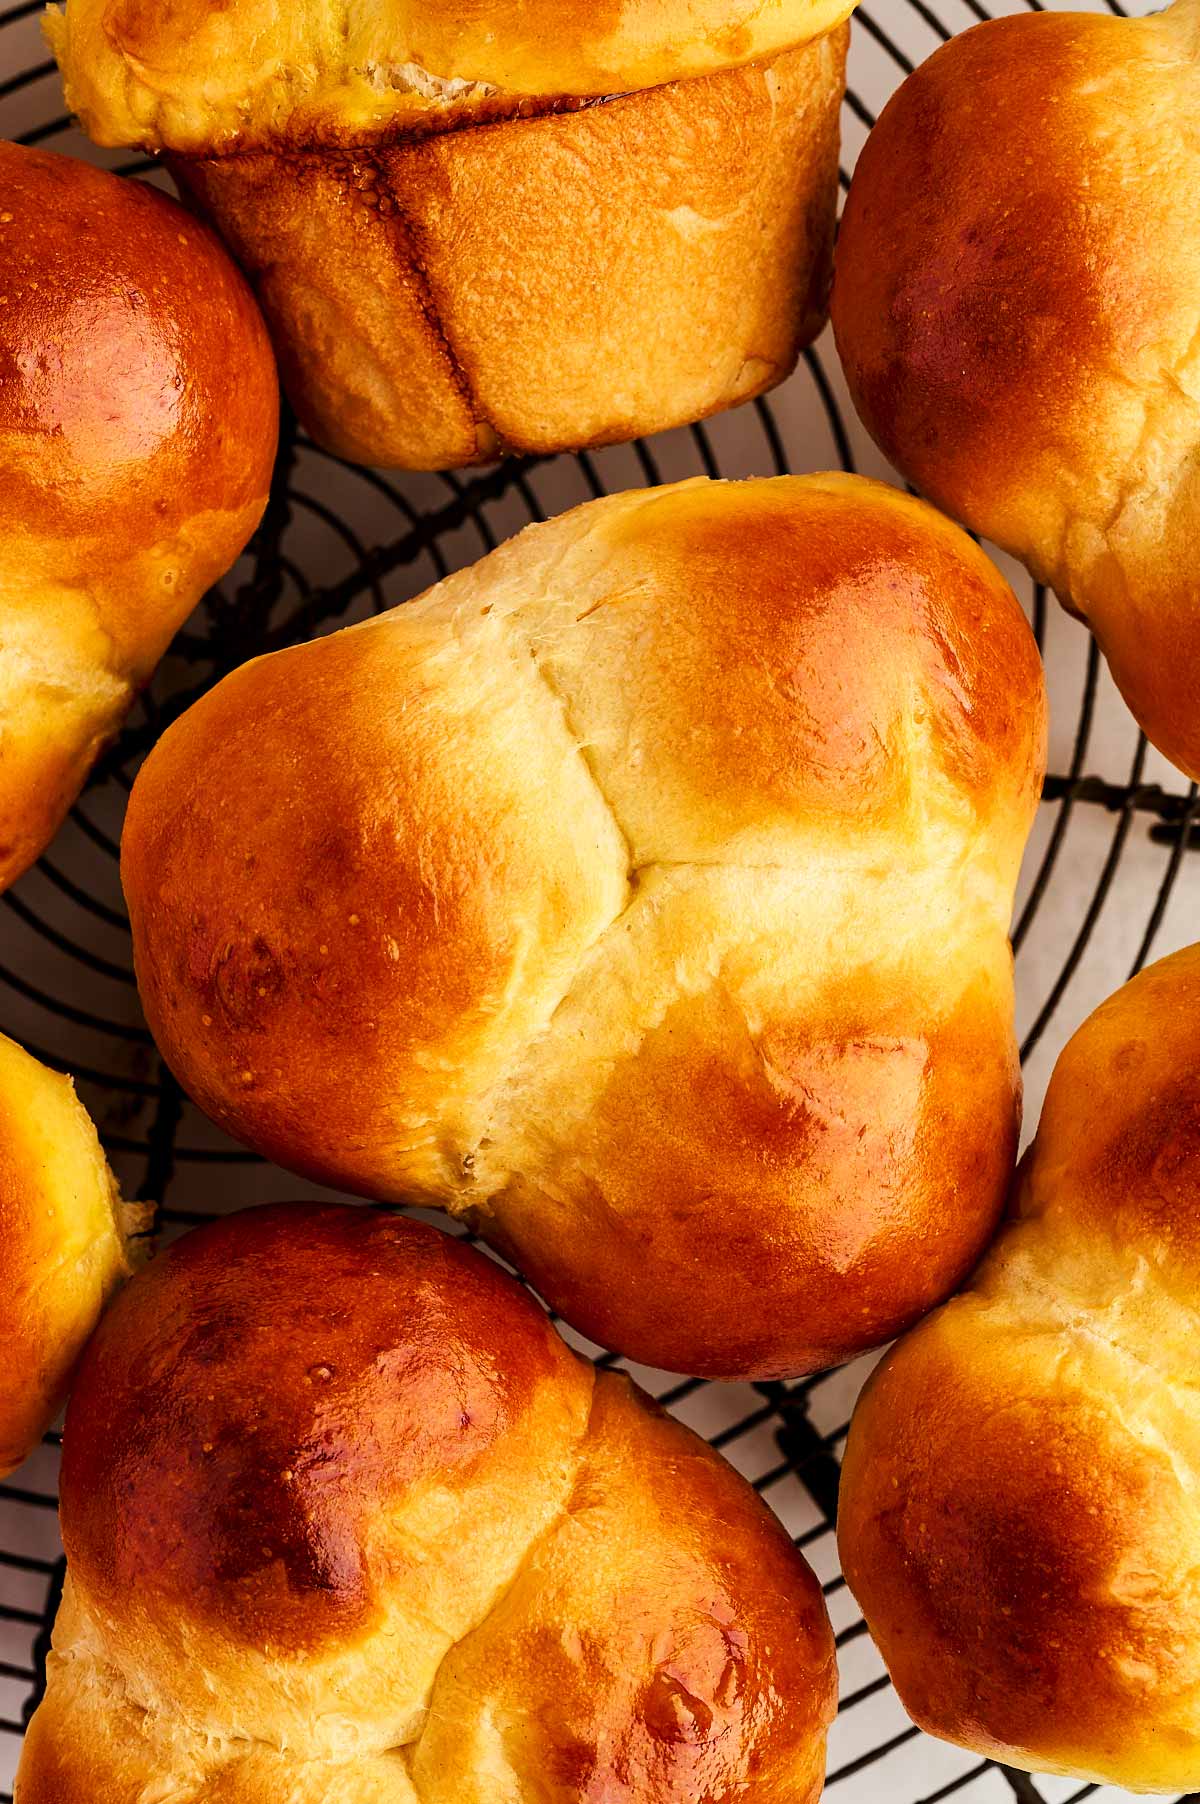
- Muffin Tin Hack: No fancy proofing baskets needed — the tin keeps them perfectly shaped and helps them grow “up” instead of “out.”
- Kid-Approved Shape: My kids love that these naturally pull apart into three perfect little bites.
- Better Than Store-Bought: For the price of a bag of flour and some milk, you get rolls that put those dry plastic-bagged ones to shame!
Let’s see how we make this:
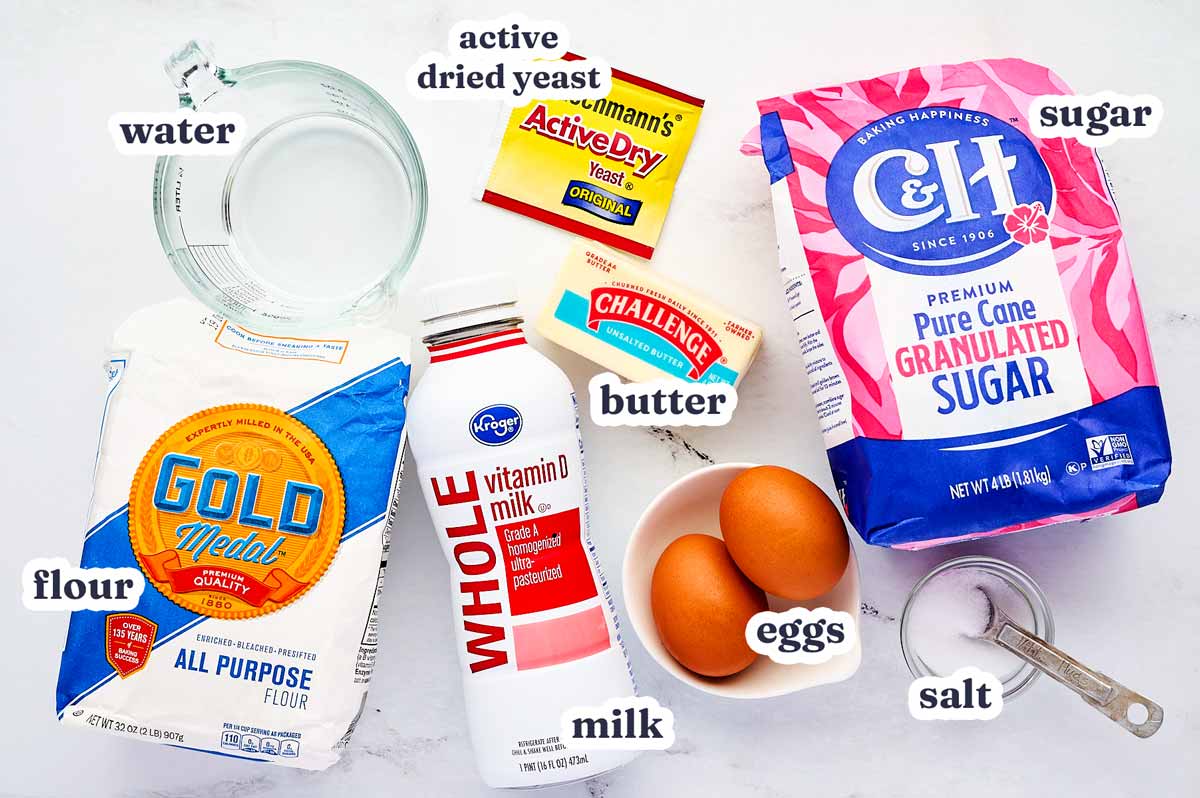
Ingredients we’re going to use
This is about swaps and notes – jump to the ingredient list for the measurements etc.
The Yeast: Make sure your packet isn’t expired! If that water-sugar-yeast mix doesn’t get bubbly in five minutes, toss it and start over. It’s better to lose five minutes now than an hour waiting for dough that won’t rise.
The Milk: I use whatever is in the fridge (usually 2% or whole). Just don’t let it get too hot on the stove. If it’s too hot for you to keep your finger in it, it’s too hot for the yeast.
The Flour: Start with 3 ½ cups and add more a tablespoon at a time. You want the dough to pull away from the sides of the bowl, but it should still feel soft and a little tacky, not stiff like a brick.
Recipe walkthrough
This is about tips and hints, and the process photos if you need a visual guide. Jump to the instructions for the precise steps.
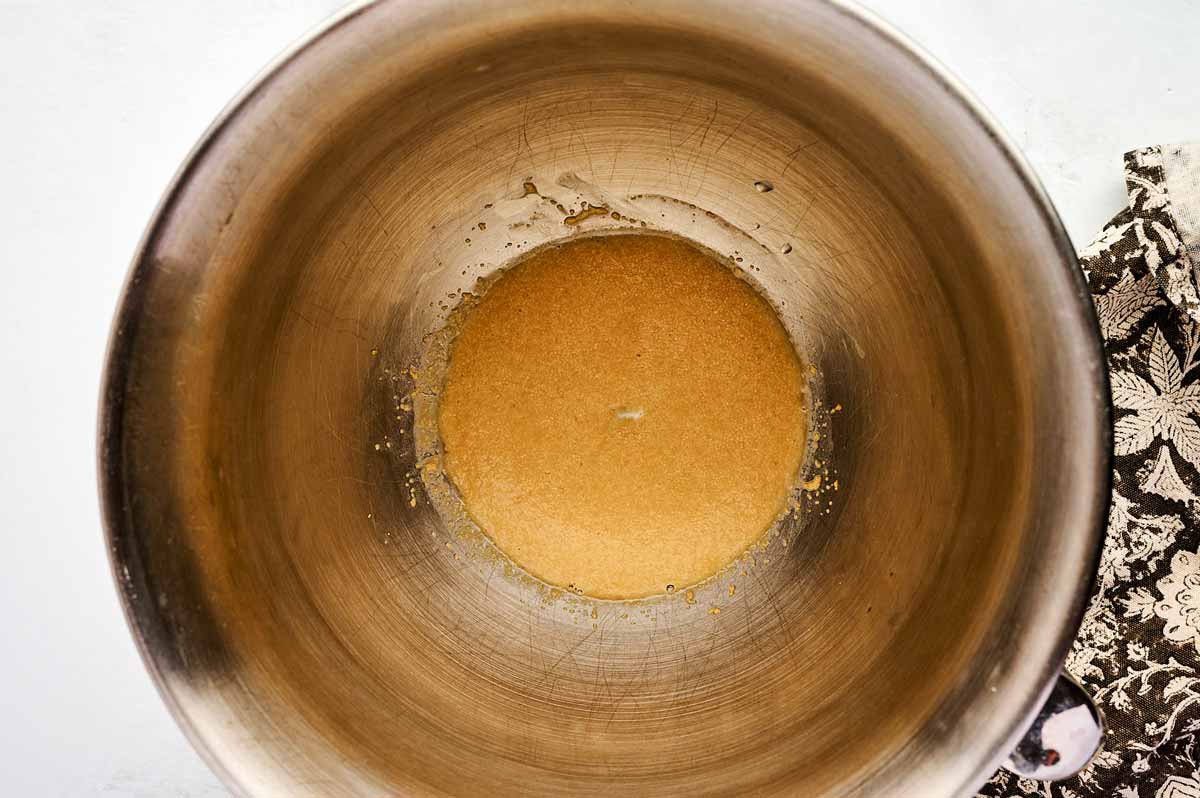
1: The yeast start.
Activate your yeast with some sugar and water before you begin – if it gets bubbly, you are good to go. If nothing happens, toss it and use a new packet!
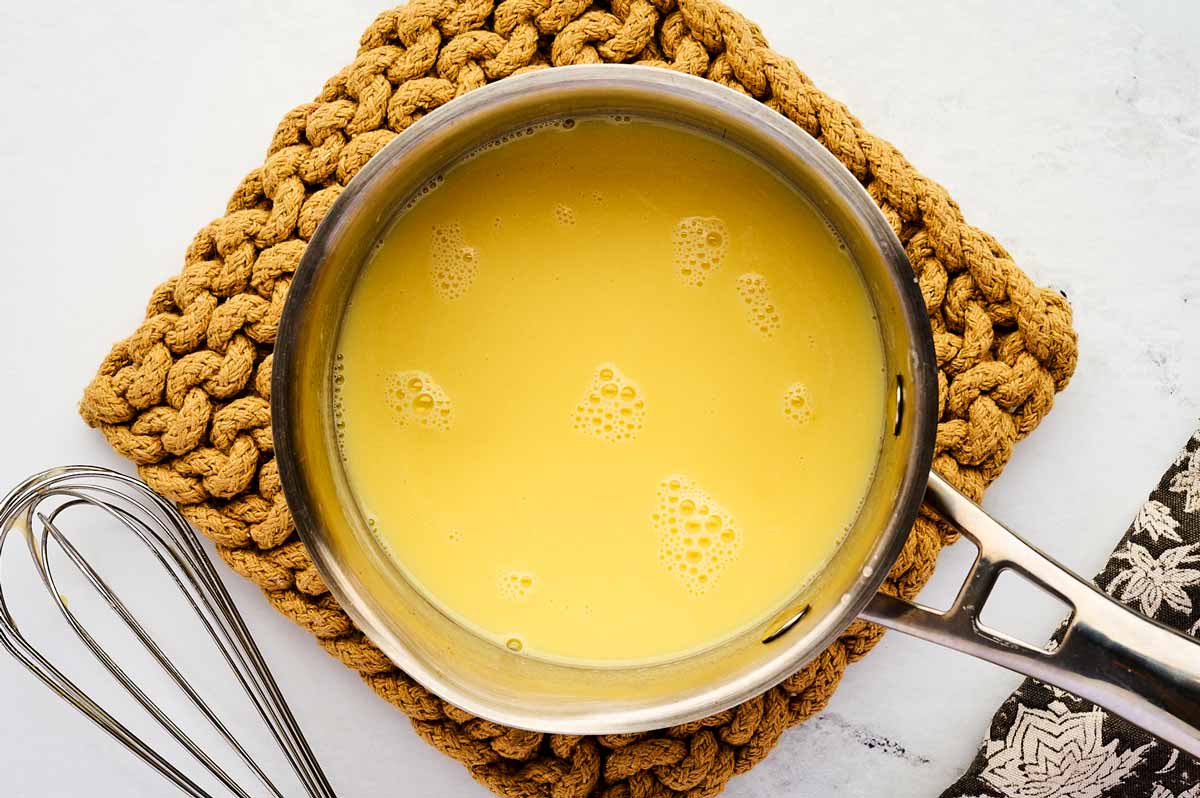
2: The temp check.
This is the only “science-y” part. Keep your liquids around 110°F. If you don’t have a thermometer, think “warm baby bottle.” If it’s scalding, you’ll kill the yeast and end up with flat rolls.
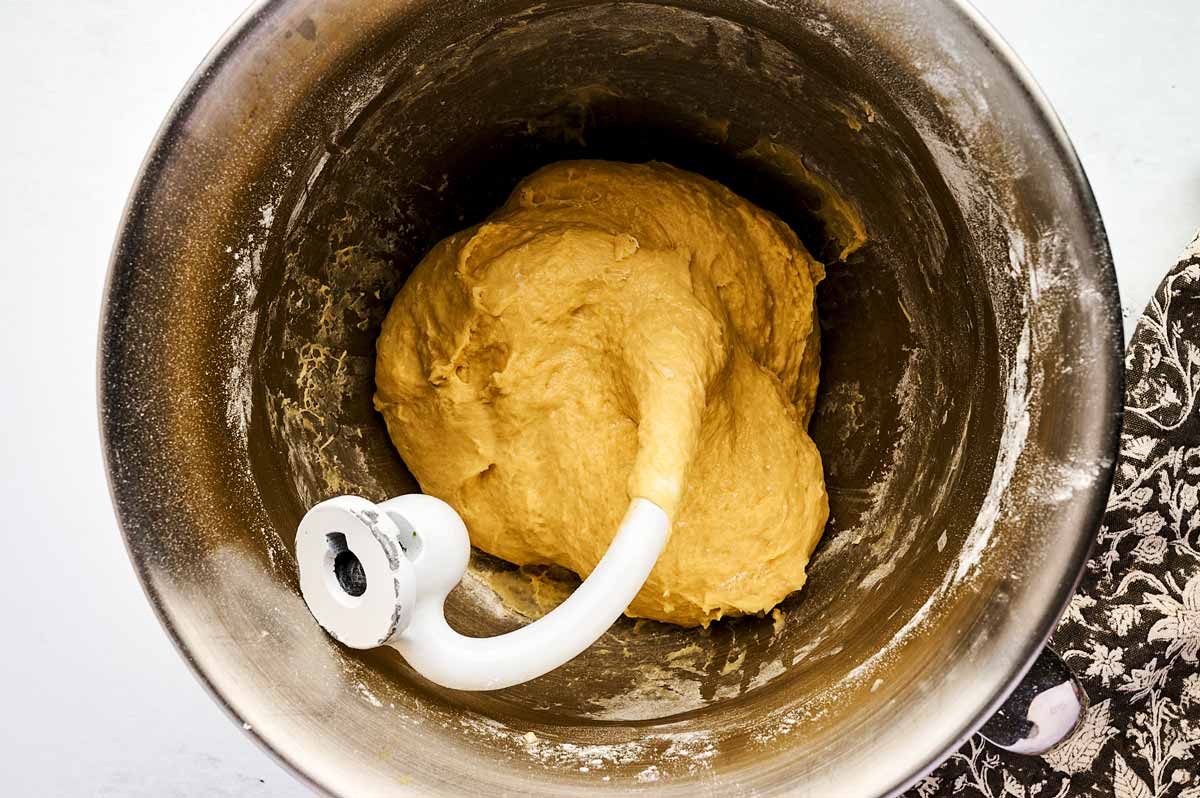
3: The dough.
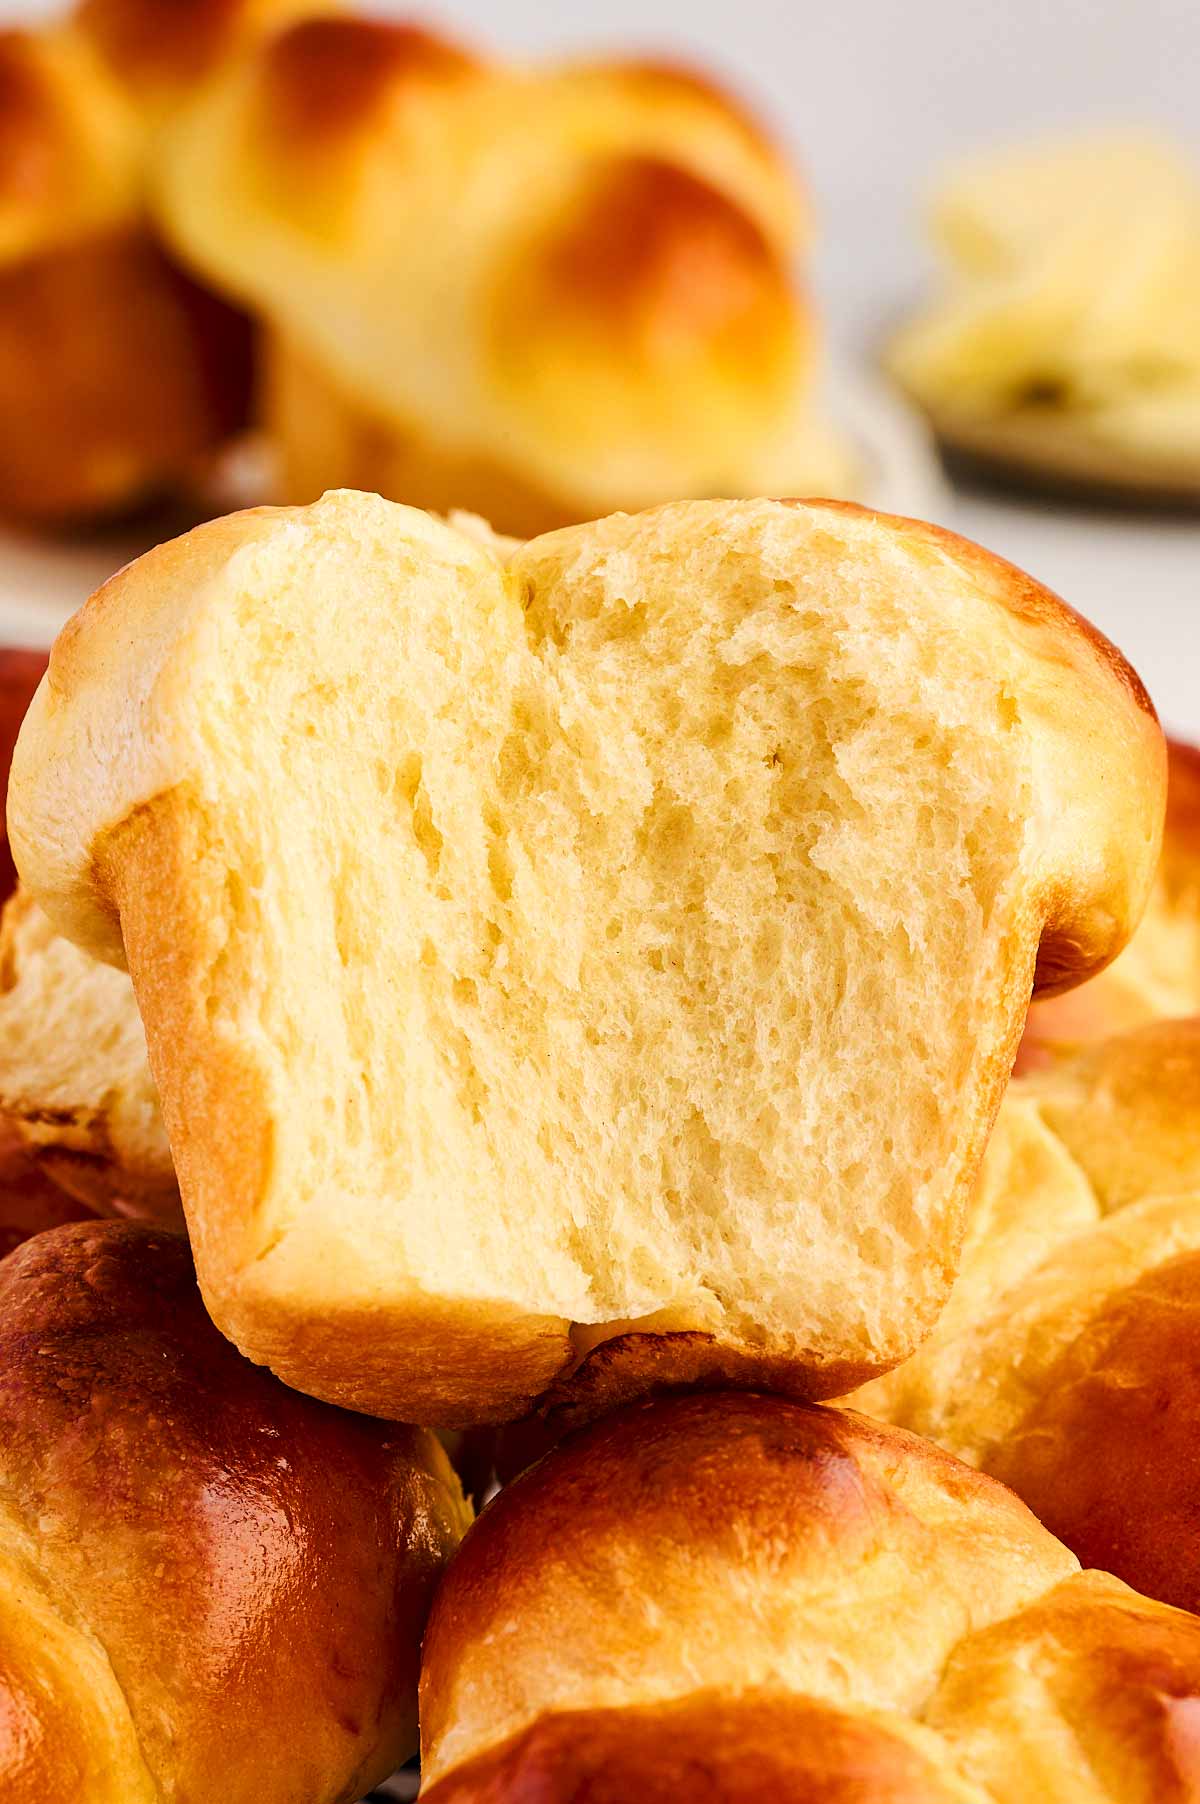
This dough needs to be a little tacky and just a touch sticky for the softest rolls! The flour soaks up the fatty liquid a little slower so it will get less tacky as it rises.
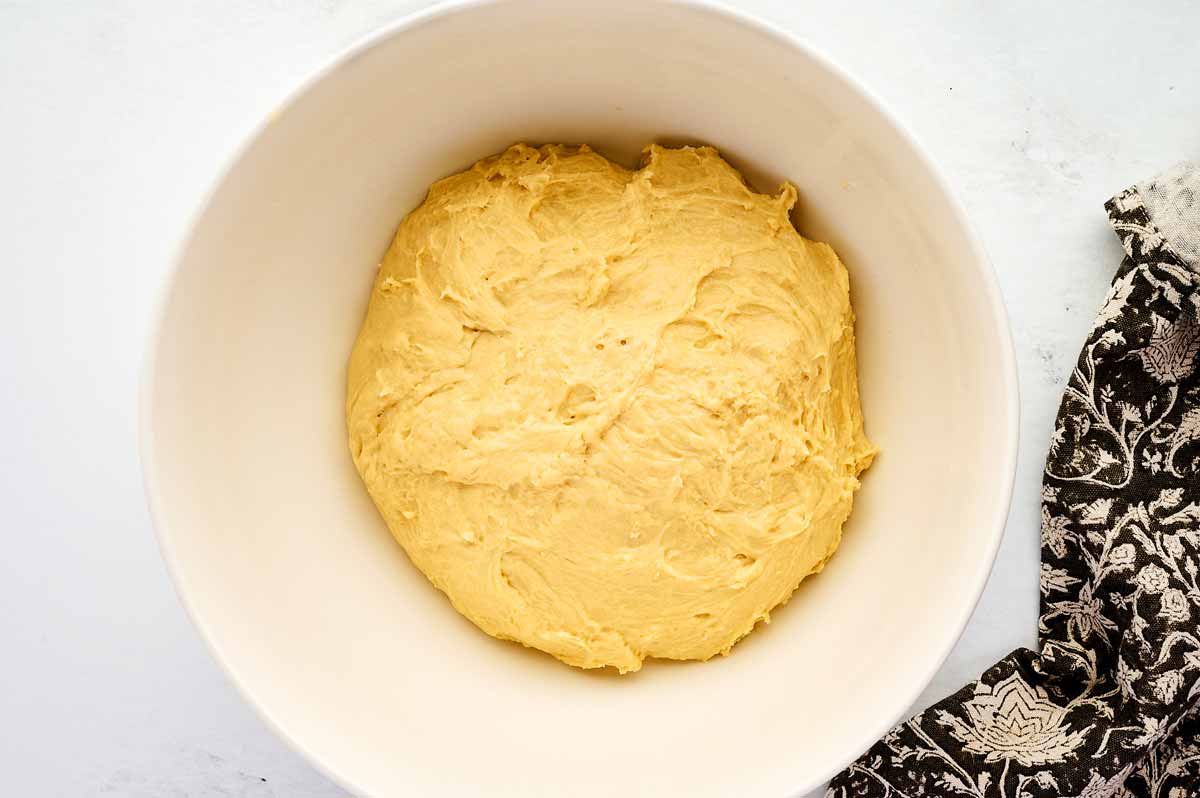
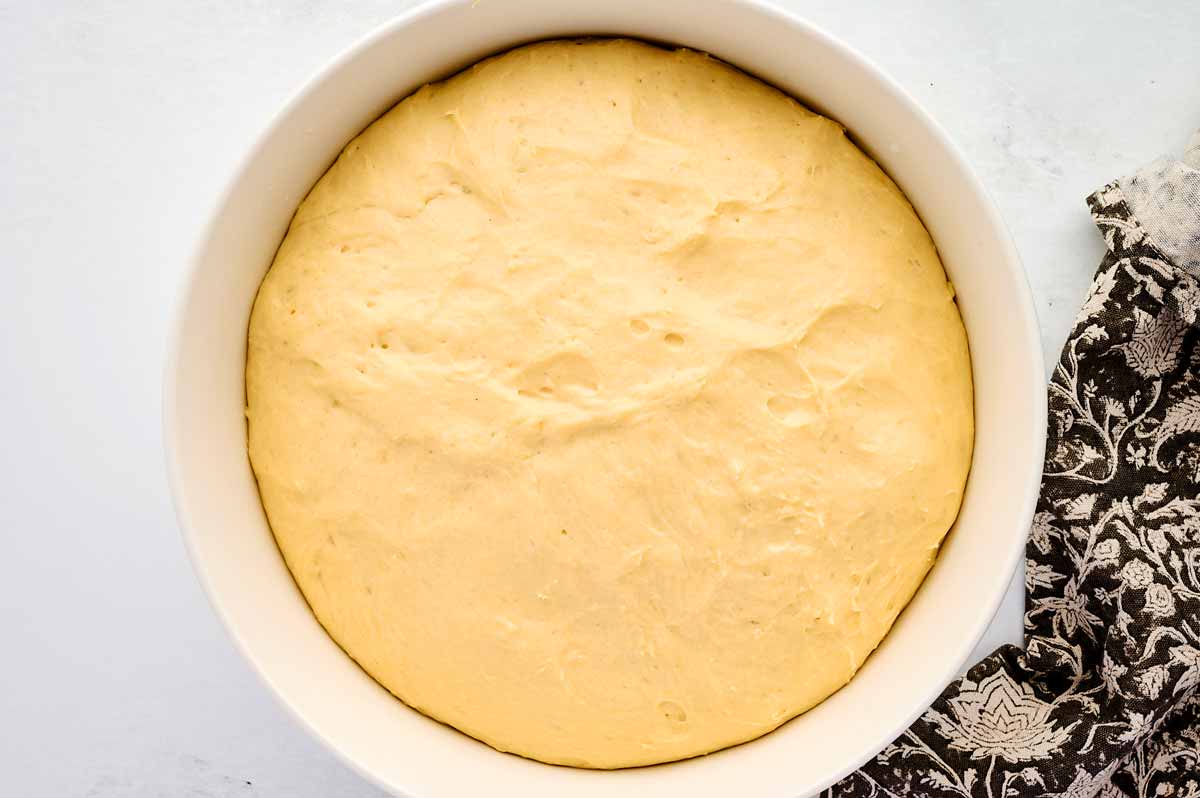
4: The first rise.
It really works like tossing a salad! Work fairly quickly once the chocolate is on. You want to get those M&Ms and marshmallows stuck in there before the coating starts to harden.
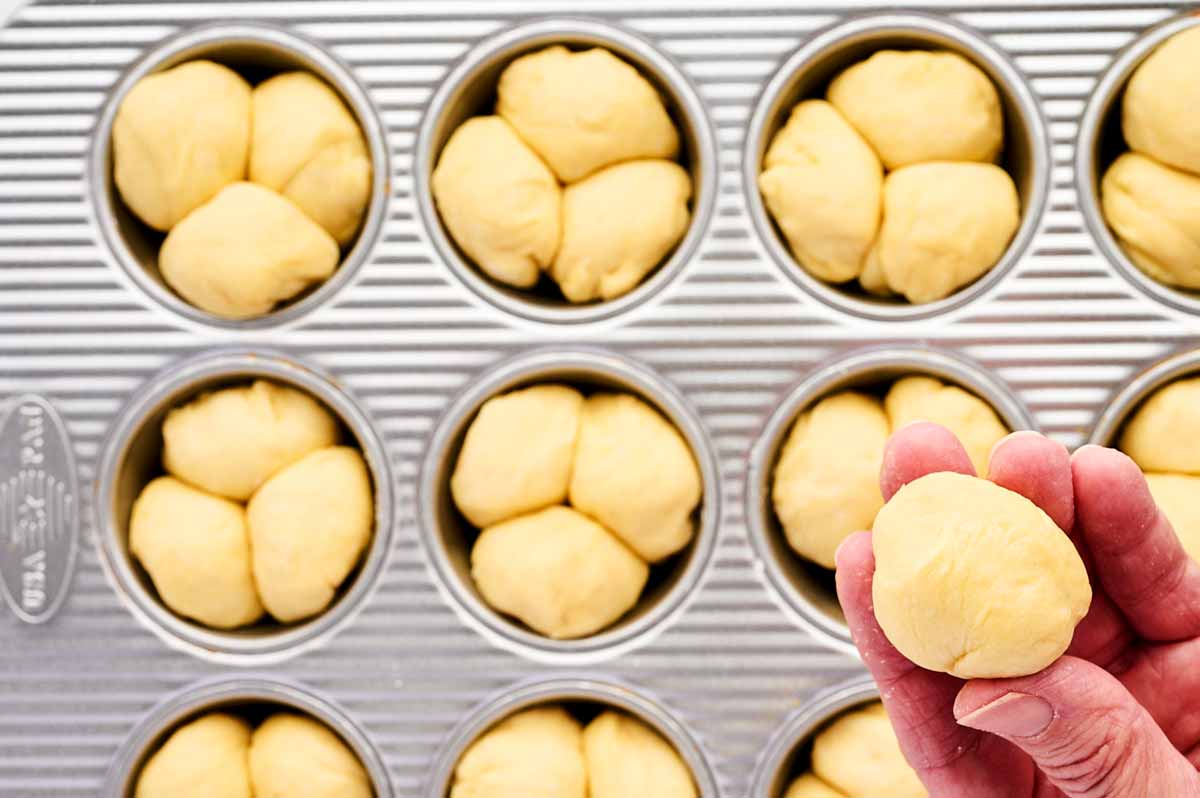
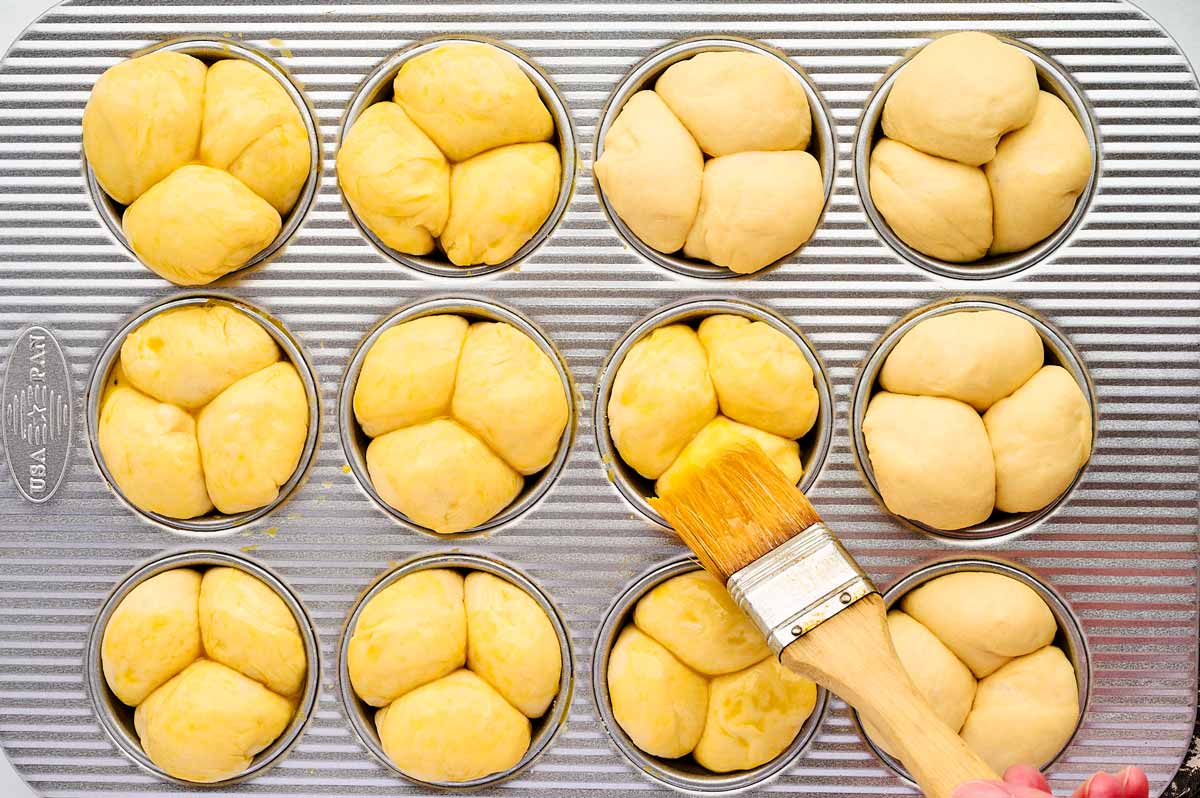
5: The shaping.
This part is actually therapeutic. Just pinch off pieces of dough and roll them between your palms. Don’t worry about them being perfectly identical — as long as there are three in each muffin cup, they’ll bake up looking beautiful.
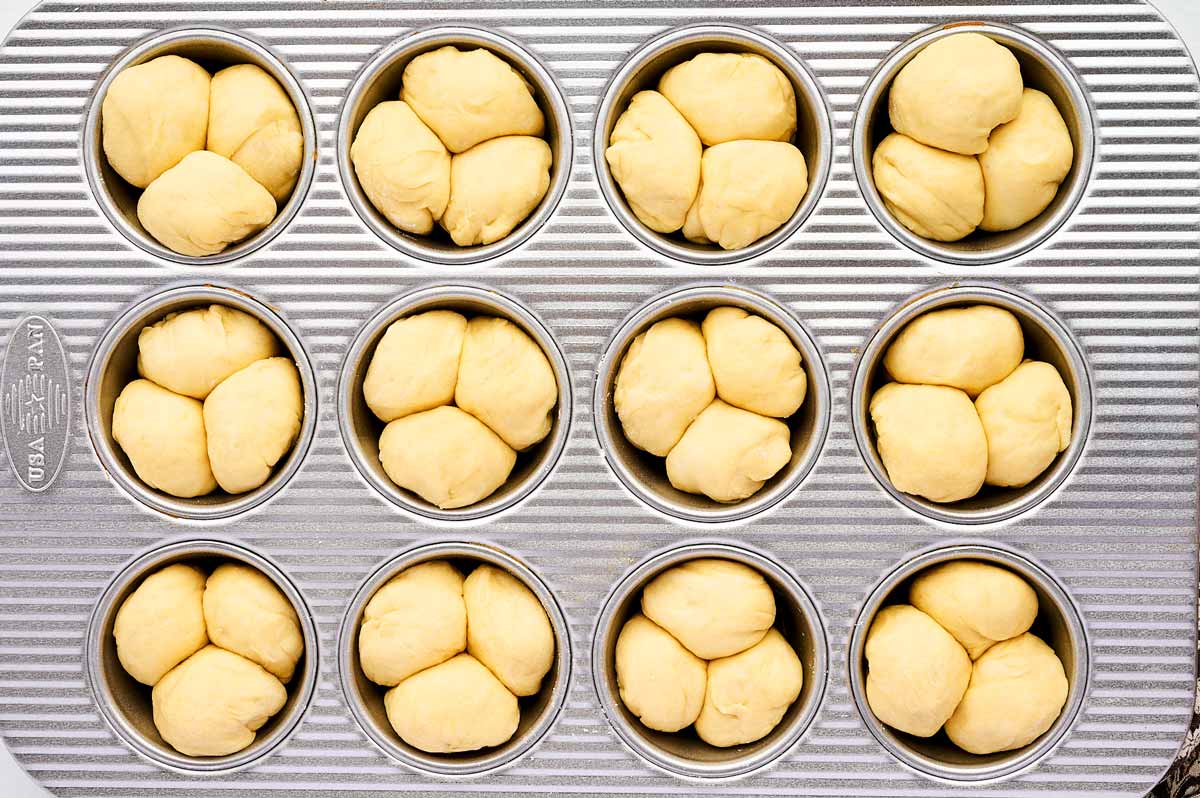
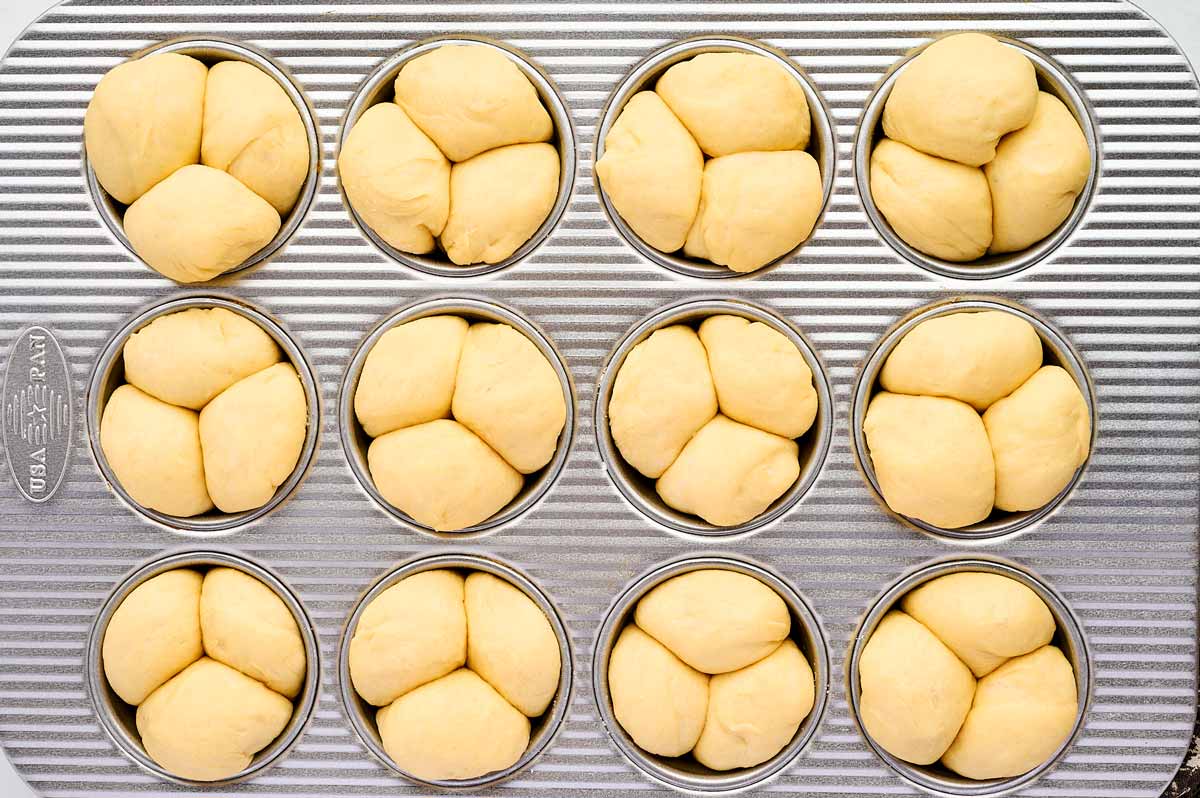
6: The second rise.
This is important, so don’t skip it! Cover the rolls again and let them rise until they are notably puffy for the fluffiest rolls.
Don’t let them go too long though or the yeast has no more power in the oven (they will look a little deflated if they are over proofed.) They are perfect when the surface looks puffy and has some tension.
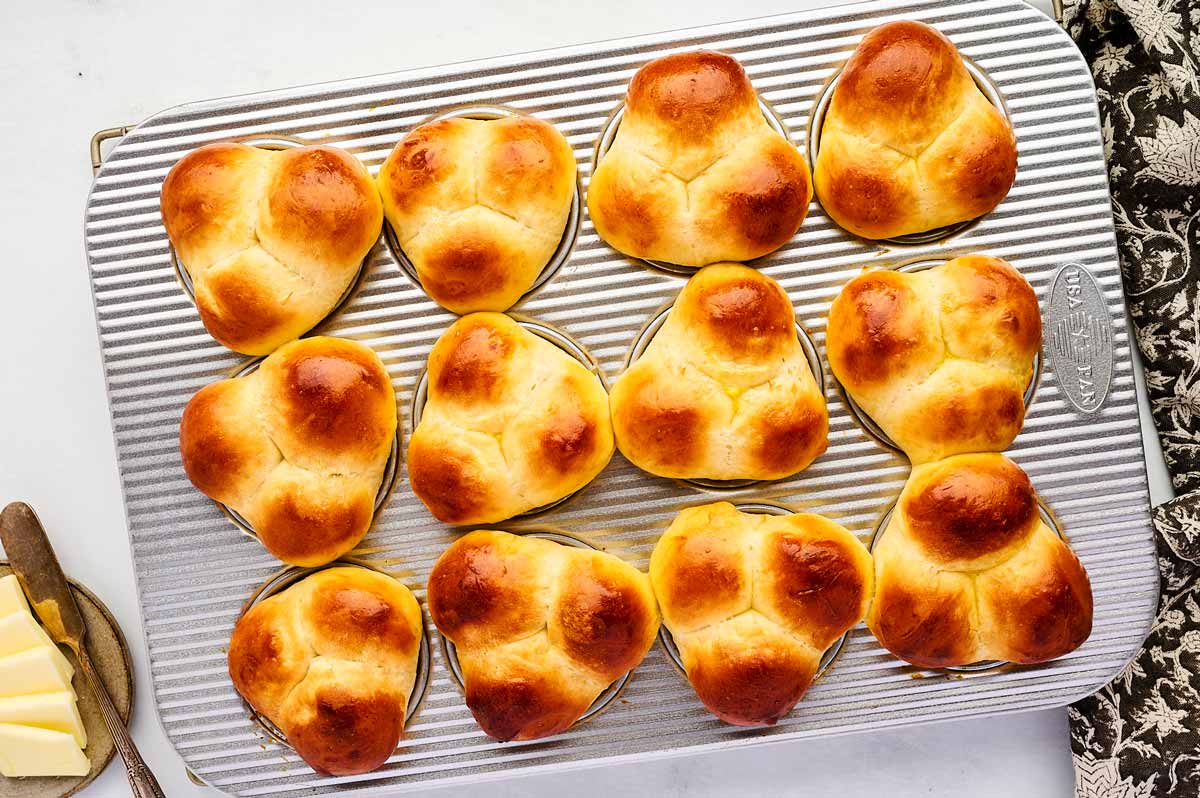
7: The egg wash & bake.
Do not skip the egg wash! Brushing that extra beaten egg on top right before they go in the oven is what gives them that shiny, professional-looking golden crust.
Bake them until they are a nice golden color.
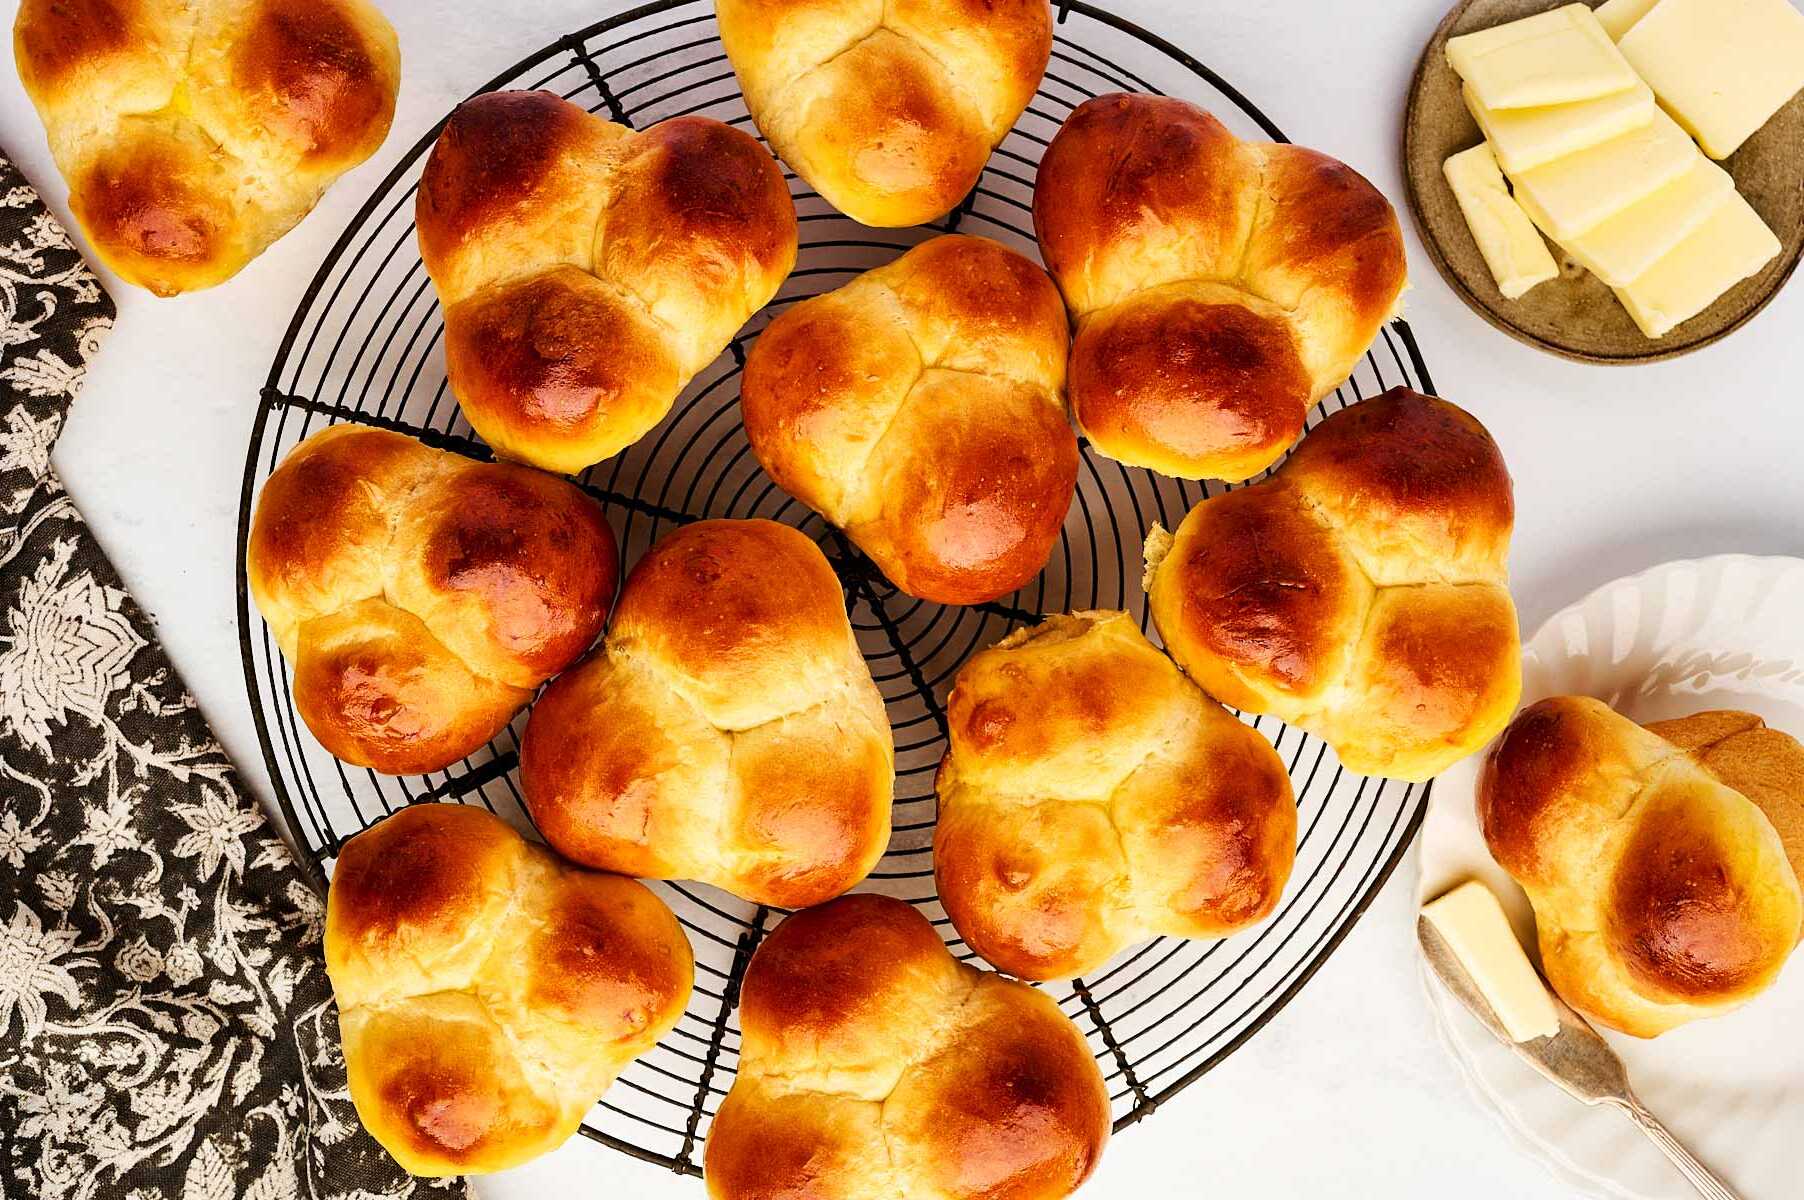
8: Serve.
Serve these warm with a big pat of salted butter. If you’re feeling extra fancy, you can brush them with a little melted garlic butter the second they come out of the oven!
Tl; dr: All the important stuff at a glance
If you read nothing else in this post, this is what you need to know:
- Check your water temp: 110°F is the sweet spot; hotter kills the yeast. Don’t go over 120°F!
- Grease the tin well: Use plenty of butter or non-stick spray so those “leaves” don’t stick to the sides.
- Don’t rush the second rise: Let them get nice and puffy in the muffin tin before you slide them into the oven.
- Quick recipe overview: Activate yeast. Knead dough. First rise. Shape. Second rise. Egg wash & bake!
FAQs
Can I make the dough ahead of time?
Yes! You can do the first rise in the fridge overnight. Just pull the dough out, let it take the chill off for 30 minutes, then shape and do the second rise as normal. It’s a lifesaver for holiday mornings.
What if I don’t have a stand mixer?
You can totally knead these by hand! It’ll take about 10 minutes of good folding and pushing on a floured counter. Consider it your arm workout for the day.
My rolls aren’t “pulling apart” — what happened?
Usually, this means the three balls were squished too tightly together or the dough was a bit too wet. They’ll still taste amazing, they just might need a knife to help them along.
If you’re looking for more comfort food breads, try my Easy Homemade Dinner Rolls, these Potato Rolls or the easiest Shortcut Homemade Buns!
Cloverleaf Rolls
Ingredients
- 1 envelope active dry yeast
- 4 tablespoons sugar (divided use)
- ¼ cup warm water
- 4 tablespoons butter (diced)
- 1 cup milk
- 1 teaspoon salt
- 2 eggs (beaten separately and divided use)
- 3 ½ to 4 cups all-purpose flour (divided use (~550g weighed) (Note 1))
Instructions
- Prep: The baking temperature in this recipe is 400°F. You only need to preheat your oven towards the end of the second rise!You will need a greased 12-cup muffin tin for baking, prep it toward the end of the first rise.
- Activate yeast: In the bowl of your stand mixer, combine yeast with 1 tablespoon sugar and warm water, no warmer than 110°F ; let stand for 5 minutes until bubbly (Note 2).1 envelope active dry yeast, 1 tablespoons sugar, ¼ cup warm water
- Make milk mixture: Place butter, milk, remaining sugar and salt in a small saucepan. Heat to 110°F, allowing butter to melt. Be sure mixture does not exceed 120°F, or you may kill off the yeast! Whisk in the egg.3 tablespoons sugar, 4 tablespoons butter, 1 cup milk, 1 teaspoon salt, 2 eggs
- Knead dough: Add milk mixture and 1-½ cups flour to yeast mixture. Knead with the dough hook on low speed, gradually adding the remaining flour (I usually need ~3-¾ cups) until a soft dough forms. Knead on medium speed for 5-6 minutes until dough is soft, pliable and forming a ball (Note 3).3 ½ to 4 cups all-purpose flour
- First rise: Place dough in a greased bowl, turning once. Cover and let rise in a warm place until doubled in size, about 45-60 minutes.
- Shape and second rise: Punch dough down; turn out on a clean surface. Shape into 36 walnut-size balls; place 3 balls in each cup of a greased muffin tin. Cover and let rise until puffy, about 20 minutes.
- Egg wash and bake: Brush rolls with the remaining beaten egg. Bake at 400°F for 12 to 15 minutes, or until golden. Cool in the pan for 5 minutes, then remove to a cooling rack to cool completely.
Notes
- Note 1: It’s important to add the correct amount of flour, else you will end up with dry/biscuit-like rolls. If you scoop your flour, it will be pretty close to 3-½ to 3-¾ cups. If you fluff, spoon and level, it will be closer to 4 to 4-½ cups. If you weigh it out, it will be 500-550g, depending on your exact ingredients.
- Note 2: If your yeast mixture isn’t bubbly after 5-10 minutes, your yeast may be expired. Discard it and use a new packet, or your rolls may not rise!
- Note 3: This dough should be just very slightly tacky/sticky. Not like paste! But a little bit sticky. The flour will absorb more of the fatty liquids as the dough rises, but if you add too much flour here you will end up with dry and dense rolls.


Comments
No Comments