

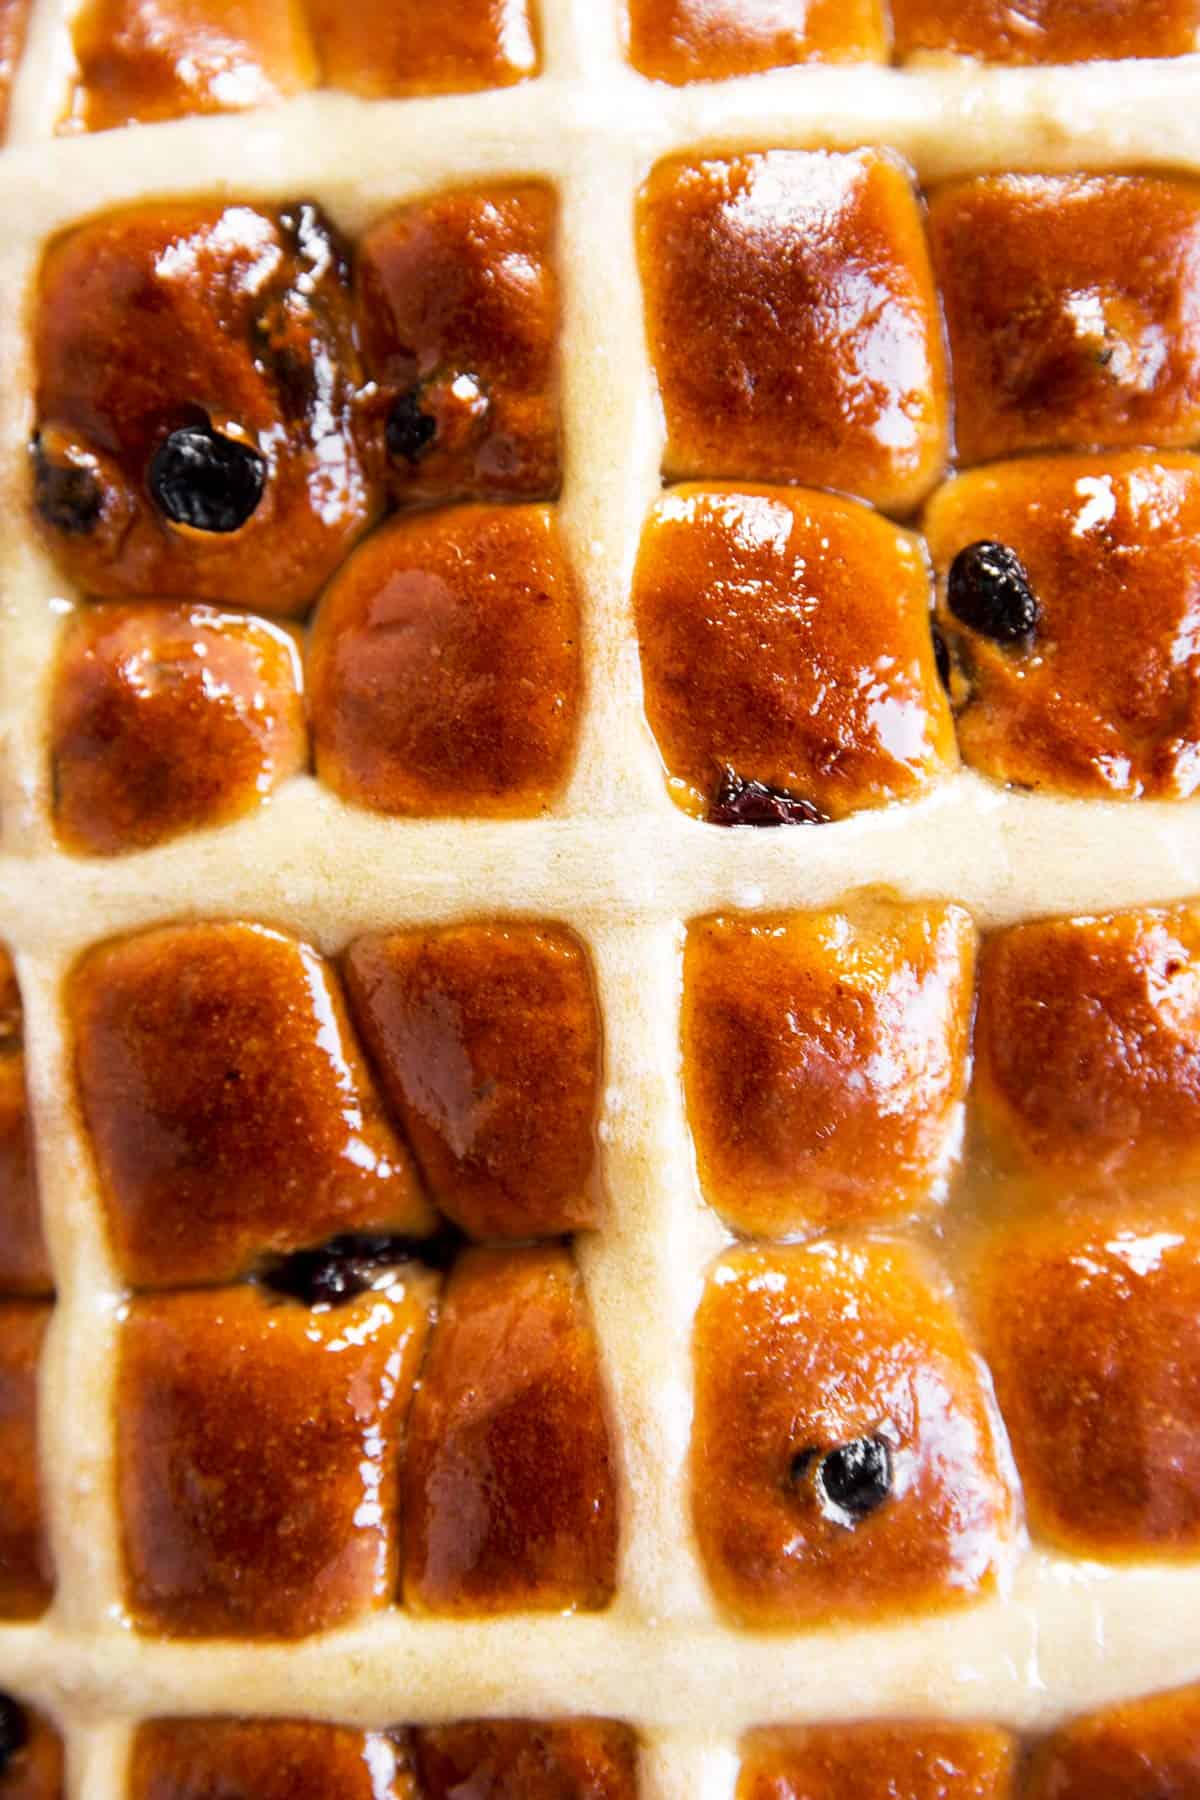
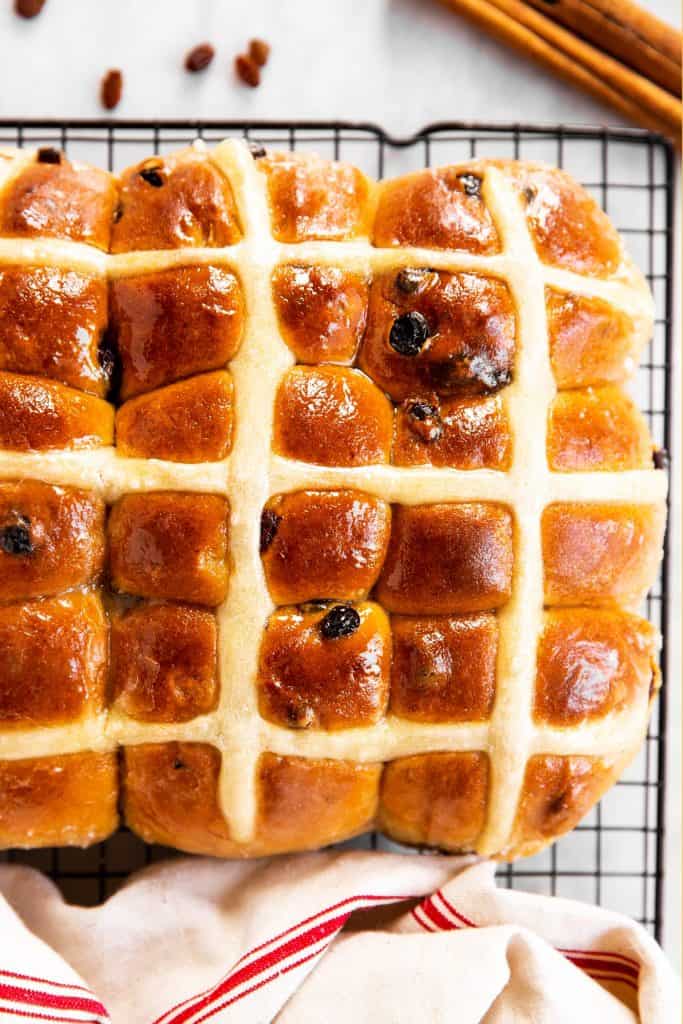
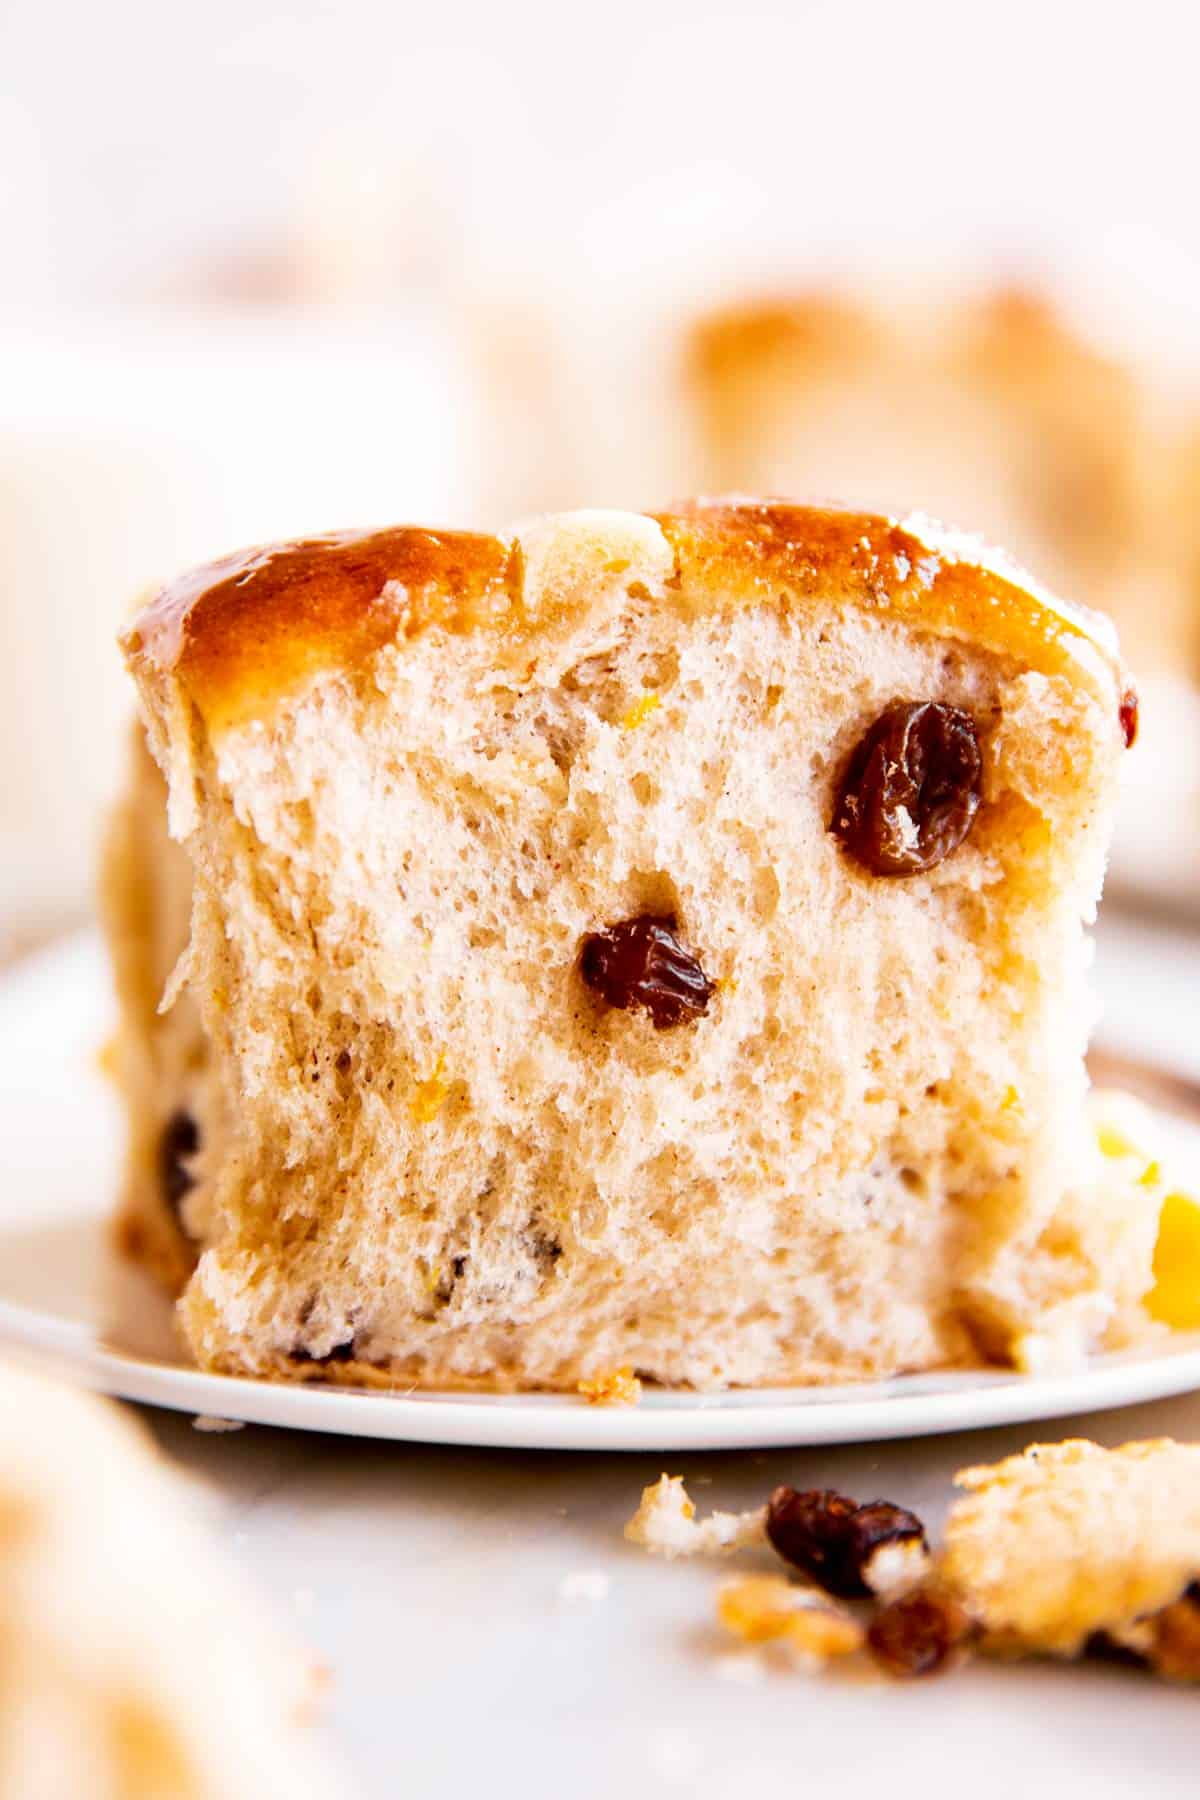
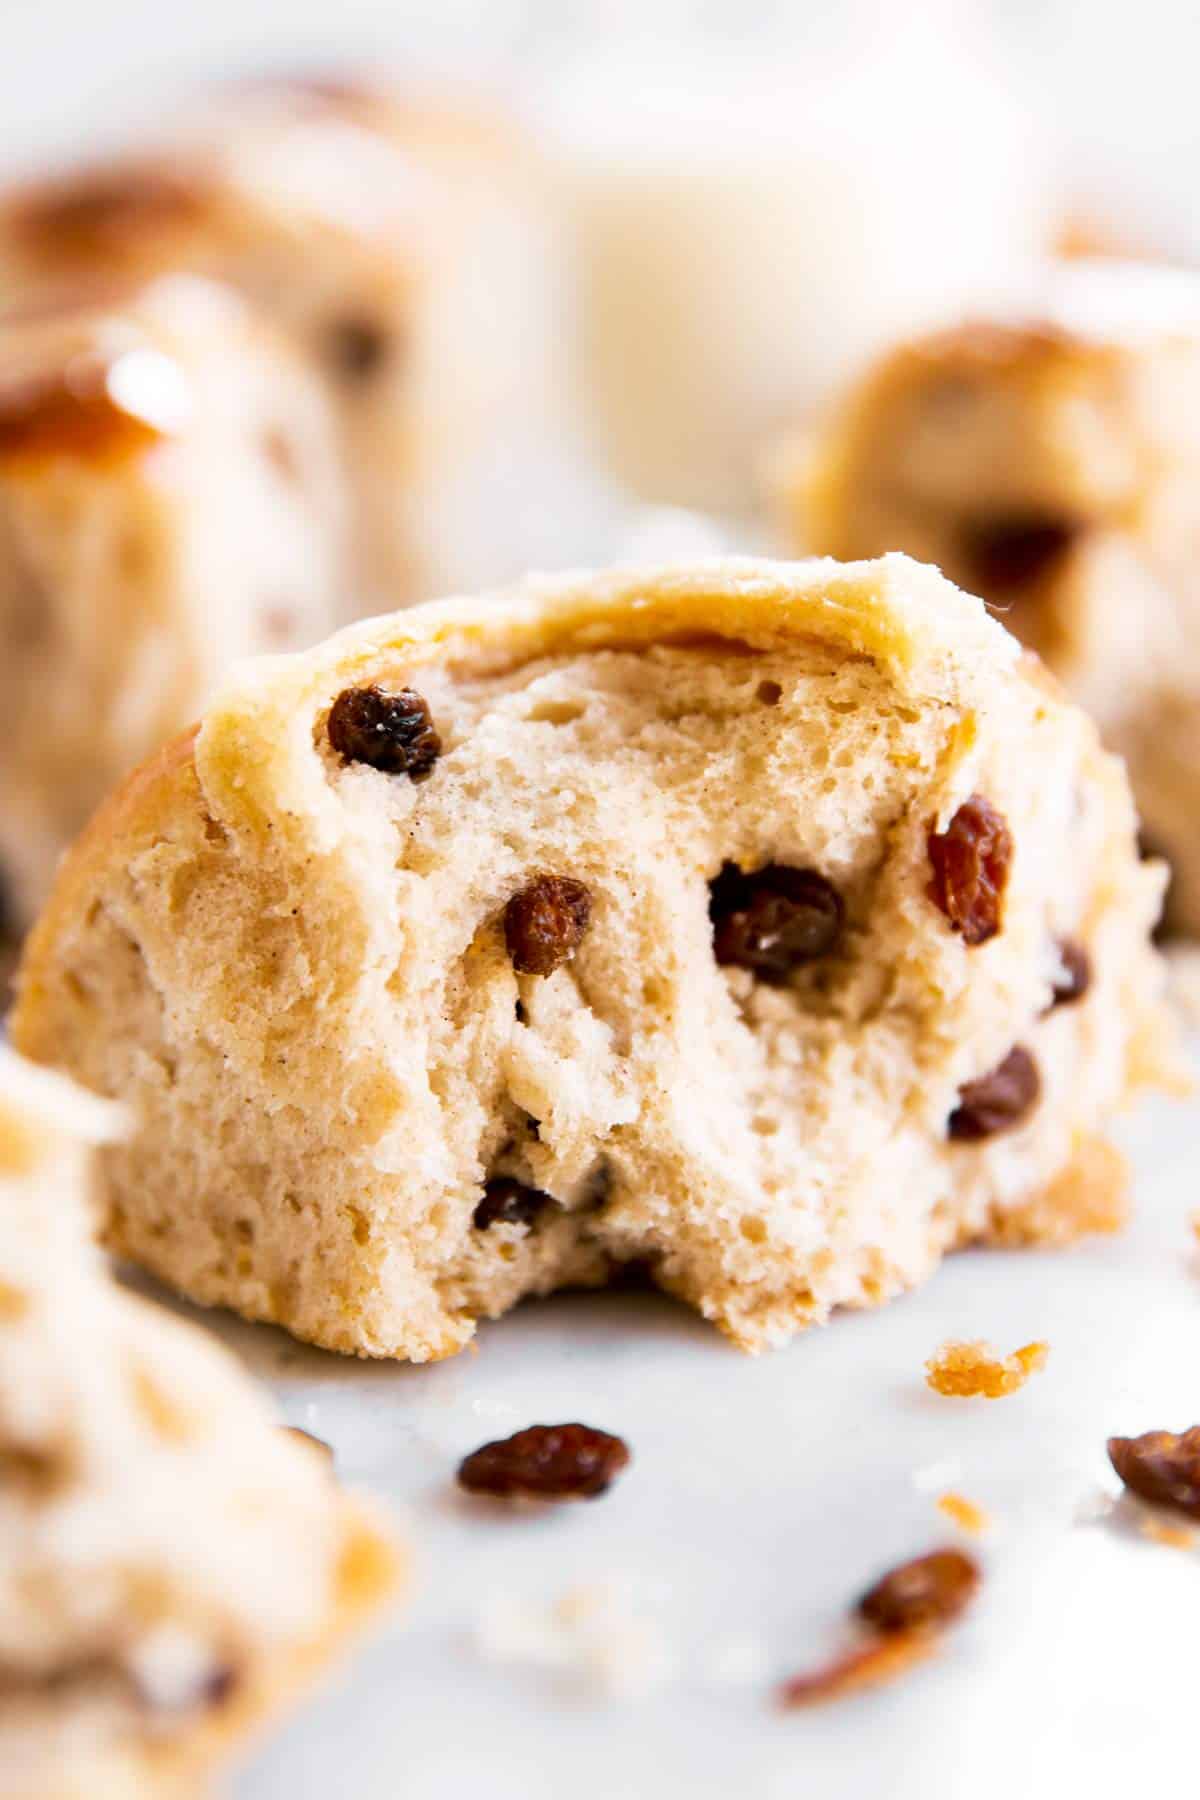
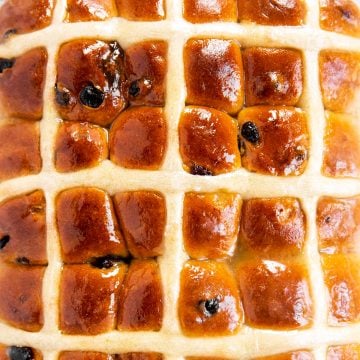
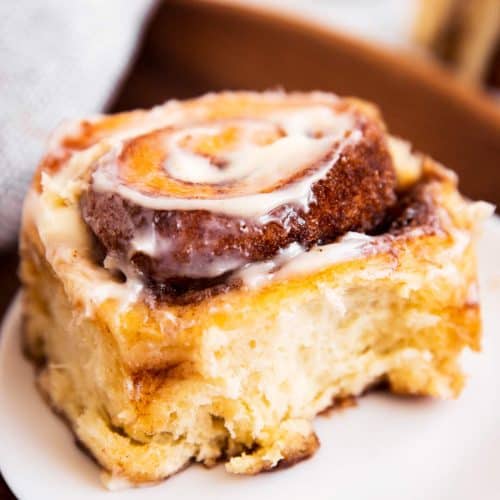
Hot Cross Buns are a classic Easter recipe you can bake at home with a simple, enriched yeast dough. The buns come out sweet and soft with hints of warm spices, orange zest and studded with raisins.
Serve these warm from the oven on Good Friday to wow your family and friends – and they are also delicious for your Easter brunch.
Homemade Hot Cross Buns recipe
I love baking my own bread, but I especially love baking special holiday breads. Hot Cross Buns are such a classic for Easter, I make them every year with my kids!
- The buns come out super soft and fluffy
- The dough is simple to make and easy to work with
- The crosses are surprisingly easy to make, too!
Ingredients you’ll need
Here is a visual overview of the ingredients in the recipe. Scroll down to the printable recipe card at the bottom of this post for quantities!
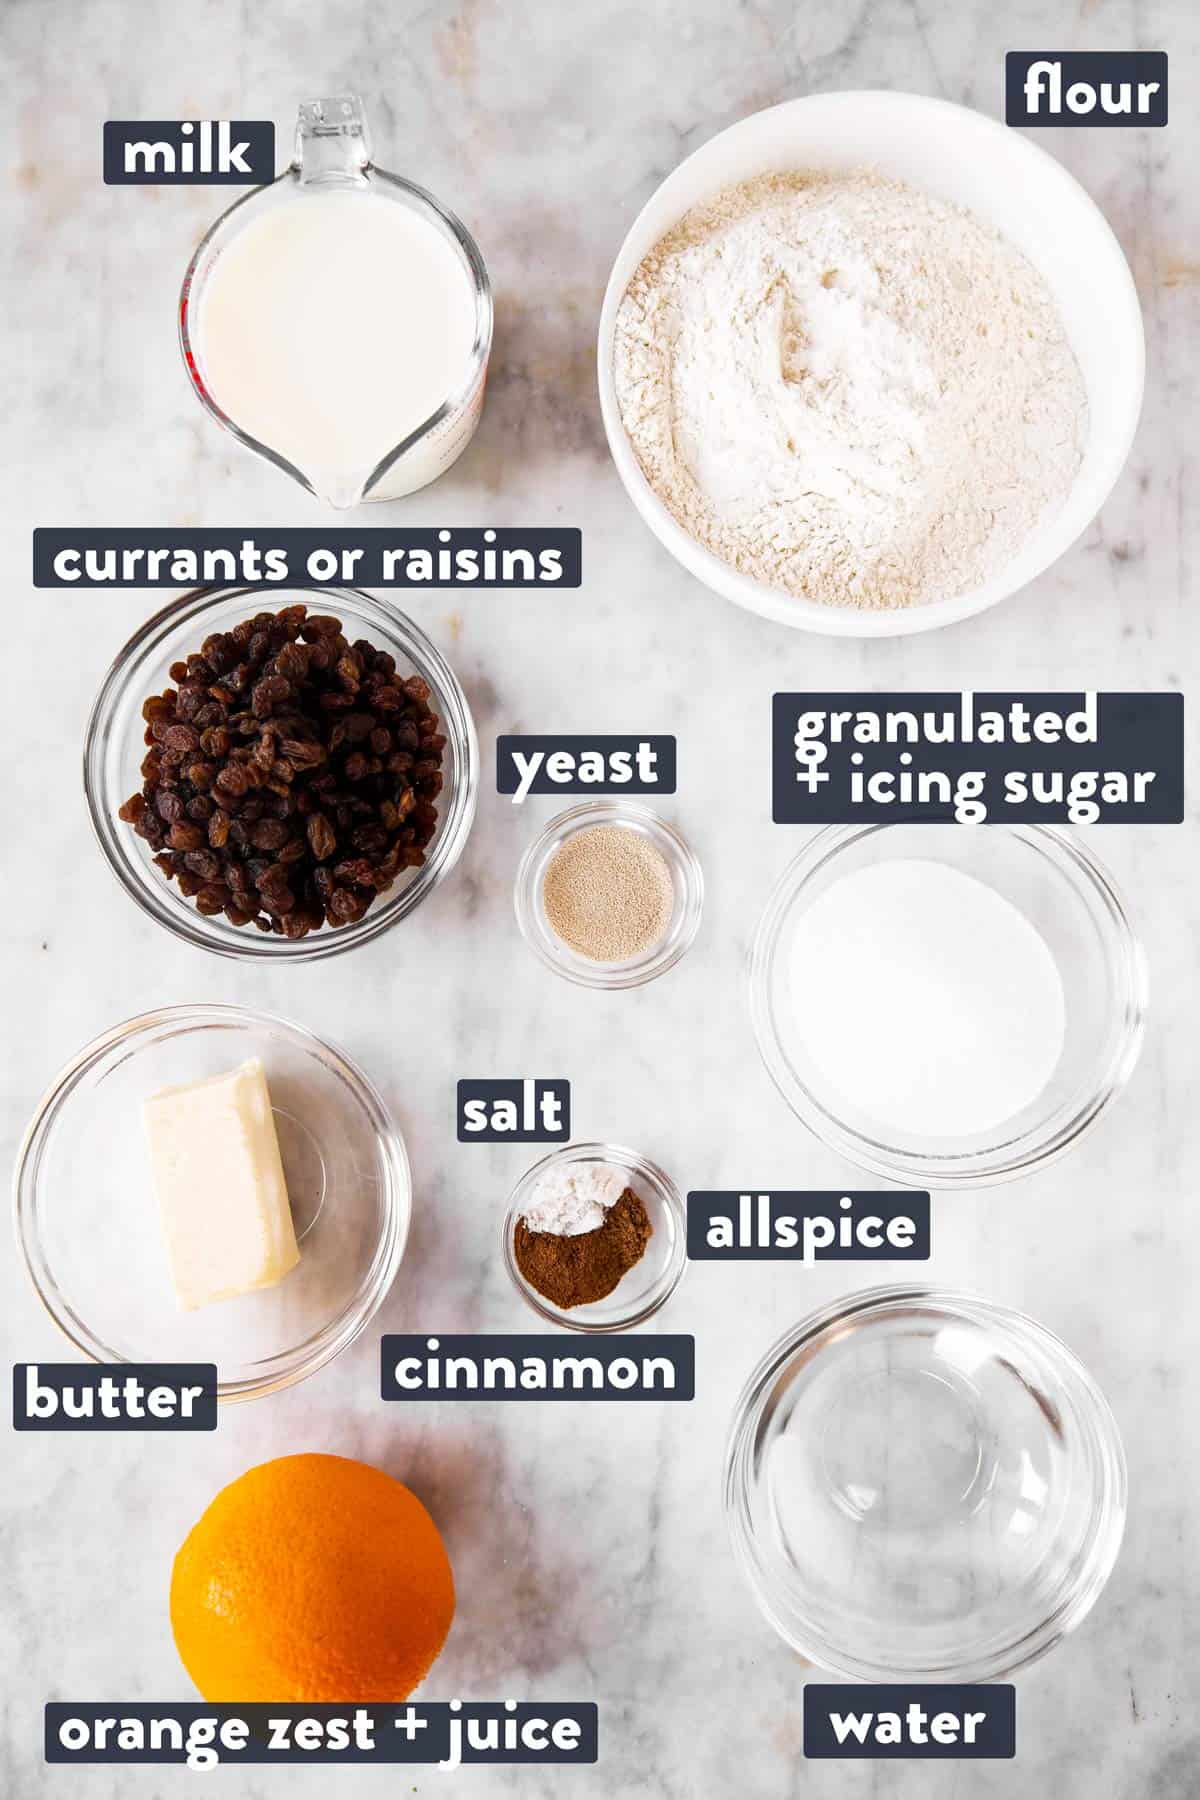
Ingredient notes
- Flour: I recommend using all-purpose flour. Whole wheat flour will yield denser rolls and you’d need to slightly increase the milk for the buns to stay soft.
- Milk: I used whole milk for extra-soft rolls, but 2% or 1% will also work. I do not recommend skim milk.
- Yeast: I used active dried yeast. Instant dried yeast can work, just watch your dough as it will rise quicker. Organic yeast is really difficult in enriched doughs (= a dough with fat and sugar, which has more difficulty rising as-is). I do not recommend using organic yeast in this recipe.
- Butter: I used real butter, which yields the best flavor in this recipe. If you must use margarine, please only use stick margarine and not a spread.
- Orange zest/juice: If you’re not a fan of orange flavor, feel free to leave these out. I do not recommend lemon zest in place of the orange zest, it doesn’t work as well with the warm spices. Use water in place of the orange juice for the glaze.
- Allspice: Feel free to leave this out if you don’t keep it on hand. You can also use pumpkin spice mix in place of the allspice, if you have it.
- Currants/raisins: Use either currant or raisins, or a mix of both. If you like it, you can also add ½ cup of mixed candied peel.
How to make Hot Cross Buns
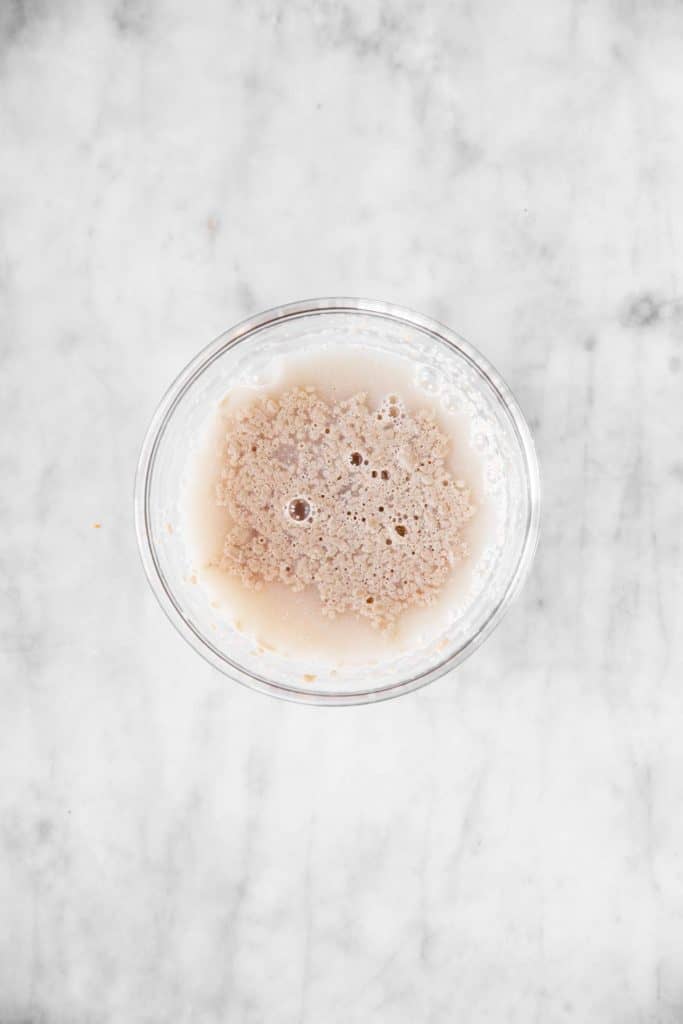
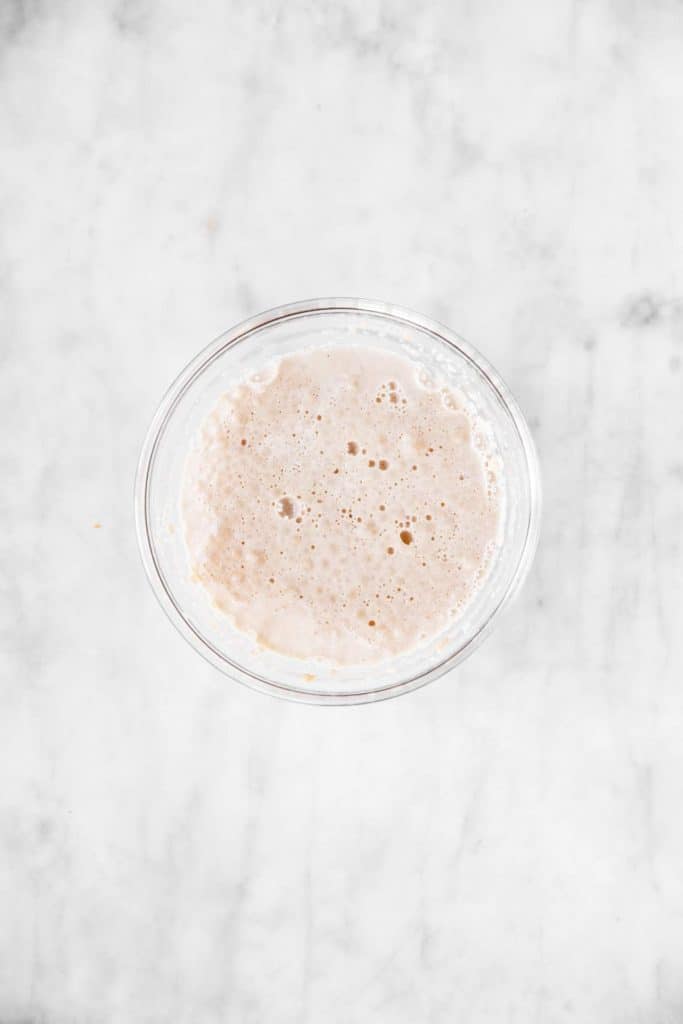
1. First, bloom the yeast. Stir it into the warm water (no more than 100°F!), add a teaspoon of sugar and let it sit for 5-10 minutes until it looks thick and frothy.

yeast before blooming bloomed yeast
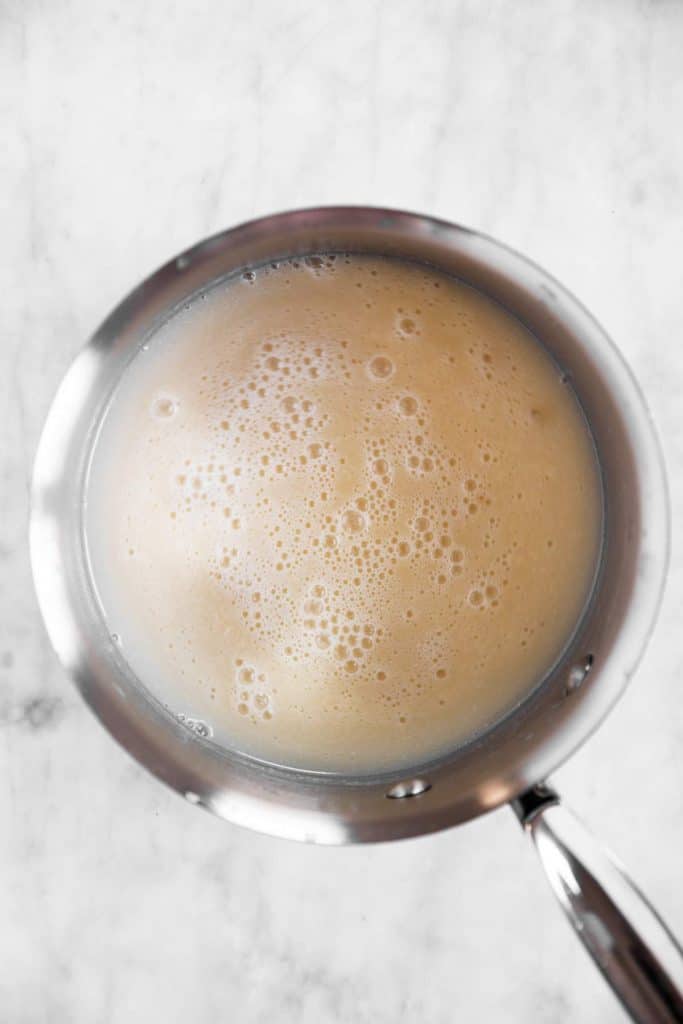
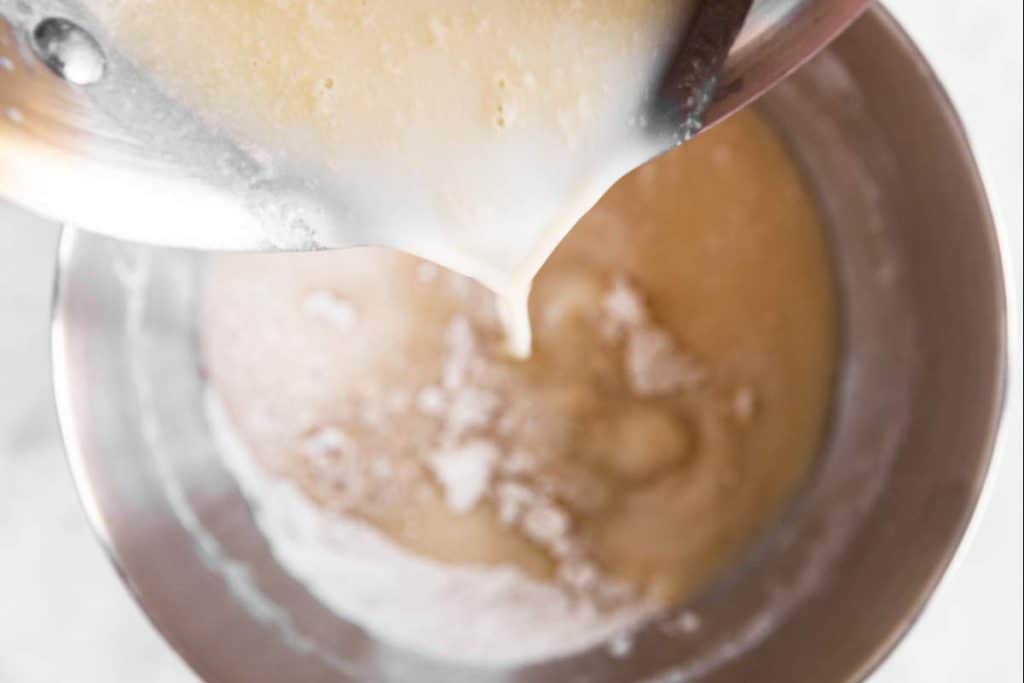
2. Warm the milk and butter to 100°F to melt the butter, then stir in the sugar. Add the bloomed yeast mixture, then add to the bowl of your stand mixer with the dry ingredients.
yeast mix stirred into milk/butter 
adding liquids to dry ingredients dough before first rise dough after first rise
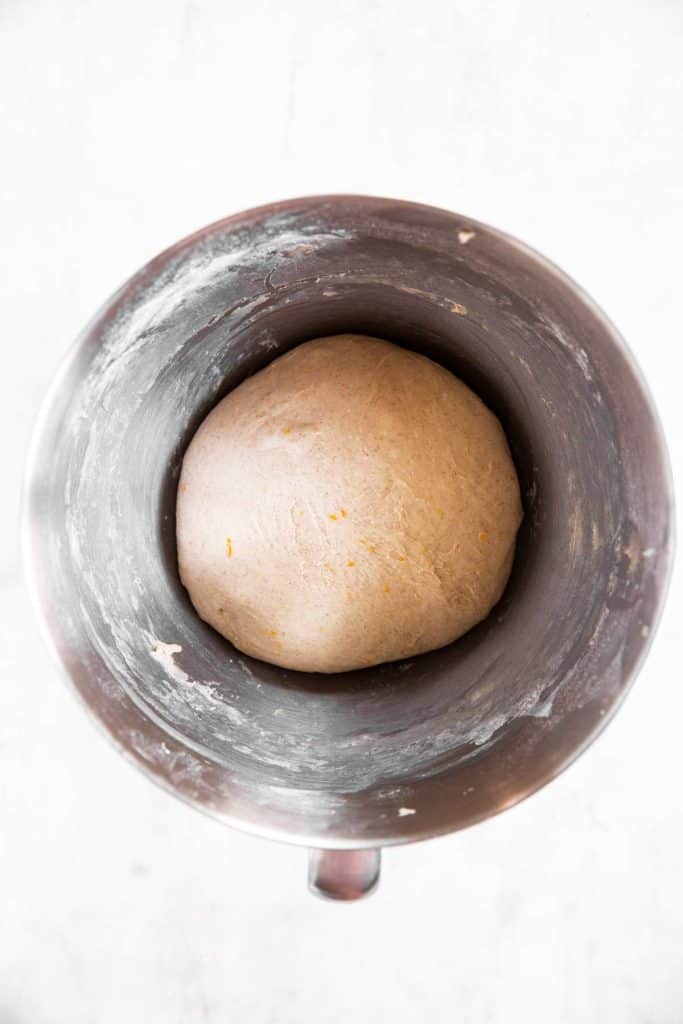
3. The dough needs to knead for 5-10 minutes in your mixer, until fully smooth. Add more flour by the tablespoon if needed, until the dough just comes together into a slightly sticky ball of dough.
Cover the bowl with plastic wrap and let sit at room temperature until doubled in size, about 1 hour.
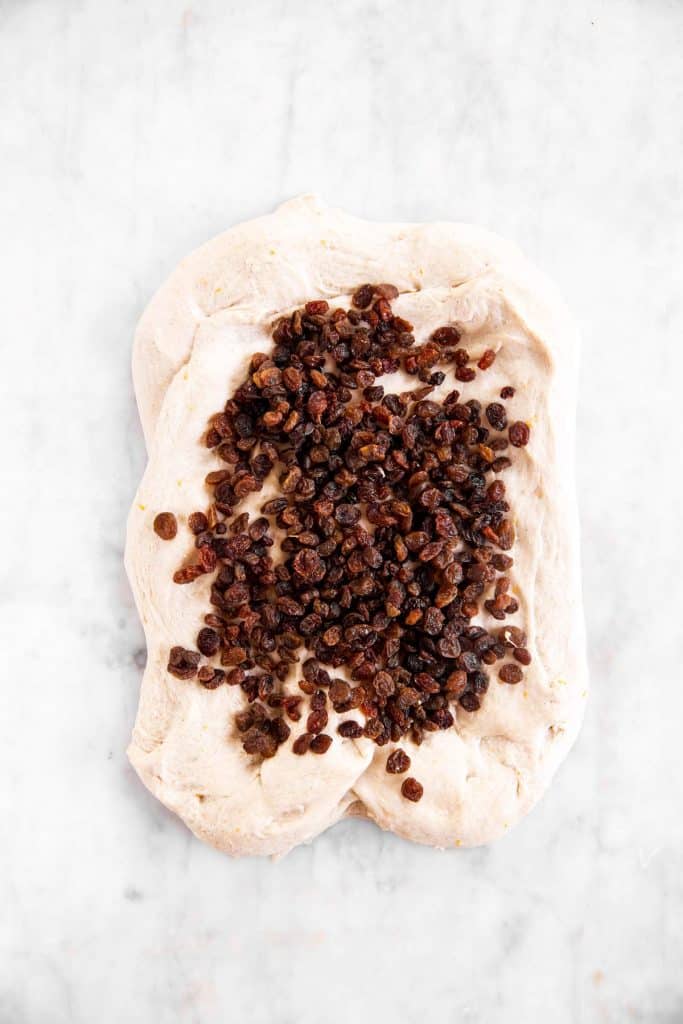
4. After the first rise, remove the dough from the bowl and flatten it into a thick rectangle (flour your worktop if it isn’t natural stone or Quartz).
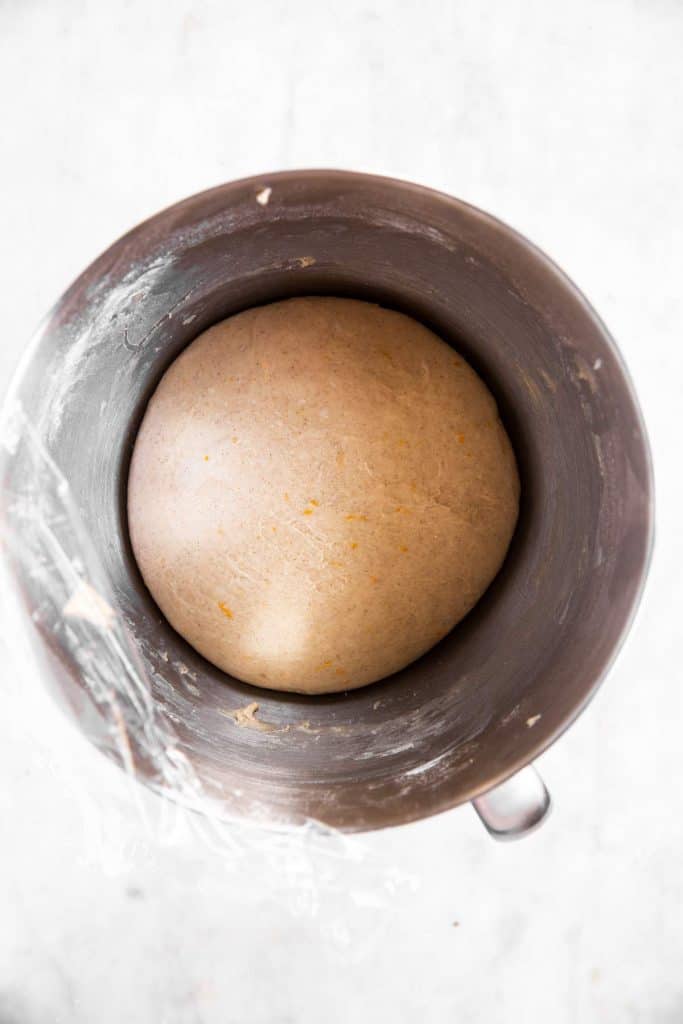
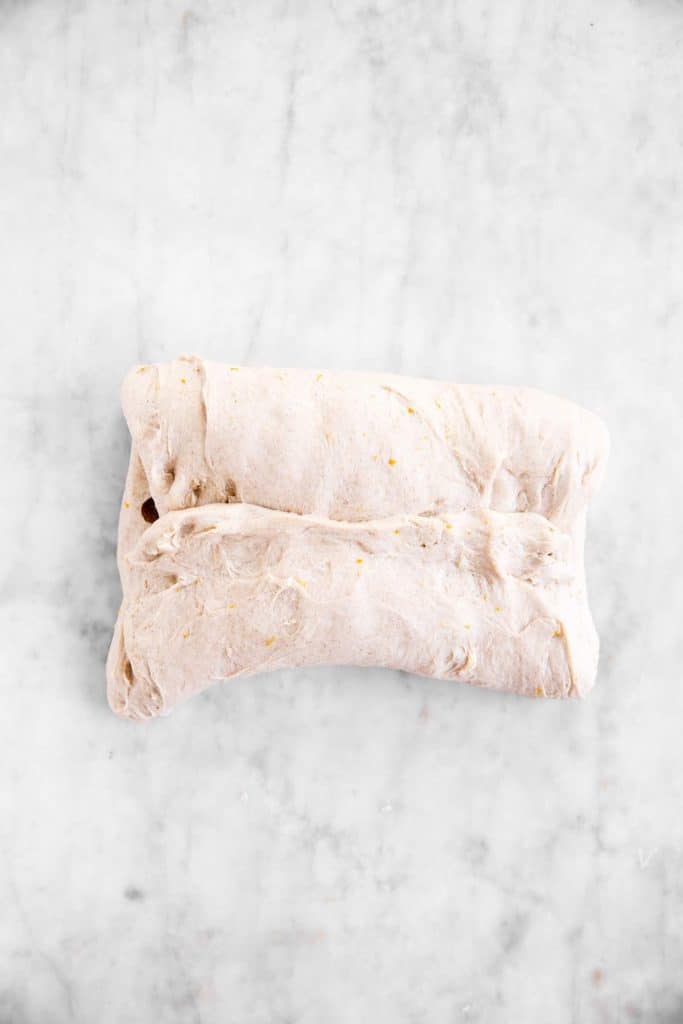
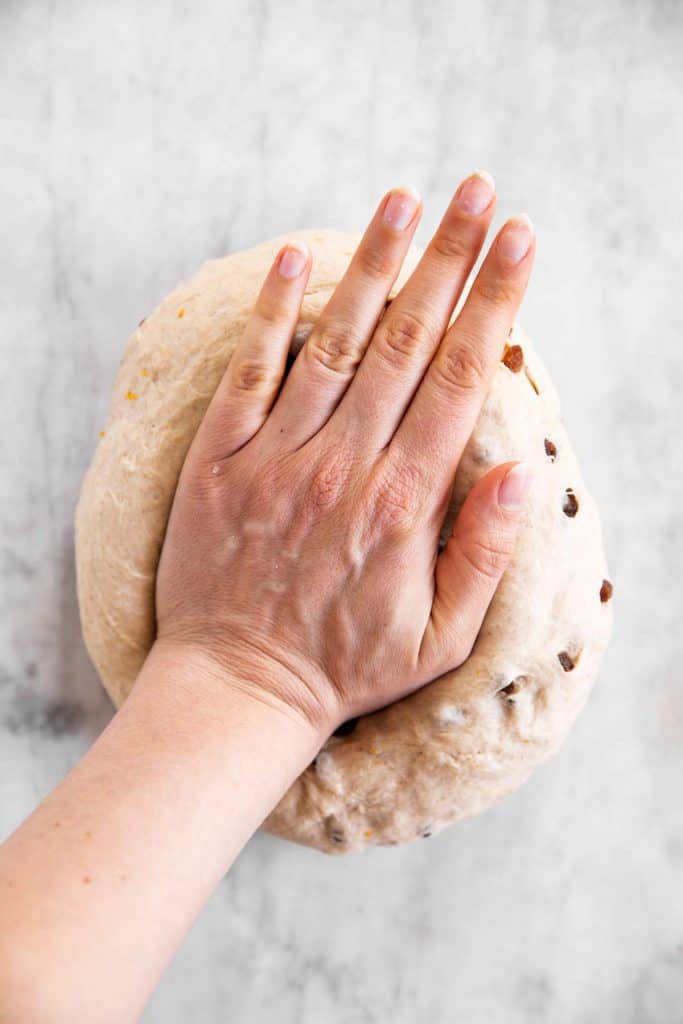
Sprinkle the raisins over the dough, then fold over the dough and knead a few times to evenly distribute the dried fruit. (We are only adding the fruit after the first rise because it can inhibit the yeast growth, so your buns will come out softer and fluffier.)
sprinkle raisins over dough fold over knead to incorporate
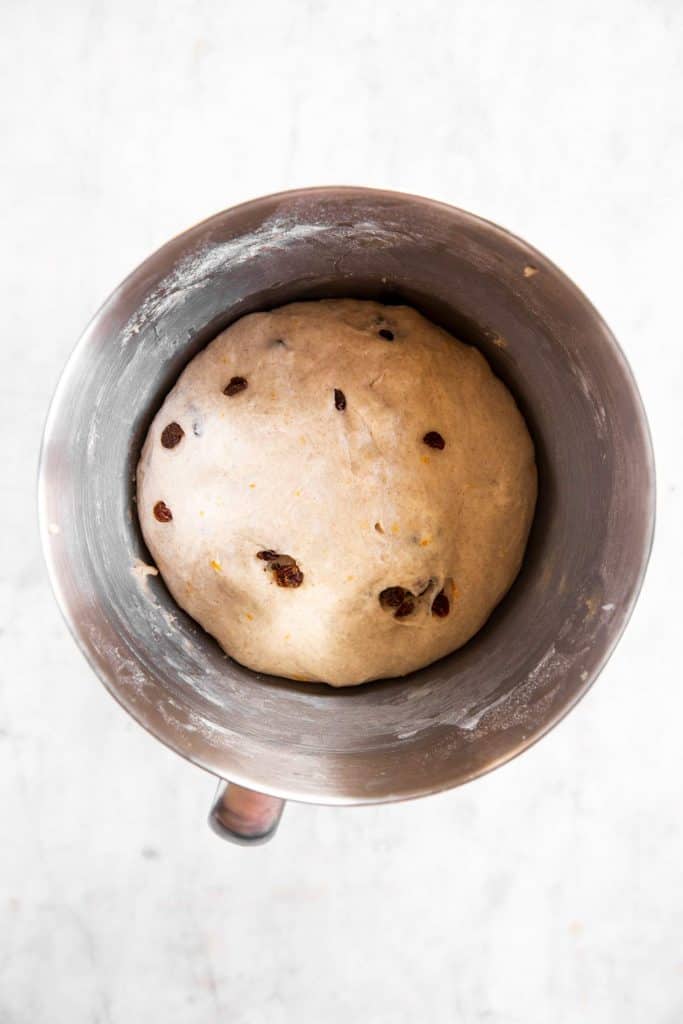
Return the dough to your bowl, cover with plastic wrap again and let sit at room temperature again until doubled in size. This will take 30-60 minutes depending on your location, room temperature and exact ingredients used.
before second rise after second rise

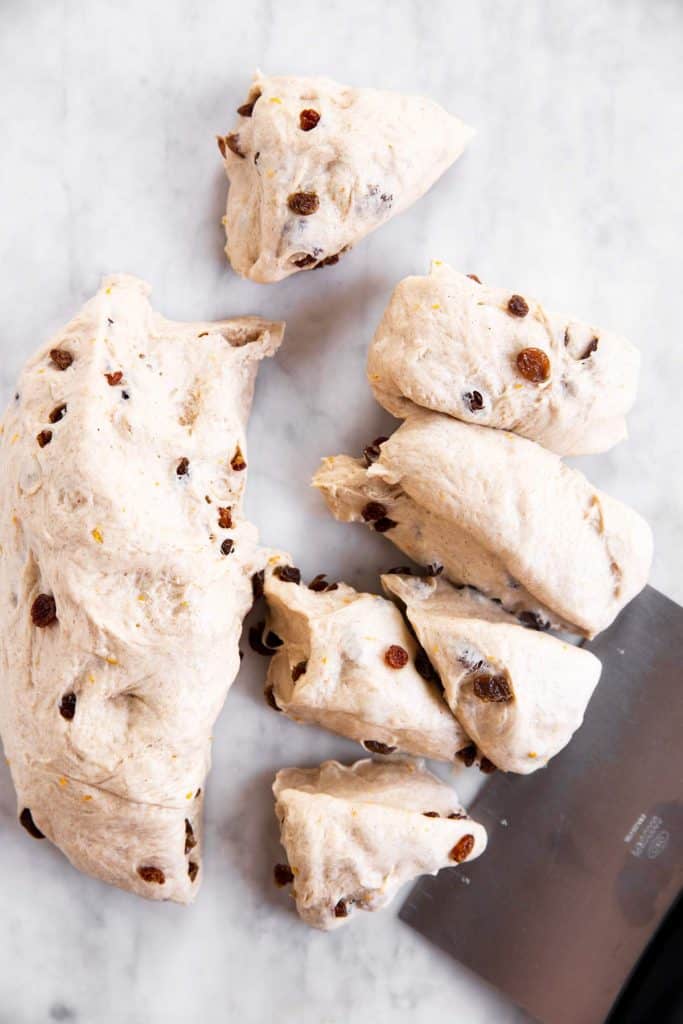
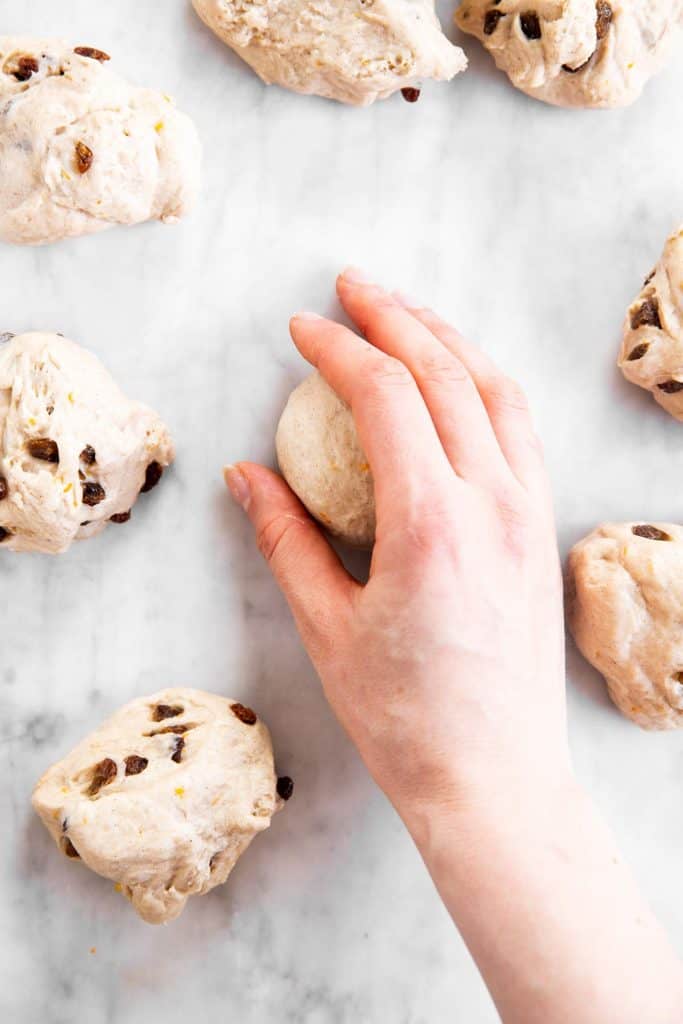
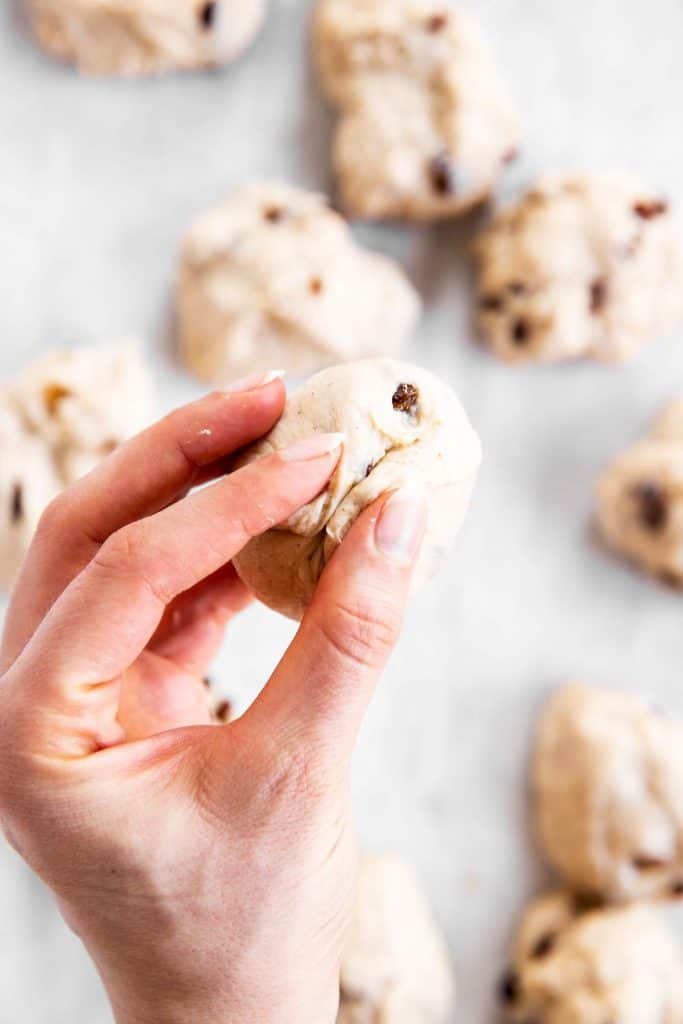
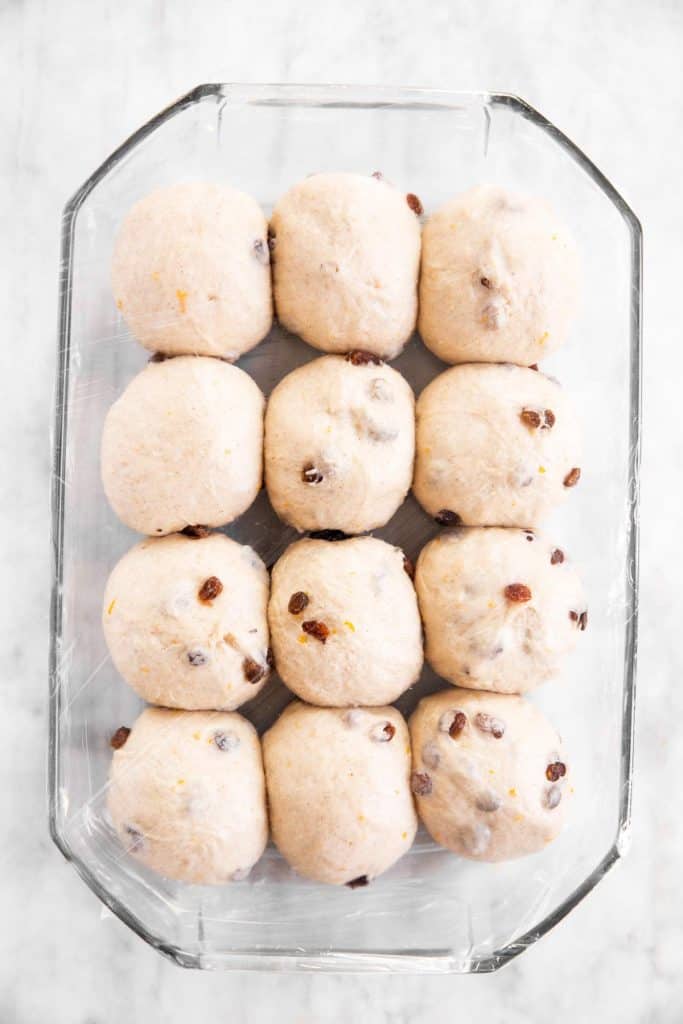
5. Once your dough is ready, punch it down and cut it into 12 equal pieces. Roll them into firm balls, then pinch the bottom seam to make sure the top is rounded and smooth.
divide dough shape rolls pinch bottom seams top should be even and smooth

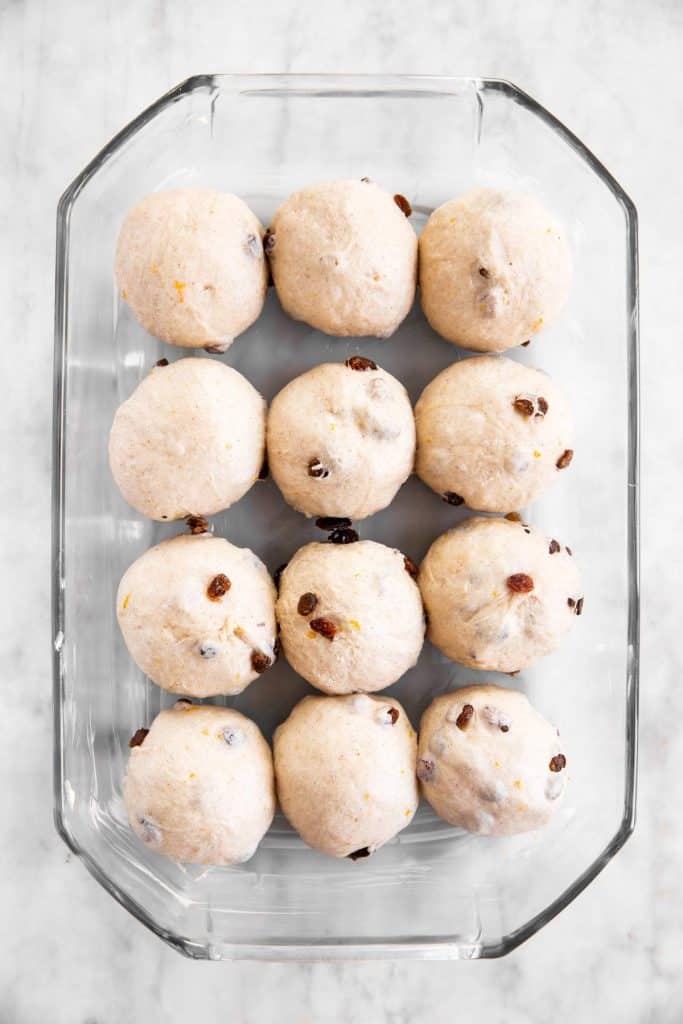
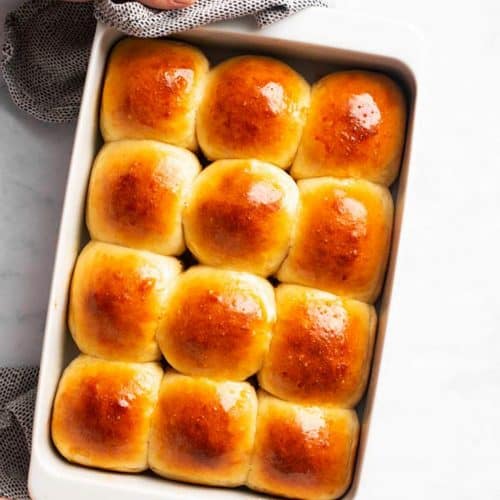
6. Place them in a 9×13 inch pan. You’ll want to lightly butter the bottom of the pan, but do not butter the sides – the bread needs to “climb up” the sides of the pan in order to fully rise during baking.
Cover the pan with plastic wrap and allow the rolls to rise one more time until puffed up, about 30-60 minutes again.
before third rise after third rise
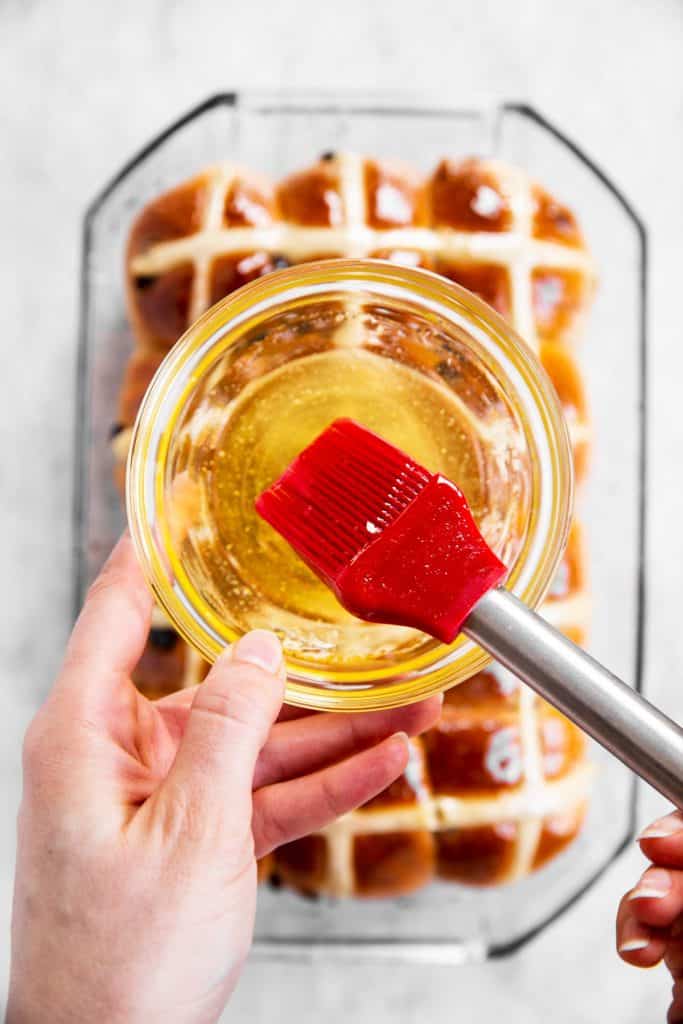
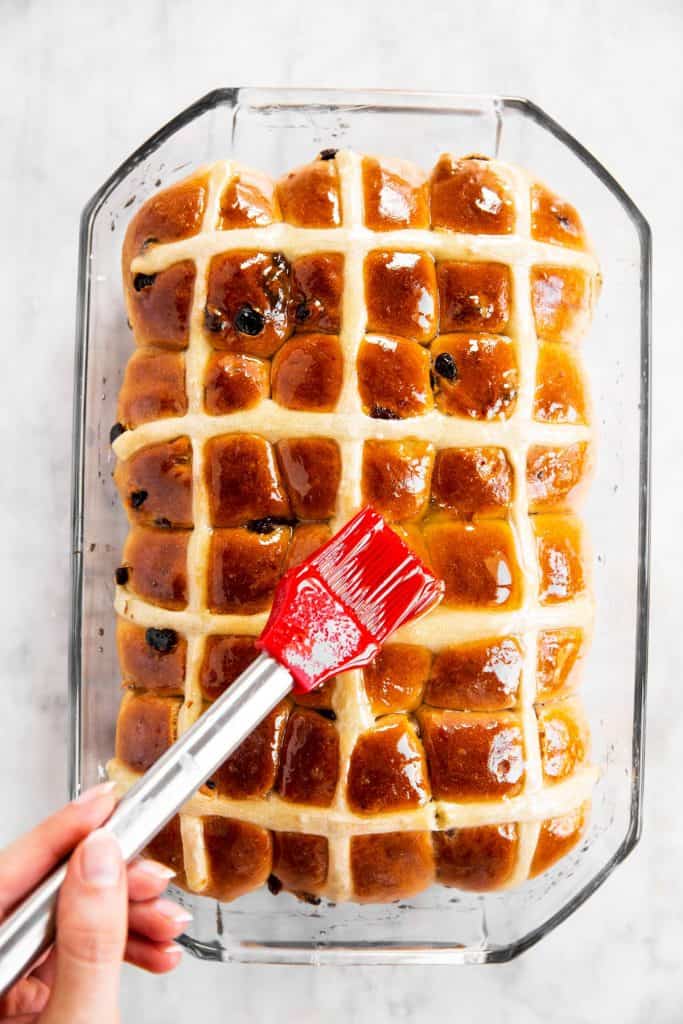
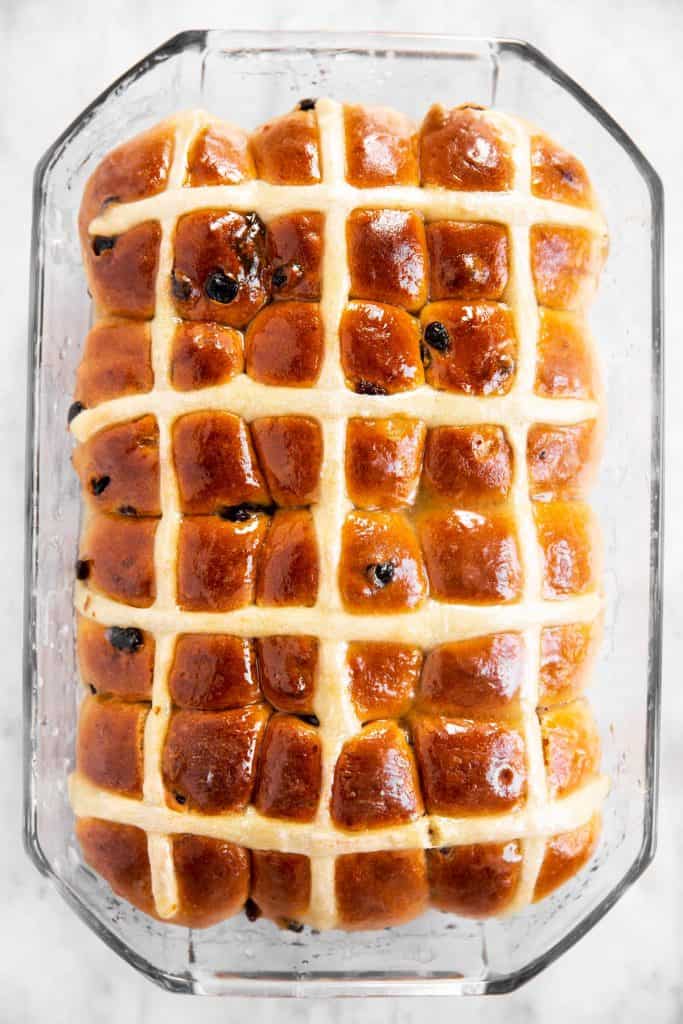
7. Bake your rolls until they are puffy and a deep golden brown on top. Remove them and immediately brush with the glaze (for the glaze, simmer orange juice and icing sugar for 1-2 minutes until clear in color).
orange glaze brush over hot rolls
Allow to rest in the pan until the rolls are cool enough to handle, then remove the entire slab of rolls and allow to cool on a wire rack.
Recipe tips
- Make sure to measure your flour correctly (spoon it into the measuring cup, then level with the back of a knife). Otherwise, you will end up with way too much flour in the dough, which yields tough, dense rolls.
- If your dough doesn’t start coming together after 5 minutes of kneading, add more flour gradually (one tablespoon at a time!) until the dough forms a pall and pulls away from the sides of the bowl. Do not add too much flour! The dough should be very soft and feel a little sticky.
- Knead the dough long enough until it is fully smooth. This will take 5-10 minutes in your stand mixer, or 10-15 minutes by hand. You should be able to pull a small piece of dough apart until you can almost see through it, without the dough ripping.
- Take your time for all three rises, else the rolls will not have the soft and fluffy texture they are supposed to get.
- Shape the rolls carefully to make sure they have a smooth, rounded top. This ensures the best bake on them.
- Make sure to use a 9×13 inch pan or very close to it. If your pan is much too small, the rolls will not bake and melt into one large bread. If your pan is much larger, the rolls will not touch and will end up too dry. My pan was actually a little small. My husband recently gifted it to me and it said 9×13, but after baking I measured it and it was an inch short on both sides. You can see that my rolls are very squished together, but they were still fine (and actually came out super tall and fluffy this way, loved them!). I would definitely not go smaller than 8×12 inches, though.
- Don’t skip simmering the glaze, it only takes 1-2 minutes and it’s worth the nice finish.
- Serve the rolls hot or still very warm, that’s really when they are the tastiest. If you have leftovers on the next day, split and toast them. I do not recommend keeping the rolls beyond one day.
Recipe FAQs
Historically, it was made of shortcrust pastry. To make it easier, many bakers use a paste made from flour and water now (which is what I use).
The four/water paste cross isn’t very tasty and you’ll probably want to pick it off before you enjoy your bun.
Alternatively, people also make the crosses after bakign and glazing the rolls with royal icing.
According to tradition, Hot Cross Buns are baked and eaten on Good Friday. The cross is to symbolize the Cross Jesus died on. The spices are said to represent the spices rubbed on Christ’s body and the raisins to represent his body inside the tomb.
There are also accounts of the buns having history further back, which is not connected to Christianity. Good Food Ireland has further interesting historical facts!
Presumably because they are decorated with crosses, and because they are best eaten hot.
Really, the buns do taste best hot/warm out of the oven. If you have leftover buns the next day, split them and toast them to heat them back up.
More Easter ideas

PS If you try this recipe, please leave a review in the comment section and add a star rating in the recipe card – I appreciate your feedback! Follow along on Pinterest, Facebook or Instagram.
Hot Cross Buns
Recipe details
Ingredients
Buns:
- 1 envelope active dried yeast (2 ¼ teaspoons)
- ½ cup water at about 100°F (38°C)
- 1 cup milk whole milk or 2% preferred
- 4 tablespoons butter
- ½ cup granulated sugar
- 4 cups all-purpose flour plus up to ½ cup more as needed
- 2 teaspoons ground cinnamon
- ½ teaspoon Allspice
- 1 teaspoon orange zest optional
- 1 ½ teaspoons salt
- 1 cup currants OR sultanas OR a mix of both
Crosses:
- ⅓ cup flour
- 4 tablespoons water
Glaze:
- 1 cup icing sugar
- 3 tablespoons orange juice OR water
Instructions
- Activate yeast and combine liquid ingredients: Whisk the yeast into the warm water in a small bowl and set aside until bubbles start to appear on the surface. In the meantime, whisk together the milk, melted butter and sugar. Add the activated yeast mixture and whisk until combined.
- Make dough: Add the flour, cinnamon, allspice, orange zest (if using) and salt to the bowl of your stand mixer fitted with the hook attachment. Add the milk mixture, then knead on medium-low speed for 5-10 minutes, or until you have a smooth ball of dough. Add a few extra tablespoons of flour, one at a time, if your dough feels too sticky!
- First rise: Tightly cover bowl with plastic wrap and let dough sit at room temperature for 1 hour, or until doubled in size.
- Add raisins: Punch down dough and remove to a lightly floured countertop. Spread into thick rectangle, then scatter raisins over top. Fold dough over raisins, then knead a few times to evenly distribute.
- Second rise: Place dough back into bowl, cover bowl with plastic wrap again and let sit for another 30-60 minus, until doubled in size again.
- Shape: Lightly butter bottom of a 9×13 inch (22x33cm) baking pan. Punch down dough, then divide into 12 equal pieces; shape into balls. Pinch bottom seams to form a smooth, rounded top and place seam-down in prepared pan.
- Third rise: Cover pan with plastic wrap and let buns rise at room temperature until big and puffed up, about 20-30 minutes.
- Add crosses and bake: Heat oven to 360°F (180°C). Combine flour and water for crosses and place mixture into piping bag. Pipe lines over rolls to form crosses. Bake buns for around 25-35 minutes or until a deep golden brown in color and middle rolls are fully baked.
- Glaze: Once rolls are baked, combine ingredients for glaze in a small saucepan and bring to a simmer over medium heat. Simmer until glaze is clear (1-2 minutes). Take off the heat and immediately brush over warm buns.
Notes
Ingredient notes
- Flour: I recommend using all-purpose flour. Whole wheat flour will yield denser rolls and you’d need to slightly increase the milk for the buns to stay soft.
- Milk: I used whole milk for extra-soft rolls, but 2% or 1% will also work. I do not recommend skim milk.
- Yeast: I used active dried yeast. Instant dried yeast can work, just watch your dough as it will rise quicker. Organic yeast is really difficult in enriched doughs (= a dough with fat and sugar, which has more difficulty rising as-is). I do not recommend using organic yeast in this recipe.
- Butter: I used real butter, which yields the best flavor in this recipe. If you must use margarine, please only use stick margarine and not a spread.
- Orange zest/juice: If you’re not a fan of orange flavor, feel free to leave these out. I do not recommend lemon zest in place of the orange zest, it doesn’t work as well with the warm spices. Use water in place of the orange juice for the glaze.
- Allspice: Feel free to leave this out if you don’t keep it on hand. You can also use pumpkin spice mix in place of the allspice, if you have it.
- Currants/raisins: Use either currant or raisins, or a mix of both. If you like it, you can also add ½ cup of mixed candied peel.
Recipe tips
- Make sure to measure your flour correctly (spoon it into the measuring cup, then level with the back of a knife). Otherwise, you will end up with way too much flour in the dough, which yields tough, dense rolls.
- If your dough doesn’t start coming together after 5 minutes of kneading, add more flour gradually (one tablespoon at a time!) until the dough forms a pall and pulls away from the sides of the bowl. Do not add too much flour! The dough should be very soft and feel a little sticky.
- Knead the dough long enough until it is fully smooth. This will take 5-10 minutes in your stand mixer, or 10-15 minutes by hand. You should be able to pull a small piece of dough apart until you can almost see through it, without the dough ripping.
- Take your time for all three rises, else the rolls will not have the soft and fluffy texture they are supposed to get.
- Shape the rolls carefully to make sure they have a smooth, rounded top. This ensures the best bake on them.
- Make sure to use a 9×13 inch pan or very close to it. If your pan is much too small, the rolls will not bake and melt into one large bread. If your pan is much larger, the rolls will not touch and will end up too dry. My pan was actually a little small. My husband recently gifted it to me and it said 9×13, but after baking I measured it and it was an inch short on both sides. You can see that my rolls are very squished together, but they were still fine (and actually came out super tall and fluffy this way, loved them!). I would definitely not go smaller than 8×12 inches, though.
- Don’t skip simmering the glaze, it only takes 1-2 minutes and it’s worth the nice finish.
- Serve the rolls hot or still very warm, that’s really when they are the tastiest. If you have leftovers on the next day, split and toast them. I do not recommend keeping the rolls beyond one day.


Brigid says
My yeast is in date and I checked the thermometer to make sure the water was the right temp and I still don’t see my yeast bubbling at the first step?
Nora says
I usually discard my yeast if it doesn’t react at all within 10 minutes and start again with new yeast. If you yeast is organic, it may take a little longer or it may only bubble very little. Hope this helps, Brigid!
Brigid Deming says
Thank you so much ! So I tried a second and still couldn’t see the bubble after whisking. I added a little sugar though and then I was cooking with gas. I’m from Australia but live in the USA now (10 years) every Easter I would miss hot cross buns so much and this was the first time I made them. To say they turned out amazing was an understatement. Thank you so so much for this recipe. Quick q though, after my third rise can I freeze them? It takes me a while to get through the recipe with kids and I kinda wish I could take them out of the oven fresh in the morning.
Nora says
I’m so glad they worked out well for you, Brigid! I would freeze shaped and in the pan, but before the third rise. Then take them out, let them thaw, then let them do the third rise.