

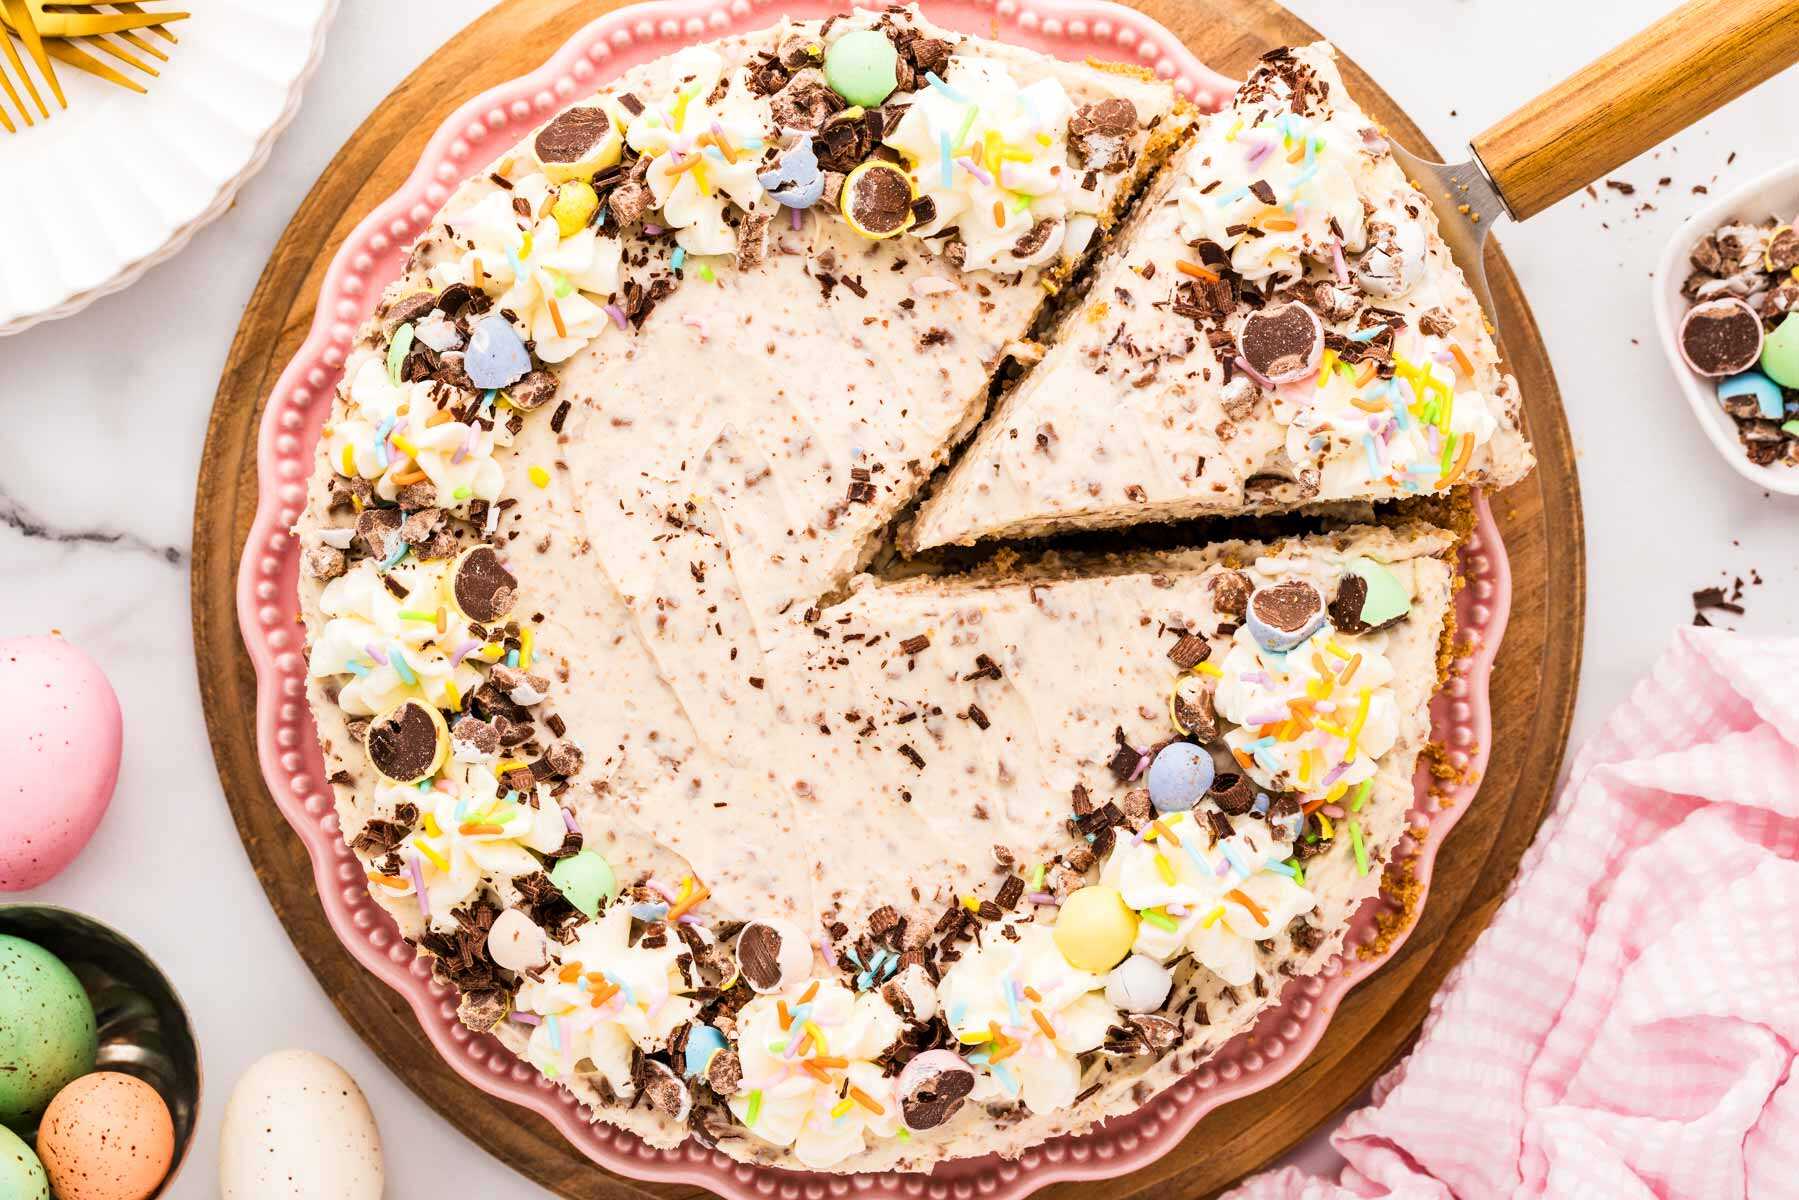
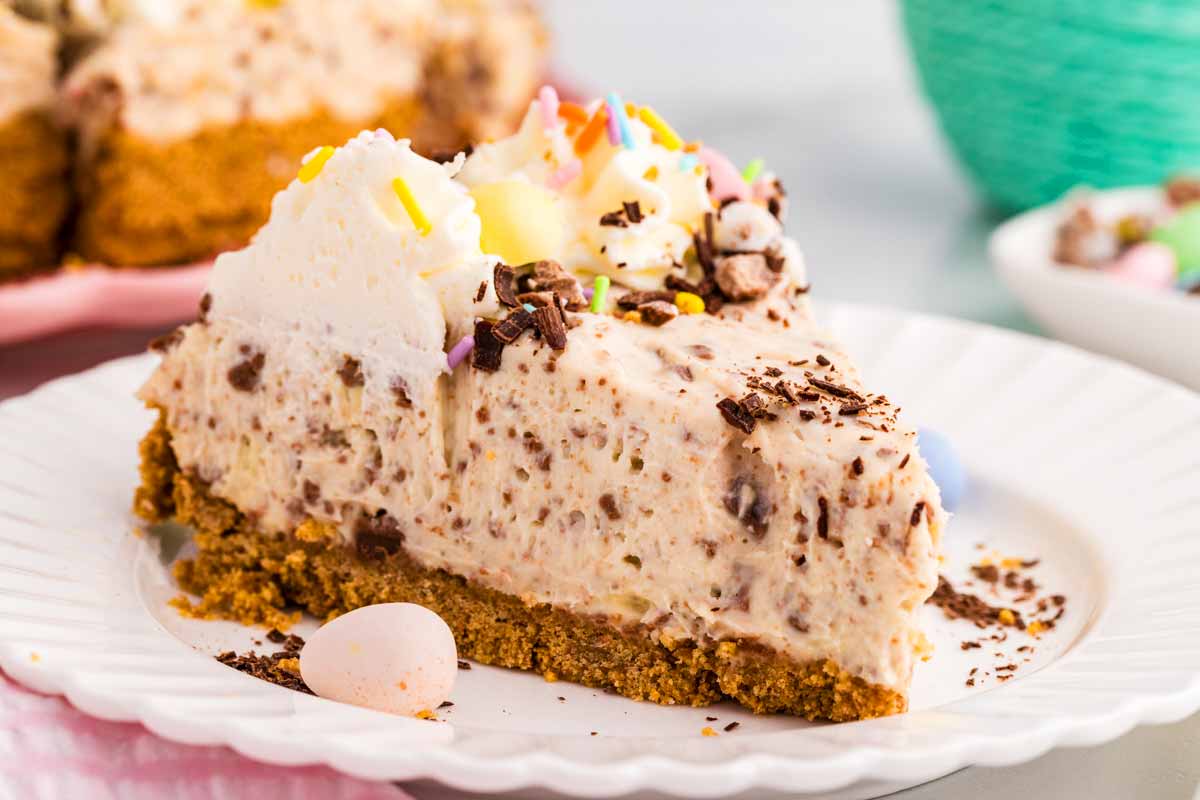
Skip the oven with a decadent No-Bake Mini Egg Cheesecake. This kid-friendly Easter recipe uses simple ingredients and takes less than 30 minutes of active prep!
What makes this recipe great
This No-Bake Mini Egg Cheesecake is my absolute “sanity saver” for Easter. It’s colorful, it’s decadent, and the best part? It doesn’t take up any precious space in the oven while you’re trying to roast carrots and rolls!
- Zero Oven Time: No water baths, no cracked tops, and no hovering over the oven door. It sets in the fridge while you sleep. And yes, even the crust sets in the fridge!
- The “Secret” Stabilizer: Using a tablespoon of instant pudding mix is a total mom-hack. It keeps the filling fluffy but firm enough to slice perfectly!
- Make-Ahead Magic: You actually have to make this the day before. That’s one less thing to do on Easter Sunday morning when you’re trying to get everyone dressed and out the door.
- Kid-Approved: If your house is like mine, Mini Eggs are a food group in April. Folding them into the batter makes this an instant hit with the little ones.
Let’s see how we make this:
Ingredients we’re going to use
This is about swaps and notes – jump to the ingredient list for the measurements etc.
The Cream Cheese: Use the full-fat blocks. This isn’t the time for the spreadable tub version or the “light” stuff; you need the fat content to help the cake stay upright.
Heavy Whipping Cream: Make sure it says “Heavy” on the carton and keep it in the back of the fridge until the very second you need it. If it’s even slightly room temp, it won’t whip, and you’ll end up with soup.
The Shortcut Option: If you’re truly drowning in to-do lists, skip the cream, sugar, and pudding mix and just fold in a 12-oz tub of thawed whipped topping. It’s a total “cheater” move, and I promise no one will complain.
Mini Eggs: To crush them, I just put them in a heavy-duty freezer bag and give them a few whacks with a rolling pin. Don’t pulverize them into dust—you want those crunchy, colorful bits in every bite.
Recipe walkthrough
This is about tips and hints, and the process photos if you need a visual guide. Jump to the instructions for the precise steps.
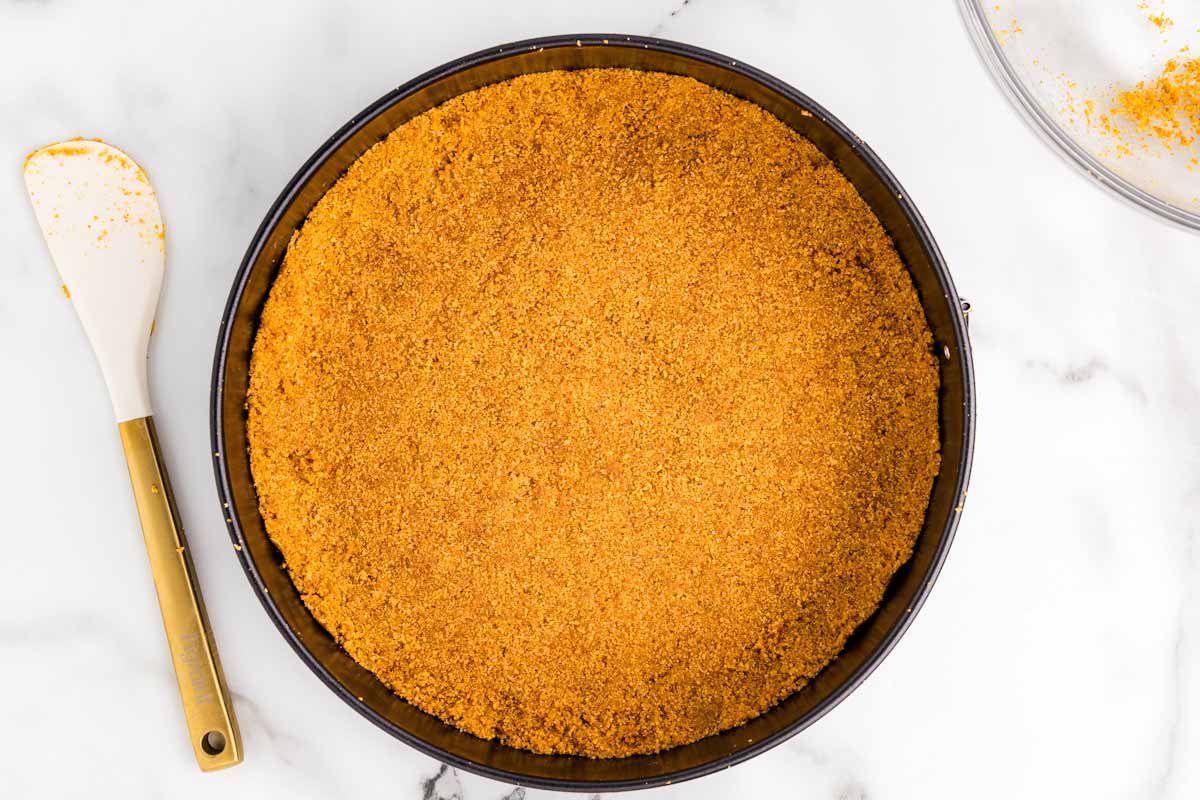
1: The crust.
When you’re doing the crust, don’t be afraid to really muscle it into the pan. Use the bottom of a flat measuring cup to press it down hard. If you’re too gentle, it’ll crumble into a mess when you try to serve it.
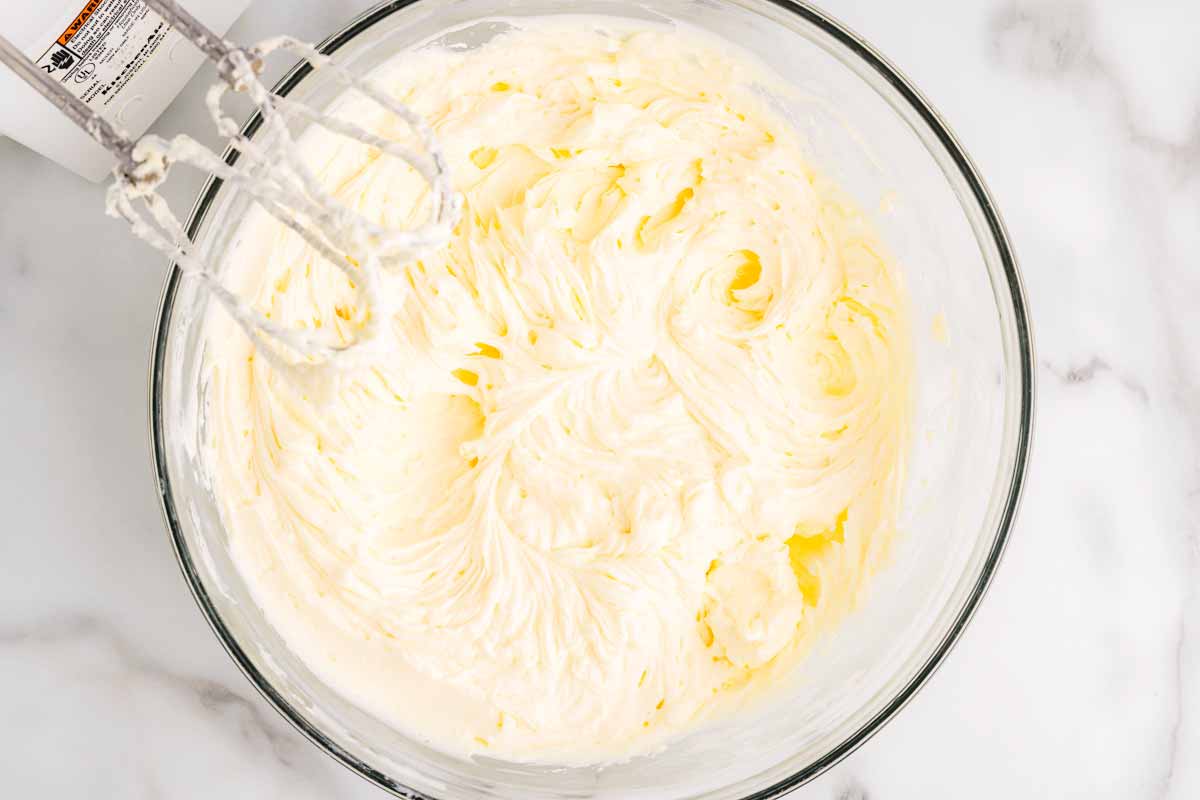
2: The filling.
For the filling, let that mixer run! You’re looking for a thick, whipped texture — if you stop too early, it’ll taste like a block of sweetened cream cheese. Give it a good 4 minutes on high.
3: Folding in the mini eggs.
When you fold in the crushed eggs and sour cream, do it by hand with a spatula so you don’t deflate all that lovely air you just whipped in.

4: Chilling.
Finally, give it the full 6 hours (or overnight) in the fridge. I know it’s tempting to sneak a slice early, but it needs that time to become “sliceable.”

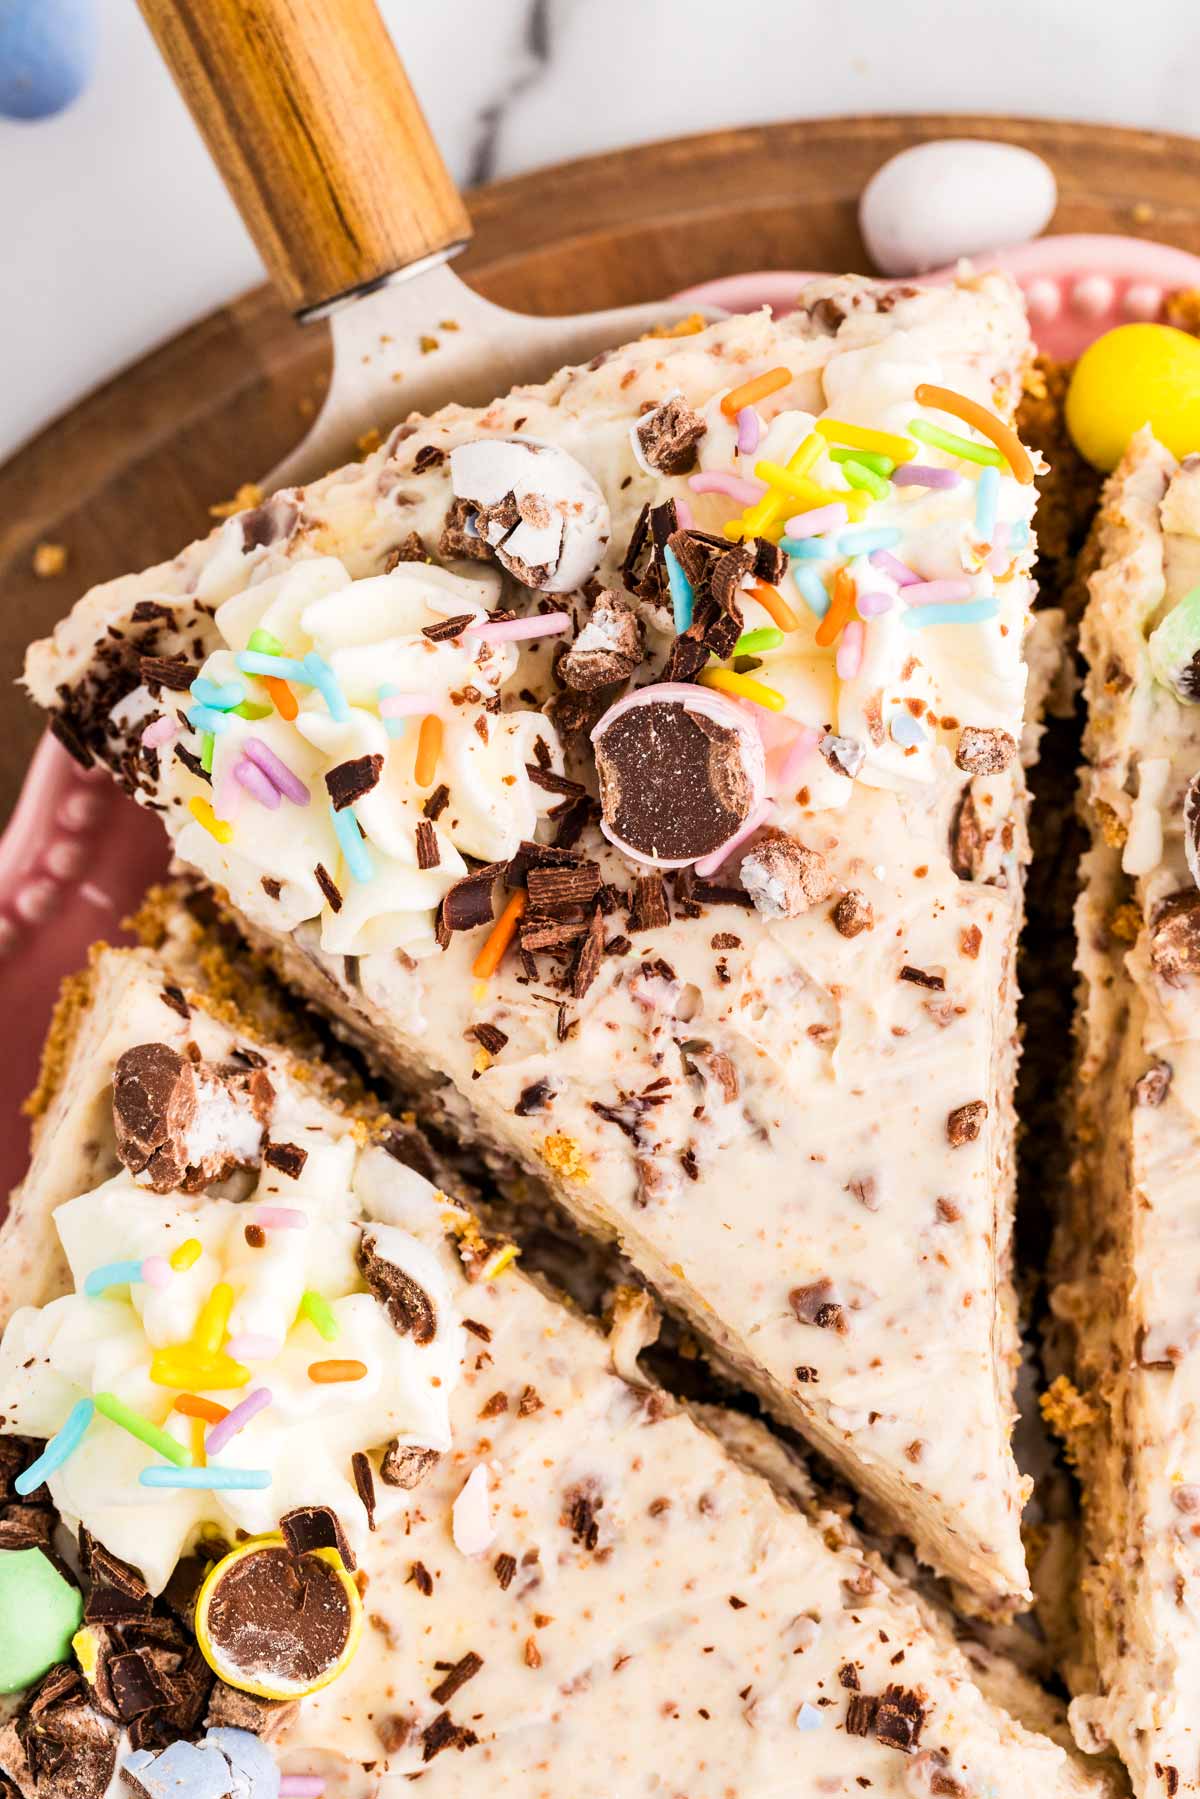
5: Serve.
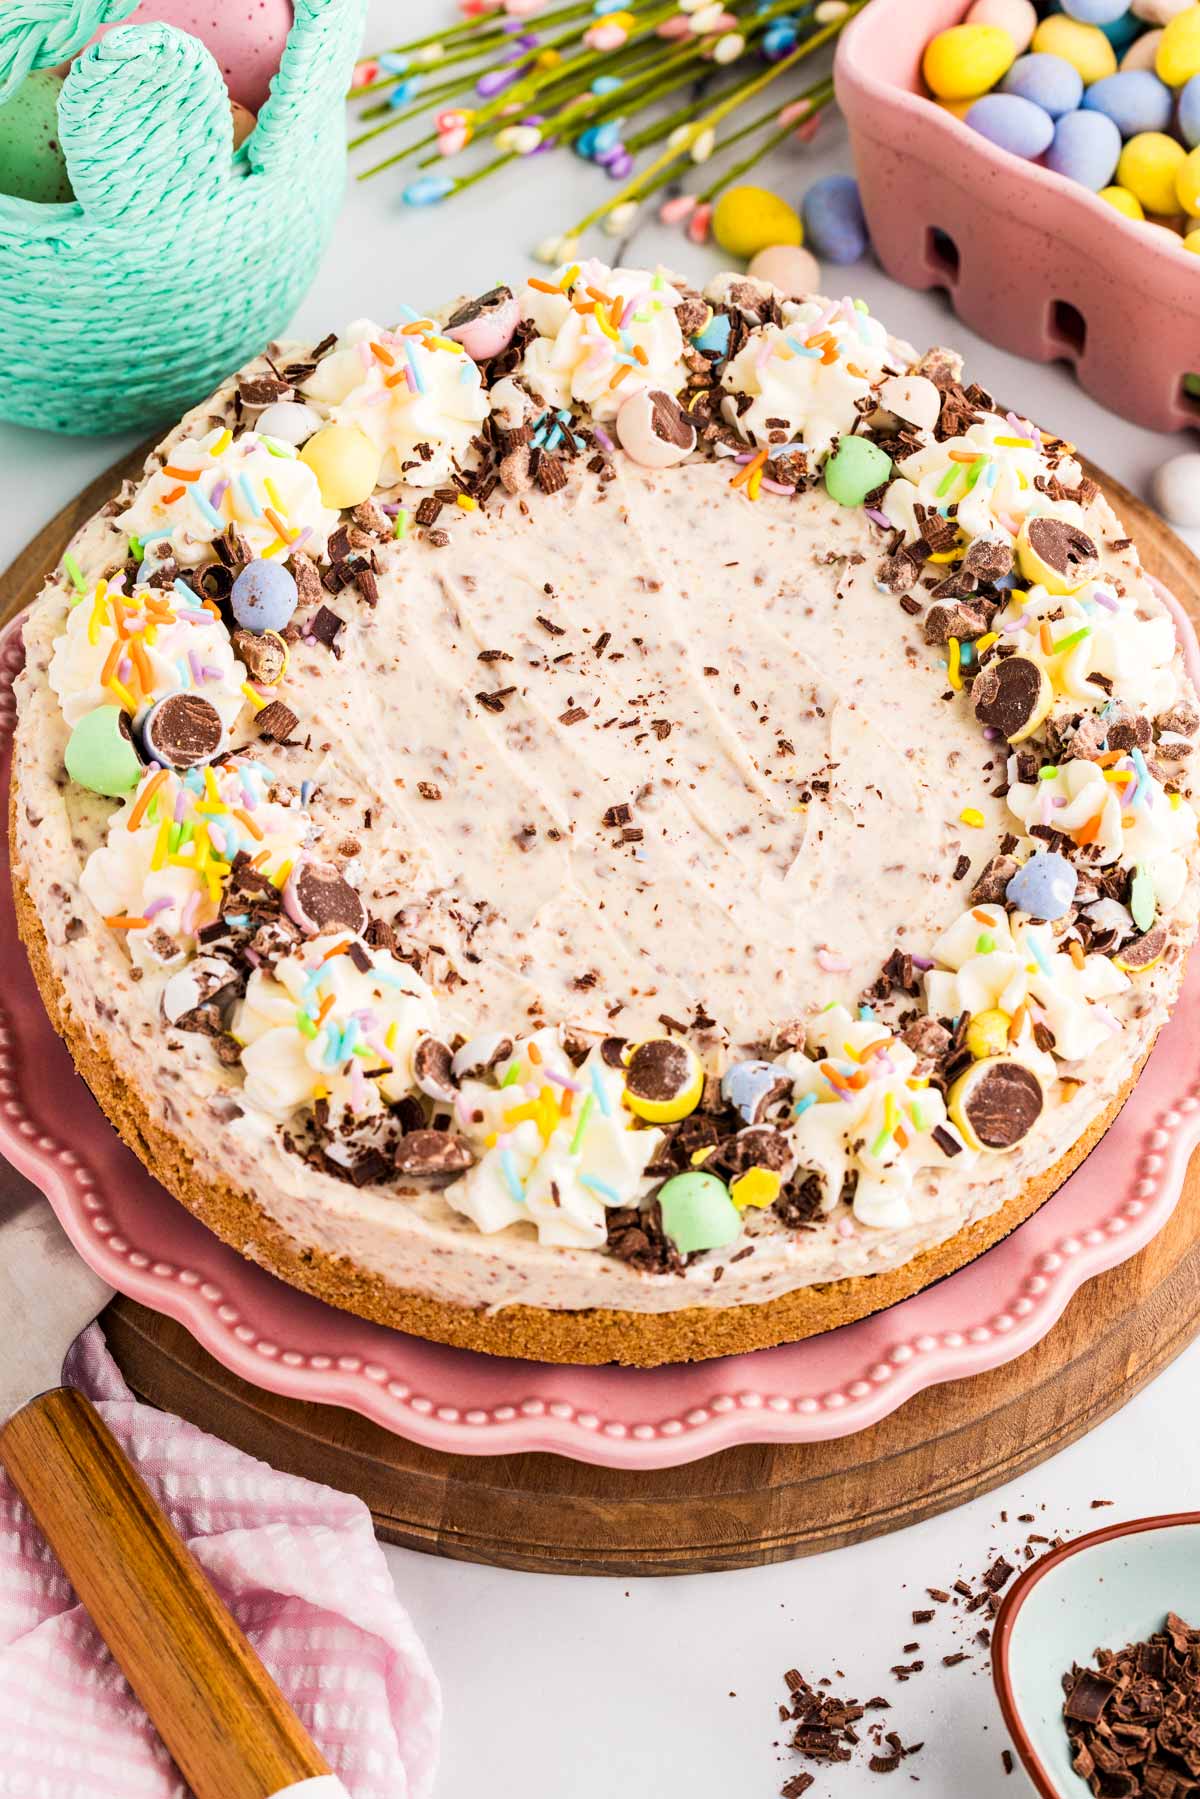
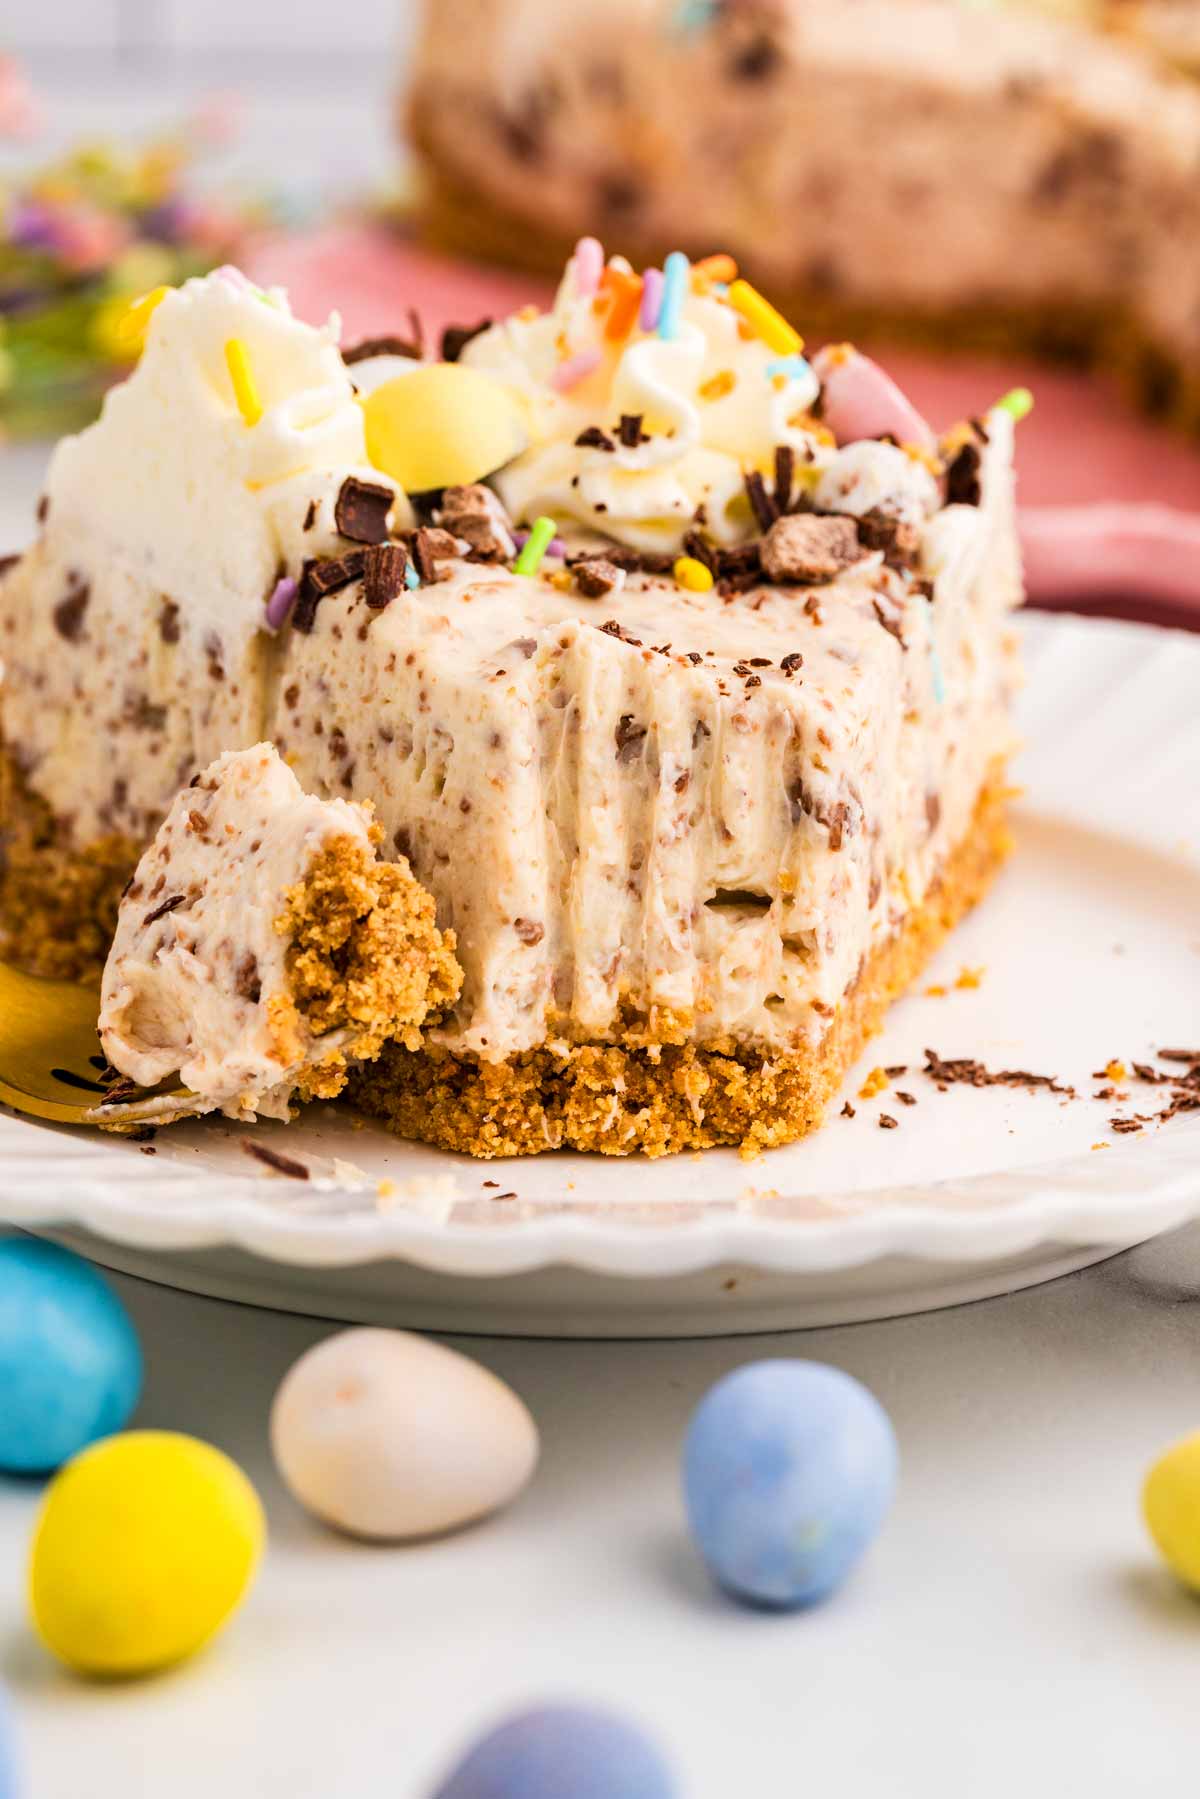
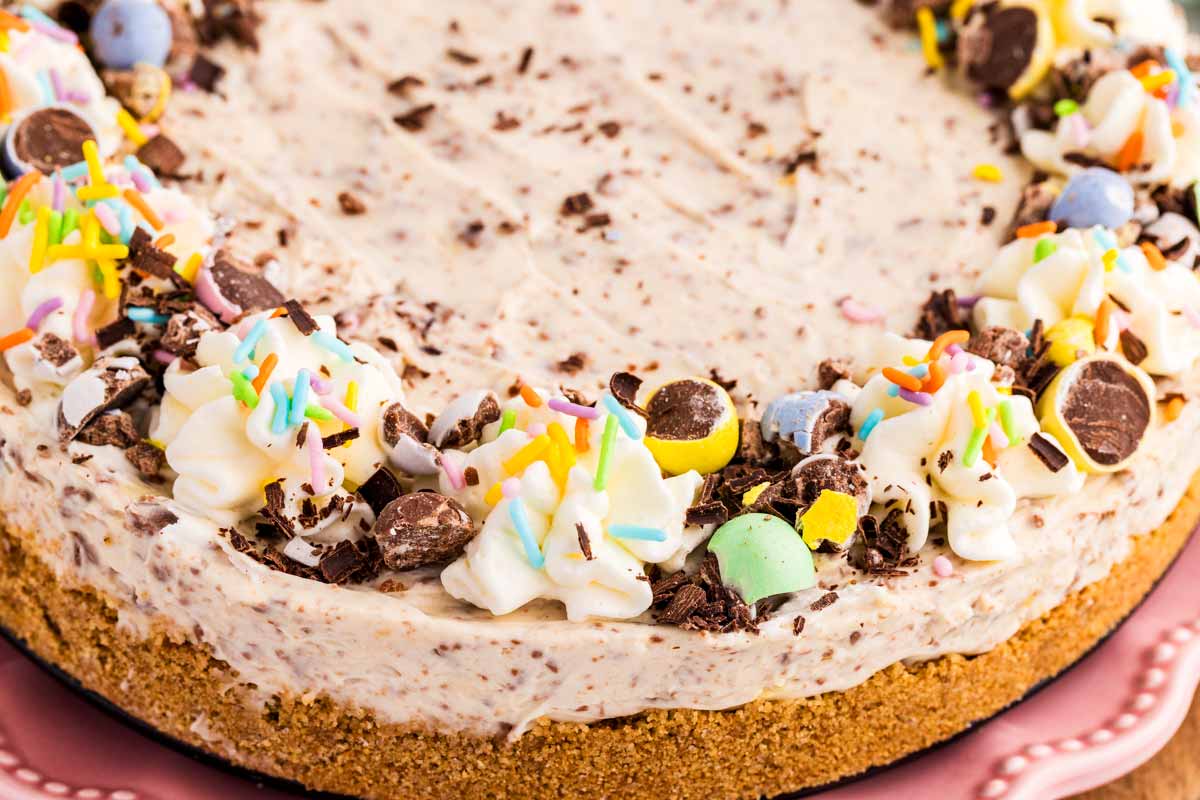
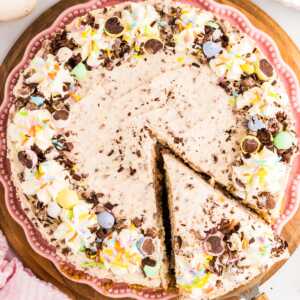
Run a knife under hot water before you slice into the cake to get those clean, professional-looking edges. I like to decorate with whipped cream, extra mini eggs and chocolate shavings!
Tl; dr: All the important stuff at a glance
If you read nothing else in this post, this is what you need to know:
- Firm Pressure: Pack that crust in like you’re building a foundation.
- Stay Cold: Use ice-cold heavy cream and full-fat cream cheese for the best set.
- Be Patient: Let it chill overnight. A rushed no-bake cheesecake is just a very thick bowl of pudding.
- Quick recipe rundown: Make crust. Assemble filling. Chill in the fridge until fully set, then decorate and serve.
FAQs
Can I use a different cookie for the crust?
Absolutely. If you have Graham crackers, great. If you have Vanilla Wafers or even those chocolate digestive biscuits, use them! Just keep the butter ratio the same.
Can I make this in a 9-inch pan instead of a 7 or 8-inch?
You can, but it will be thinner. If you want that tall, “wow-factor” cheesecake look, stick to the smaller pan.
How long does it stay fresh?
It’s best within 2 days. The candy coating on the Mini Eggs can start to “bleed” color into the filling after a while, so it’s definitely a “make, chill and eat” kind of dessert.
Looking for more cute Easter treats? Try my Bunny Bait, these Easter Sugar Cookies or the No Bake Bird’s Nest Cookies!
No Bake Easter Mini Egg Cheesecake
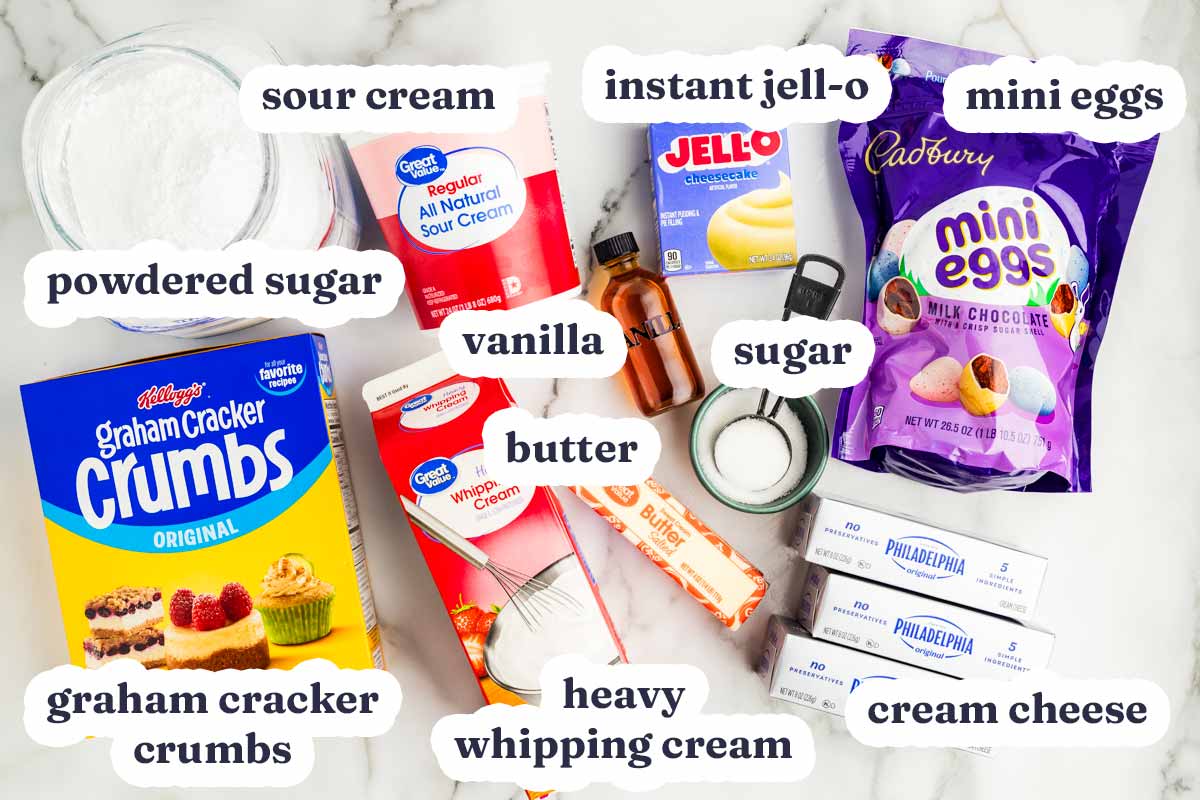
Ingredients
Cheesecake base
- 2 cups graham cracker crumbs (around 14 full sheets (Note 1))
- 2 tablespoons granulated sugar
- ½ cup butter (melted)
Cheesecake filling
- 3 (8-oz) blocks full fat cream cheese
- 1 cup heavy whipping cream (well chilled (Note 2))
- 1 cup powdered sugar
- 1 tablespoon instant pudding mix (optional but recommended (makes filling firmer and easier to slice))
- 1 teaspoon vanilla extract
- ¼ cup sour cream (OR Greek yogurt)
- 1 (10-oz) bag mini eggs (crushed (Note 3))
Garnish
- whipped cream, mini eggs, chocolate shavings, sprinkles… (optional)
Instructions
Prep:Line the bottom of a 7 or 8 inch springform pan with baking parchment. - Base:Combine graham cracker crumbs, sugar and butter well in a mixing bowl. Add to the prepared pan and press into the bottom and a little up the sides (press firmly, or the base will not hold together). Chill in the fridge until ready to use.2 cups graham cracker crumbs, 2 tablespoons granulated sugar, ½ cup butter
- Filling:Beat cream cheese in a large mixing bowl with an electric mixer until creamy. Add heavy whipping cream, powdered sugar, cornstarch and vanilla extract. Beat on high speed until thick and fluffy, about 4 minutes (Note 4). Add sour cream (or yogurt) and crushed mini eggs; carefully fold in.3 (8-oz) blocks full fat cream cheese, 1 cup heavy whipping cream, 1 cup powdered sugar, 1 tablespoon instant pudding mix, 1 teaspoon vanilla extract, ¼ cup sour cream, 1 (10-oz) bag mini eggs
- Finish:Spread filling evenly in prepared crust. Cover and chill in the refrigerator for at least 6 hours, better overnight. To finish, carefully remove the outer ring of the pan (run a hot knife along the side if it's stuck). Garnish as you like and serve chilled.whipped cream, mini eggs, chocolate shavings, sprinkles…
Video
Notes
- Note 1: Feel free to use a different cookie for the base. Vanilla Wafers or Chocolate Digestives are also delicious!
- Note 2: If you’d rather use whipped topping, feel free to skip the heavy whipping cream, icing sugar, cornstarch and vanilla extract. Instead, use one 12-oz container frozen whipped topping (thawed).
- Note 3: You can also use 8oz of finely chopped milk chocolate in place of the crushed mini eggs in the filling.
- Note 4: The filling needs to be beaten well on high speed, around 3-4 minutes. If you don’t beat it enough, you’ll be eating a brick of plain cream cheese mixed with runny cream. Use a spoon to scrape a little filling out of the bowl to test – it should sound and look whipped and lightly fluffy.


Comments
No Comments