
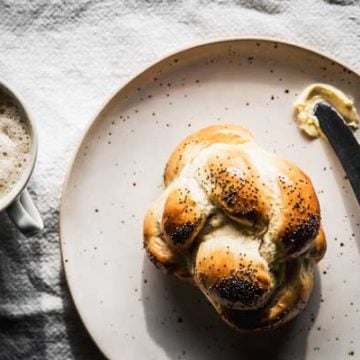
Braided Bread
Recipe details
Ingredients
- ½ stick butter
- 1 ¼ cups whole milk
- 2 tablespoons fine caster sugar
- 1 packet dry active yeast
- 4 cups all-purpose flour
- 1 ½ teaspoons fine sea salt
- 1 egg beaten
- poppy seeds for sprinkling (optional)
Instructions
Bread dough
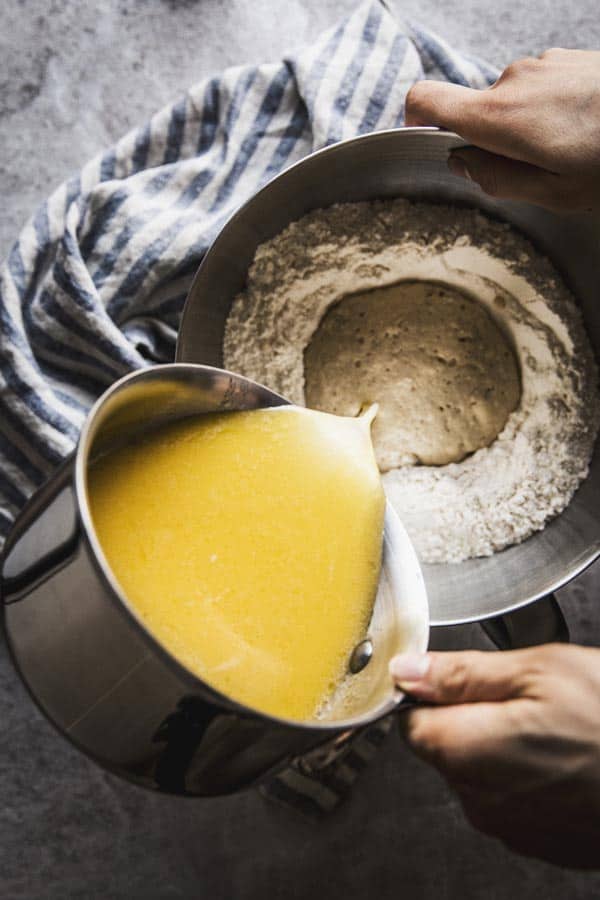
- Prepare the liquid:Melt the butter in a small saucepan over medium heat. Whisk in the milk and sugar.
- Activate the yeast:Place the dried yeast into a small bowl and add three tablespoons of the milk mixture. Stir well, cover losely and let stand for 5 minutes. It should bubble up and become sponge-like in texture.
- Make the levain:Place the flour in the bowl of a stand mixer. Make a well in the middle and pour in the activated yeast. Pour in about ⅓ of the milk mixture and stir in just enough of the flour to form a wet dough. Cover and let stand for 15 minutes. Again, it should rise into a puffed up sponge.
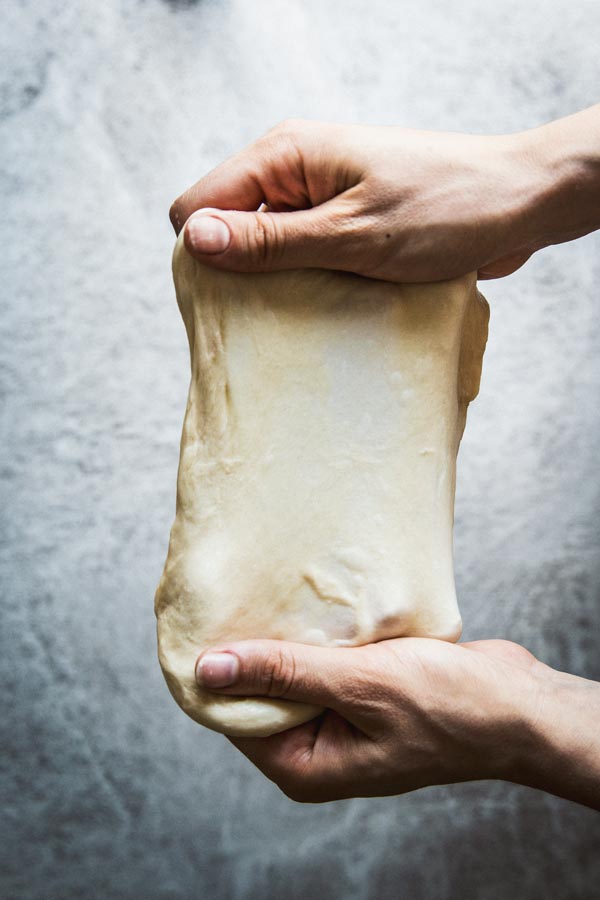
- Knead the bread:Add the salt and remaining milk mixture to the bowl. Knead in your stand mixer fitted with the dough hook attachment on low speed for 8 minutes. Rest for 1 minute. Knead on medium speed for 4 minutes. Rest for another minute. If the dough still rips apart easily, knead on medium-high speed for 2 minutes, otherwise medium will do.
First rise
- Check with the windowpane test if your gluten has developed enough. If not, keep kneading. If it has, shape the dough into a ball, place back into the bowl and cover with a clean kitchen towel.
- Let the dough rise until doubled in volume, usually about 1-2 hours (depending on your altitude, higher altitude makes for a quicker rise; and other factors outlines in the tips below).
Shape bread
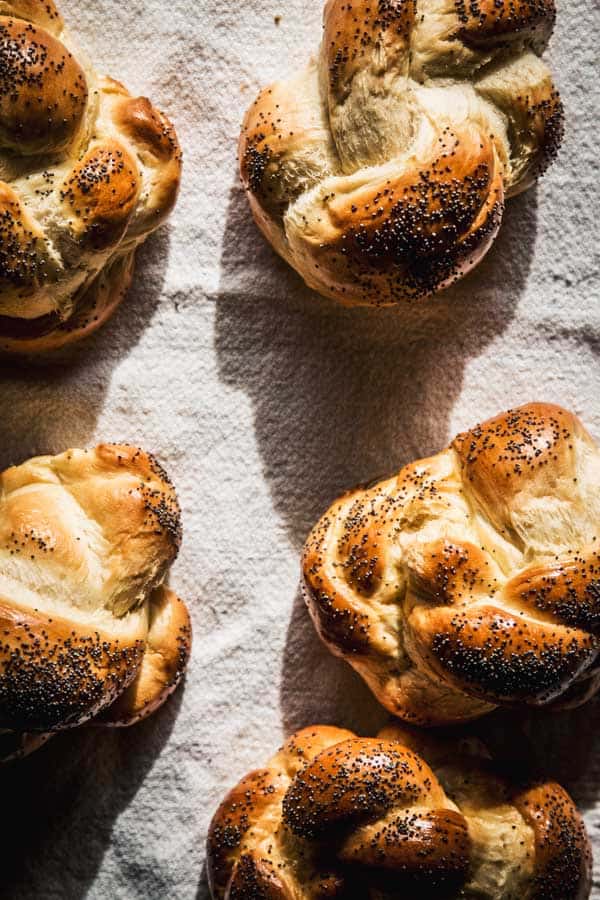
- Once your dough has risen, remove it onto your work surface. For one large braid, divide it into two equal pieces. Roll them into long-ish strands and braid. Otherwise, weigh out 2 ½ oz (72g) portions of the dough and make mini braids. Pinch their ends together to form rolls.
Second rise
- Place your shaped bread on a lined baking sheet. Cover with the towel and let rise and relax for another 15 minutes. In the meantime, heat the oven to 400°F (200°C).
Bake
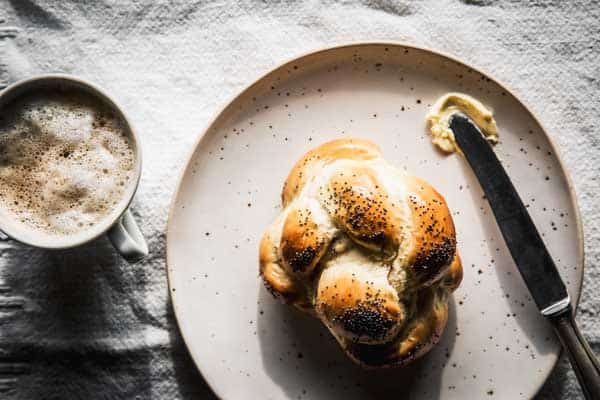
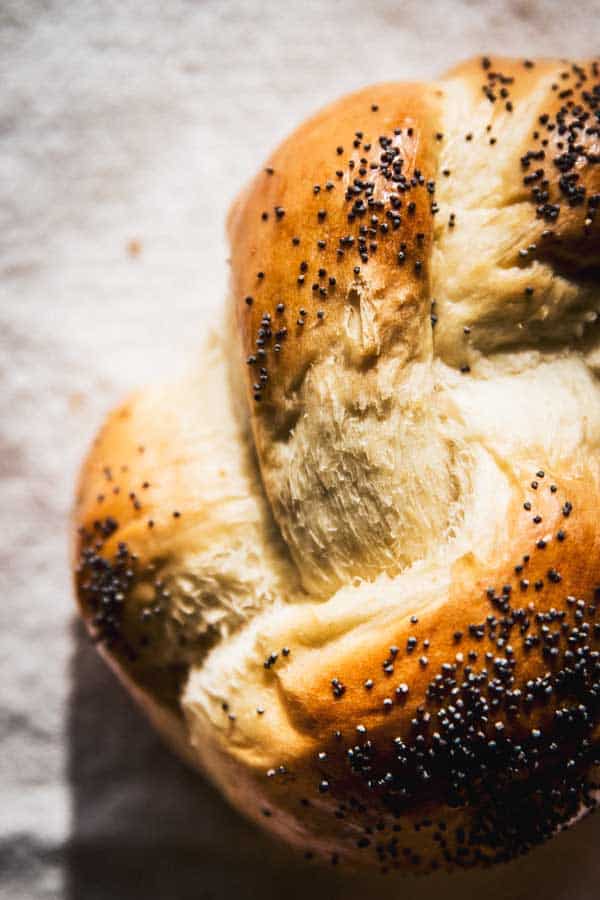
- Once your bread is ready, brush it well with the beaten egg. You can sprinkle it with poppy seeds (or sesame) if you like.
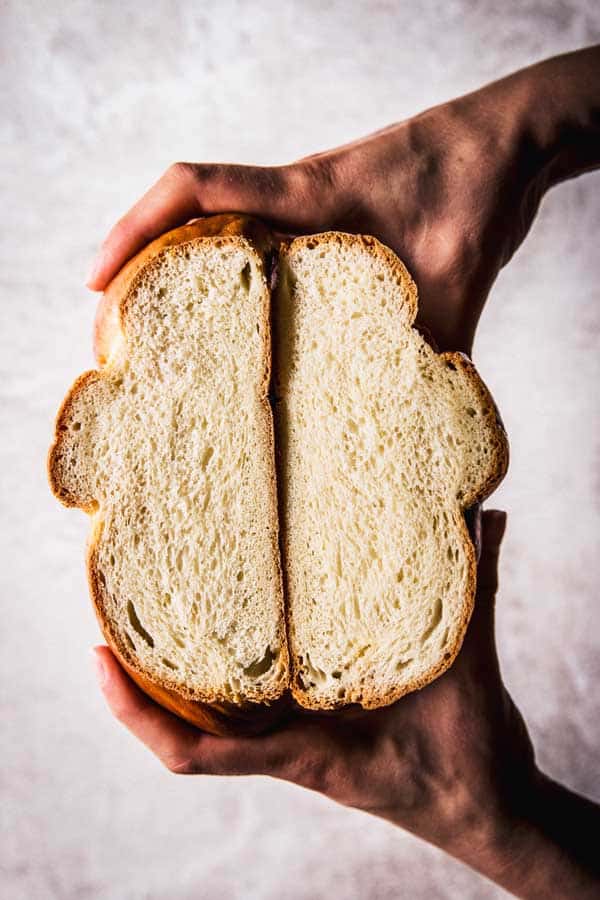
- Bake a large braided bread for 25-30 minutes, small ones for 12-15. They will sound hollow when tapped on the bottom and have a nice golden brown crust.
Cool
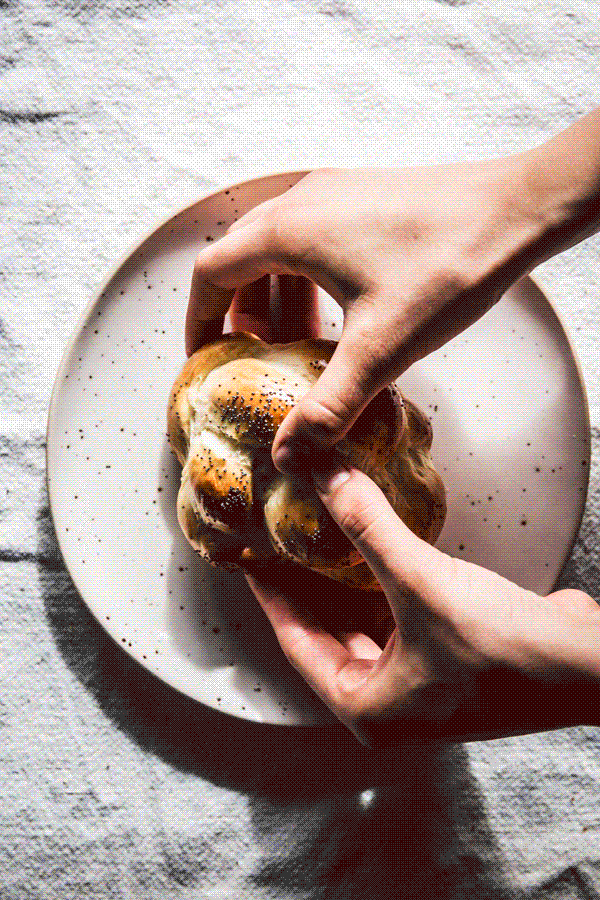
- Allow to cool on a rack. Best eaten warm with butter and honey!
More recipe information
Baking Tips
Baking with yeast can be intimidating. And it definitely was to me! Until, sorry about the cliché, my grandma started teaching me how to make the most beautifully fluffy Zopf. And I’ll gladly share some enlightenments with you (I’ll spare you her yelling though, ha!).
Just as an aside, when you make this Swiss-style braided bread, know that it is called Zopf because that’s what German-speaking people call something… braided. It looks quite similar to Challah bread, but the dough is made a little differently.
Tips to make the dough
You’ll need to melt the butter, and since I find it tedious and boring to wait for something to cool down enough for the yeast to survive, I recommend pouring the cold milk straight into it, together with a few tablespoons of sugar.
The butter will be hot enough to start dissolving the sugar, while the cold milk will bring the temperature down enough without hardening the butter again. Never use liquid hotter than 120°F with your yeast! It will destroy the yeast and your bread will not rise.
Please note that I’m using European butter, so if you can get your hands on a slightly fatter European-style stick of butter, all the better.

I grandma bakes bread in a complicated fashion:
- First, you’ll activate the yeast with a few tablespoons of the milk/sugar mix. 5 minutes in a small bowl will do.
- Secondly, you’ll make a quick and dirty levain. A well in the middle of the flour, no salt added yet (!), you’ll mix the activated yeast with a little more liquid and flour. 15 minutes of rest will give you a nice pre-rise.
- If you want to knead by hand, prepare yourself for half an hour of hard work. Otherwise you can throw the remaining liquid and salt into the bowl and knead in a stand mixer with the hook attachment.
Dough consistency
My grandmother has always been a temperamental and intuitive baker, she would not use any scales but judge by the feel of the dough. She’d start kneading, then go out to feed the calves. She’d come back and continue, only to remember the hens needed to be brought inside.
But this time she let me sweat and swear, punch the dough, complain about it sticking to my hands. In between her chores outside, possibly cleaning a cow or two, she’d come back and bark at my complaints in her sweetly-rough signature style.
Though, as usually, she turned out to be right. After 25 minutes of manual labor, I was left with a silky-smooth ball of dough.
This is where I learned that bread dough is initially wet and sticky. So, do not be tempted to add a bunch of extra flour if your dough feels very slack and sticky initially – do the entire kneading outlined in the recipe, and only THEN add a little more flour if the dough is absolutely impossible to handle.
Kneading the dough
Like I said… I can be complicated about this ? here is how I knead the bread dough:
- knead 8 minutes on low (that’s when you’ll notice the dough coming together. But don’t be fooled, the windowpane test will still fail)
- allow the gluten to rest for 1 minute
- knead 4 minutes on medium speed
- 1 more minute of rest
- a final 2-3 minutes on medium-high speed…
Windowpane test
… which is when you should be able to successfully pull a small amount of dough into a tiny window without it ripping apart.
By the way: Windowpane test? I learned that one from the Great British Bake Off, not my grandmother. Apparently this Paul Hollywood dude is a pretty great baker, too ? The theory behind it is that the gluten strands will develop enough for you to be able to pull a bit of dough into a square thin enough to almost see through.
And this, my friend, is the true secret behind fluffy enriched bread. Because that coveted soft fluff comes from nowhere else but nicely developed gluten strands.
So if you can pull your dough into a windowpane, it’s ready for the first rise!
First rise
The other crucial part of bread making is the rise, which depends on a lot of factors:
- where you live (humidity and altitude play a big part – more humid climates, or living at altitude, can speed up the leavening process; if you feel your bread is always too yeasty, try cutting the yeast in half)
- the season you’re in (hotter season > faster rise)
- if you are a heavy air conditioner (cooler room > slower rise)
- the type of yeast you use (dry yeast, active yeast, instant yeast, baker’s yeast, organic yeast… all have their own timing)
- magic and wizardry that’s beyond our scope ?
Just shape your kneaded dough into a neat ball, place it in the bowl and cover with a clean tea towel. I left this dough for nearly 2 hours, using organic dried yeast. It should be big and soft and puffy, and full of strands when you pull it.
If you under-proof your dough, you’ll notice it ripping apart on the sides during baking. If you over-proof, it might not bake as beautifully as a properly risen dough does.
Braiding step by step
Braiding a basic two-strand bread isn’t difficult or greatly artful, but I leave the more sophisticated stuff for events like Easter and Christmas.
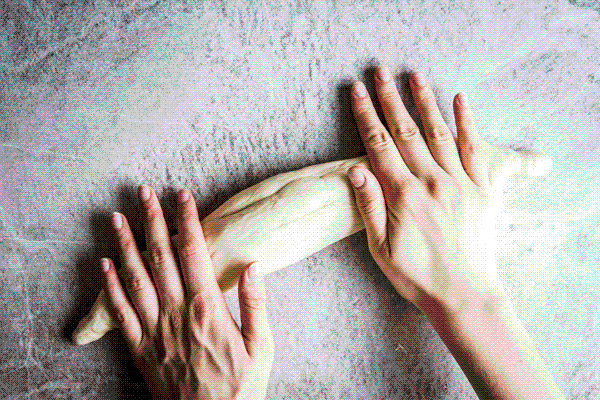
Cut the dough in half and roll each into a strand, slightly thicker in the middle.
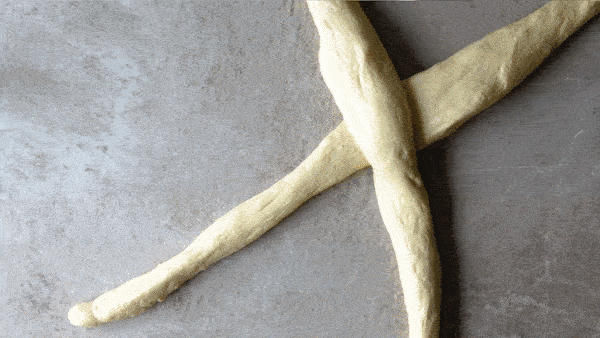
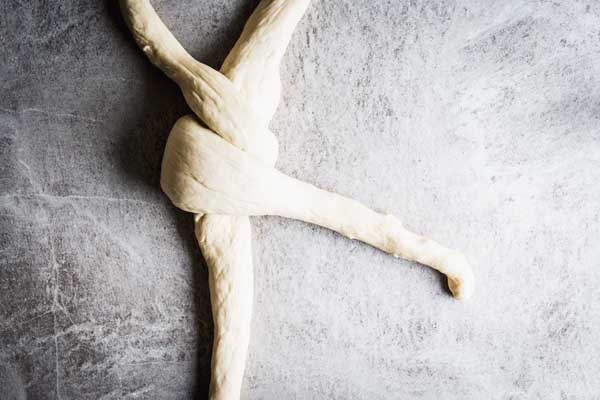
Then place them on top of each other to form a large X. Crossover the strands as you can see in the short clip below:
The first few times can be a little overwhelming, but the more braided bread you bake… The better you get at it! Try to braid slowly and lay the strands down neatly, it makes the whole process easier.
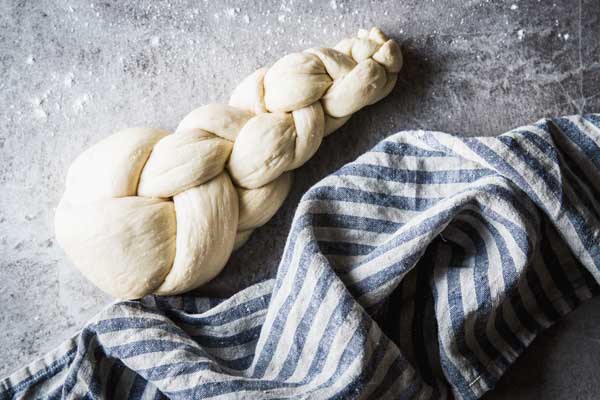
Finally, you’ll need to prod and prop the entire Zopf a little, so it lays flat and shapely. Tuck the loose ends under and you’re done!
How to make knotted rolls
One thing that I love to do is breaking my dough into 2.5oz balls and create tiny two-strand braids. I then bring the ends together and pinch them to form a small roll.

Second rise
A second rise of around 15 minutes helps relax the strands once more before baking. Make sure you don’t forget your bread, and make sure to turn on the oven at the right moment – or you’ll overproof, and your bread will not rise into a beautifully fluffy work of art.
Egg wash
The egg wash is crucial for a nice color and shine. I never bother to use just an egg yolk, I always take the entire egg. Brush carefully and thoroughly!
If you’re wondering why I’m not putting any eggs into the dough itself, it is because I’ve found it to dry out much quicker after baking. (If you know you’re eating right away and long for a warmer color, go ahead and add an egg yolk to the dough, along with an extra tablespoon of flour!)
Baking
It’s a rather quick bake, a large Challah made with 4 cups of flour is done in roughly 25-30 minutes, smaller rolls will be ready in 12-15 minutes.
Don’t take them out while they’re still too pale, or they’ll be doughy and dense in the middle. Never be afraid of color in cooking and baking – you’ll only achieve great flavor if you dare to let the right things brown.
If you want to be very accurate and nerdy about this (ahem, like yours truly), get a food thermometer with a thin probe – enriched breads are done at around 200°F (or 95°C).
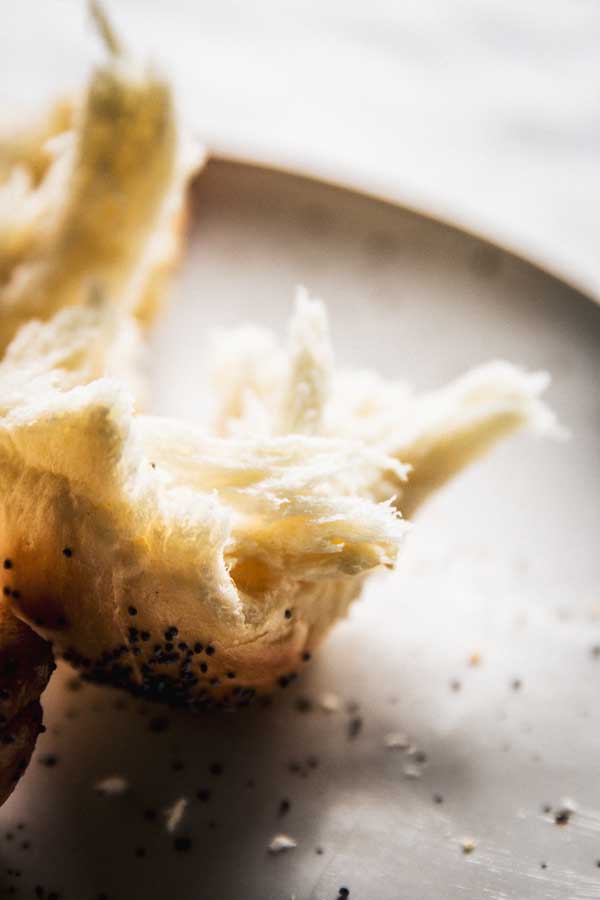
The strands will puff up and slightly pull apart during baking, which results in the most beautiful look:
If they don’t pull apart… That usually happens to me when my second rise took too long and I overproofed the braided bread. If you looks closely, you can see the large bread I made for the photos was this way… I bake it almost weekly with my kids and it always comes out fine, but I tried to make it absolutely perfect for the blog THREE TIMES in a row, alas! Perfection is the enemy of perfectly adequate, sigh. The rolls, however, turned out quite well and incredibly fluffy.

Storage
I don’t know how much of this warm bliss you’ll have left to put into storage, haha! But if you do, wrap it in a clean tea towel and keep it at room temperature for a day, maximum.
It does dry out and lose its fluffiness. But if you end up forgetting about it and find it on day 4, definitely turn it into a French toast casserole! I have some recipes for that:
- Slow Cooker Raspberry Chocolate Chip French Toast Casserole
- Blueberry Streusel French Toast Casserole
- Strawberry Cream Cheese French Toast Casserole
Happy baking!


Raphaelle says
I fell in love with Zopf when i traveled to Switzerland this spring. I have been longing to make some ever since I have returned. This recepie is incredible! My zopf turned out amazing!!! I really appreciated your advice on kneading the dough even if your initial thought was that it was too wet, because that was mine and I was tempted to add more flour. However, I did not and after mixing the dough in my stand mixer for your suggested times, the dough was absolutely perfect. Thank you!
Christine ANNUNZIATO says
I am trying this dough after successfully making challah both with yeast ans with sourdough. I measured this precisely and am wondering why my dough is so dang dry! I added a little butter and a little more milk but am still feeling with drier than play dough type dough. It holds together but barely. Was difficult to roll into my four pieces to braid and is just not moist! I sprayed with water and covered for the rise but am sad and hoping it will turn around. Is it missing eggs or something?!
Nora says
Christine, I’m sorry you’re not having a better experience. The flour to milk ratio in this recipe is absolutely standard and what many yeast dough recipes out there call for. The added butter should make it even softer and smoother. It is not missing eggs. If it was too dry, then unfortunately something must have gone wrong. Did you spoon your flour into the cup and level off with a knife, or did you scoop it with the measuring cup?
Mara says
This is so offensive to Jewish culture