

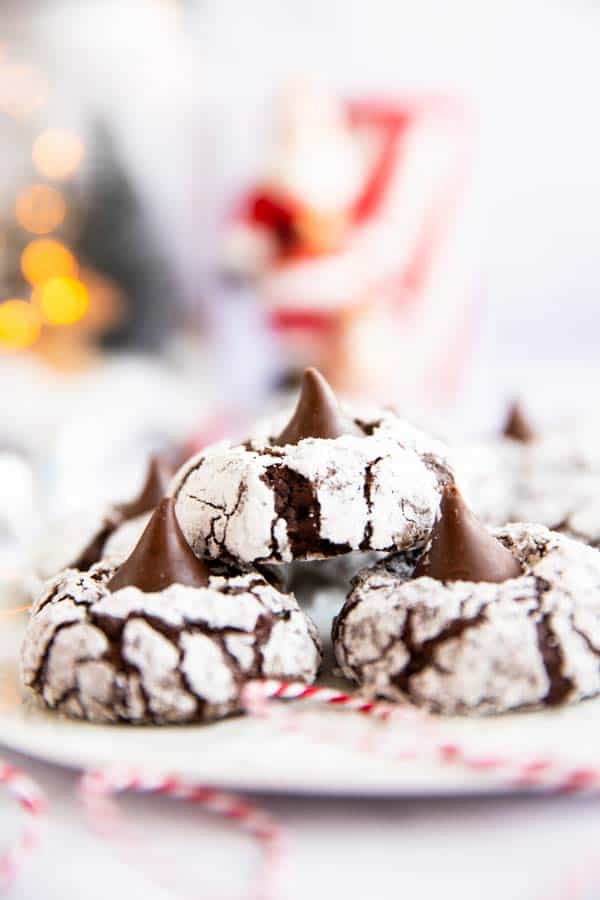
Enjoy crinkle cookies? I think you’re going to positively love these chocolate crinkle blossoms! Try them for Christmas this year – they’re so easy to make.
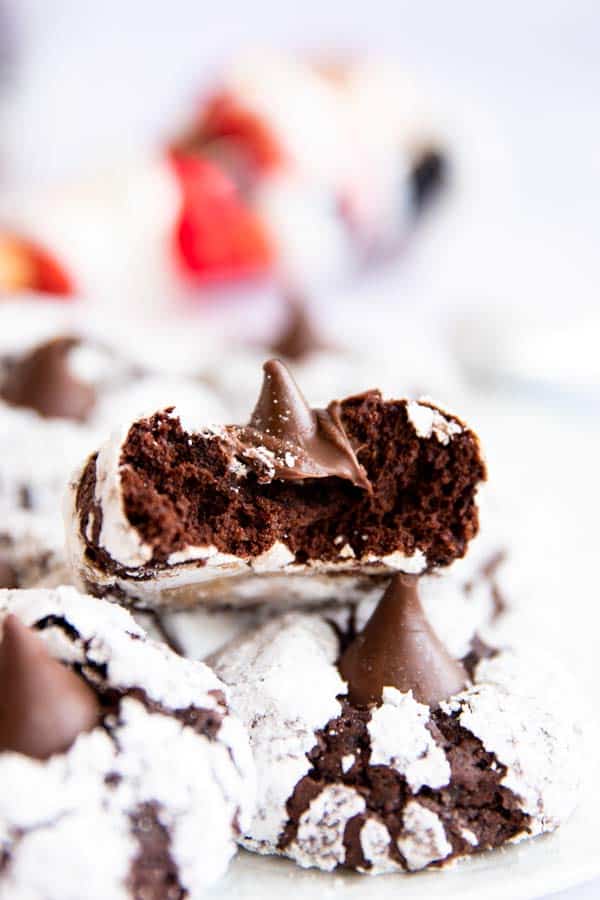
What makes chocolate crinkle cookies even better? Adding a chocolate kiss to turn them into a blossom cookie, of course! These are perfect for Christmas cookie exchanges, holiday parties or just because ❤️
This was a suggestion from reader Crystal on Pinterest, who shared that she makes my regular Chocolate Crinkle Cookies with Hershey’s Hot Cocoa Kisses. I couldn’t find the Hot Cocoa variety so I used regular ones, but any Christmas specialty flavor would go great with these.
PS If you try this recipe, please leave a review in the comment section and add a star rating in the recipe card – I appreciate your feedback! Follow along on Pinterest, Facebook or Instagram.

Chocolate Crinkle Blossoms
Recipe details
Equipment
- Cookie Sheet
Ingredients
- 1 cup unsweetened cocoa powder
- 2 cups all-purpose flour
- 1.5 teaspoons baking powder
- ¼ teaspoon salt
- ⅓ cup butter softened
- 1 ½ cups white sugar
- 2 teaspoons vanilla
- 4 large eggs
- ½ cup powdered sugar
- 32 Chocolate Kisses
Instructions
- Make cookie dough: Combine cocoa powder, flour, baking powder and salt in a medium bowl. Set aside. Place butter, sugar and vanilla in a large mixing bowl and beat with an electric mixer until combined. Add the eggs, one at a time, and mix on medium-low speed just until combined – about 10 seconds each. Add the dry ingredients to the egg mixture and mix on low speed until incorporated.
- Chill cookie dough: Cover the bowl and chill the dough for at least 1 hour or up to overnight (the longer you chill, the thicker the cookies will be).
- Roll cookies: When ready to bake, preheat the oven to 350°F. Place the powdered sugar in a medium bowl. Roll the dough into heaping tablespoon-sized balls and cover them well with the powdered sugar.
- Bake cookies: Place on a lined baking sheet set 2 inches apart (bake in batches! do not bake two baking sheets at the same time!) and bake for 8-12 minutes, or until spread and crackled. Remove from the oven and immediately press a chocolate kiss into the middle of each cookie. Cookies will still be soft, so let them cool on the baking sheet for 5 minutes before removing them to a cooling rack to cool completely (do not touch the chocolate kiss until completely solid again).
Notes
Ingredient Notes:
Cocoa Powder: Make sure to use unsweetened cocoa powder suitable for baking. Readers have reported using Hershey’s special dark cocoa powder, which made the cookies richer and even more chocolate-y. Flour: I haven’t tried this recipe with a flour other than all-purpose, but do let me know if you try these with a gluten free blend. Baking Powder: Not the same as baking soda, so please don’t substitute unless you’re OK with the risk of getting a different result. Butter: Use real butter and not buttery spread. Stick margarine that specifically says to substitute butter in baking can be used. Vanilla Extract: I use real vanilla extract because we like the flavor best. Please don’t use vanilla flavoring in place of the extract, as the flavoring is much stronger. Powdered Sugar: If your powdered sugar is hardened/clumpy, make sure to break it up by mashing with a fork or crumbling up with your fingers until powdery again.Baking Tips:
Cookie size: You can make these larger or smaller. To make larger cookies, use 2 tablespoons of dough per cookie. They will bake in 12-15 minutes. To make regular-sized cookies, use 1 generous tablespoon of dough per cookie. They will bake in around 8-10 minutes. Baking Time: The exact baking times will depend on your oven and how hot it runs, so remember to check on your cookies frequently. Don’t overbake or they will be hard – they should be soft like pudding when you take them out of the oven, but the top should feel dry (eg there shouldn’t be any dough sticking to your fingers when you lightly touch them). They’ll firm up as they cool! If you overbake, they will be tough AND they will not sink back down to reveal their beautiful crinkle pattern. Dough: When beating in the eggs, only do them for max 10 seconds each, otherwise they will get too frothy and your cookies will blow up too much in the oven. Stickiness: Yes, it’s a sticky dough, and even after chilling it will start sticking to your palms – that’s normal. Just wash your hands after every few cookies you rolled and it will be fine. One reader suggested dusting your hands with powdered sugar to keep the cookies from sticking, it worked very well for her. Make sure you stick to the ingredient amounts the recipe calls for. Otherwise the dough could be too sticky to ever roll, or you could end up with dry cookies. Powdered Sugar Coating: Make sure you coat the cookies with a thick, even layer of powdered sugar without any gaps – that’s the only way to get that beautiful look!Storage Tips:
On the counter: The crinkle cookies stay fresh in an airtight container at room temperature for about 3-4 days. In the freezer: If you want to keep the cookies for longer, they freeze well for up to 3 months (see blow).Freezer Instructions:
To freeze unbaked dough: It’s easy to freeze the rolled cookie dough balls (don’t dip them in sugar though!) Freeze on a lined baking sheet in a single layer until firm (about 2 hours, then transfer to freezer bags and freeze for up to 2 months. To bake, just take as many balls as you want to make from the freezer and let sit on a plate on the counter for 30 minutes, then roll in powdered sugar and bake. To freeze baked cookies: Place the cooled cookies in layers in freezer containers, separating layers with baking parchment. Label with the name and use-by date (freeze for up to 3 months). To defrost, put them on a wire rack and let them sit at room temperature for about 30 minutes. Do not let them sit in the container or on a plate, or they will get soggy. If you want warm, freshly-baked cookie flavors, you can place the thawed cookies on a baking sheet and warm them at 275°C for 5-6 minutes.More recipe information
Try these Christmas cookies next


Or check out our collection of easy cookie recipes for more ideas!


Martha Glassy says
I made these last year, using Hershey’s Peppermint Kisses. They were amazing! I wish I could post a picture of them!
Joe Boyer says
I made these they turned out like little brownie! They were awesome! I used Lindt milk chocolate balls instead , turned out nice!