

There’s nothing quite like the magic of making pie crust from scratch – flaky, buttery, and full of love! Whether you’re a pie-making pro or this is your first adventure, this simple recipe will give you perfect results every time.
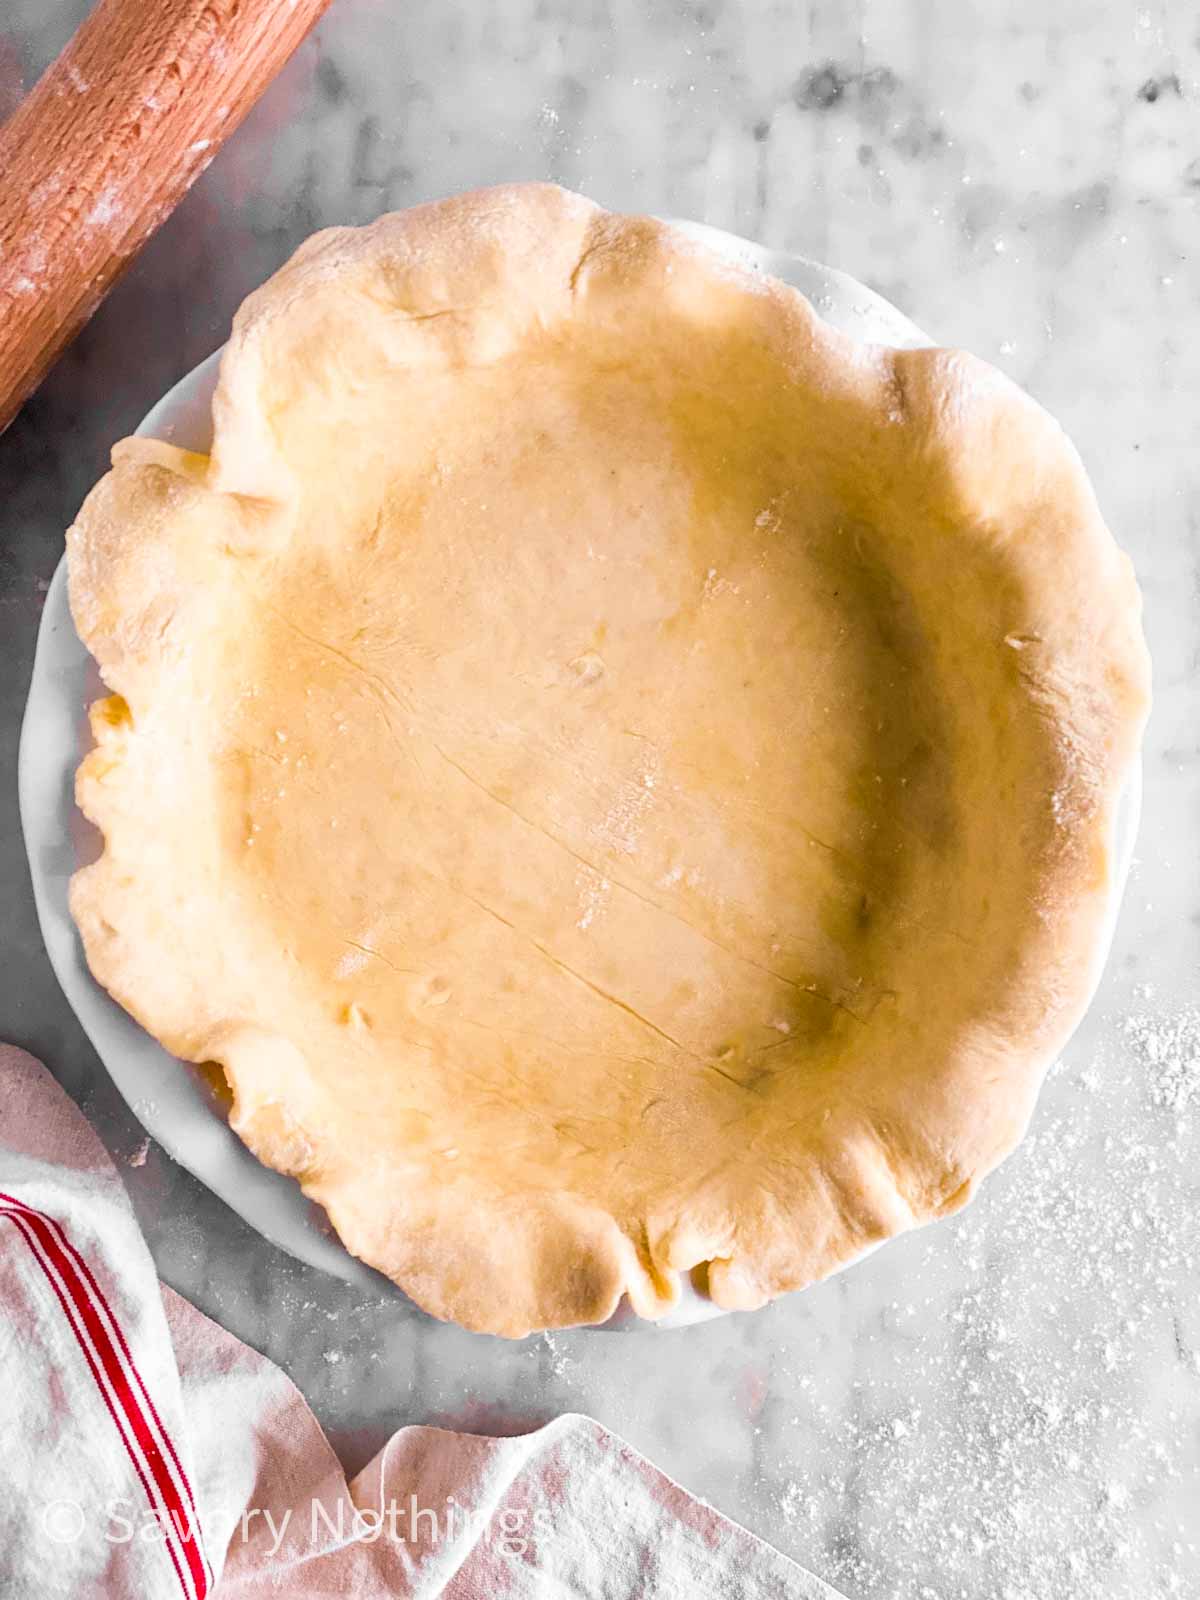
Grab your apron, your favorite rolling pin, and let’s bake up something unforgettable together!
Why you’ll love this recipe
- Foolproof and easy: With clear steps and tips, even beginners can achieve a perfectly flaky crust every time.
- Versatile and delicious: Whether you’re baking a sweet fruit pie or a savory quiche, this crust is the perfect base for all your creations.
- Made with love: There’s nothing like homemade, and this recipe brings that nostalgic, melt-in-your-mouth goodness to your table.
Ingredients you’ll need
Here is a visual overview of the ingredients in the recipe. Scroll down to the printable recipe card at the bottom of this post for quantities!
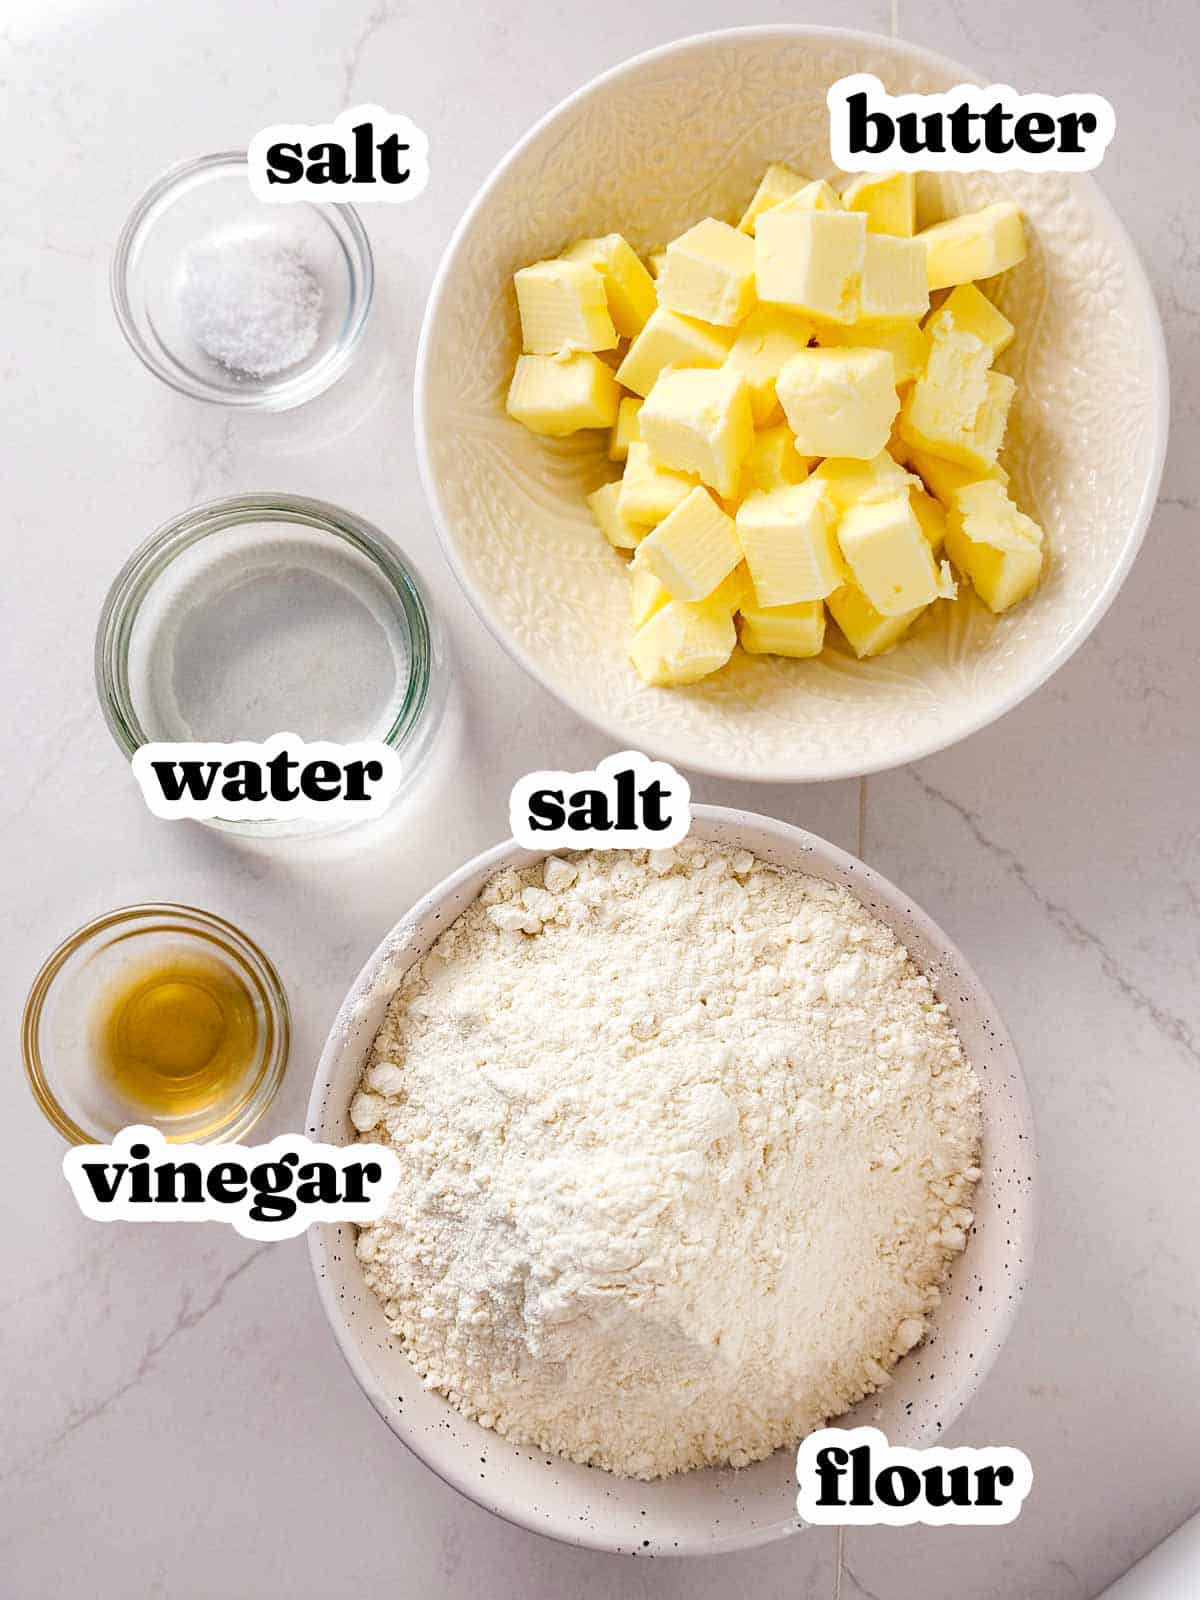
Ingredient notes
- Fat: The crust turns out best with a high-quality European-style butter (it has a slightly higher fat content), but it’s delicious with regular butter, too. Please don’t use buttery spread or margarine. If you prefer a slightly richer flavor, swap half the butter with chilled shortening. Make sure to use it cold from the fridge. It yields the flakiest pie crust.
- Flour: All-purpose flour works best, but for a more tender crust, you can substitute part of it with pastry flour.
- Salt: Don’t skip it! Salt enhances the flavor of the crust. For a savory dish, you can add a pinch more; for sweet pies, it’s fine as is.
- Apple cider vinegar: This doesn’t affect the taste of the pie pastry, but it helps to make the pie crust flaky. Vinegar helps to stop the gluten from developing. Developing the gluten would make for a tough crust, so please don’t skip it out of fear you’re going to end up with a tart crust.
Video tutorial
How to make pie crust pastry
This is a very simple pie crust even beginners can easily pull off. It has just the right amount of butter to make a flaky crust without turning out dense and soggy.
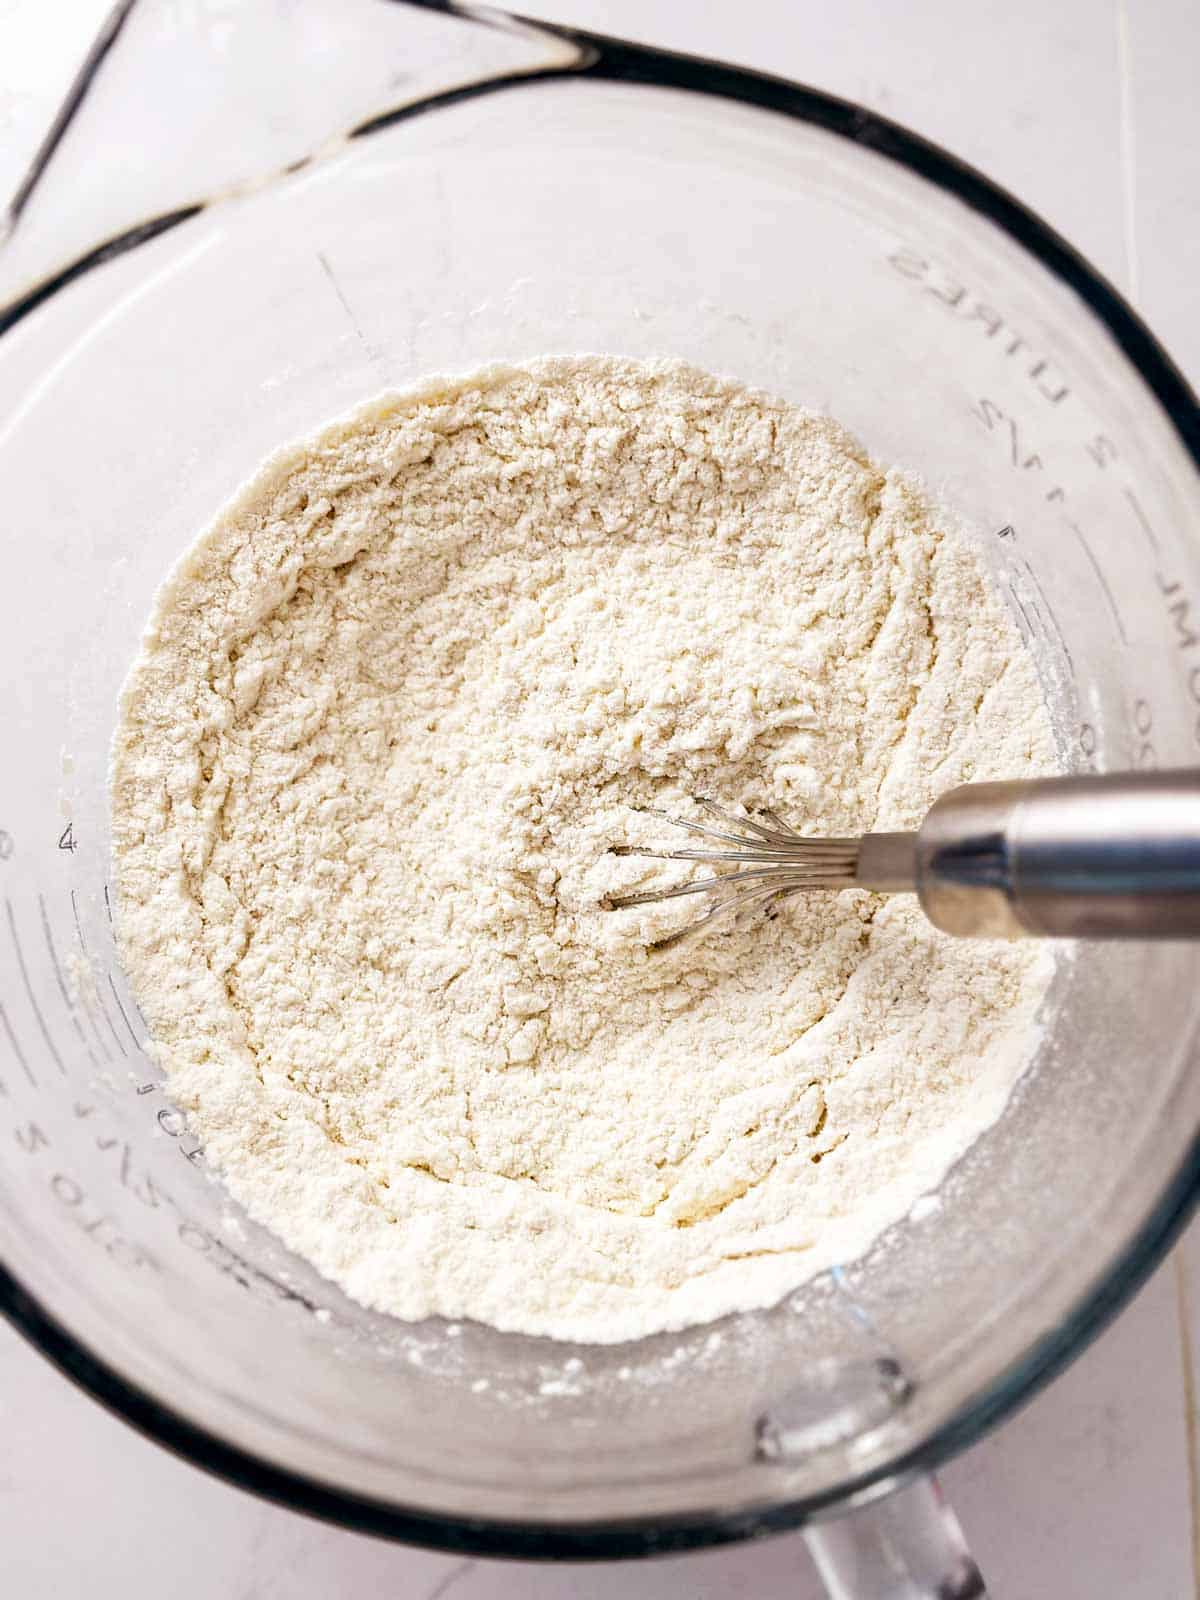
1. Prepare the dry ingredients
Let’s start by grabbing a large mixing bowl (do use a large enough bowl or blending the butter and flour will be messy and tedious).
Toss in the flour and salt, giving them a quick mix to combine. Nothing fancy here – a little swirl with your fingers or a whisk will do.
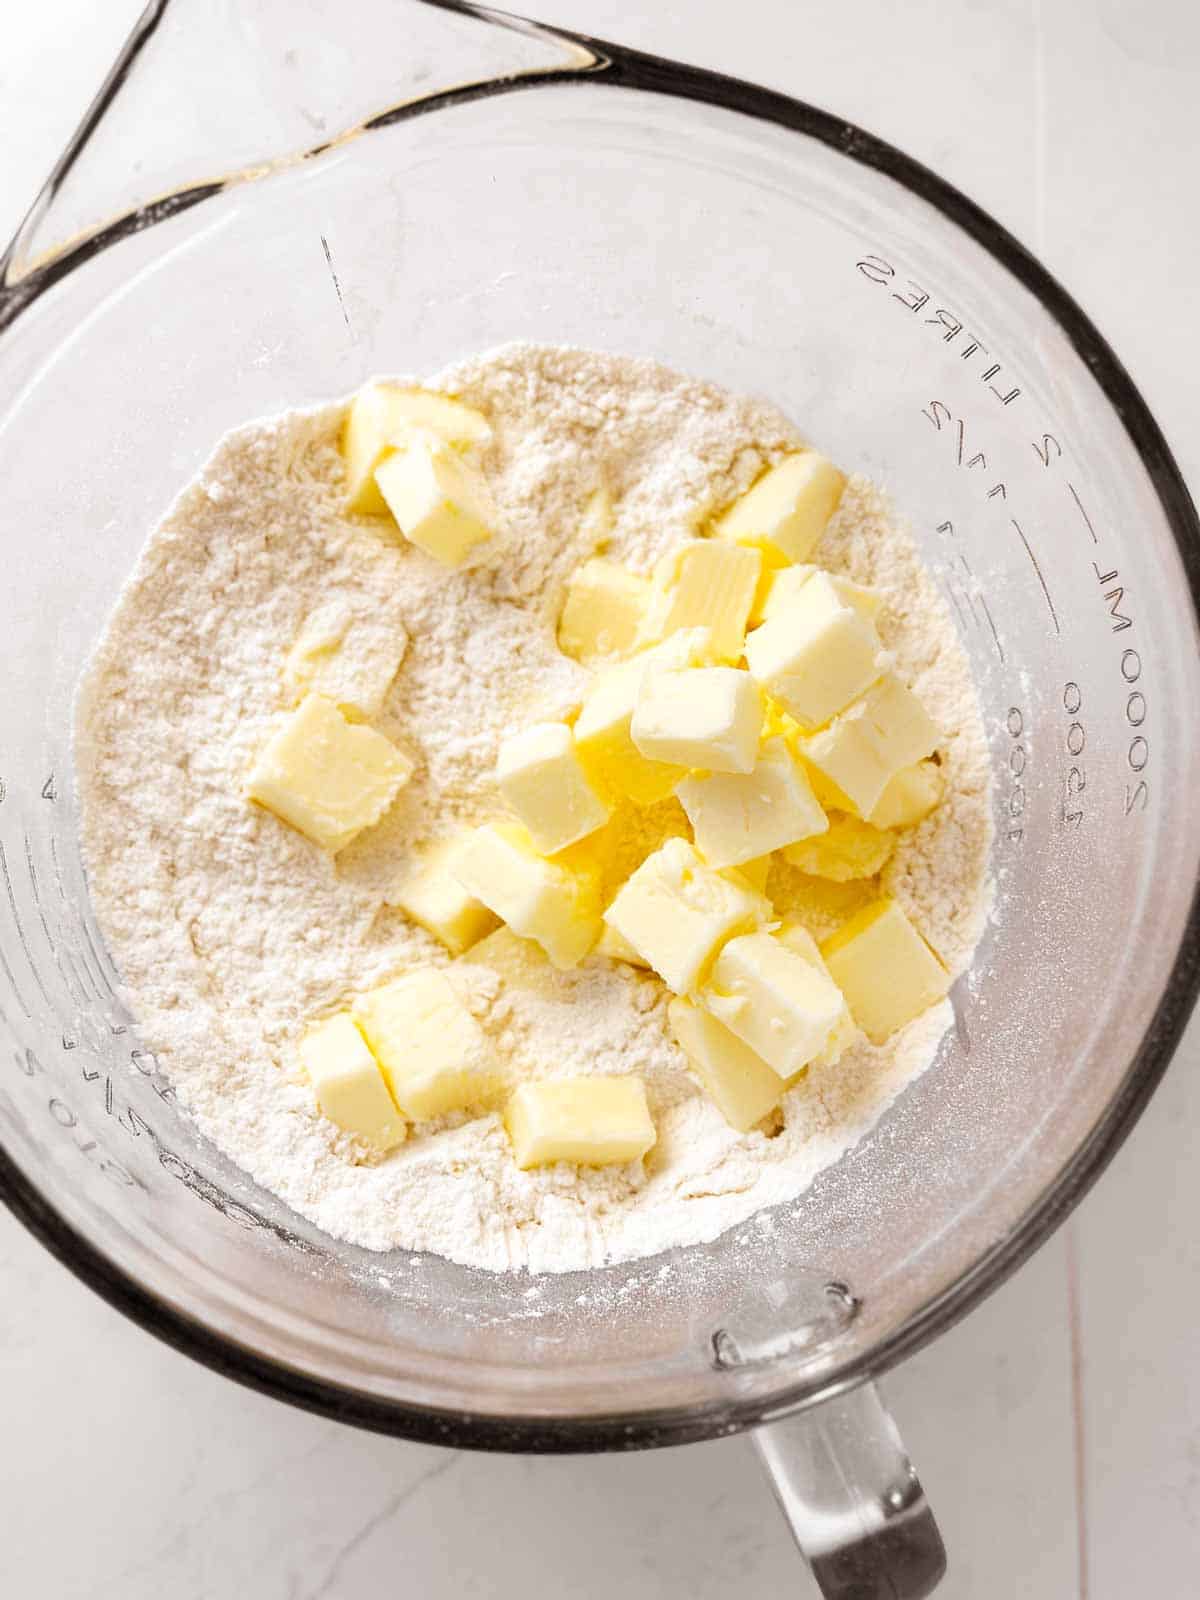
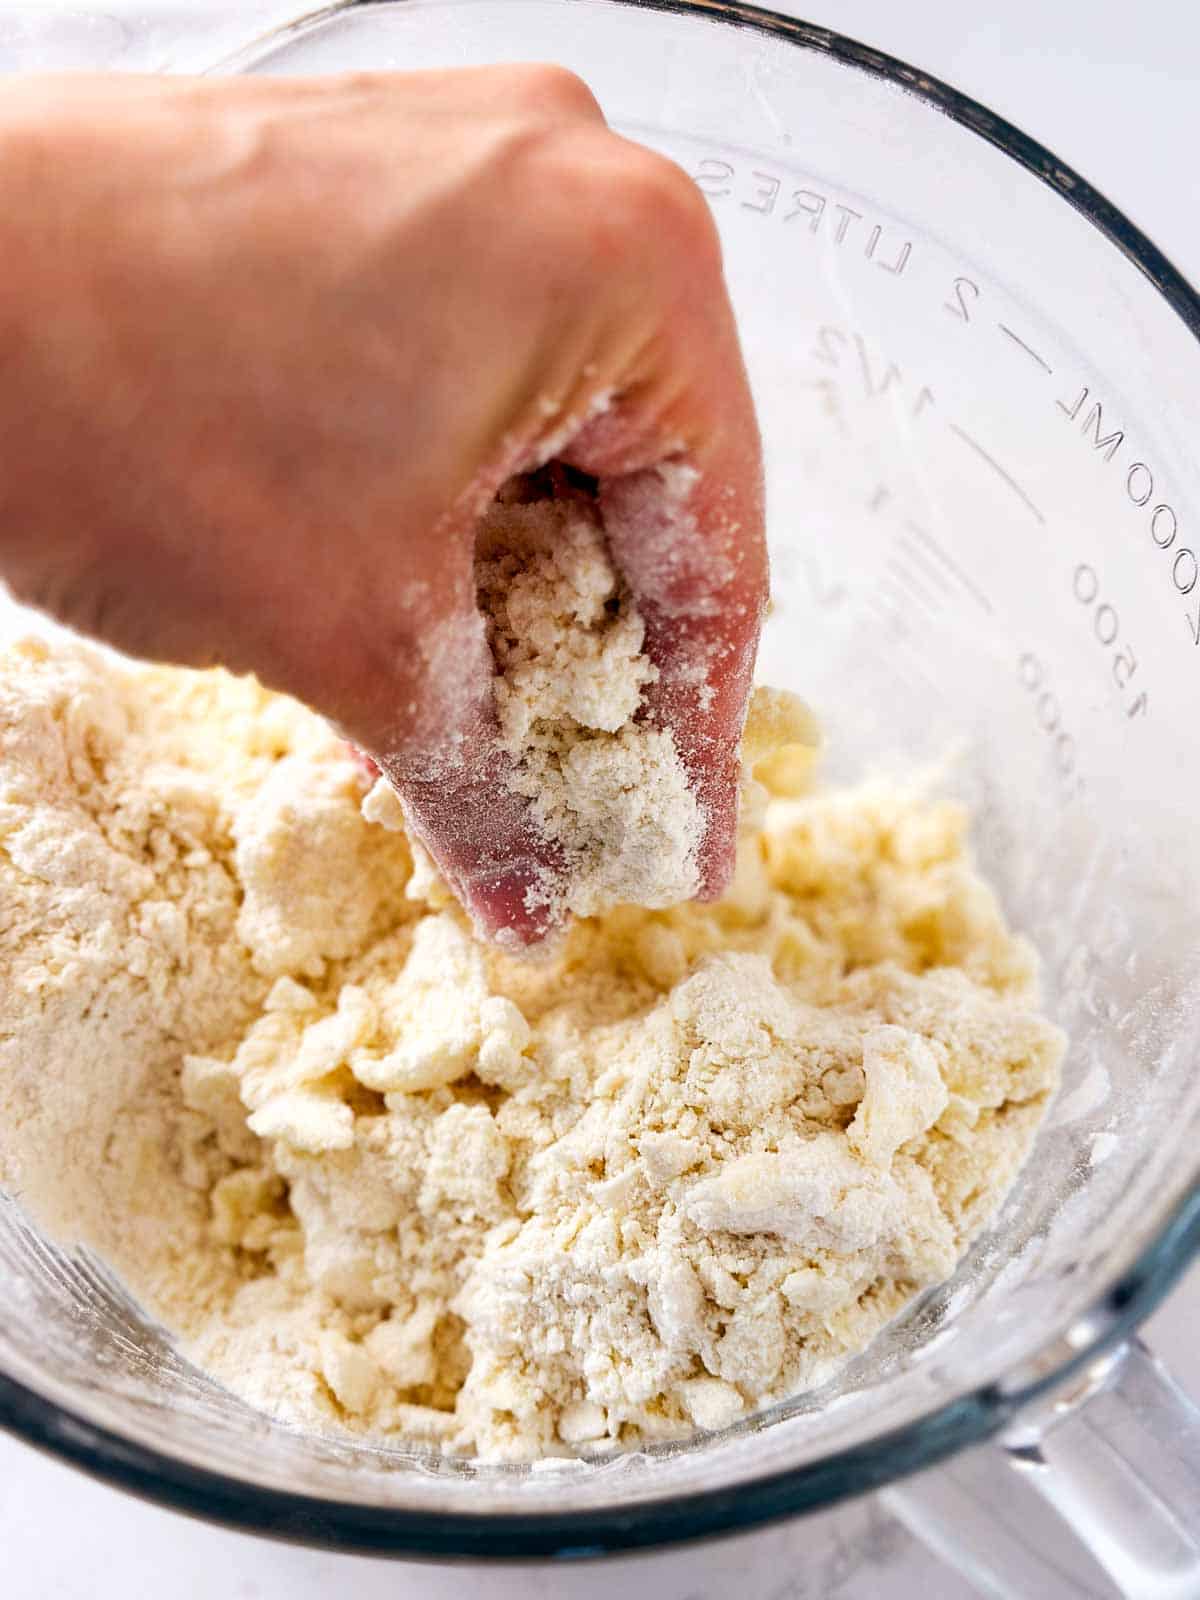
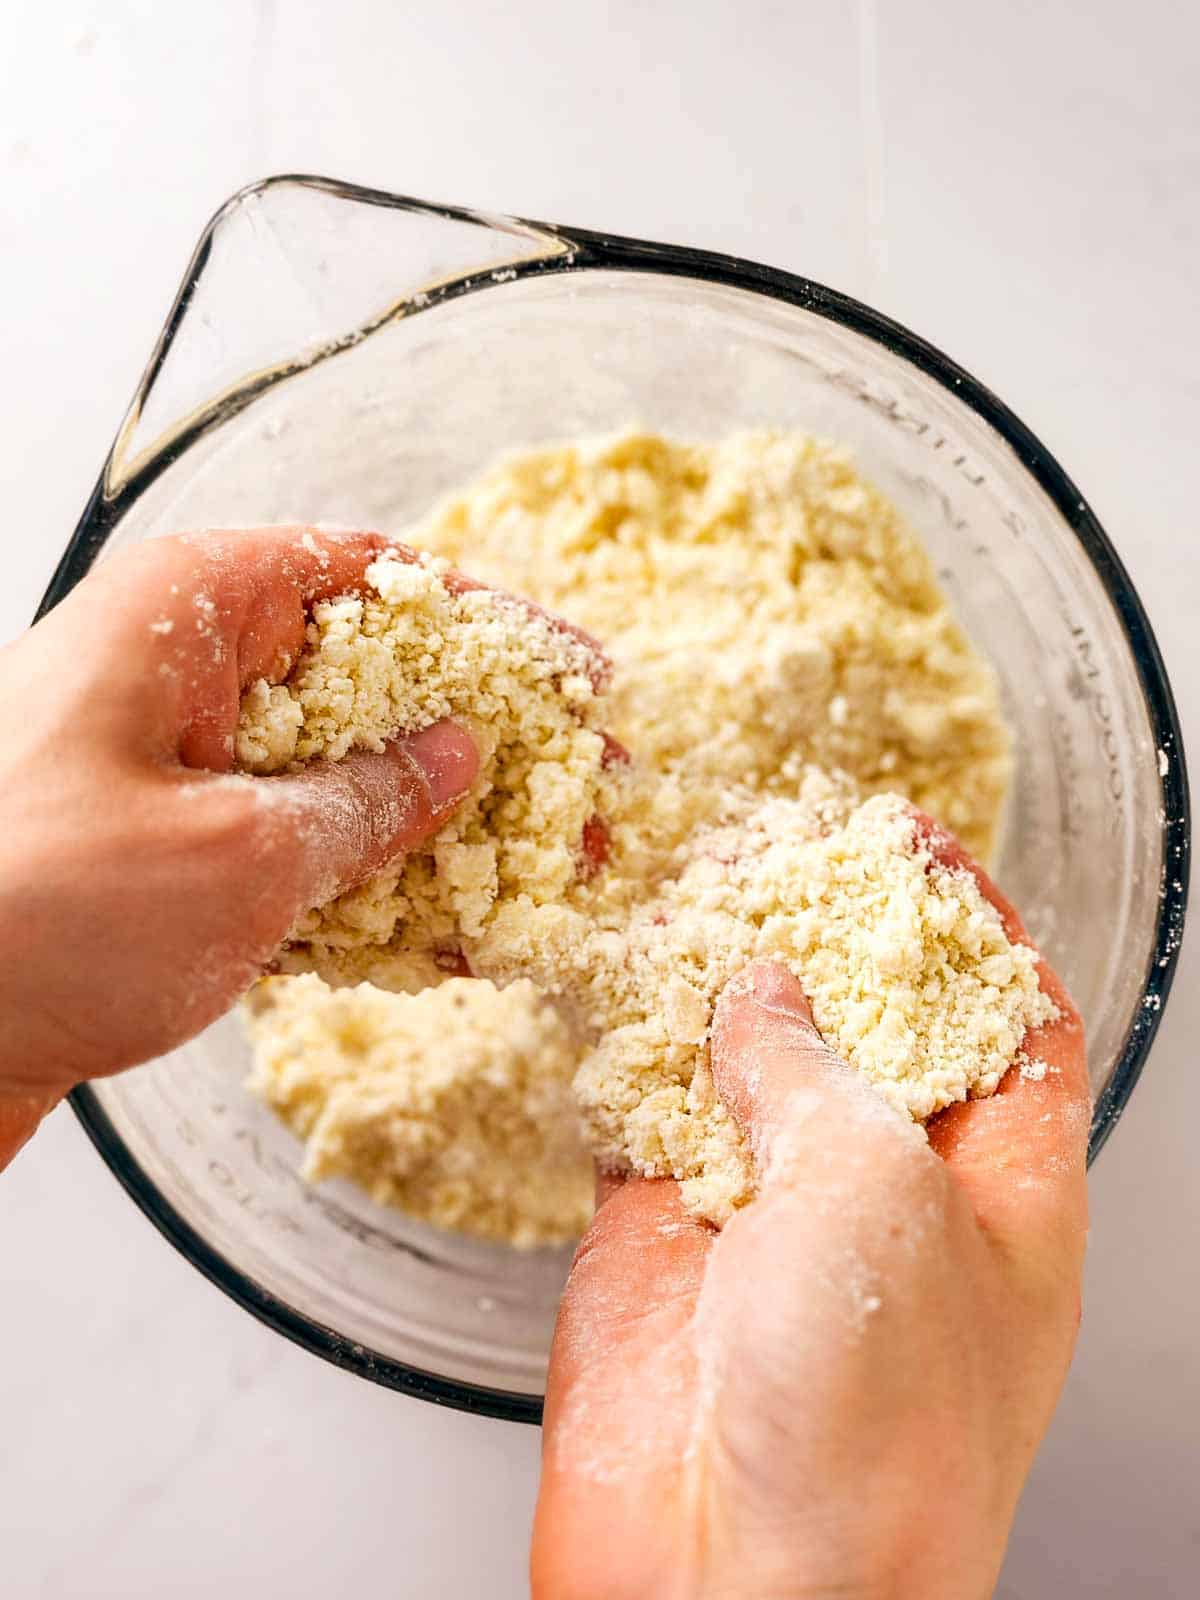
2. Work the butter into the flour
Next, take your cold, cubed butter and add it to the bowl. Now, use a pastry blender or your fingertips to blend the butter into the flour until you have a crumbly mixture. Use a pastry blender or your fingertips to rub it all together until the mixture looks like crumbs.
Think sand at the beach – some big chunks, some little ones, but no giant clumps of butter. Don’t overthink it; we’re aiming for a crumbly, sandy texture here. If you overwork it, it will become too pasty!
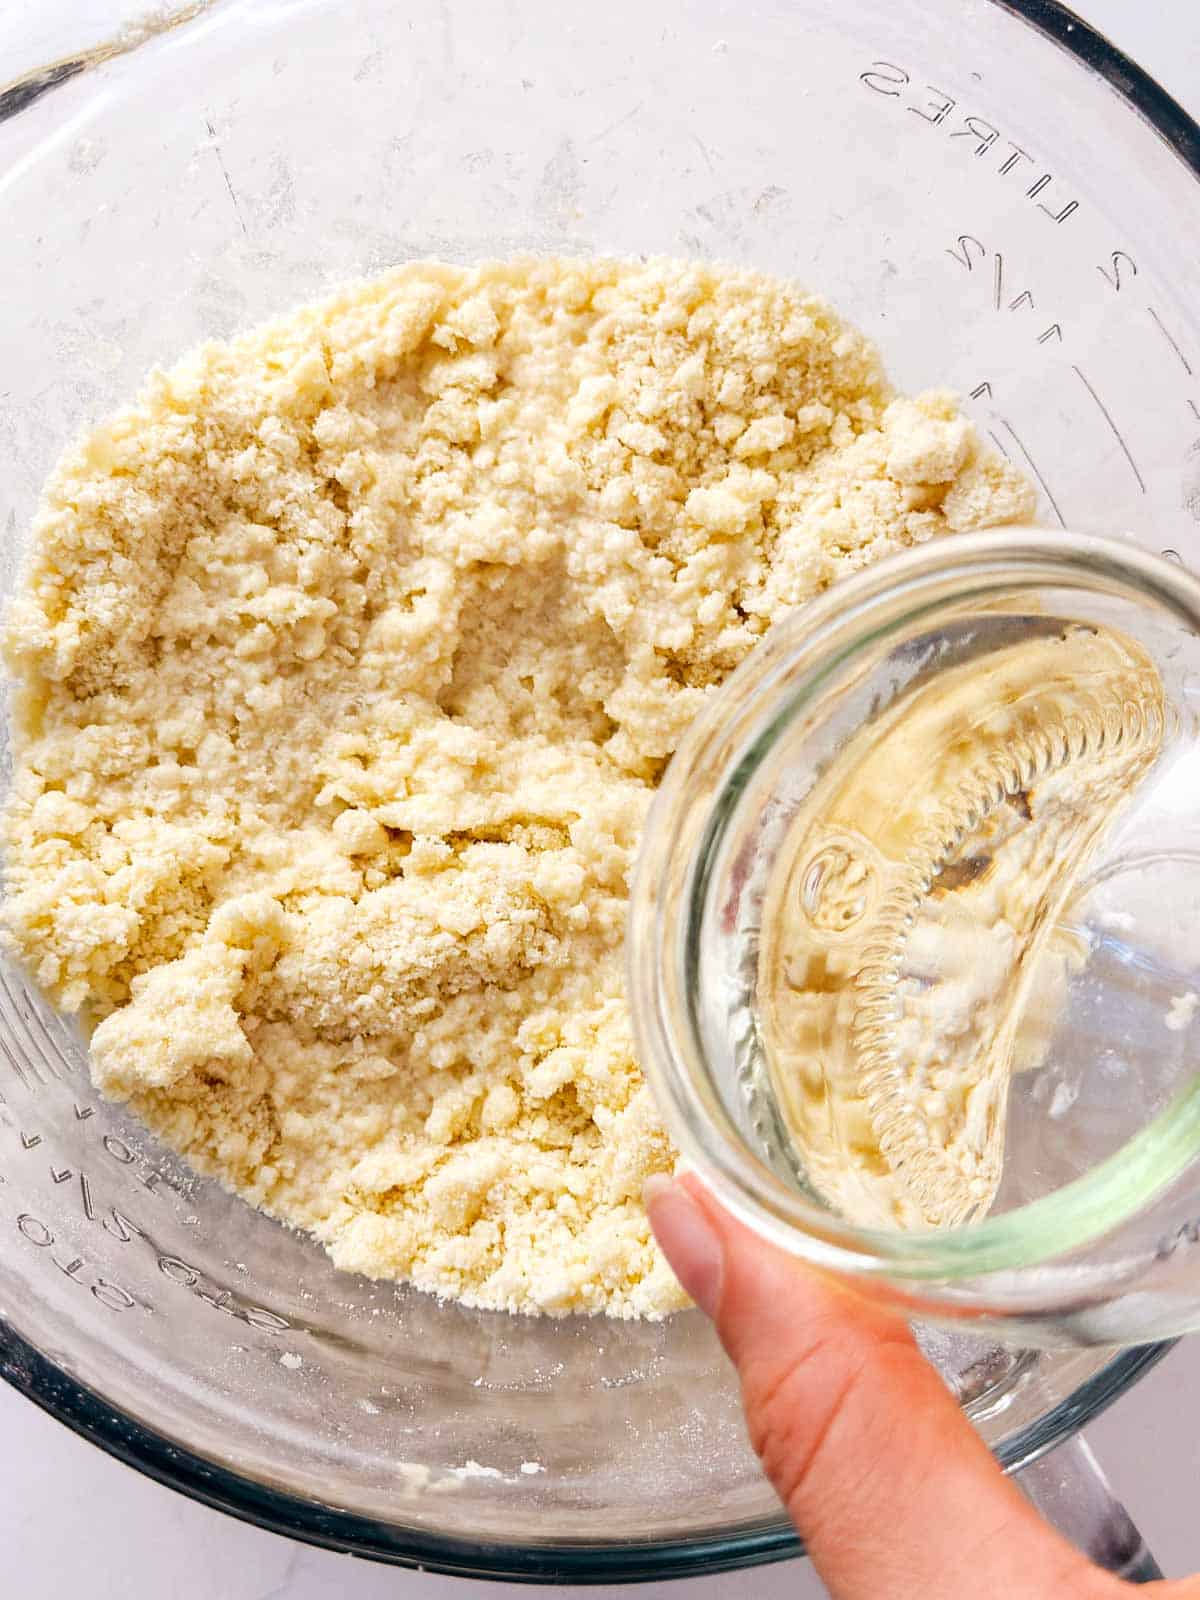
3. Add the wet ingredients
In a measuring jug, mix the apple cider vinegar with the ice-cold water.
Slowly pour this mixture into the bowl a little at a time. Use a fork or your hands to gently bring the dough together. The goal is to combine everything without kneading – just mix until it holds together in a shaggy ball.
Push the dough into a ball. Do not knead or overwork!
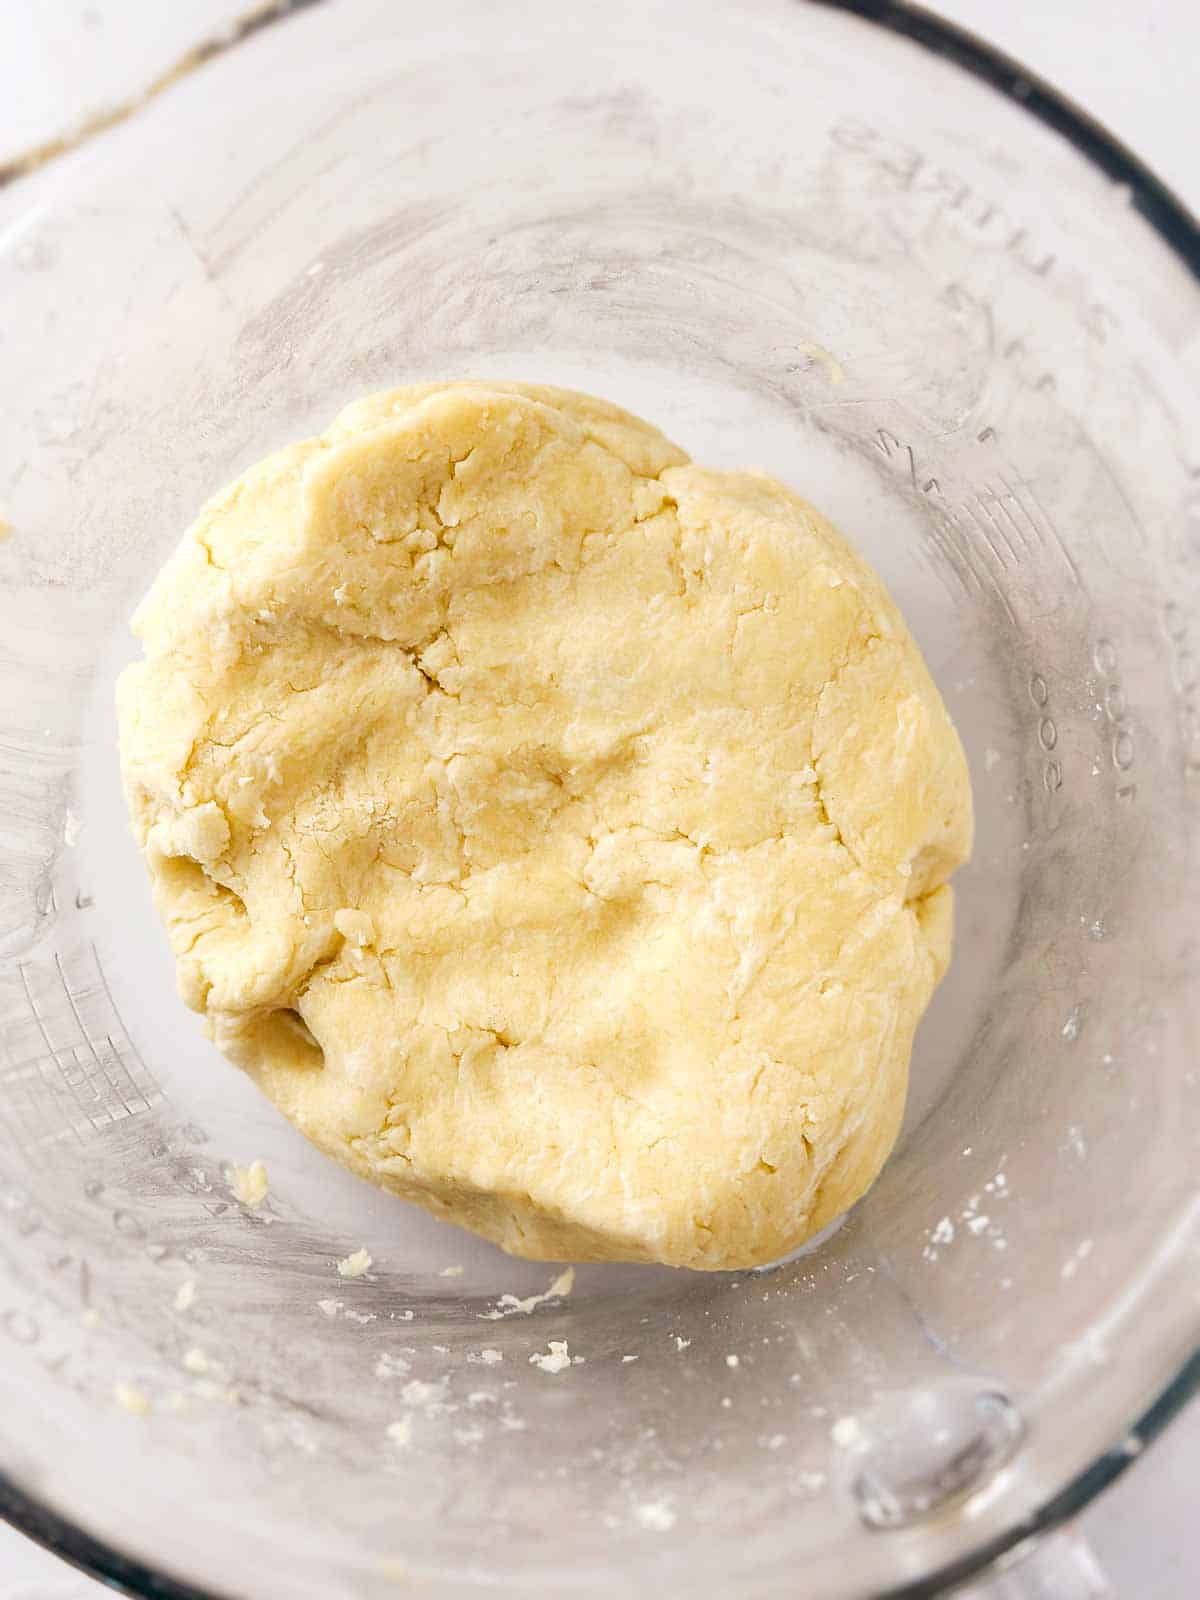
4. Chill the dough
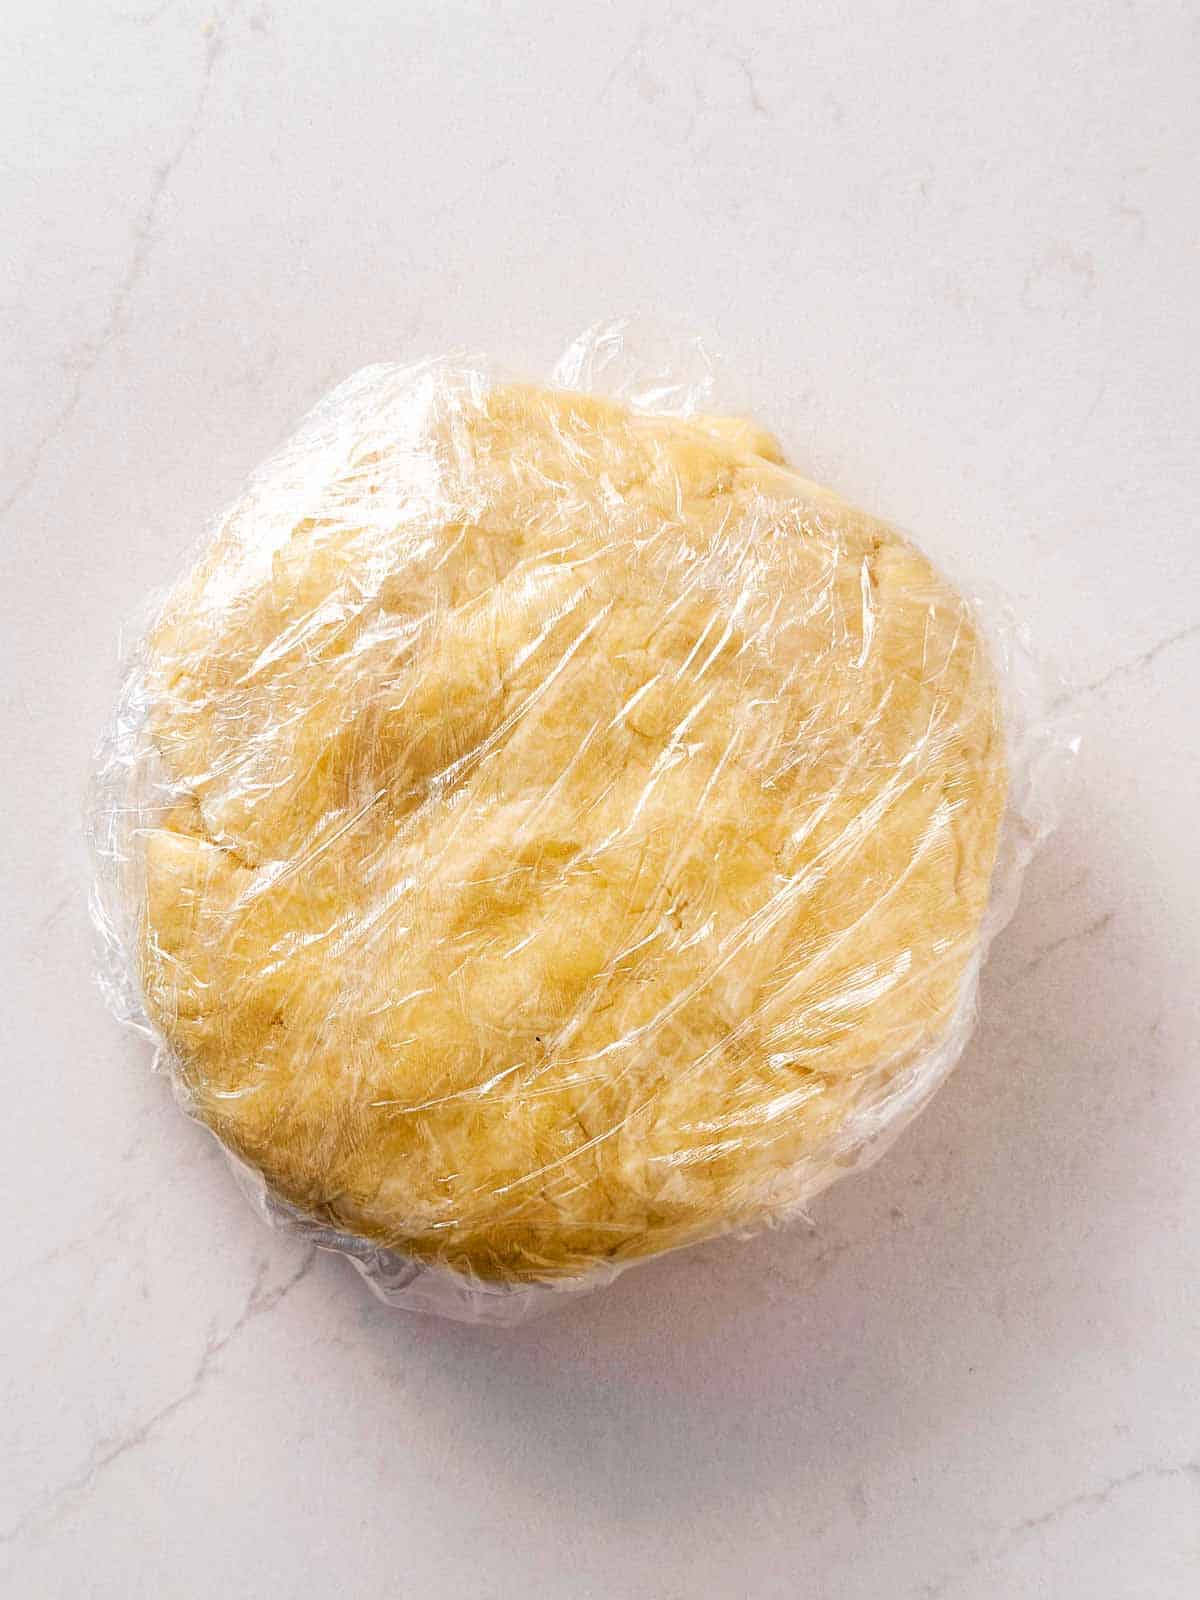
Once the dough comes together, divide it into two equal portions (I made a double batch for the stacked photo below!)
Shape each portion into a flat disk, wrap them tightly in foil or plastic wrap, and pop them into the fridge for at least an hour. This chilling step helps the butter firm up, which is key for that beautifully flaky crust.

You just made pastry for a homemade pie crust. That was easy, wasn’t it?
How to roll out pie crust
Rolling out pie crust and fitting it into a pie dish can be tricky! Here are my best tips to make this step absolutely foolproof:
Roll out the crust:
Place 1 sheet of baking parchment on your work surface, and place 1 chilled disk of pie pastry in the middle.
Note: If your pie pastry is very chilled and hard, it can be easier to roll it after it’s been at room temperature for 5-10 minutes. Do not let it stand for longer though or the butter will get soft and your pie crust could turn out dense and gummy.
Cover the pastry disk with a second sheet of baking parchment and start rolling it out. It will require some strength in the beginning.
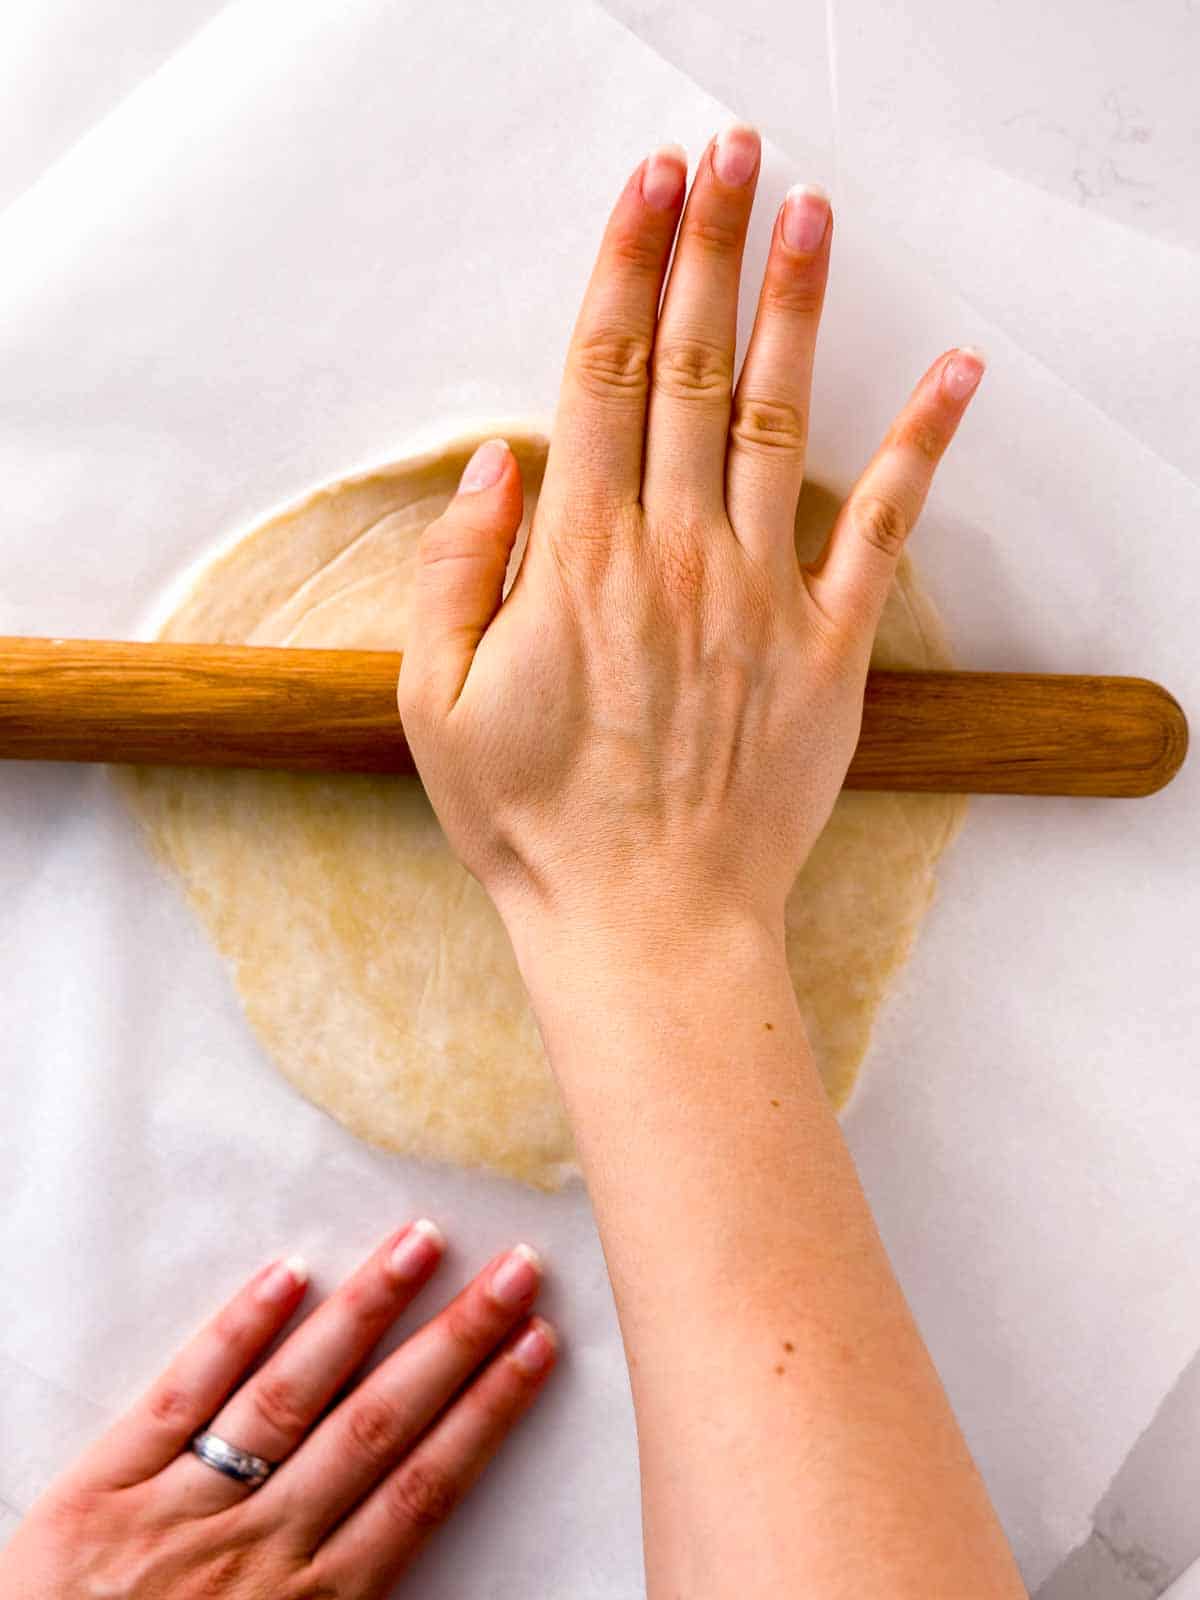

Once you have slightly flattened the disk and can start properly rolling, do this (if you need a visual, check out the recipe video):
- roll over the pastry disk 5-6 times with your rolling pin
- turn the pastry ⅛ turn to the right (you can turn it with both sheets of baking parchment attached, no need to peel the pastry off the baking parchment each time you turn it!)
- roll over the pastry disk 5-6 times with your rolling pin again
- turn the pastry ⅛ turn to the right again
- … keep going this way until your pastry is slightly larger than a 9 inch pie dish.
>> Rolling out your crust this way makes it come out as an almost perfect circle, which makes it a lot easier to fit the crust into your pie dish. You also don’t need to add any flour for rolling it out, which keeps the crust from turning out dry and floury.
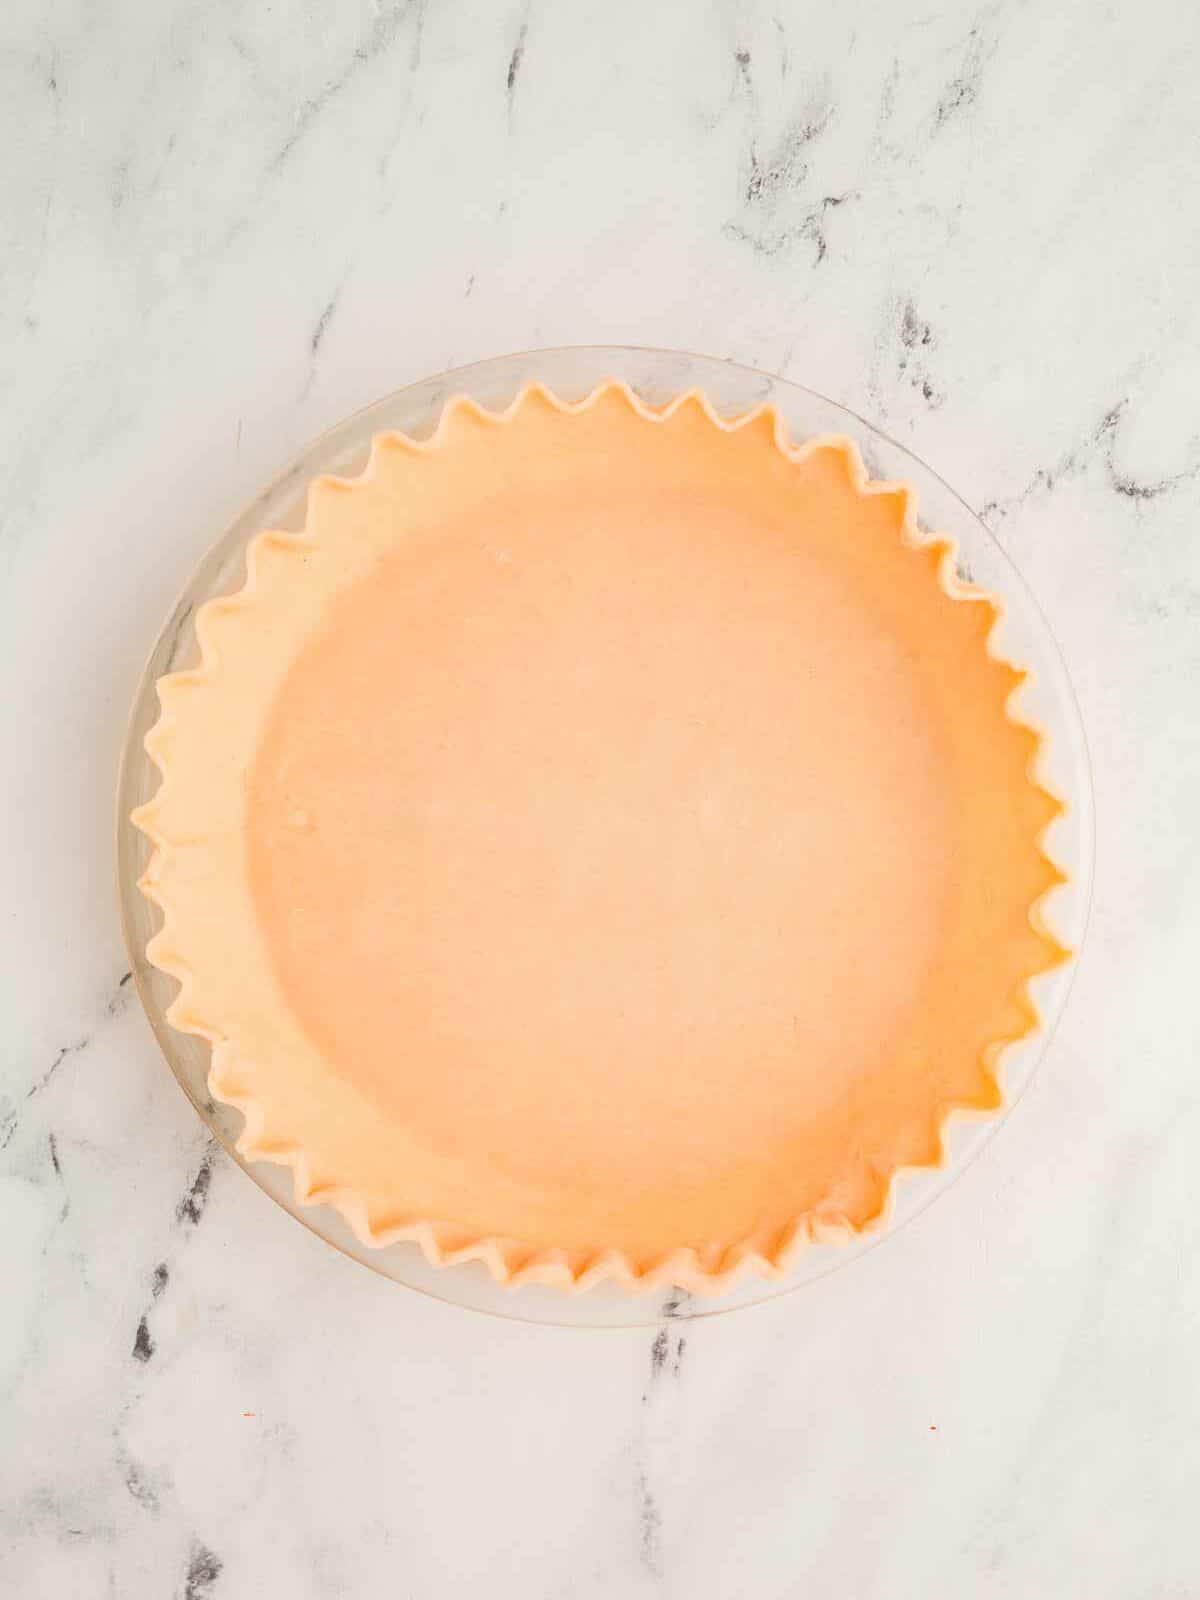
Fit the crust into your pie dish:
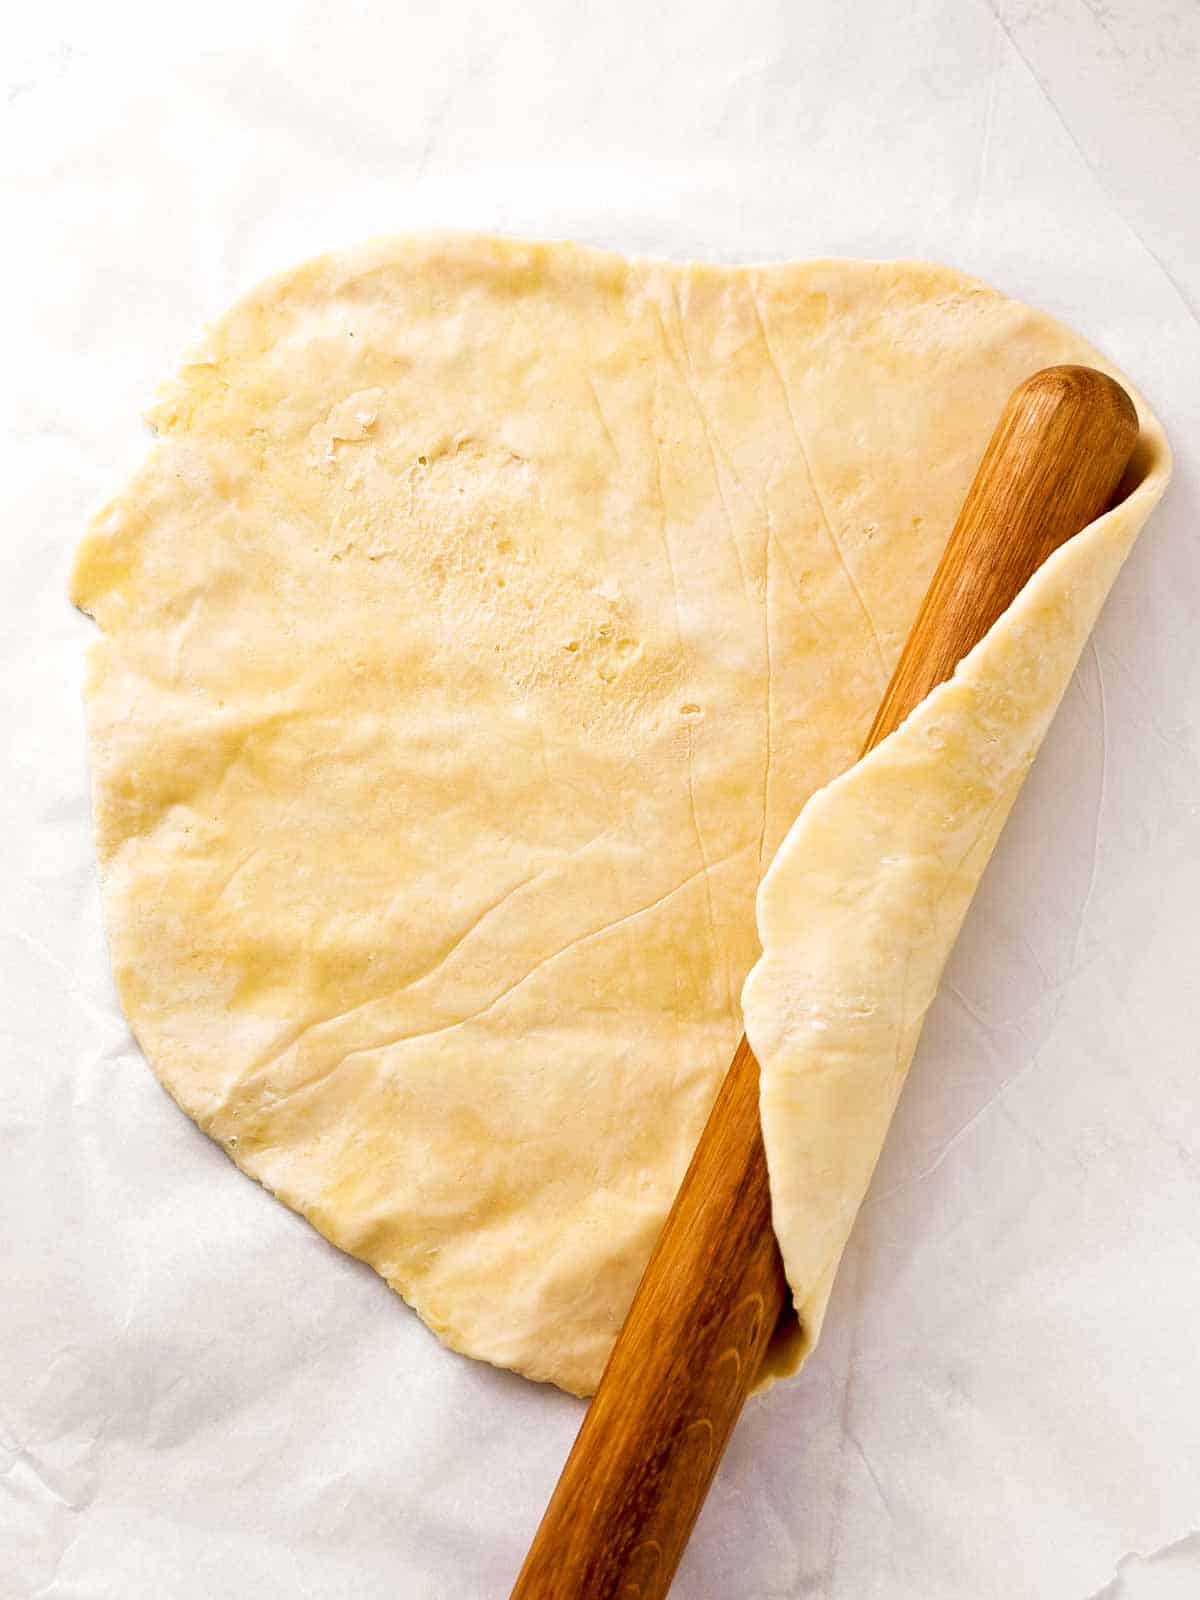
The easiest way to fit pie crust into a pie dish is to place it over your rolling pin.
Once you have rolled out the pastry into a large circle, peel off the top parchment layer.
Loosely roll the pastry over your rolling pin (see the video for a visual instruction) and lift it over your greased pie dish.
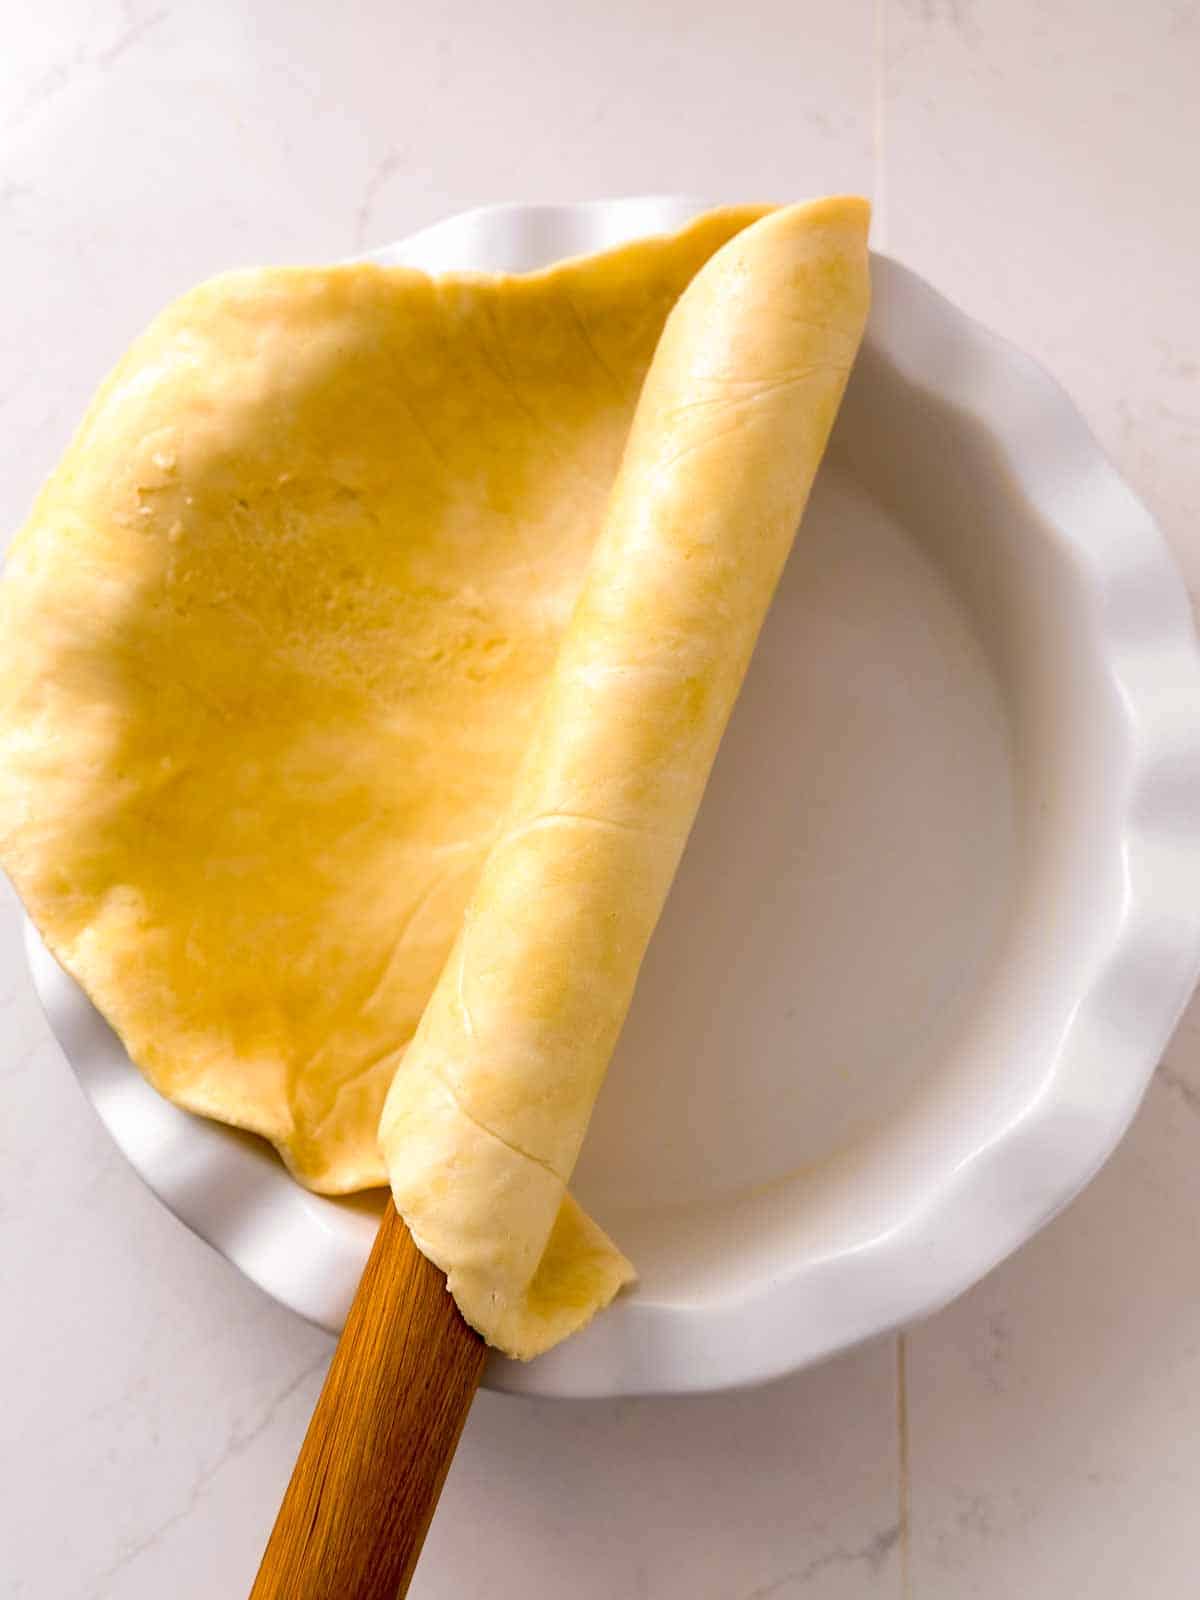
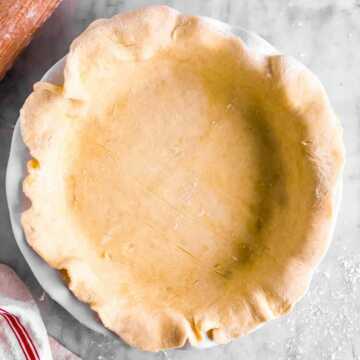
Unroll the pastry right on top of the pie dish, then carefully fit the bottom edges into the pie dish – make sure the pastry fits in properly at this point, it won’t be easy to adjust it once it is chilled.
For a double crust: Leave the overhang where it is and chill the pie crust right in the pie dish for at least another 30 minutes.
Roll the top crust into a circle the same way as described above, then chill it as well.
Once you have filled the pie, fit the chilled top pastry over the filling. Trim any overhang and use it to patch up any gaps. Lightly push the pie crust edges together, then crimp all around to seal.
For a single crust: Tuck the overhang between the pie dish and the pastry, to make a standing edge.
Crimp the pastry all around, then chill the pie crust right in the pie dish for at least another 30 minutes.
How to bake pie crust
Baking pie crust correctly is one of the final steps to ensure a flaky, crisp pastry case for your favorite homemade pie.
How to bake a filled pie crust
Baking a filled pie crust is easy and foolproof if you follow these steps:
1 Preheat the oven:
For the optimum result, preheat your oven well. Start it at least 15 minutes before you want to bake your pie.
2 Place a baking sheet in the oven:
Place a baking sheet in the oven as it preheats.
Placing your pie on the baking sheet that’s already blazing hot will flash-cook it from the bottom, reducing the risk of a soggy bottom crust.
Pro-Tip: Place your baking sheet in the lower half of your oven – pies need more heat from the bottom than the top.
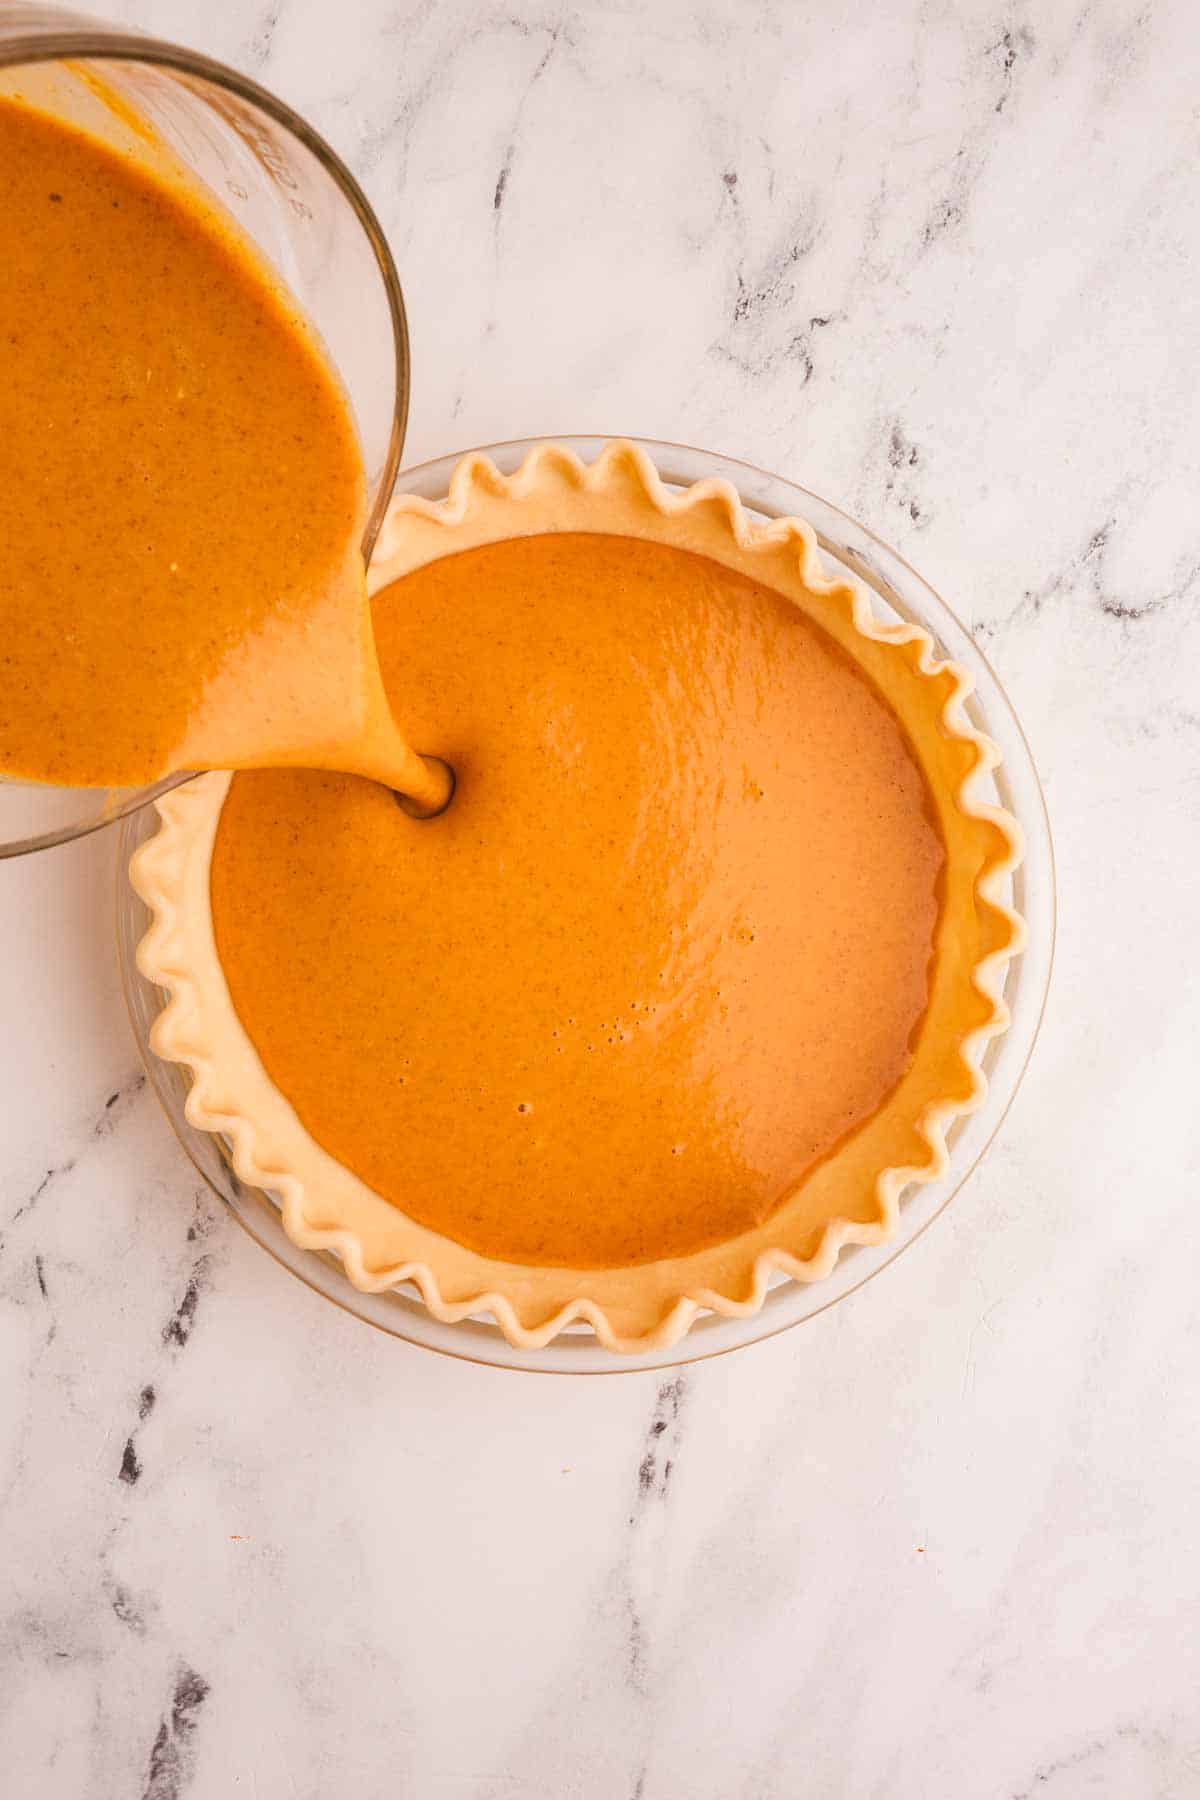
3 Fill your pie right before baking
Filling the pie right before baking will ensure your pastry is still cold from the fridge AND it will keep the filling from softening the bottom crust before it can begin baking.
Make sure you get your filled pie into the oven as soon as it is ready for the best homemade pie.
4 Bake your pie HOT at first
Most pie recipes will have you bake your pie at a hotter setting for the first 15 or so minutes.
This helps to quickly set the crust, yielding a flakier and crisper result.
Turn down the temperature as stated in your recipe after 10-15 minutes. Do not open the oven to do this!
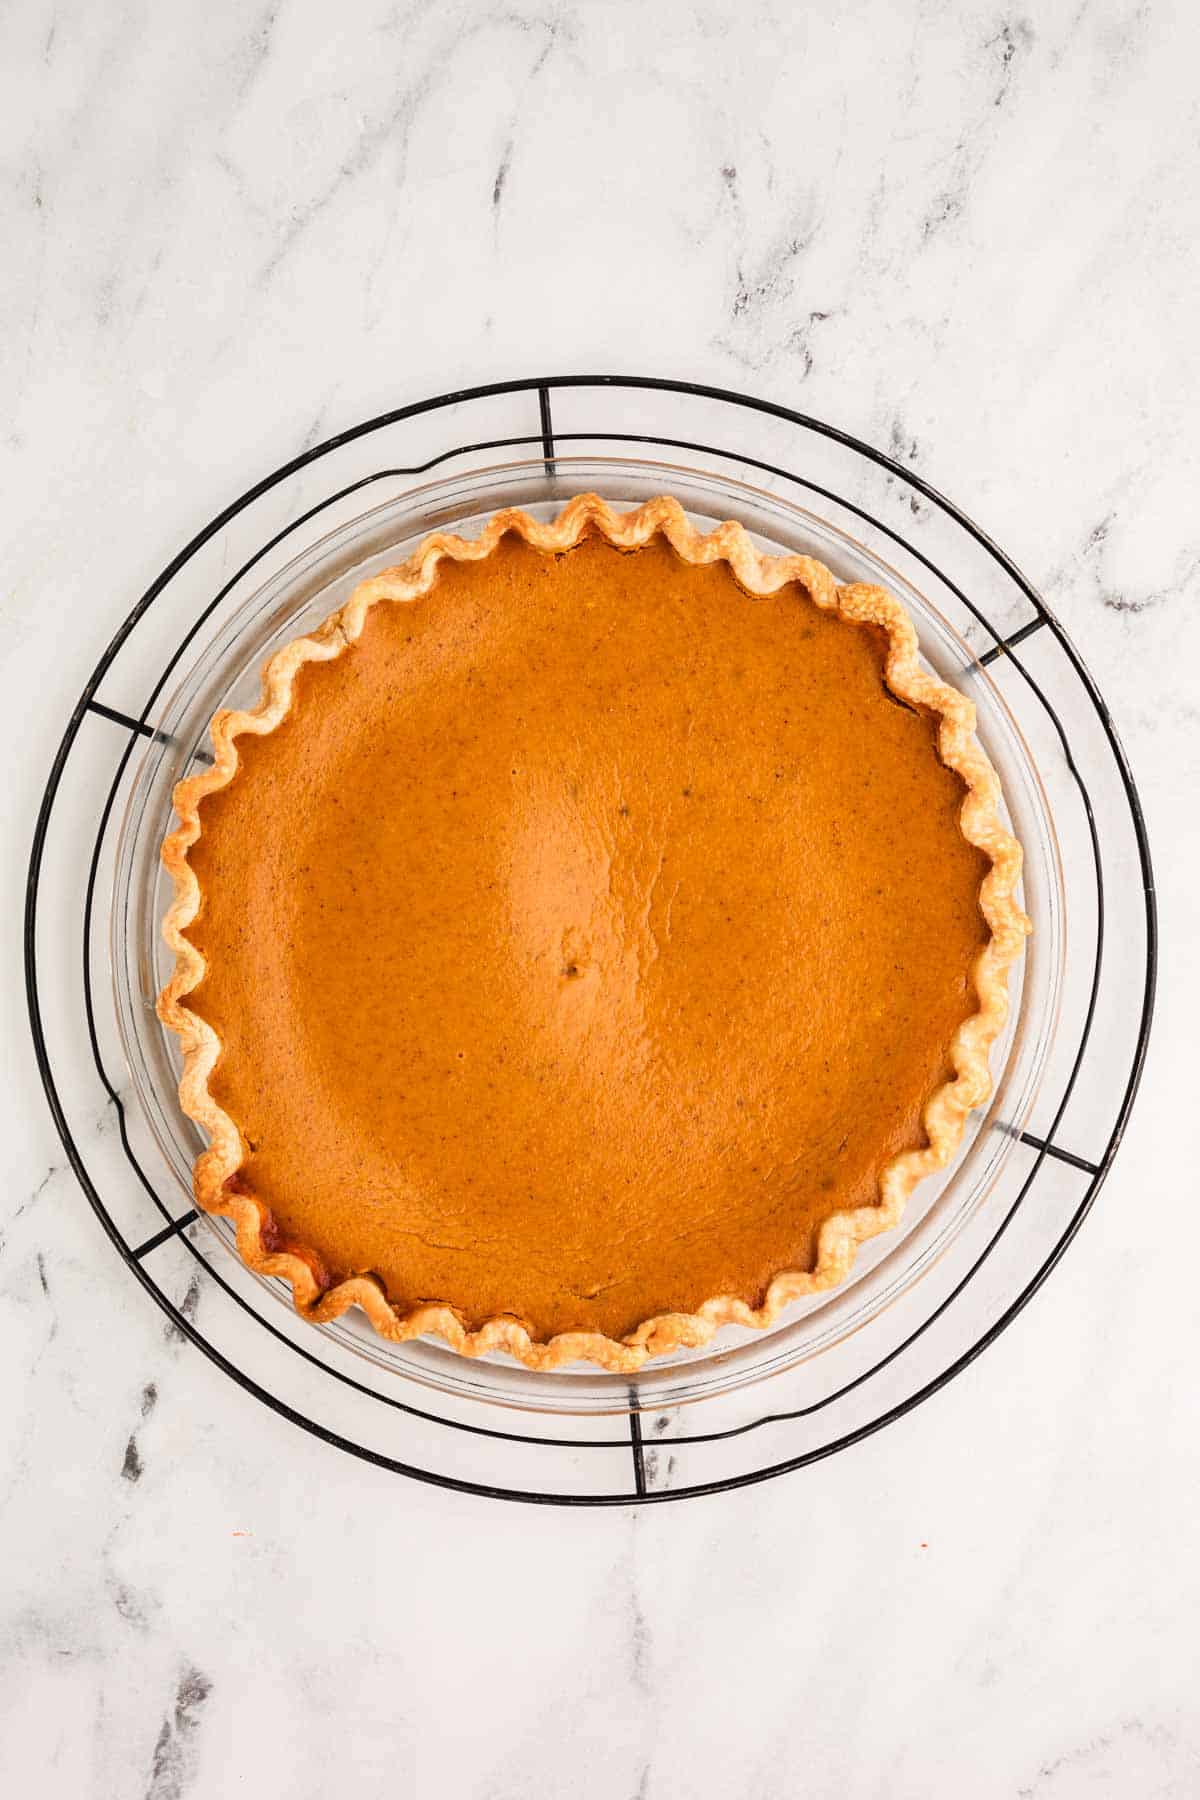
5 Watch your pie closely as it bakes
Baking pie isn’t a set-it-and-forget-it kind of deal. Start monitoring your pie after 20-30 minutes in the oven.
If the edges start getting too dark, add aluminum foil or a pie crust shield to prevent burned edges.
I always have to do this when I bake a pie, so don’t skip checking up on yours!
Once your pie is done, follow the instructions of your recipe. Some pies need to sit in a switched off oven for a while, while others can be removed immediately. Once it can be removed from the oven, always cool your pie in the dish on a wire rack to prevent a soggy crust!
Top tips for baking success
Tips for a flaky crust
- use the vinegar in the pie pastry as directed in the recipe above to help keep the gluten from developing
- use butter cold from the fridge and ice-cold water
- be patient when cutting the butter into the flour, you want to end up with a bowl full of crumbs for the best butter distribution
- do not knead the pastry (it’s not bread dough!), just push it together into a ball. Kneading would develop the gluten, which results in tough pie crust. Kneading would also disturb the distribution of the butter – you want flecks of butter in the pastry for maximum flakiness, not butter that’s evenly kneaded into the dough!
- do not skip or shorten the chilling time – it’s essential to have the butter in the pastry well-chilled for maximum flakiness
More recipe tips
- Pie crust shield to prevent burned edges: You can use a few shorter pieces of aluminum foil to cover the edges of your pie (sometimes I have to loosely cover the top with a large piece too, for the final 15 minutes in the oven).
- How to blind bake a pie crust: If your recipe says to blind bake your pie crust before filling it, here’s how to do that:
- follow the pie crust making steps outlined above, right up to fitting your pie crust into the pie dish and crimping the edges (instructions for a single crust).
- chill the pie crust well: chilling the pie crust very well is crucial for blind baking, or your crust could shrink. chill it in the pie dish for at least 30 minutes prior to baking
- fill the crust with pie weights: line the pie crust with parchment paper and fill it with pie weights.
- Pro-tip: Pie weights
- If you don’t have any pie weights: If you don’t have any pie weights, you can use uncooked chickpeas or beans instead – my mom sometimes used whole hazelnuts if she didn’t have anything else on hand!
- bake the pie crust in the preheated oven on a preheated baking sheet for 12-15 minutes, or until the edges are starting to brown.
- remove the pie crust from the oven and carefully lift out the parchment with the pie weights. return the crust to the oven and bake for another 7-9 minutes for a partially pre-baked pie crust, or 10-15 minutes for a fully baked crust.
- cool a fully baked crust on a wire rack before filling!
Recipe variations
- Crisco Pie Crust: If you prefer making a pie crust with shortening instead of butter, use all shortening/Crisco in place of the butter called for in my pies crust recipe above. Cut the flour back to 2 ¼ cup.
- Vegan Pie Crust: Follow the recipe as written, using solid coconut oil or vegan margarine in place of the butter.
- Whole Wheat Pie Crust: Cut the flour back to 2 cups, using whole wheat pastry flour OR white whole wheat flour. Follow the remaining recipe as written.
Decorative pie tops
The finishing touch to your pie? Making it look picture-perfect! It’s easier than you think with these tips:
Egg wash
For a beautifully golden, shiny look, brush your pie crust with an egg yolk that was beaten with 1 teaspoon of water right before baking.
Tip: What can you use in place of egg wash?
If you can’t use eggs, or don’t want to, here are some alternatives to make your pie crust look good after baking:
- Half-and-half or heavy cream can be used for a lightly shiny pie crust
Your pie looks even prettier if you lightly sprinkle the top with coarse sugar after egg washing it.
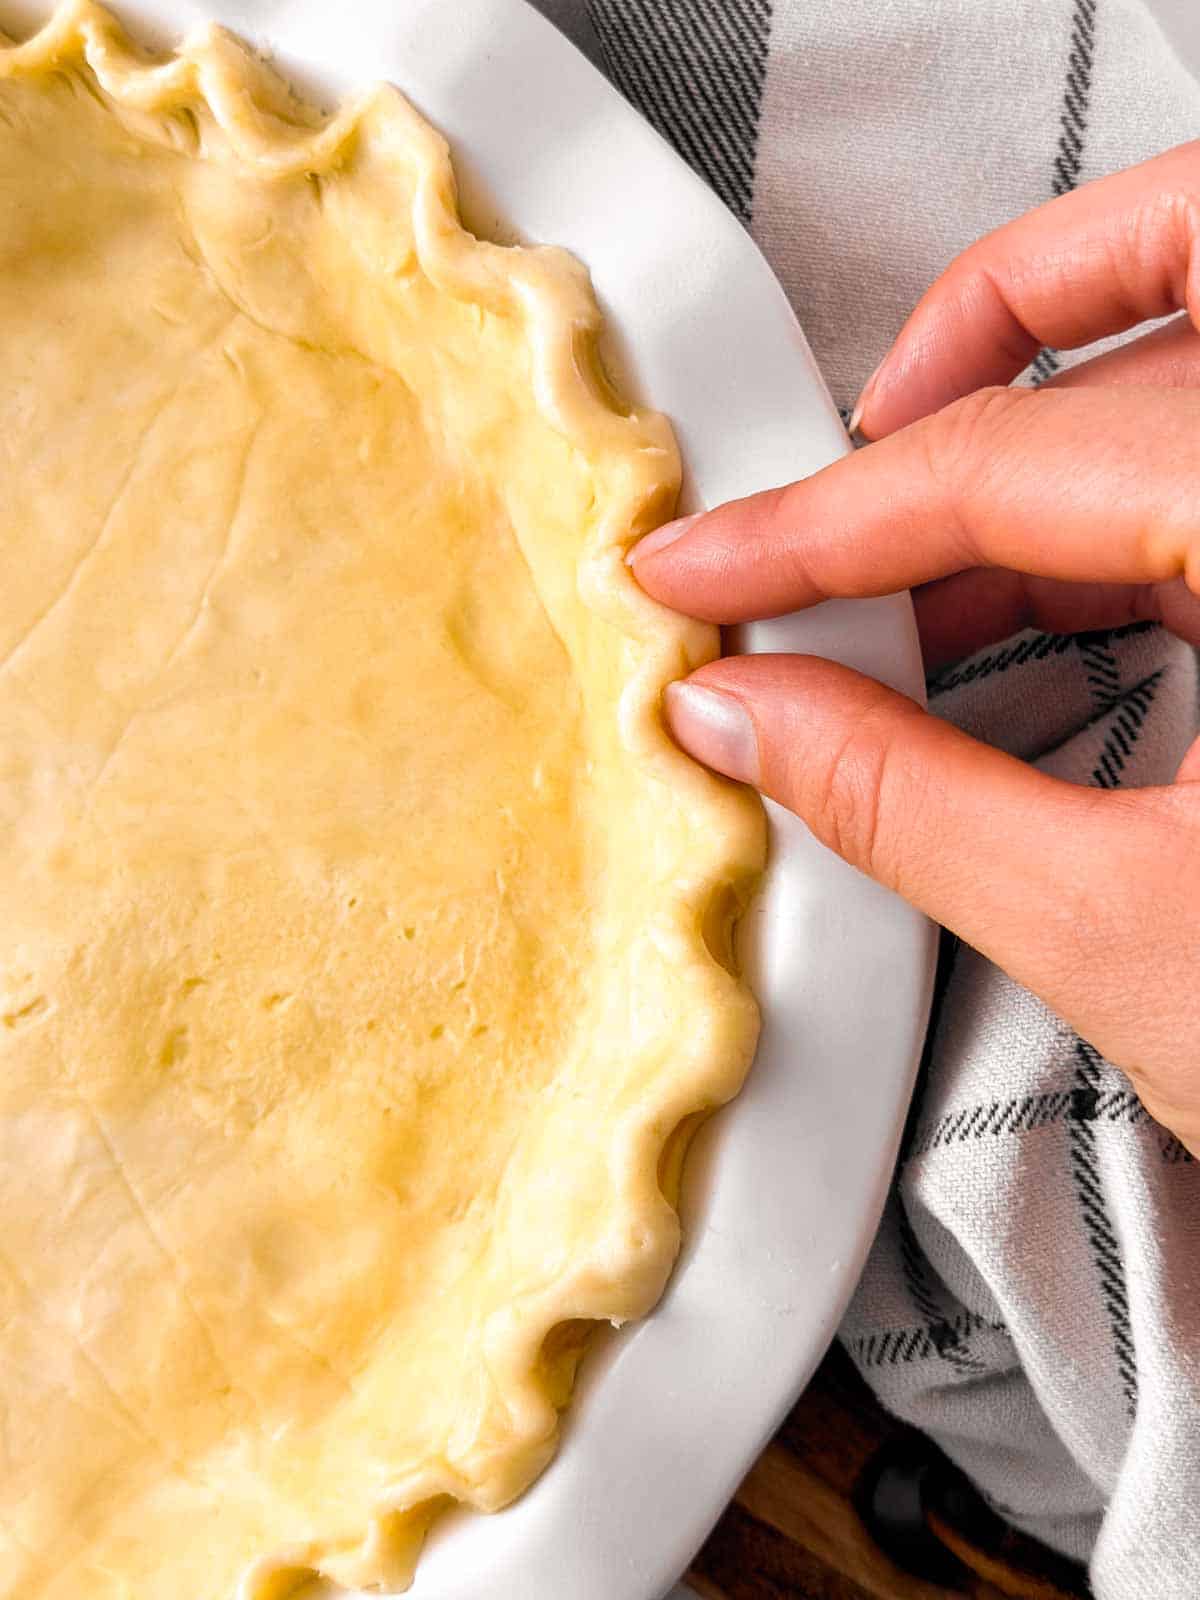
Fluted edges
Fluting pie crust is super simple once you get the hang of it.
- Place one finger against the outside edge of the pastry
- Use the thumb and index finger of your other hand to push the pastry around your finger
- Go all the way around the pie pastry to flute the entire crust
Beautiful top crusts
You can give your pies a different look by using different techniques for pie crust tops. The most popular are:
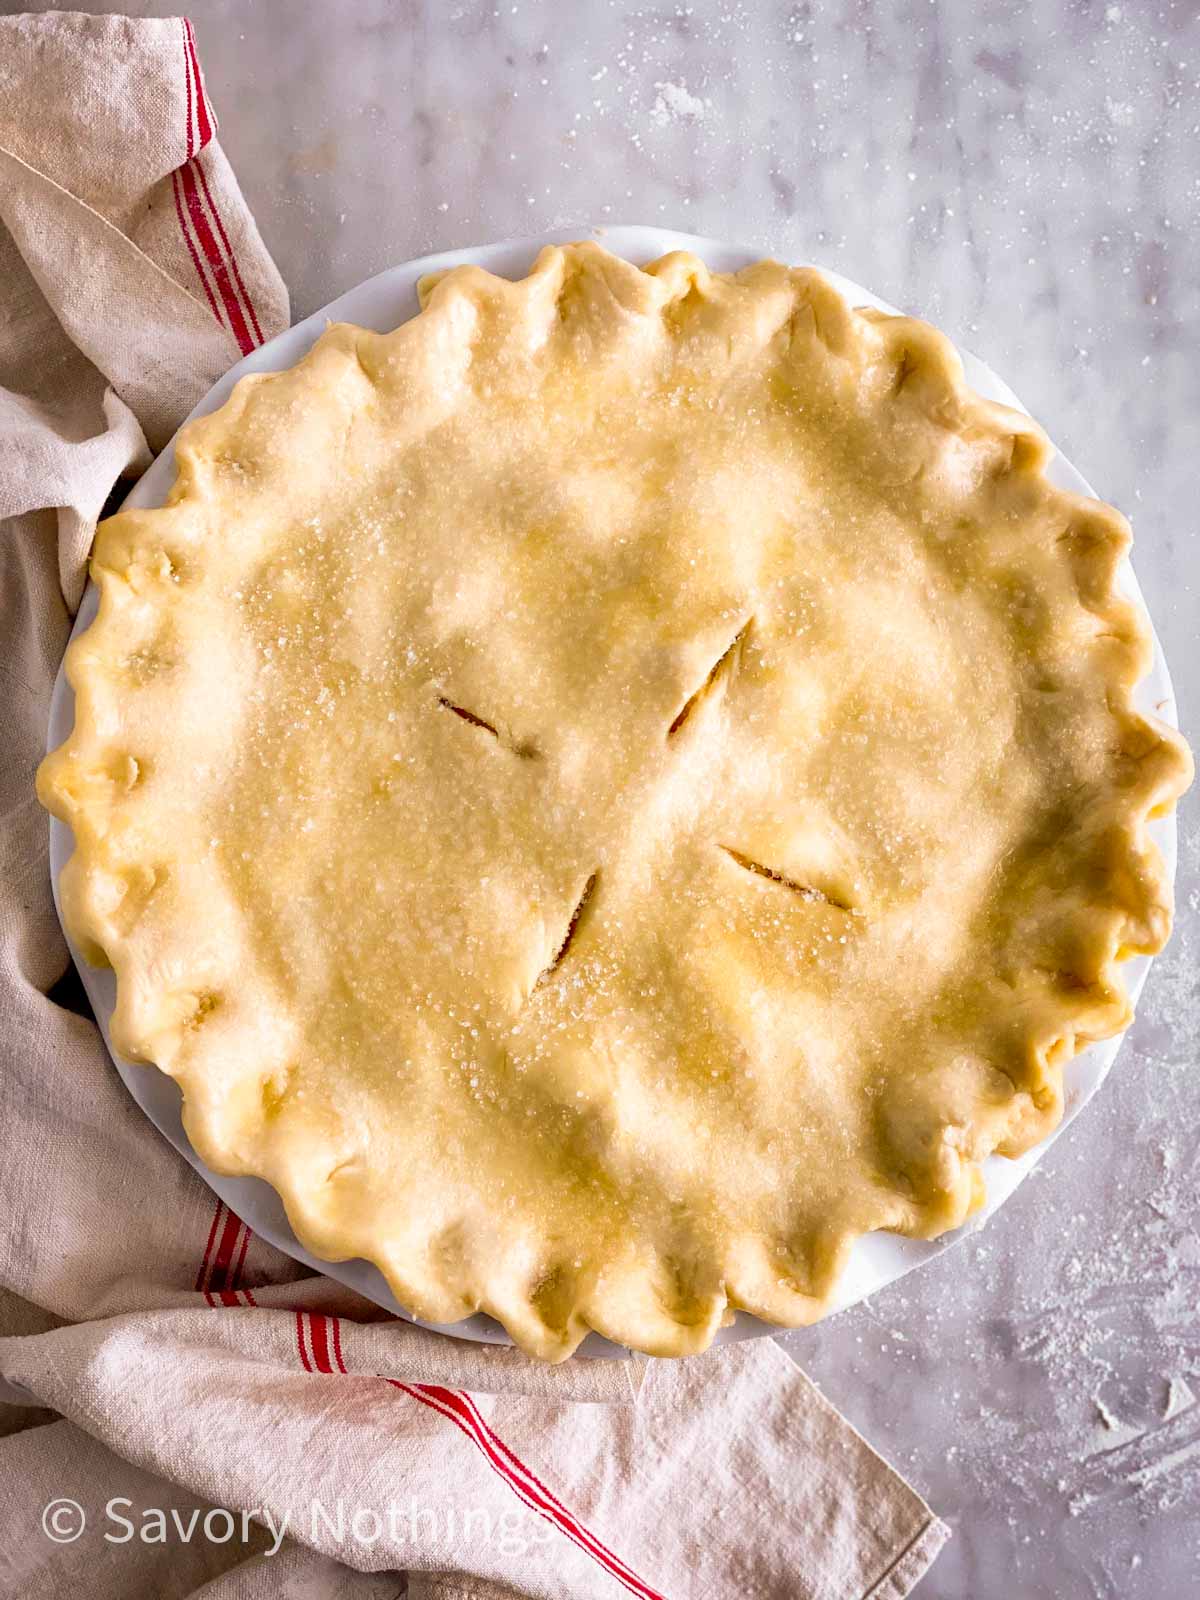
- Whole pie crust (eg classic apple pie) – be sure to cut some air vents into the top crust!
- Place the whole rolled out top crust over your filling.
- Press the edges together and crimp to seal.
- Be sure to cut some air vents into the top pastry!
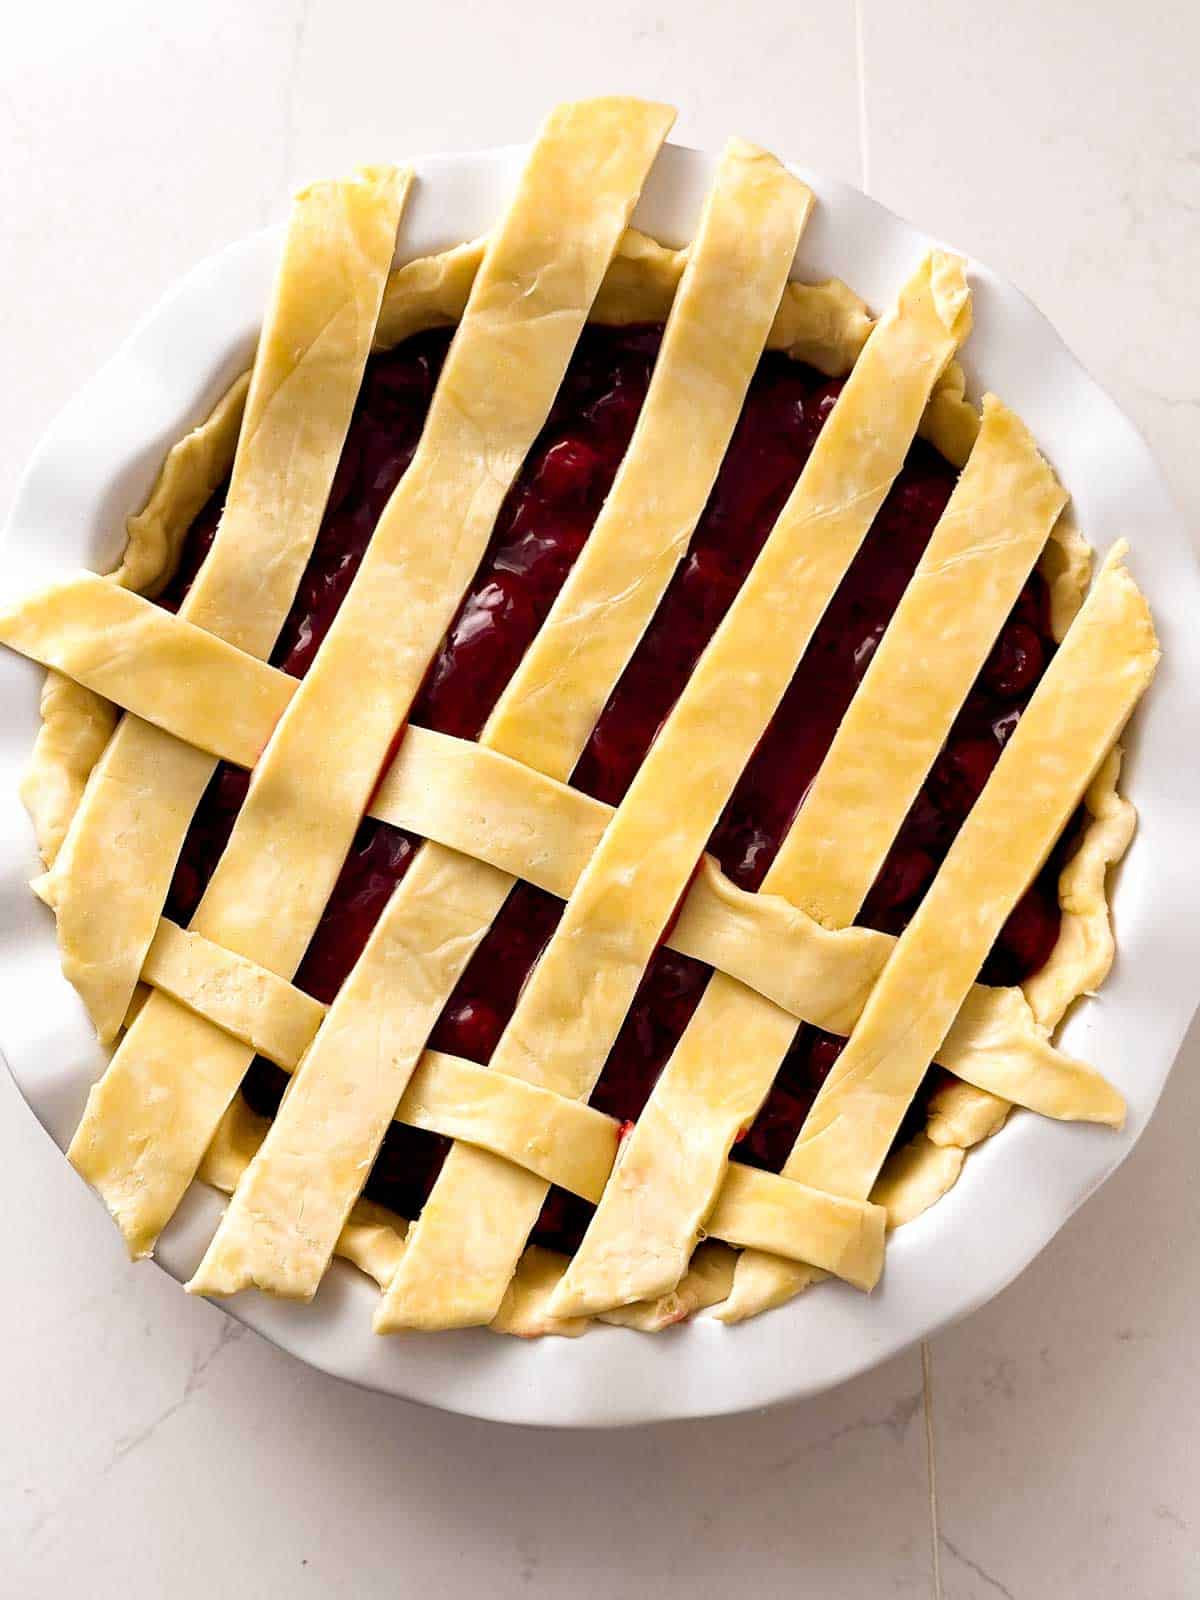
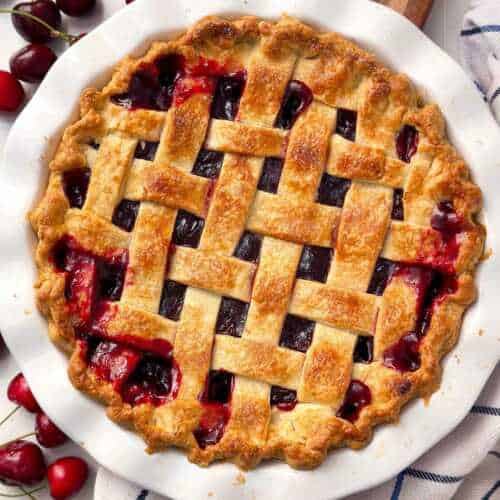
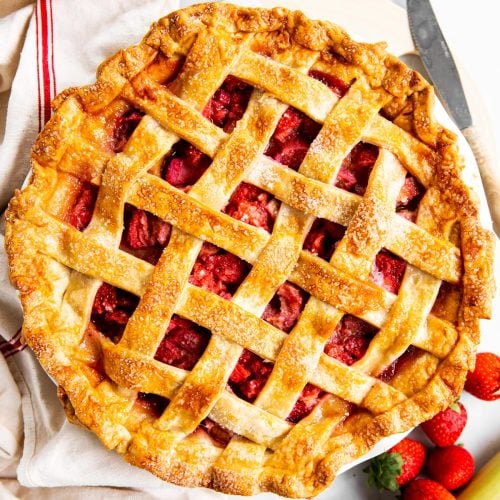
- Lattice pie crust: A lattice pie crust is great for colorful fillings, like cherry or strawberry-rhubarb pie.
- You can either make a simplified version by cutting the rolled out top crust into ½ inch wide strips, then simply arranging them into a criss-cross on top of each other, ½ inch apart. Make sure to trim the top and bottom crust evenly, to pinch the ends of the pastry strips to the bottom crust and to crimp the edge all around to seal it.
- OR make a classic lattice crust by weaving the strips of crust on top of the pie: Place half of your strips about ½ inch apart over the filling. Weave the remaining strips over and under the strips you placed on the pie. Trim the strips and pastry evenly all around the pie, then pinch together to make a standing edge and crimp.
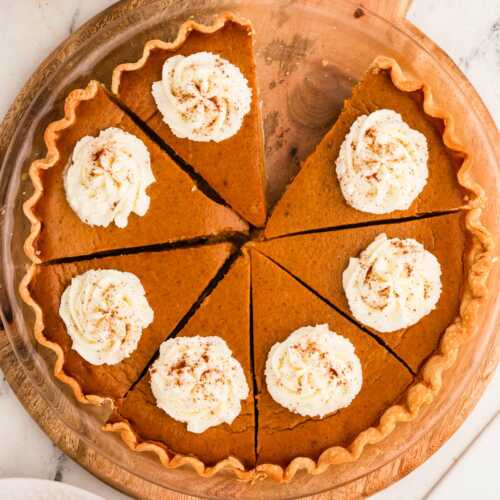
- Decorative cut-out pie crust: A “naked” pie like pumpkin pie looks even prettier with a few decorative cut-out shapes on top. I prefer baking the cut-outs separately, then placing them on top of the pie after baking.
- Crumble topping: A crumble topping is heavenly on top of fruit pies! We love it on apple pie or peach pie.
- Combine 1 cup flour, ½ cup sugar, 1 teaspoon cinnamon and ¼ teaspoon salt in a medium mixing bowl. Cut in ¼ – ⅓ cup cold butter until pea-sized crumbs form. Chill for 15-20 minutes, then top your fruit filling with the crumble and bake.
Storage tips
Freezer instructions
Unbaked and baked pie crust without filling can be frozen for up to two months.
- Wrap discs of unbaked pie pastry in plastic wrap, then in aluminum foil. Label with the name and use-by date before freezing. Defrost in the fridge overnight before rolling out and using like freshly made pastry.
- Baked pie crust can be frozen in the pie dish. Cool completely, then wrap in plastic foil first, then in aluminum foil. Label with the name and use-by date before freezing. Thaw unwrapped on a rack on the counter before using.
Freezing filled pies
Filled pies can be frozen up to 2 months.
- baked pies: cool completely, then wrap in plastic foil first, then in aluminum foil. Label with the name and use-by date before freezing. Bake at 300°F for 45-60 minutes to defrost and warm.
- unbaked pies: carefully wrap in plastic foil first, then in aluminum foil, making sure you’re not turning the pie or the filing will leak out. Label with the name and use-by date before freezing, making sure the pie is level in the freezer. Thaw in the fridge before baking as directed in the recipe.
Fruit pies can be frozen baked or raw. Most other pies need to be baked prior to freezing (eg pumpkin). Pies with a meringue, unbaked pastry cream/custard or whipped cream topping cannot be frozen.
Storing unbaked crust
Unbaked pie crust discs can be stored in the fridge tightly wrapped in foil up to 2 days.
Storing baked pies
Refrigerate custard-based pies once they have cooled to room temperature. Pies that contain no dairy or eggs in the filling can be stored on the counter (cover with a clean tea towel to keep flies away!) for up to 2 days.
Troubleshooting
Adding too much water to pie crust develops the gluten too much, yielding a tough pie crust.
Crumbly pie crust that falls apart when rolling is most likely too dry.
Add an extra tablespoon or two of water to the pastry if it feels too dry and crumbly when you’re pushing it together into a dough ball.
Make sure to measure your flour correctly (spoon and level, don’t scoop – or use a kitchen scale) to avoid adding too much flour to the recipe.
To prevent a soggy pie crust, pay close attention to these steps in the recipe:
– chill the pie crust as directed
– do not line the pie dish with parchment paper; instead butter or grease it well before adding the pastry
– make sure you take the pie crust out of the fridge and fill it RIGHT before baking
– start the pie at a hot temperature on a preheated baking sheet
– bake the pie in the lower half of your oven
– cool the pie in the dish on a cooling rack
I hope you’re now confident you know how to make pie crust from scratch!
Favorite pie recipes

PS If you try this recipe, please leave a review in the comment section and add a star rating in the recipe card – I appreciate your feedback! Follow along on Pinterest, Facebook or Instagram.
Easy Homemade Pie Crust
Recipe details
Ingredients
- 2 ½ cups all-purpose flour
- ½ teaspoon salt
- ¾ cup cold unsalted butter cubed
- 1 teaspoon apple cider vinegar
- ½ cup ice-cold water
Instructions
- Blend dry ingredients and butter: Mix flour and salt in a large mixing bowl. Add the butter and blend using pastry blenders or your fingers until you have a bowl filled with crumbs.
- Make pastry: Mix vinegar and water in a measuring jug. Slowly pour over dry ingredients and mix just until it comes together into a dough. Push into a ball. Do not knead or overwork! Divide into 2 disks, wrap in foil and chill for 1 hour.
- Roll out crust: Place 1 disk of the pastry between 2 sheets of baking parchment. Roll into a circle slightly larger than a 9 inch pie dish. Fit into the lightly greased pie dish and place back into the fridge to chill. For a double crust pie, roll out top crust as directed for bottom crust, and chill between the prachment sheets until ready to use. Use the crust with your favorite pie filling.
Notes
- 1 ½ cups PLUS 2 tablespoons all-purpose flour
- generous ¼ teaspoon salt
- 8 tablespoons cold unsalted butter cubed
- ¾ teaspoon apple cider vinegar
- 5 tablespoons ice-cold water
- 1 ¼ cups all-purpose flour
- ¼ teaspoon salt
- 6 tablespoons cold unsalted butter cubed
- ½ teaspoon apple cider vinegar
- ¼ cup ice-cold water
Nutrition
More recipe information
Recipe first published on 10/01/2019. Updated with new photos and better text on 11/26/2024. The recipe has stayed the same.


Mary Bailey. says
This is the way I now make pie crusts- with vinegar. It’s better than my mother’s Criso crust. Recently, I purchased a beautiful, ceramic quiche pan. I’m worried that it will not survive the trip from a cold refrigerator to a hot oven. Have you used a ceramic pan for this technique?
Nora says
Mary, I agree, vinegar is such a great addition to pie crust. Glad it’s working out well for you!
Good point about the pan. I will need to update my post to add this question. I have done it, BUT I am always very scared of it bursting. It’s not my own idea to bake pie this way, I learned it years and years ago from Sam Sifton’s Thanksgiving cookbook. So I believe people do make pie this way, but it’s definitely safest in a metal pan. I would not attempt with a special-to-you pan. I will do some research and update my post! Thanks for bringing this up.
Pamela Stanley says
Hi Nora,
I’ve gone over your pie crust recipe, plus your apple pie filling recipe as well, and no where that I can see says anything about the oven temperature for baking the pie. Can you please in the recipe card section list the oven temperature, and bake time when making the
fresh apple pie. Thank you!
Nora says
Hi Pamela, sorry you couldn’t find the temperature. Good point, I never thought about this. The baking temperature can be found in the apple pie recipe. Hope this helps!
Christina Middleton says
Hello there, could you possibly put weights of ingredients in you recipes?
Here in England we don’t use cups for amounts of flour etc, we use weighed amounts of flour sugar butter etc. BTW I love love love your recipes ?
Nora says
Christina, absolutely:
312g flour
1/2 teaspoon salt
165g cold unsalted butter
1 teaspoon apple cider vinegar
120ml ice cold water
For rolling out, a 9-inch dish is about 23cm in diameter. Hope this helps!
Anna Spooner says
This is the most amazing, comprehensive pie crust tutorial I have ever seen. It’s a HUGE blessing for a newbie to scratch cooking like me!
I can’t thank you enough – can’t wait to try it!!!
Amanda R says
Made a triple batch last week and froze, defrosted overnight in the fridge and used this morning with my granny’s Apple pie filling, 2x Libby’s pumpkin pie filling recipe, my famous burbon pecan and with the rest my nieces made pie crust chips. This is the ONLY pie crust recipe I’ll use from now on!! All pies baked perfectly, none shrunk, and the pie chips are so flaky we have already eaten all lol
Nora Rusev says
so glad to hear this, Amanda! And now I’m craving pie crust chips 😀
Emma says
Spending thanksgiving in the mountains and someone forgot to bring the frozen pie shells, that someone bring me!! Sue me but I normally never make my pies from scratch, so I used this recipe With canned pie filling bc it seemed the easiest. Pies look like storebought crust lol, so I guess it worked out great!
Nora Rusev says
Haha, glad you managed to salvage Thanksgiving, Emma 😀
Brenda says
Tried this recipe last weekend to test for thanksgiving and it was SO easy and turned out perfectly flaky without leaking any butter. I had a major pie fail last year, THANK YOU for this recipe!!!!
Nora Rusev says
So glad the pie crust worked out this well for you, Brenda!