

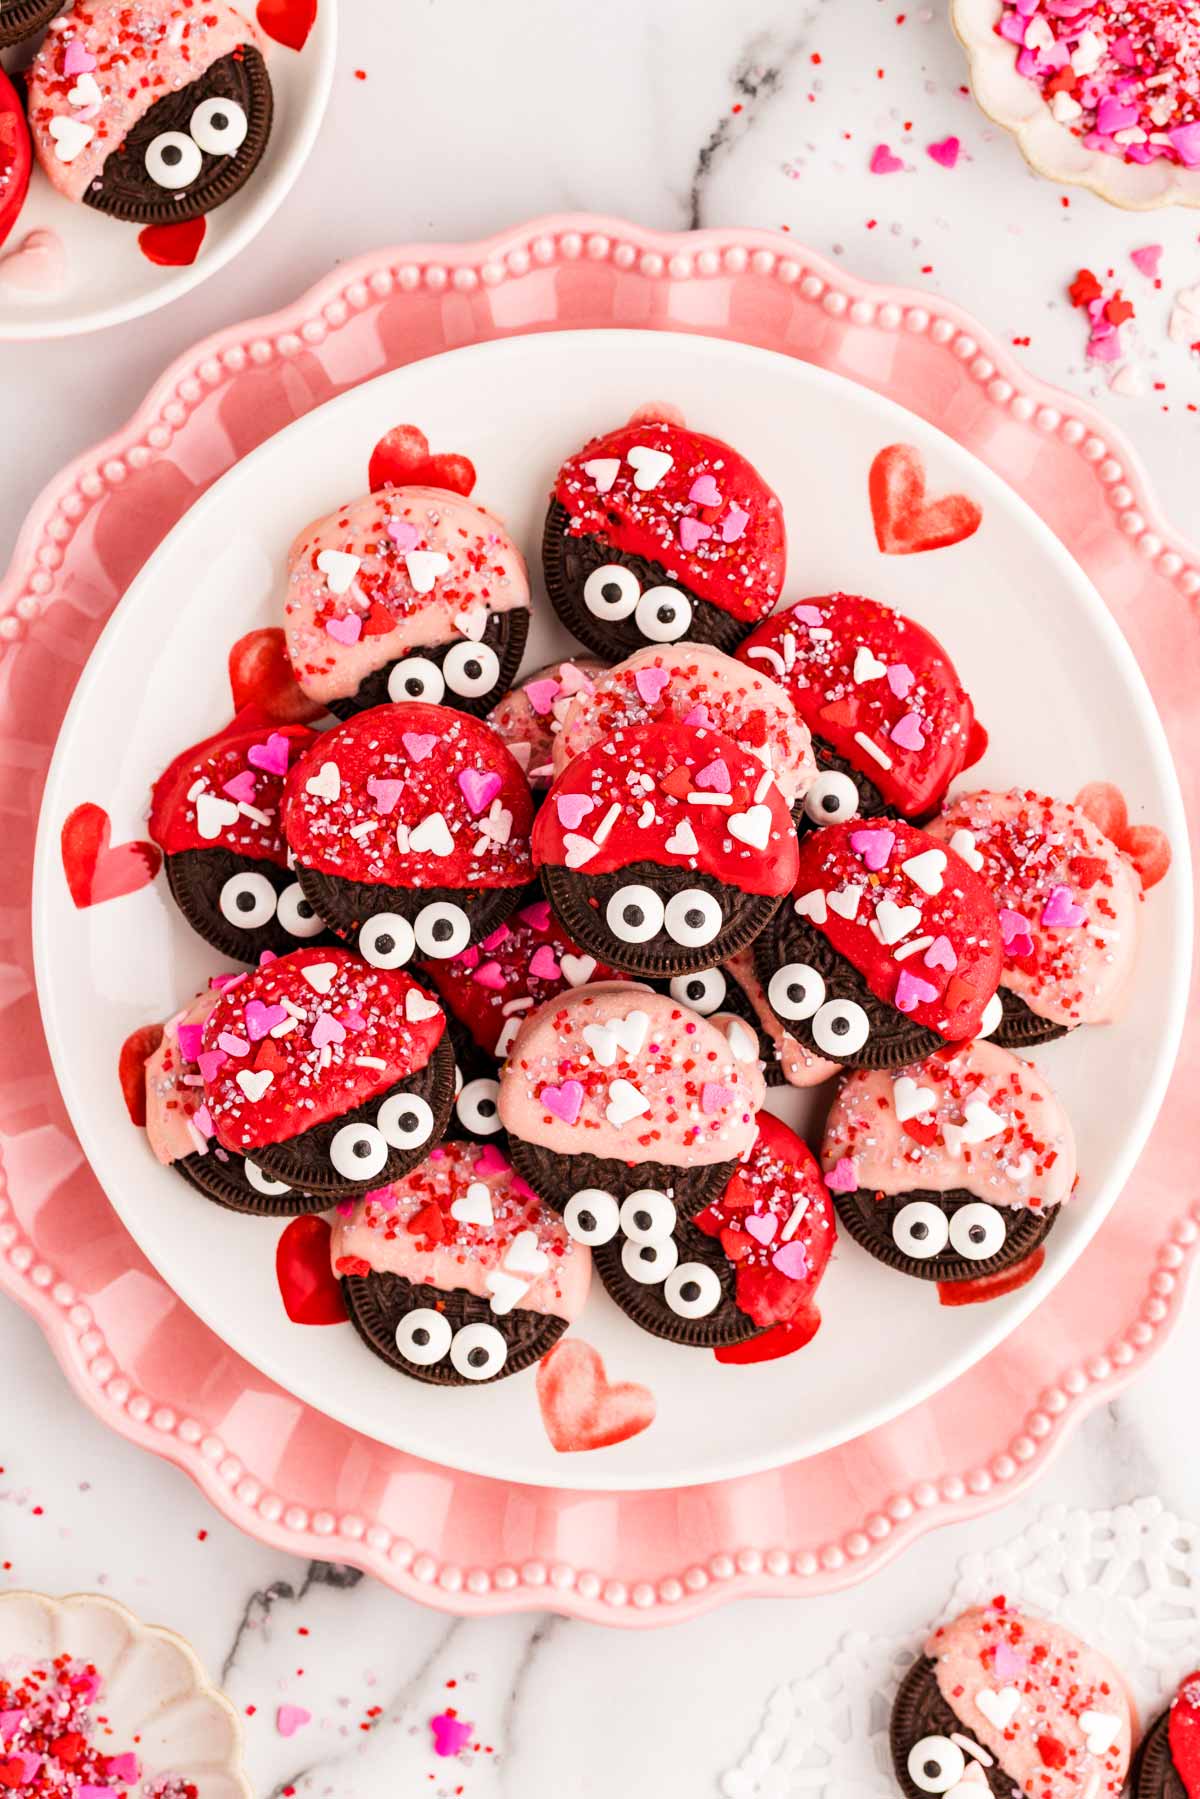
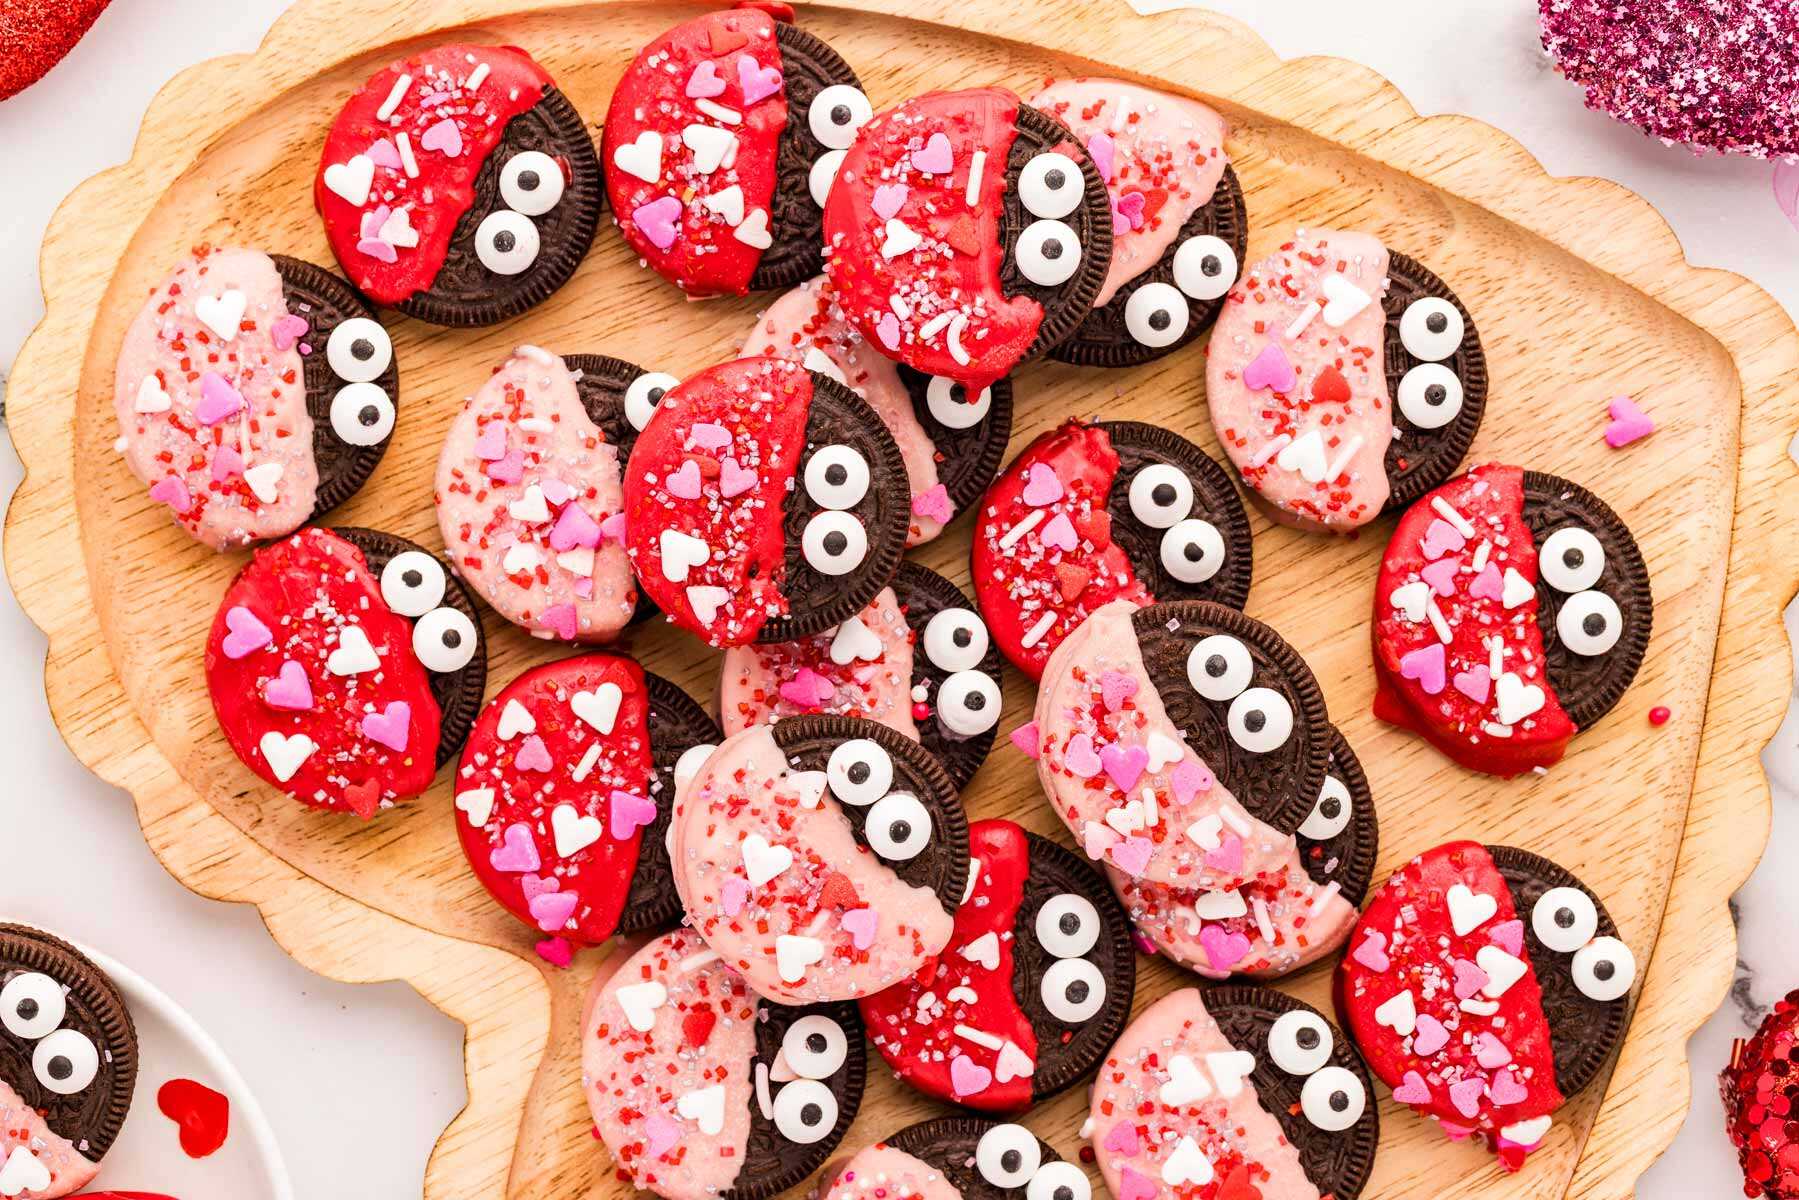
Need a last-minute Valentine’s Day snack that doesn’t involve baking? These Love Bug Oreos are the ultimate busy mom hack for a festive, adorable treat!
What makes this recipe great
Valentine’s Day is right around the corner, and if you’re anything like me, your “to-do” list is already a mile long. Between the school card exchange and the neighborhood party, I always want to bring something that looks like I spent hours on it, without actually spending hours on it. These Love Bug Oreos are my secret weapon. They are part craft, part snack, and 100% cute!
- Fast No-Bake Magic: You don’t even have to turn on the oven, which is a major win during a busy week. Also, these are SO quick to make, and easy enough to always look adorable.
- Total Crowd-Pleaser: I have yet to find a kid (or a grown-up) who can resist a chocolate-covered Oreo.
- The “Semi-Homemade” Flex: It’s just enough effort to feel special, but simple enough that the kids can actually help you decorate.
- Customizable: You can go classic red, bright pink, or even a mix to match whatever Valentine’s vibe you’re feeling this year.
Let’s see how we make this:
Ingredients we’re going to use
This is about swaps and notes – jump to the ingredient list for the measurements etc.
The Oreos: Grab a standard ~14-oz package, or get the family-sized 18oz. Just a heads-up: Oreos can be a little brittle, so expect a few to break in the package. I usually plan on getting about 24-26 “perfect” bugs out of a 14-oz box once you account for the ones that don’t make the cut.
The Candy Melts: Red or pink are the classics. If you’re feeling ambitious, do both! If you want to be fancy and color expensive white chocolate yourself, make sure to use a gel food color and NOT a water-based food color. Else, you chocolate will completely seize up.
The Eyes: Look for the ones where the pupils aren’t the tiniest dots. The bigger pupils give them that wide-eyed, adorable “love bug” look that makes them stand out.

Recipe walkthrough
This is about tips and hints, and the process photos if you need a visual guide. Jump to the instructions for the precise steps.
1: Melt the candy coating.
Make sure you melt them slowly — if they get too hot, they can get “clumpy,” and we want a smooth finish for our bugs.

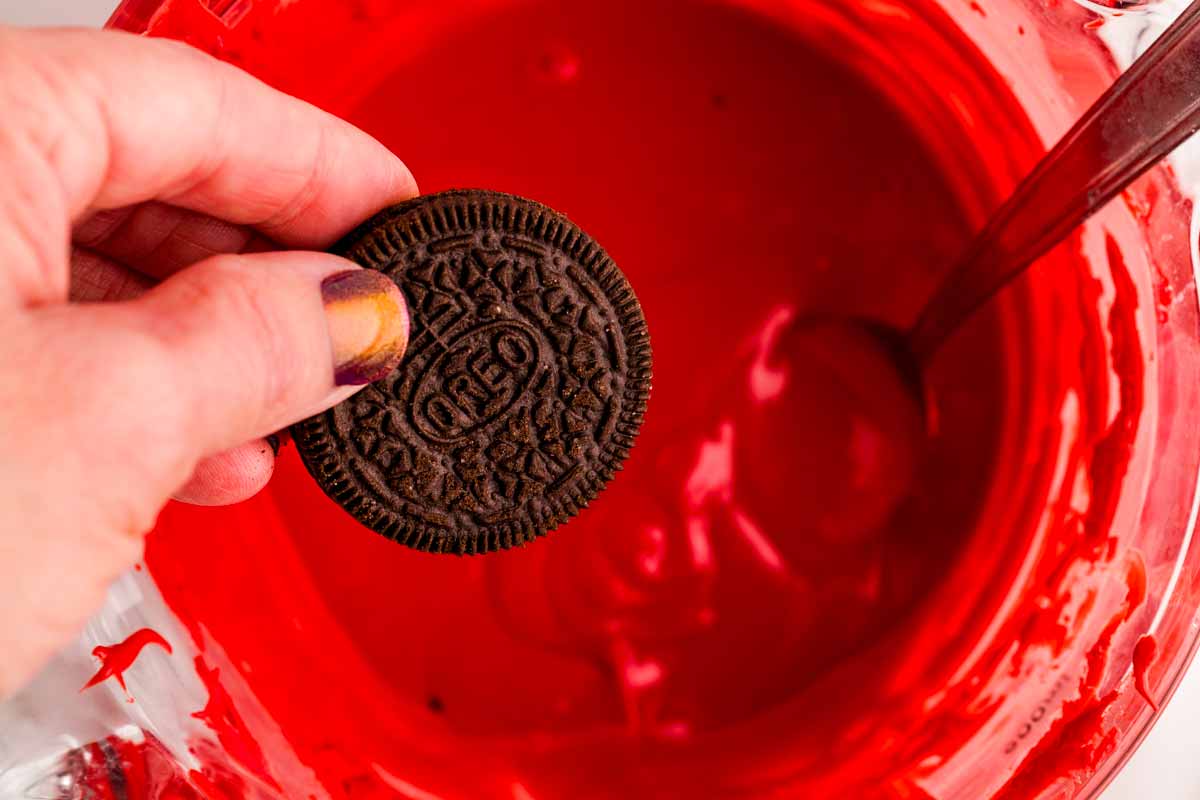
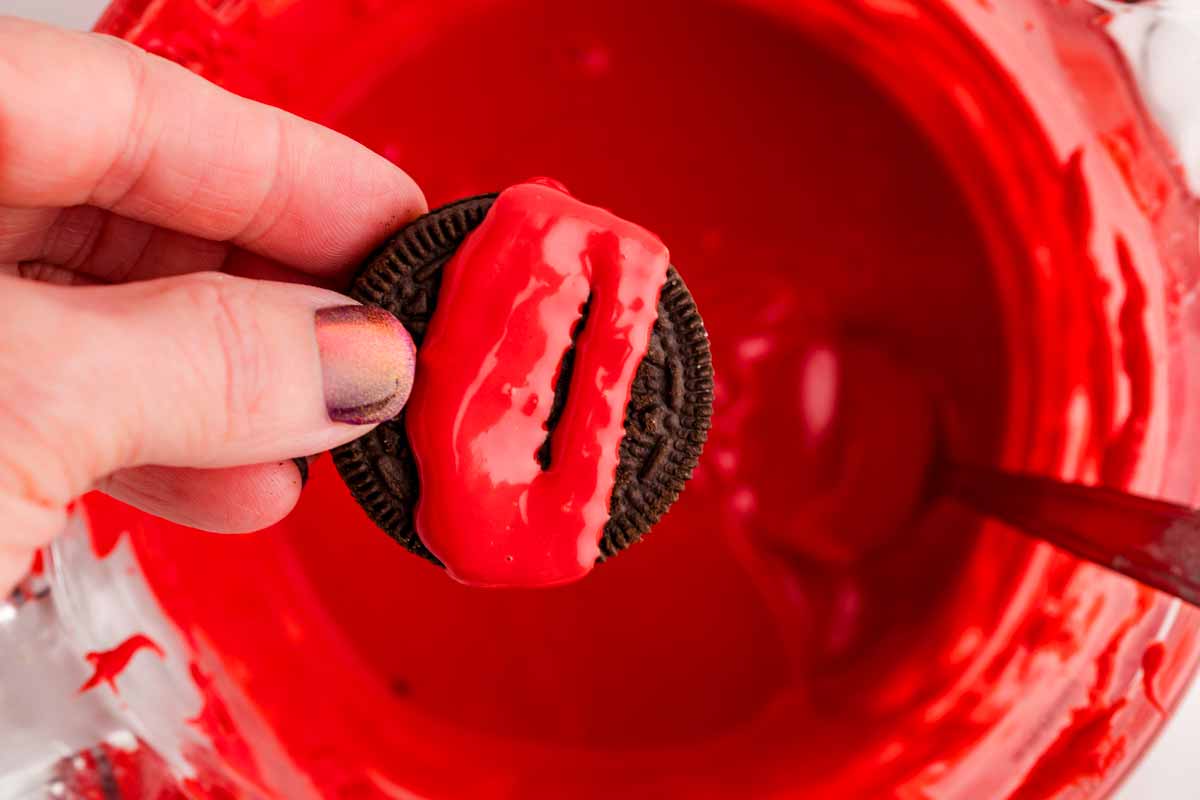
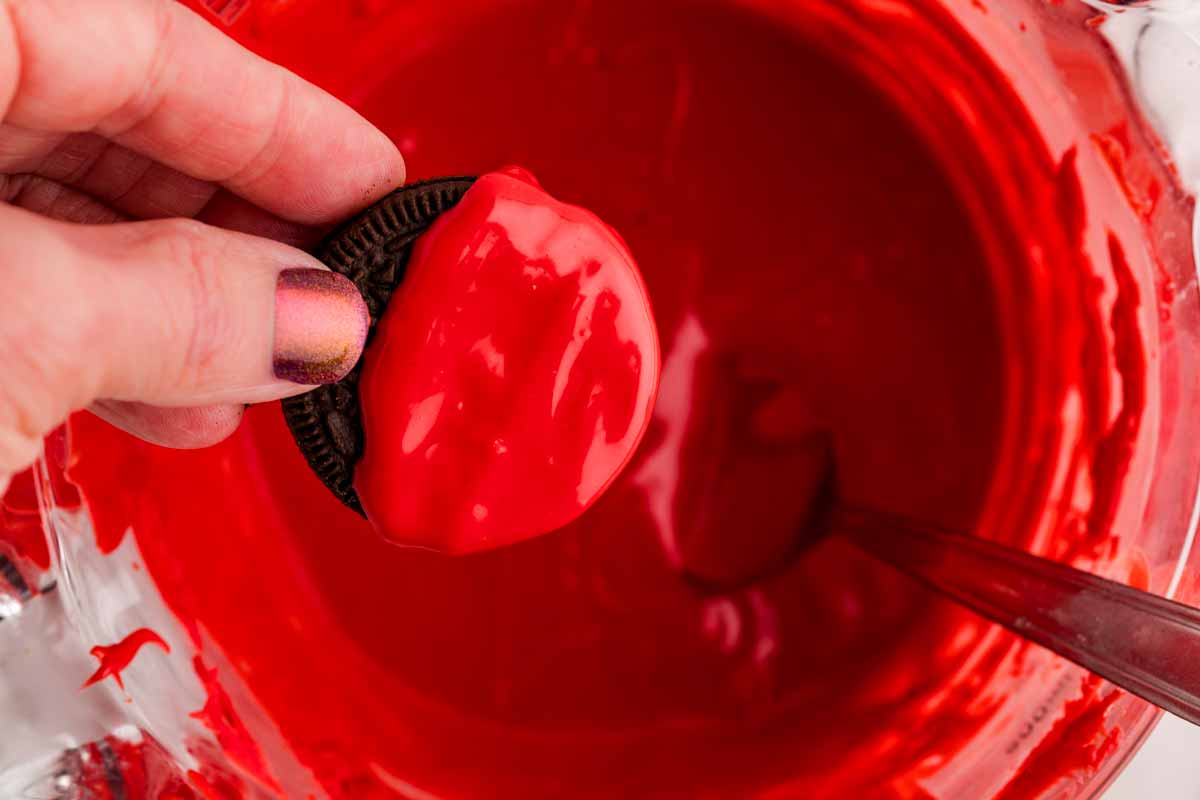
2: The dipping secret.
Instead of a full dunk, I like to hold the Oreo over the bowl and spoon the candy melt over about ⅔ of the cookie.
This keeps Oreo crumbs from ruining your bowl of melted chocolate and prevents that huge “puddle” of chocolate from forming when you set them down to dry.
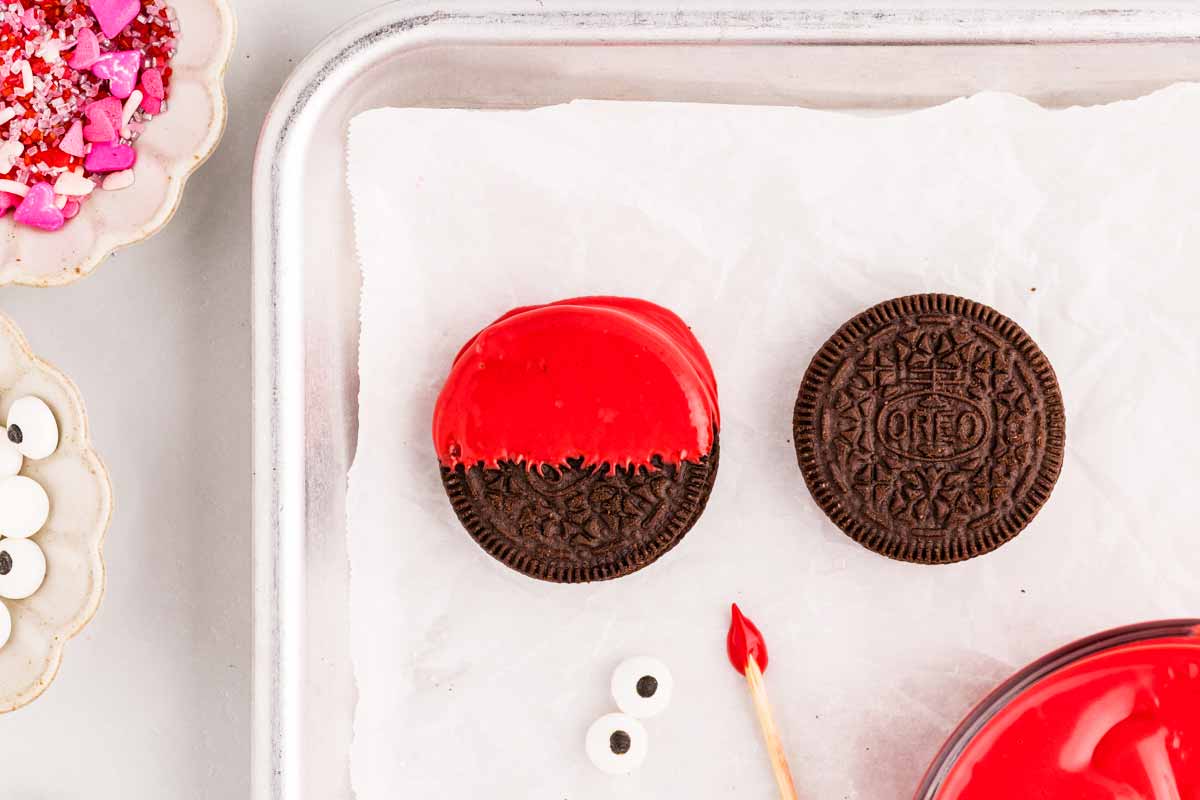
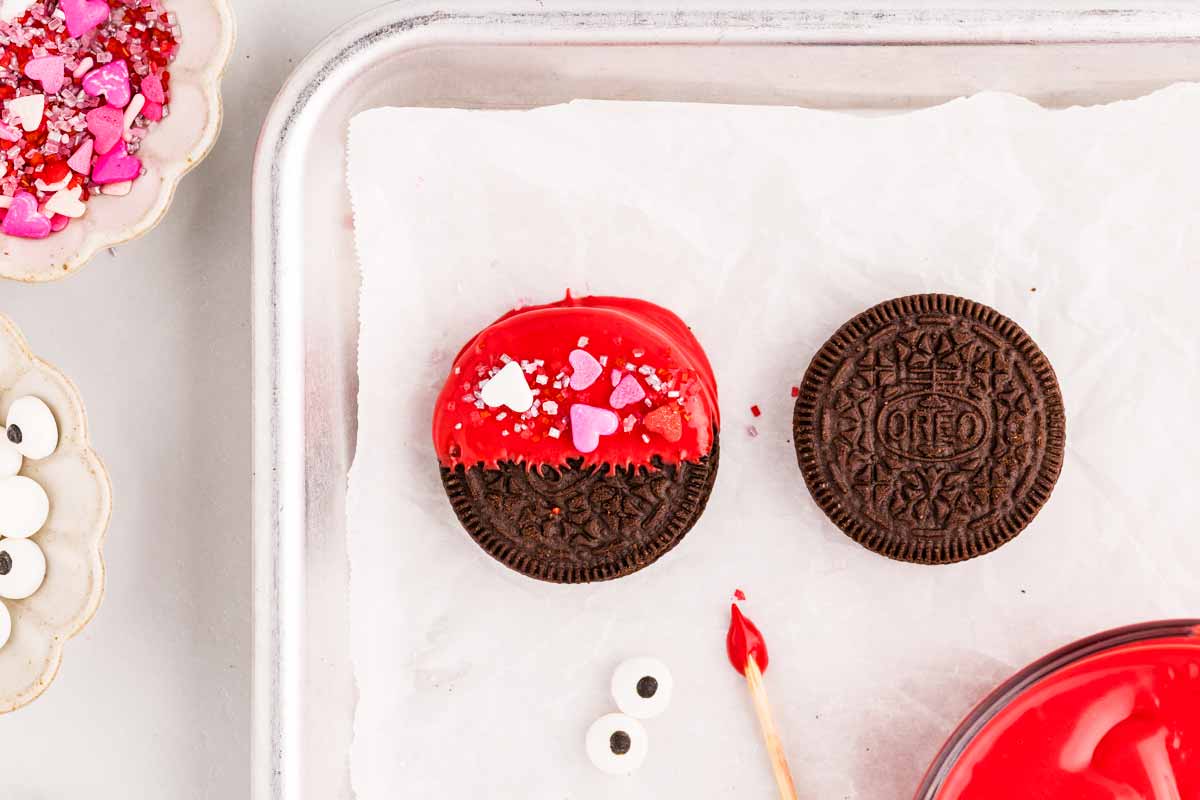
3: Timing the sprinkles.
You have to be quick! Sprinkle your hearts or colored sugar on the wet candy melt immediately. Once it starts to set, nothing will stick, and you’ll have “naked” bugs.
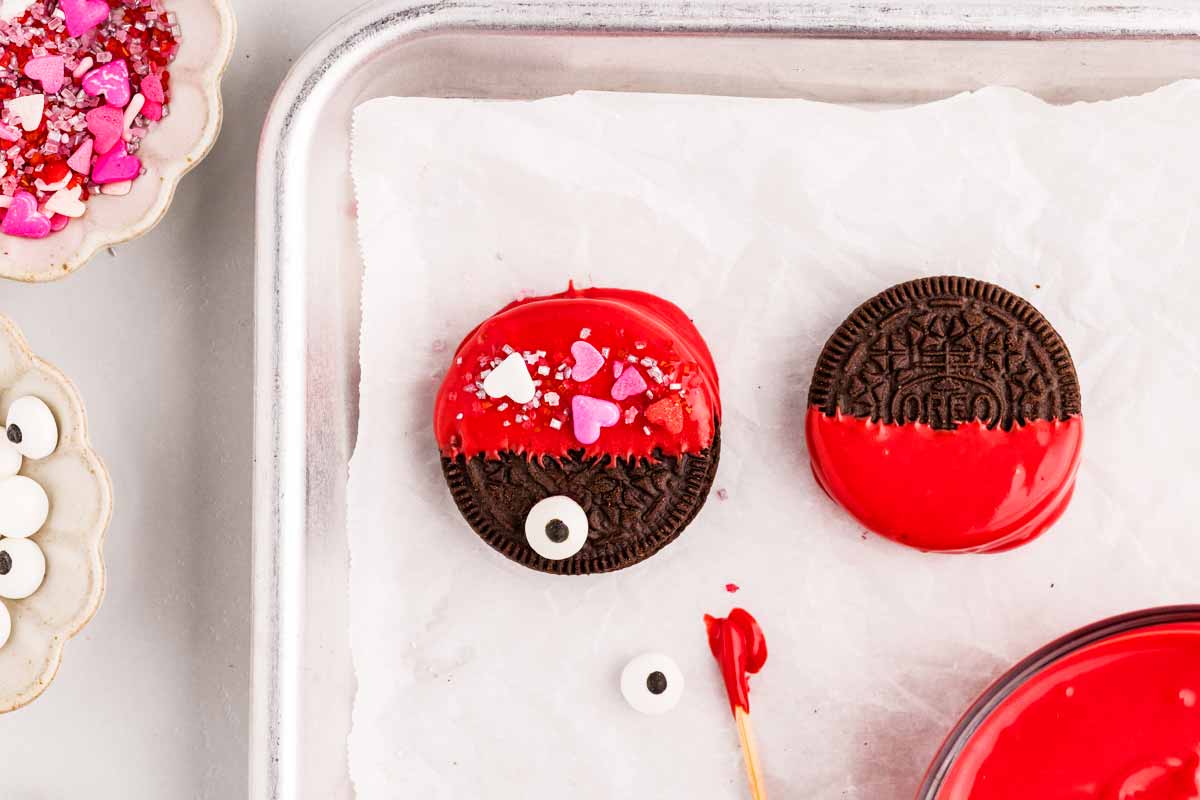
4: Applying the Eyes.
Once the “bodies” are starting to set a little, it’s time for the faces. Use a toothpick to dab a tiny bit of candy melt onto the back of the eye.
If you’re using red melts, be extra careful — too much and your bugs will look like they’ve been up all night with a colicky baby!
5: The waiting game.
Let them set at room temperature until they’re solid. If you try to move them too early, you’ll leave fingerprints in the shiny coating!

Tl; dr: All the important stuff at a glance
If you read nothing else in this post, this is what you need to know:
- Timing: Plan for 20 minutes of prep and 30 minutes of setting time.
- Spoon, don’t dip: Spoon the coating over the cookie to avoid crumbs in your bowl.
- Go light on the “glue”: Use a toothpick for the eyes so they don’t look bloodshot.
- Store smart: Keep them at room temperature or in the fridge for up to 3 days.
- Quick recipe rundown: Melt candy melts. Working one at a time, coat ⅔ of the Oreo in candy melt. Immediately add sprinkles. Attach eyes and allow to set.
FAQs
Can I make these a few days early?
Absolutely. These stay fresh in an airtight container for about 3 days. I actually prefer making them in the days leading up to Valentine’s Day with the kids, because they get so excited and it creates such great anticipation
Why is my candy melt so thick and hard to spread?
Sometimes candy melts can be stubborn. If yours feels like paste, stir in a tiny teaspoon of coconut oil or shortening. It’ll thin it out and give it a nice, professional shine.
Are these kid-friendly to make?
Yes, absolutely, if you manage expectations. When my kids were very little, I would just let them add sprinkles and do the rest by myself. An elementary kid can definitely handle some candy melt spreading, and by middle school they mostly need supervision and an adult to take care of the melting. I also pour the candy melts into a fresh, cool bowl so nobody touches anything super hot!
Can I use white chocolate instead?
You can! Just use gel food coloring to get that red or pink hue. Avoid liquid water-based food coloring, though, or your chocolate will “seize” and turn into a grainy mess – which is what I learned when I tried this:

If you’re on a roll with the extra-easy Valentine’s treats, you’ll love the Cupid’s Crunch and my Valentine’s Day Cake Mix Cookies!

Love Bug Oreos
Ingredients
- 12 ounces candy melts (red or pink, or offer both for more variation!)
- 1 (~14-oz to 18-oz) package Oreo cookies ((this will give you ~33 to ~45 cookies, some will be broken or break while decorating, so you will probably end up with ~25-35 ladybugs; depending on the size Oreo package you get))
- Valentine’s day sprinkles and/or colored sugar
- small candy eyes (you need around 50 to 70 pieces; a ~1oz package is plenty, I prefer to use eyes where the pupils are not too tiny so they look cuter)
Instructions
- Prep: Place a piece of nonstick way paper on a baking sheet or large plate. Melt the candy melts according to package directions.12 ounces candy melts
- Coat: Working one at a time coat ⅔ of each cookie with candy melt. (Note 1)1 (~14-oz to 18-oz) package Oreo cookies
- Decorate: Immediately sprinkle with your sprinkles and decorations.Valentine’s day sprinkles and/or colored sugar
- Add eyes: Attach two candy eyes to the uncoated part of each Oreo. (Note 2)small candy eyes
- Set: Let the decorated Oreos sit at room temperature until fully set. Gently release from the wax paper and remove any excess coating as needed. Store covered at room temperature or in the fridge for up to 3 days.
Notes
- Note 1: You can dip the Oreos, but I prefer to hold them over the bowl and use a teaspoon to spoon candy melt over the Oreo, then let gravity cover about ⅔ of the cookie, or spread gently with the spoon. That way, you don’t end up with a ton of Oreo crumbs in the candy melts, which kind of ruins the decorations for the second half of the batch. I also prefer if the bottom is not covered in a crazy amount of candy melt, because when you lay them on the wax paper, most of the candy melt on the bottom of the cookie will spread to the side and create a wide rim around your ladybug. You want a nice thick layer on top and on the side, that’s how they look best.
- Note 2: You can either use a toothpick to dab a TINY bit of candy melt on the bottom of each eye, or use edible adhesive. If you’re using red candy melts, make sure you only use a TINY amount, or your ladybugs will look like they have bloodshot eyes.


Comments
No Comments