

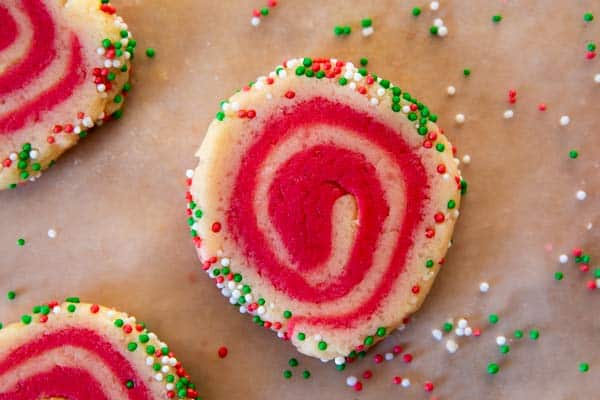
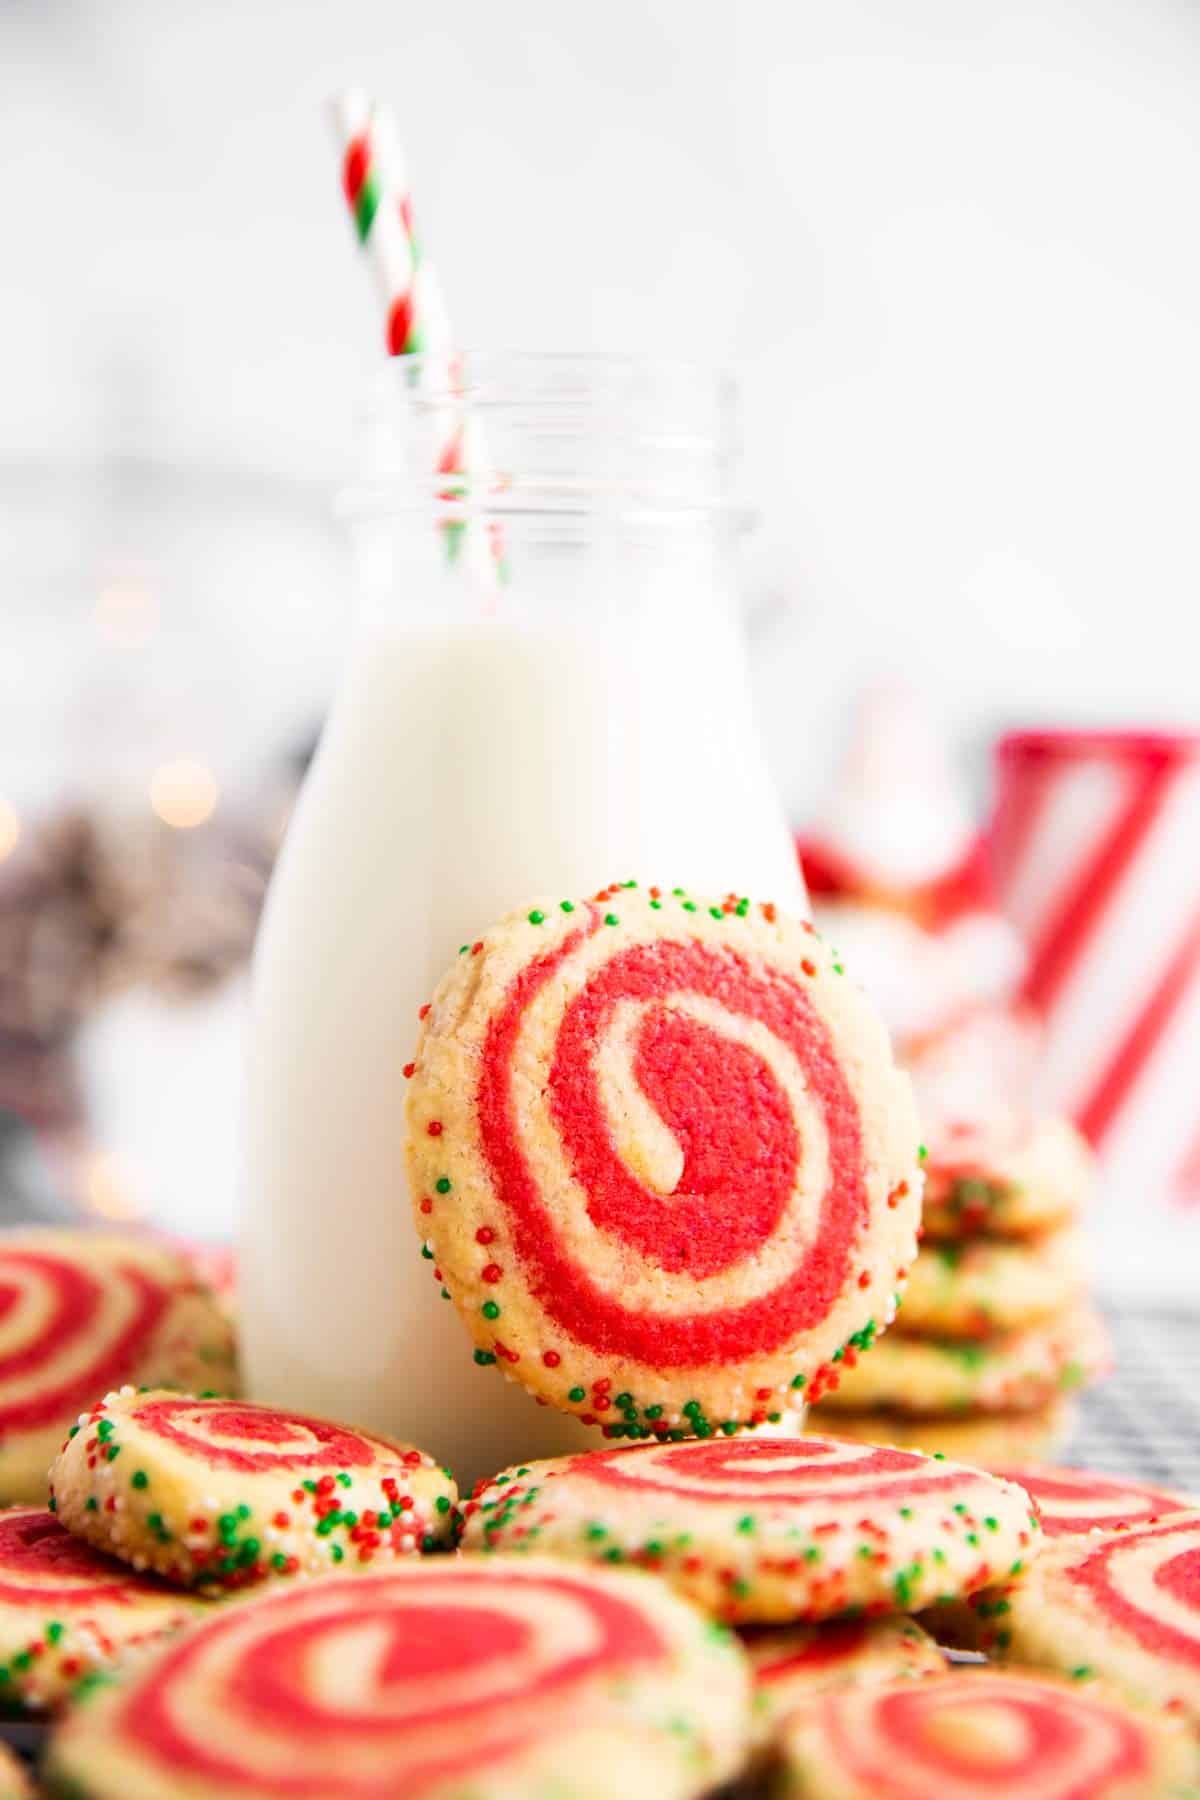
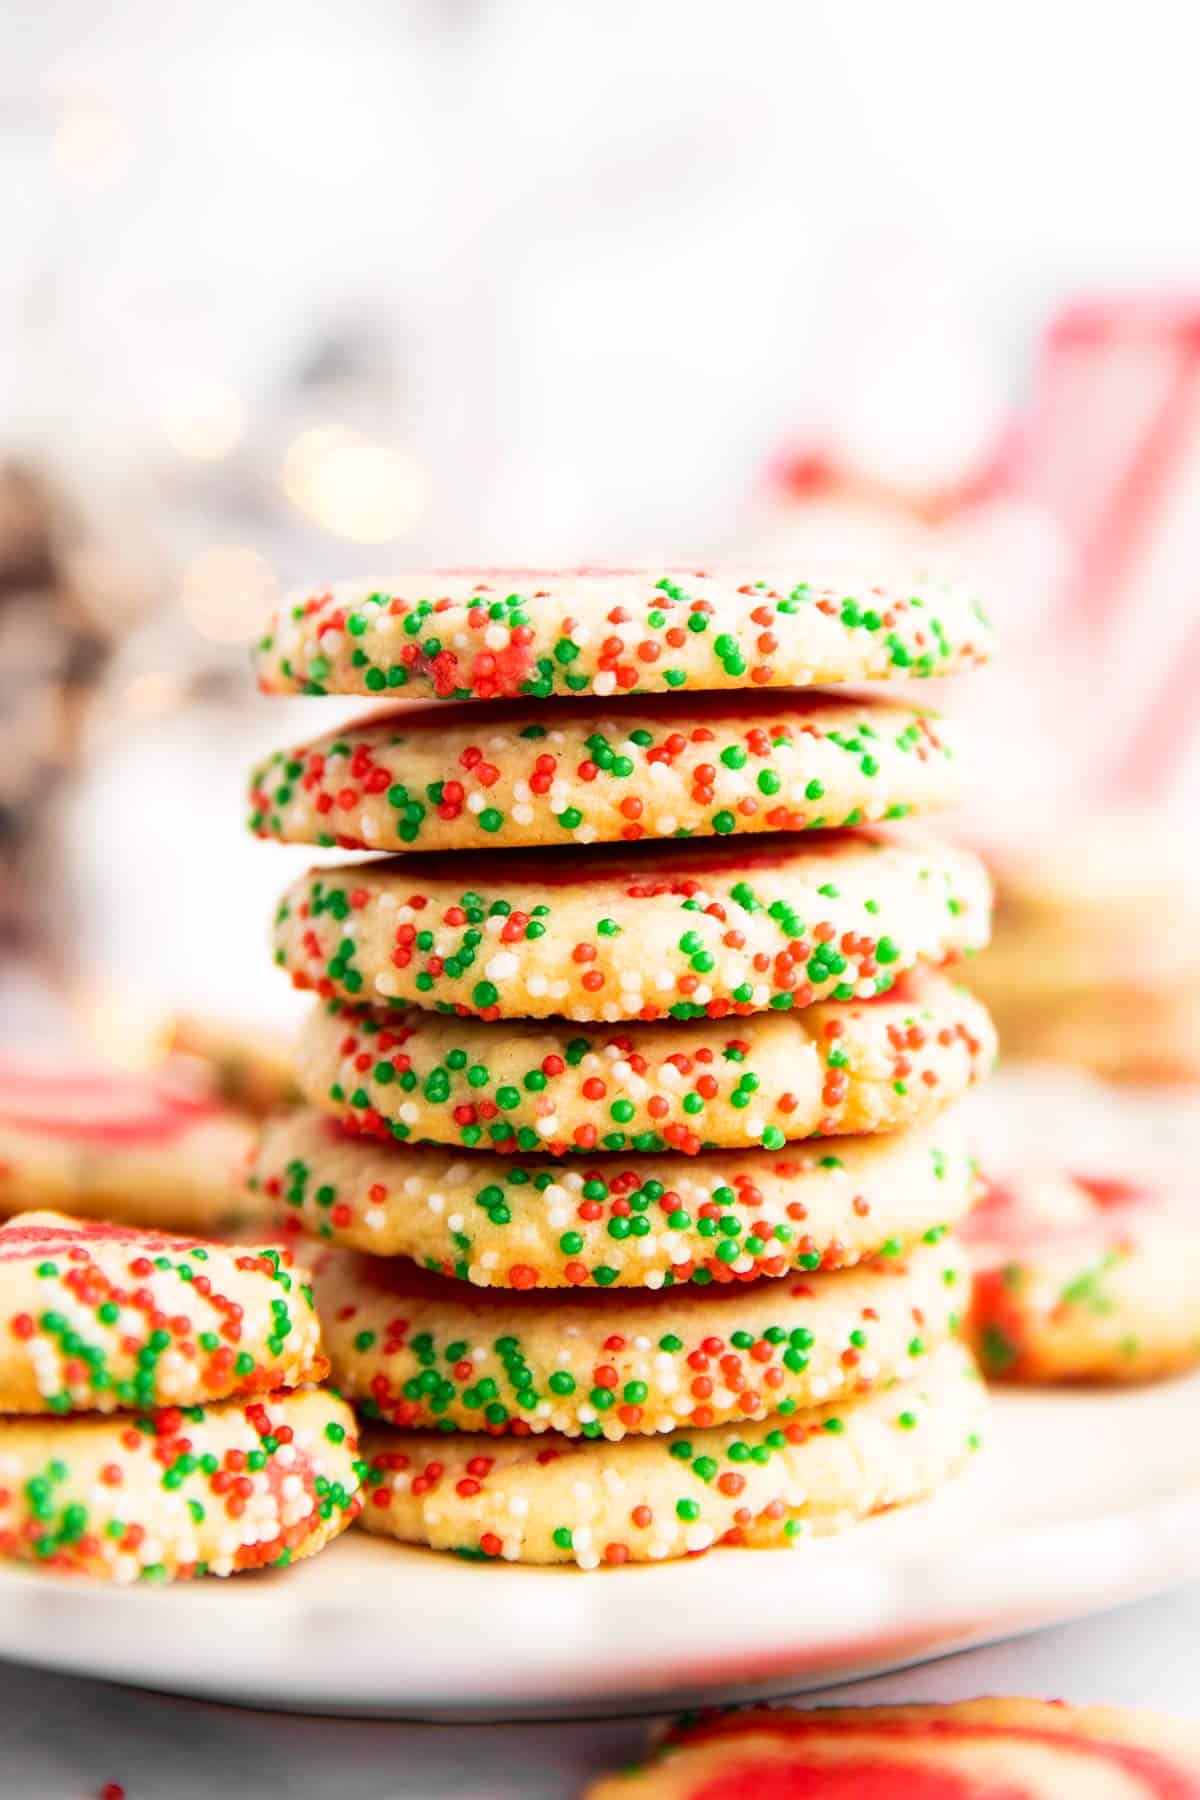
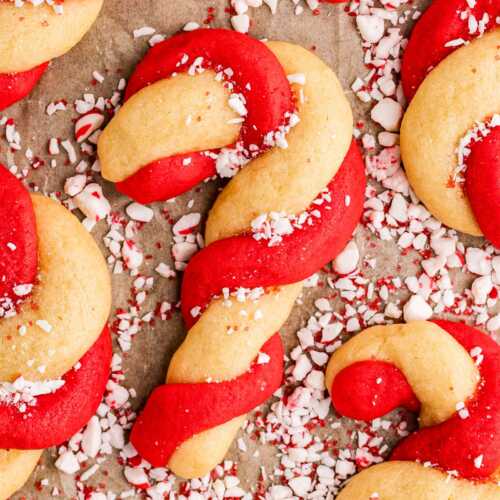
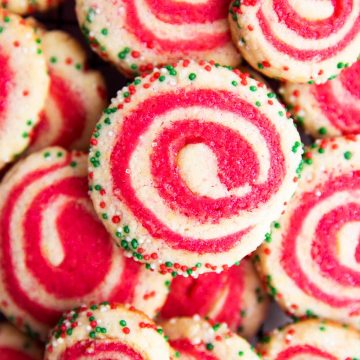
These pinwheel sugar cookies come in the most fun holiday colors for a cheerful Christmas cookie for your cookie box this year. The sugar cookie dough is easy to make and only needs to chill for a short amount of time.
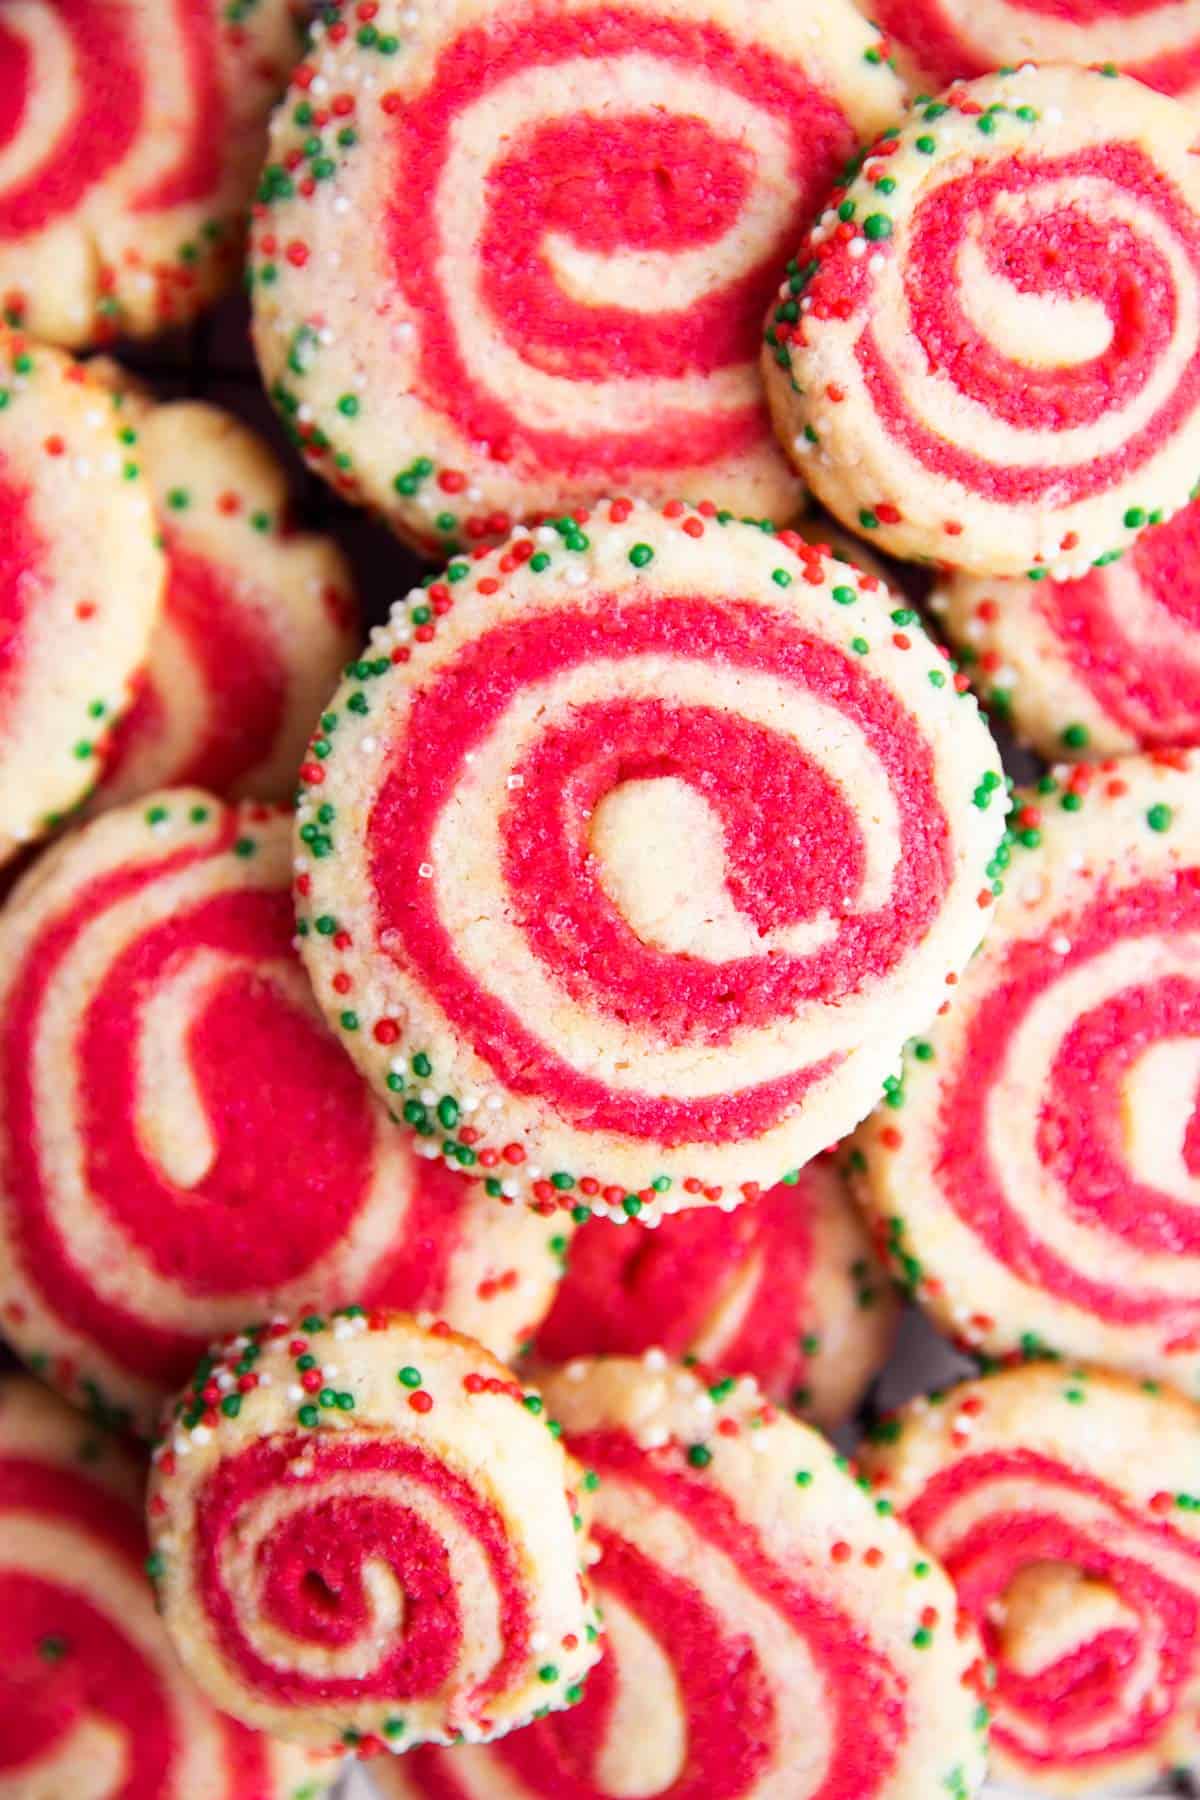
This is one of my favorite holiday cookies – the swirls are SO adorable! These can be a little tricky to make, but I’ve included step by step photos right below the recipe ingredients to help you.
Use your favorite holiday colors for the nonpareilles around the outside here, I prefer the classic red/white/green but the sky’s the limit. You can also leave them out if you don’t have any on hand!
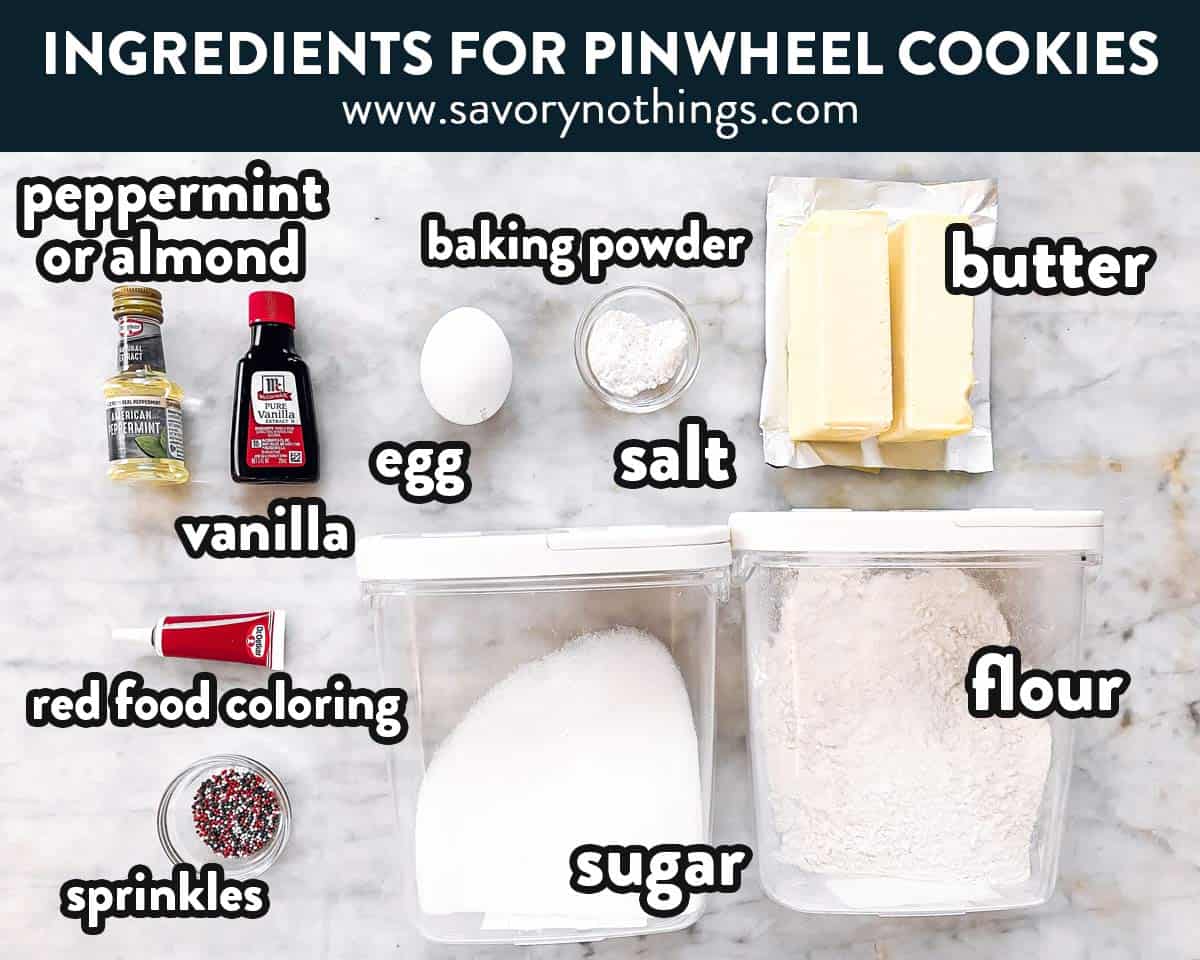
Ingredients you’ll need
Here is a visual overview of the ingredients in the recipe. Scroll down to the printable recipe card at the bottom of this post for quantities!
Ingredient notes
- Butter: Real butter works best in this recipe. If you have to use margarine for any reason at all, please use stick margarine and NOT a spreadable margarine.
- Red food coloring: I use gel coloring, because I find it works best in cookie dough. If you use a different coloring, please refer to the instructions on the packaging to add it correctly.
- Peppermint or almond extract: I know many people like using peppermint extract in these, because they look like peppermint candies. But the old-fashioned recipes often call for almond extract, so feel free to use either. I like the cookies both ways, maybe even a little better with almond.
How to make Christmas pinwheel cookies
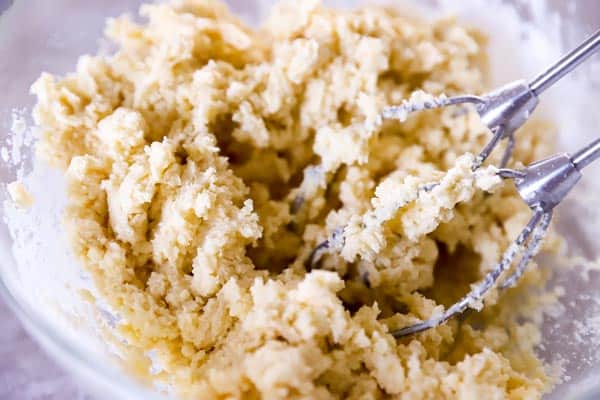
You start the cookie dough by first creaming the butter and sugar until fluffy.
Then, add the egg and cream until just combined – do not overmix the egg, or your cookies may come out tough.

Then, combine the flour, baking powder and salt in a small bowl. Add the dry ingredients to the creamed mixture and beat on low speed just until combined into a cookie dough.
You want it to come together, but do not overmix past that point, or your cookies won’t have the right texture.
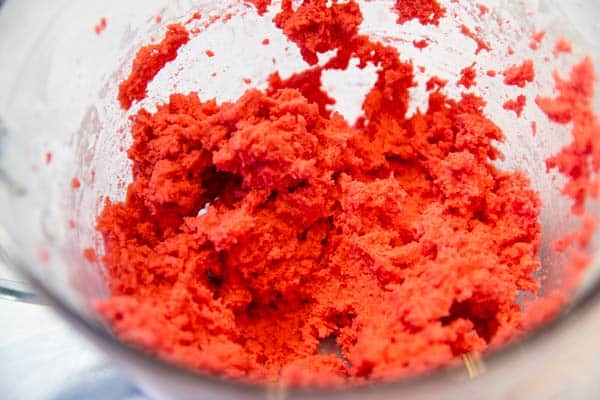
Now cut the dough in half. Place half on your work surface, knead 4-5 times, then set aside.
To the other half, add the red food coloring. Use your mixer to fully combine the food coloring with the dough. If the red dough feels too sticky after adding the color, add a tablespoon of flour to make it a little firmer.
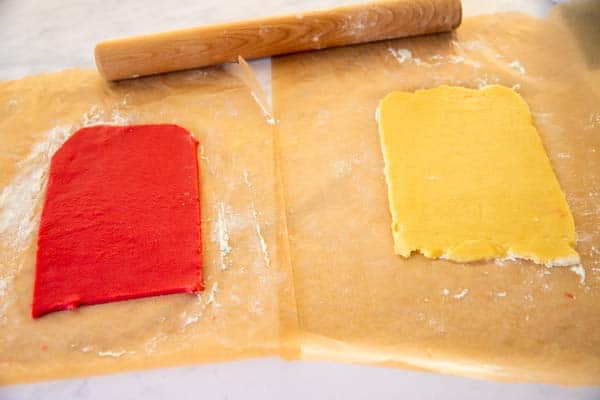
Once you have chilled the dough, roll out both colors separately, each between two sheets of wax paper.
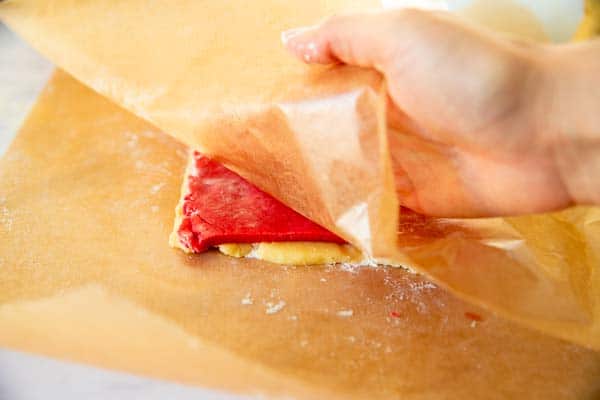
Lift the red dough up with the help of the wax paper, then invert it onto the plain dough. Make sure to carefully align the edges as well as possible.
To roll it up, I like using the wax paper like a sushi mat. Make sure the log is fairly tight, or the layers may split a little once the cookies are baked.
I like rolling up the dough before chilling, because the dough is less prone to splitting and cracking when it’s warm.
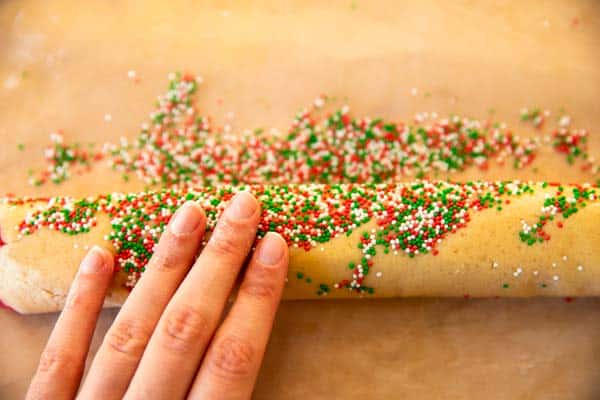
You could egg wash the log of dough before adding the sprinkles to make them stick better, but I don’t like the taste and color it adds. Up to you!
I just gently roll the cookie dough log over the sprinkles, making sure they stay put in the dough.
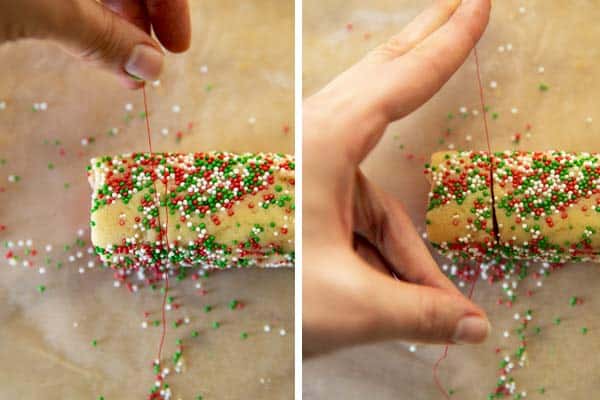
Now, slice the cookies. This is how you use a piece of sewing three/dental floss to cut off the cookies, this makes them look perfect:
- slide the thread underneath the log
- hold both ends up and cross them over
- pull both ends to slice off a ¼ inch thick cookie (make sure to pull evenly)
Place the cookies spaced apart on lined baking sheets.
Before baking, chill the sugar cookies for 15-30 minutes to help them keep their shape during baking.
Recipe tips
- Add enough food coloring to the dough to make it a bright red, the color will get lost a little during baking. Also, make sure to fully incorporate the coloring into the dough for best results.
- Do not skip chilling the cookie dough before rolling it out, it will be impossible to work with.
- Do not skip chilling the shaped cookies either, they will not keep their shapes well in the oven without chilling.
- Make sure you roll the log up firmly, else the two colors will separate from each other in the oven.
- You can slice the cookies with a sharp knife if you don’t want to mess with the dental floss, but they do come out best if you slice them with the floss.
Freezer instructions
I actually don’t recommend freezing this dough to make the pinwheel cookies– it’s a lot harder to work into this shape after freezing.
To freeze the baked cookies: Place the cooled cookies in freezer-friendly boxes in layers (separate layers with wax paper), label with the name and use-by date (freeze for up to 3 months) before sticking in the freezer.
To defrost, remove from the freezer container and place on a wire rack on the counter for a few hours, until defrosted. Your sprinkles may discolor a little sure to the moisture from defrosting, the wire rack helps combating it a little.
Storage instructions
The cookies keep well in closed cookie tins at room temperature for 1-2 weeks though.

More festive Christmas cookies
PS If you try this recipe, please leave a review in the comment section and add a star rating in the recipe card – I appreciate your feedback! Follow along on Pinterest, Facebook or Instagram.
Christmas Pinwheel Sugar Cookies
Recipe details
Equipment
- 2 Medium Mixing Bowls
- Wax Paper
- Rolling Pin
- Sewing thread OR unscented dental floss
- Baking Sheet
Ingredients
- 1 cup butter softened
- 1 cup granulated sugar
- 1 large egg
- 1 teaspoon vanilla extract
- 1 teaspoon almond extract OR peppermint extract, if you prefer
- 3 cups all-purpose flour
- 1 teaspoon baking powder
- ½ teaspoon salt
- 1 teaspoon red food coloring or less if you have a more concentrated food coloring (I used 1 teaspoon gel)
- ¼ cup Christmas Nonpareilles round sprinkles
Instructions
Make Cookie Dough:
- Cream wet ingredients: Place butter and sugar in a large bowl and beat with an electric mixer until creamy. Add egg and both extracts and beat until combined.
- Add dry ingredients: In a separate bowl, combine flour, baking powder and salt well. Add to butter mixture and mix on low speed until combined into a cookie dough.
- Color dough: Tip out half of the cookie dough mix on your work surface and knead a few times until smooth. Set aside. Add the red food coloring to the remaining half of cookie dough in your mixing bowl and mix with your hand mixer on low speed until fully incorporated. Add more coloring as needed (I used about one teaspoon gel).
Shape Cookies:
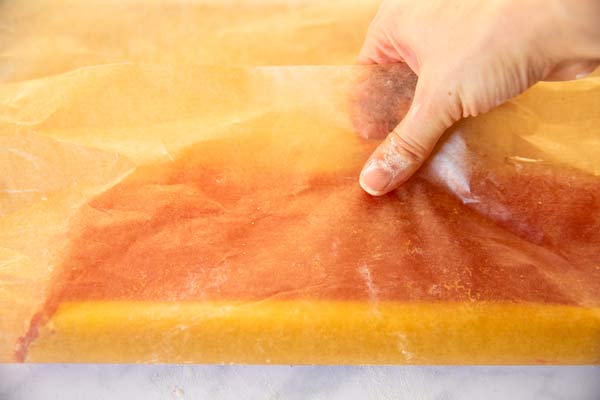
- Roll out and layer: Place plain dough between two sheets of wax paper and roll out to a rectangle of about 8×15 inches. Repeat process with red dough. Peel top layer of wax paper off both doughs, then invert red dough on top of the plain dough. Gently roll over both doughs with the rolling pin a few times (make it no larger than 9×16 inches) to make sure both doughs stick together. Remove top layer of way paper.
- Roll and slice: Trim short sides to make them even, then roll up into a log starting at one of the short sides. Place nonpareilles in a shallow baking dish (make sure your dough log fits) and roll the log in the sprinkles. Using a piece of unscented dental floss or sewing string, carefully slice into ¼ inch thick slices (see notes for step photos).
- Chill: Place sliced cookies on lined baking sheets about 2 inches apart. Refrigerate for 15 – 30 minutes, or until firm and cold.
Bake:
- Heat oven to 350°F. Bake cookies in batches for 10 minutes (one tray at a time, keep the others refrigerated) or until just starting to turn golden on the bottom (do not overbake). Cool on the baking sheet for 5 minutes, then transfer to a cooling rack to cool completely.
Notes
Ingredient notes
- Butter: Real butter works best in this recipe. If you have to use margarine for any reason at all, please use stick margarine and NOT a spreadable margarine.
- Red food coloring: I use gel coloring, because I find it works best in cookie dough. If you use a different coloring, please refer to the instructions on the packaging to add it correctly.
- Peppermint or almond extract: I know many people like using peppermint extract in these, because they look like peppermint candies. But the old-fashioned recipes often call for almond extract, so feel free to use either. I like the cookies both ways, maybe even a little better with almond.
Recipe tips
- Add enough food coloring to the dough to make it a bright red, the color will get lost a little during baking. Also, make sure to fully incorporate the coloring into the dough for best results.
- Do not skip chilling the cookie dough before rolling it out, it will be impossible to work with.
- Do not skip chilling the shaped cookies either, they will not keep their shapes well in the oven without chilling.
- Make sure you roll the log up firmly, else the two colors will separate from each other in the oven.
- You can slice the cookies with a sharp knife if you don’t want to mess with the dental floss, but they do come out best if you slice them with the floss.

Michelle says
I know you said you don’t recommend freezing the dough because it’s much harder to shape but what if we roll in up into a log, freeze, slice and bake whenever? Would that work??? Thank you in advance
Nora says
I would probably slice them, then freeze in a single layer until firm. Once they’re fully frozen, you can pop them into freezer bags and bake whenever! Hope this helps, Michelle!
Donna says
Planning to make these next week. Some clarification on when dough is chilled please. Before rolling out, after rolling into log and after slicing?? Or am I misunderstanding something?
Nora says
Donna, I only chill them once they’re sliced! If you find the dough too soft to work with, feel free to chill it before rolling for 15-30 minutes. Hope this helps!
Megan says
I do love these! Though quick question: how long do you chill the dough before rolling? I know you say to chill 15-30 minutes once sliced, but I didn’t see the chilling times. Thank you!
Nora says
No chilling necessary before rolling, Megan! If your home is very warm/you find the dough too sticky/difficult to roll, you can chill it for 15-30 minutes before rolling. But I’ve never found it to be necessary. Hope this helps!
Susan says
I wish I could give these more than 5 stars!!!!!! Great recipe, great instructions. Perfect for our neighborhood cookie plates ❤️
Nora says
I’m so happy to hear this, Susan!
Amber says
Love these! Made by myself without the kids cuz they were a surprise from our Christmas elf (we don’t do the naughty elf on the shelf stuff, ours is an overly kind one ?). Definitely a keeper.
Nora says
I’m so glad the recipe worked for you and your kind elf, Amber!
Hannah Whitaker says
Made with granddaughter, cookies came out looking and tasting great.
Nora says
I’m so glad, Hannah!