
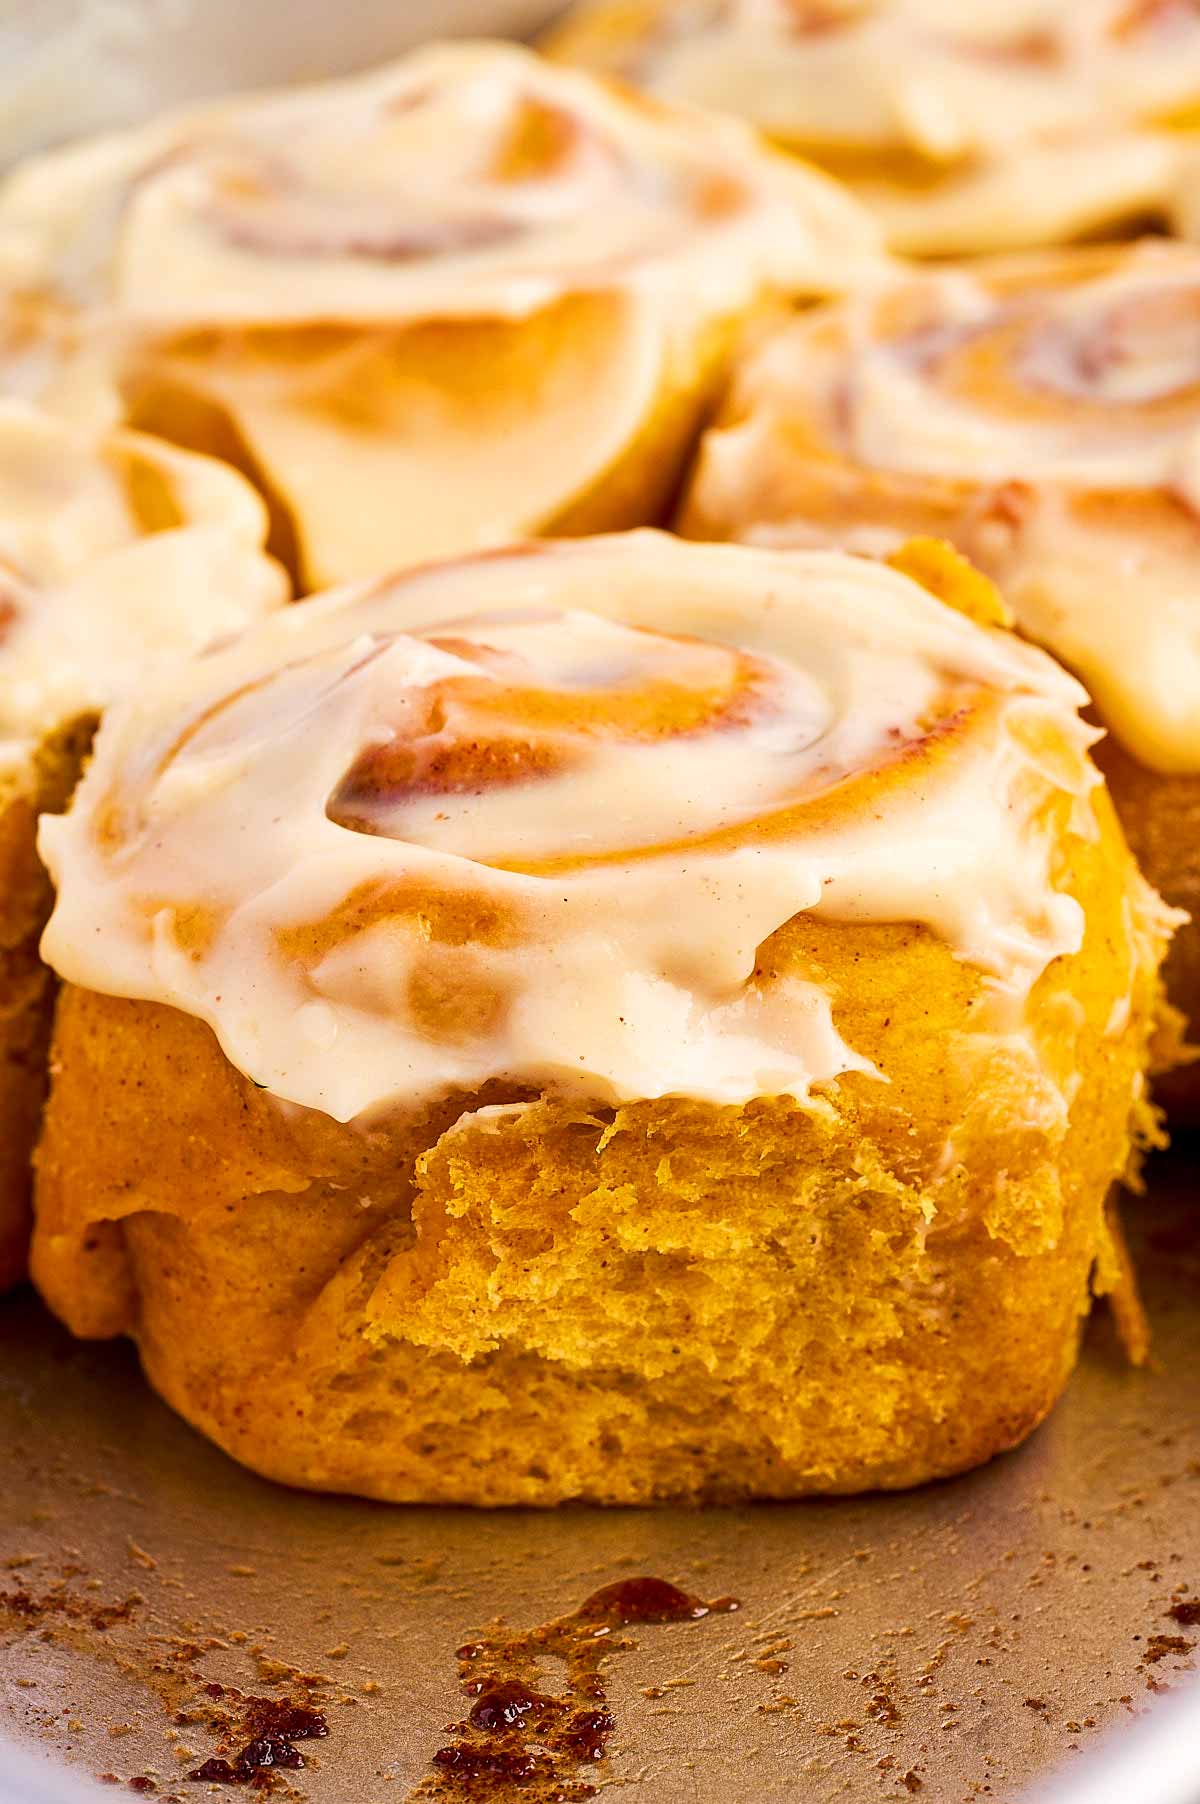
These Pumpkin Cinnamon Rolls are my ultimate cozy fall baking project! Soft, pillowy pumpkin-spiced brioche dough is swirled with warm brown sugar, cinnamon, and pumpkin pie spice, then topped with a luscious maple cream cheese frosting that melts right into every warm swirl.
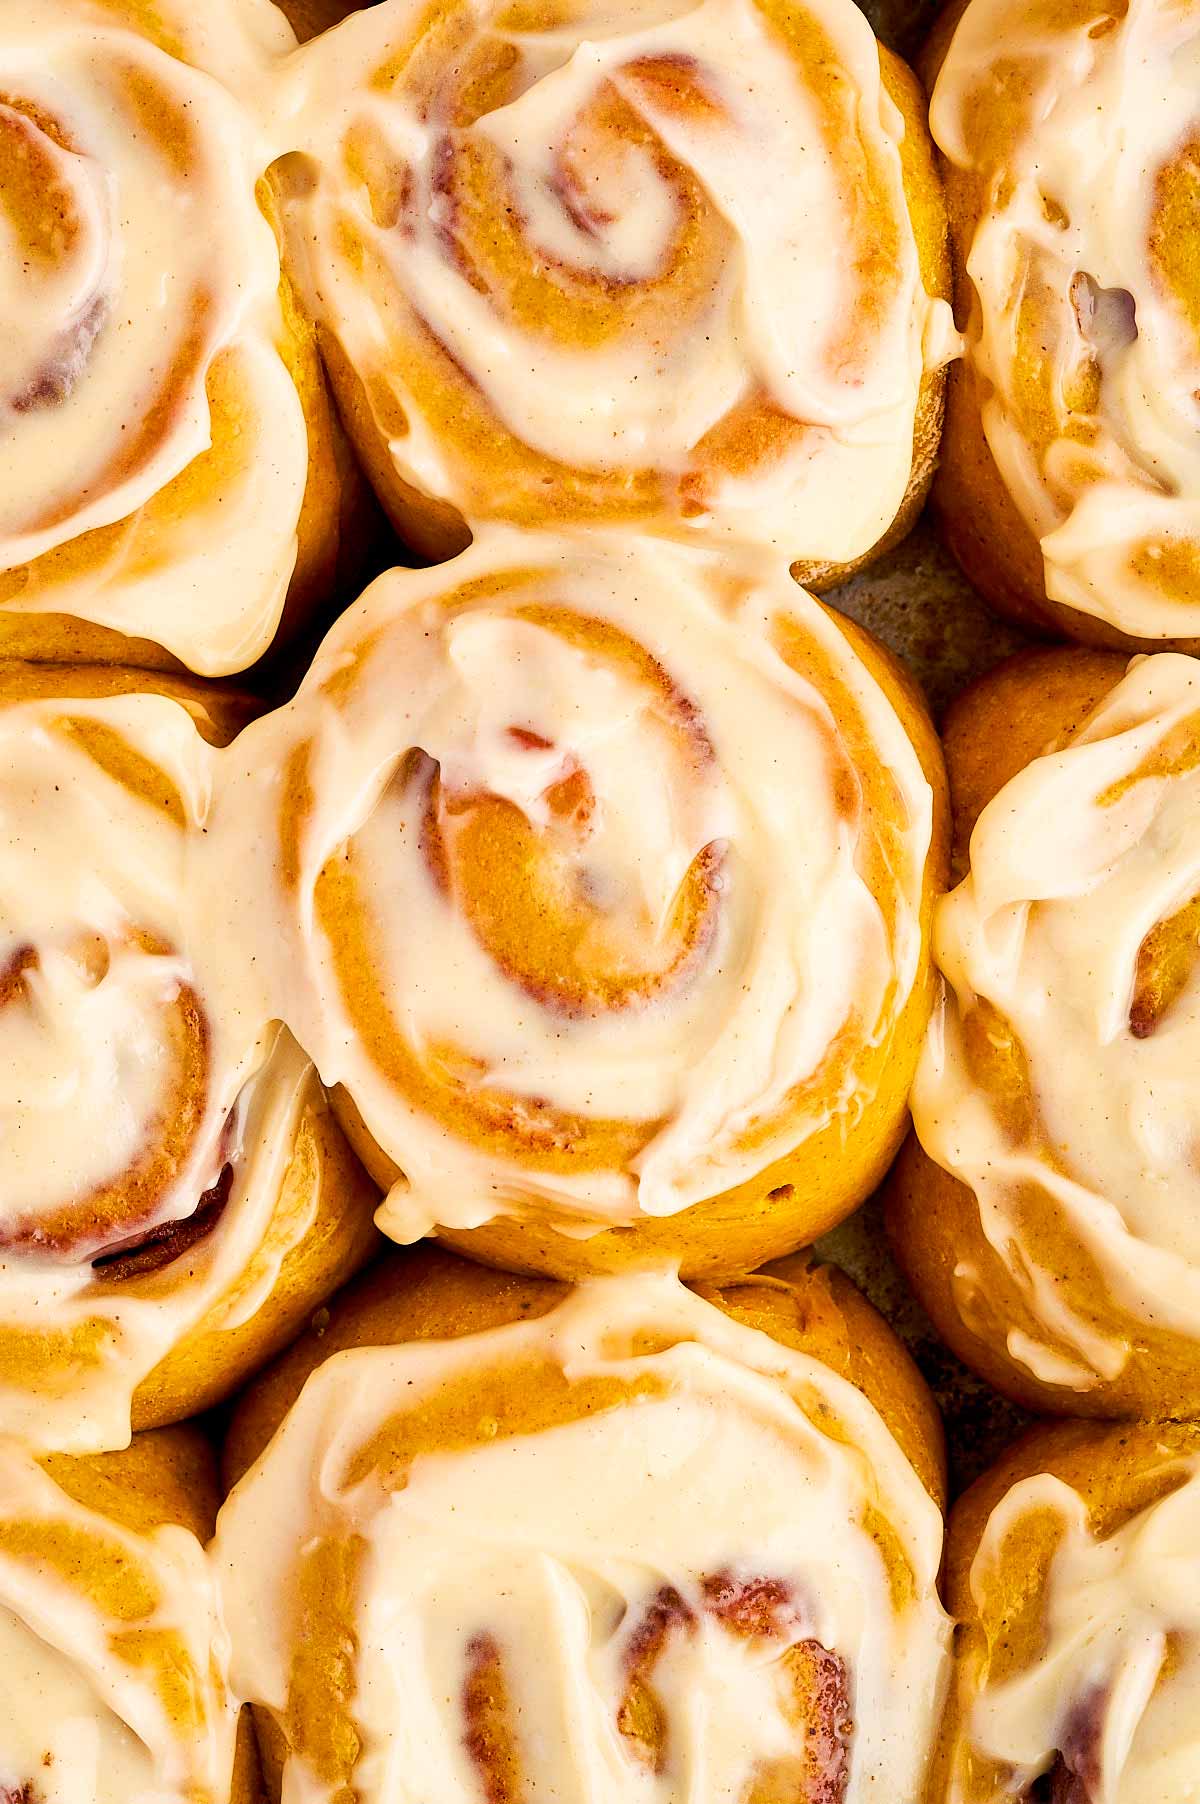
The ultimate cozy fall treat (and all my secrets to getting them bakery-soft!)
Once the weather starts turning crisp and the leaves start falling, there is nothing I love more than filling the house with the smell of warm cinnamon and pumpkin spice. My kids go completely wild for cinnamon rolls on slow weekend mornings, and adding pumpkin right into the dough takes them to a whole new level of cozy!
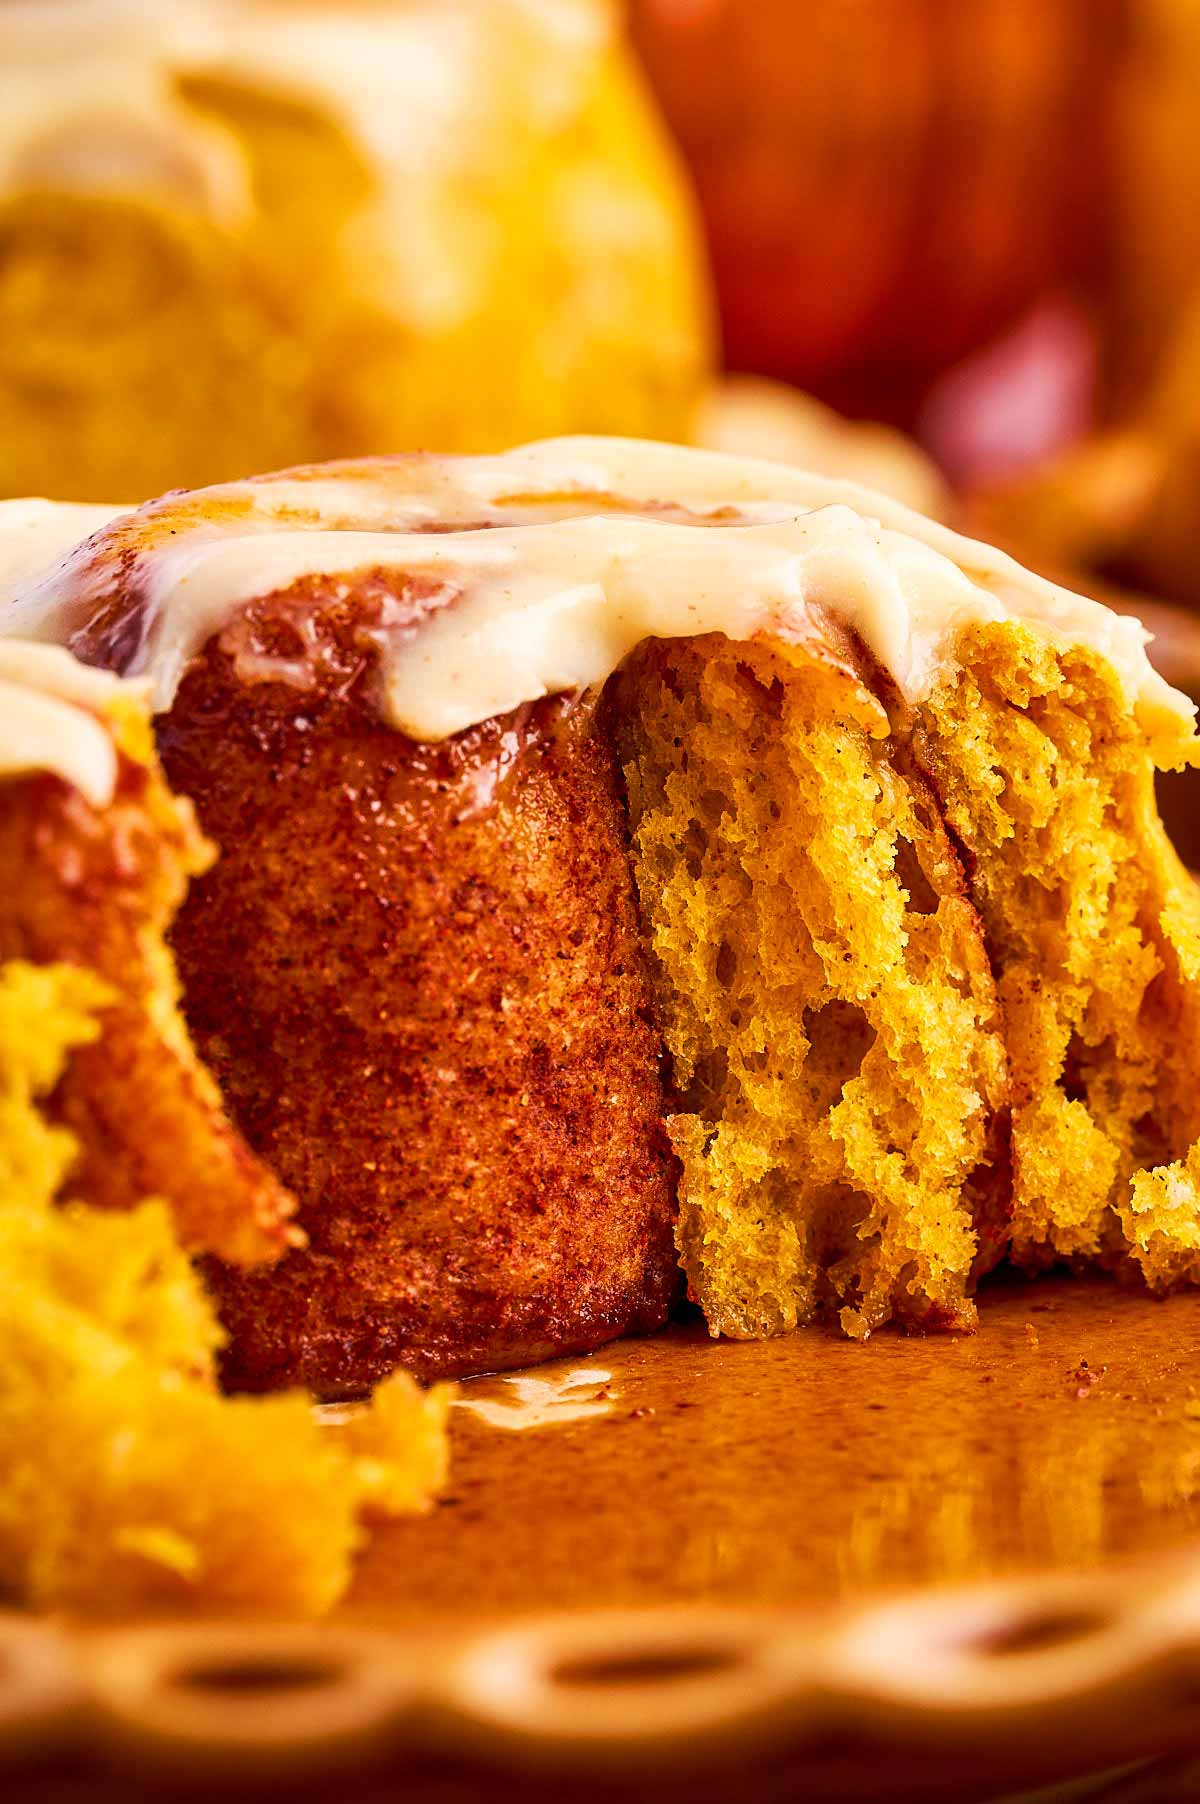
Now, I am going to be completely honest with you: baking with pumpkin can be a little tricky. Because pumpkin puree adds so much extra moisture and weight to an enriched yeast dough, a lot of pumpkin cinnamon roll recipes turn out dense, gummy in the middle, or dry around the edges.
I tested batch after batch to get the exact ratios, pan type, and proofing times dialed in so they come out ultra-soft, fluffy, and evenly baked every single time. Yes, I may have pulled out a measuring tape and sewing thread to cut them evenly, and yes, I may own a dough incubator 🤭 – but I promise you do not need fancy gadgets to make these work! Just follow a few simple baking rules below, and you will have bakery-worthy rolls right out of your own oven.
Also, side note but sorry – this post is long. Cinnamon rolls are something I’m very convinced are simple, but not necessarily that easy to get right. A lot of small things can affect the bake, so I try to be as thorough as I can when I share a recipe like this.
Ingredients I like to use, plus notes
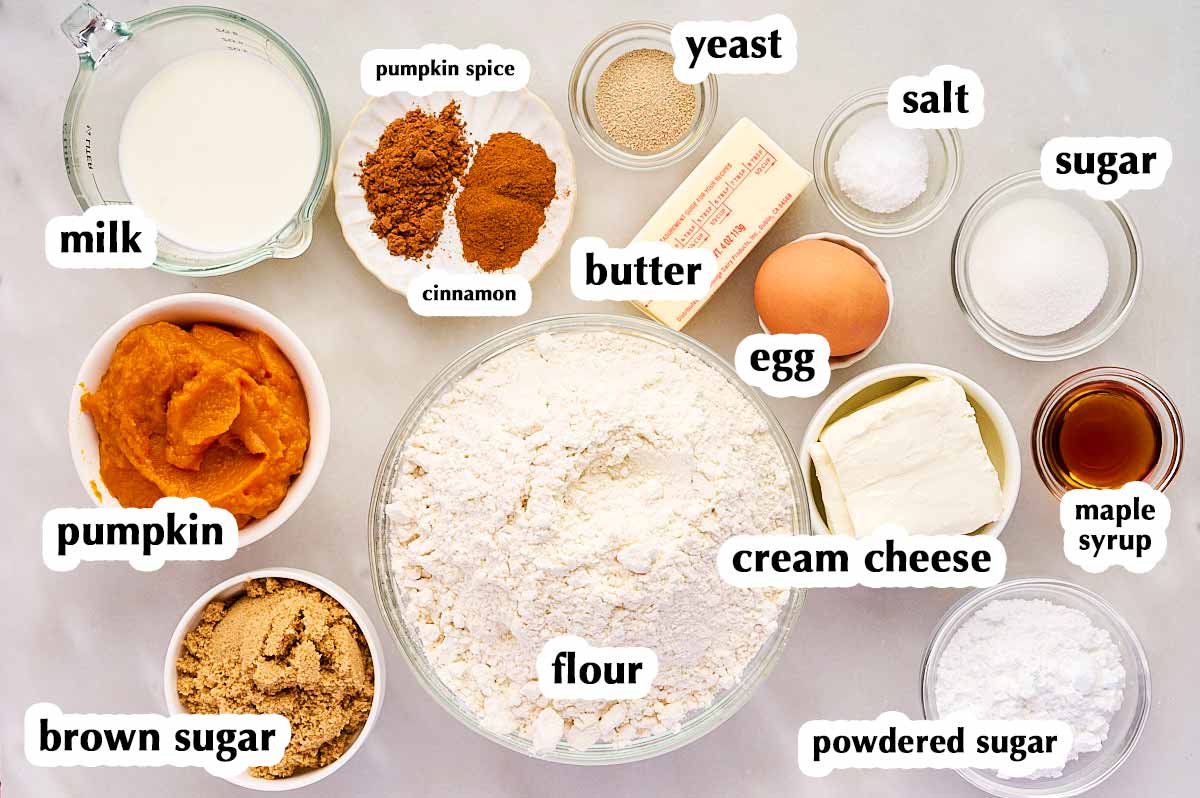
Here is a visual overview of the ingredients in the recipe. Scroll down to the printable recipe card at the bottom of this post for quantities!
- Whole milk & yeast: Warm your milk to 105°F (41°C) so it wakes up the yeast without killing it. If your yeast mixture doesn’t get frothy after 10 minutes, your yeast is likely expired and you’ll want to start fresh.
- Pumpkin puree: I often use homemade roasted pumpkin puree, which adds incredible flavor, though canned 100% pure pumpkin works great too (just make sure it’s pure pumpkin and not pumpkin pie filling!).
- All-purpose flour: You’ll need between 3 ½ and 4 ½ cups depending on how watery your pumpkin is and how you measure your flour. If you fluff, scoop, and level, you’ll land closer to 4 ½ cups; if you scoop straight from the bag, closer to 3 ½ cups. If you have a kitchen scale, I weighed my test batches and it is consistently between 540g and 560g.
- Salt: Do not forget the salt in the dough! It heavily affects both the flavor and the gluten structure. Use slightly more if you’re baking with sea salt. One time I forgot the salt and the rolls were terrible. So, remember the salt!
- Unsalted butter: You’ll use melted butter in the dough, and room-temperature softened butter in the filling. Make sure the filling butter is truly just room temperature – never melted or overly soft!
- Spices & brown sugar: A mix of ground cinnamon and pumpkin pie spice in both the dough and the light brown sugar filling gives you that unmistakable autumn warmth in every bite. If you’re not a fan of pumpkin pie spice, just use more cinnamon.
- Maple cream cheese frosting: A simple blend of softened cream cheese, powdered sugar, real maple syrup, and a pinch of cinnamon and salt creates a tangy-sweet glaze that balances the spiced rolls without being overly heavy. Not everyone in my family likes cream cheese frosting, but the frosting also helps to create the softest rolls. If you don’t want to frost, I recommend brushing the warm rolls with a little melted butter to soften the tops and to add some sheen.
How to make Pumpkin Cinnamon Rolls
Making homemade cinnamon rolls is super straightforward once you break it down into three stages: making the dough, shaping the rolls, and baking. Because pumpkin dough behaves a little differently than standard dough, make sure to read these quick tips before you start!
Critical baking tips: Read before you cook!
- Use a metal baking pan, NOT ceramic: I cannot stress this enough! Pumpkin dough is quite heavy, and a ceramic dish insulates too much. In a ceramic pan, the edge rolls will overbake long before the middle rolls are cooked through. Always use a 9×13 inch metal baking pan (or bake them freestyle on a sheet pan if you don’t have a metal cake pan).
- Stick to a 10×20 inch rectangle: It can be tempting to roll the dough out larger to get extra swirls, don’t do it! Rolling it larger makes the filling layer too thin, and those super-tight swirls have trouble baking through – plus the centers tend to pop up into a weird cone shape in the oven.
- Don’t add extra butter to the filling: 4 tablespoons of room-temperature butter is the sweet spot for a 10×20 inch rectangle. If the butter is too warm or you add too much, it leaks out into the pan and leaves big, empty gaps between your swirls instead of keeping them soft and cohesive.
- Watch your proofing temperature: Enriched doughs hate high heat. Do not proof your dough in a turned-off oven with the light on or in a pre-warmed microwave, because you can’t control the exact temperature – if it gets too warm, the butter in the dough melts and ruins the bake. Keep your proofing spot at or below 77°F (26°C), and don’t overproof!
Overproofed rolls lose their yeasty lift and deflate/collapse in the oven. Conversely, if you underproof, they will be too dense. In my temperature-controlled dough incubator at 77°F, the dough bulk proofs in exactly one hour, and the second proof takes 20-30 minutes. If your kitchen is cool, it can be up to two hours bulk-proofing and 1 hour for the second proof.
Recipe walk-through/baking tips
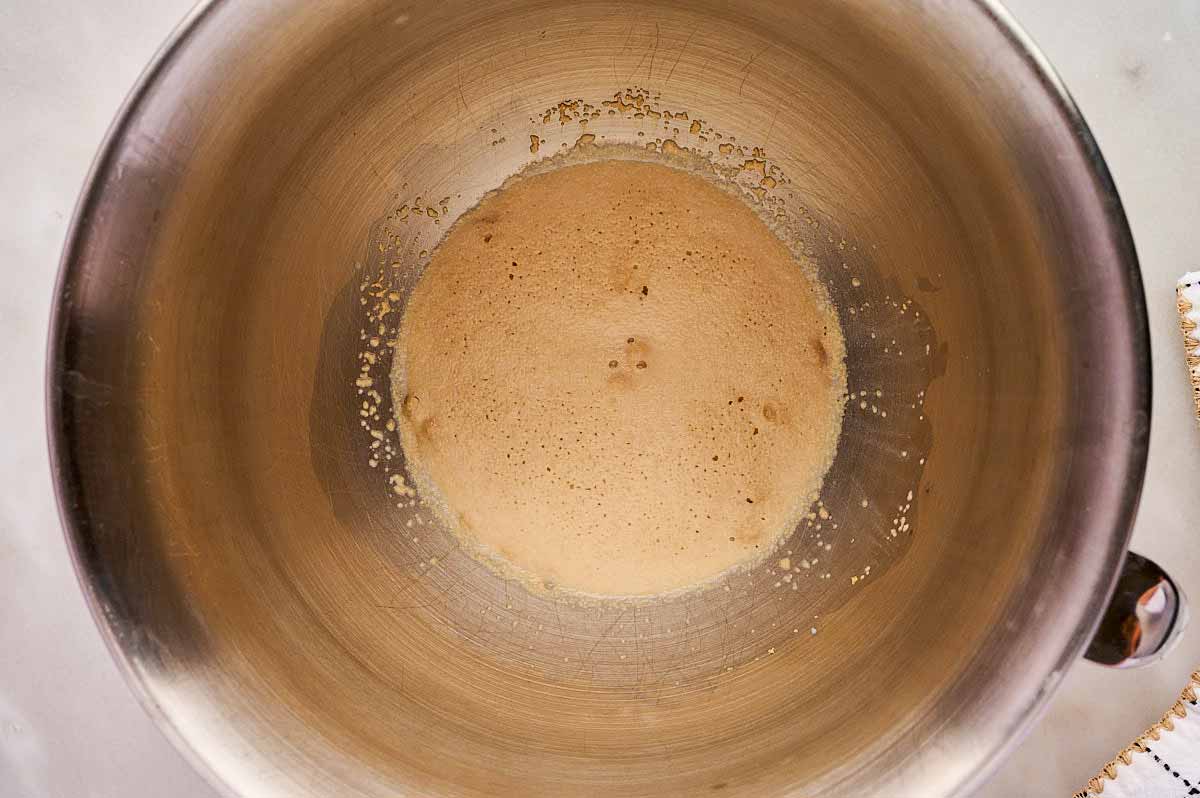
1. Blooming the yeast & mixing liquids: First, combine your milk, yeast, and sugar to get frothy. I know this seems like an unnecessary extra step, but it really does make a difference! Also, if your yeast doesn’t get bubbly here, you’ll know it’s not active anymore and you can start over.
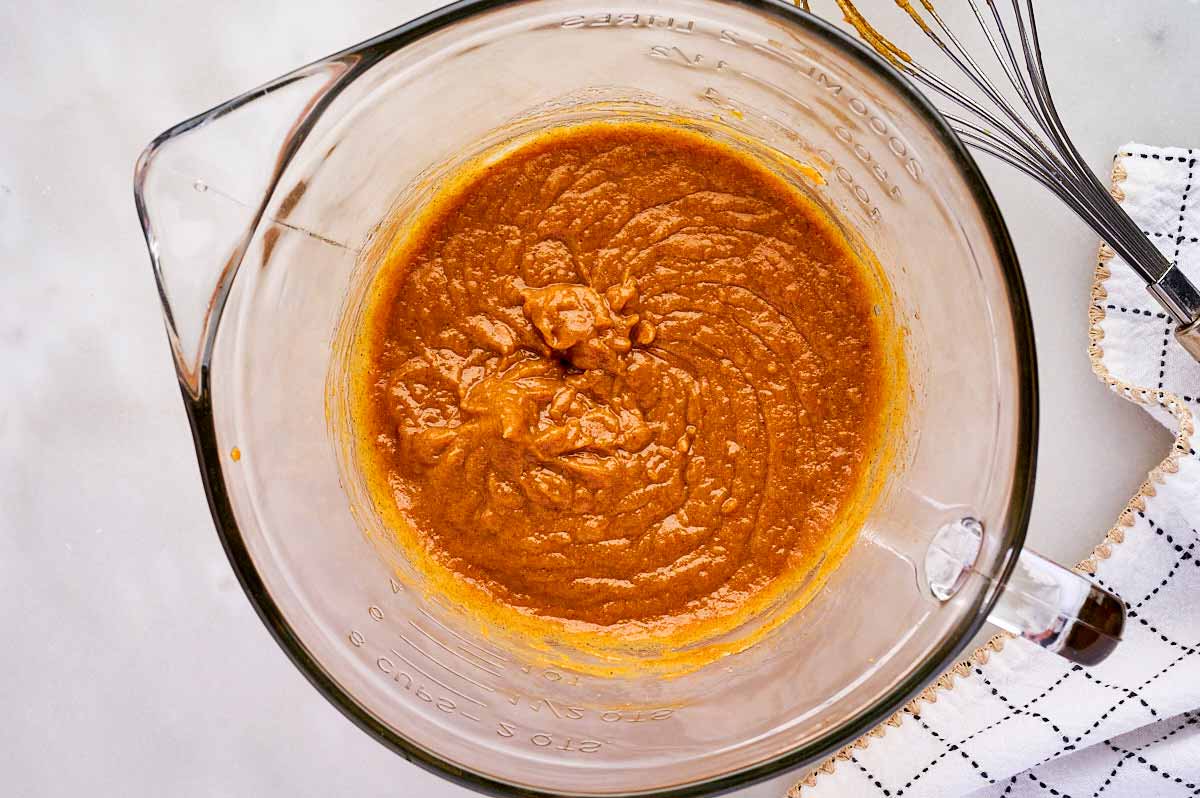
While you’re waiting, whisk the melted butter into the pumpkin puree first before adding the egg. This cools the butter down so it doesn’t scramble or affect the egg’s structure. (Don’t panic if the mixture looks a little split when using chilled pumpkin or eggs – that’s just the butter firming back up and won’t hurt the dough at all!)
2. Kneading the dough: We start by adding the pumpkin mixture to the yeast mixture. Then, we’re stirring half of the flour into the pumpkin mixture in the bowl of a stand mixer.
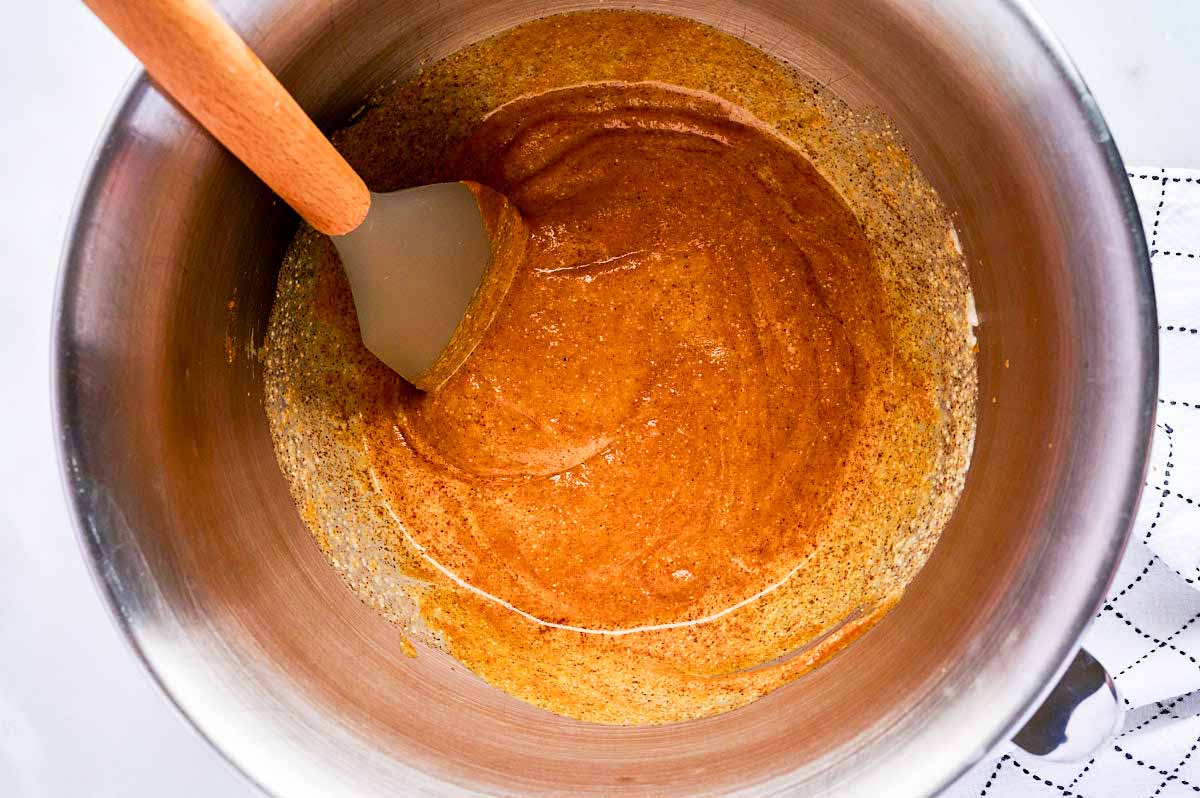
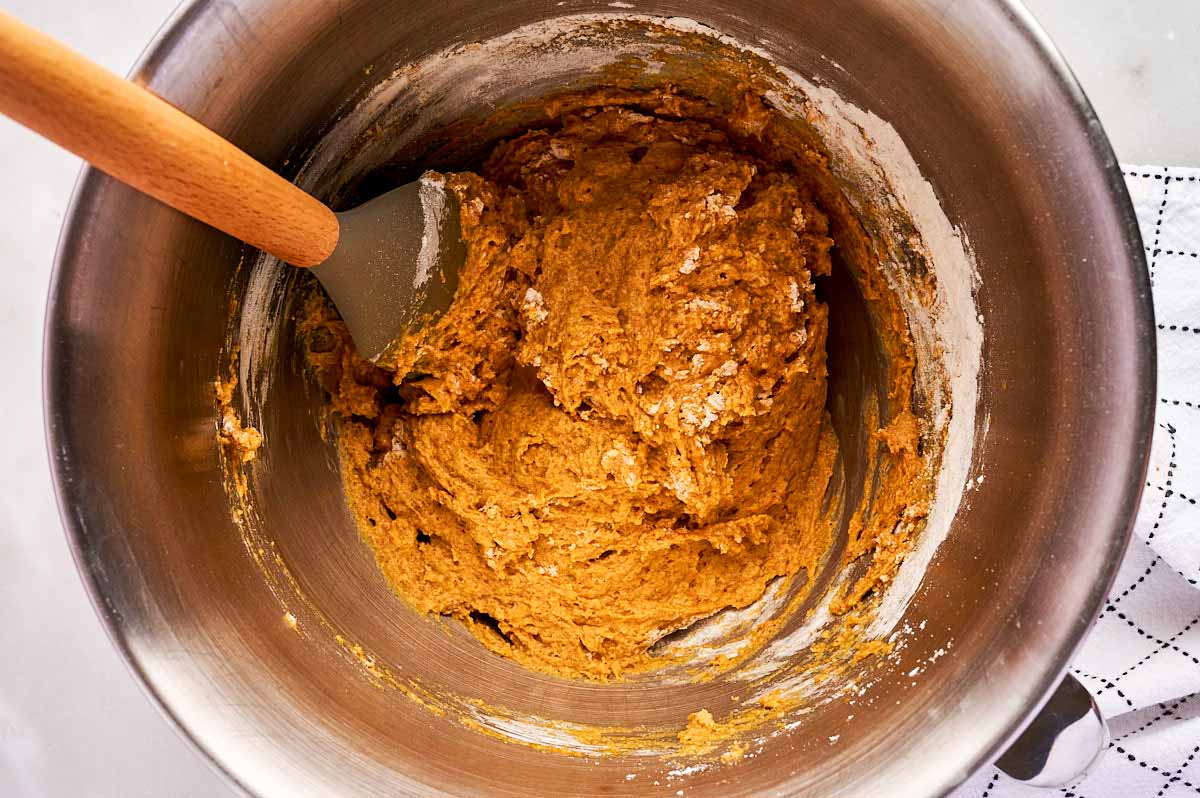
Start your mixer and then gradually add the remaining flour 2 tablespoons at a time while kneading.
Once kneaded, the dough should be very soft and slightly tacky – it should come together in a ball while still clinging a tiny bit to the bottom of the bowl and annoying you just a little as it sticks to your hands. Because of the butter, the flour absorbs moisture slowly and will feel less sticky after it rises.
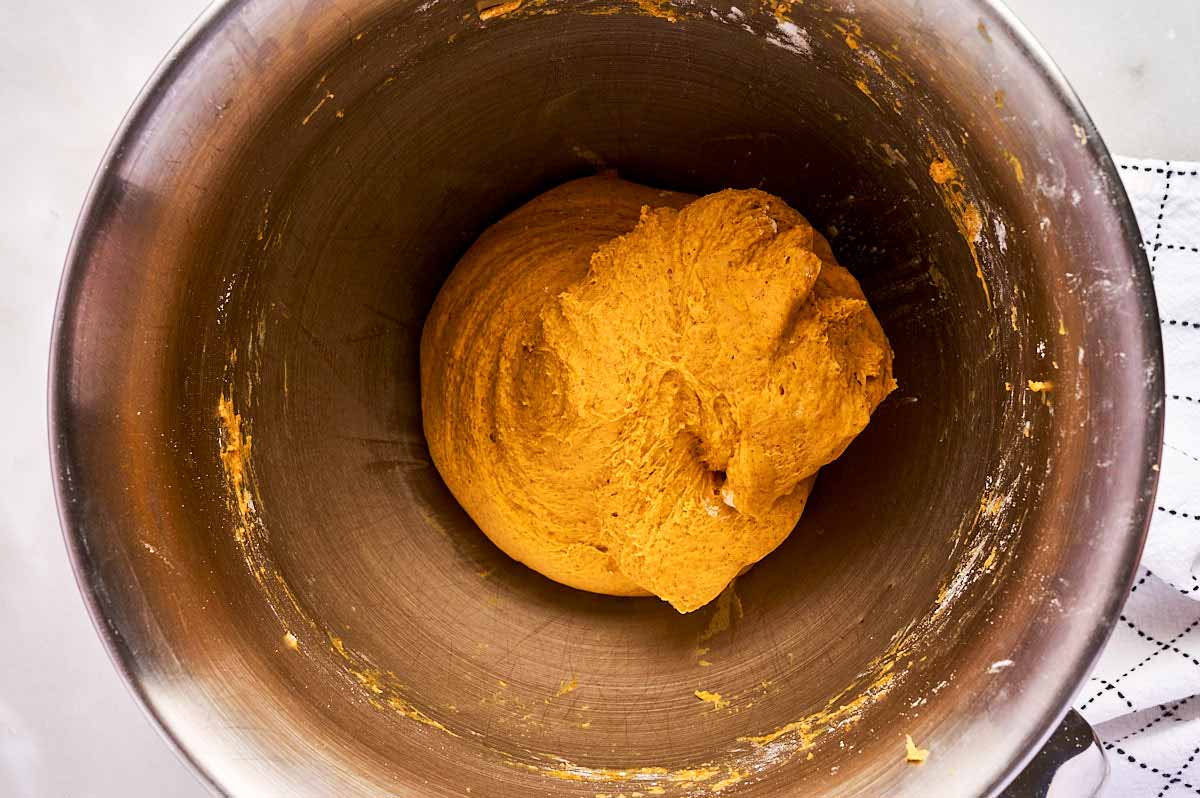
3. First proof: I like to place the dough in a ceramic bowl, or into a plastic dough proofing basin. I always feel that the dough rises much, much slower in the metal bowl of my stand mixer for some reason, so I do always transfer it.
You’ll want to proof it until doubled in size. I use a dough incubator 🤭 and I set it to 25°C/77°F. This takes almost exactly 1 hour to bulk proof the dough. If your kitchen is cool, it can take up to 2 hours.
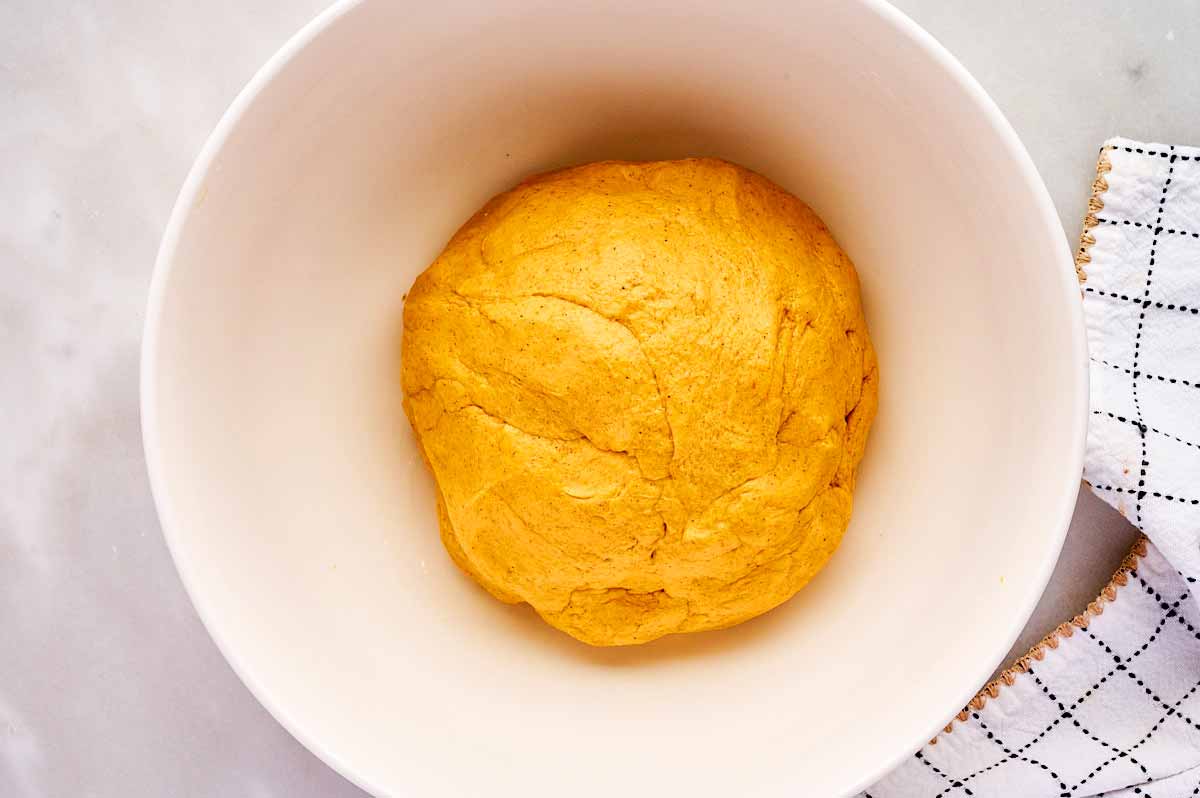
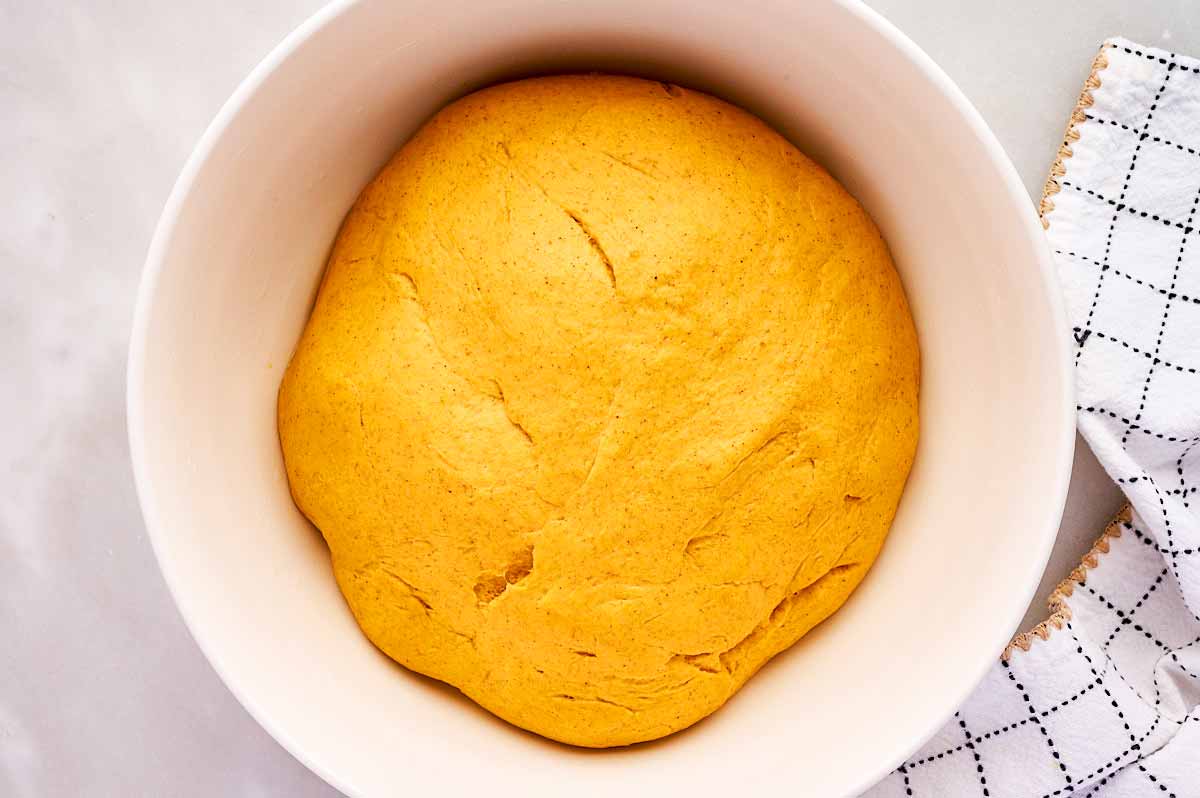
4. Filling prep: I know some people like to combine the butter, sugar and cinnamon for their filling, but in this recipe I like to spread the butter separately, then sprinkle it with cinnamon sugar.
Combined with cinnamon and sugar, I find the butter a little harder to spread, and this dough is very soft – it’s better to soften the butter to room temperature (not too warm, or it will all leak out of the rolls during baking!) and combine the cinnamon and sugar separately.
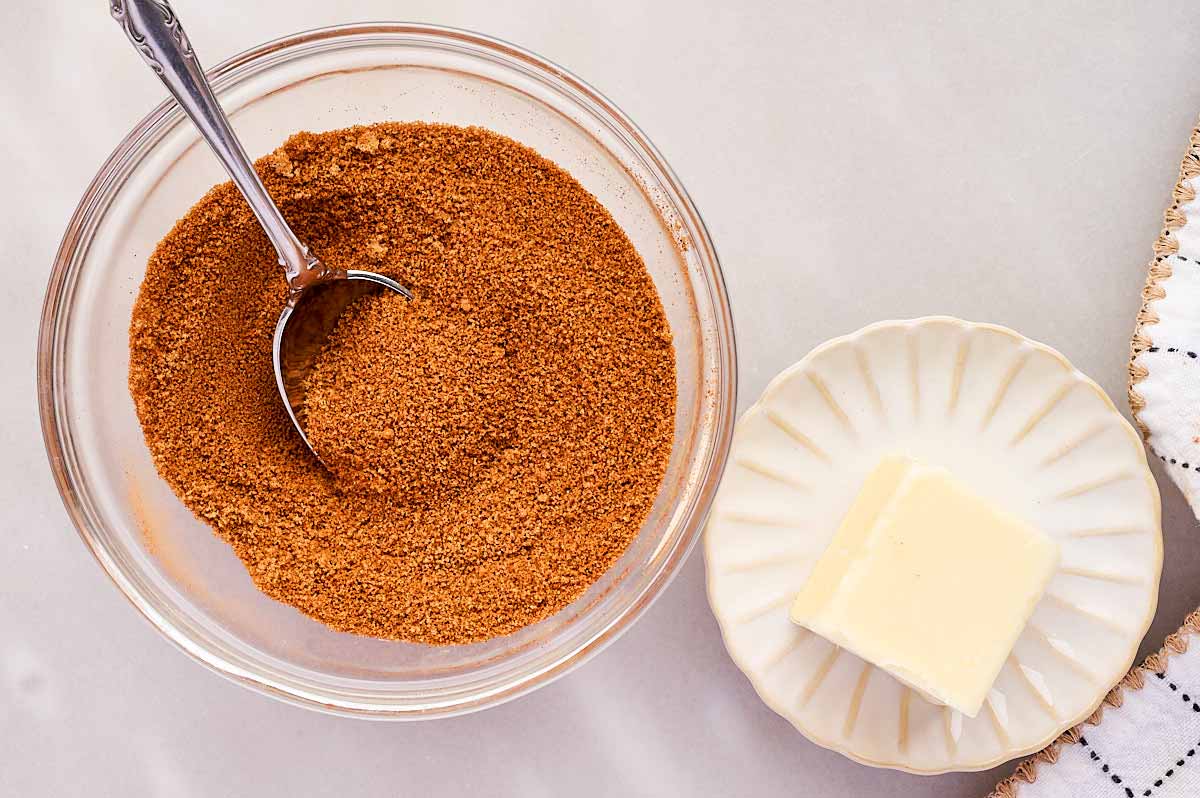
5. Rolling & cutting cleanly: Roll your dough into a relatively neat 10×20 inch rectangle and spread on the softened butter, leaving a ½-inch border around the edges. Sprinkle with the cinnamon sugar.
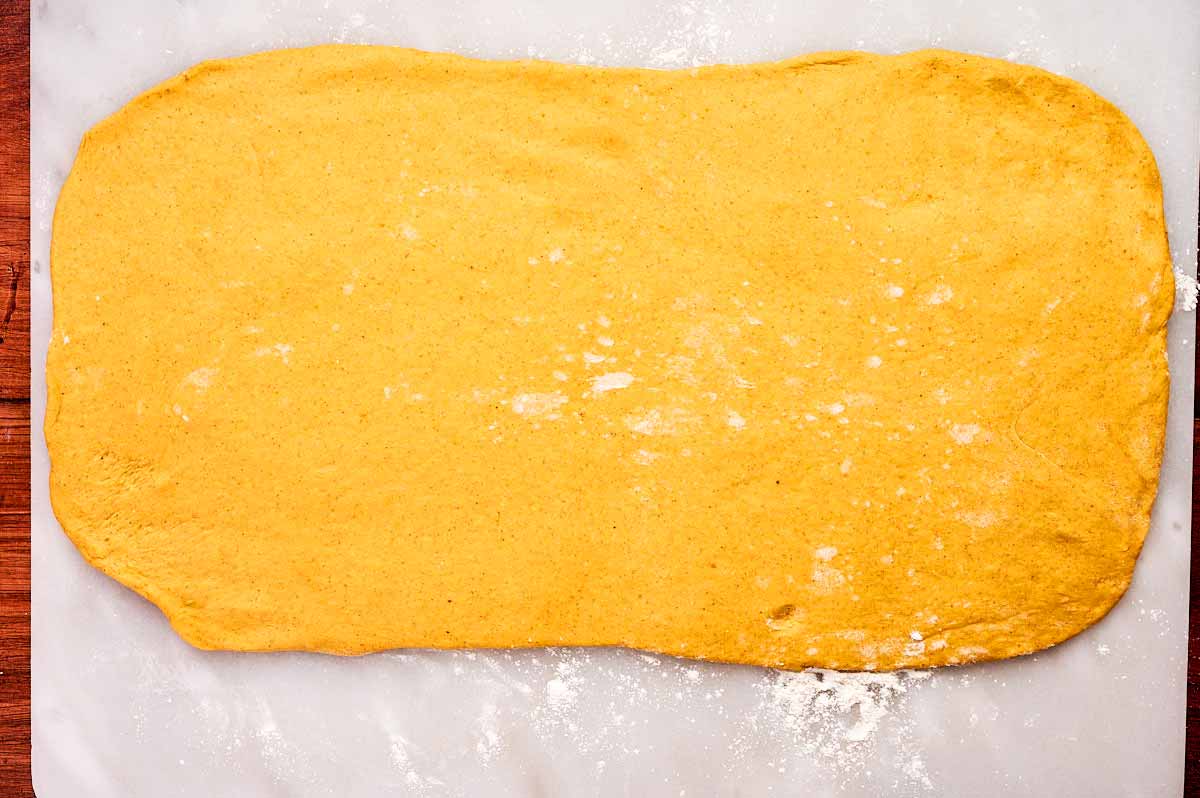
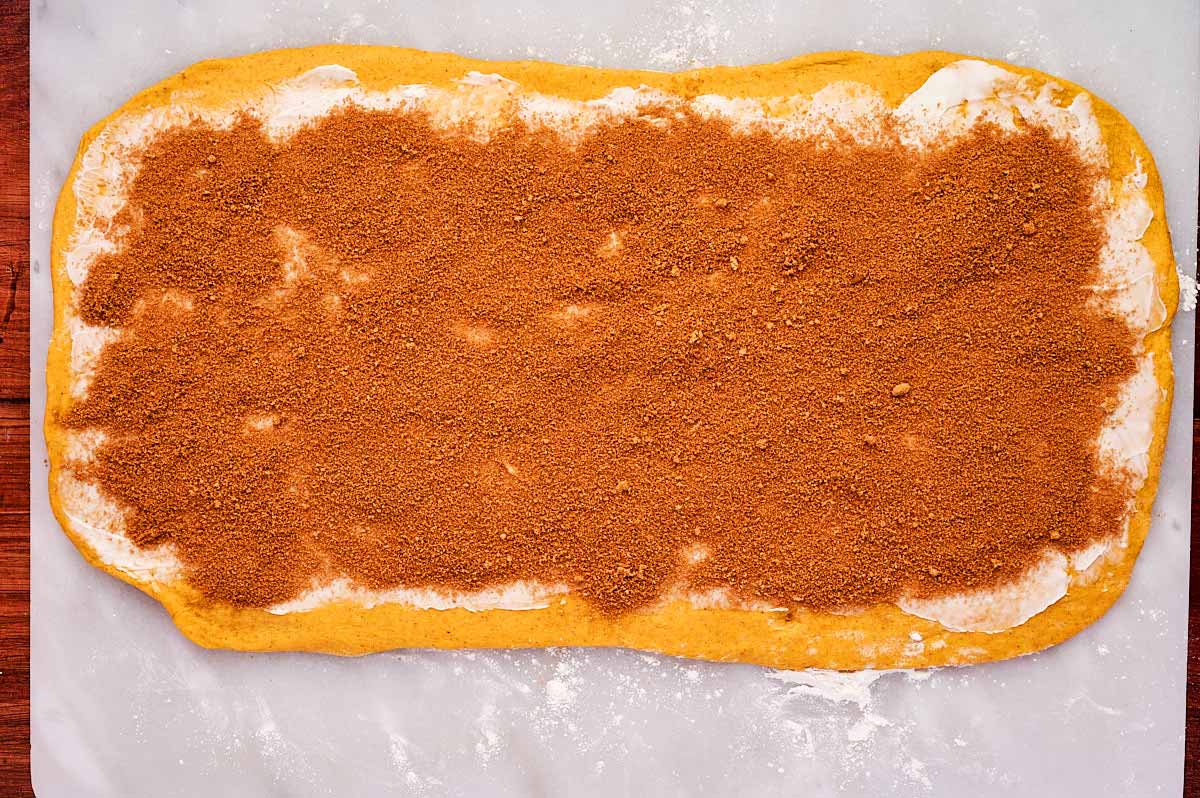
Roll it up snugly from the long 20-inch edge – snug enough to hold its shape, with just a tiny bit of give so the centers don’t pop up in the oven.
For super clean slices without squishing the dough, slide a piece of plain, thin sewing thread (or unflavored dental floss) underneath the log, cross the ends over the top, and pull!
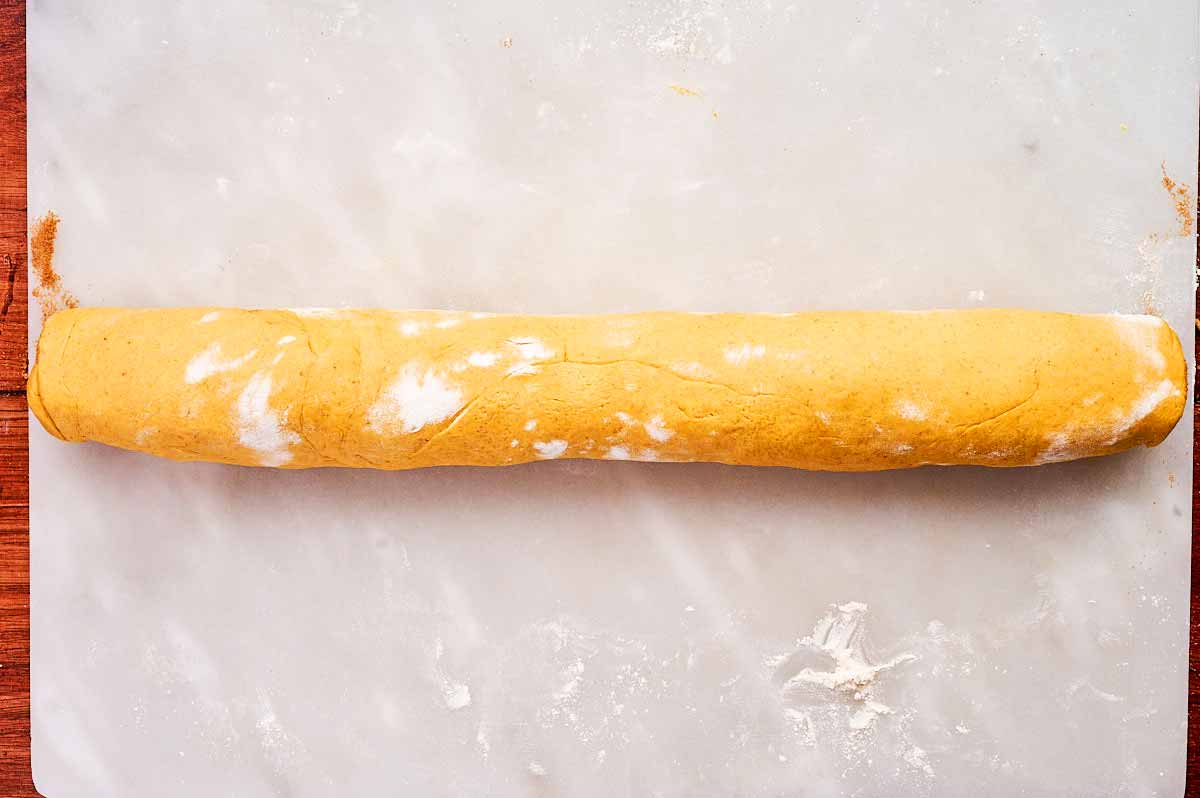
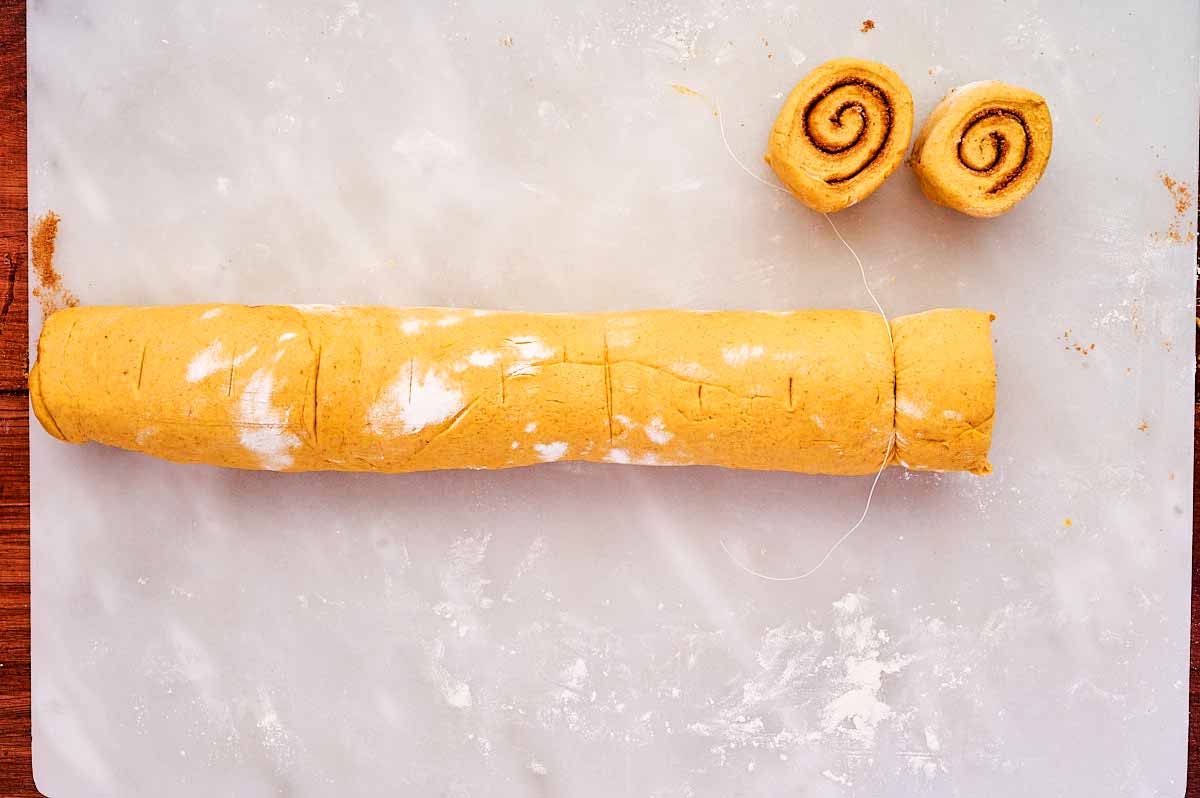
6. Strategic pan placement and second proof: The rolls in the center of the pan always take the longest to bake. To make sure everything finishes at the exact same time, place the two slightly smaller end pieces in the middle of your 9×13 pan and put the largest rolls around the outside edges.
Cover the pan tightly with plastic wrap (I’m not a fan of single-use plastic, but plastic wrap is the only thing I’ve found that doesn’t end up glued to the rolls in case they rise a little too much, plus you can easily keep an eye on them). Let the rolls rise until they have visibly increased in size and are puffy, but still spring back to their original shape when gently pushed.
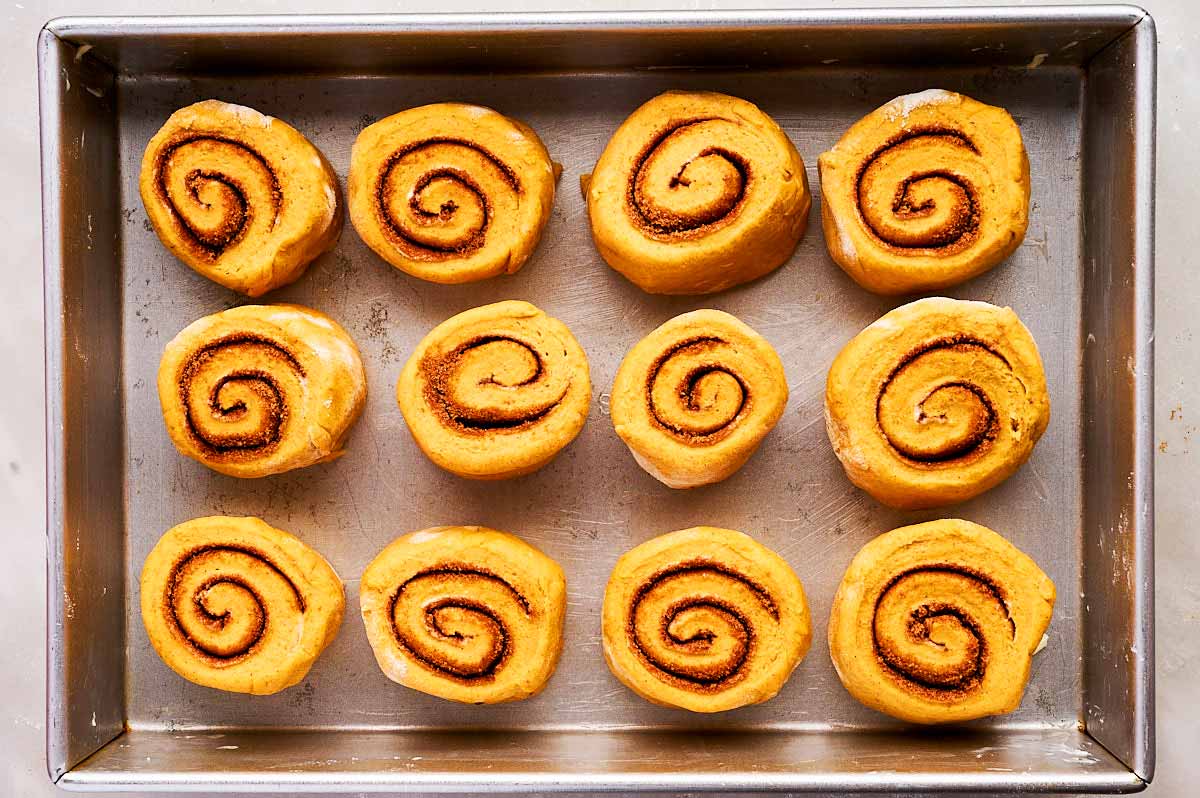
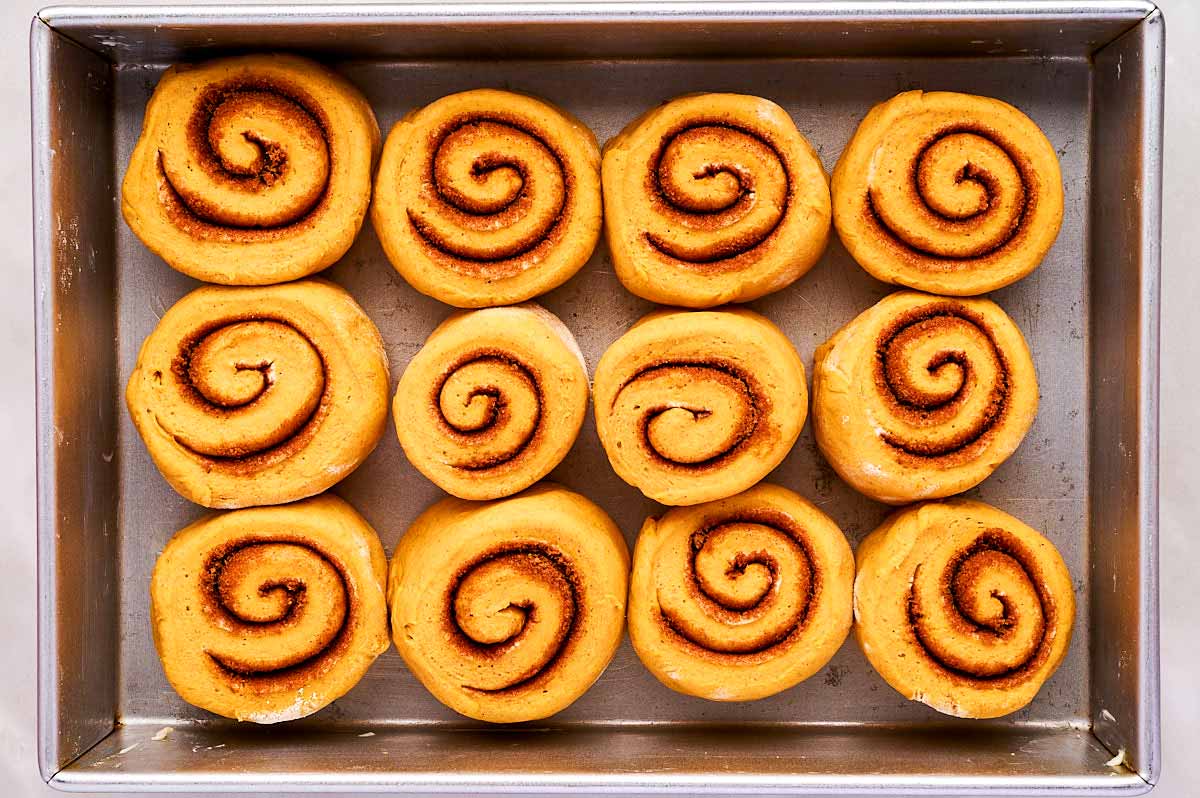
7. Checking for doneness: Bake at 350°F for 18–25 minutes, loosely tenting with foil after 15 minutes so the tops don’t get too dark. The best way to guarantee gooey, fully baked centers without guessing is an instant-read thermometer – pull them out right when the center rolls hit 190–195°F (87–90°C).
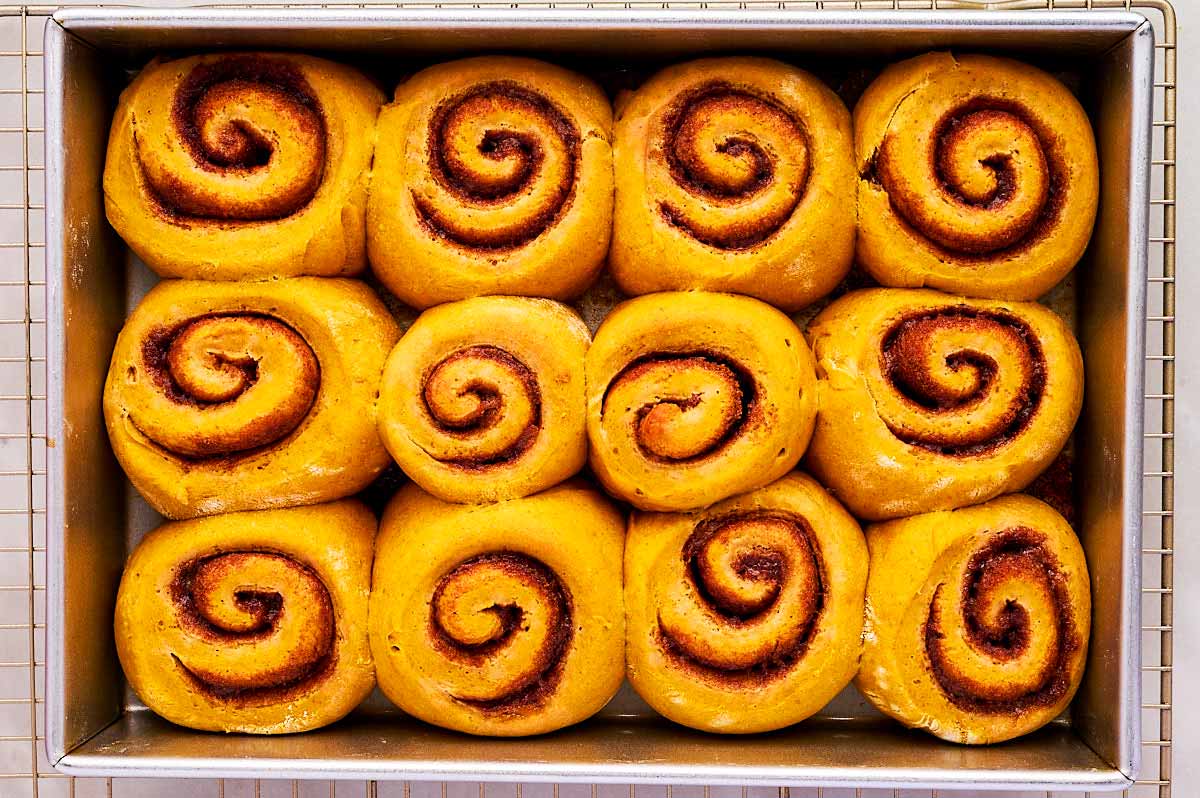
Let them cool in the pan for 10 minutes before spreading on that maple cream cheese frosting!
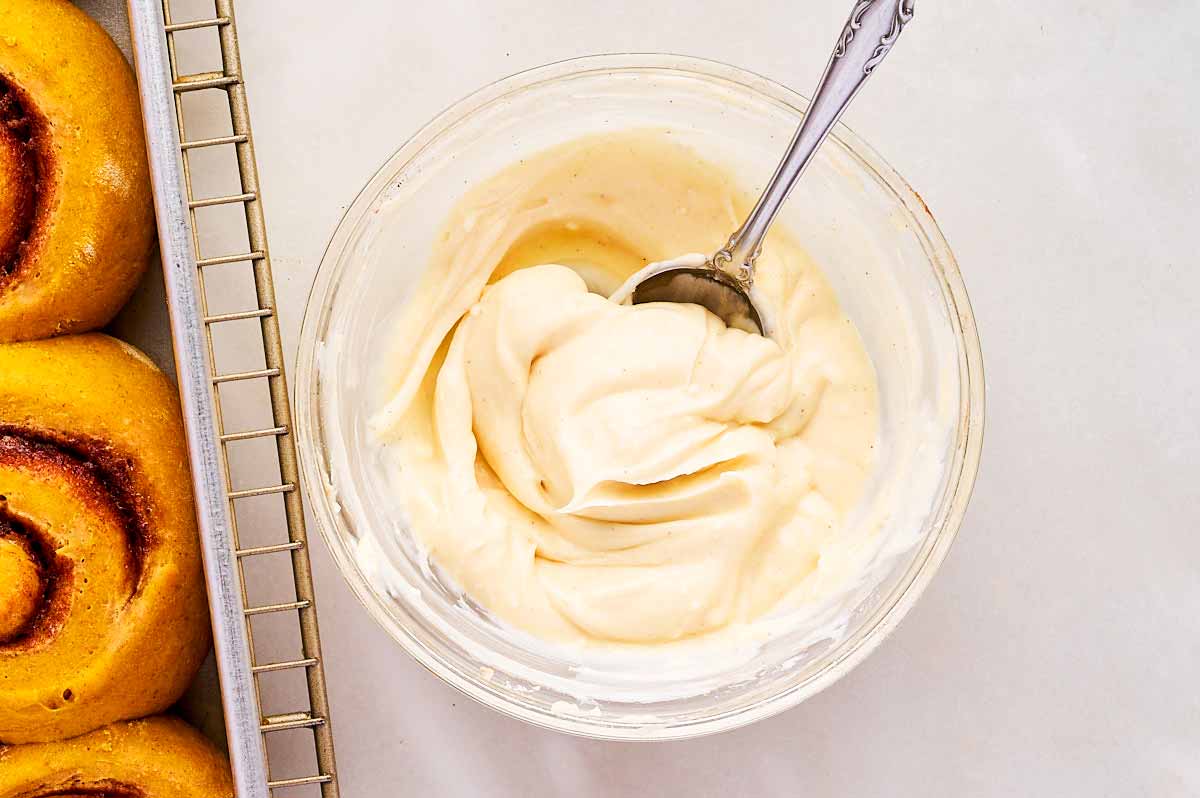
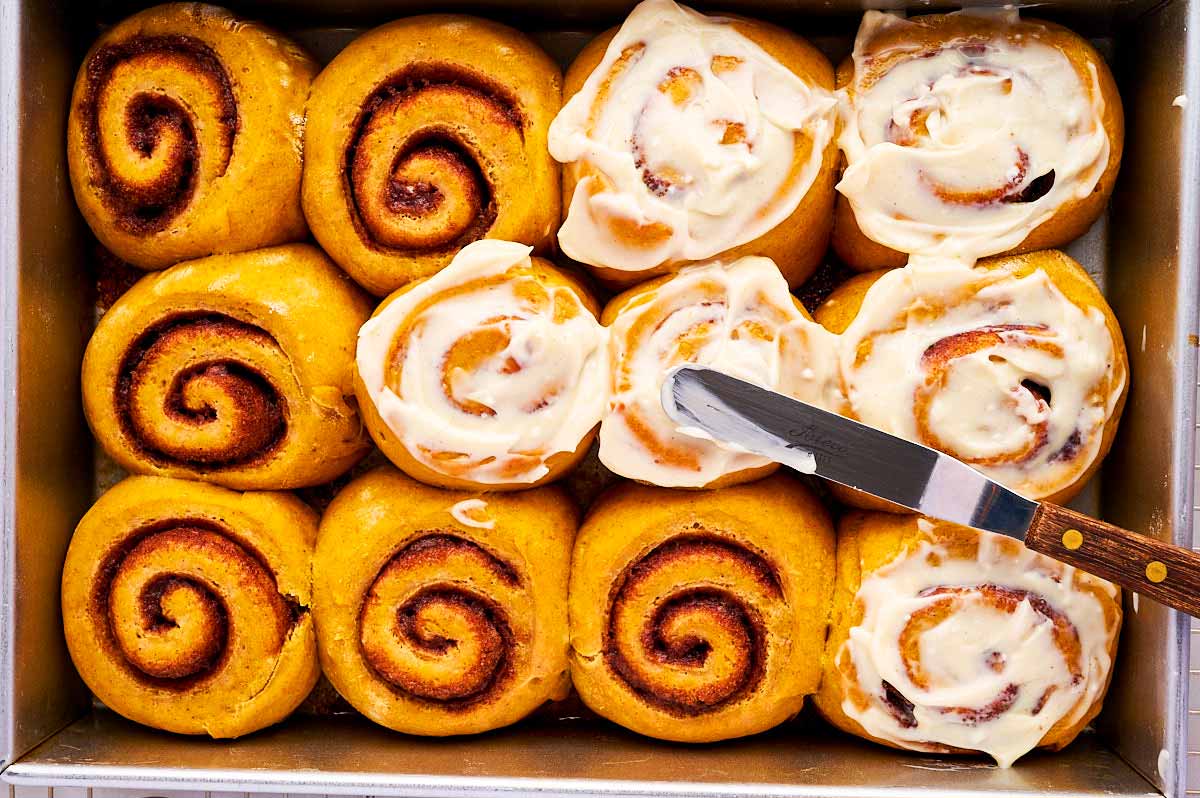
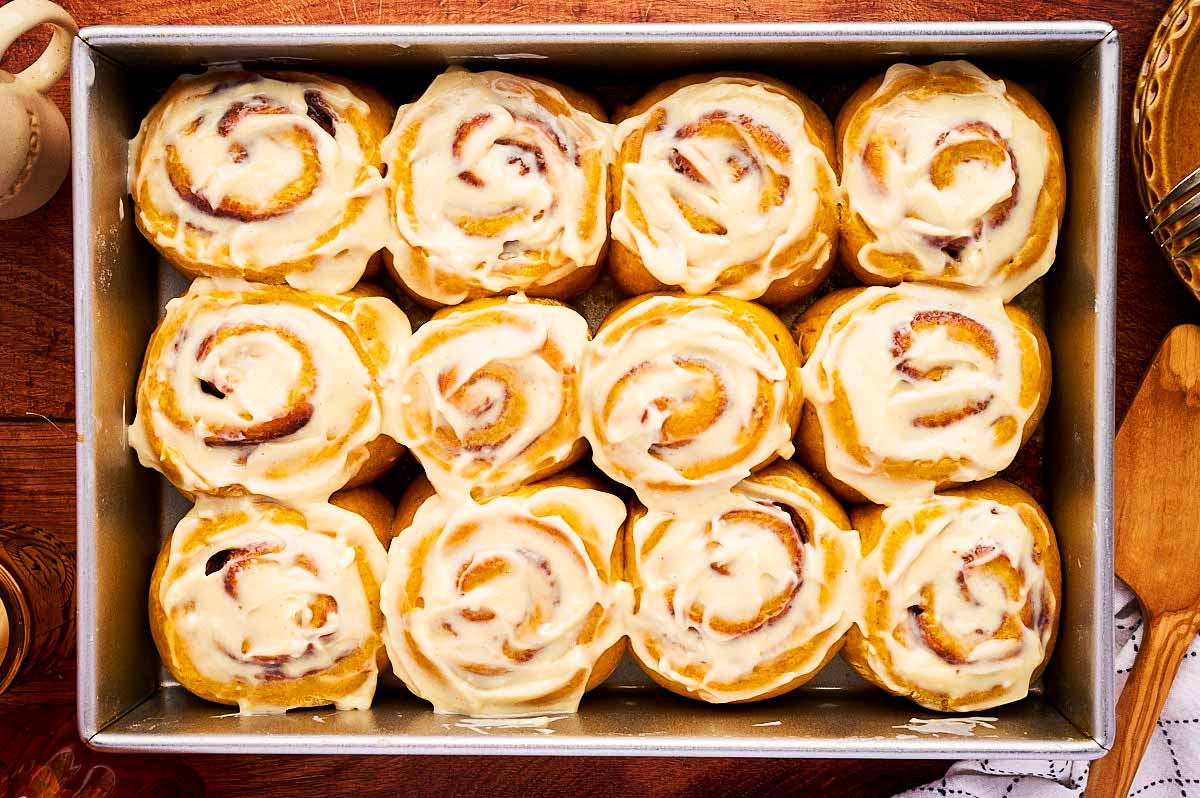
We like these best eaten warm, once the frosting has seeped into the rolls somewhat! But they are also delicious cold.
How to make Pumpkin Cinnamon Rolls ahead (overnight option!)
If you want warm, fresh-from-the-oven cinnamon rolls for a holiday morning or a lazy weekend without waking up at the crack of dawn, you can easily prep these the night before!
Because this is a heavy, butter-rich pumpkin dough, there are just a couple of important rules so the centers still bake all the way through:
- Prep through shaping: Make the dough, let it complete its first rise, roll it out, fill it, and slice your rolls into your greased 9×13 inch metal baking pan just like normal. (Again, make sure it’s metal – a cold ceramic dish straight from the fridge will take way too long to heat up in the oven, and you risk cracking it from thermal shock!)
- Chill right away (skip the second rise at night): As soon as the rolls are in the pan, tightly cover them with plastic wrap and place them straight into the refrigerator. The cold temperature slows the yeast way down so they slowly rise overnight without overproofing. You can chill them for 8 to 14 hours.
- Warm up & puff in the morning: Take the pan out of the fridge 45 to 60 minutes before you want to bake. Leave them covered on the counter (or place them in a 77°F/25°C dough incubator for about 20-30 minutes) until they lose their fridge chill and look noticeably puffy.
- Bake and frost: Uncover and bake at 350°F as directed, adding 2–3 extra minutes if the dough is still slightly cool in the center. Always double-check with your instant-read thermometer that the middle rolls hit 190–195°F (87–90°C) before pulling them out!
Serving ideas for a cozy fall morning
These warm pumpkin rolls are pretty much perfection all on their own, especially with a hot mug of coffee, chai tea, or warm apple cider. If you’re putting together a bigger holiday or weekend brunch spread, I love pairing them with something savory to balance out the sweetness:
- Crispy air fryer bacon or breakfast sausage
- Fluffy scrambled eggs or a simple omelette
- A bowl of fresh autumn fruit (sliced honeycrisp apples, pears, and grapes are our favorites)
How to store and reheat Pumpkin Cinnamon Rolls
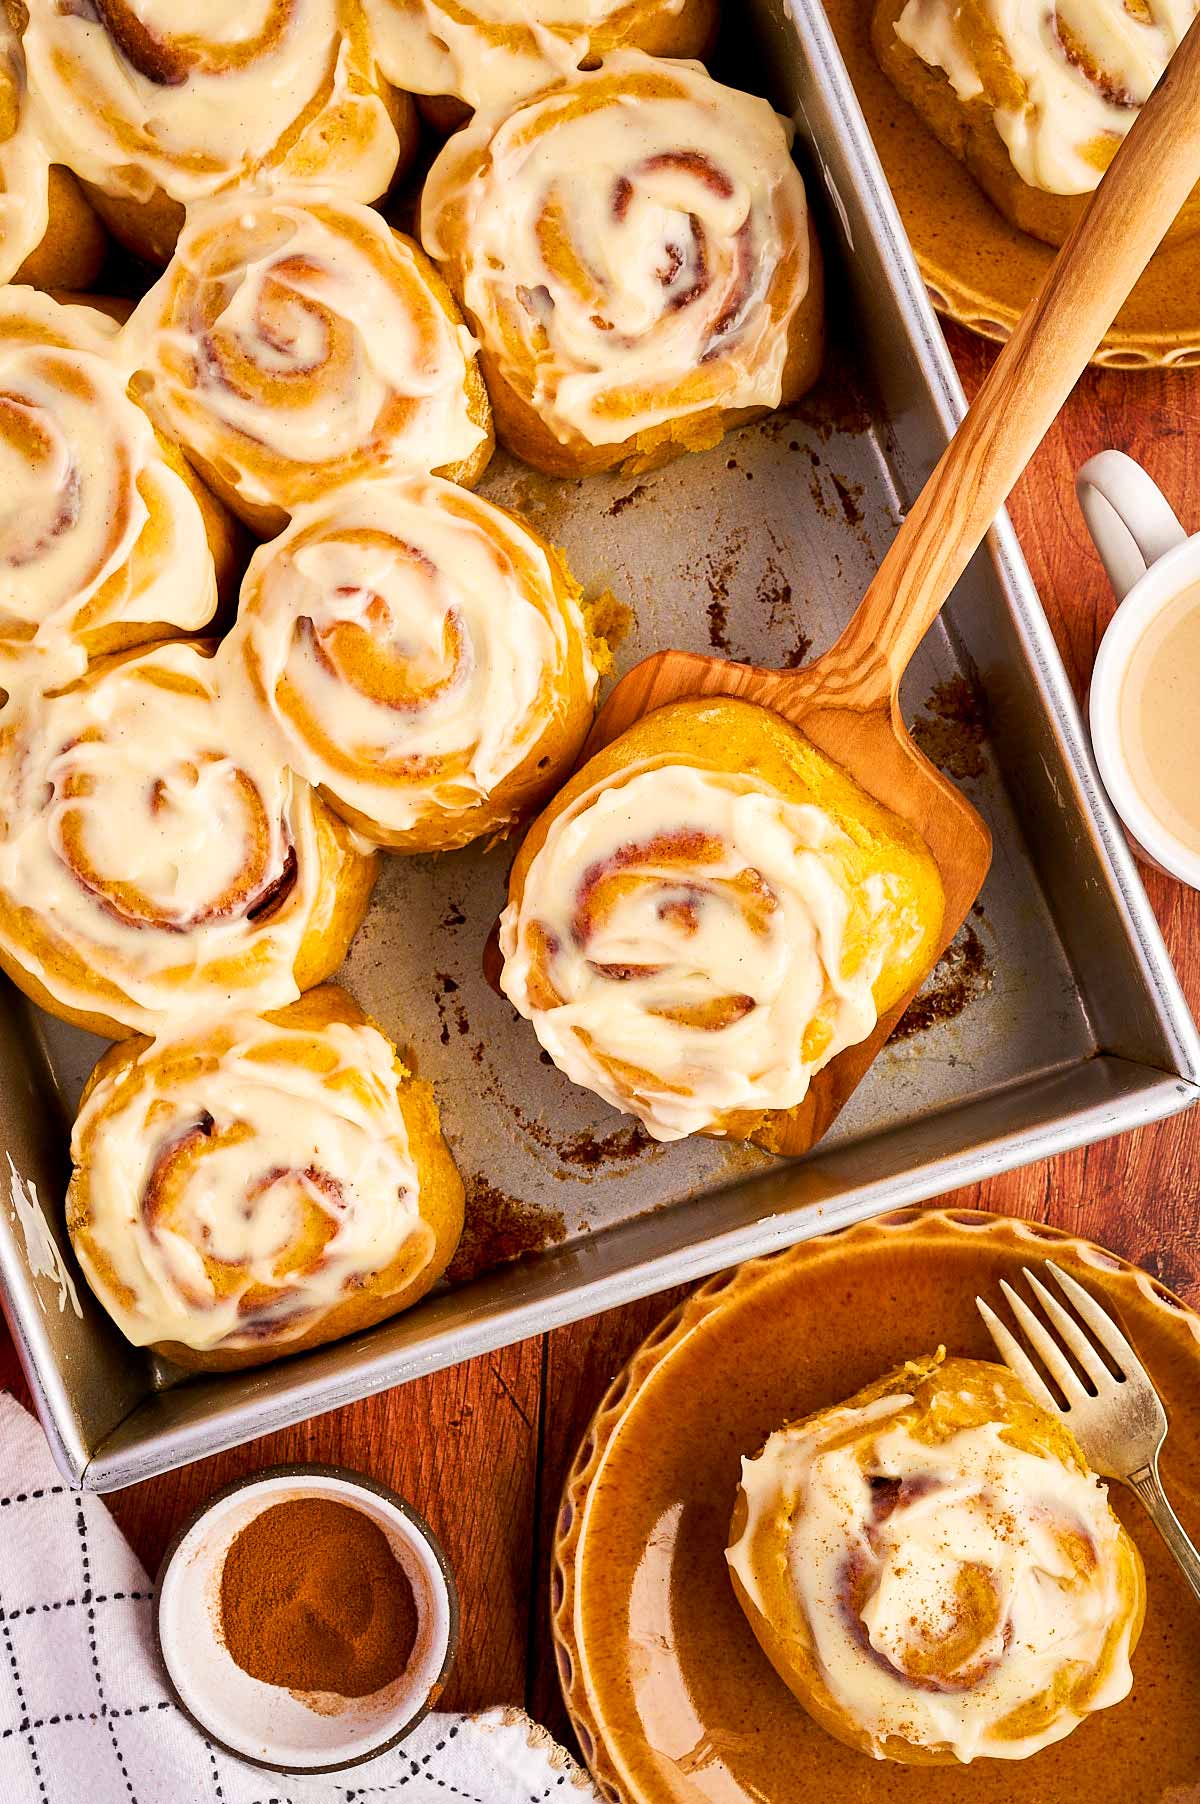
Because these rolls are topped with a real cream cheese frosting and made with moist pumpkin dough, they must be stored in the refrigerator.
- In the fridge: Let the rolls cool completely, then cover the pan tightly with plastic wrap or transfer leftovers to an airtight container. They will stay fresh in the fridge for up to 2 days.
- Reheating: Cold cinnamon rolls tend to firm up in the fridge, so I definitely recommend warming them up before eating! Pop an individual roll in the microwave for 15–20 seconds until soft, gooey, and warm all the way through.
- Freezing (unfrosted): If you want to freeze a batch for later, let the baked rolls cool completely before frosting, wrap them tightly in plastic wrap and foil, and freeze for up to 2 months. Thaw overnight in the fridge, unwrap, warm in the oven at 325°F for about 10-15 minutes until heated through, and slather with fresh maple cream cheese frosting!
Pumpkin Cinnamon Rolls
Ingredients
- ½ cup whole milk (warmed to 105F (41C))
- 2 ¼ tsp yeast
- 2-4 tablespoons granulated sugar (depends on your preferred level of sweetness in the dough, we don’t like it too sweet so I use 2 tablespoons but you can increase for a sweeter dough)
- 1 cup pumpkin puree
- 4 tablespoons unsalted butter (melted)
- 1 large egg (room temperature preferred)
- 1 ½ teaspoons ground cinnamon
- 1 ½ teaspoons pumpkin pie spice
- 1 ½ teaspoons salt (use slightly more if using sea salt; do NOT forget the salt – it heavily affects the taste and the dough structure)
- 3 ½ – 4 ½ cups all purpose flour (this will highly depend on how you measure your flour, and how watery your pumpkin puree is. If you fluff, scoop and level your flour you will need closer to 4 ½ cups; if you scoop your flour it will be closer to 3 ½ cups. I weighed out how much flour I use for a few test batches I did, and it’s always between 540 and 560g. I use homemade roasted pumpkin puree.)
Filling
- ½ cup light brown sugar
- 1 ½ teaspoons ground cinnamon
- 1 ½ teaspoons pumpkin pie spice
- pinch of salt
- 4 tablespoons unsalted butter (softened at room temperature (do not melt the butter, do not soften it at more than room temp – if the butter is too warm, it will affect how the cinnamon rolls bake, cause larger gaps between the swirls and cause more of the filling to leak out))
Frosting
- 4 oz cream cheese (softened)
- 2-4 tablespoons powdered sugar
- 1 tablespoon maple syrup
- ground cinnamon and salt (optional to taste (I use a few pinches of cinnamon and a pinch of salt))
Instructions
Make dough:
- Activate yeast: Place the milk, yeast and sugar in the bowl of your stand mixer (or in a large mixing bowl if you’re kneading by hand). Stir to combine, cover and let sit for 10 minutes until frothy. If nothing happens, your least is likely expired and you will need to start over.½ cup whole milk, 2 ¼ tsp yeast, 2-4 tablespoons granulated sugar
- Assemble liquid ingredients: In a large measuring jug, whisk together the pumpkin and the melted butter (whisking the butter into the pumpkin first helps to cool it down so it doesn’t affect the structure of the egg). Then, whisk in the egg, cinnamon, pumpkin spice and salt. This mixture can look a little flaky – don't worry, it's just the butter firming back up and it ill not affect the results.1 cup pumpkin puree, 4 tablespoons unsalted butter, 1 large egg, 1 ½ teaspoons ground cinnamon, 1 ½ teaspoons pumpkin pie spice, 1 ½ teaspoons salt
- Start dough: Once your yeast mixture is ready, add the pumpkin mixture to the mixing bowl as well and stir to combine. Stir in half of the flour. Place the bowl in your stand mixer fitted with the hook attachment and start kneading on low speed (or knead by hand). Add the remaining flour 2 tablespoons at a time, until the dough starts coming together. Knead on medium speed for 5 minutes. It should come together in a ball but still slightly stick at the bottom of the bowl. The dough should be very soft and slightly tacky and sticky. The butter content in the liquid causes the flour to absorb liquid at a lower rate, so it will get less sticky as it sits to rise. However, after kneading, it should not be so sticky that you cannot handle it at all. You should be able to shape it into a ball while it annoys you a little bit because it somewhat sticks to your hands 🙂3 ½ – 4 ½ cups all purpose flour
- First proof: Place the dough in an oiled bowl, turn over to coat. Cover and let rise until doubled in size. This will take 1-2 hours, depending on the room temp. I let it rise in a dough incubator at 77°F/25°C and it takes exactly one hour. (Do not go warmer than 77°F/25°C if you use a temperature controlled environment for your dough, or the butter may get too warm, which will negatively affect the bake. For this reason, I also do not recommend to proof your dough in the oven with the light on or in a pre-warmed microwave, because you do not have exact control over the temperature and it could be too high for an enriched dough like this one.)
Shape rolls:
- Prep and make filling: Lightly grease a 9×13 inch metal baking pan.Make sure your butter for the filling is softened at room temperature.Combine the light brown sugar, ground cinnamon, pumpkin spice and salt for the filling in a small bowl.½ cup light brown sugar, 1 ½ teaspoons ground cinnamon, 1 ½ teaspoons pumpkin pie spice, pinch of salt
- Roll out and fill: Once your dough is ready, gently push down on your dough to release extra air. Flour your worktop, and lightly flour the outside of your dough. Roll it into a rectangle, sized 10×20 inches.Spread with the softened butter, leaving a ½ inch gap around the edges. Evenly sprinkle with the brown sugar filling.4 tablespoons unsalted butter
- Roll into a log and cut: Starting from the long 20in edge, roll the dough into a log. You want to roll it snugly, but with a little bit of give so the dough can expand in the oven without the centers popping up and out. Once you get to the end, pinch the seam closed to avoid filling sprinkling out. Slightly flatten the seam with your hands and roll the log seam-side down. Cut into 12 rolls and place into your prepared dish. (I am quite particular about this step, I use a measuring tape and mark where I need to cut with a blunt knife, then I use a piece of sewing thread to cut off rolls and place each in the dish. The smaller end rolls I try to place in the middle of the dish, because the middle rolls take the longest to bake so I try to avoid placing the largest rolls in the middle of the dish.)
- Second proof: Tightly cover the dish with plastic wrap and proof again, until the rolls look notably puffy. In my dough incubator it takes 20-30 minutes, tops. If you proof yours at room temperature and you keep the air conditioning on the cooler side, it may take up to 60 minutes.
Bake and frost:
- Bake: Preheat your oven to 350°F (175°C) while your rolls are rising. Once you’re ready to bake, remove the plastic wrap from the rolls and place them on the middle rack in the oven. Bake for 18-25 minutes, depending on preferred doneness. I loosely tent with foil after 15 minutes to avoid darkening, and my rolls bake in a white enameled metal dish in pretty much exactly 18 minutes. You’re looking for rolls that look set in the middle and turn lightly golden around the edges. The safest method is to use an instant-read thermometer. The rolls are done once they reach 190-195°F (87-90°C). However, this does NOT work well when baking in a ceramic dish, because of the way ceramic behaves. Again, I highly highly recommend baking these in a metal dish, or if you don’t have a metal dish, just bake them freestyle on a sheet pan (they will bake slightly faster) which is still better than a ceramic dish. The pumpkin dough is just quite heavy and a ceramic dish insulates too much).
- Cool: Once your rolls are done, remove the dish from the oven and let them cool in the pan on a cooling rack for 10 minutes.
- Frost: While your rolls are cooling, stir together all frosting ingredients in a small bowl. Spread on the warm rolls. Serve the rolls warm once the frosting has settled, if you like.4 oz cream cheese, 2-4 tablespoons powdered sugar, 1 tablespoon maple syrup, ground cinnamon and salt
Notes



Comments
No Comments