

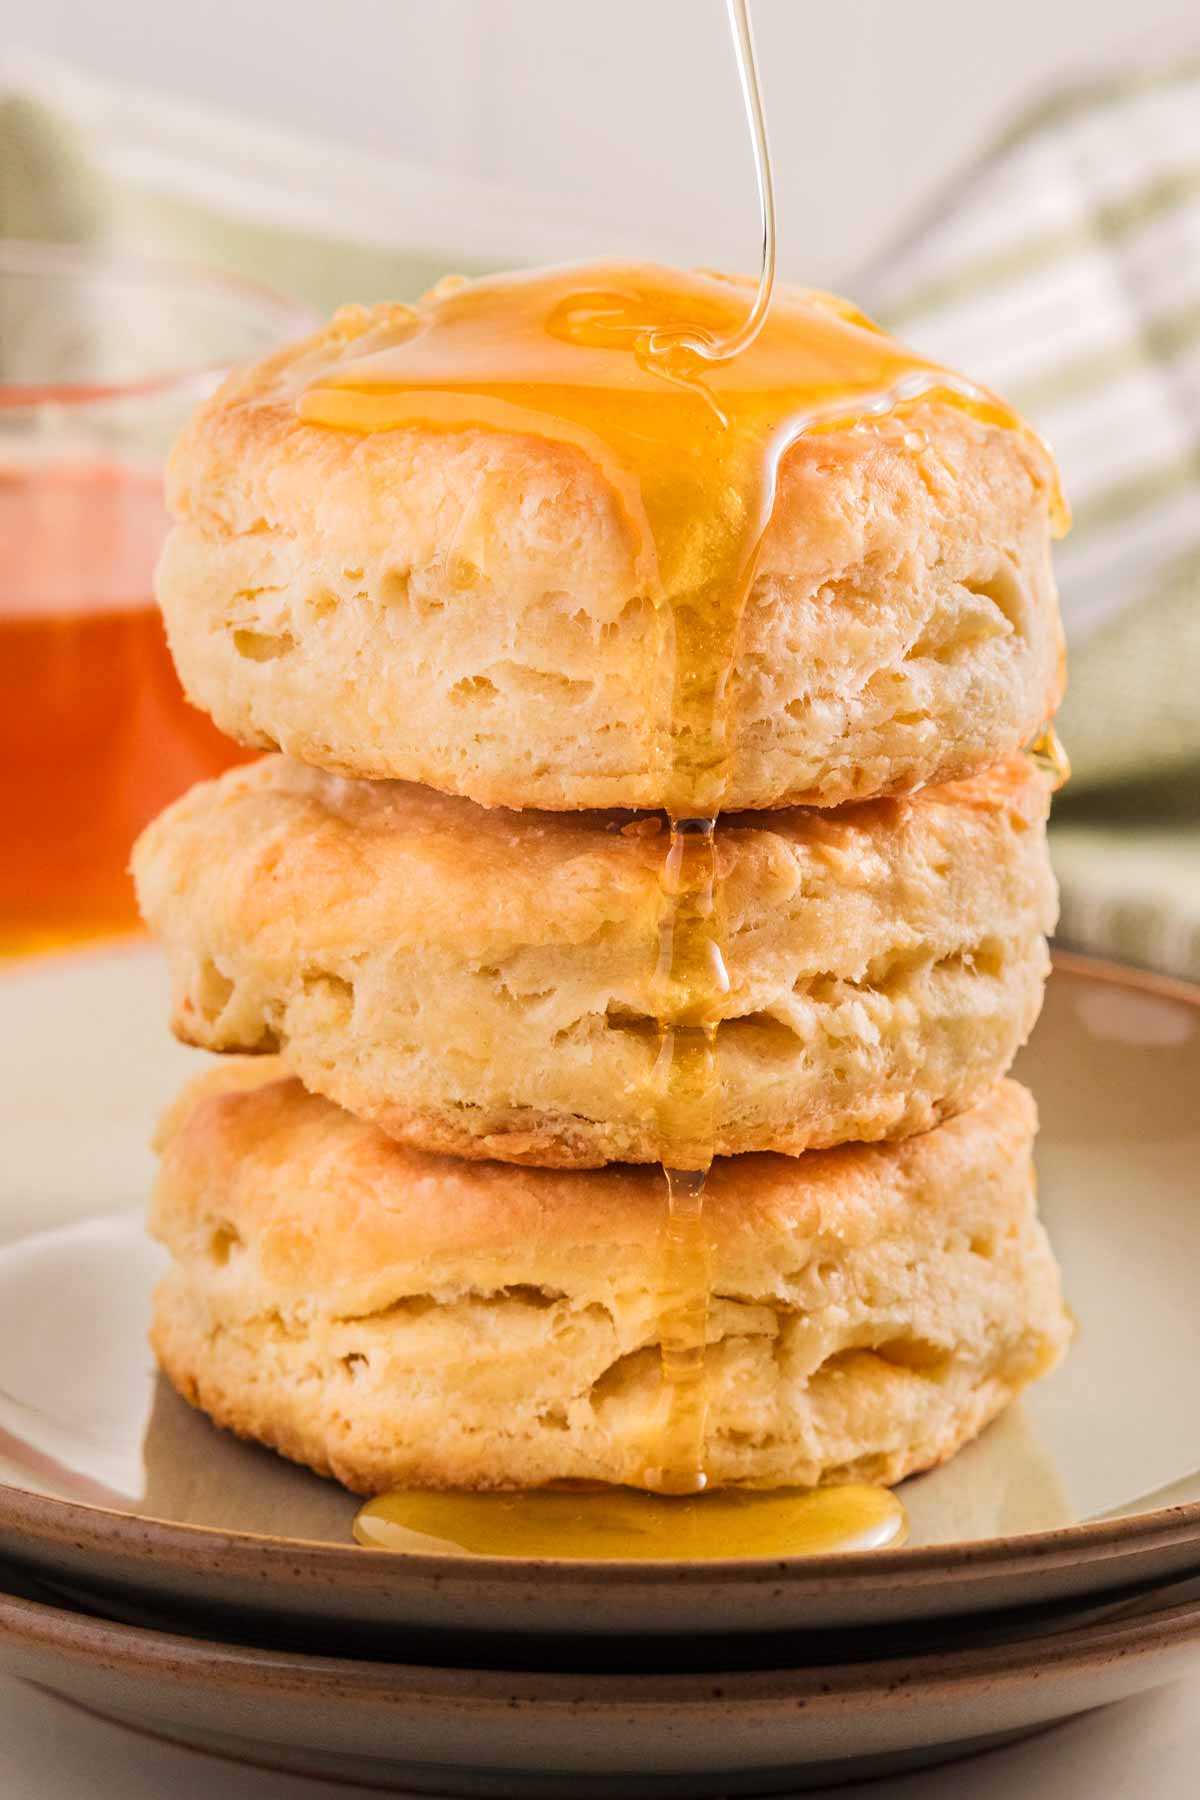
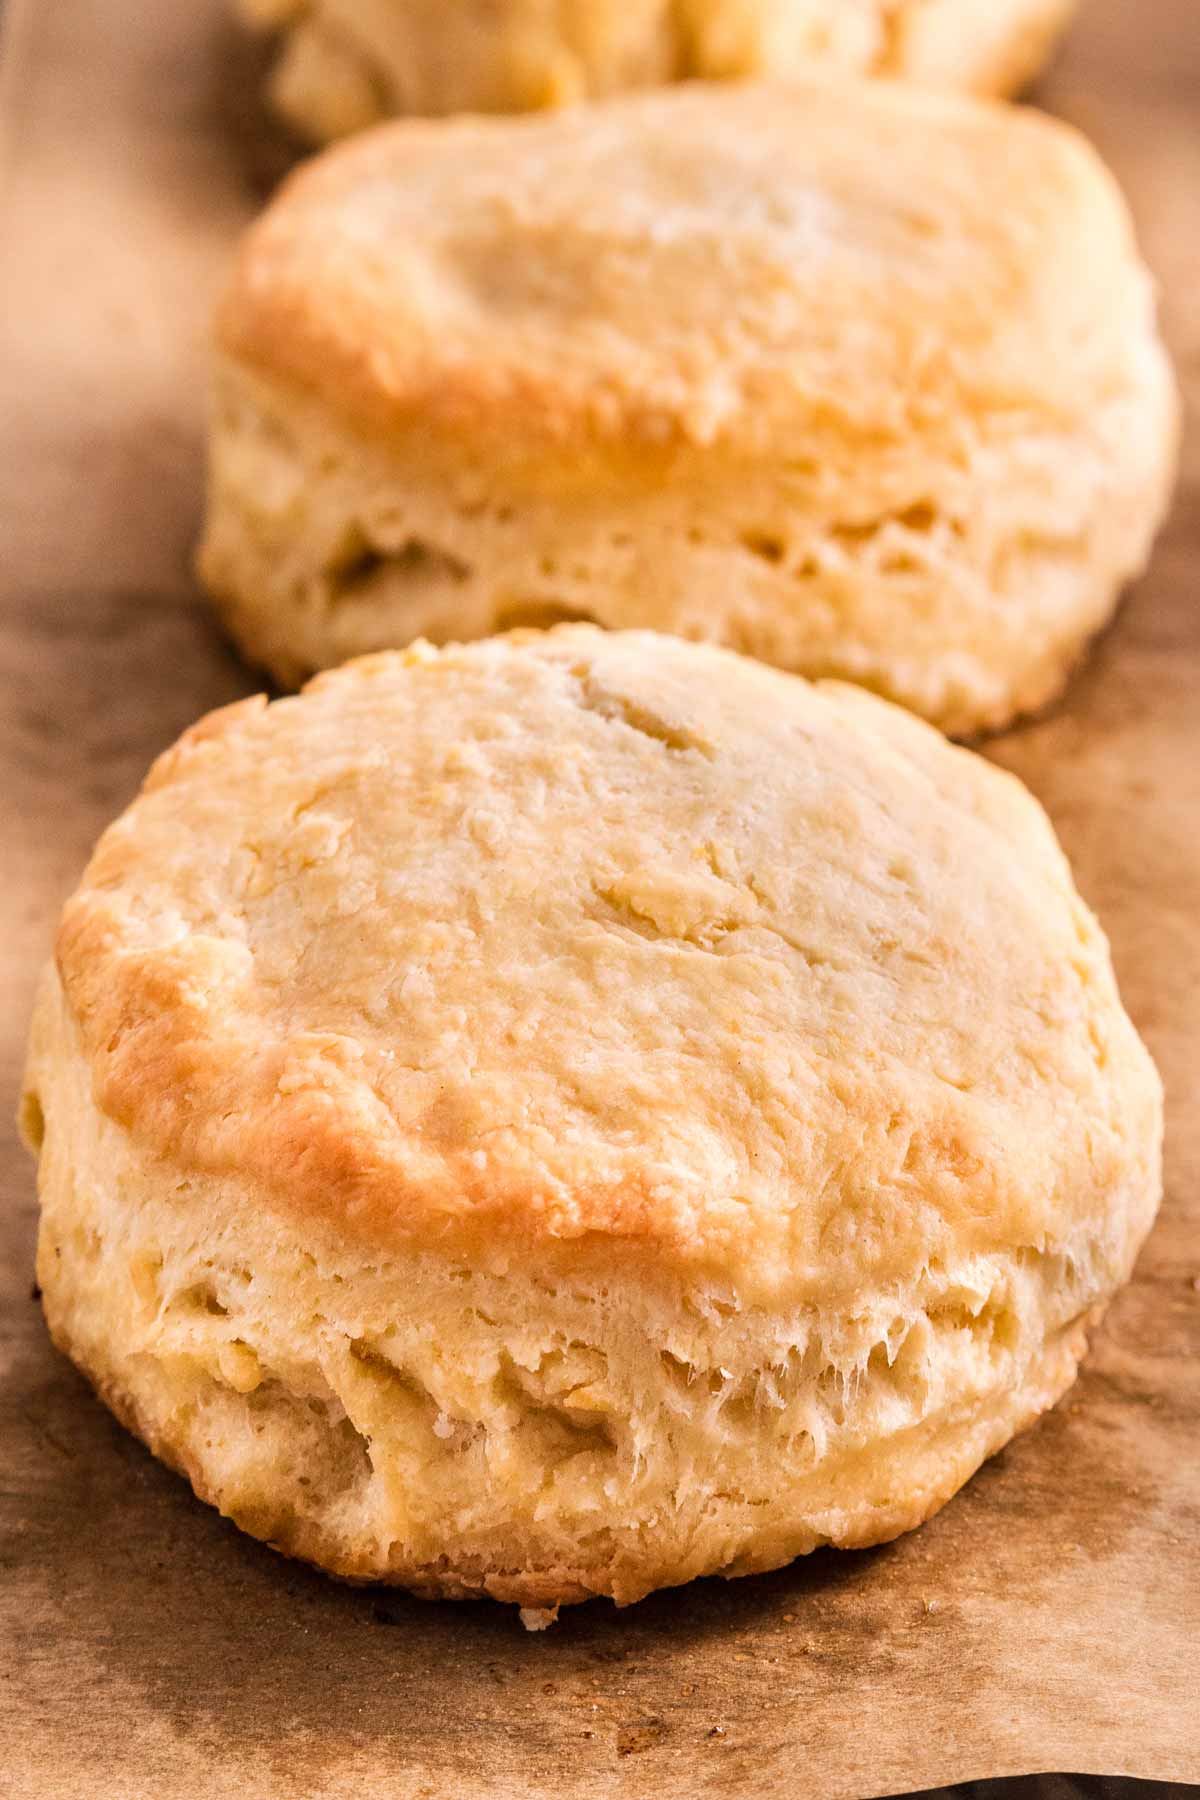
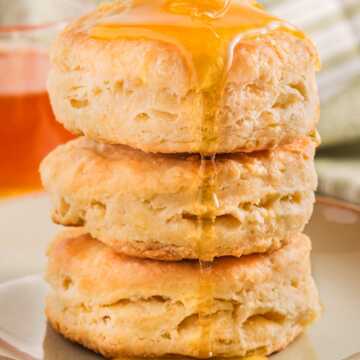
If you’re looking for the perfect buttermilk biscuit recipe, stop scrolling because you just found it! These biscuits are everything they should be – tall, flaky, buttery, and so simple, you’ll wonder why you haven’t been baking them all along.
Whether you’re serving them with a cozy family breakfast or sneaking one fresh out of the oven with a little extra butter (no judgment here!), this recipe is about to become a staple in your kitchen.
Why you’ll love this recipe
- It’s foolproof: I’ve tested this recipe so many times, I could make these biscuits in my sleep – and I promise, you’ll get perfect, fluffy results every single time.
- Minimal effort, maximum payoff: These biscuits come together with just a few simple ingredients and steps, but they’ll taste like you spent hours in the kitchen.
- Family-approved: My kids devour these straight from the oven (and my husband isn’t far behind!). They’re perfect for weekend mornings, lazy afternoons, or even as a quick side for dinner.
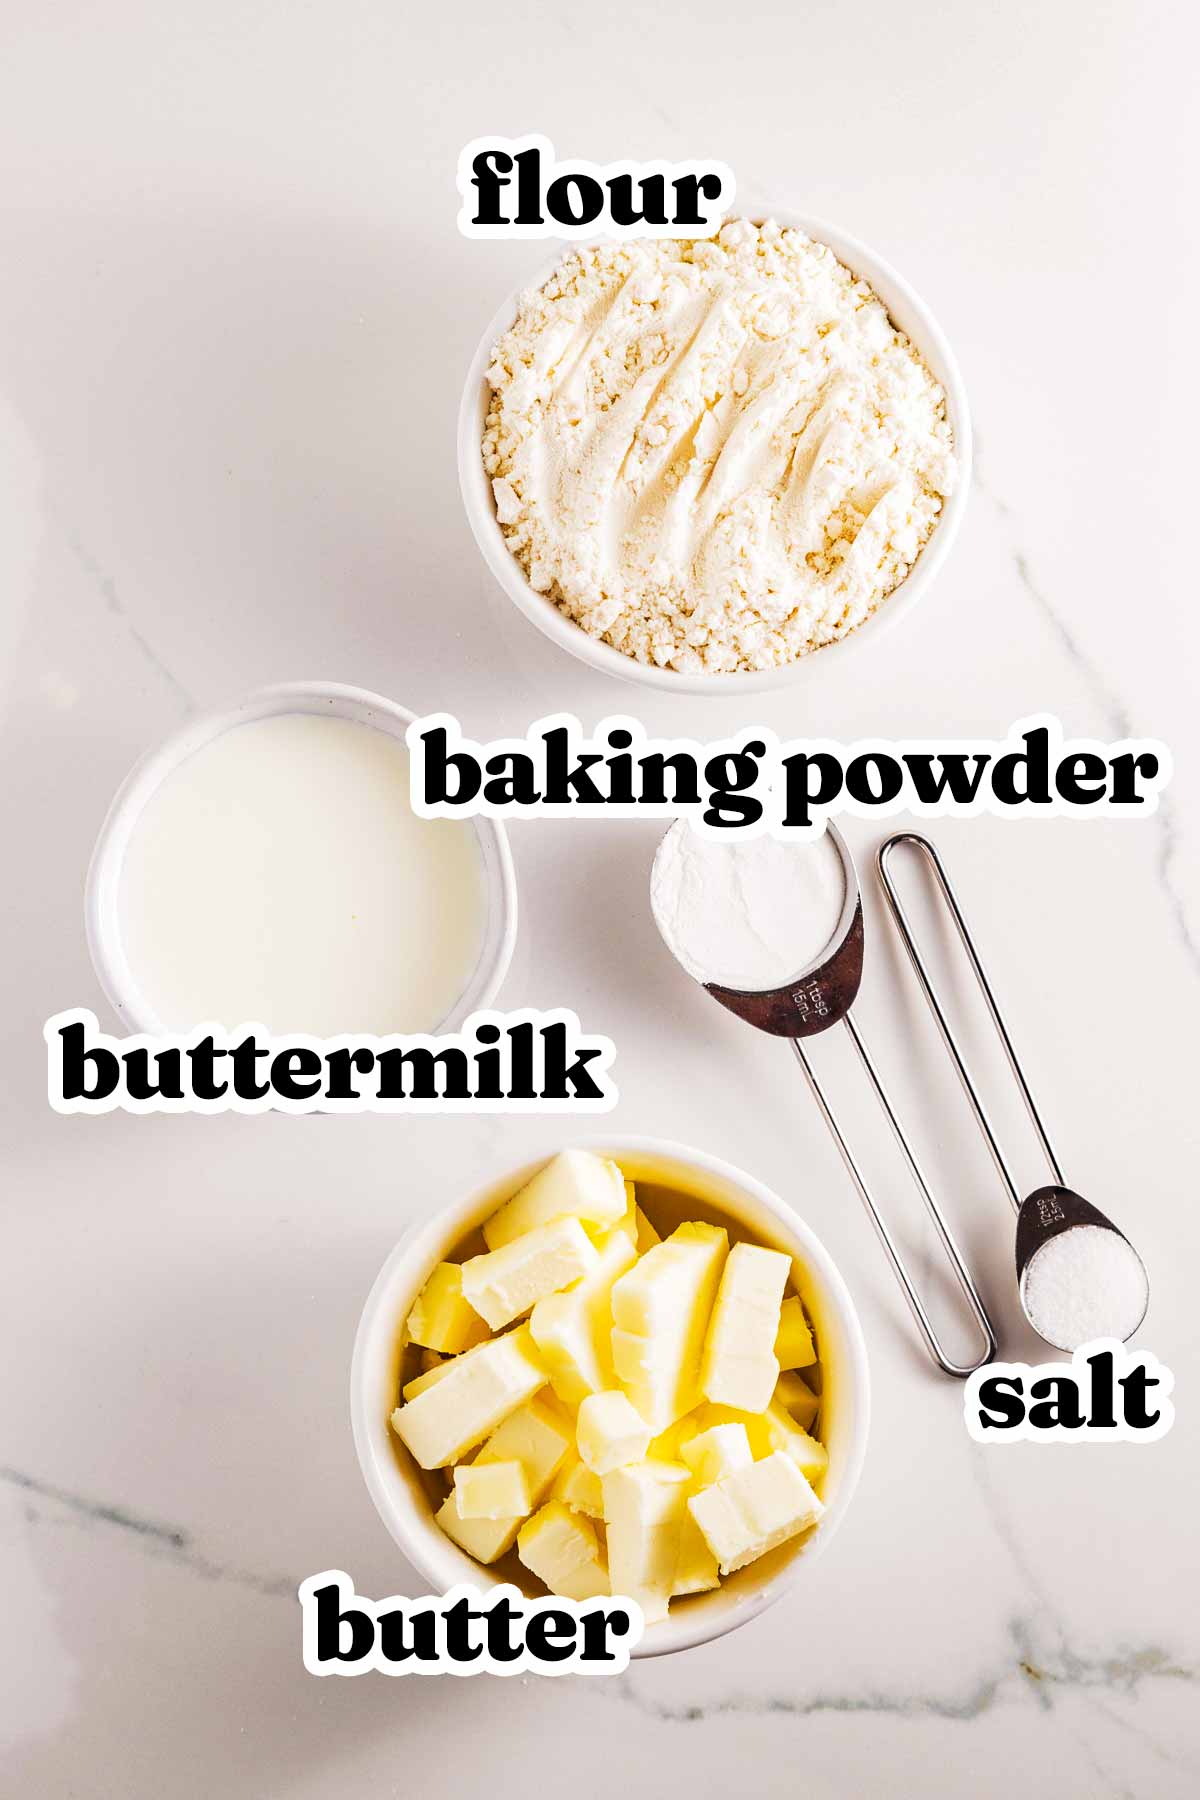
Ingredients you’ll need
Here is a visual overview of the ingredients in the recipe. Scroll down to the printable recipe card at the bottom of this post for quantities!
Ingredient notes
- Butter: Make sure your butter is cold, straight from the fridge – this is the secret to flaky biscuits. If you don’t have butter on hand, you can substitute shortening for a slightly different texture (still delicious!).
- Buttermilk: Buttermilk gives these biscuits their signature tender crumb and a slight tang. No buttermilk? No problem! Stir ½ teaspoon of white vinegar or lemon juice into ⅔ cup of milk, let it sit for 5 minutes, and use it as a perfect substitute.
- Flour: Use all-purpose flour for the best results. I haven’t tested these with whole wheat flour, but if you want to experiment, try using half whole wheat and half all-purpose to avoid overly dense biscuits.
- Baking powder: Fresh baking powder is key for a good rise. If yours has been sitting in the pantry for over a year, it’s time to replace it – trust me, it makes all the difference!
How to make biscuits from scratch
Let’s make some amazing buttermilk biscuits together! Don’t worry, I’ll walk you through every step – we’ve got this.
1. Prep your oven and pan: First, get that oven nice and hot – set it to 450°F. Trust me, the high heat is what helps these biscuits rise tall and get golden perfection on top.
While the oven preheats, grab a baking sheet and line it with parchment paper. No parchment? Just give it a light greasing with butter or non-stick spray – it’ll work just fine!
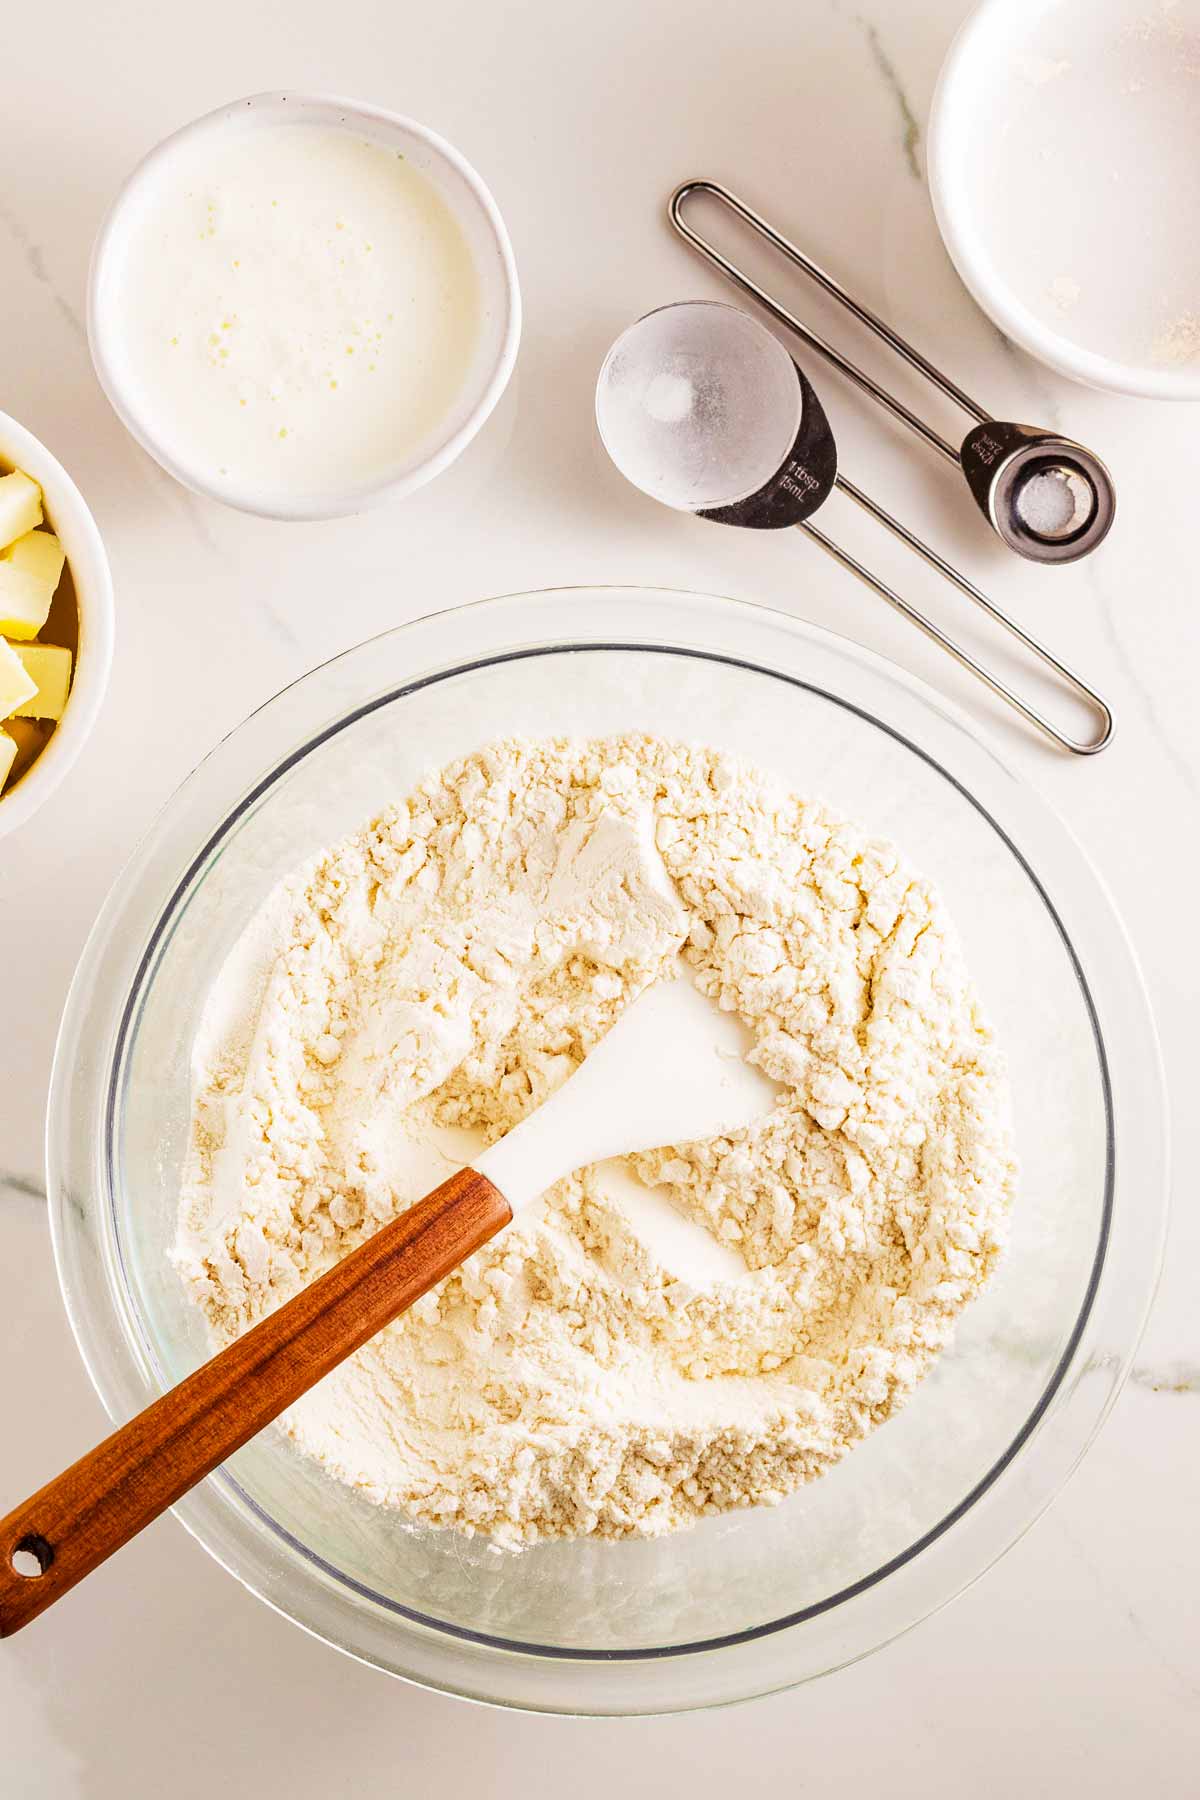
2. Mix up the dry ingredients: In a big mixing bowl, combine 2 cups of all-purpose flour, 1 tablespoon of baking powder, and ½ teaspoon of salt. Give it a good stir to make sure everything’s evenly mixed.
This step is super simple, but it’s important – you don’t want clumps of salt or baking powder hanging out in your biscuits.
3. Cut in the butter: Now, grab your ½ cup of cold, cubed butter (that’s 1 stick) and add it right into the bowl with the flour mix. Here’s where the magic starts.
Use a pastry cutter, a fork, or even your hands to work the butter into the flour until you get little crumbly bits. You want the pieces to be about the size of peas – they don’t have to be perfect!
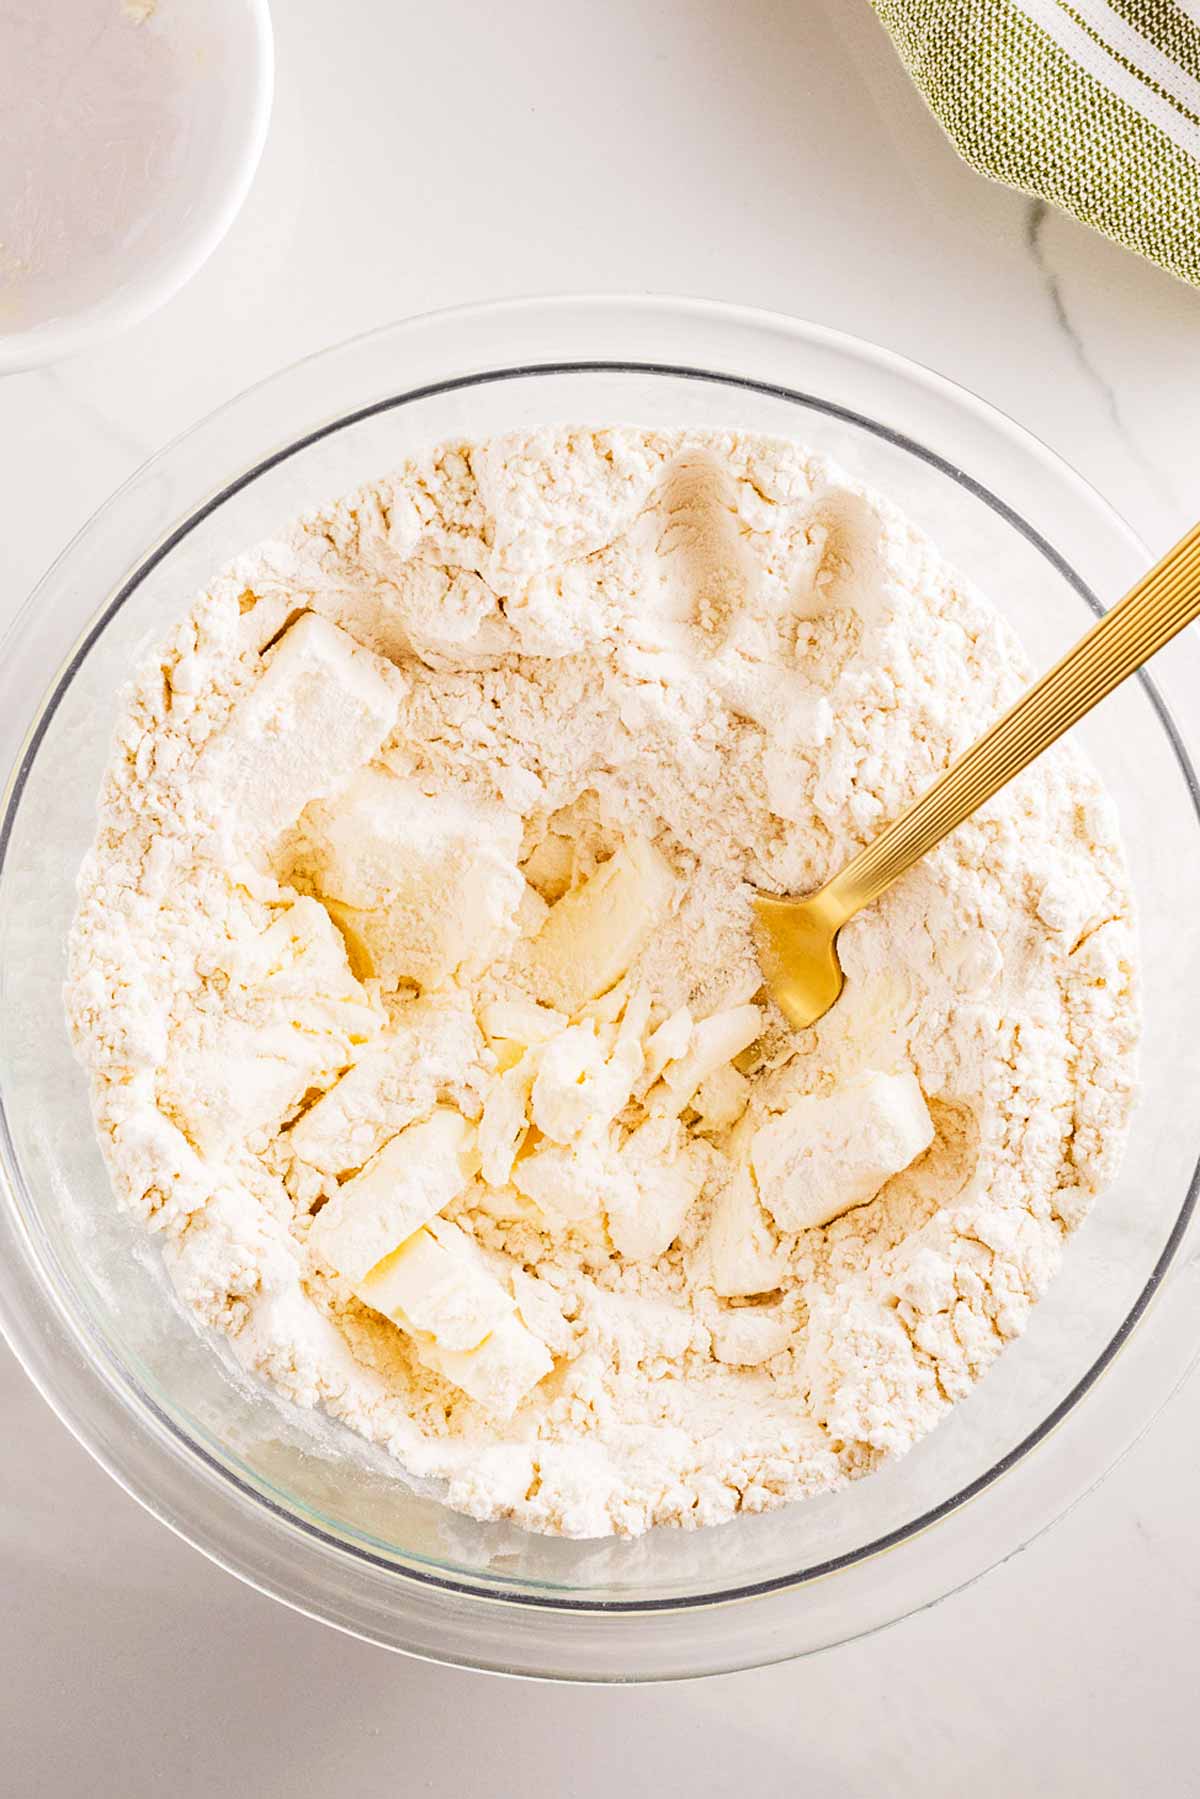
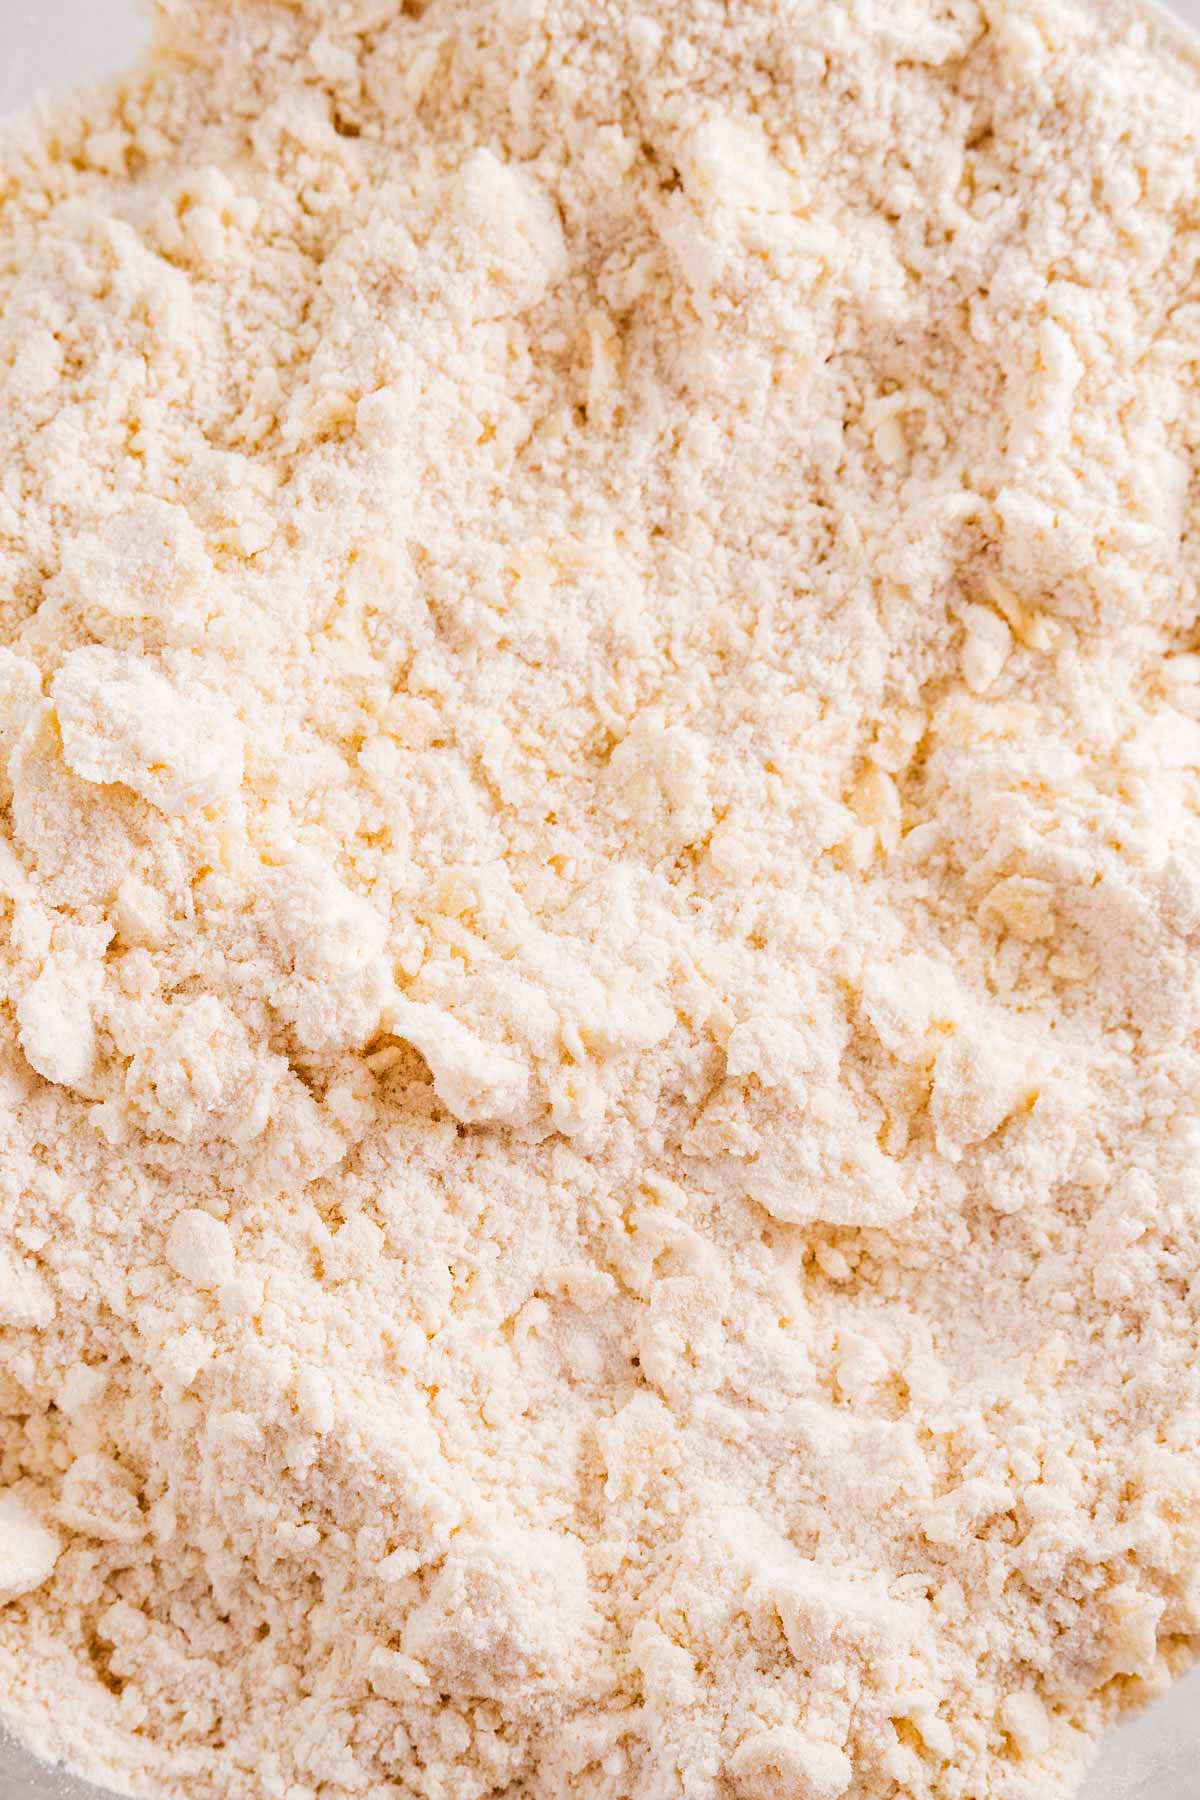
The cold butter is what gives you those glorious flaky layers, so don’t let it melt. If you’re using your hands, work quickly and maybe give your fingers a little chill in cold water first.
4. Add the buttermilk and mix the dough: Pour in ⅔ cup of cold buttermilk (straight from the fridge, please!) and stir it in gently. I like to use a wooden spoon or a spatula here – just mix until the flour is mostly combined.
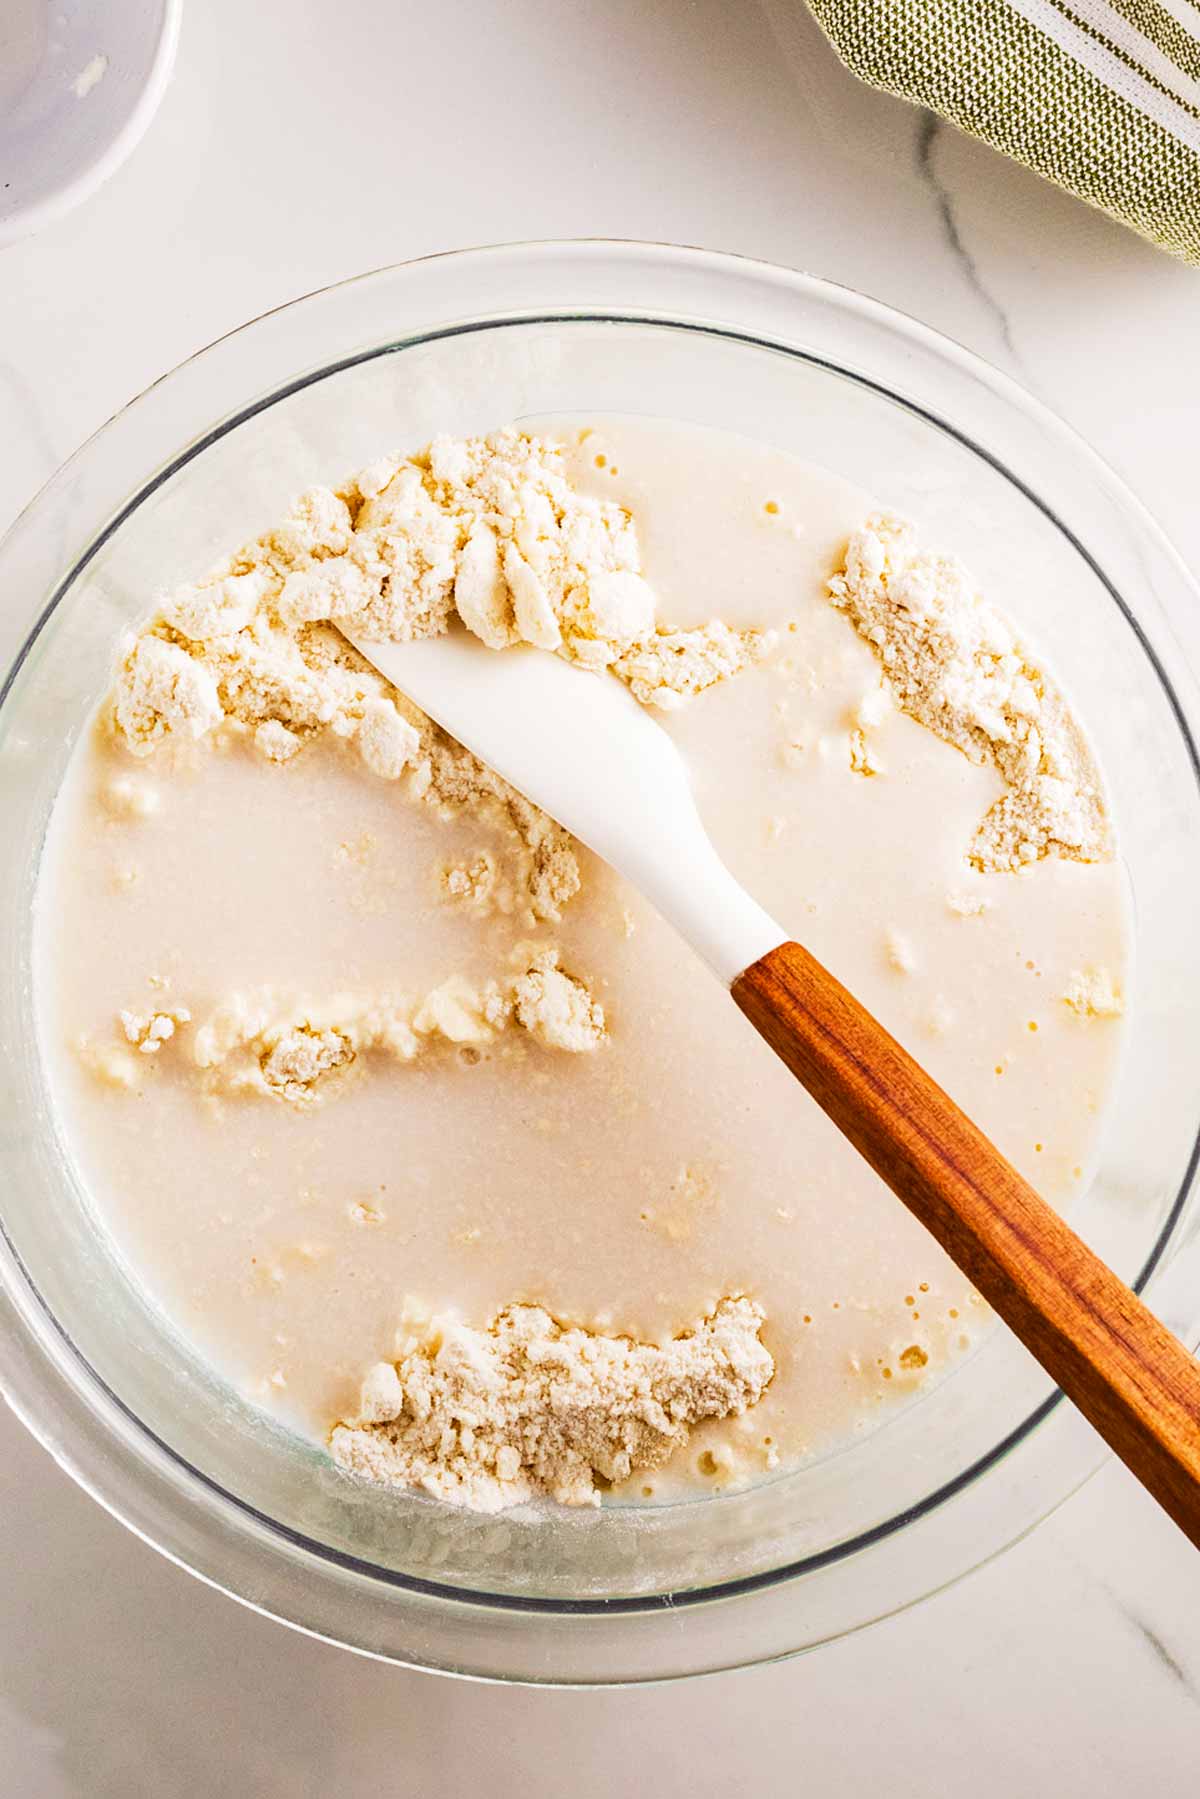
The dough will look scraggly and messy, and that’s exactly what you want! If it feels too dry and crumbly, add 1-2 tablespoons of extra buttermilk, one spoon at a time.
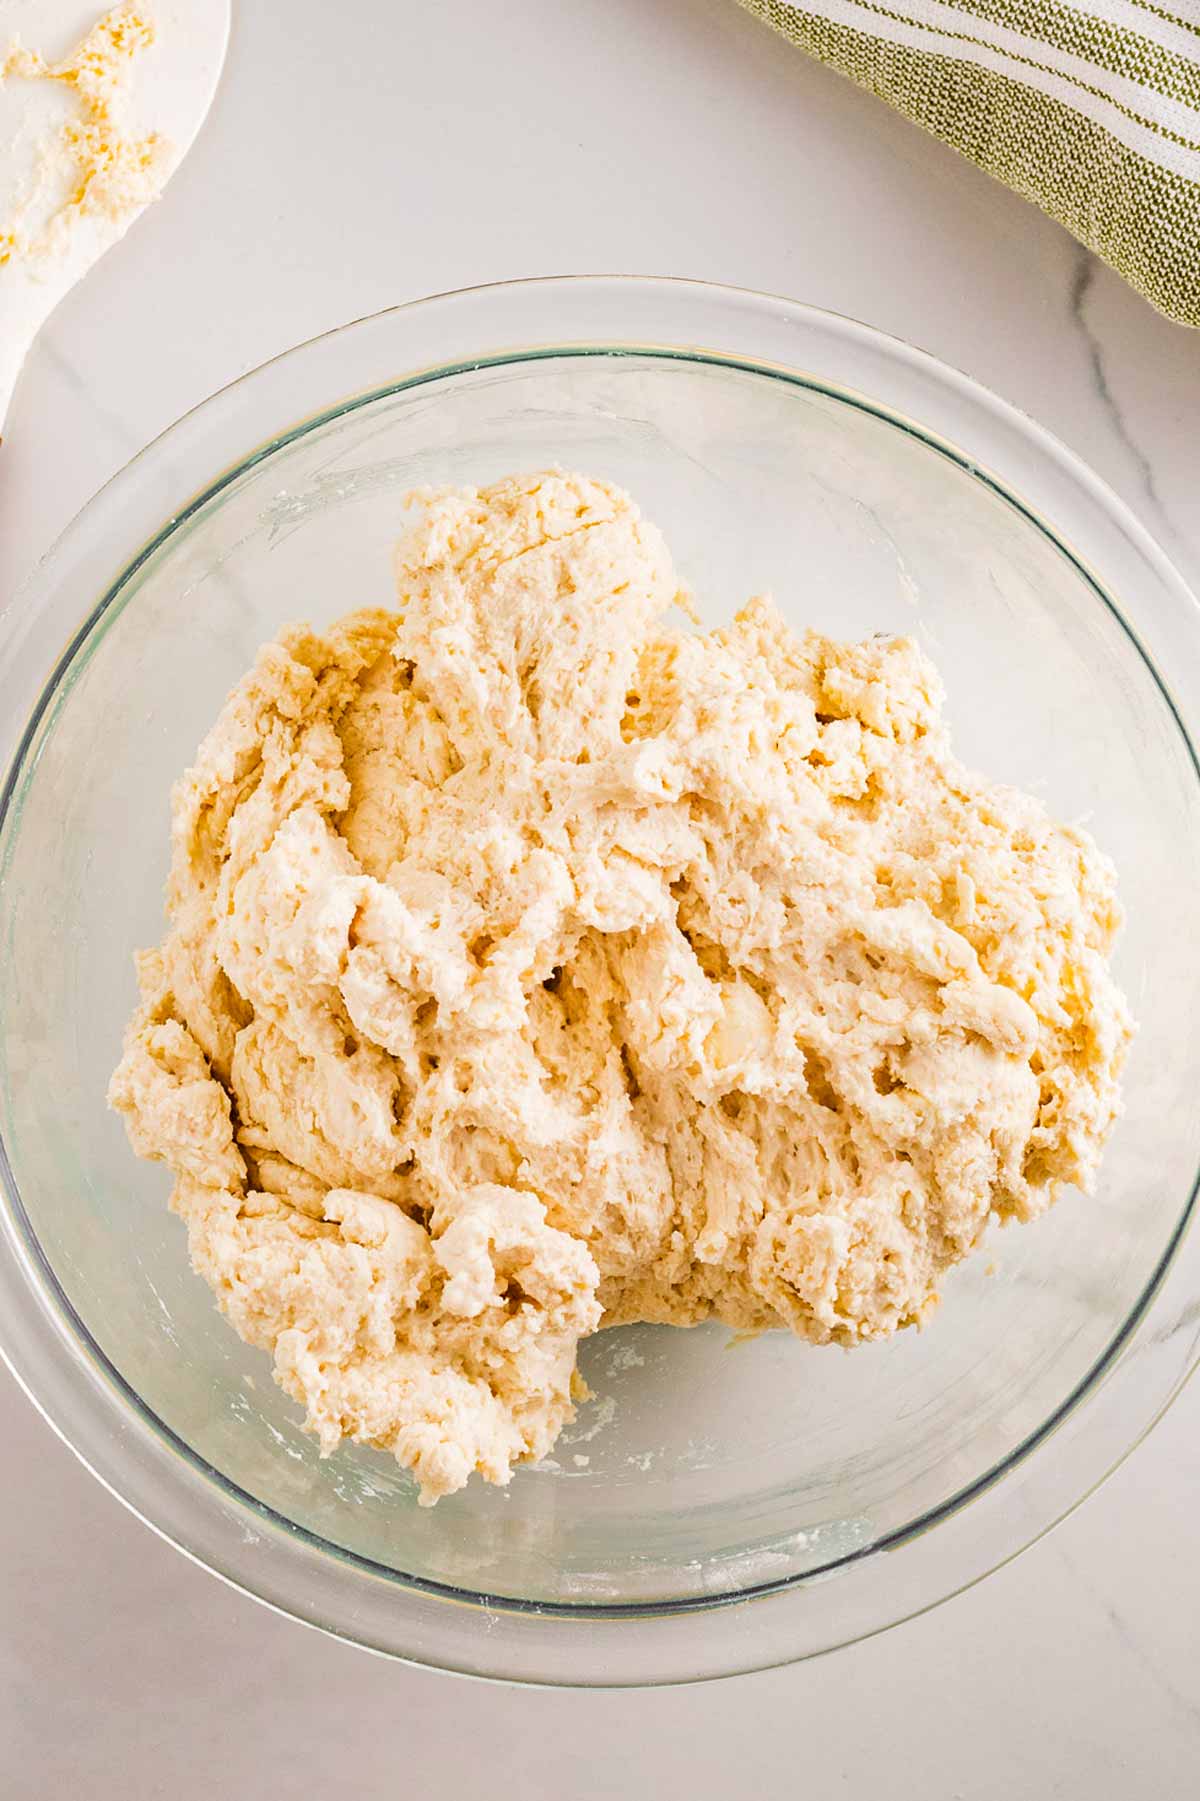
5. Bring the dough together – fold for layers: Turn the dough out onto a floured surface – don’t skip this part, or you’ll have a sticky situation on your hands! Now, gently bring the dough together with your hands.
Once it’s formed into a rough ball, flatten it to ½ inch thickness, then fold it into thirds (just like a letter). Rotate the dough 90 degrees, flatten gently, and fold again – this is how you get those beautiful, flaky layers. Just don’t overwork the dough or you’ll end up with tough and flat biscuits.
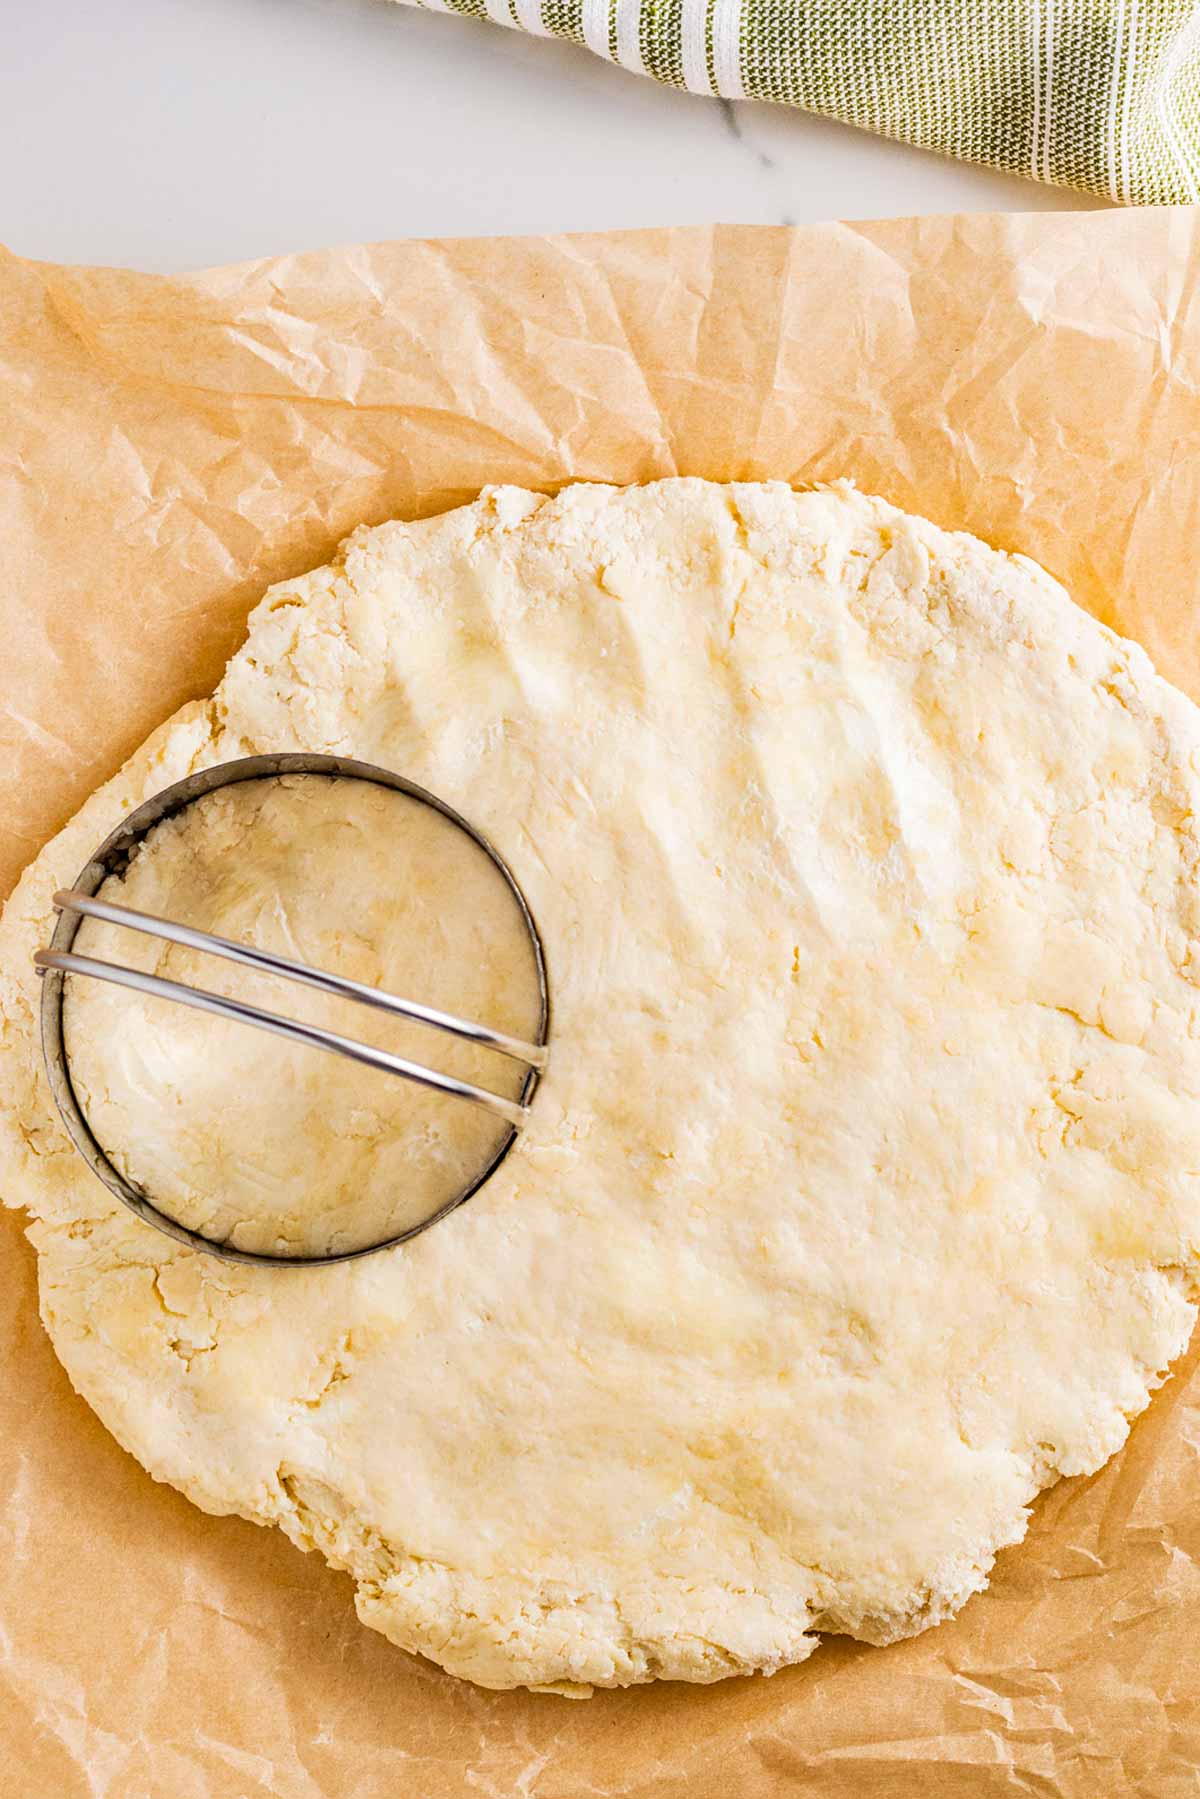
6. Cut out your biscuits: Now for the fun part! Use your hands to gently pat the dough into a 1-inch thick circle – no rolling pins allowed here. I know it feels thick, but trust me, that’s what makes them so tall and fluffy.
Grab a 2½-inch biscuit cutter (or a drinking glass works in a pinch!), dip it lightly in flour, and press straight down into the dough. Whatever you do, don’t twist the cutter – that can seal the edges and keep the biscuits from rising properly.
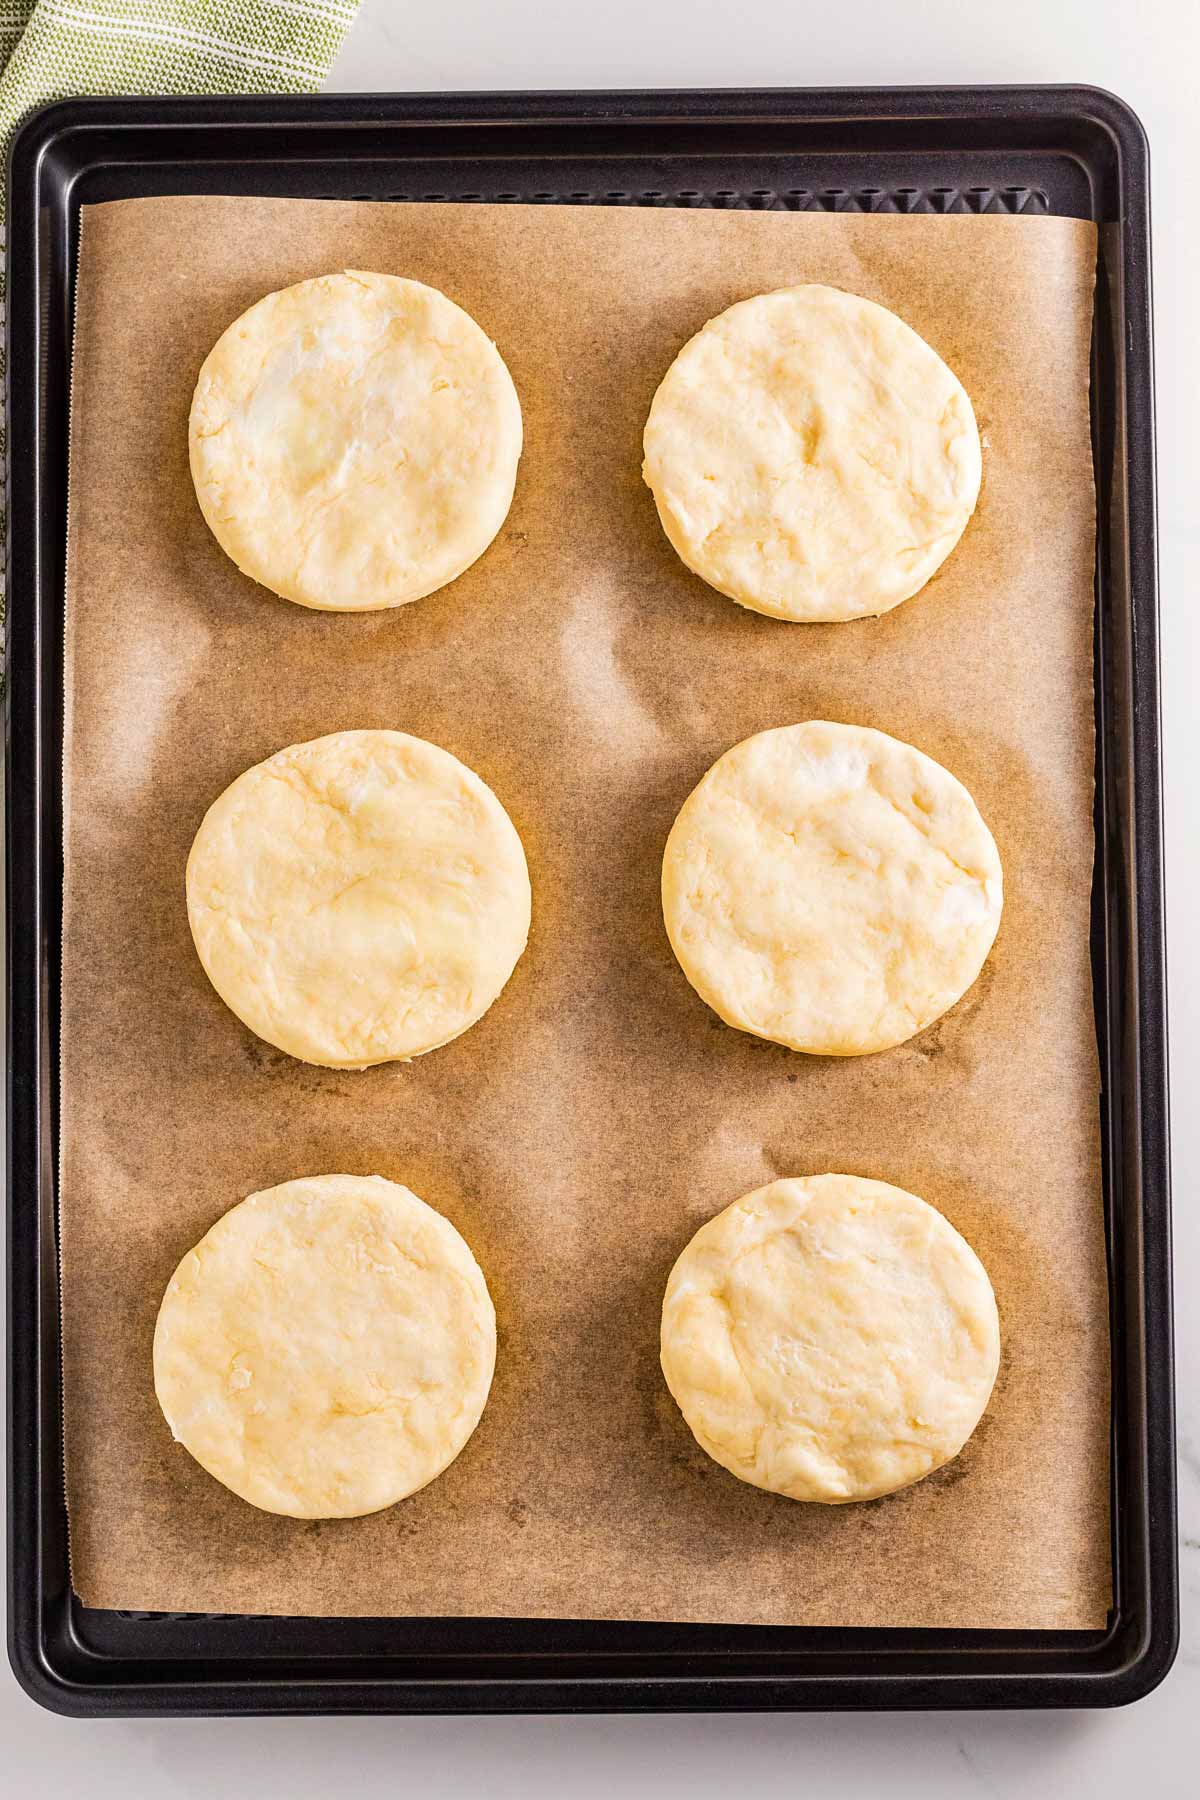
Place each biscuit on your prepared baking sheet. If you space them apart, they get more browned all around. If you space them closer together, they support each other as they rise but they turn out softer. Up to your preferences!
Gather the dough scraps, gently press them together, and cut out a few more biscuits until you’re out of dough.
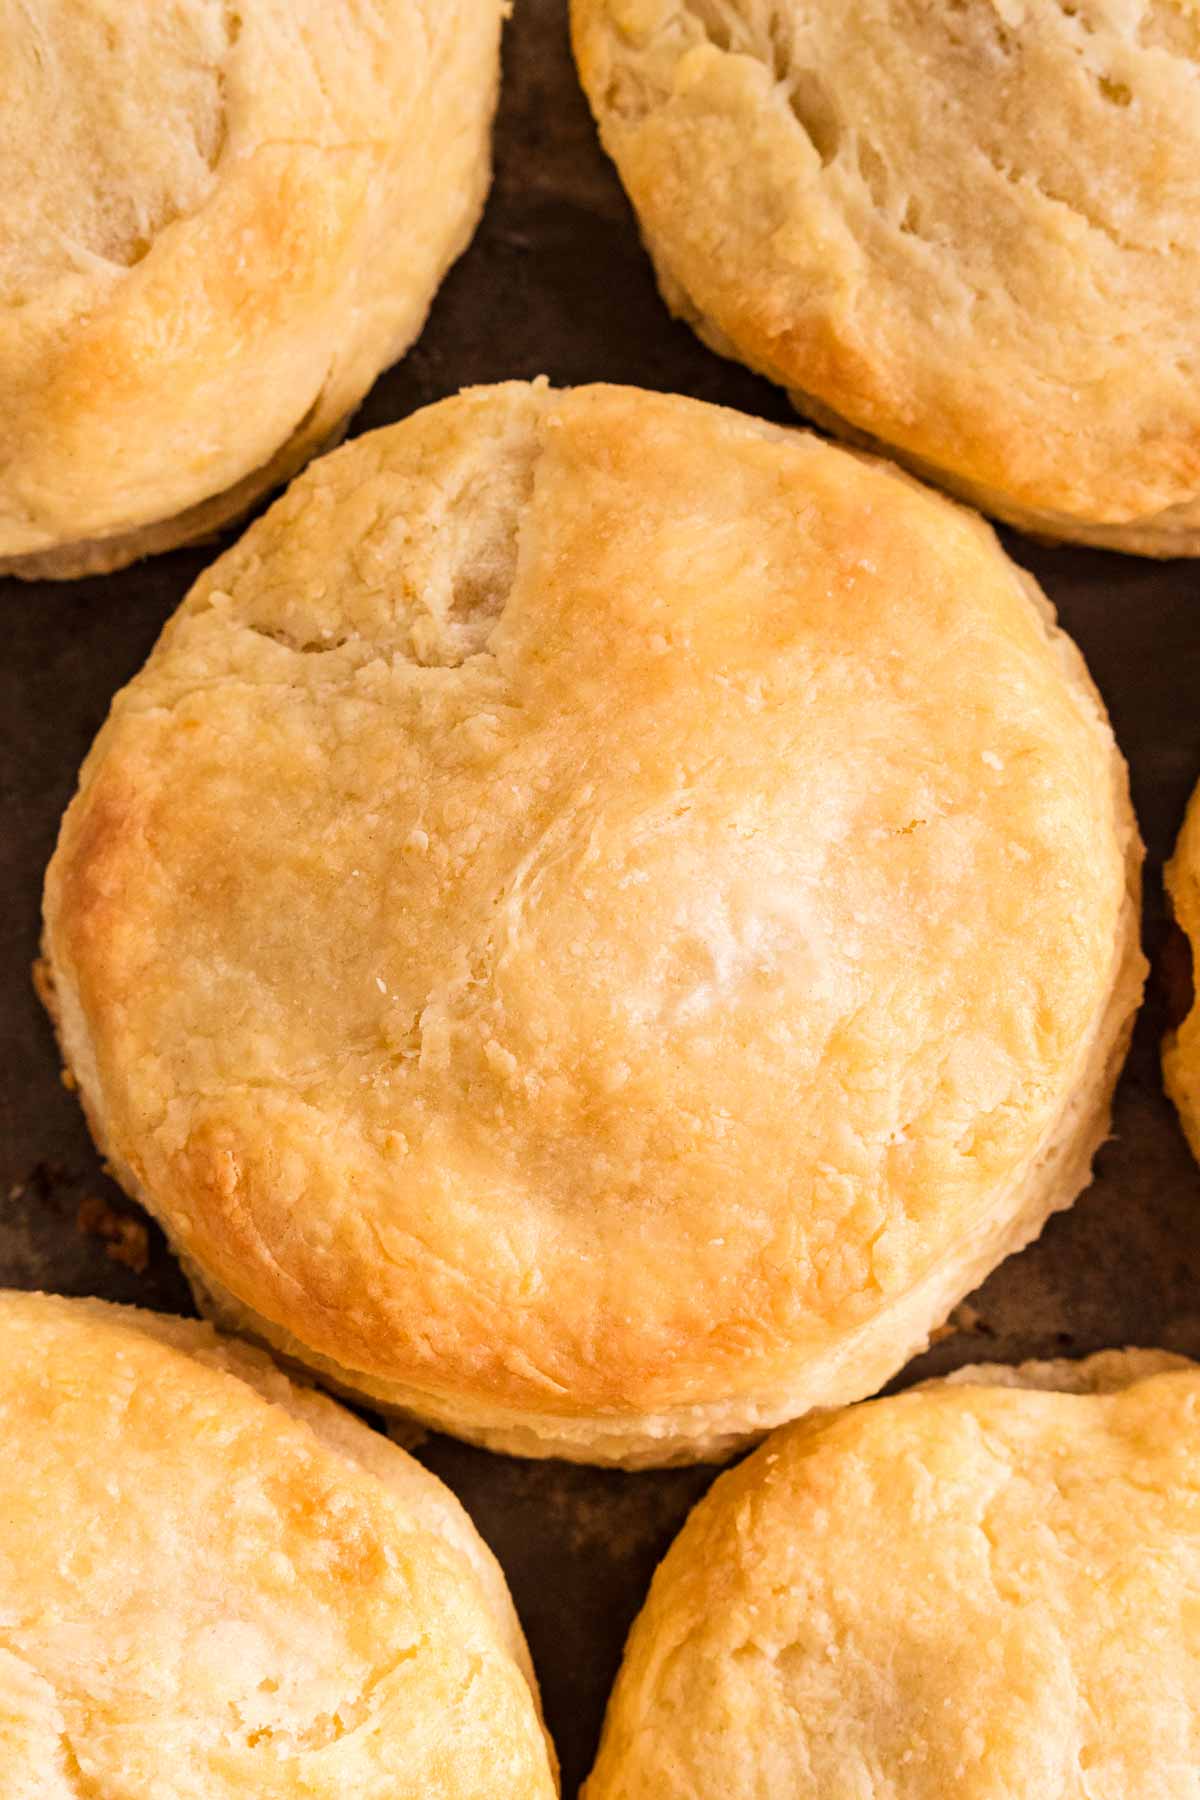
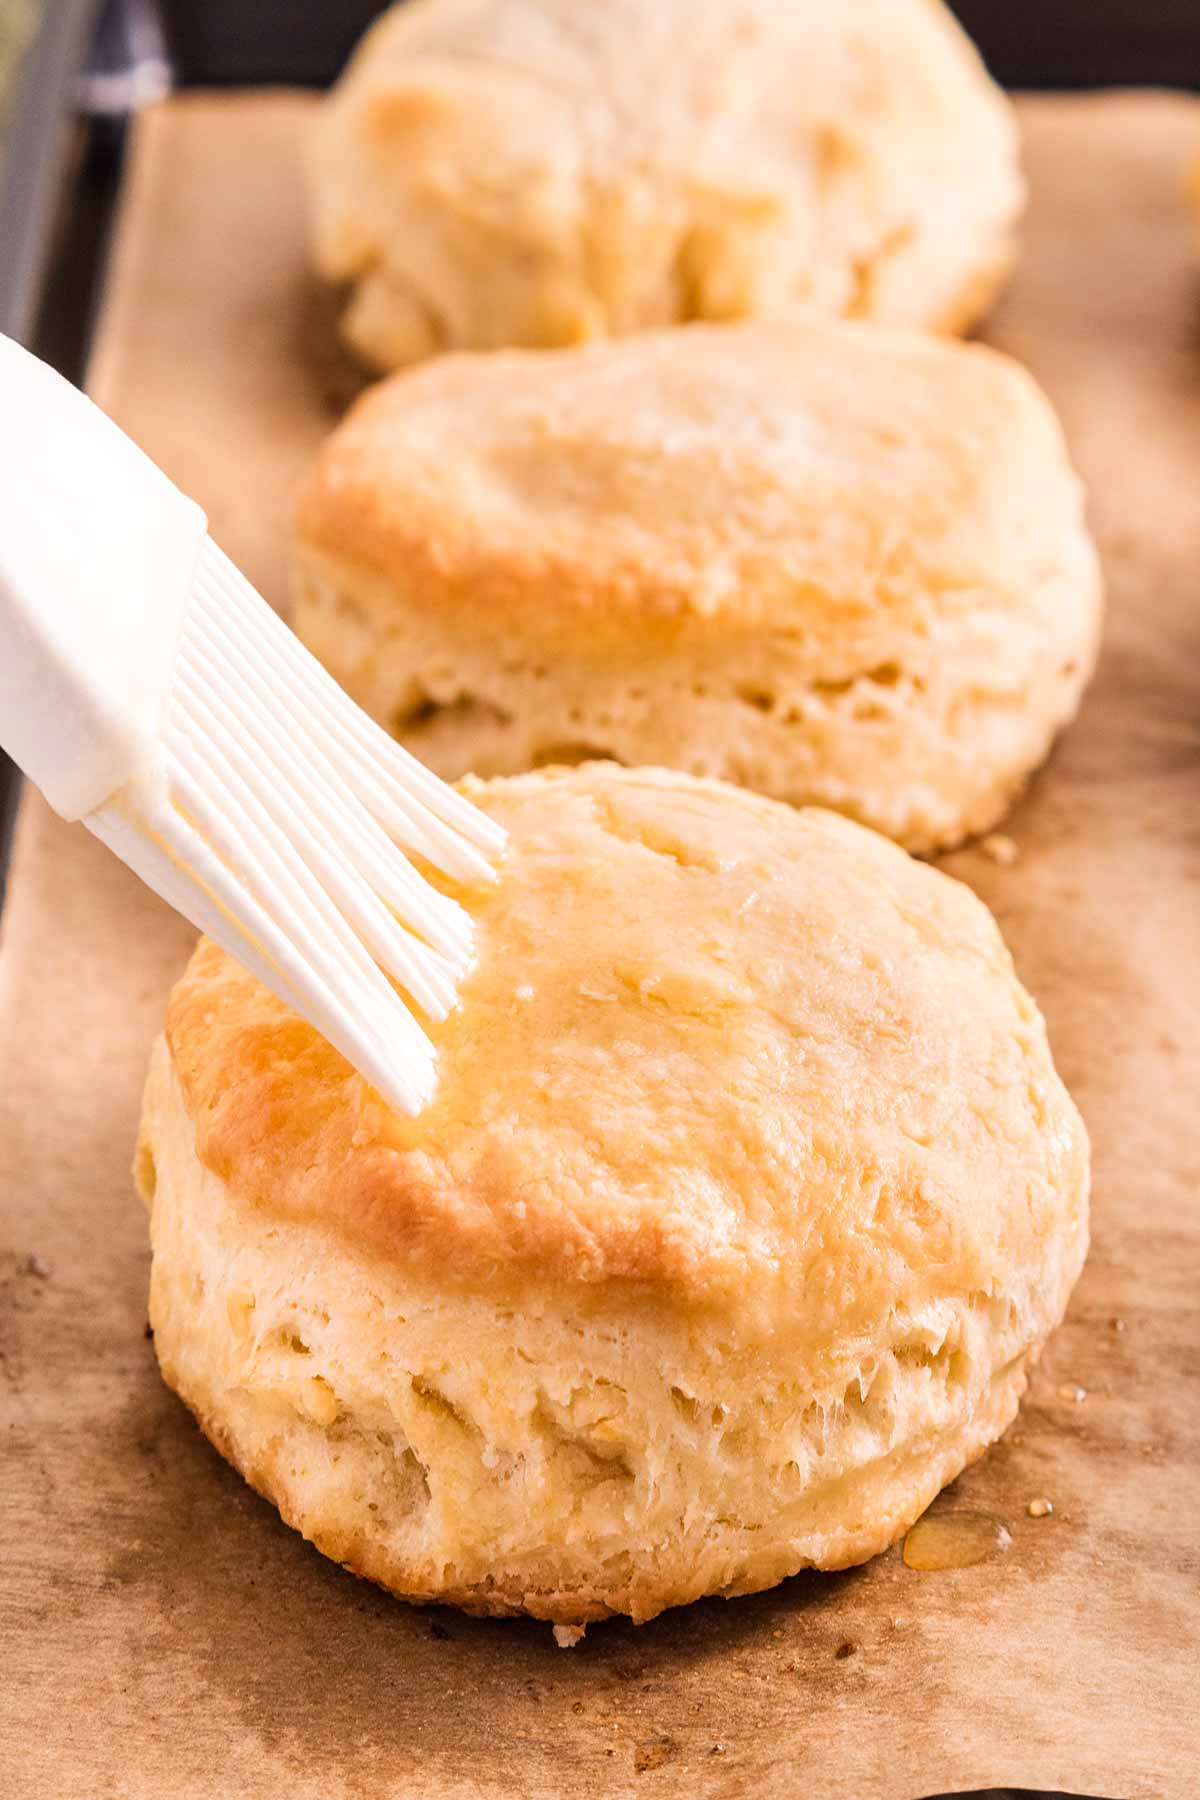
7. Bake to perfection: Pop the baking sheet into your preheated oven and bake for 8-10 minutes. Keep an eye on them – you want the tops to turn a beautiful, light golden color.
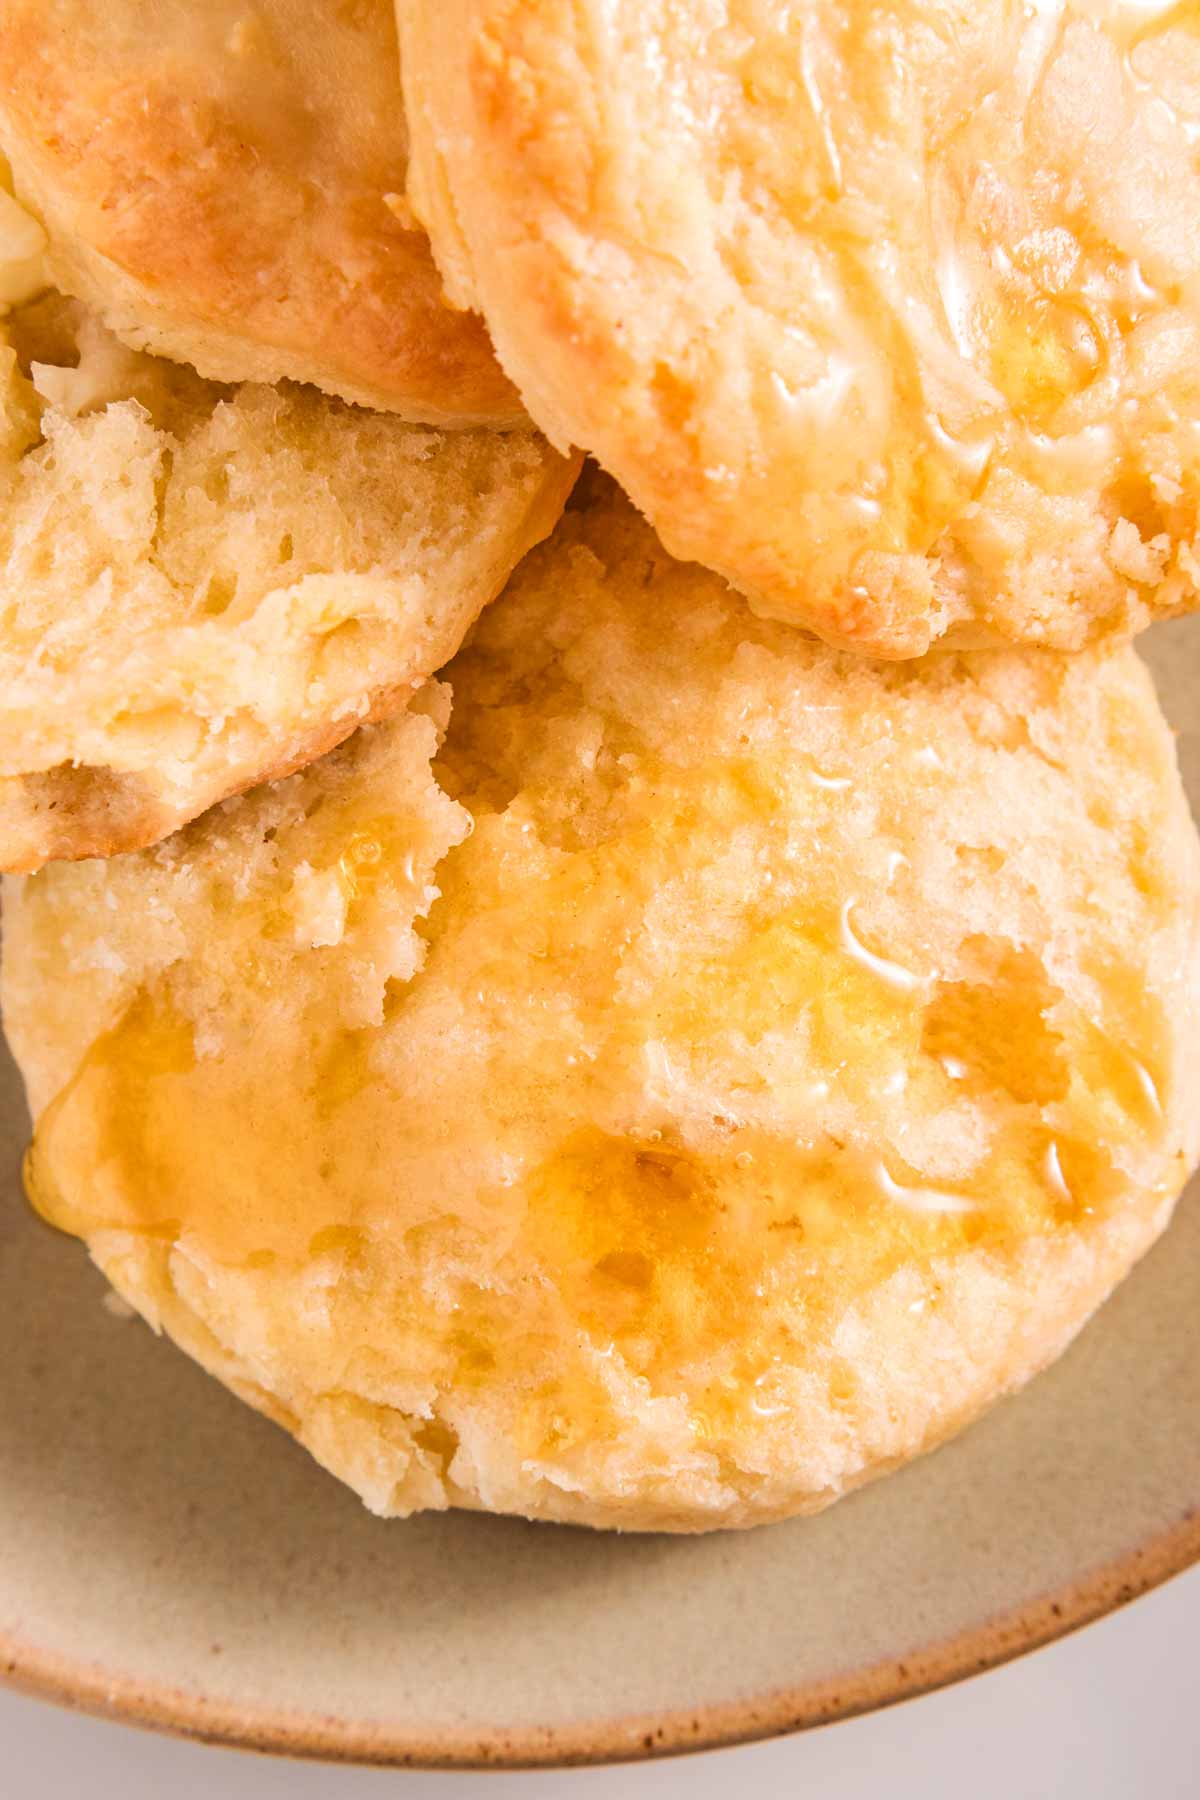
As soon as they’re out of the oven, brush the tops with 1 tablespoon of melted butter. This little step takes them over the top – trust me!
8. Serve warm and enjoy: Now comes the best part – eating them!
Serve these biscuits warm, straight from the oven, with a little extra butter, jam, or honey. My family can’t keep their hands off these, and I have a feeling yours won’t either.
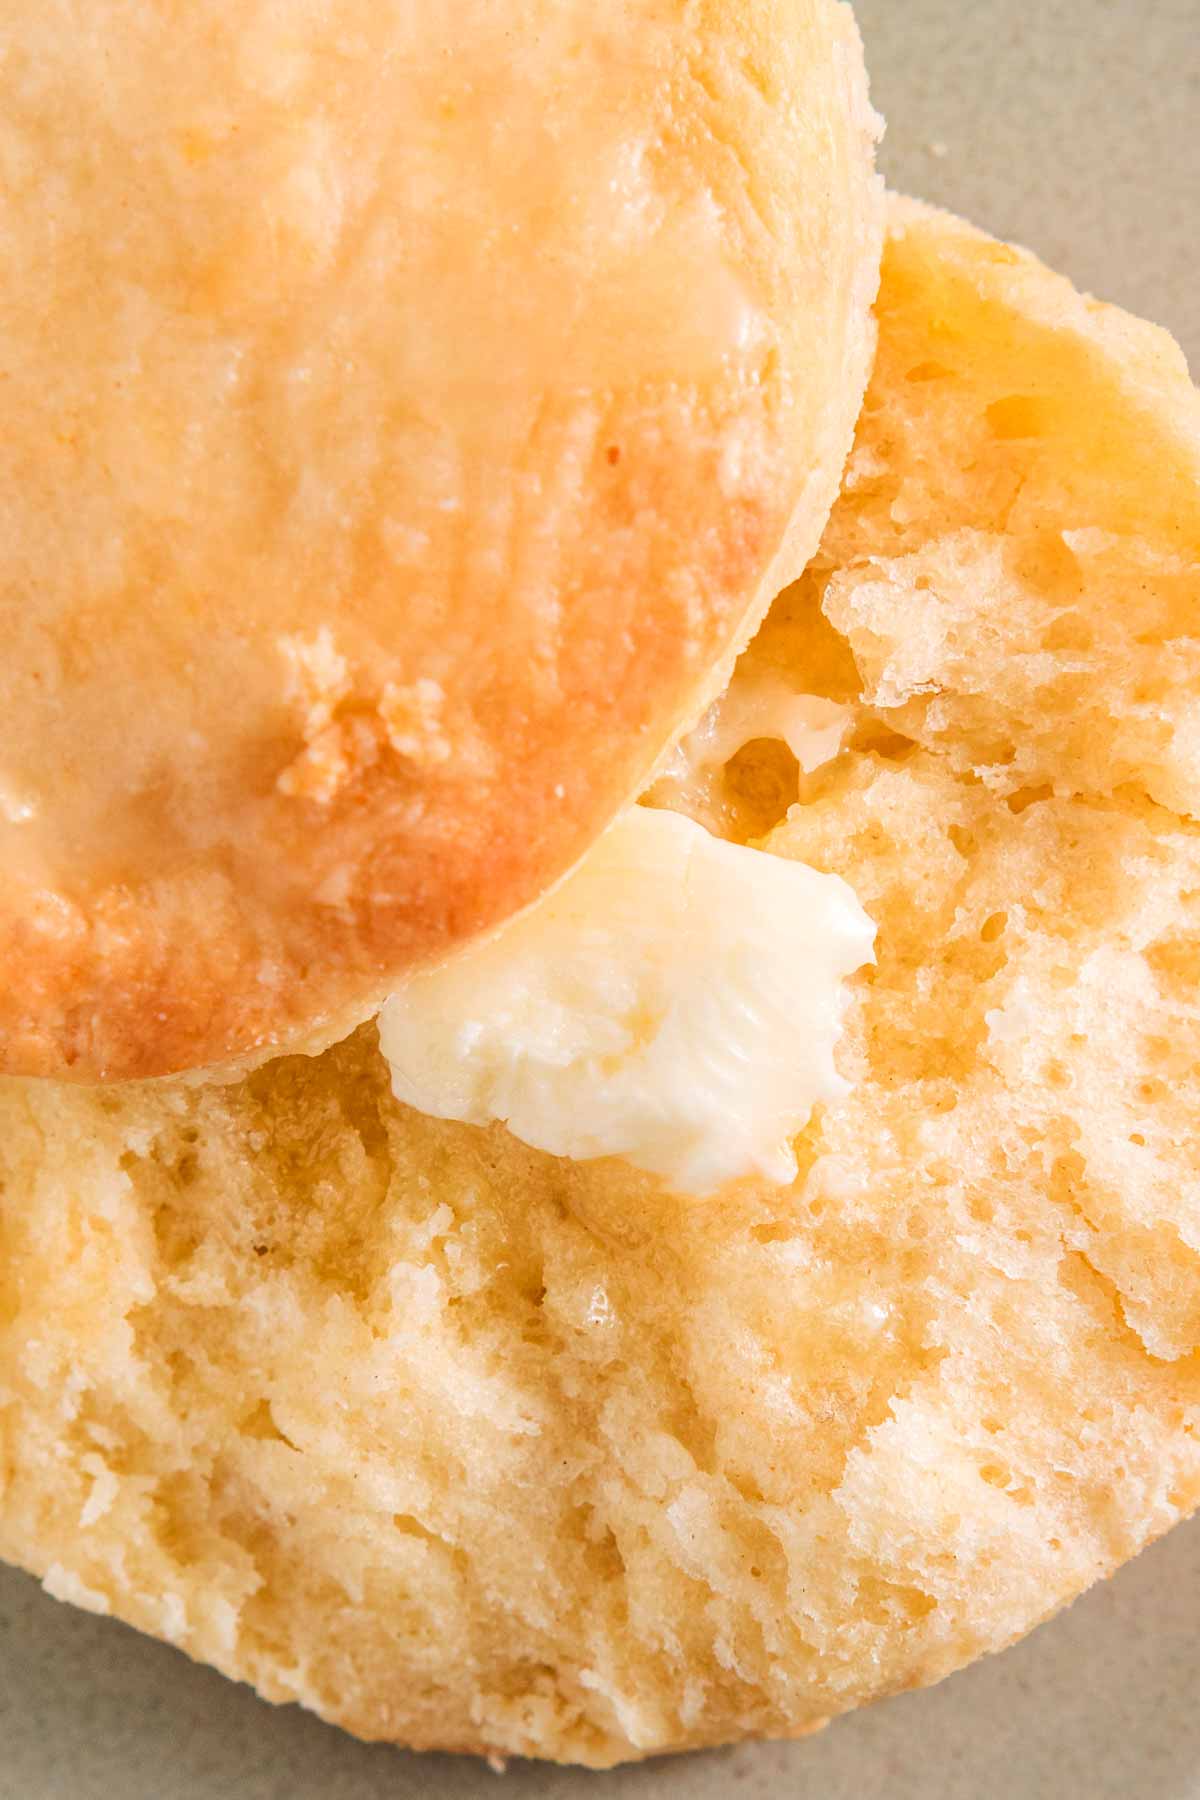
See? Easy, right?! Now go grab one (or two), and enjoy the fruits of your biscuit-baking success!
Baking tips
- Use cold ingredients: I can’t stress this enough – keep your butter and buttermilk cold. This is the secret to creating those irresistibly flaky layers.
- Work the dough gently: Trust me, less is more here. Overmixing or kneading too much will make the biscuits tough, so handle the dough as little as possible.
- Fold for layers: I always fold the dough twice to get those beautiful, flaky layers. It’s a simple step that makes such a difference!
- Cut straight down: When cutting, press the biscuit cutter straight down and pull it back up cleanly – no twisting! Twisting seals the edges and stops the biscuits from rising tall.
- Don’t skip the high heat: That 450°F oven might seem intense, but it’s exactly what you need for biscuits that rise quickly and turn golden on top.
- Bake immediately: Once your dough is ready, pop it in the oven right away. I’ve learned that letting it sit too long warms the butter, and warm butter = flat biscuits. If you fear your biscuits got too warm, freeze them for 5-10 minutes.
- Brush with butter: I always brush the tops with melted butter straight out of the oven – it adds so much flavor and keeps the biscuits perfectly soft.
Biscuit FAQs
Buttermilk adds liquid, fat and acidity to the biscuit dough.
The acidity, specifically, helps the biscuits to rise in combination with the baking powder.
If you don’t have buttermilk on hand, combine ⅔ cup regular milk with ½ teaspoon white vinegar (or lemon juice) and leave it to sit on the counter for 5 minutes before using.
There are several reasons for dry or tough biscuits:
Too much flour: If you mess up the fat to flour ratio in the biscuits, they will come out dry and tough. It’s important to measure your flour correctly: Spoon it into the measuring cup, don’t scoop. Do not pack the measuring cup with flour/don’t press it down to fit more in – the flour should be in a fluffy pile. Then, level off the measuring cup with the back of a knife.
Problems with leavening: If your baking powder is expired, it can’t work as well and the biscuits will not rise properly. This results in dense and tough baked goods. Make sure to use baking powder that isn’t out of date, and add the exact amount given in the recipe.
Heavy kneading: The dough for biscuits must be handled as little as possible! I know it’s tempting to knead to make it smooth, but this is the biggest mistake you can make with your biscuits. Do not knead the dough, do not work it too hard. A shaggy, crumbly, messy dough is the only way to get perfectly fluffy biscuits.
Baking: Biscuits need high heat, fast. If you fail to preheat your oven, or use a lower temperature than indicated in the recipe (yes, it really is 450°F!), your biscuits will fail to rise in the oven and come out tough.
In terms of flakiness, shortening is definitely best for biscuits: It melts less into the flour and helps to keep the gluten from developing.
I personally much prefer the flavor of butter in biscuits, though. This is why I always use all-butter and compromise that tiny bit on fluffiness.
Helpful recipe hints
Recipe variations
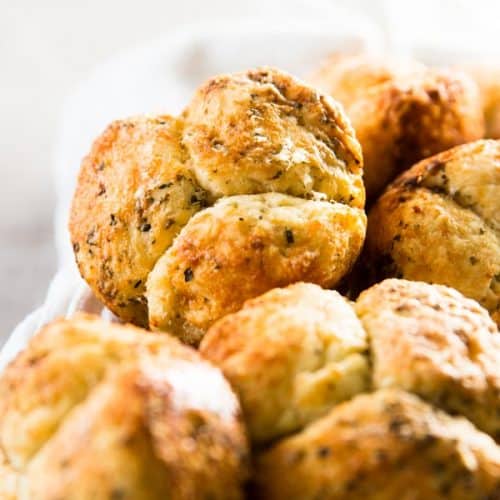
- Cheddar biscuits: Add ¾ cup of shredded cheddar cheese to the flour mix before cutting in the butter. Perfect with soups or chili!
- Herb biscuits: Stir 1-2 teaspoons of your favorite dried herbs (like rosemary, thyme, or parsley) into the dry ingredients. Brush with garlic butter after baking for an extra burst of flavor.
- Sweet biscuits: Add 2 tablespoons of sugar to the dry ingredients and top the baked biscuits with a sprinkle of cinnamon sugar for a slightly sweet treat.
Storage and freezer tips
- Storing leftovers: Keep leftover biscuits wrapped in a clean tea towel, but be sure to serve them the same day they were baked. Biscuits don’t really keep!
- Freezing options: Want biscuits on hand for busy mornings? Freeze the unbaked, cut-out biscuits on a baking sheet, then transfer them to a freezer bag once solid. When ready to bake, pop them in the oven straight from the freezer, adding 2-3 minutes to the baking time.
Serving ideas
These buttermilk biscuits pair perfectly with just about any meal, no matter if you’re serving them for breakfast, lunch, or dinner. Here are some of my family’s favorite ideas (apart from eating them warm with butter and honey):
- Breakfast of champions: Serve these biscuits with soft scrambled eggs, crispy air fryer bacon, and a side of fruit salad for the ultimate comfort breakfast.
- With chili or stew: Pair them with a warm bowl of crock pot beef stew or a hearty crock pot chili for a cozy family dinner.
- Easy sliders: Slice the biscuits in half and use them to make mini sliders with pulled pork, with shredded chicken, or your favorite ham and cheese combo.
- Simple side: Serve warm biscuits alongside honey glazed ham or oven baked pork chops for a delicious family dinner.
- Sweet treat: Turn these into a quick dessert by topping warm biscuits with whipped cream and fresh strawberries for a simple strawberry shortcake! Or go out with my strawberry shortcake recipe – made even better with my homemade strawberry sauce!
More baked favorites
PS If you try this recipe, please leave a review in the comment section and add a star rating in the recipe card – I appreciate your feedback! Follow along on Pinterest, Facebook or Instagram.
Homemade Buttermilk Biscuits
Recipe details
Ingredients
- 2 cups all-purpose flour
- 1 tablespoon baking powder
- ½ teaspoon salt
- ½ cup cold butter cubed (that’s 8 tablespoons or 1 stick)
- ⅔ cup buttermilk plus 2-4 tablespoons extra as needed
- 1 tablespoon melted butter to brush on the baked biscuits
Instructions
- Prep: Heat oven to 450°F. Line a baking sheet.
- Mix dry ingredients: Add flour, baking powder and salt to a mixing bowl and combine very well.
- Cut in butter: Add cold butter cubes to dry ingredients and cut in (using a pastry cutter or your hands) until crumbs forms.
- Finish dough: Add buttermilk, then stir only a few times until no dry flour remains. Add a few more tablespoons buttermilk if dough seem dry. Do not overwork as you stir! Dough should feel very sticky. Immediately turn out on a floured surface.
- Layer dough: Gently bring dough together by hand, adding flour as needed if too sticky. Once combined, flatten dough to ½ inch thickness. Fold into 3rds (like a letter). Rotate 90 degrees, repeat flattening and folding, taking care not to overwork dough.
- Cut biscuits: Using slightly damp fingers, press dough to 1 inch thickness (it will seem very thick, but 1 inch is correct – not not use a rolling pin!). Cut into ~2½ inch circles using a lightly floured biscuit cutter and place on prepared baking sheet. Push dough scraps together and flatten with fingers to cut out more biscuits. (If kitchen is warm or biscuits took a long time to cut and dough has warmed, freeze biscuits on baking sheets for 5-10 minutes before baking.)
- Bake: Bake in hot oven for 8-10 minutes, until lightly golden on top. Do not overbake, or biscuits will be dry. Immediately brush with melted butter and serve warm.
Notes
Ingredient notes
- Butter: Use cold butter for flaky layers. Shortening works as a substitute.
- Buttermilk: No buttermilk? Mix ⅔ cup milk with ½ teaspoon vinegar or lemon juice.
- Flour: All-purpose works best. For whole wheat, replace half the flour and add extra buttermilk if needed.
- Baking powder: Fresh baking powder ensures a good rise. Replace if it’s over a year old.
Recipe tips
- Keep ingredients cold for the fluffiest biscuits.
- Don’t overmix or overwork the dough – gentle handling keeps them tender.
- Press the biscuit cutter straight down; twisting seals the edges and prevents rising.
- Bake in a hot oven (450°F) for tall, golden biscuits.
- Brush with melted butter right out of the oven for extra flavor.
Storage tips
- Leftovers: Store at room temperature in a tea towel, eat the same day they were baked.
- Freezing: Freeze unbaked biscuits, then bake straight from frozen, adding 2-3 minutes to the bake time.
Nutrition
More recipe information
I first published this recipe on 04/08/2020. I updated it with new photos and better text on 12/16/2024. The recipe technique got a few small tweaks to perfect it, but has largely stayed the same.


Connie says
Easy to make