

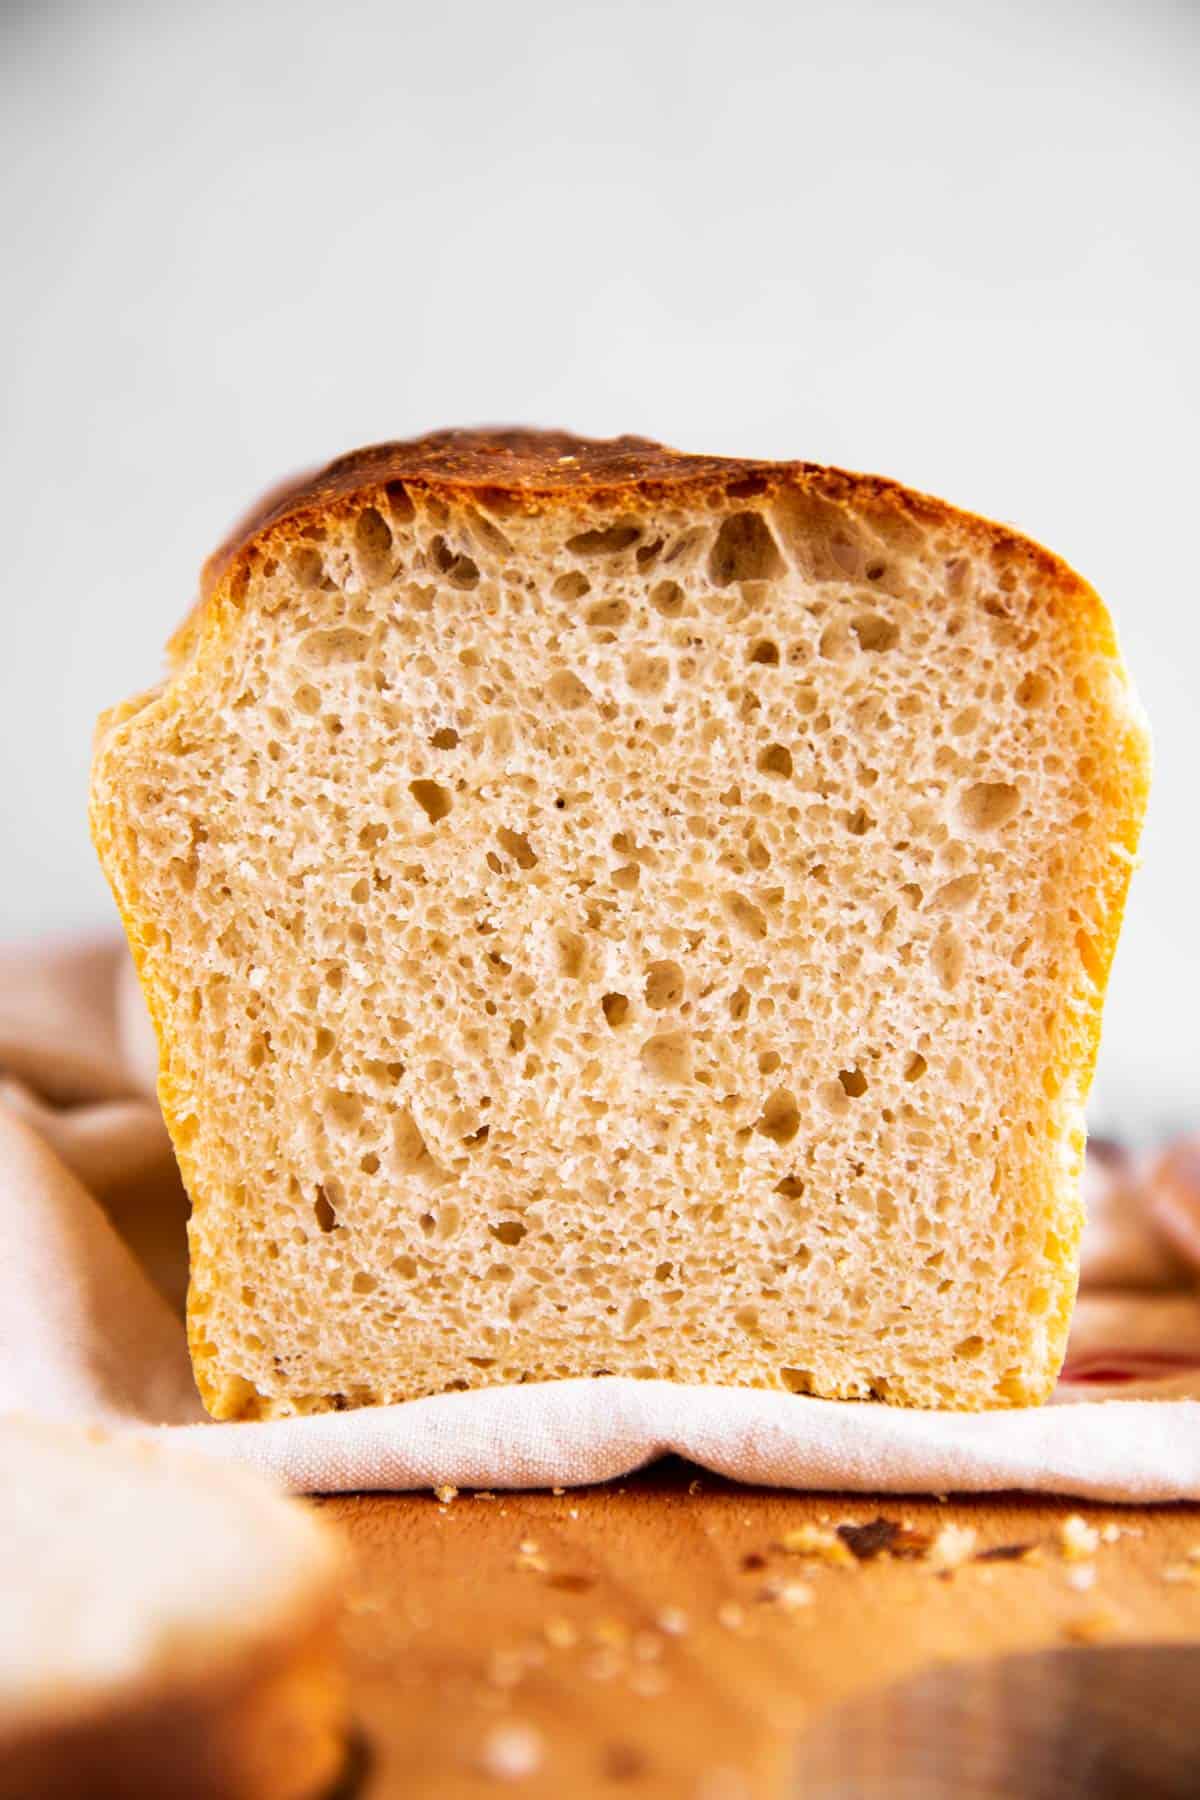
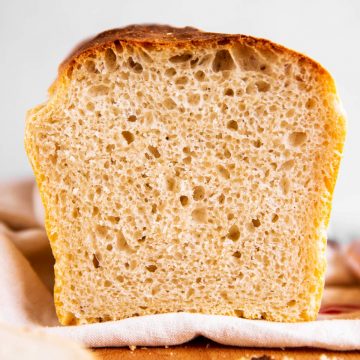
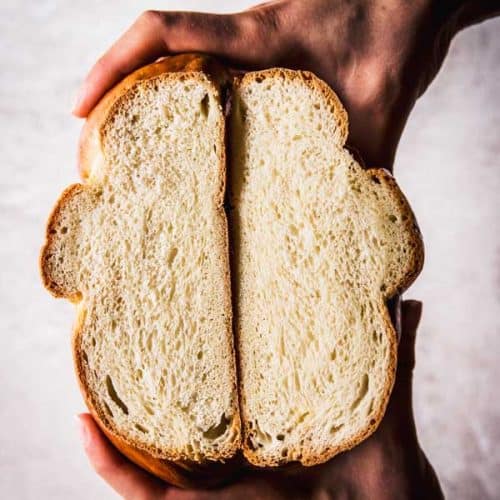
This easy Sourdough Bread recipe is perfect for beginners or as a quick-to-prep everyday bread – the dough is simple to make and easy to handle, the bread is baked in a loaf pan and yields a wonderfully crusty bread, perfect for sandwiches.
Jump to:
About this sourdough bread recipe
We love sourdough bread around here. This recipe my favorite everyday bread my husband bakes for us all the time.
- The dough is super easy to make and to handle. It’s not overly sloppy/sticky and it’s really not messy at all.
- The bread bakes in a loaf pan, so there’s no shaping or slashing of the bread – perfect for beginner bread bakers or when you’re short on time!
- The long rise yields a flavorful but mildly sour bread, which is great for families with kids!
Ingredients you’ll need
Here is a visual overview of the ingredients in the recipe. Scroll down to the printable recipe card at the bottom of this post for quantities!
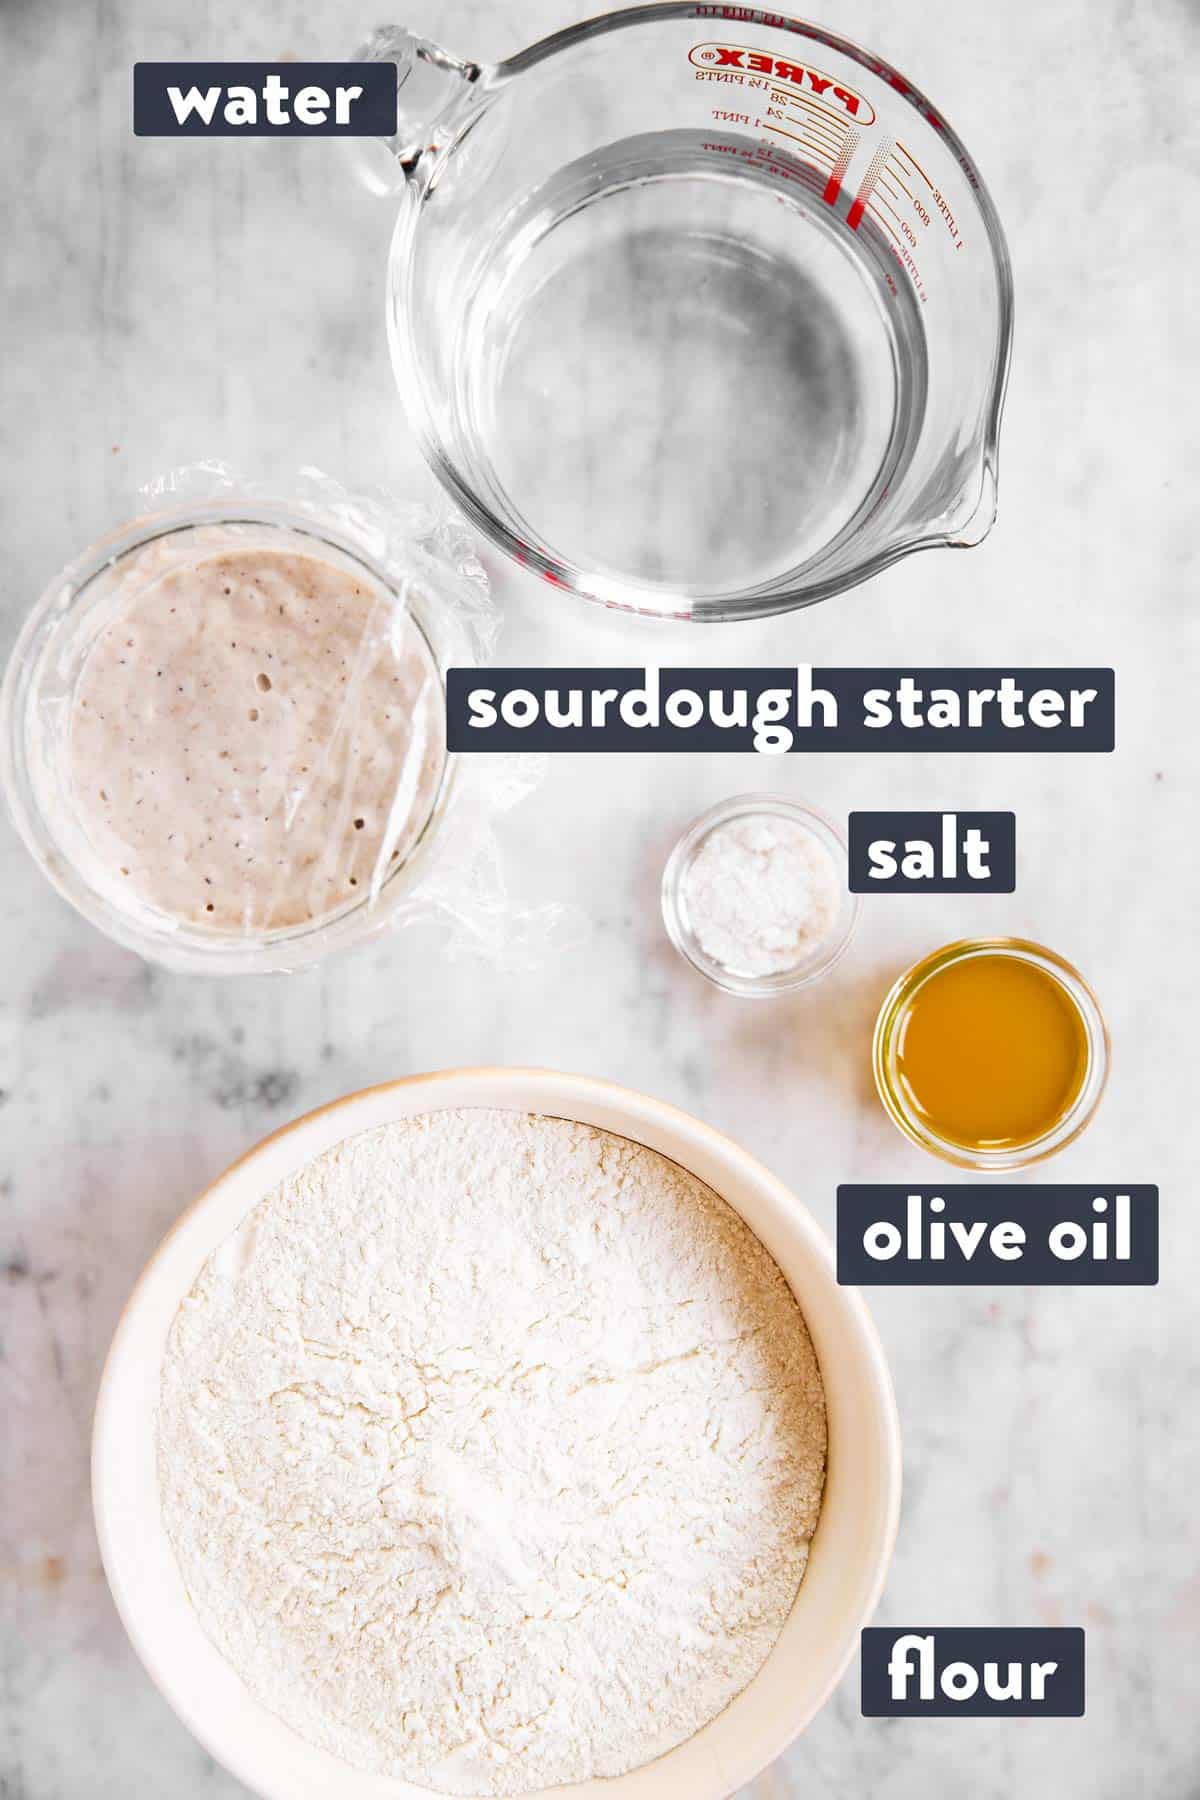
Ingredient notes
- Flour: We mostly use all-purpose flour for this recipe. We have made the recipe with half whole wheat, half all-purpose flour very successfully. We have also tried all whole wheat (and all whole spelt), which both come out a little denser.
- Sourdough starter: I use a sourdough starter at 75% hydration. If yours is at 100% hydration, I recommend reducing the water added to the fed starter by ¼ cup.
- Olive oil: This is the oil we always use in this sourdough bread. Feel free to use a different vegetable oil if you prefer.
- Water: We use hand-warm tap water for this recipe. If you use cold water, the dough will take longer to rise (which can be nice if you need it to take longer, or if you want to maximize flavor).
How to make sourdough bread
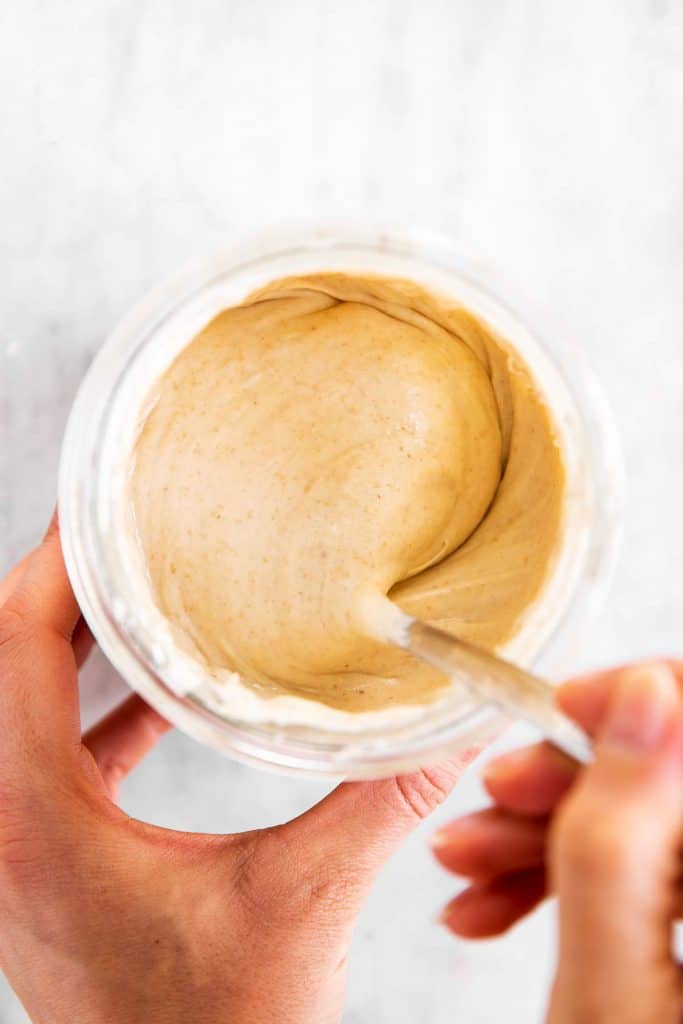
1. Start by preparing your starter the night before. Take ½ cup of your sourdough starter and feed it with 1 ⅔ cups flour and ⅔ cup water.
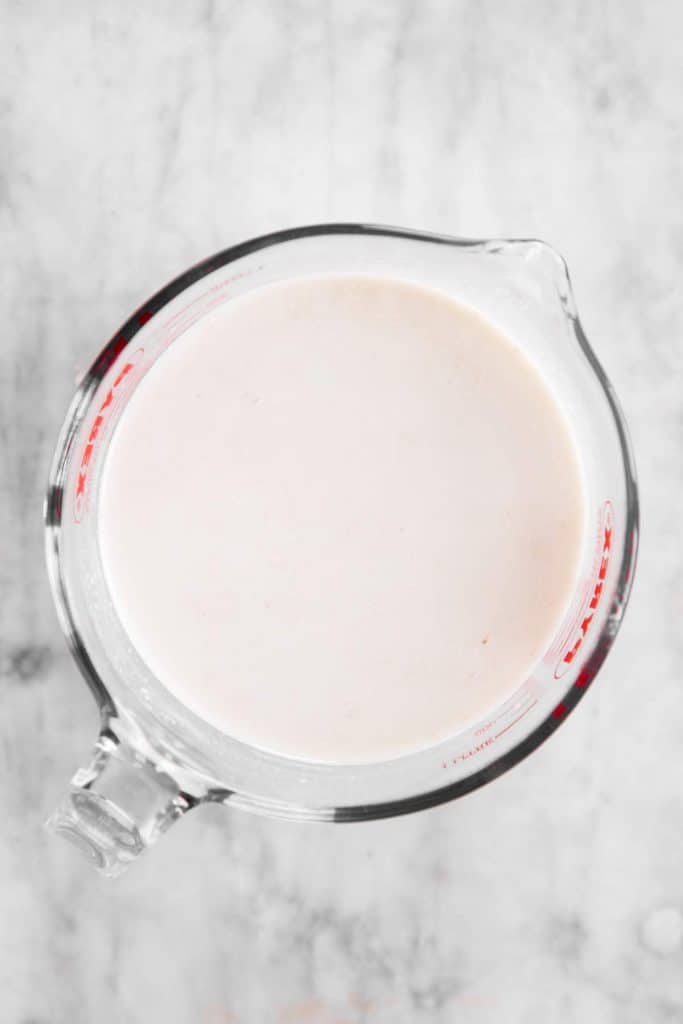
2. The next day, stir your fed starter well. You need 1 ½ cups to use in your bread recipe.
Dissolve those 1 ½ cups of starter in 2 cups of hand-warm water.

stir your starter dissolve it in water
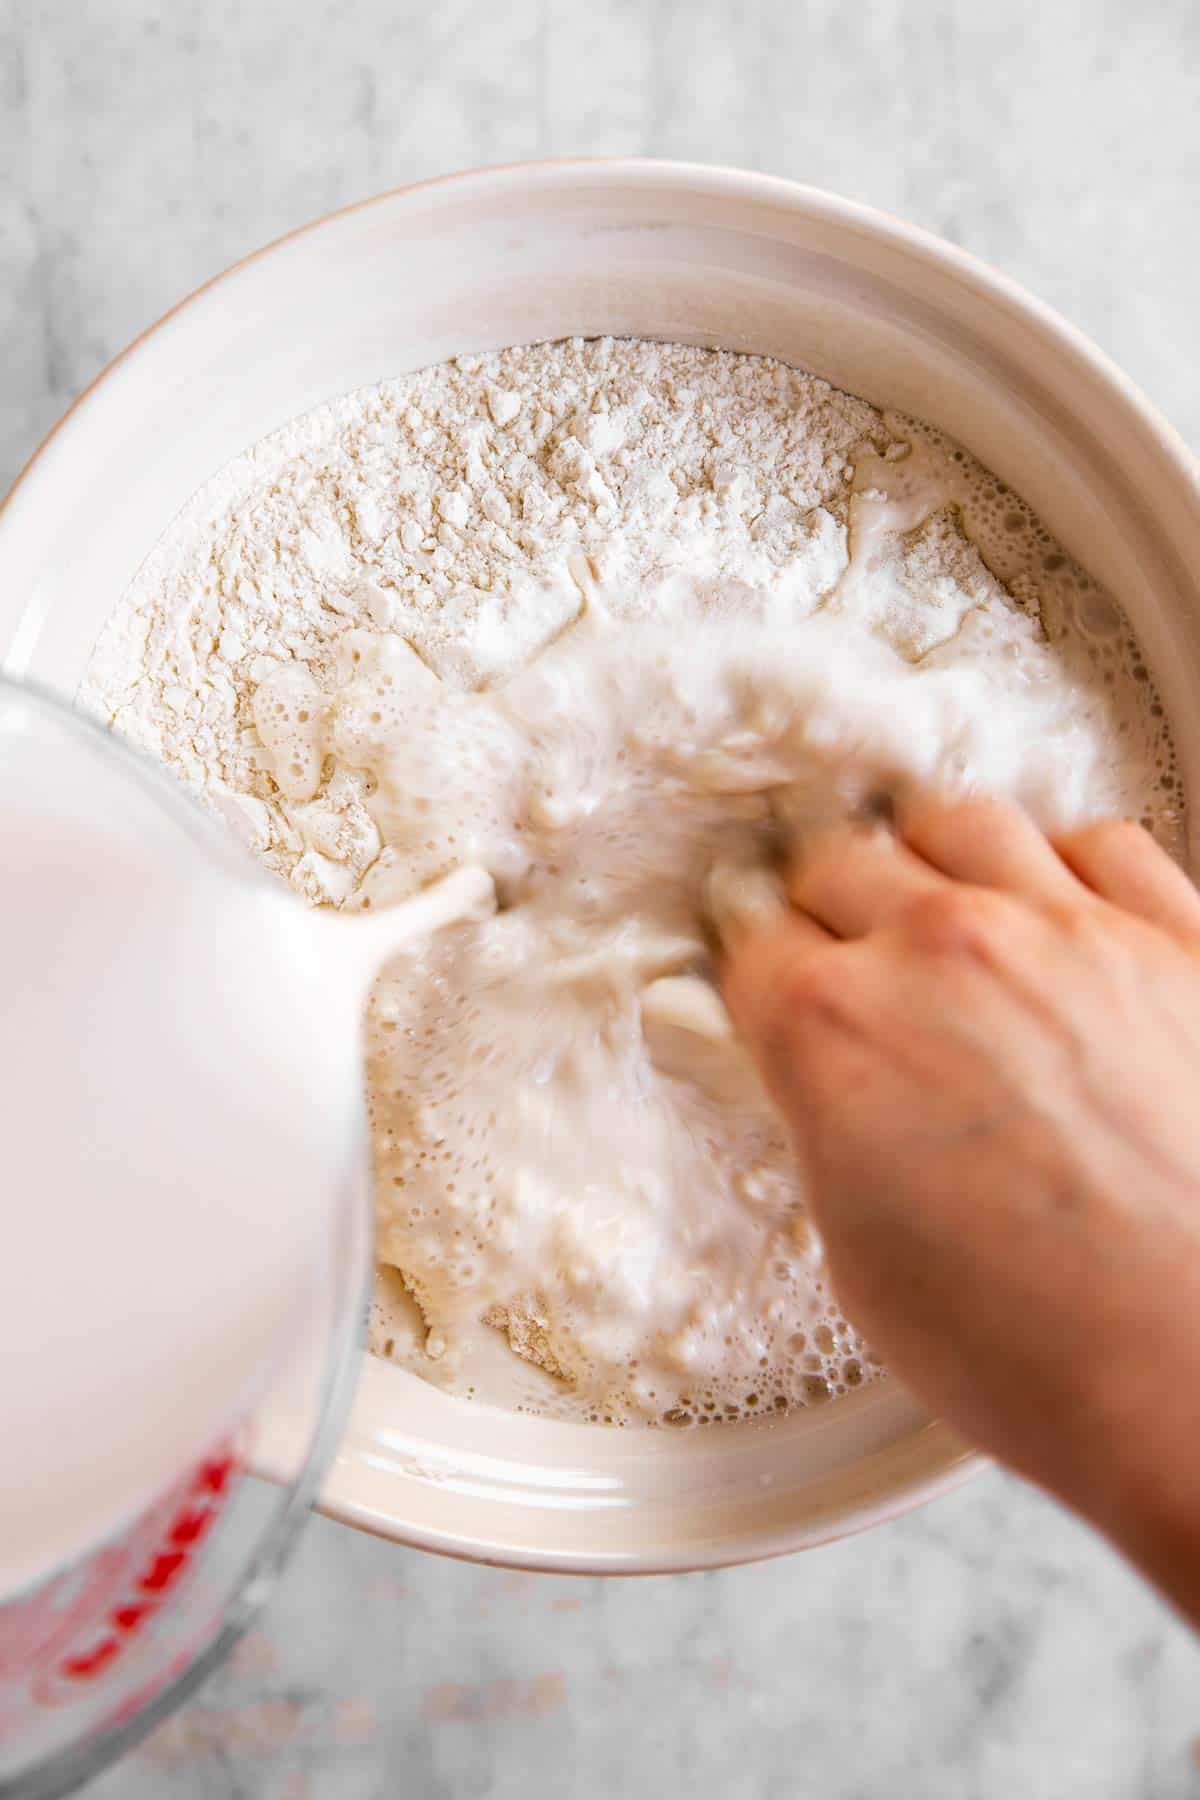
3. Place 6 ⅓ cups of flour in a very large mixing bowl, then pour in your starter/water mix while stirring with clean fingers.
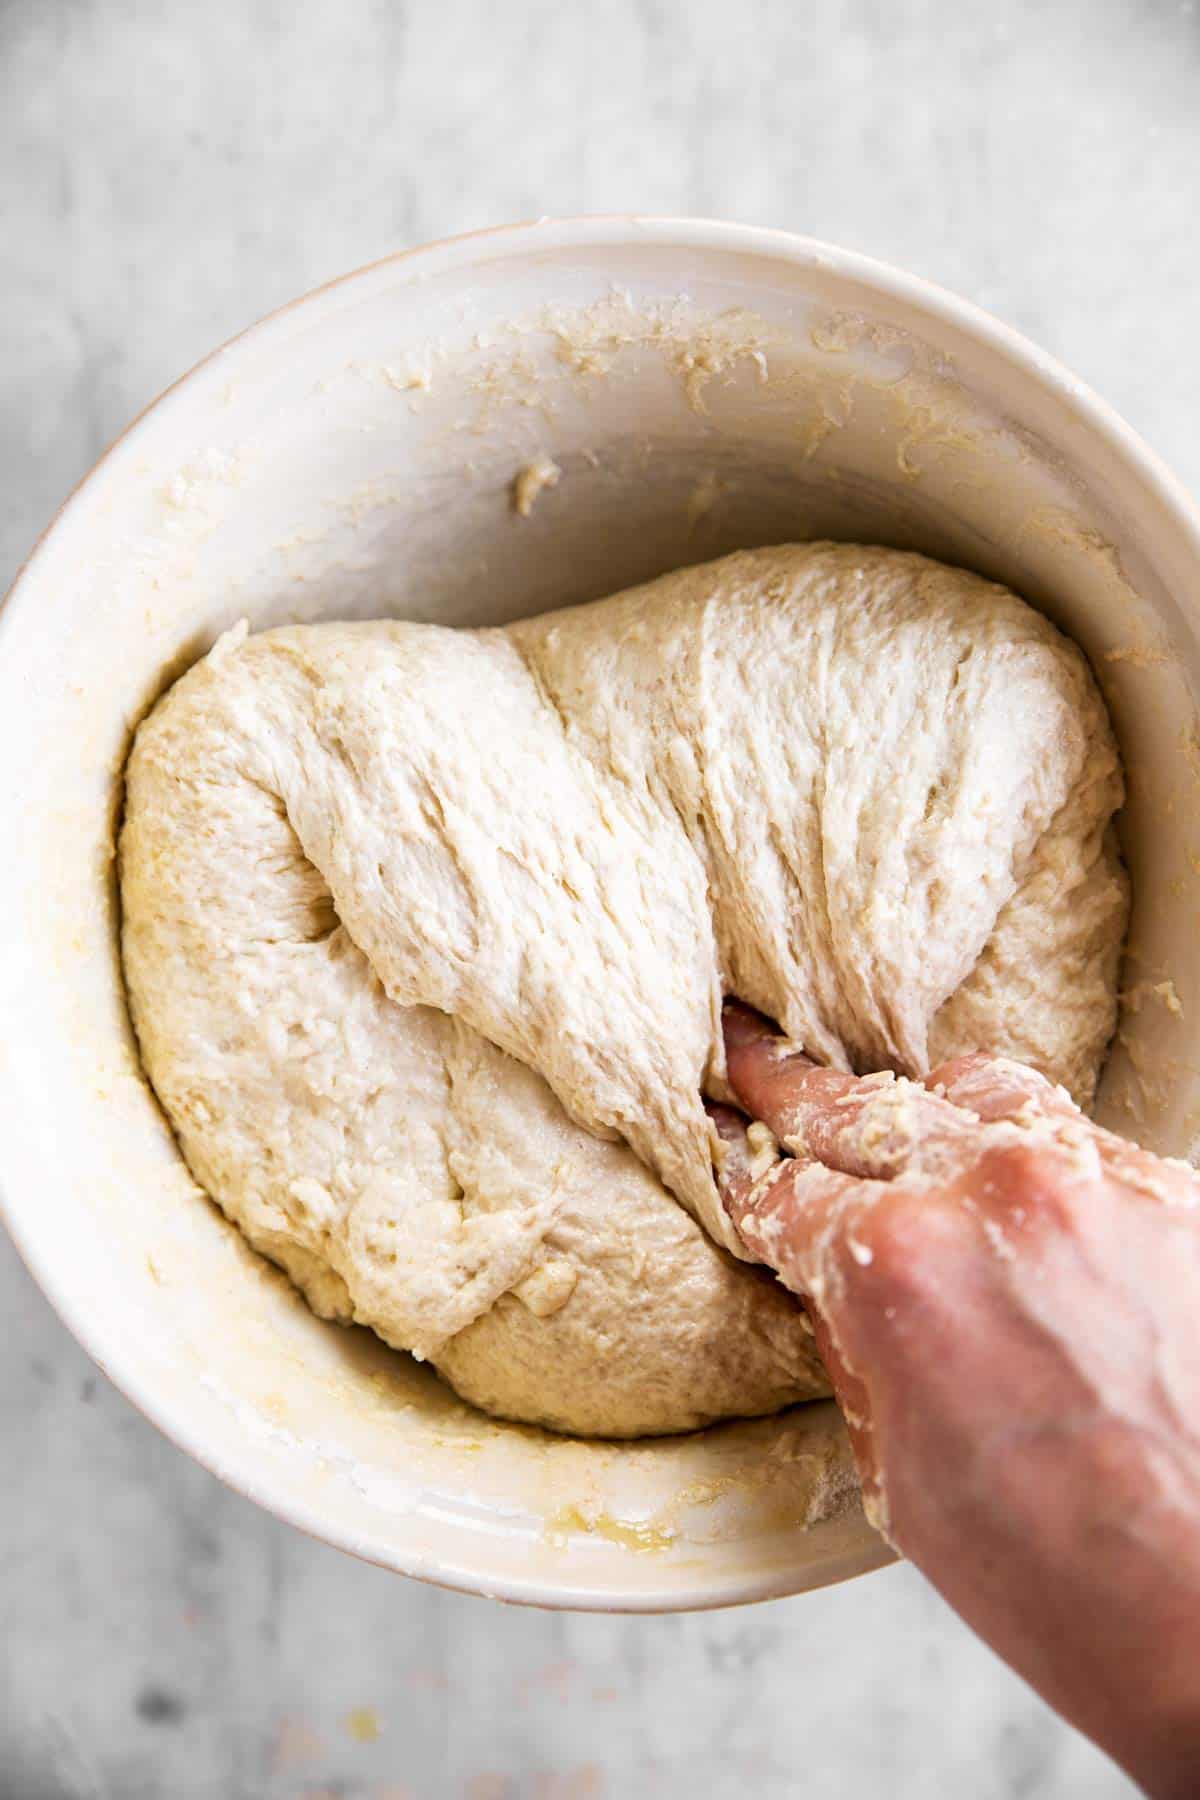
4. Once you have added all of the dissolved sourdough starter, sprinkle over the salt. Stretch and fold your dough 3-4 minutes in the bowl.

stir in dissolved starter work in salt
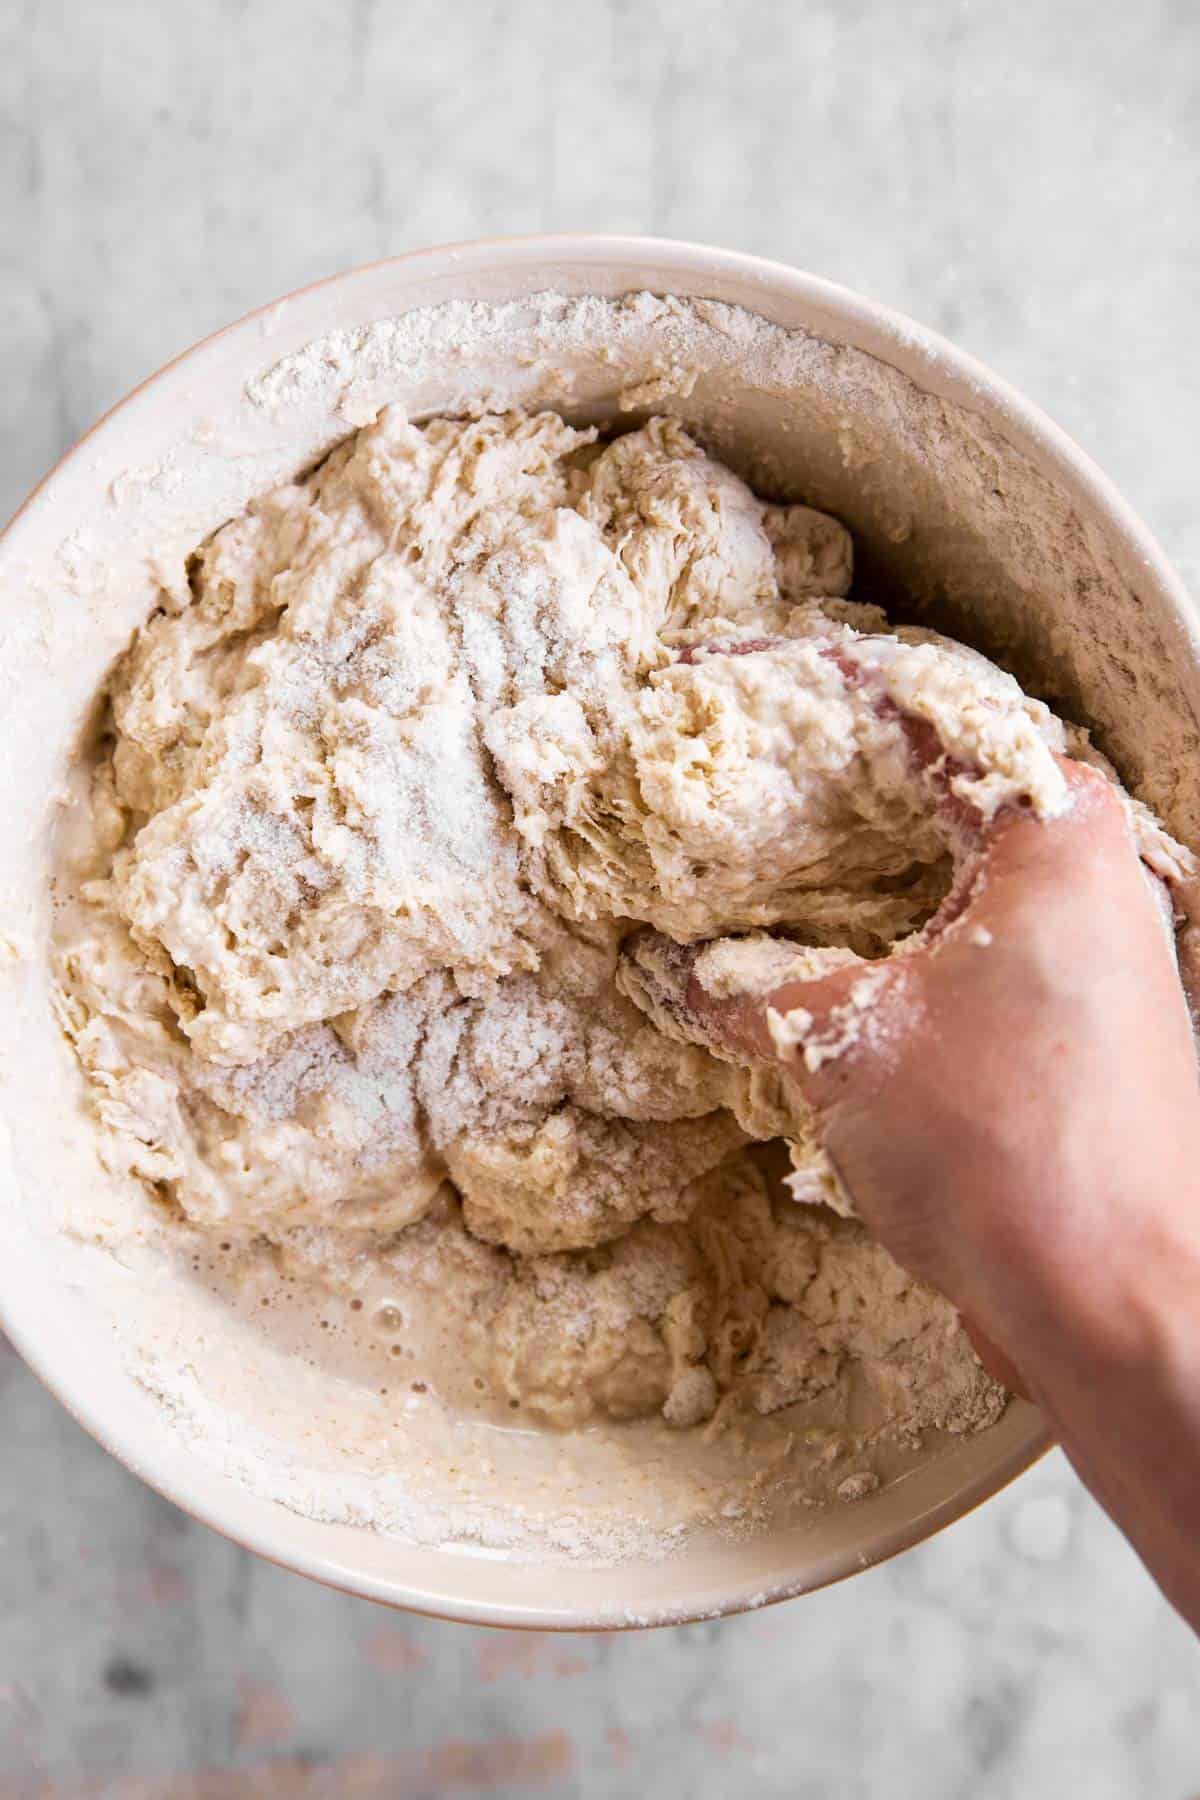
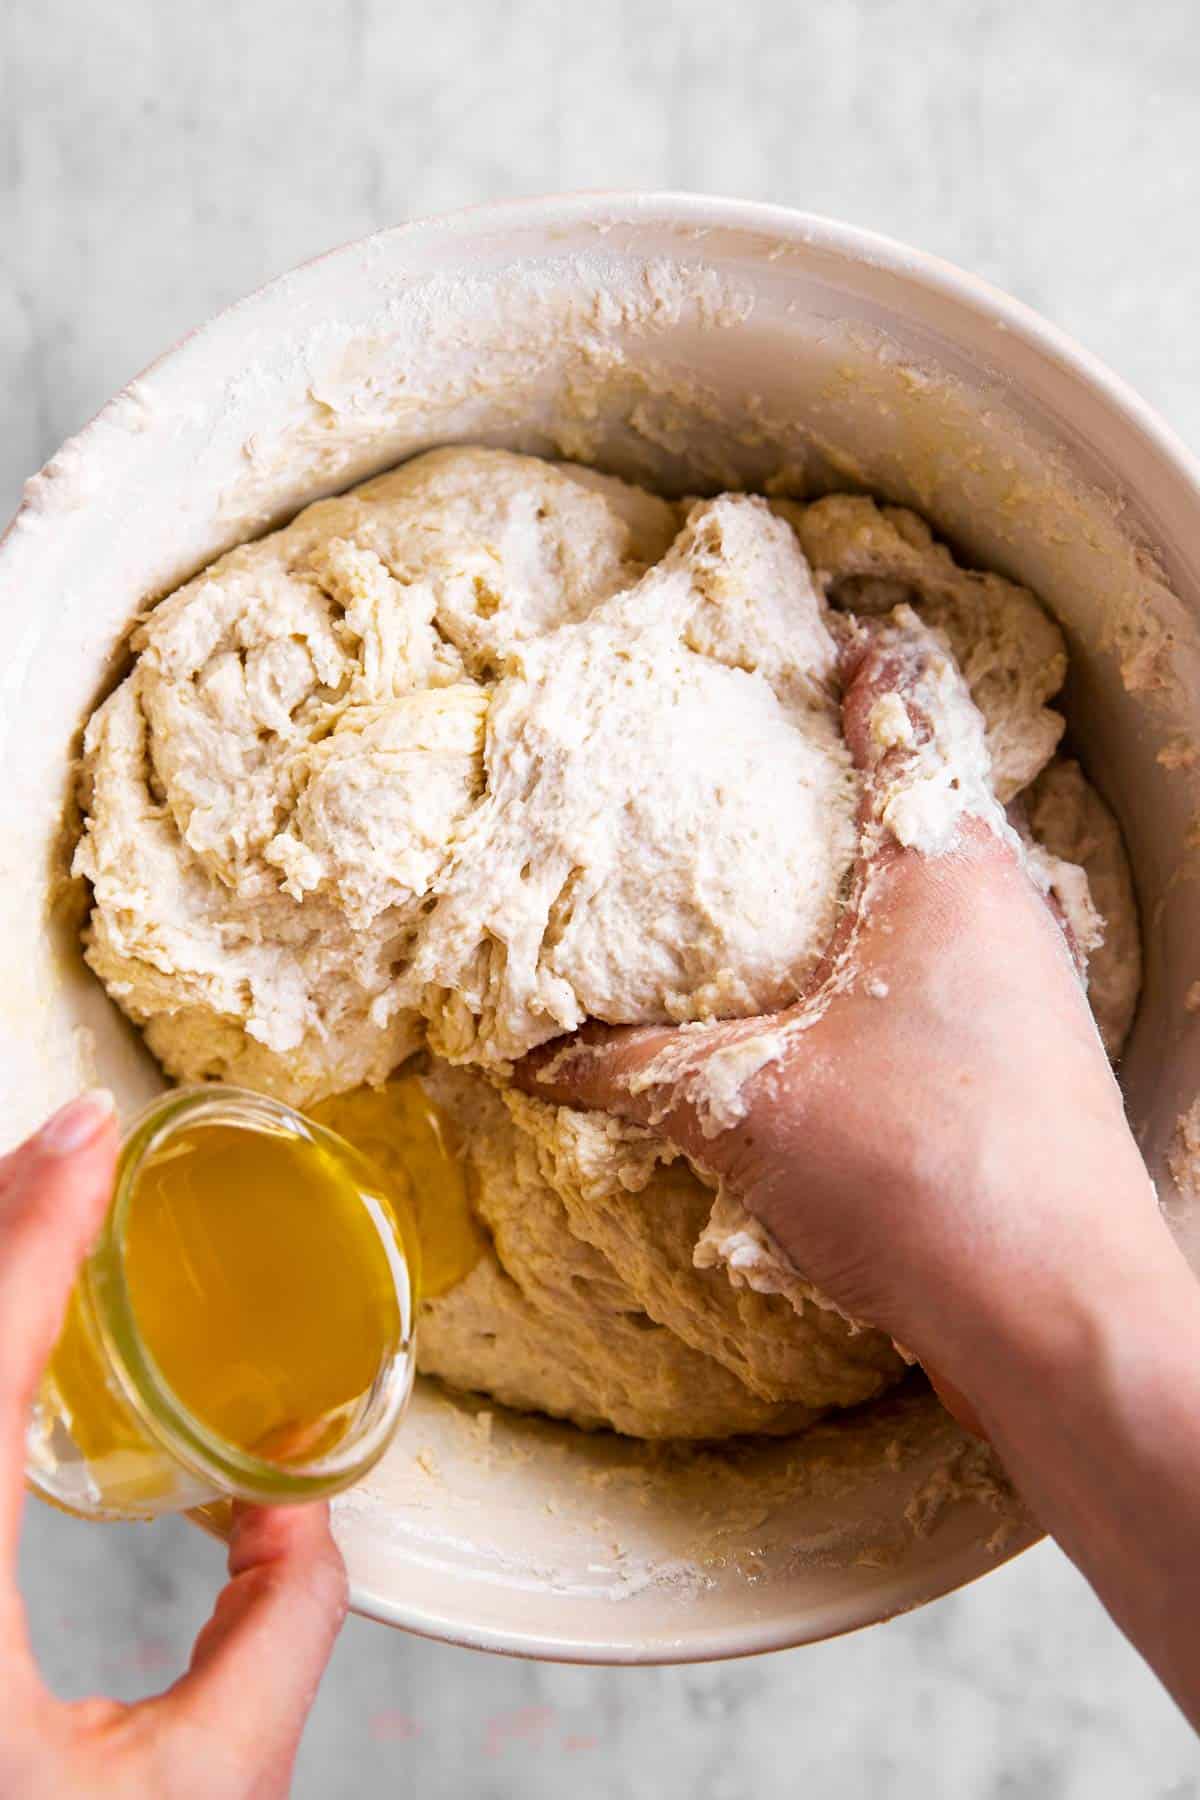
5. Once you have stretched/folded and the dough has somewhat come together, slowly knead in the oil. Your dough should become much smoother as a result.
Watch this video clip to see how I do all of my kneading (or stretching/folding) before the first rise:
6. Stretch and fold for 3-5 more minutes, until you have a smooth and soft, slightly sticky dough.
work in oil strech/fold until smooth
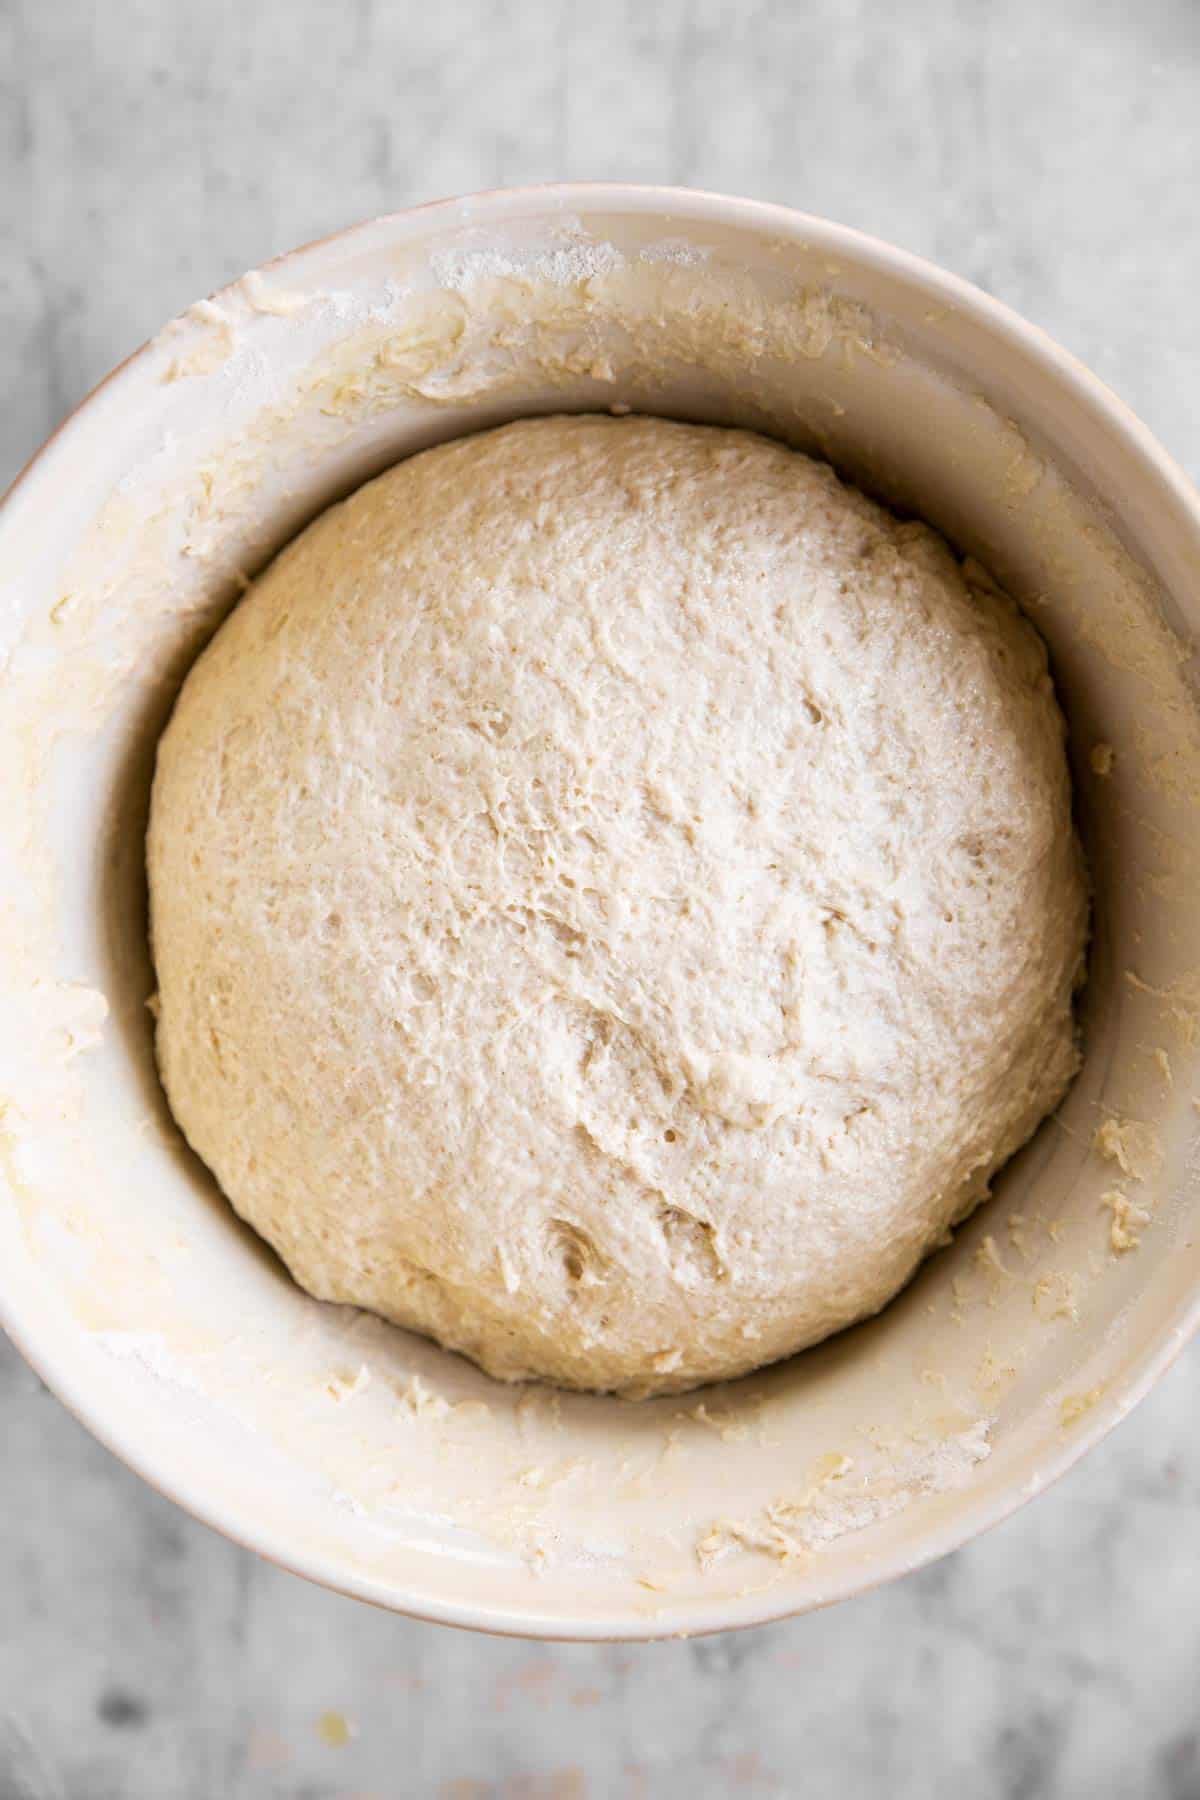
7. Place the dough seam down, in your bowl. It should have a relatively even, rounded surface on top for the best rise.
Tightly cover the bowl with plastic wrap and let it rest in a warm place 2-4 hours, until it has at least gained 50% in size.
before first rise after first rise
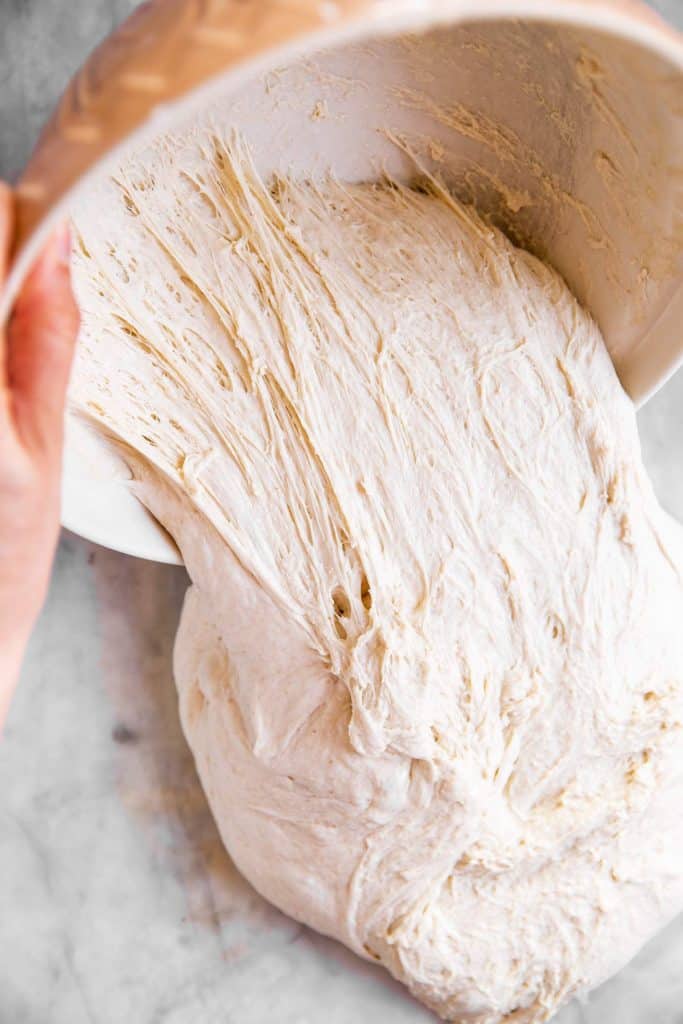
8. Remove the dough from your bowl to a clean, lightly oiled work surface.
dough should look stringy remove to oil surface stretch 
and fold
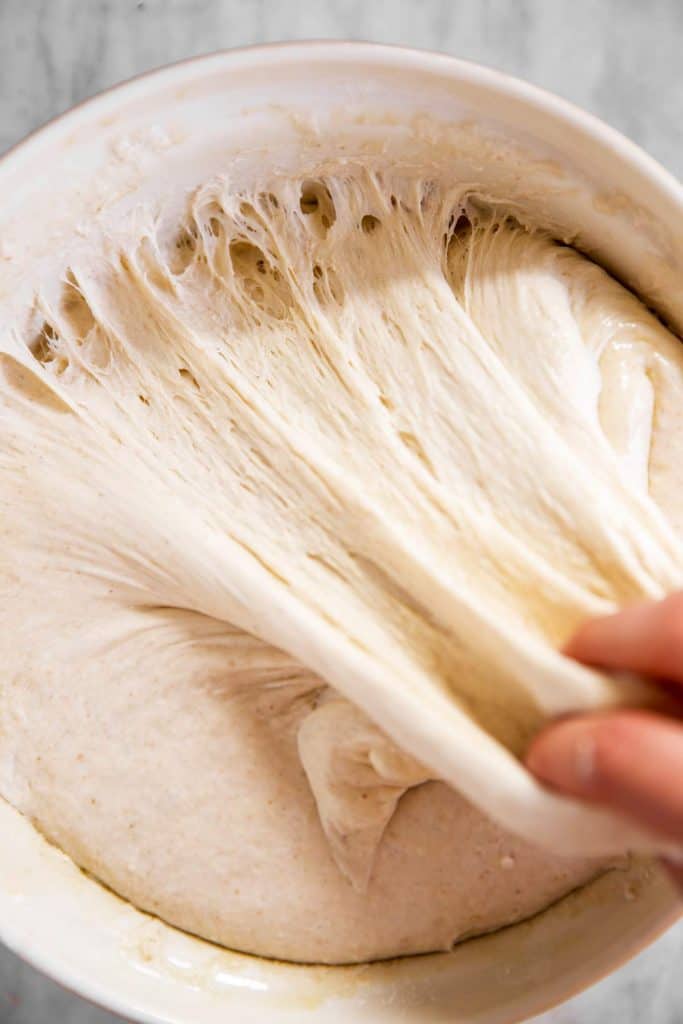
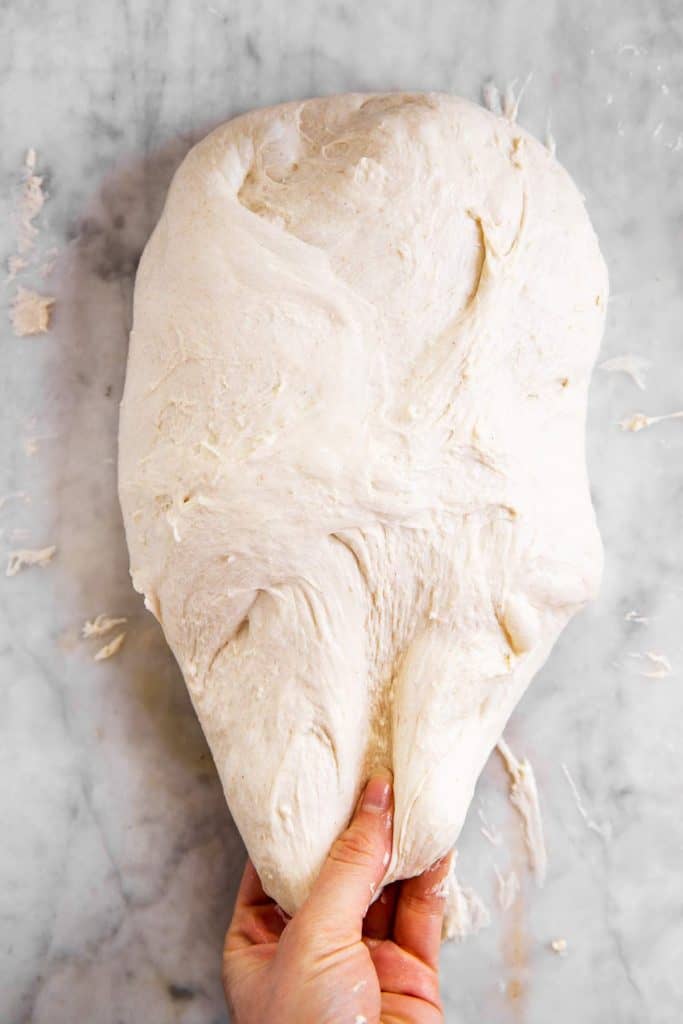
Stretch and fold it 8 times (I look at the dough as a rectangle and strech/fold each side, one after the other, twice around clockwise – see the video below!).
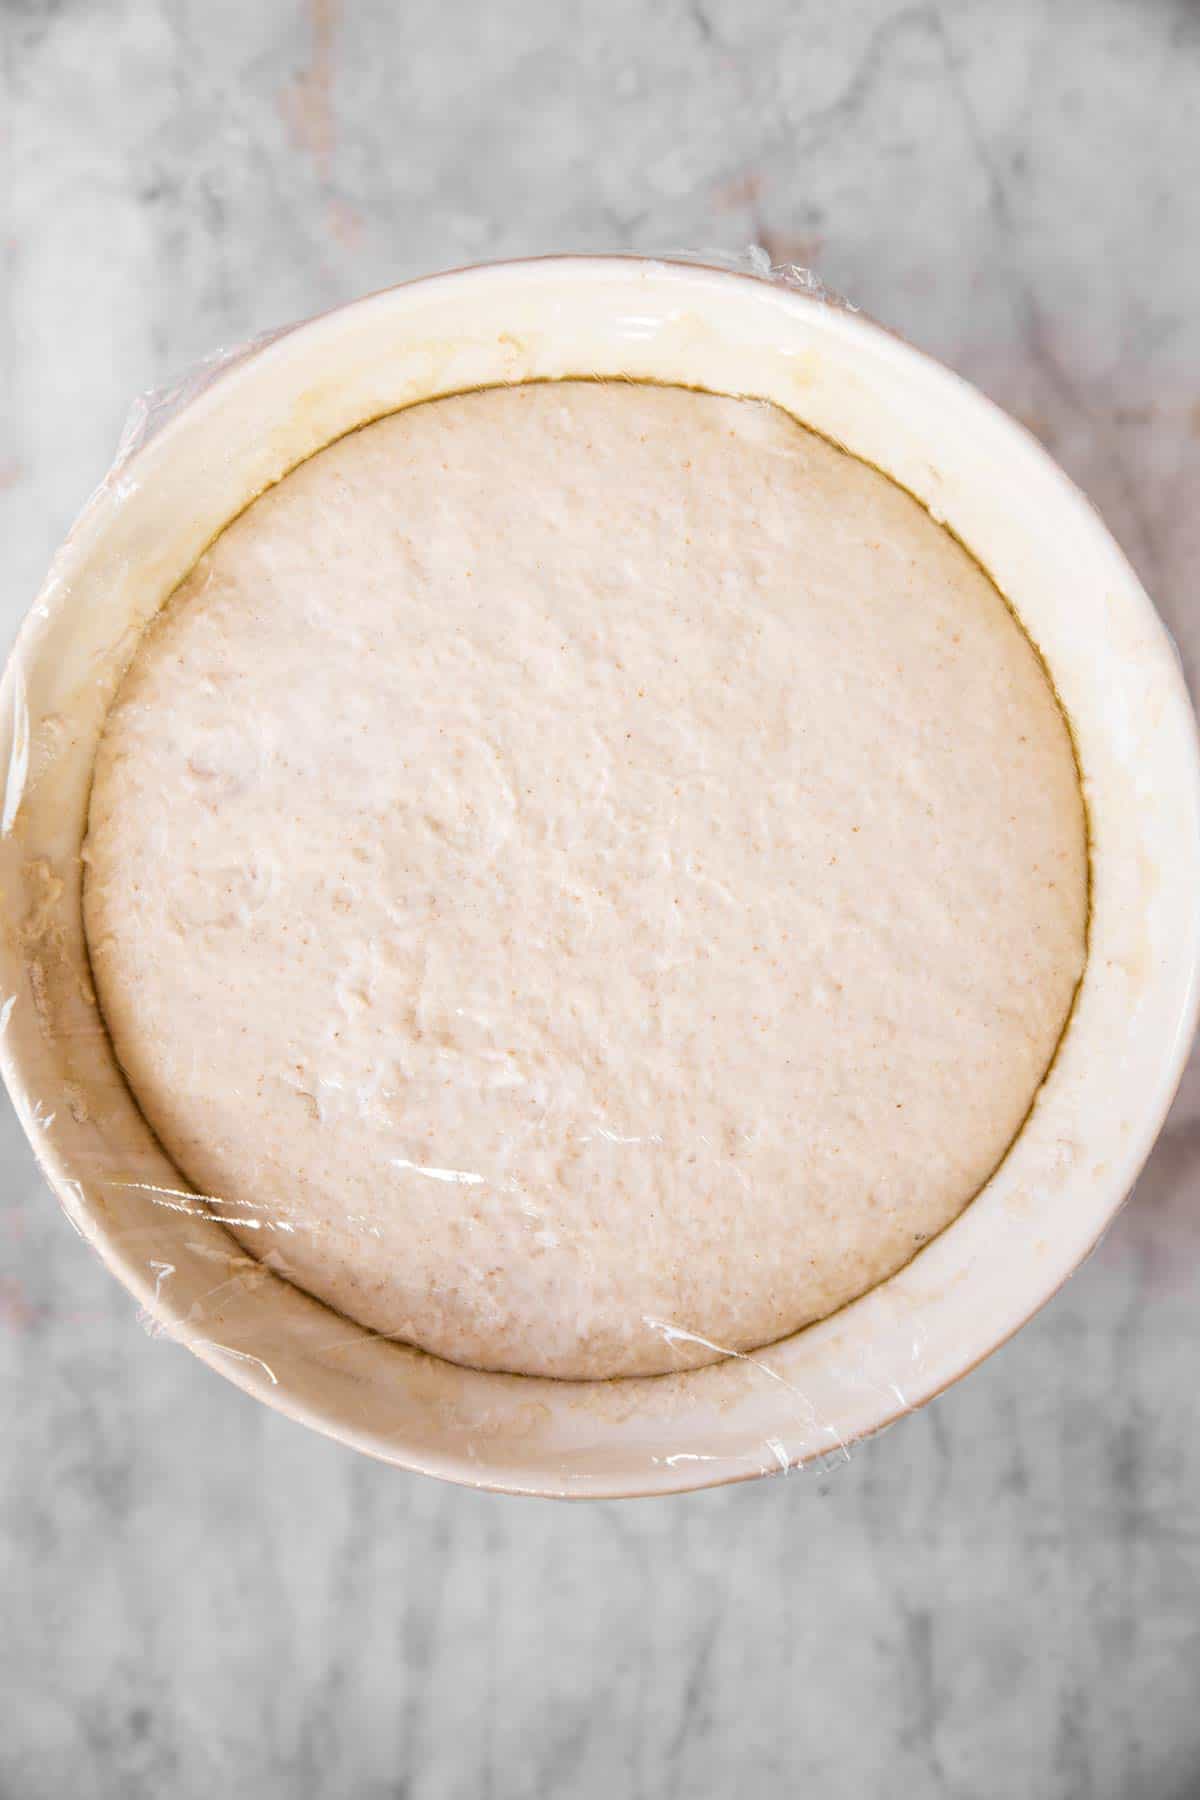
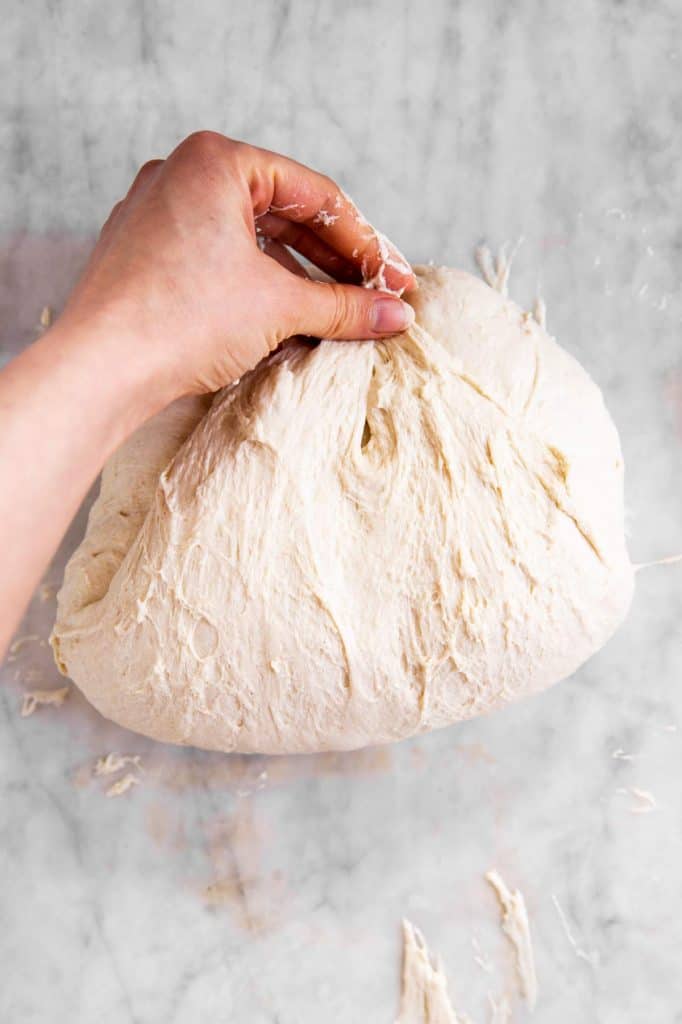
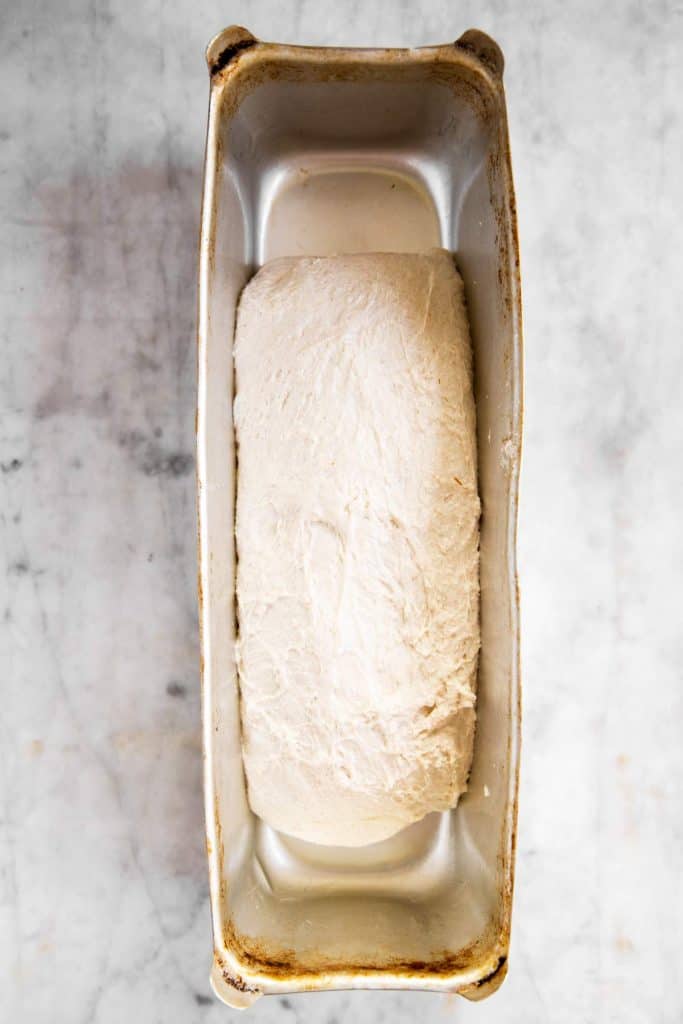
9. Shape your dough into a log (I stretch and fold 3-4 times from only the top and bottom for this, not left or right). Place it into a lightly oiled 16×4 inch (10x40cm) loaf pan (OR 2 8×4 inch (10x20cm) loaf pans).
Cover the pan tightly with plastic wrap and let the bread rise for 3-4 more hours, until the dough nicely fills the pan.
before first rise after first rise

For our jumbo pan (this next link is an affiliate link and I earn a commission for purchases made after clicking through), this is the exact one we own, and we love it! It looks totally beaten up at this point, because we’ve been using it 2-3 times every single week for the past 5 years. It works so well to make a large loaf of bread, which is exactly what we need for our family of 3 hungry, active kids and 2 tired parents ?
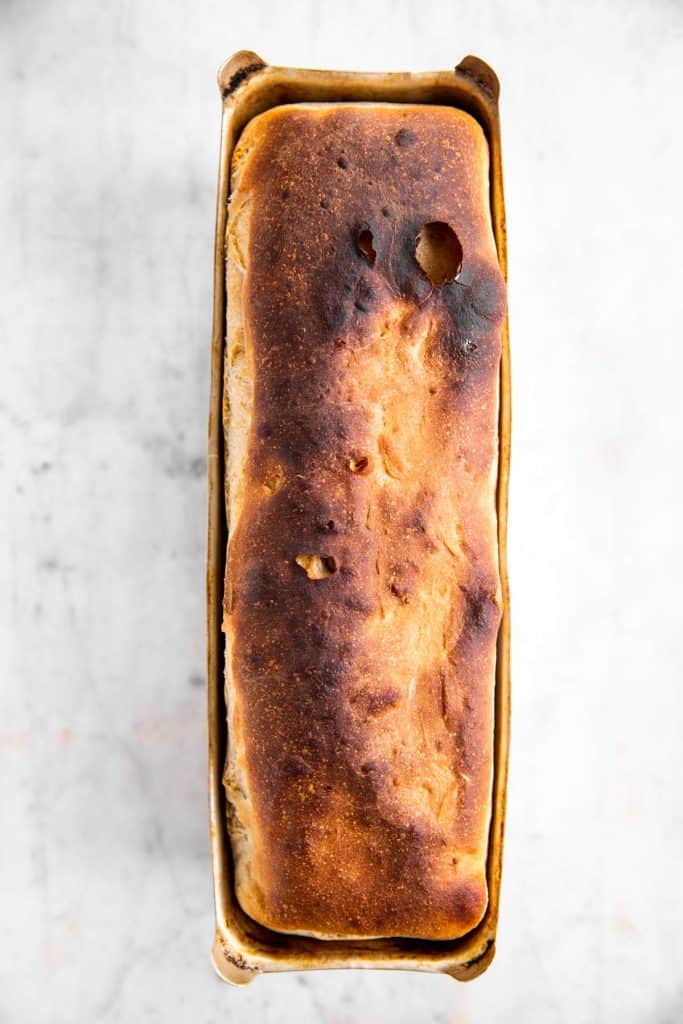
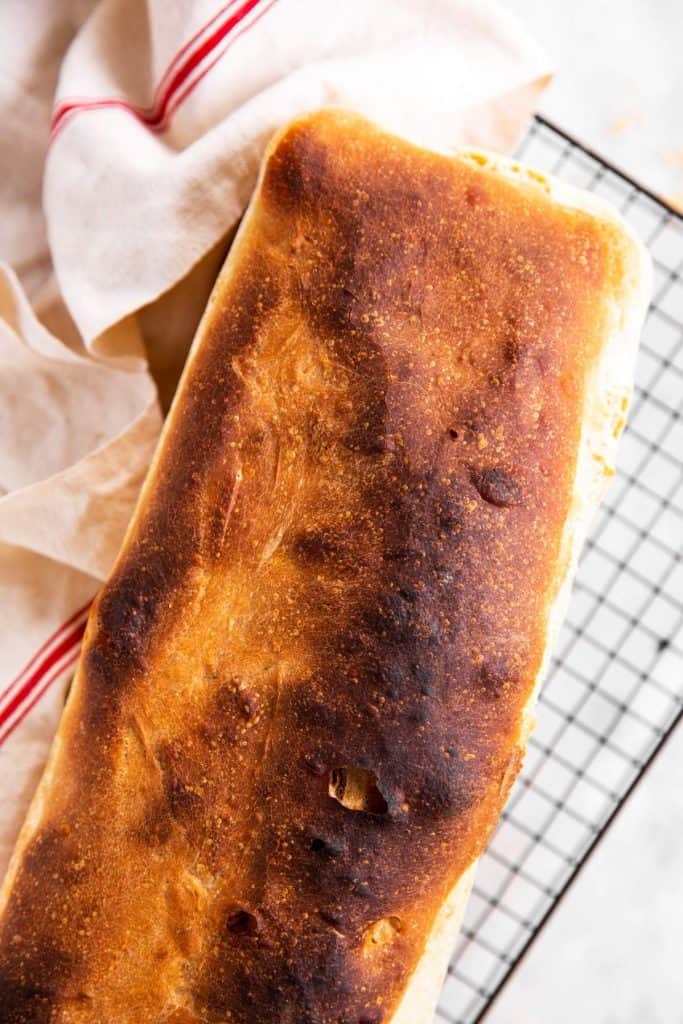
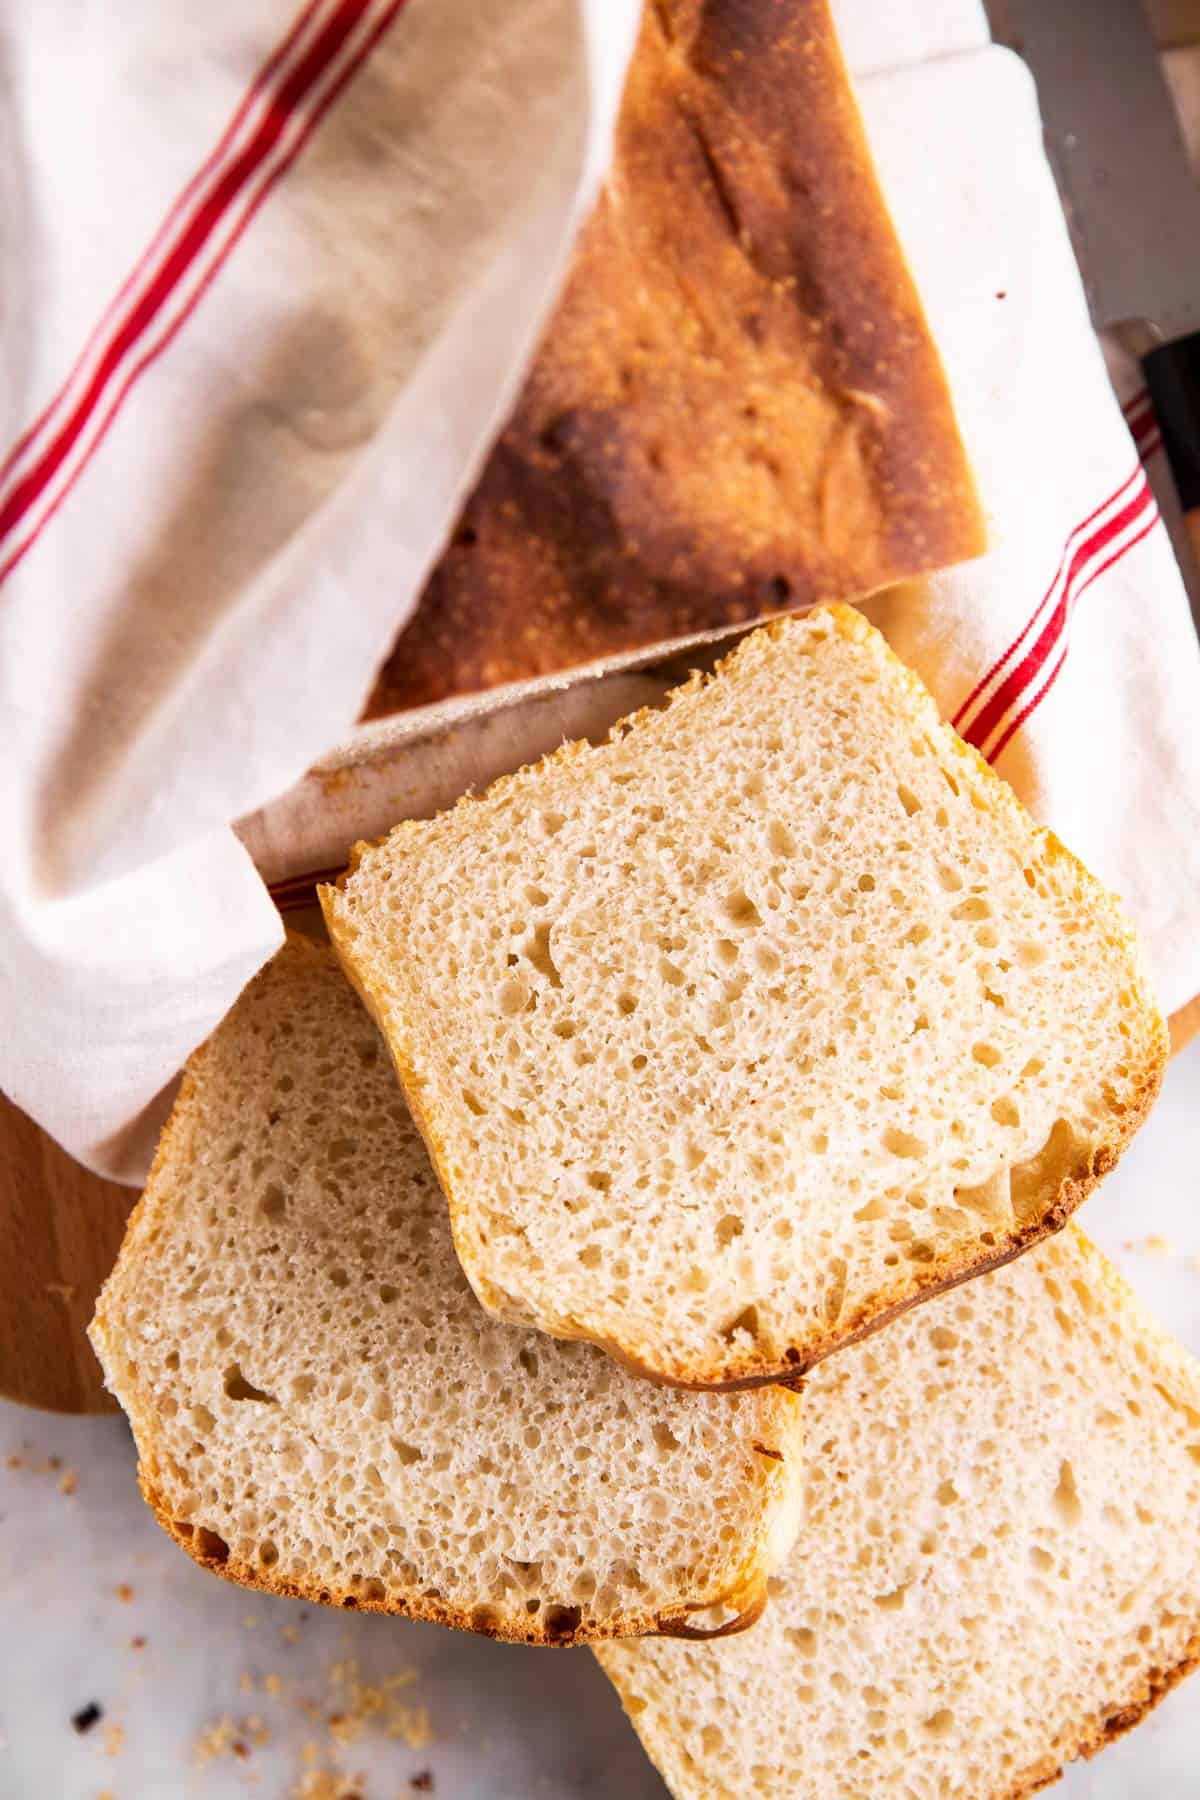
Once you’re ready to bake, heat the oven to 440°F (230°C). Uncover the pan and bake the bread for 30-35 minutes on the middle rack, until deep brown and very crusty on top. Remove it from the pan immediately and let it cool on a cooling rack before slicing.
just baked cool on rack out of the pan
Recipe tips
- The needed flour/water amount can vary a lot depending on different factors (altitude, humidity, season, exact flour used, extact starter used…). Use the flour/water in the recipe as a guide, but then alter by feel. The dough should be smooth, very stretchy and good to handle. But it should still be a little tacky.
- Make sure to measure your flour correctly! I fully recommend a kitchen scale when baking bread. You can get them pretty cheap on Amazon, (affiliate link, I make a commission for purchase made after clicking through) this one has tons of great reviews. With measuring cups, make sure to spoon your flour into the cup, then level it off with the back of a knife. Do not scoop the flour with the cup! You could end up with 50% more flour than you need!
- The stretch/fold technique sounds intimidating, but it’s really simple. You just grab one side of the dough rectangle, pull it out, then fold it over the dough as if you were folding a towel. Check out the short video clips in the post above for visual reference.
- Lightly damp or lightly oiled hands get less messy when stretch/folding your dough.
- Do not add more flour just because your dough feels too sticky initially, you need to thoroughly stretch/fold it to correctly assess hydration.
- Make sure to give your sourdough enough time to rise, it really needs the time to develop and to yield a flavorful bread.
Storage tips
Countertop
Once cooled, store the bread wrapped in a clean kitchen towel on your counter for up to 3 days. We have a bread box we keep it in.
Freezer
You can also freeze your sourdough bread. I highly recommend freezing it pre-sliced. Separate single slices with way paper, that way you’re able to remove only what you need from the freezer!
Place the bread in labelled and dated freezer bags or containers, seal and freeze for up to 3 months.
To defrost, remove the bread from the freezer bag/container and thaw on a rack on the counter for several hours, until fully defrosted. You can lightly toast it for a freshly-baked taste!
Serving ideas
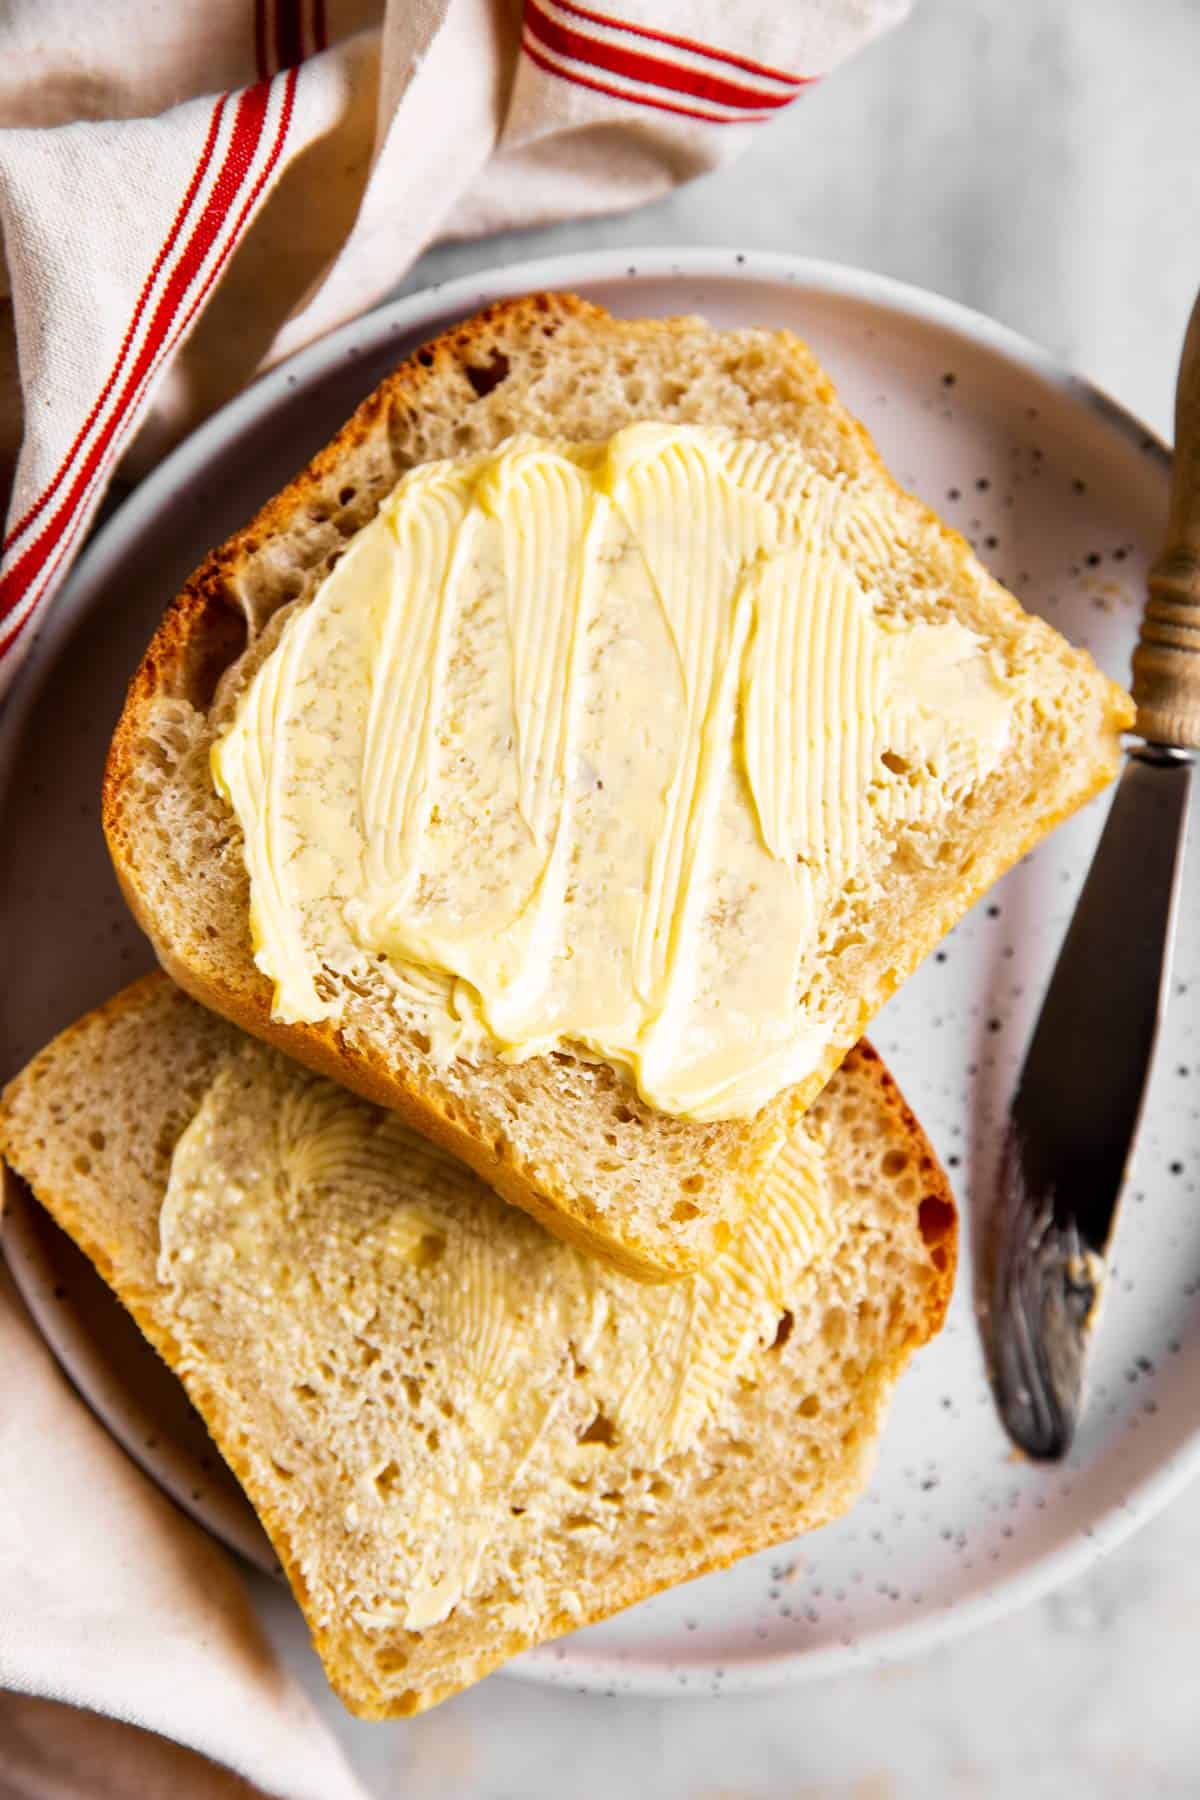
To be honest, we mostly eat this bread instead of store-bought toast for breakfast. With a pat of butter and some raspberry jam, or with almond butter and honey… This is one of my favorite quick and easy breakfasts.
It’s also great toasted with some bacon and a fried egg to top it off as a simple weekend breakfast.
I also serve it with salad for lunch, with soup for a light dinner… Or as a sandwich with egg salad, chicken salad… Basically with everything under the sun, ha!
PS If you try this recipe, please leave a review in the comment section and add a star rating in the recipe card – I appreciate your feedback! Follow along on Pinterest, Facebook or Instagram.
Easy Sourdough Bread
Recipe details
Ingredients
For the fed starter
- ½ cup 75% hydration sourdough starter see notes for different hydration
- 1 ⅔ cups all-purpose flour
- ⅔ cup water
For the bread dough
- 1 ½ cups fed starter
- 2 cups hand-warm water
- 6 ¼ cups all-purpose flour
- 1 tablespoon salt
- ¼ cup olive oil
Instructions
Prep (night before)
- Feed starter: The night before, combine ingredients for fed starter in a medium jar, cover with plastic wrap and let sit on counter overnight.
Make dough
- Dissolve starter: On baking day, remove 1 ½ cups (300g) of fed starter and dissolve it in 2 cups (500ml) hand-warm water in a large measuring jug.
- Combine with flour: Place 6 ¼ cups (800g) all-purpose flour in a large mixing bowl. Slowly pour in water/starter mixture while stirring with clean fingers.
- Add salt: Once all of dissolved starter has been added, sprinkle over salt.
- Knead: Stretch/fold bread dough in bowl for 3-5 minutes, until coming together.
- Add oil: Slowly work in oil, then stretch/fold dough in bowl for another 3-5 minutes, until smooth.
Rising
- First rise: Place dough, seam down, in bowl. Cover bowl tightly with plastic wrap and let sit at room temperature for 2-4 hours, until at least 50% increased in size.
- Knead: Remove dough to a lightly oiled work surface, stretch and fold 8 times.
- Shape: Lightly oil a 4×16 inch (10x40cm) loaf pan (OR two 4×8 inch (10x20cm) pans; divide dough in half for next steps for two pans). Stretch/fold dough only from top and bottom (not from the sides) 3-4 times to create a log, place in prepared pan.
- Second rise: Tightly cover pan with plastic wrap, then let sit at room temperature for another 2-4 hours, until dough fills pan.
Baking
- Bake: Heat oven to 440°F (230°C). Remove plastic wrap from pan and bake bread for 30-35 minute, until deep golden and crusty on top. Remove from oven and from pan immediately and allow to cool on a cooling rack before slicing.
Notes
Ingredient notes
- Flour: We mostly use all-purpose flour for this recipe. We have made the recipe with half whole wheat, half all-purpose flour very successfully. We have also tried all whole wheat (and all whole spelt), which both come out a little denser.
- Sourdough starter: I use a sourdough starter at 75% hydration. If yours is at 100% hydration, I recommend reducing the water added to the fed starter by ¼ cup.
- Olive oil: This is the oil we always use in this sourdough bread. Feel free to use a different vegetable oil if you prefer.
- Water: We use hand-warm tap water for this recipe. If you use cold water, the dough will take longer to rise (which can be nice if you need it to take longer, or if you want to maximize flavor).
Recipe tips
- The needed flour/water amount can vary a lot depending on different factors (altitude, humidity, season, exact flour used, extact starter used…). Use the flour/water in the recipe as a guide, but then alter by feel. The dough should be smooth, very stretchy and good to handle. But it should still be a little tacky.
- Make sure to measure your flour correctly! I fully recommend a kitchen scale when baking bread. You can get them pretty cheap on Amazon, (affiliate link, I make a commission for purchase made after clicking through) this one has tons of great reviews. With measuring cups, make sure to spoon your flour into the cup, then level it off with the back of a knife. Do not scoop the flour with the cup! You could end up with 50% more flour than you need!
- The stretch/fold technique sounds intimidating, but it’s really simple. You just grab one side of the dough rectangle, pull it out, then fold it over the dough as if you were folding a towel. Check out the short video clips in the post above for visual reference.
- Lightly damp or lightly oiled hands get less messy when stretch/folding your dough.
- Do not add more flour just because your dough feels too sticky initially, you need to thoroughly stretch/fold it to correctly assess hydration.
- Make sure to give your sourdough enough time to rise, it really needs the time to develop and to yield a flavorful bread.


Comments
No Comments