

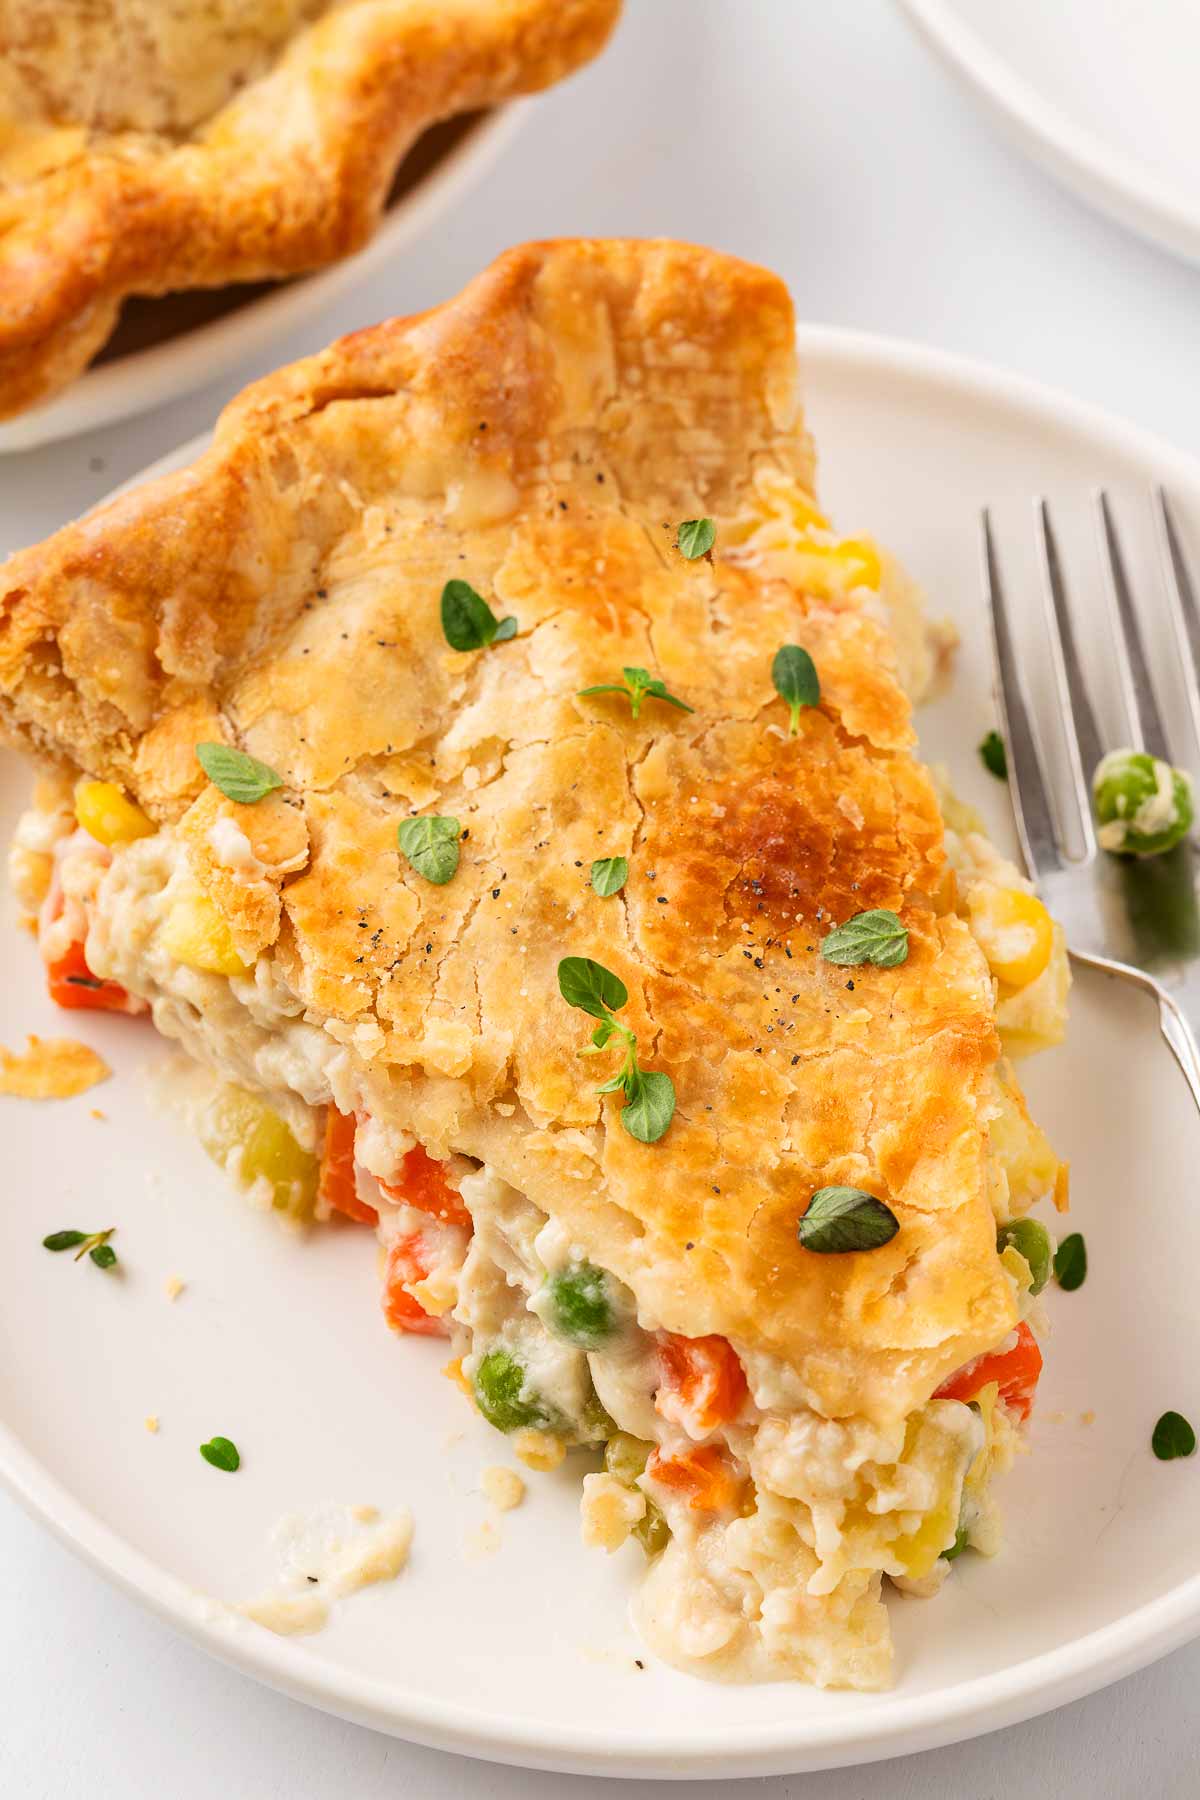
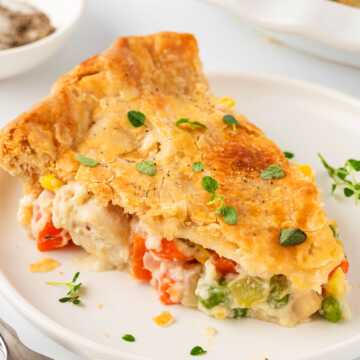
There’s something incredibly comforting about a warm, homemade chicken pot pie. My recipe combines tender chicken, vibrant vegetables, and a creamy sauce, all encased in a flaky, golden crust. It’s the perfect dish to bring everyone together around the dinner table on a chilly night!

Jump to:
Why this recipe works
- Classic comfort food: My recipe combines tender chicken and vegetables in a creamy sauce encased in a flaky crust. Doesn’t get more classic than a good old homemade pot pie!
- Family-friendly: A hearty meal that both kids and adults enjoy. At least in theory 😉
- Make-ahead option: Prepare the filling in advance for a quicker weeknight dinner. Super convenient for busy days!
Ingredients you’ll need
Here is a visual overview of the ingredients in the recipe. Scroll down to the printable recipe card at the bottom of this post for quantities!
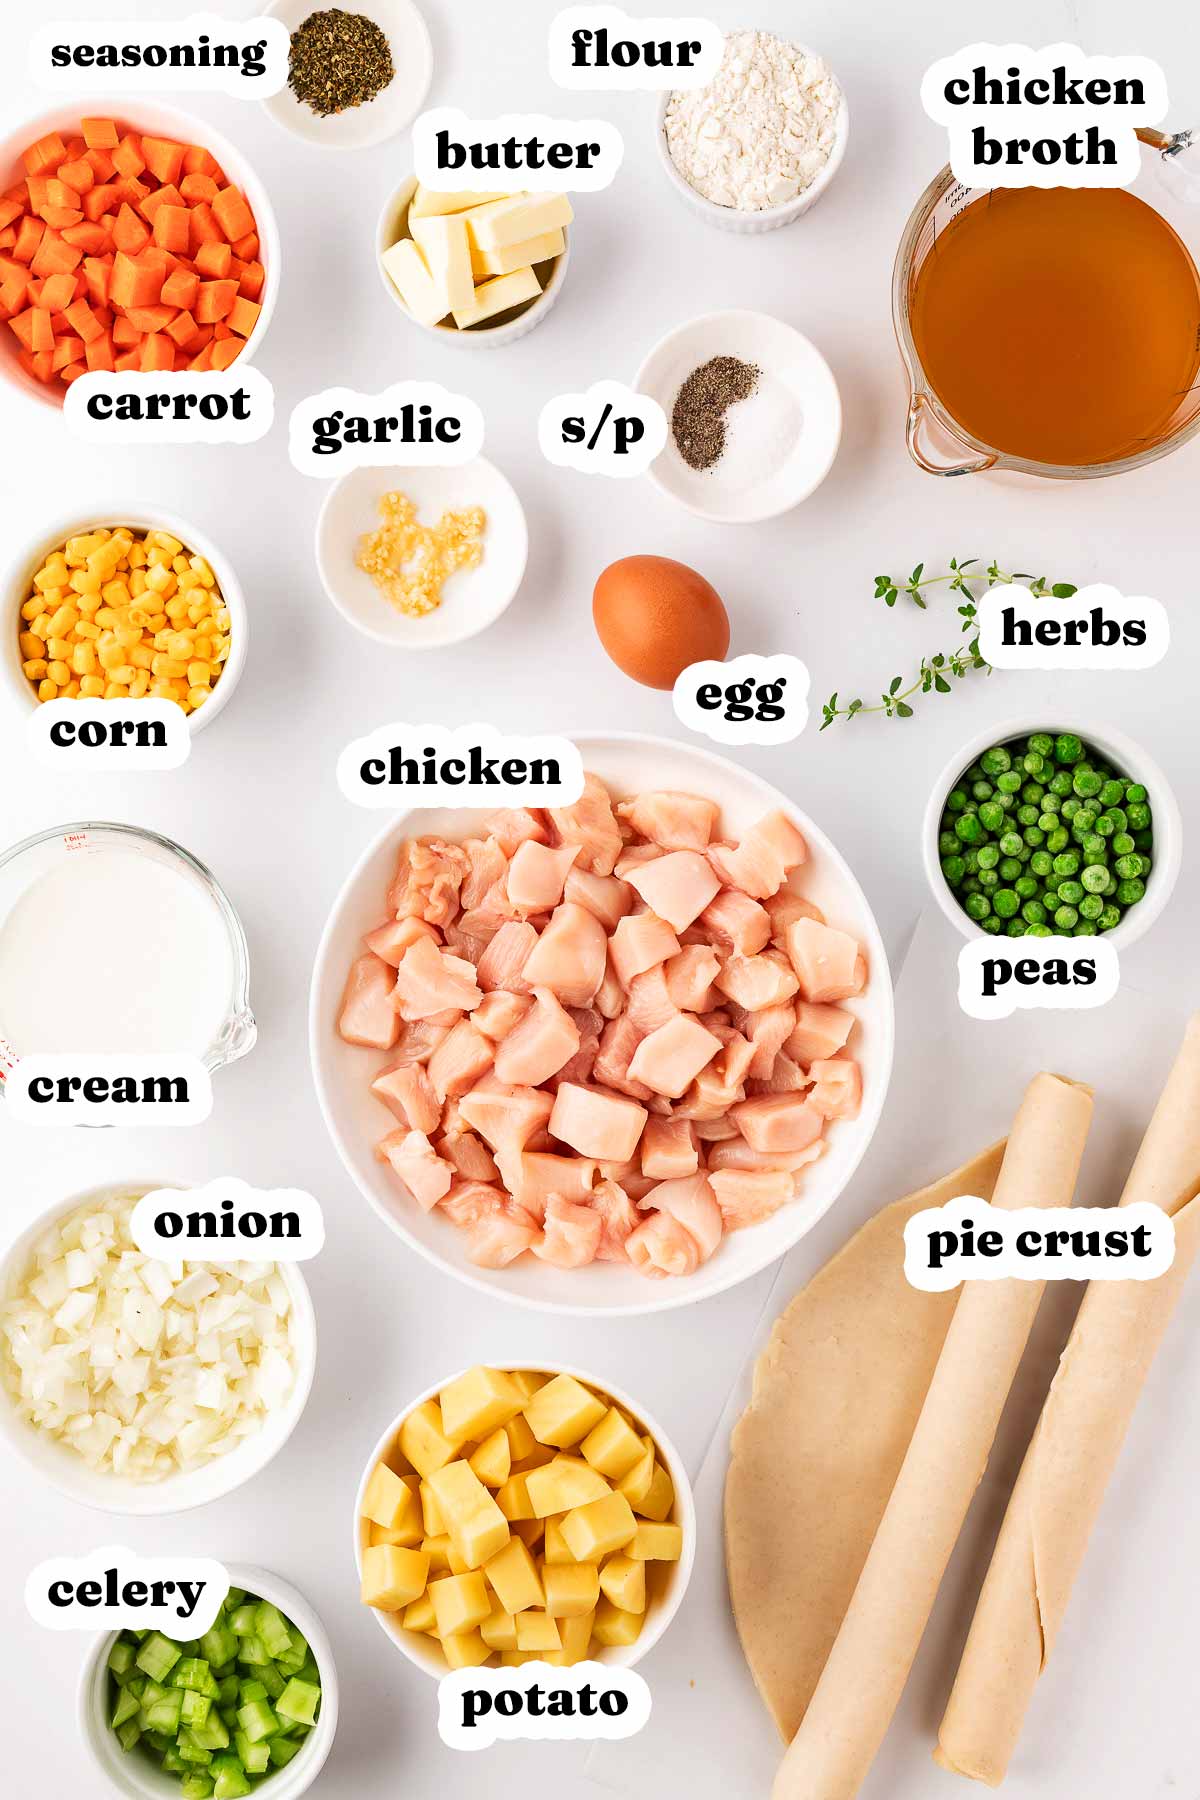
Ingredient notes
- Chicken breast: Boneless, skinless chicken breast works best, but thighs can be used for a richer flavor.
- Vegetables: A mix of potatoes, carrots, celery, peas, and corn adds color and nutrition. Feel free to substitute with your family’s favorites.
- Pie crusts: Store-bought crusts save time, but homemade adds a special touch.
- Half-and-half: Provides creaminess; whole milk or a mix of milk and cream can be used as substitutes.
Recipe variations
- Cheddar biscuit topping – Swap the pie crust for a layer of cheesy biscuit dough for a soft, golden topping with extra flavor.
- Herbed puff pastry – Use puff pastry instead of pie crust for a flakier, lighter texture and brush with garlic butter before baking.
- Crispy skillet pot pie – Skip the bottom crust and bake the filling in an oven-safe skillet with a single crust on top for a faster, rustic version.
Step by step overview
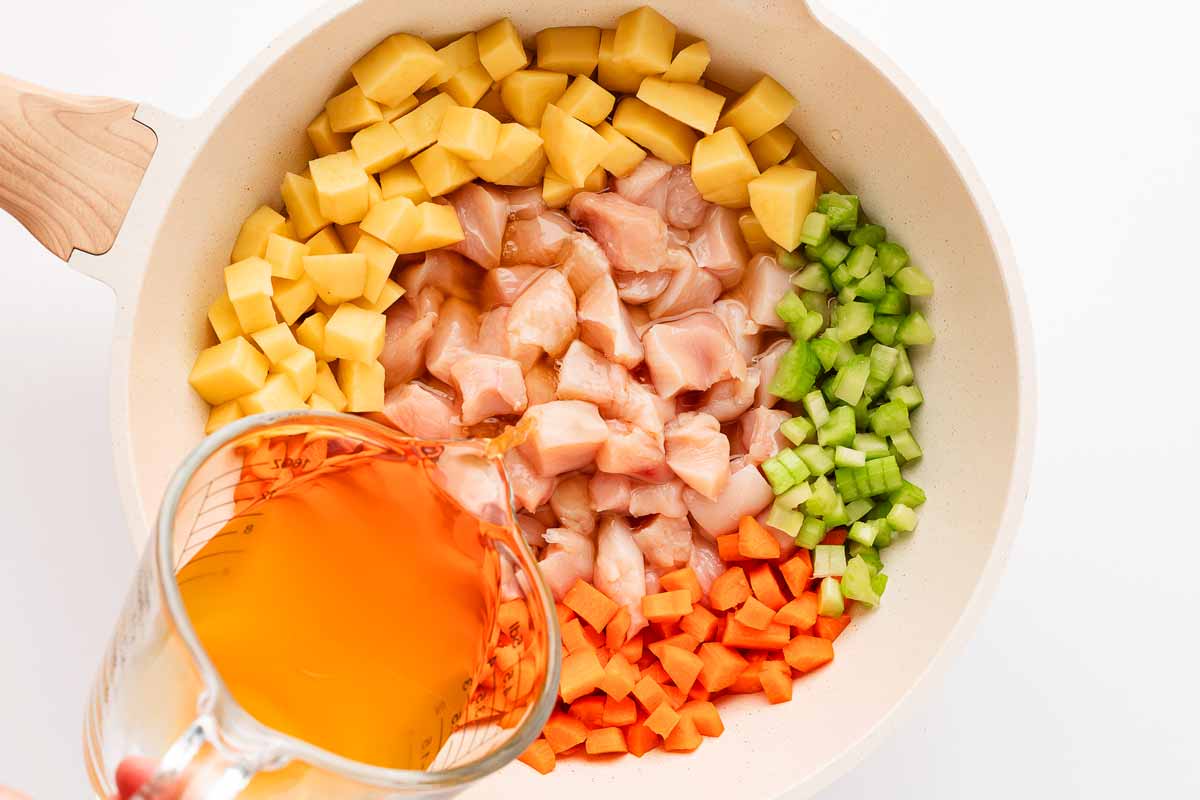
1. Add veggies & chicken:
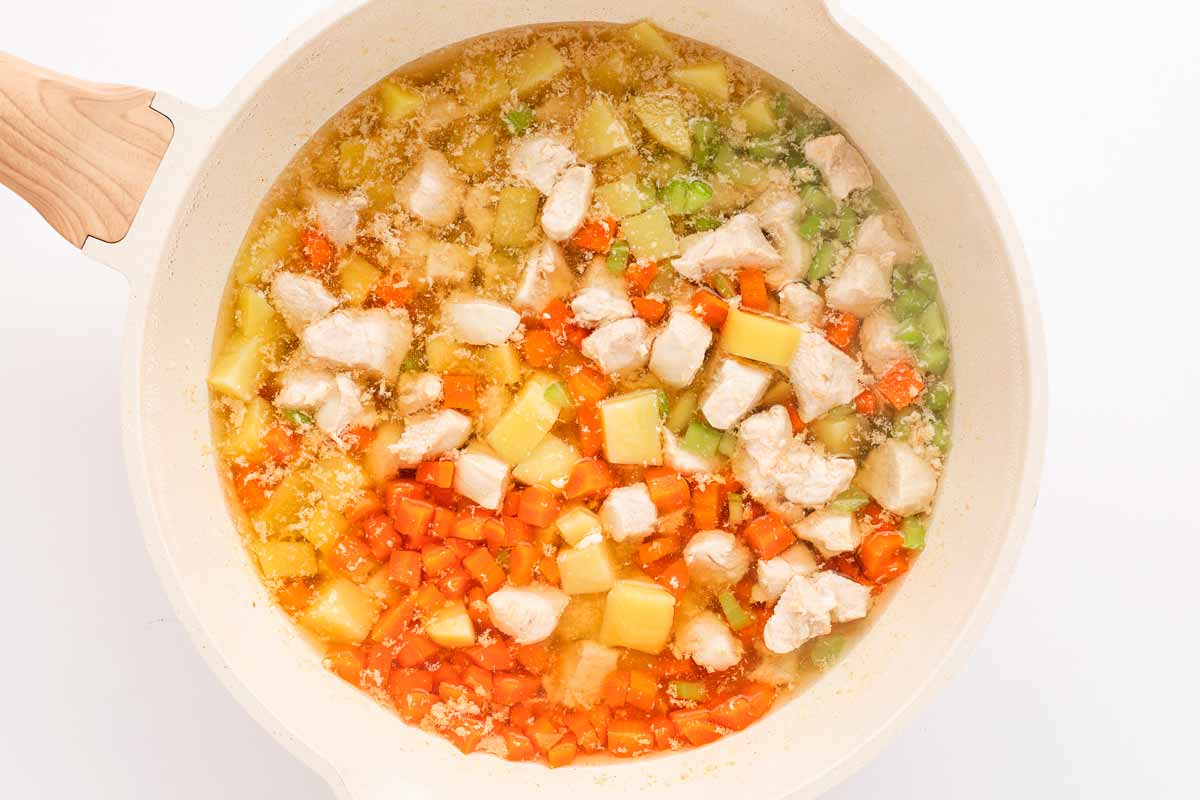
2. Simmer:
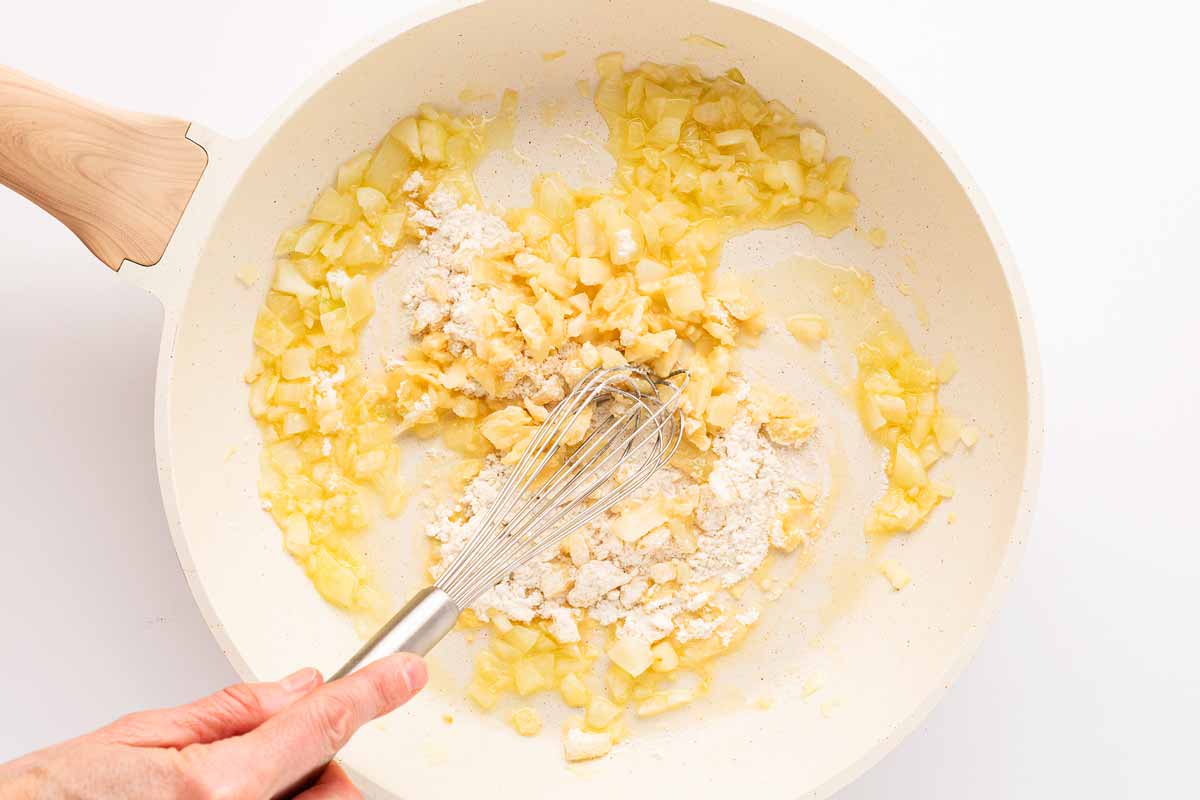
3. Make roux:
4. Add half-and-half:
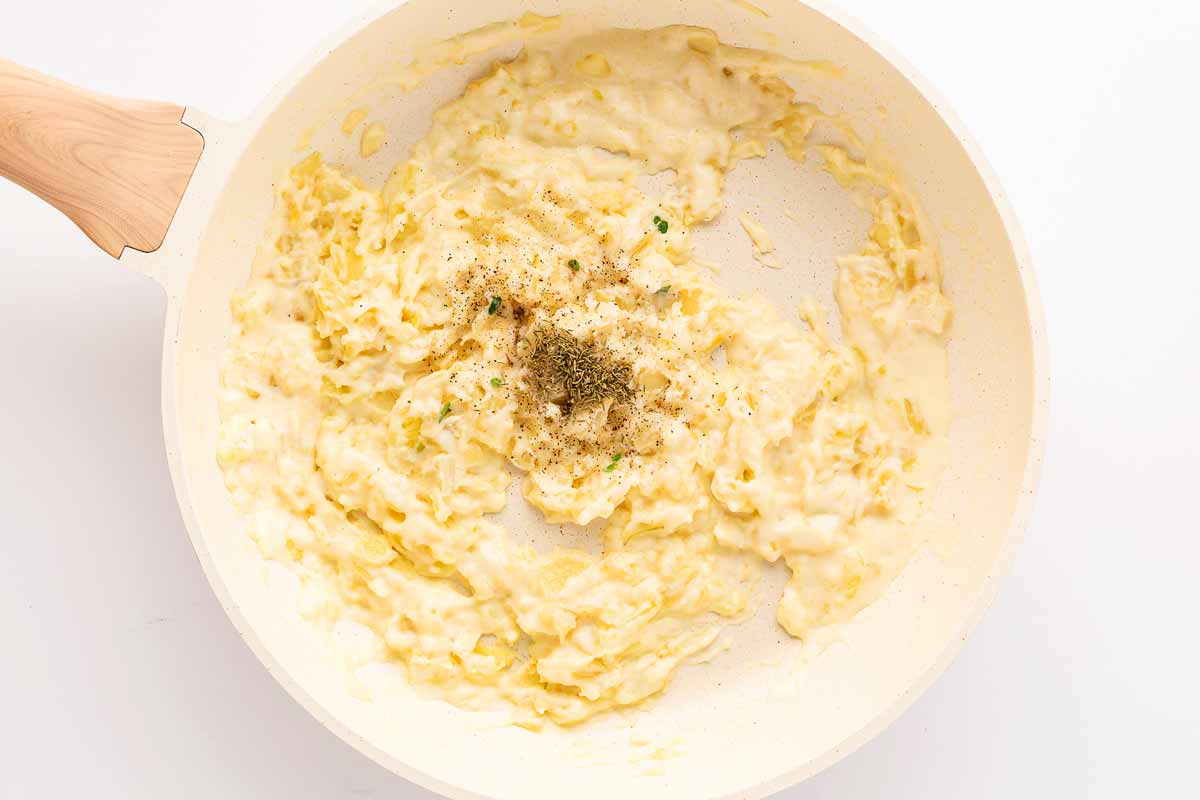
Season with salt, thyme, and black pepper.
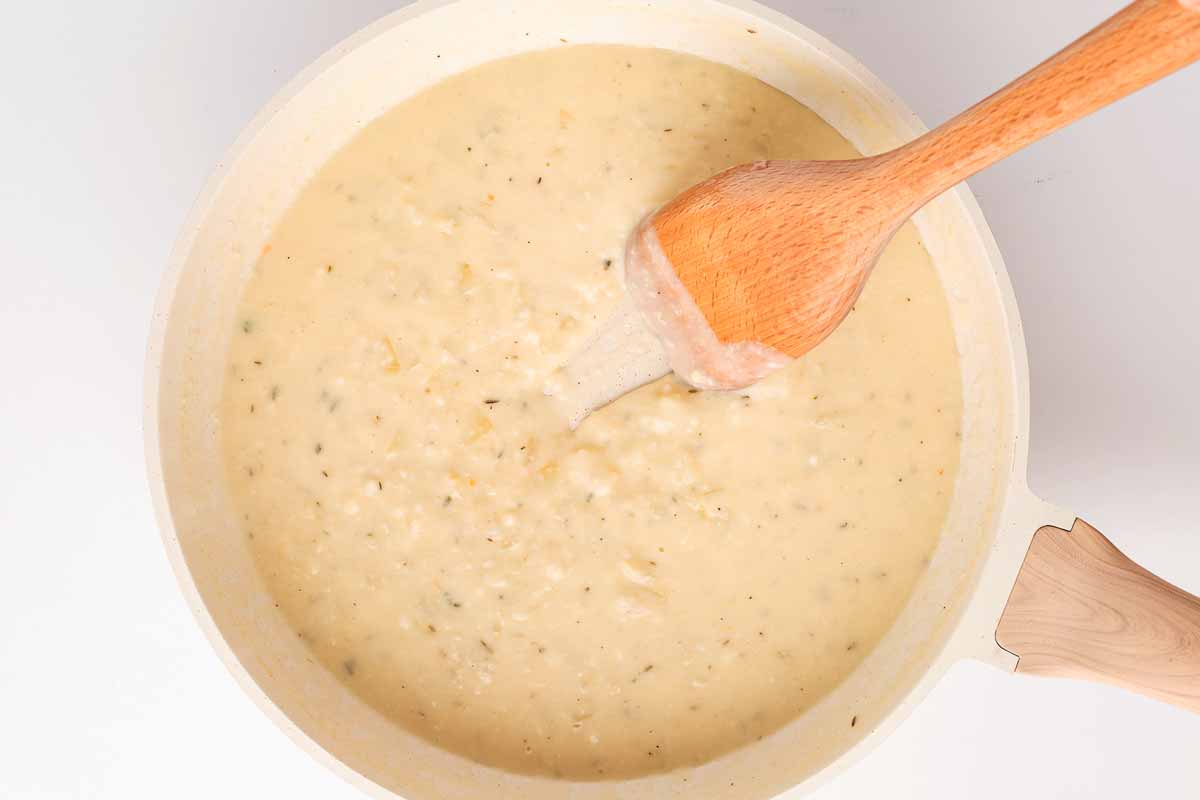
5. Finish sauce:
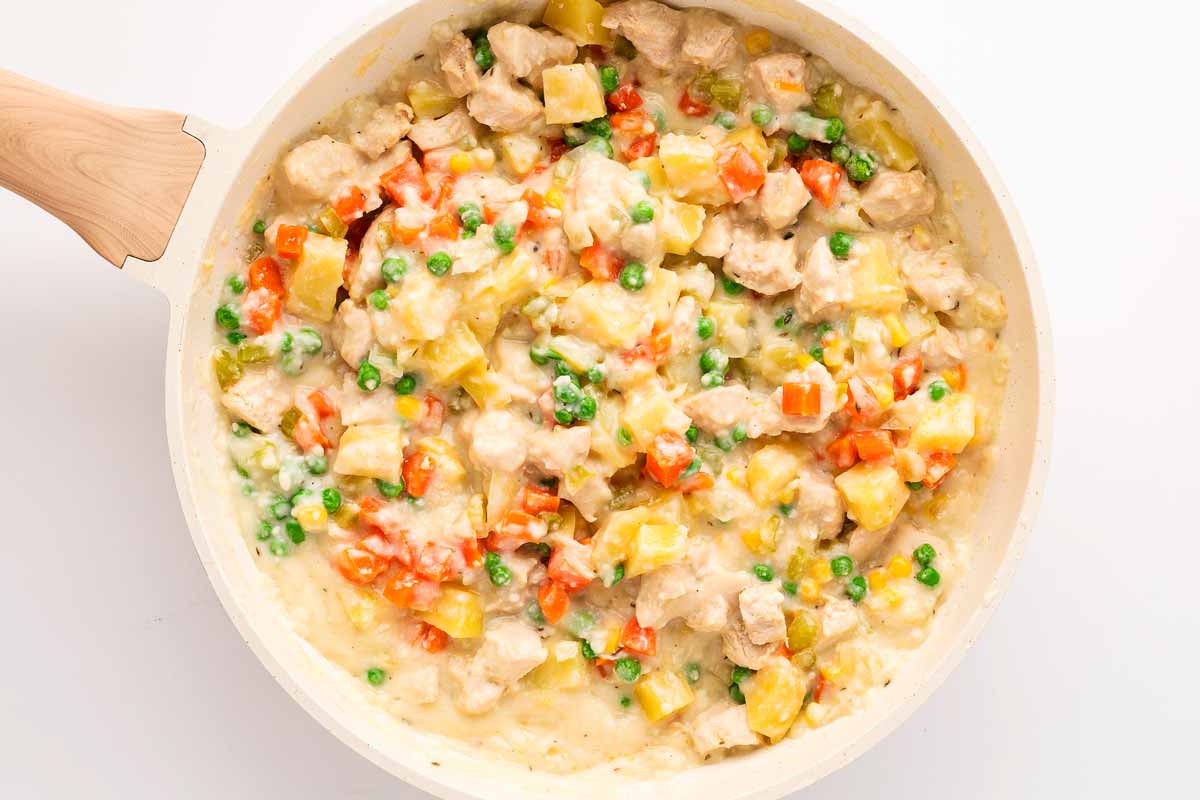
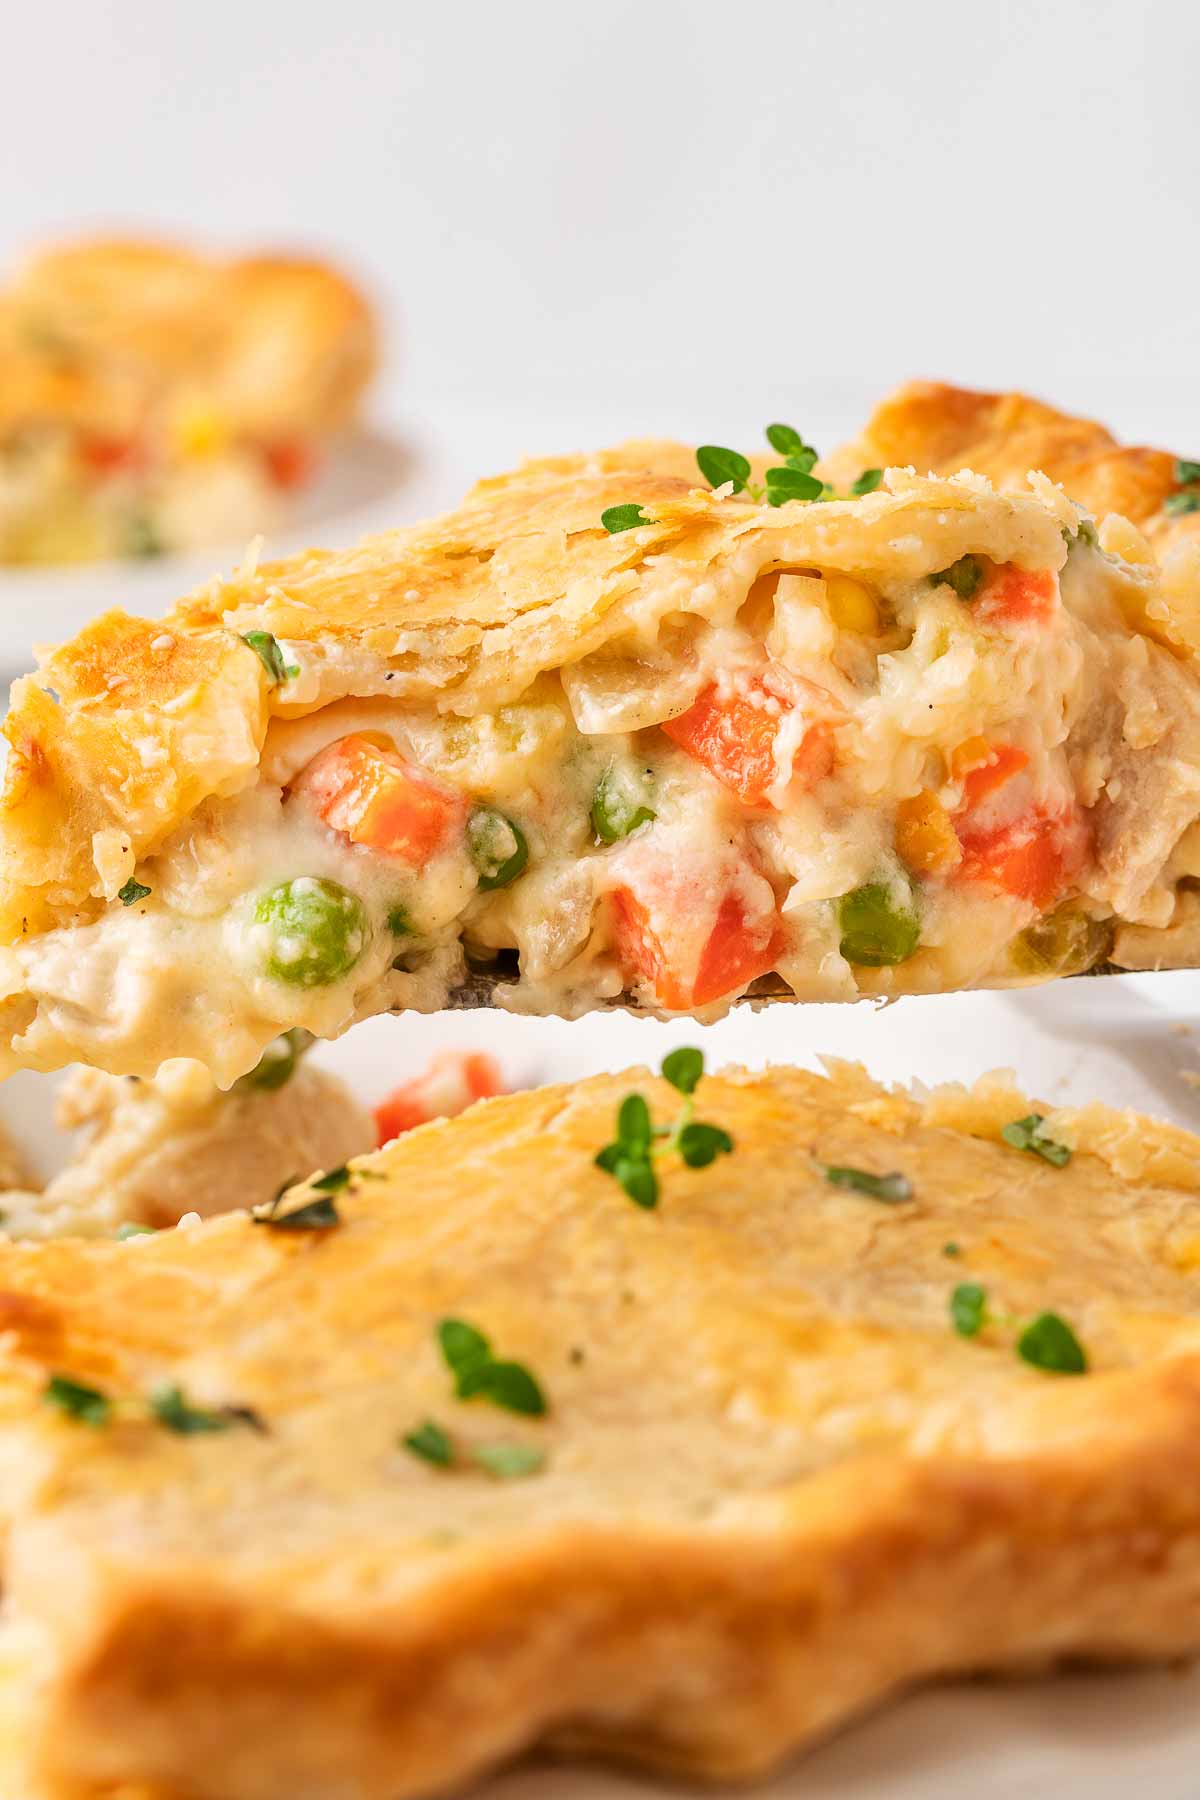
6. Finish filling:
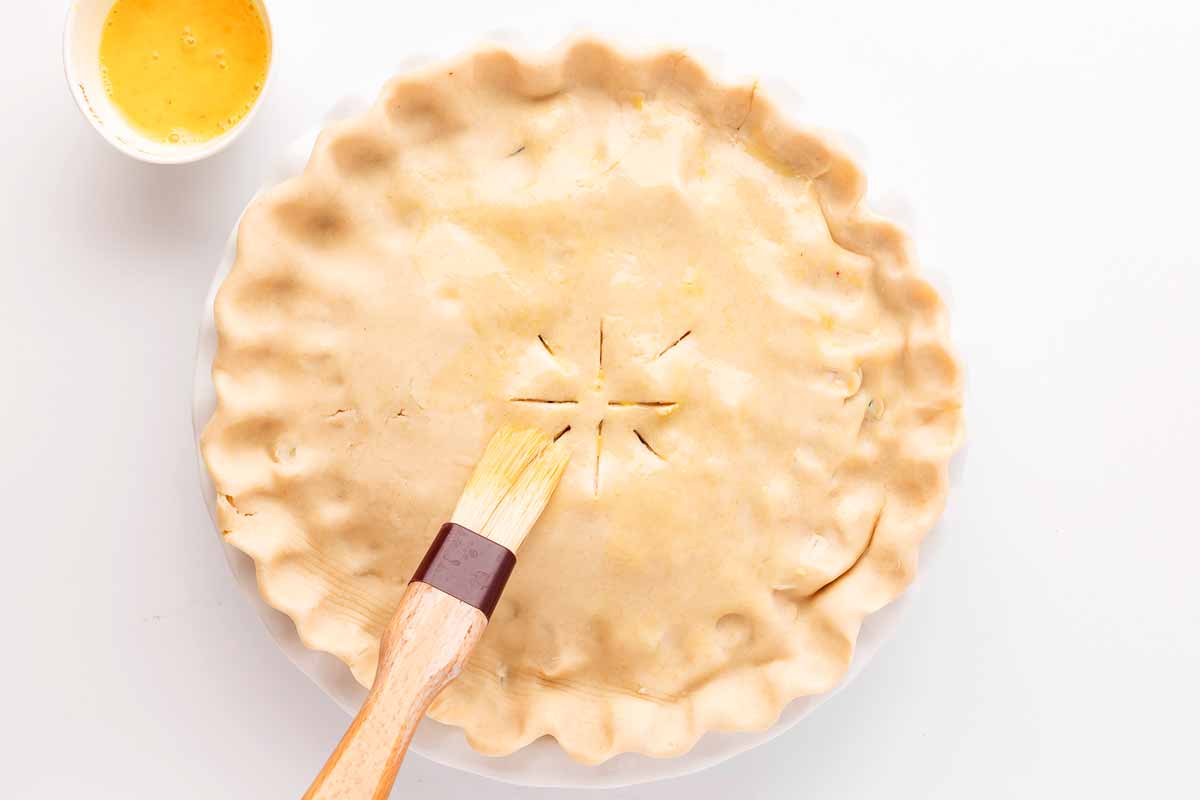
Preheat the oven to 425°F. Line a greased 9-inch pie plate with one crust and refrigerate. Roll out the second crust into a 10-inch circle (if not pre-rolled) and keep it chilled until needed.
Tip: If you want extra flakiness, brush the bottom crust with a little beaten egg before adding the filling – it helps create a barrier so it stays crisp! 🥧✨
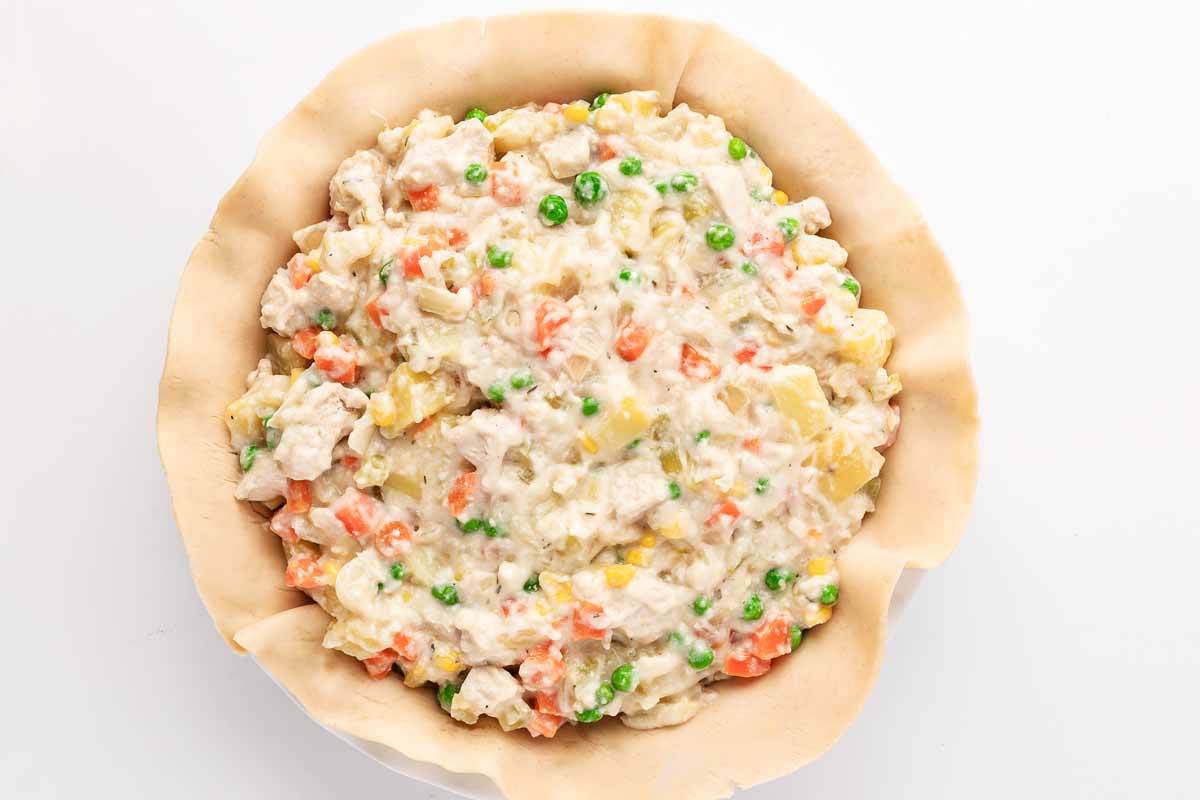
7. Assemble:
8. Finish:
9. Bake:
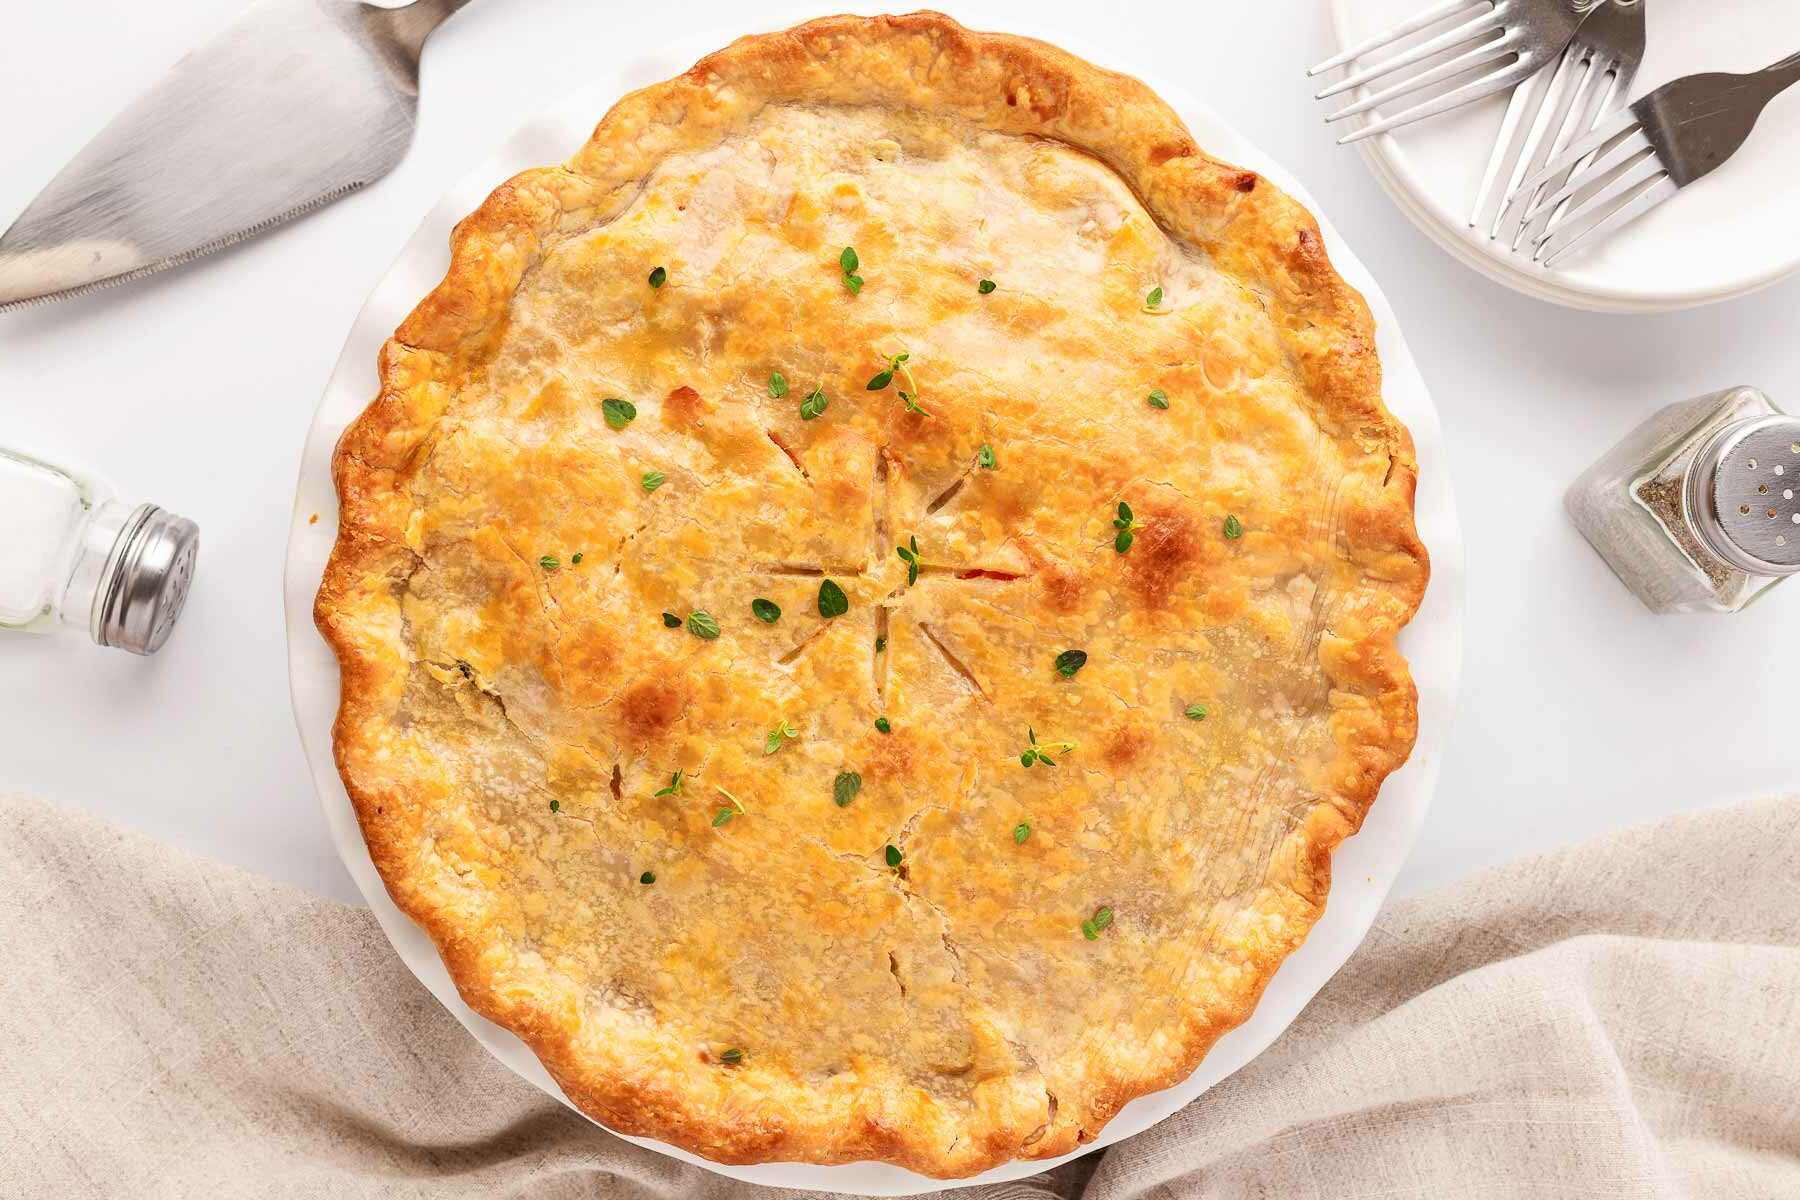
Let the pie rest at least 10 minutes before slicing (or 30-60 minutes if you want the filling extra thick). Serve warm and enjoy!
Tips for success
- Cooling the filling: Make sure the filling is completely cooled before assembling the pie to prevent a soggy crust!
- Preventing over-browning: Use foil or a pie shield to cover the crust edges if they brown too quickly.
- Keep your crust cold – A warm crust gets soft and won’t bake up flaky. If the dough starts feeling too warm while assembling, pop it back in the fridge for 5-10 minutes before baking.
- Avoid a soupy filling – If your filling looks too thin after simmering, let it cook a few extra minutes to thicken. You can also stir in a tablespoon of cornstarch mixed with a little cold water for extra thickness.
- Resting time: Let the pie rest after baking to allow the filling to set properly.
Helpful hints
Troubleshooting & storage questions
A soggy bottom crust often results from the filling’s moisture seeping into the dough.
To prevent this, make sure the filling is fully cooled before adding it to the crust.
If you still experience a soggy crust, consider blind baking the bottom crust until it’s lightly golden before adding the filling. Applying an egg wash to the pre-baked crust can also create a barrier against moisture.
A runny filling may result from insufficient thickening. Ensure you’re using the correct amount of flour and allow the filling to simmer until it reaches a thick consistency before adding it to the crust.
If the filling still appears too thin, mix a tablespoon of cornstarch with a small amount of cold water and stir it into the simmering filling to help thicken it.
There are a few easy ways to crimp the crust!
The fork method is the simplest – just press the tines of a fork around the edges to seal. For a classic fluted edge, use your fingers to pinch and press the dough into a wavy pattern. If you want an extra decorative touch, use your other hand, a spoon or the back of a knife to create a scalloped look.
No matter the method, make sure the edges are well-sealed to keep the filling from bubbling out during baking!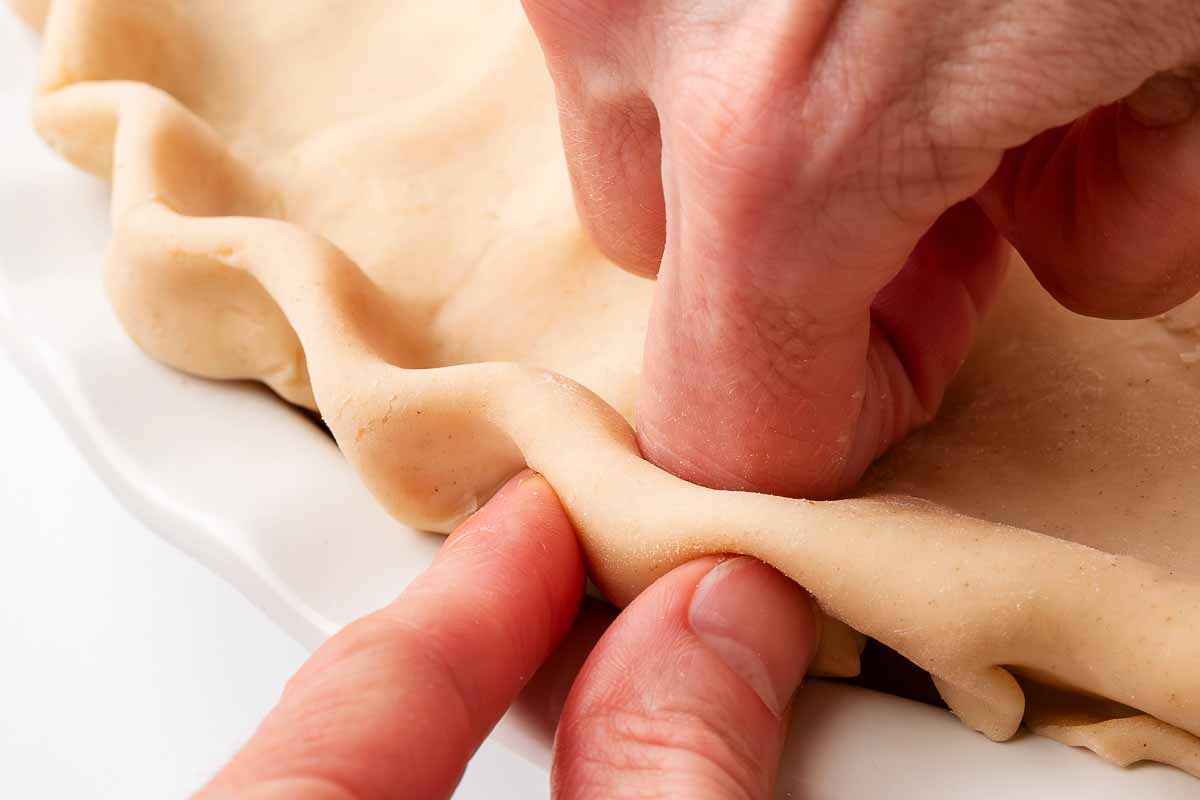
Yes, you can prepare the filling and crust separately. Store the cooled filling and unbaked crust in the refrigerator. When ready to bake, assemble the pie with the cold filling and crust. This method helps maintain a crisp crust.
Allow the pie to cool completely, then cover it tightly and refrigerate. Properly stored, it can last up to 3-4 days.
For refrigerated leftovers or thawed pie, preheat your oven to 350°F (175°C), cover the pie with foil to prevent over-browning, and bake for about 20 minutes or until heated through.
Yes, assemble the pie but do not bake it. Wrap it tightly in plastic wrap and aluminum foil, then freeze. When ready to bake, it’s recommended to thaw the pie overnight in the refrigerator to prevent the crust from becoming soggy.
Serving tips
We love serving this chicken pot pie with a simple green salad with lemon vinaigrette or roasted air fryer veggies to balance out the richness. I let the pie sit for at least 10 minutes before slicing – it helps the filling thicken up and makes for cleaner cuts.

PS If you try this recipe, please leave a review in the comment section and add a star rating in the recipe card – I appreciate your feedback! Follow along on Pinterest, Facebook or Instagram.
Homemade Chicken Pot Pie
Recipe details
Ingredients
- 1 medium-large Yukon Gold potato peeled and diced into ½ inch pieces (about 1 cup)
- 1 large carrot peeled and cut into ¼-inch dice (about 1 cup)
- 1 stick celery thinly sliced (about ½ cup)
- 1 pound chicken breast cut into ½-3/4 inch pieces
- 1 ½ cups chicken broth
- 4 tablespoons unsalted butter
- 1 medium onion finely diced (about 1 cup)
- 1 clove garlic finely minced
- 4 tablespoons all-purpose flour
- ¾ cup half-and-half
- ½ teaspoon salt
- ¼ teaspoon dried thyme
- black pepper to taste
- ½ cup frozen peas
- ½ cup frozen corn
- 2 (9-inch) pie crusts store-bought or homemade
- 1 large egg beaten
Instructions
Make filling:
- Cook vegetables and chicken: Place 1 medium-large Yukon Gold potato, 1 large carrot, 1 stick celery and 1 pound chicken breast (all diced) in a medium-large pot.Add 1 ½ cups chicken broth, bring to a simmer over medium-high heat.Reduce heat to medium and simmer, covered, until vegetables and chicken are just tender (8-10 minutes). Take off the heat and set aside. Do not drain!
- Make filling: Melt 4 tablespoons unsalted butter in a deep, wide skillet over medium heat. Add 1 medium onion (diced) and cook until softened, about 8 minutes. Stir through 1 clove garlic (minced). Do not brown!Reduce heat to medium-low. Whisk in 4 tablespoons all-purpose flour and cook for one minute, whisking constantly. Pour in ¾ cup half-and-half, whisking constantly, until smooth. Season with ½ teaspoon salt, ¼ teaspoon dried thyme and black pepper.
- Simmer filling: From chicken and vegetable mixture, measure out liquid (careful, hot, use a ladle). If necessary, top up with broth to reach 1 ½ cups. Whisk liquid into creamy filling until smooth. Simmer 5-10 minutes, until thickened to your liking.
- Finish filling: Stir chicken mixture, ½ cup frozen peas and ½ cup frozen corn into filling. Check for seasoning and adjust as needed. Set aside to cool completely before adding to pie crust (cooling filling completely will help prevent a soggy crust).
Assemble pie:
- In the meantime, prepare pastry: Use one (9-inch) pie crust to line a well-greased 9-inch pie plate. Do not trim edges yet. Set pie plate into refrigerator to chill.Roll remaining pie crust into an about 10-inch circle, if not using pre-rolled crusts. Place on parchment paper and cover with plastic wrap. Chill in refrigerator as well until filling is ready.
- Finish pie: Preheat oven to 425°F. Place cold filling into pastry-lined pie dish. Place pastry lid on top. Trim, seal and flute edges. Cut slits into the top as air vents.Brush with 1 large egg (beaten). Bake in preheated oven for 35-40 minutes or until golden brown. After 20 minutes of baking, cover edges with foil or pie shield.
- Rest and serve: Place pie on wire rack and rest for at least 10 minutes before slicing. Filling thickens as it cools, so if you prefer a thicker filling, wait for 30-60 minutes before serving!
Notes
Yukon Gold potatoes hold their shape better than russets.
Frozen peas and corn make prep easier, but fresh works too.
Pie crusts can be homemade or store-bought—keep them cold for the best texture.
Half-and-half adds creaminess; don’t swap for milk, or the filling may be too thin. Recipe tips: For the best crust, let the filling cool completely before assembling.
To avoid a soggy bottom crust, you can brush it with egg wash before adding the filling.
Let the pie rest for at least 10 minutes before slicing so the filling sets properly. Storage: Store leftovers covered in the fridge for up to 3 days and reheat in the oven at 350°F to keep the crust crisp.
To freeze, assemble but don’t bake – wrap tightly and freeze for up to 3 months. Defrost before baking, or bake straight from frozen at 425°F, adding extra time as needed.
Nutrition
More recipe information
Recipe first published on 01/31/2018. Updated with new text, photos and improved recipe on 02/18/2025.


Melody says
This recipe sounds really good! I was wondering, though, if it’s safe to put a cold glass pie plate on a baking sheet that has been preheated to 420? I thought a drastic, sudden change in temperature like that would cause the glass to break.
Nora says
Melody, that is a very valid question. I’m not sure. I’ve only ever used ceramic pie dishes and never had an issue. I do follow a lot of professional chefs/bakers who recommend this method for most kids of pies. I’ll do some research and if I find anything relevant, I’ll update in the post!