
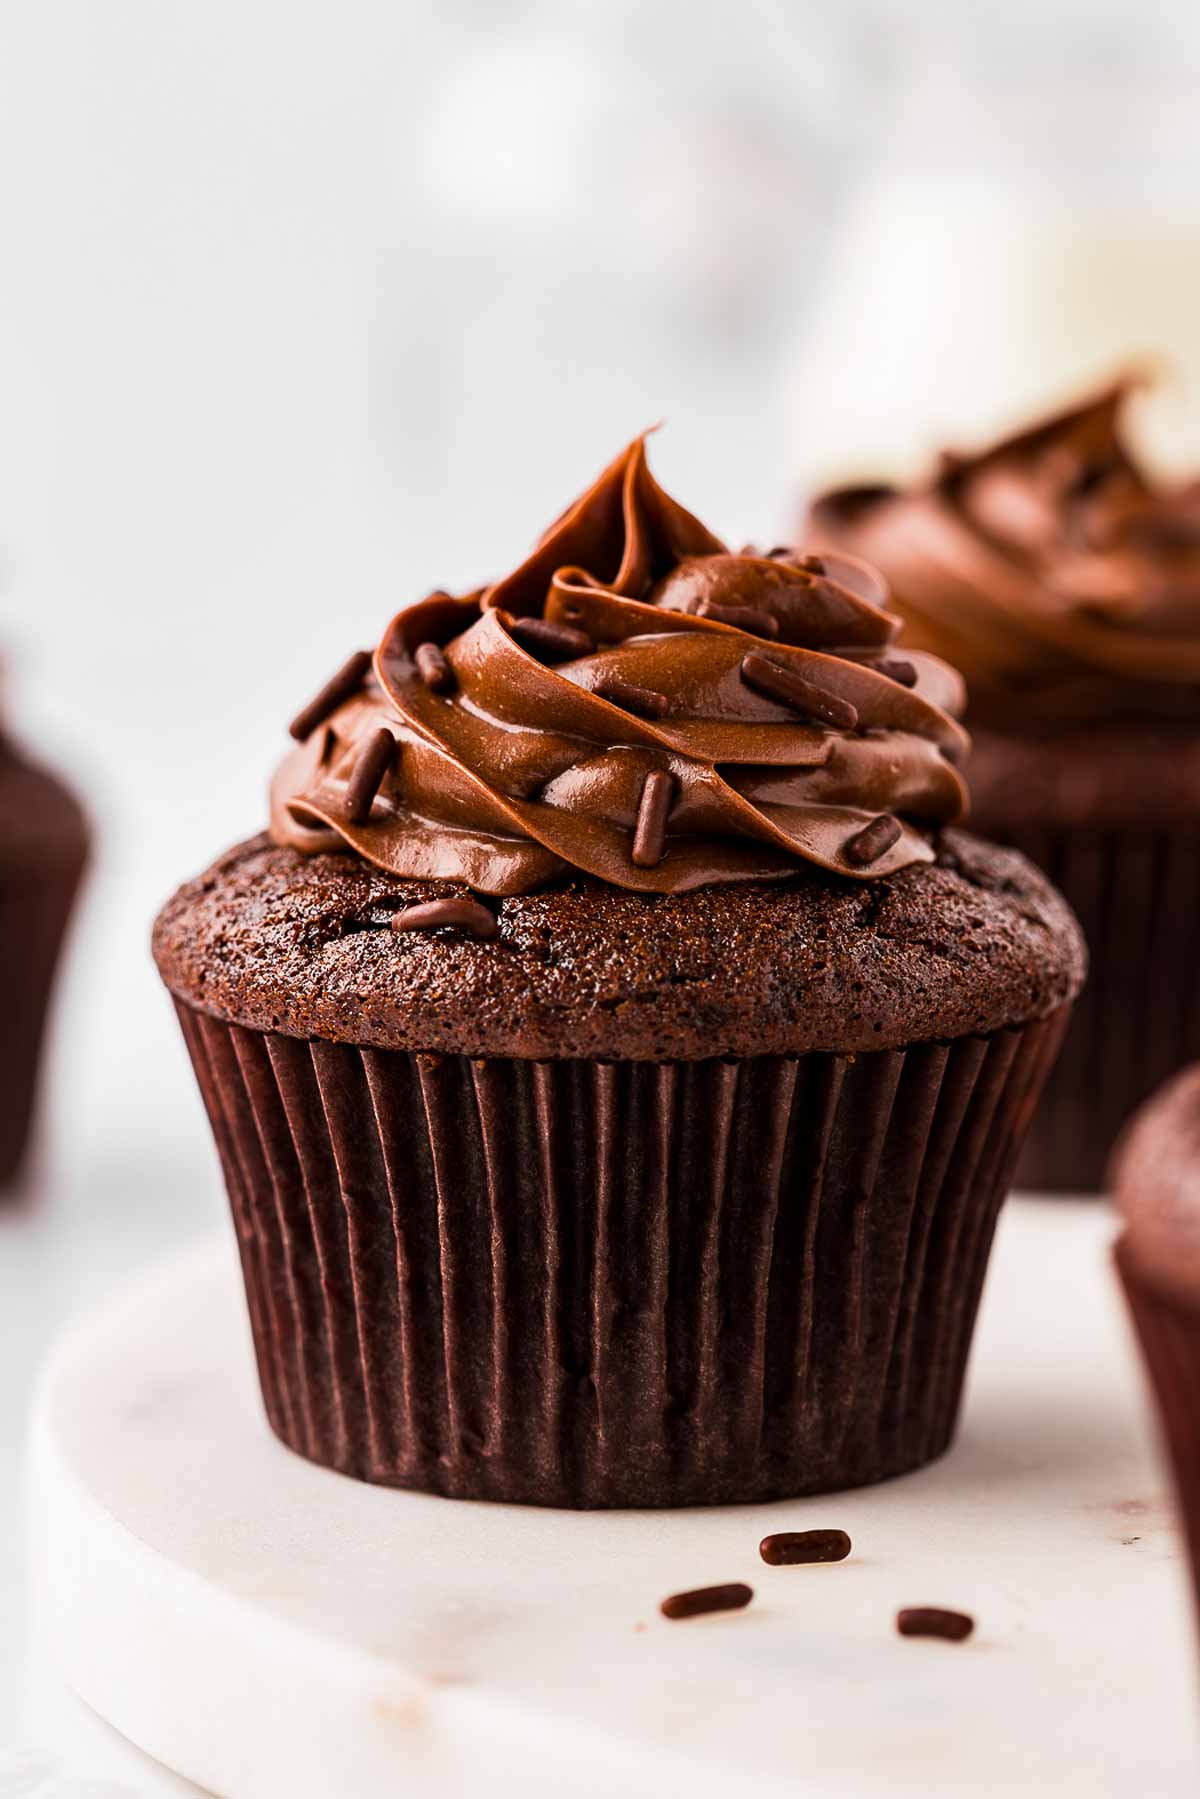
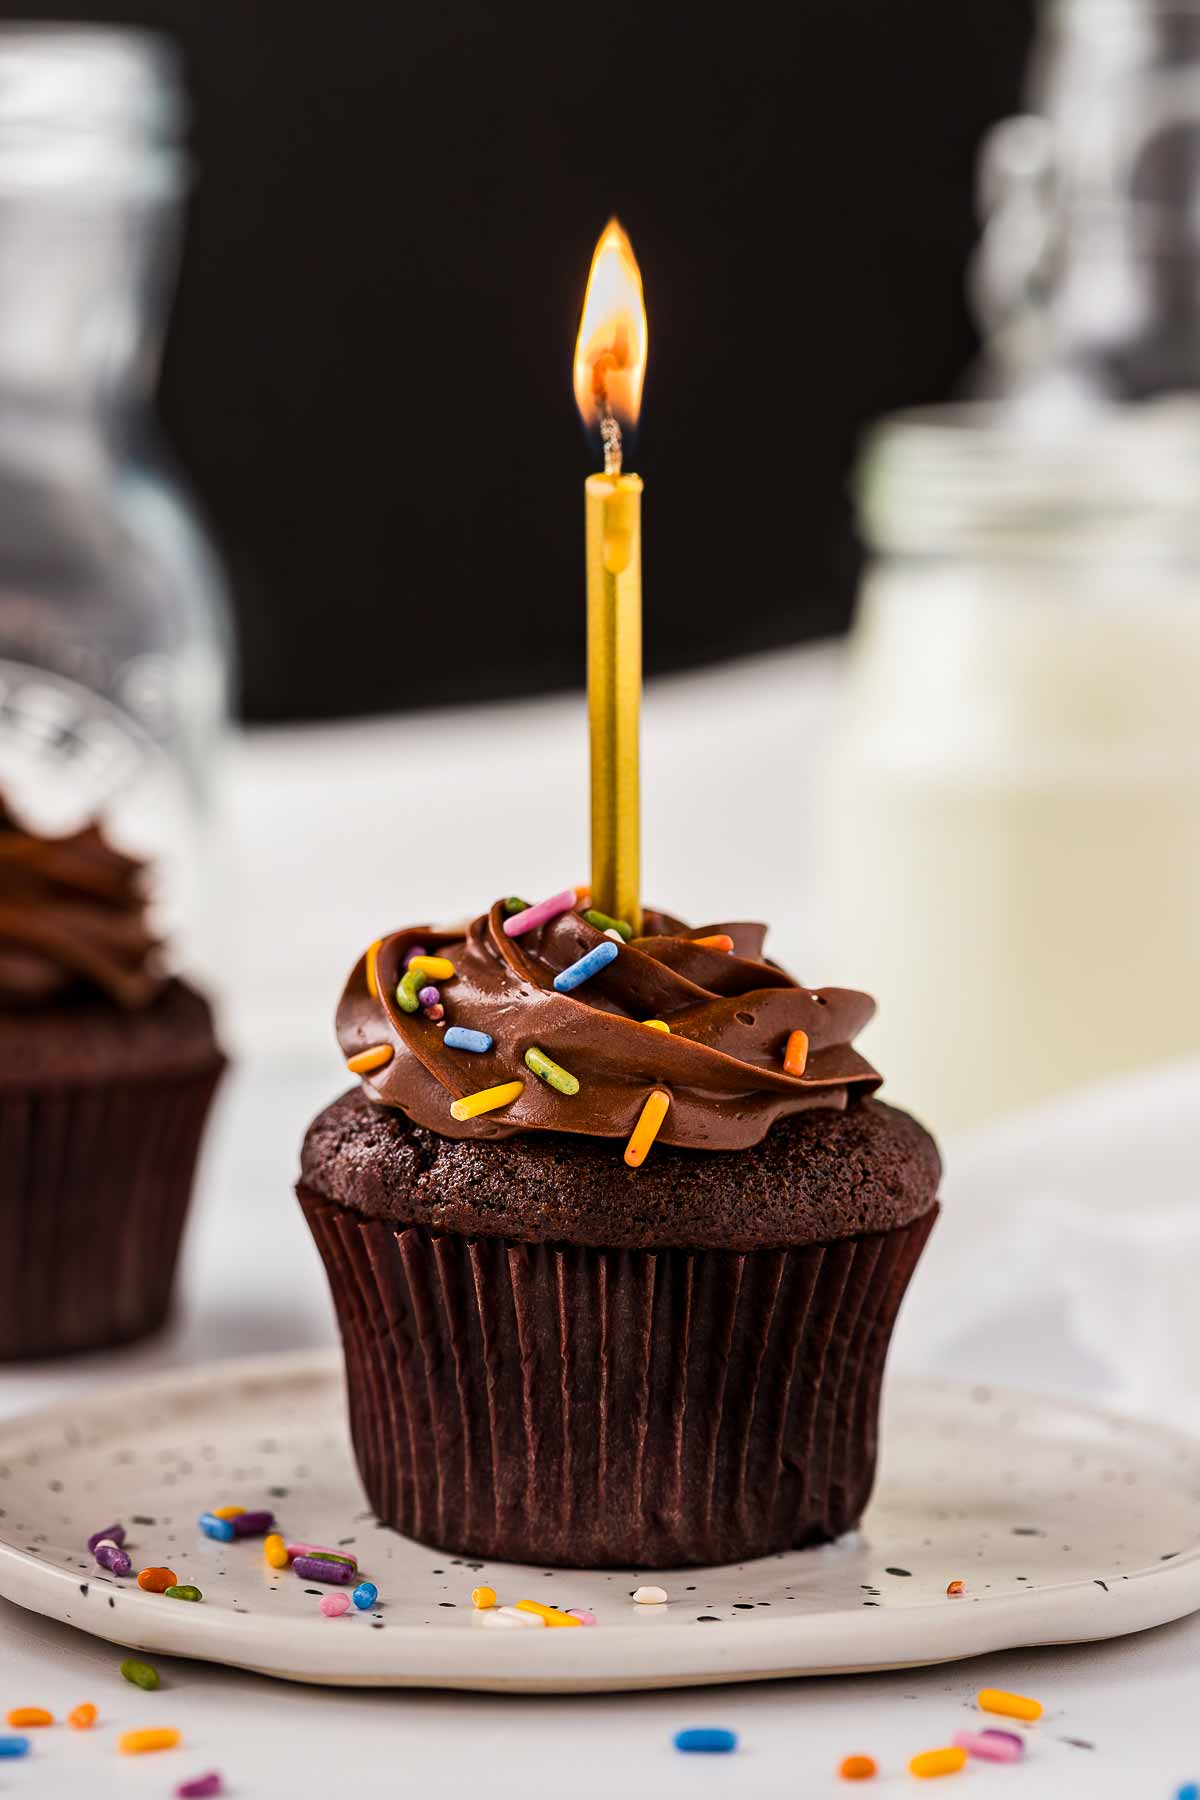
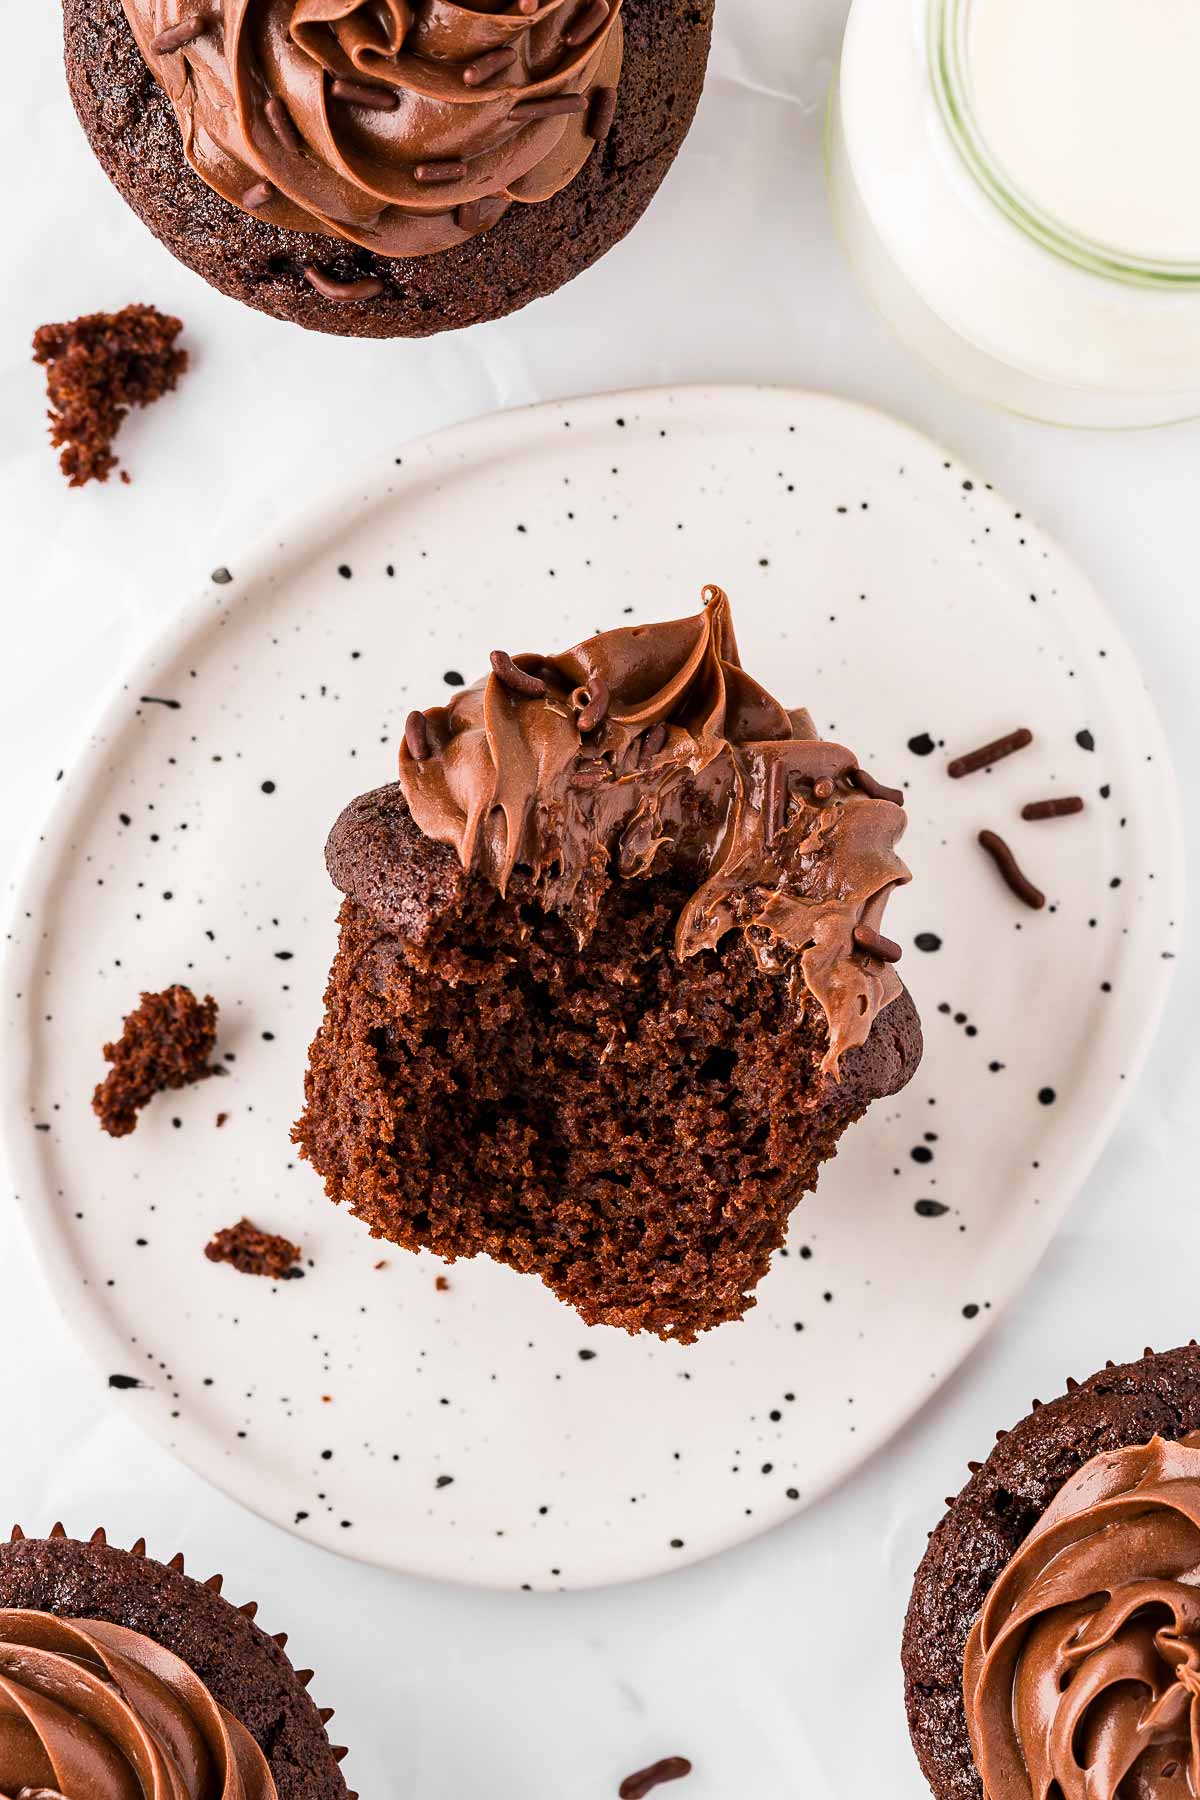
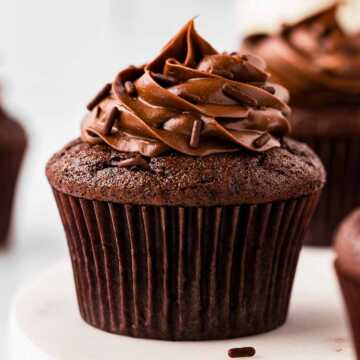
If you’re looking for the perfect chocolate cupcake recipe – rich, moist, and deeply chocolatey – this is it. Made with simple ingredients and a no-fuss method, these cupcakes are easy enough for a weekday treat but taste like they came from a fancy bakery!
Jump to:
Why this recipe is the best
- No mixer needed – Just a whisk, a bowl, and a spatula! I love a good shortcut, and not having to haul out my stand mixer is a win.
- Super quick to make – The batter comes together in minutes, so whether it’s a last-minute class treat or a sudden cupcake craving, you’re covered.
- Zero dryness, all chocolatey goodness – Thanks to buttermilk, oil, and hot coffee, these cupcakes stay unbelievably moist. I’ve made a lot of dry chocolate cupcakes, and trust me – these are the softest, most chocolate-packed ones yet!
Ingredients you’ll need
Here is a visual overview of the ingredients in the recipe. Scroll down to the printable recipe card at the bottom of this post for quantities!
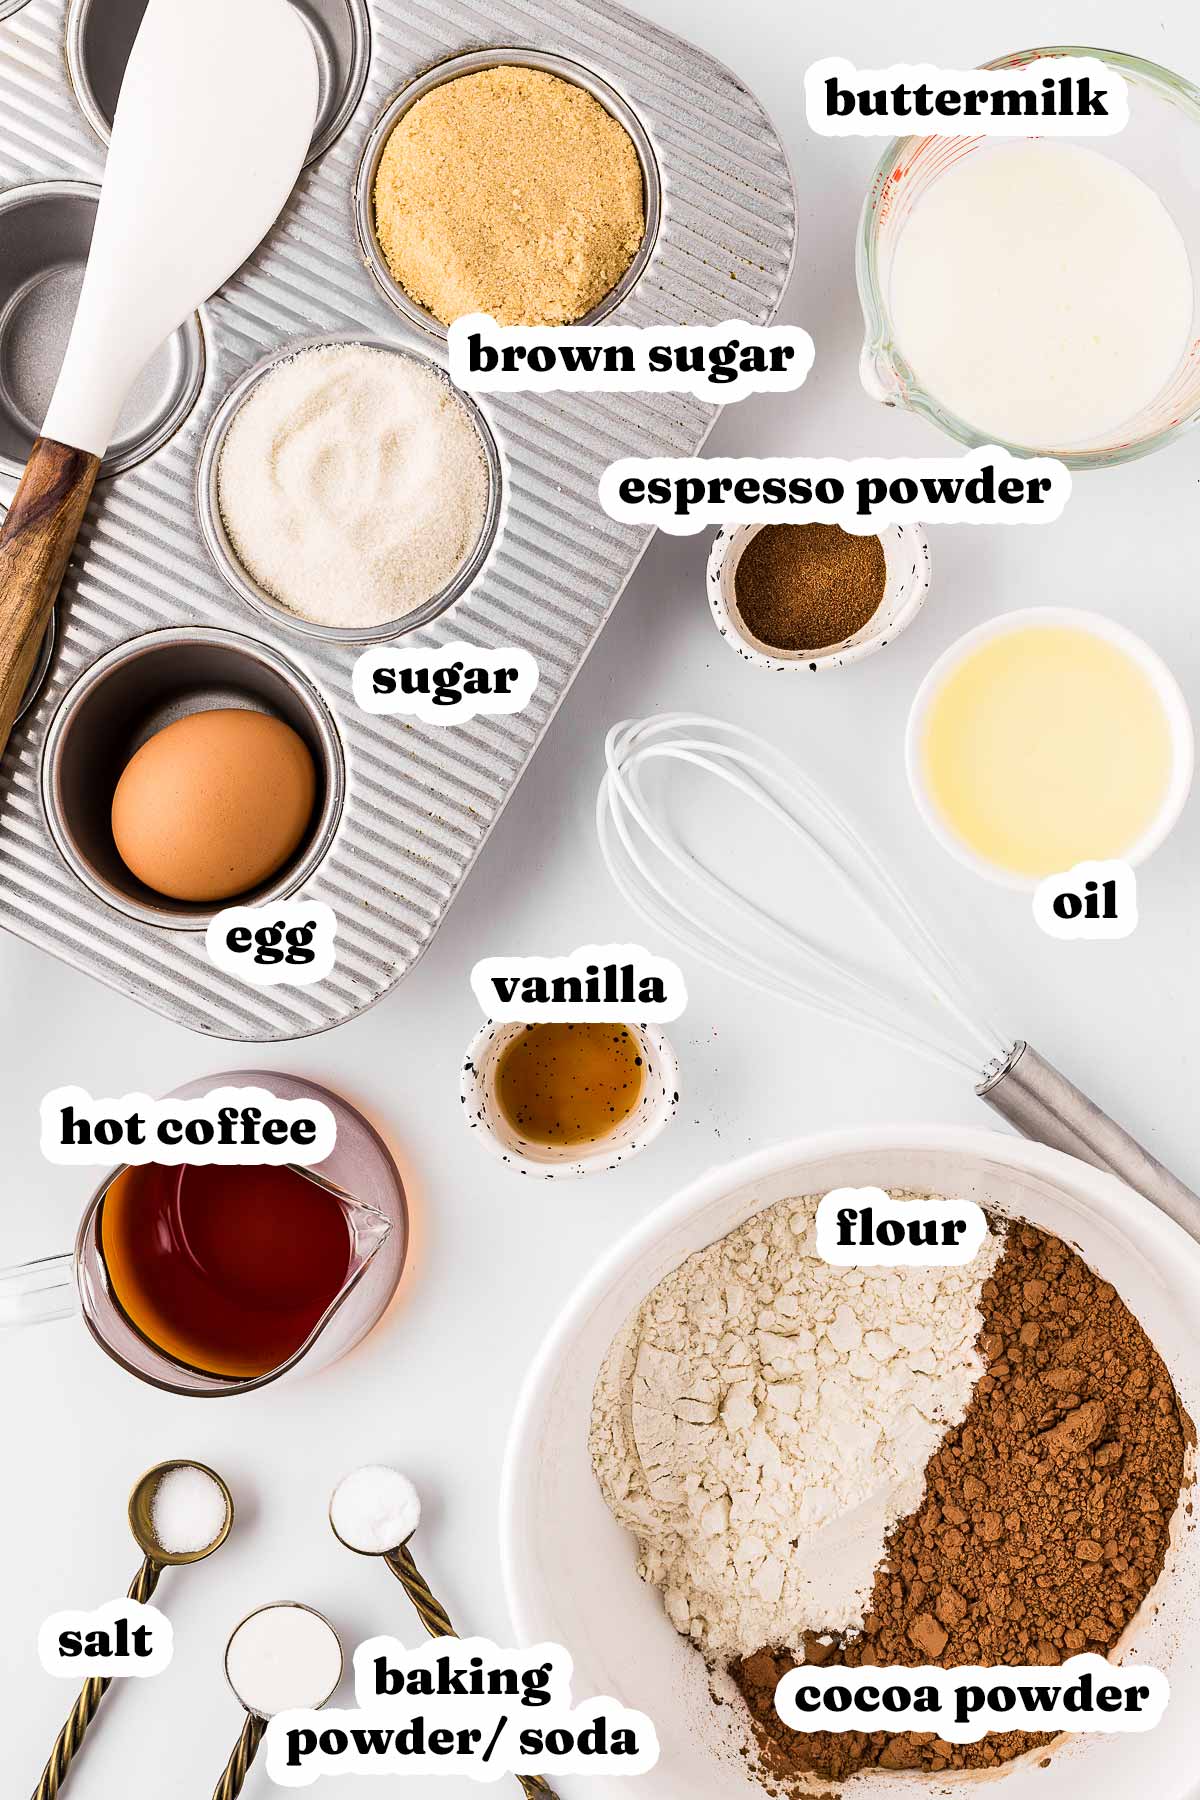
Ingredient notes
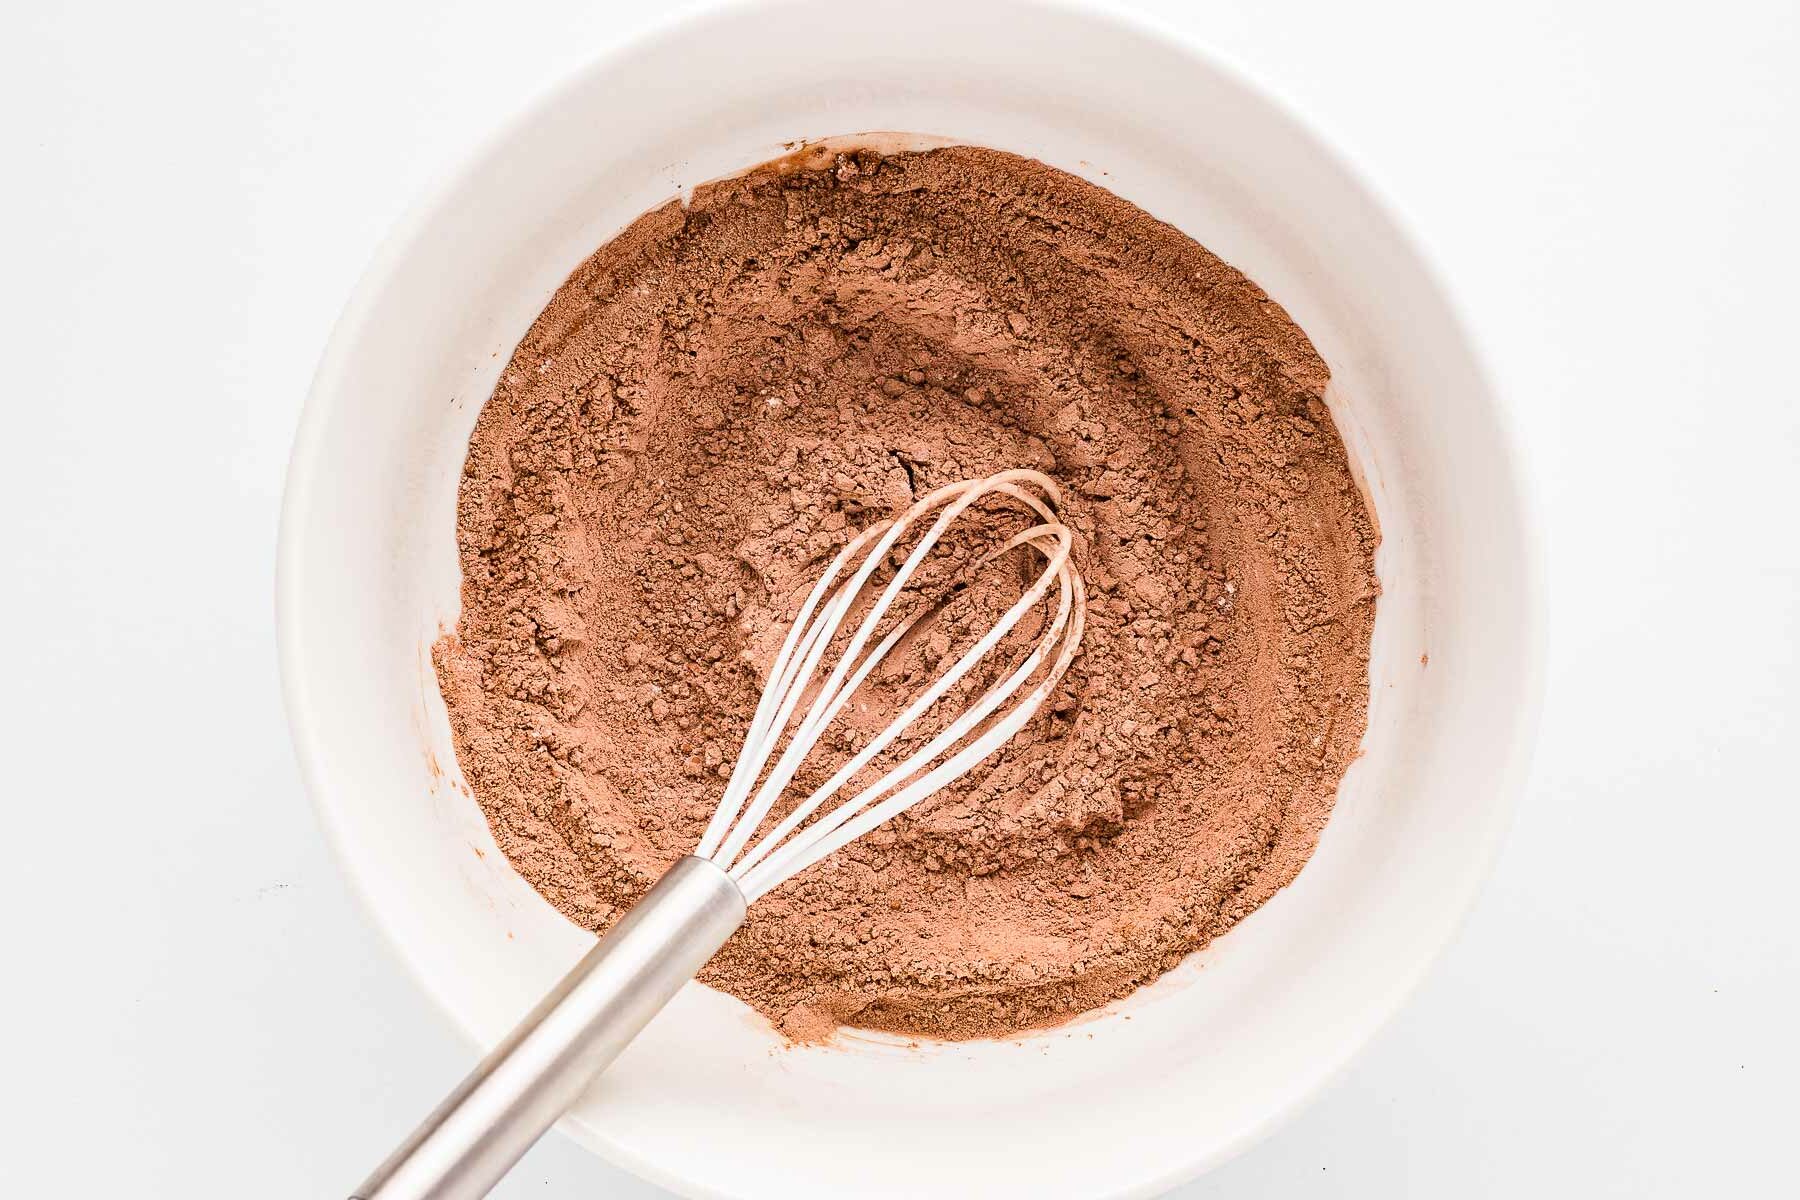
- Cocoa powder – Use unsweetened cocoa powder, not Dutch-processed. Regular cocoa reacts with the baking soda to help the cupcakes rise properly.
- Espresso powder (optional) – This won’t make your cupcakes taste like coffee – it just enhances the chocolate flavor. If you don’t have it, you can skip it or swap it for ½ teaspoon chai spice mix for a warm, spiced twist.
- Buttermilk – This keeps the cupcakes extra moist and tender. If you don’t have buttermilk, mix ½ cup whole milk with ½ teaspoon vinegar or lemon juice and let it sit for 5 minutes.
- Vegetable oil – Keeps the cupcakes soft and moist for days. Melted butter can be used, but the texture will be slightly denser.
- Hot coffee (or hot water) – Coffee deepens the chocolate flavor without making it taste like coffee. If you don’t want to use it, hot water works just fine! The key is using hot liquid – it helps “bloom” the cocoa for a richer flavor.
- Brown sugar & white sugar – The mix of both gives these cupcakes the best texture – moist and fluffy with just the right sweetness. If you’re out of brown sugar, you can use all white sugar, but the cupcakes won’t be quite as soft.
- Baking powder & baking soda – These work together to give the cupcakes a nice rise. Make sure they’re fresh – expired leaveners can lead to flat, dense cupcakes!
Recipe variations
- Double Chocolate Cupcakes – Stir ½ cup mini chocolate chips into the batter for extra melty chocolate in every bite.
- Mocha Cupcakes – Swap the hot coffee for strong brewed espresso and add ½ teaspoon cinnamon for a bold coffeehouse-style twist.
- Chocolate Orange Cupcakes – Add 1 teaspoon orange zest to the batter and swap vanilla extract for orange extract for a rich, citrusy chocolate flavor.
How to make chocolate cupcakes
Let’s make some ridiculously good Chocolate Cupcakes! This is a simple, no-fuss recipe, but a few little tricks will make sure they turn out perfect every time.
1. Preheat & Prep: Start by preheating your oven to 350°F. Line a 12-cup muffin pan with cupcake liners so you’re ready to go once the batter is mixed.
2. Mix dry and wet ingredients separately: In a large mixing bowl, whisk together 1 cup flour, ½ cup cocoa powder, 1 teaspoon baking powder, ¼ teaspoon baking soda, ¼ teaspoon fine sea salt, and 1 teaspoon espresso powder (if using).
In a separate bowl (or a large measuring cup—fewer dishes!), whisk together ½ cup white sugar, ½ cup packed brown sugar, ⅓ cup vegetable oil, ½ cup buttermilk, ⅓ cup hot coffee (or hot water), ½ tablespoon vanilla extract, and 1 large egg.
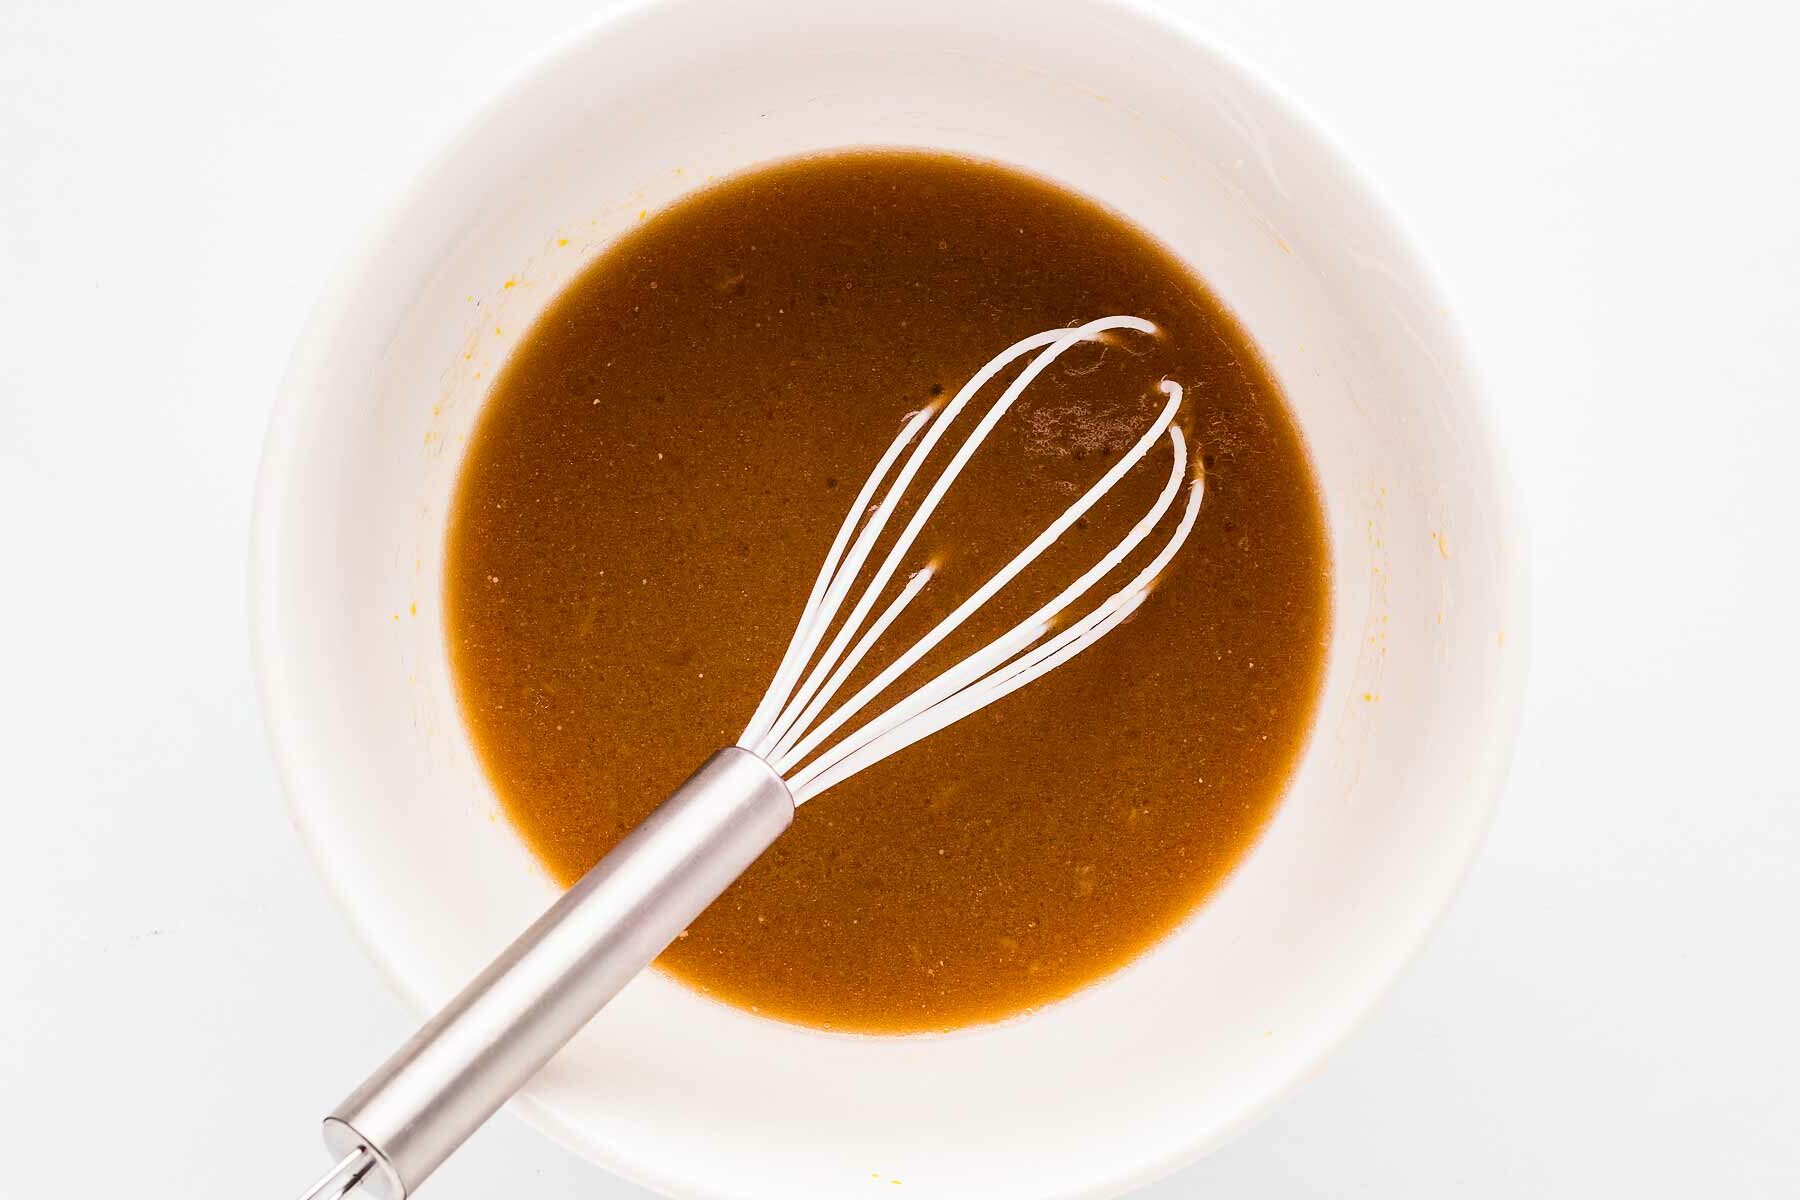
The espresso powder won’t make the cupcakes taste like coffee – it just deepens the chocolate flavor. If you don’t have it, you can skip it or use ½ teaspoon chai spice mix for a fun twist!
The hot coffee (or water) is key – it helps “bloom” the cocoa powder, bringing out even more rich, chocolatey goodness. And the buttermilk? That’s what keeps these cupcakes incredibly moist and tender.
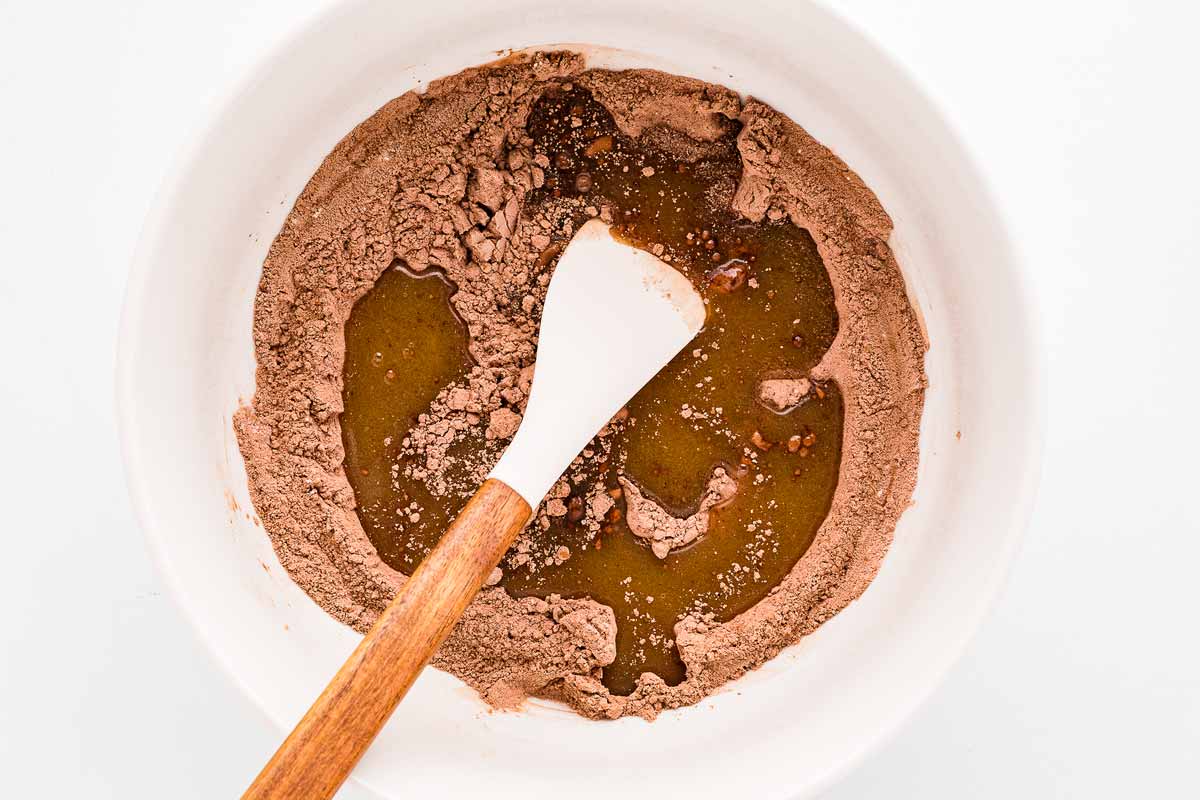
4. Combine wet & dry: Now, pour the wet ingredients into the bowl with the dry ingredients. Use a wooden spoon or spatula to stir – NOT a whisk! Whisks can overwork the batter and make the cupcakes dense instead of fluffy.
Stir until just combined; the batter will be thin, and that’s totally normal! Overmixing is the biggest culprit for tough cupcakes, so stop as soon as you don’t see dry streaks of flour.
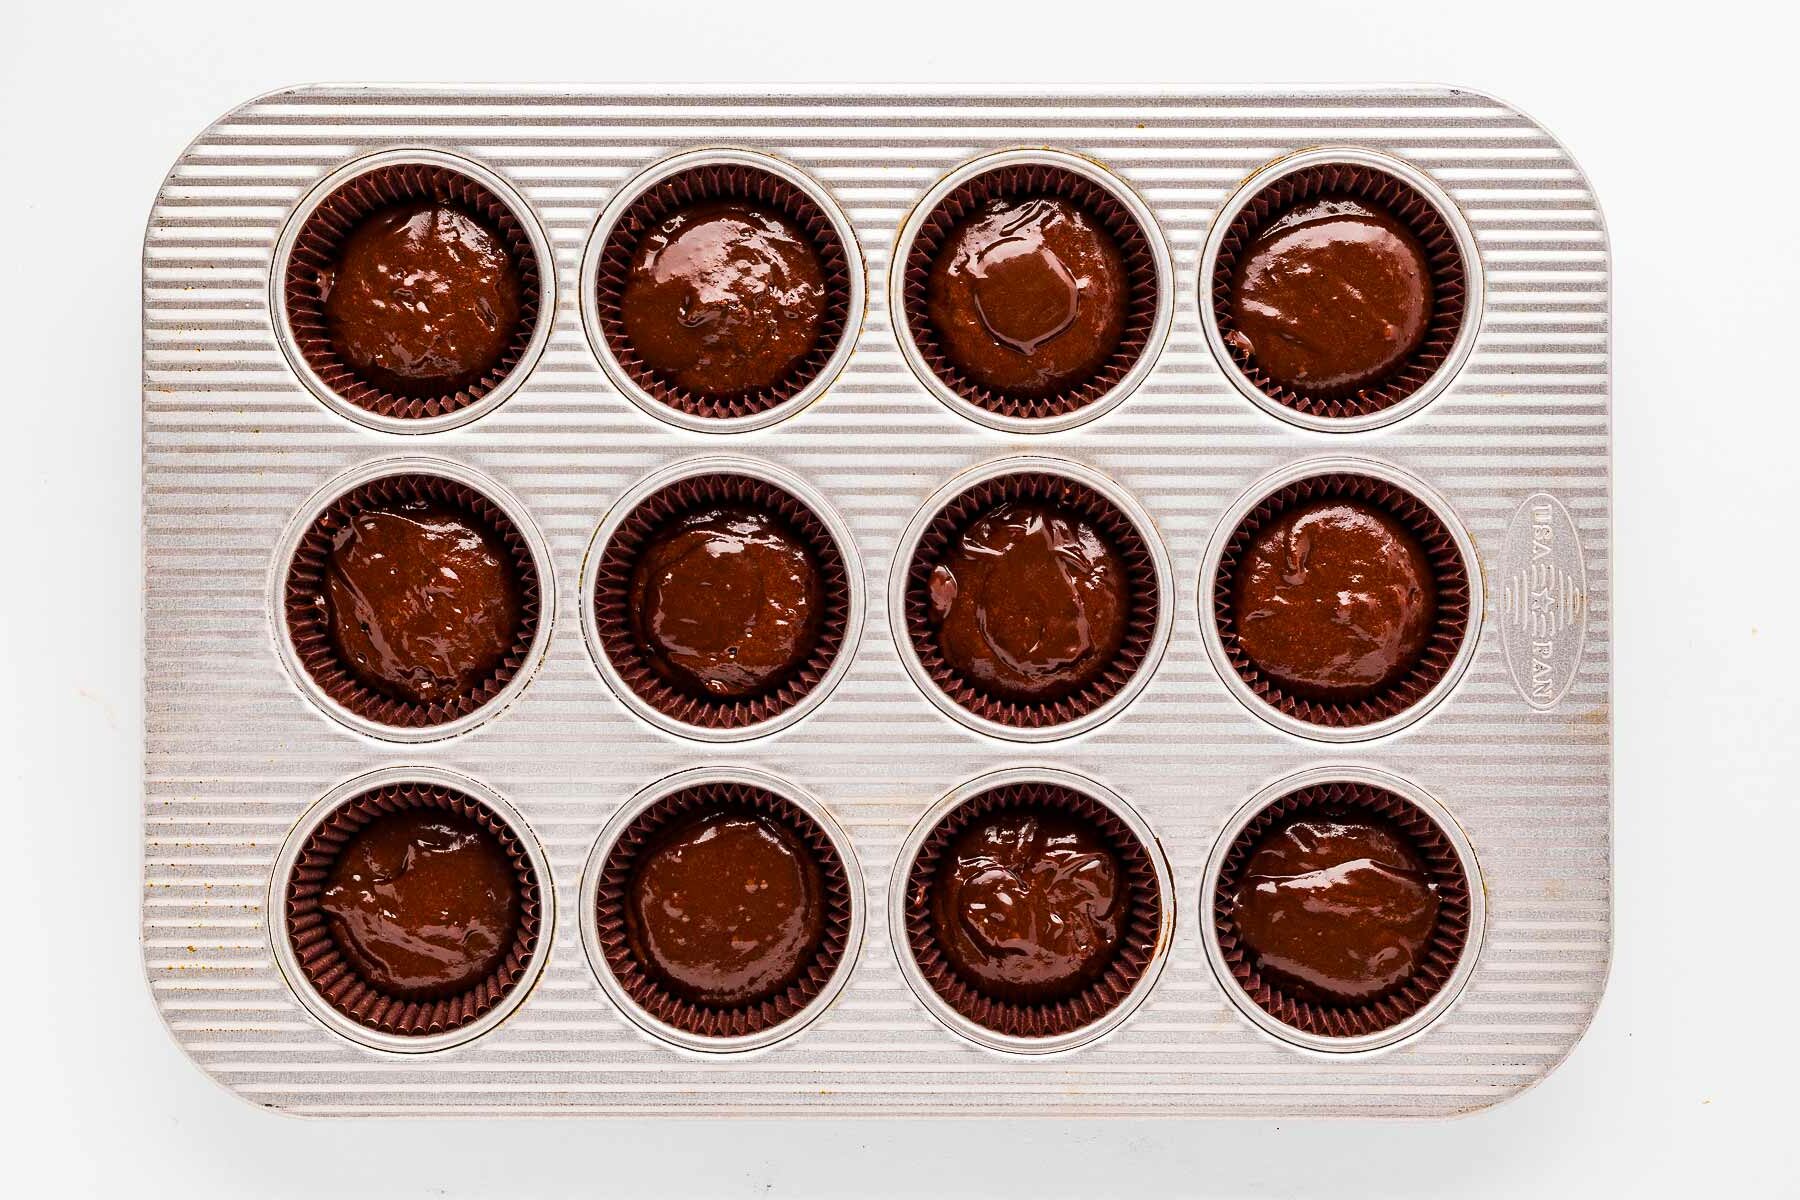
5. Fill liners & bake: Evenly divide the batter between the 12 cupcake liners – I like using a cookie scoop for this to keep things mess-free. They should be about ⅔ full (too full, and they might overflow).
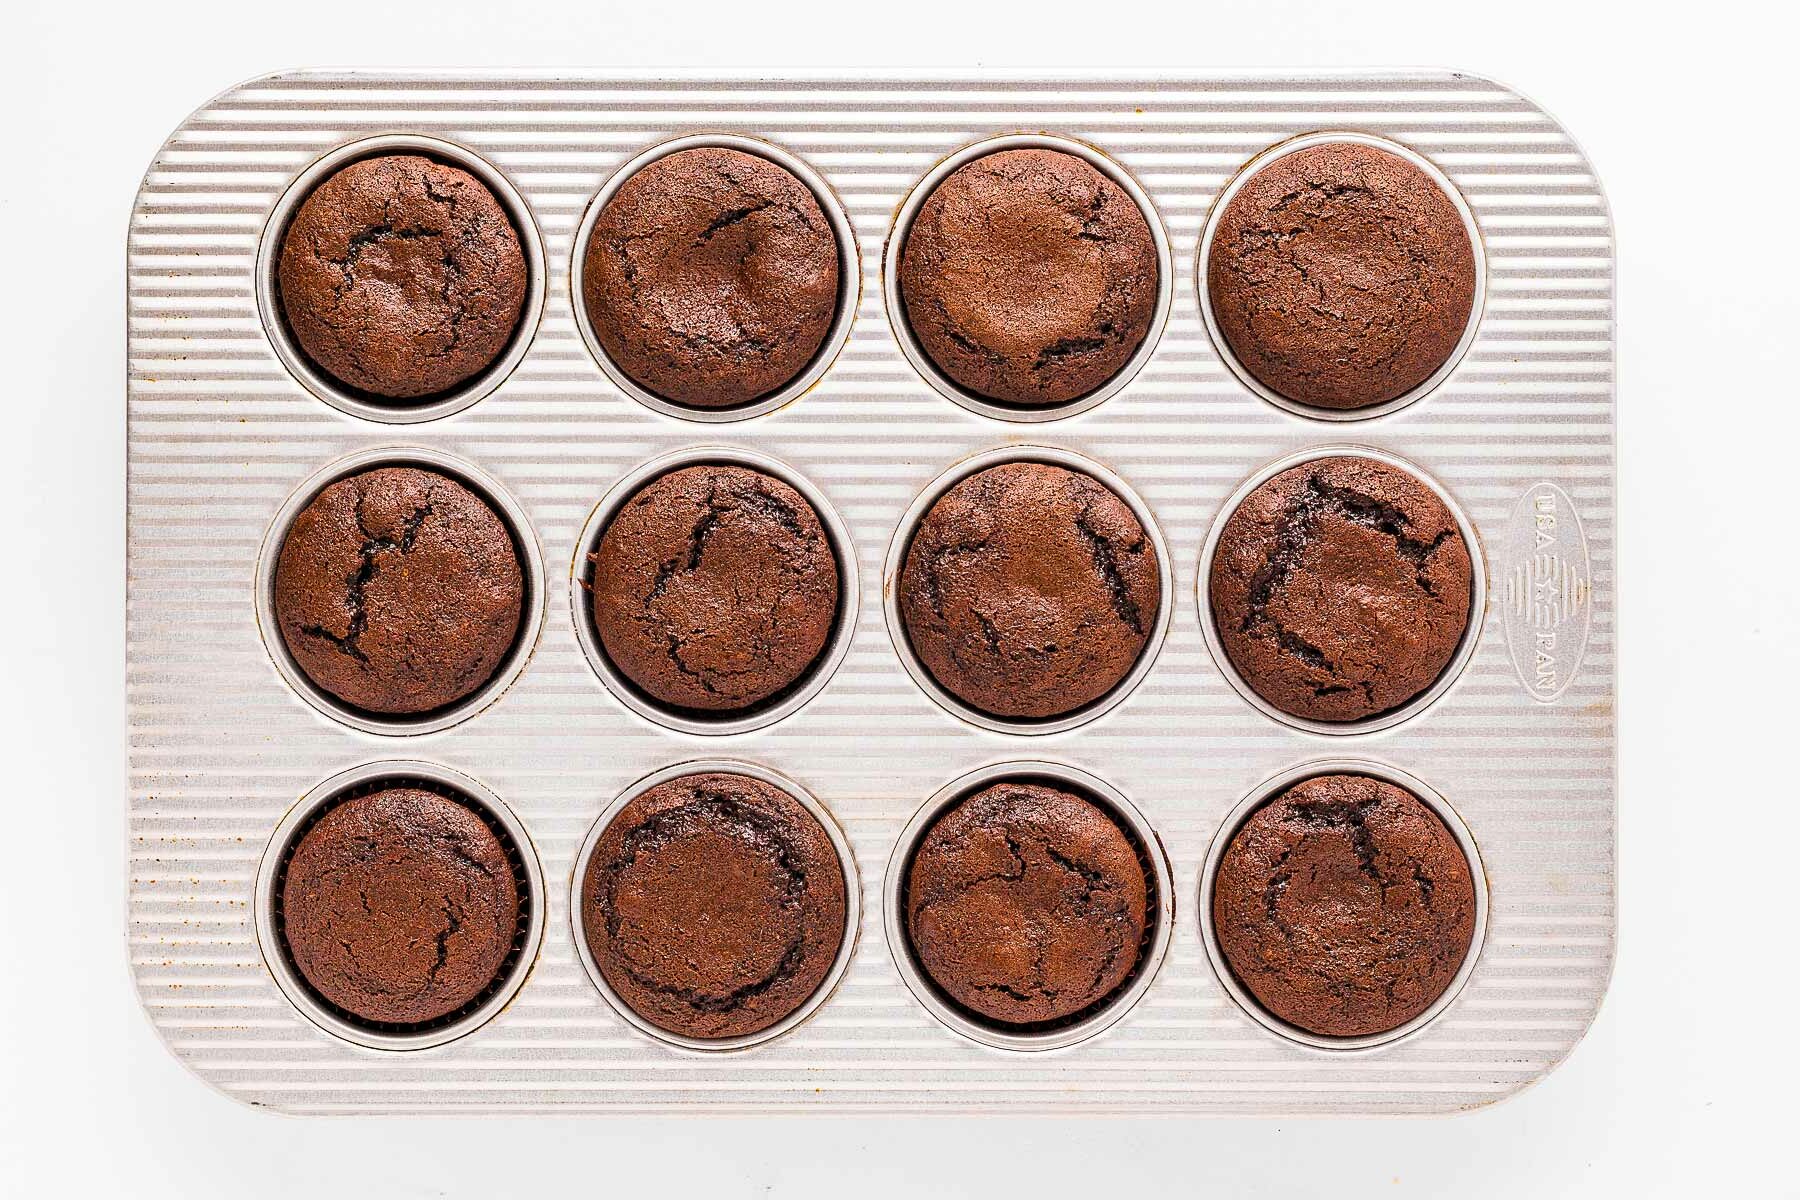
Bake for 20 minutes or until a toothpick inserted into the center comes out clean. If you see a few moist crumbs, that’s fine – just no wet batter.
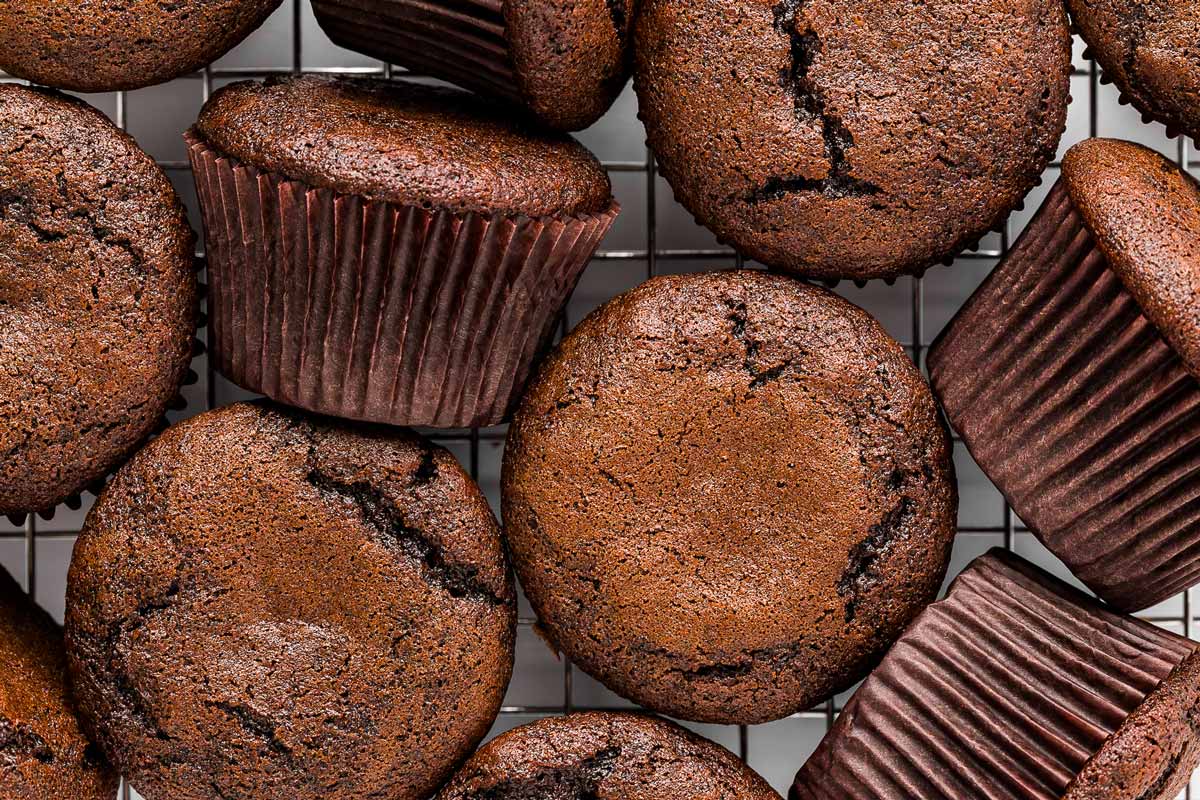
6. Cool and frost: Let them cool in the pan for 5 minutes, then transfer to a wire rack to cool completely before frosting.
That’s it! Now you’ve got the softest, most chocolate-packed cupcakes ready for whatever frosting you love.
Top tips for recipe success
- Use hot coffee or water – This helps “bloom” the cocoa powder for a deeper chocolate flavor. Don’t skip the heat!
- Measure the flour correctly – Spoon it into the measuring cup and level it off. Scooping packs in too much flour, making dry cupcakes.
- Don’t overmix – Stir just until no dry streaks remain. Overmixing leads to dense, tough cupcakes.
- Fill liners only ⅔ full – Too much batter = cupcakes that overflow and sink in the middle.
- Check doneness early – Every oven is different! Start checking at 18 minutes – a toothpick should come out clean or with a few moist crumbs.
- Cool completely before frosting – Warm cupcakes = melted frosting mess. Let them cool on a wire rack, removed from the pan, for best results.
- Fresh baking soda & powder are a must – Expired leaveners = flat cupcakes. If they’ve been sitting in your pantry for a while, replace them!
Helpful recipe hints
Troubleshooting & storage
Overbaking is a common cause of dryness. Ensure you check for doneness promptly and avoid baking longer than necessary.
Overmixing the batter can lead to a gummy texture. Mix until ingredients are just combined to avoid this issue.
Yes, you can bake the cupcakes a day ahead. Once they’ve cooled completely, store them in an airtight container at room temperature.
Absolutely! Frosting cupcakes a day ahead is fine.
For cupcakes with non-perishable frostings like buttercream, it’s generally safe to store them at room temperature in an airtight container for up to two days. This helps maintain their moistness and flavor.
Cupcakes with perishable frostings, such as those containing cream cheese or whipped cream, should be refrigerated in an airtight container to ensure safety. Always consider the specific ingredients in your frosting when deciding on storage methods.
Absolutely! Unfrosted cupcakes can be frozen for up to three months. After cooling, wrap them individually in plastic wrap, then place in a freezer bag or container before placing in the freezer.
Let frozen, unwrapped cupcakes thaw at room temperature for about 1 hour or until soft. To refresh them, pop them in a 300°F oven for 5 minutes—it brings back that just-baked taste!
Topping and filling ideas
These are the perfect blank canvas for all kinds of frostings, toppings, and fillings:
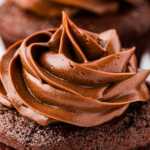
- Frosting ideas: Classic chocolate buttercream is always a win, but these are also amazing with cream cheese frosting, peanut butter frosting, or even whipped ganache (in the photos!) for an ultra-decadent finish.
- Toppings that impress: Keep it simple with chocolate shavings or sprinkles, or go all out with a sprinkle of flaky sea salt for an effortless but fancy look. Or try strawberry sauce for a chocolate covered strawberry taste!
- Fun fillings: Want to take these over the top? Core out the center and fill them with chocolate ganache, raspberry jam, peanut butter, or marshmallow fluff – because why not?

PS If you try this recipe, please leave a review in the comment section and add a star rating in the recipe card – I appreciate your feedback! Follow along on Pinterest, Facebook or Instagram.
Easy Chocolate Cupcakes
Recipe details
Ingredients
Dry Ingredients:
- 1 cup all-purpose flour
- ½ cup unsweetened cocoa powder NOT Dutch process
- 1 teaspoon baking powder
- ¼ teaspoon baking soda
- ¼ teaspoon fine sea salt
- 1 teaspoon espresso powder OR ½ teaspoon chai spice mix; optional
Wet Ingredients:
- ½ cup granulated white sugar
- ½ cup light brown sugar packed
- ⅓ cup vegetable oil
- ½ cup buttermilk
- ⅓ cup hot coffee OR hot water!
- ½ tablespoon vanilla extract
- 1 large egg
Instructions
- Prep: Preheat oven to 350°F and line a 12 cup cupcake pan with liners.
- Mix dry ingredients: Add 1 cup all-purpose flour, ½ cup unsweetened cocoa powder, 1 teaspoon baking powder, ¼ teaspoon baking soda, ¼ teaspoon fine sea salt and 1 teaspoon espresso powder to a large bowl and whisk until well combined.
- Mix wet ingredients: Add ½ cup granulated white sugar, ½ cup light brown sugar, ⅓ cup vegetable oil, ½ cup buttermilk, ⅓ cup hot coffee, ½ tablespoon vanilla extract and 1 large egg to a separate bowl or measuring cup and whisk until smooth.
- Add wet to dry: Add the wet ingredients to the dry ingredients and stir (no whisk! use a wooden spoon or spatula) just until combined. The batter will be thin.
- Fill liners and bake: Divide the batter between the prepared cupcake liners. Bake for 20 minutes or until a toothpick inserted into the middle comes out clean. Cool in the pan for 5 minutes, then remove to a cooling rack to cool completely before adding any frosting.
Notes
Ingredient notes
- Cocoa powder – Use unsweetened, not Dutch-processed, for the best rise.
- Espresso powder – Enhances chocolate flavor; optional but recommended.
- Buttermilk – Keeps cupcakes moist; sub with milk + ½ tsp vinegar or lemon juice.
- Vegetable oil – Makes cupcakes soft; butter works but results in a denser texture.
- Brown & white sugar – The mix gives the best texture; subbing all white sugar works but makes them less soft.
Recipe tips
- Use hot liquid – Helps intensify chocolate flavor.
- Measure flour correctly – Spoon and level; don’t scoop.
- Don’t overmix – Stir until just combined; overmixing = dense/gummy cupcakes.
- Fill liners ⅔ full – Prevents overflow and sinking.
- Check doneness early – Start at 18 min; a toothpick should have moist crumbs, not wet batter.
- Cool before frosting – Warm cupcakes = melted frosting mess.
Storage tips
- Make ahead – Bake a day ahead and store in an airtight container.
- Leftovers – Store frosted cupcakes at room temp (buttercream) for 2 days or refrigerate (perishable frostings).
- Freezing – Freeze unfrosted cupcakes up to 3 months; thaw at room temp.
Nutrition
More recipe information
Recipe first published on 02/13/2018. Updated with new photos and text on 02/10/2025. The recipe has only seen minimal improvements, it has mostly stayed the same because it’s amazing 😉


Comments
No Comments