

Wondering how to hard boil eggs for perfect results every time? With this method, you can easily hard boil eggs without messing them up.
Plus, I’m sharing different times for differently set yolks, how to alter the cooking times when using larger or smaller eggs – and my two favorite tricks for easily peeling the boiled eggs!
Hard boiled eggs
- Knowing how to boil eggs for the perfect outcome every time is such a great skill to have in the kitchen! Not only do they make for a great, protein rich snack, the are also great to use in homemade egg salad and other dishes.
- This is a great recipe to make ahead or for easy meal prep, the boiled eggs can be stored in the fridge for up to 5 days. It is best to store them in their shells.
- This recipe is so basic and easy, and this method of cooking eggs makes it nearly impossible to overcook them – perfect for beginners!
Jump to:
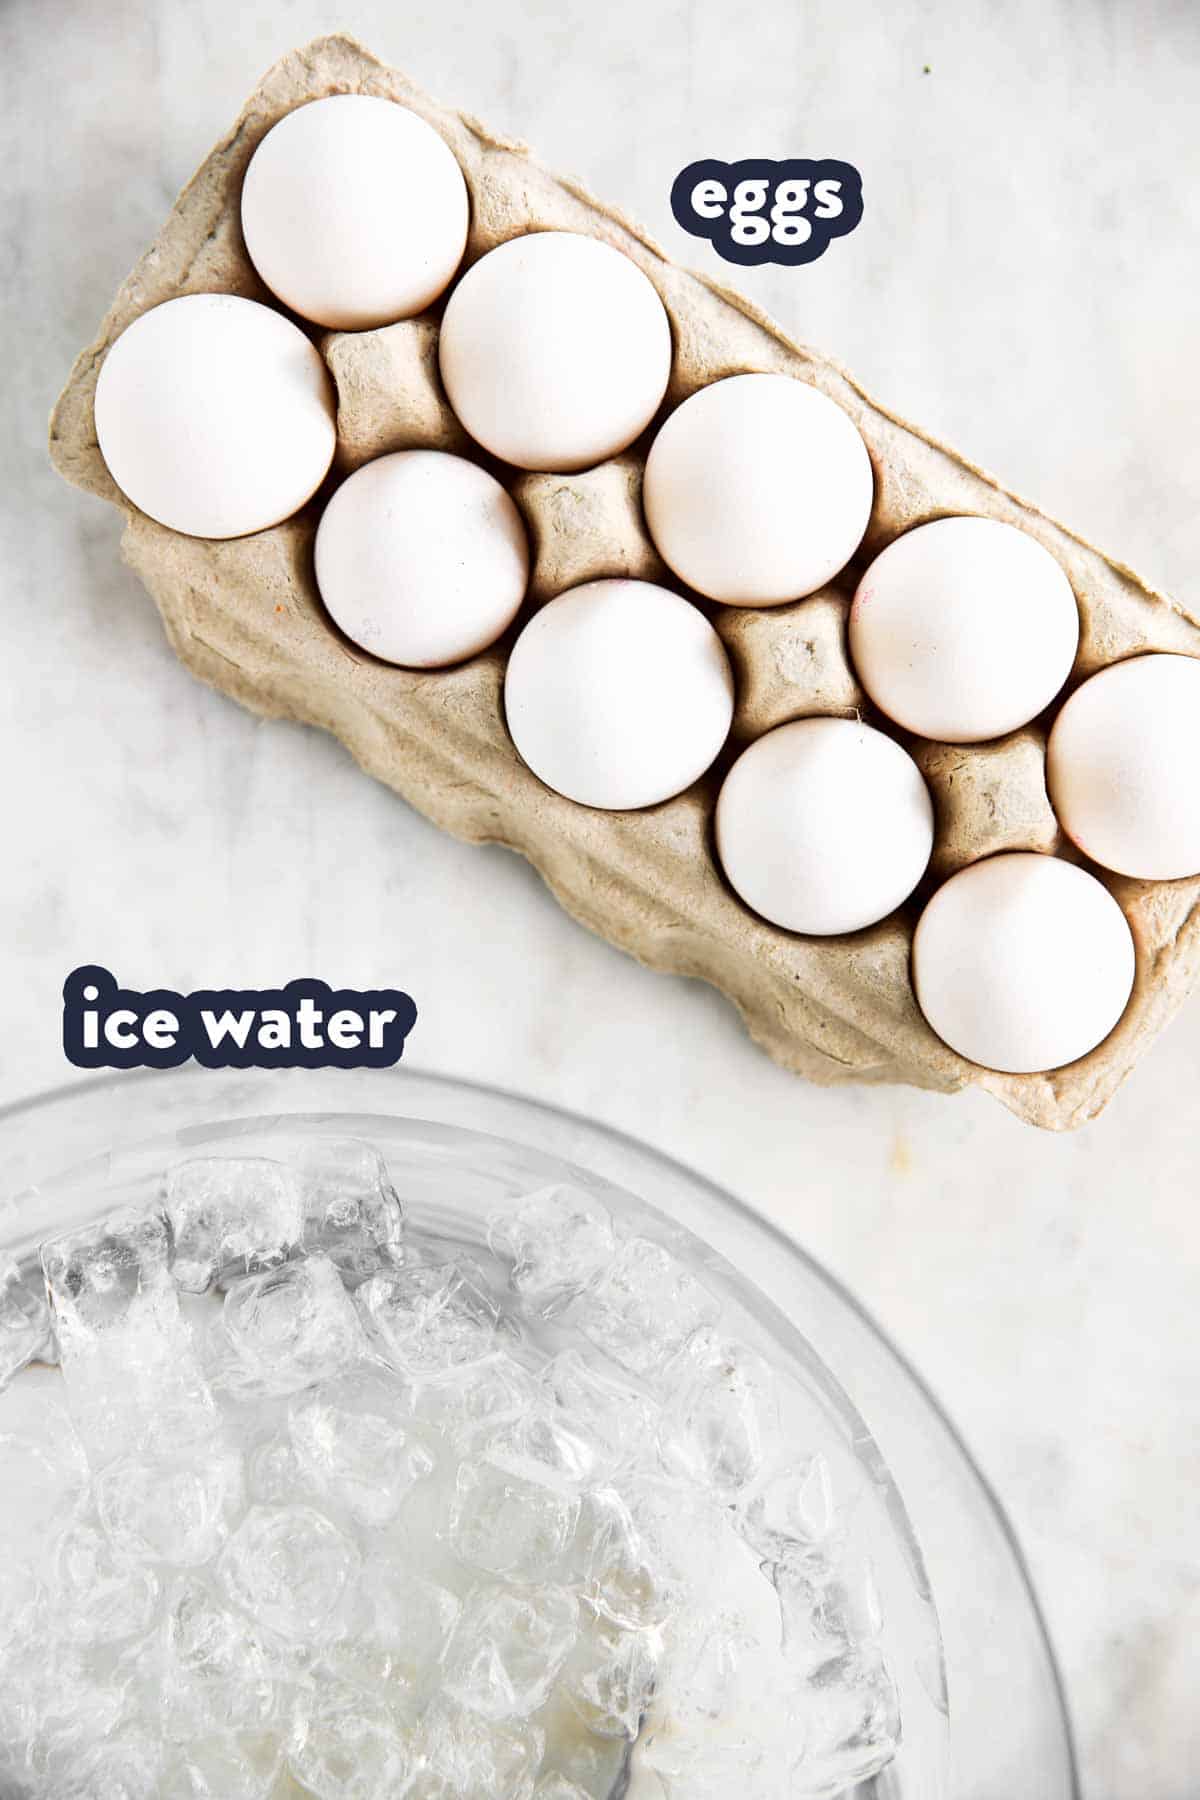
Ingredients you’ll need
Here is a visual overview of the ingredients in the recipe. Scroll down to the printable recipe card at the bottom of this post for quantities!
Ingredient notes
- Eggs: I used large eggs, each weighing about 2oz. If you use smaller or larger eggs, you will need to adjust the cooking time. The following are estimates I have figured out for myself over the years, but depending on your exact egg size, you may need to cook a “test egg” to see how much exactly you need to alter the timing.
- 1 extra minute for extra-large (about 2.25oz per egg)
- 1.5 – 2 extra minutes for jumbo (about 2.5oz per egg)
- 1 minute less for medium (about 1.75oz per egg)
- 1.5 minutes less for small (about 1.5oz per egg)
- Ice water: I highly recommend making a bowl filled with actual ice cubes and cold water to cool the eggs; but if ice is unavailable, just use the coldest water from the tap and chill it in the fridge as the eggs are cooking.
How to boil eggs
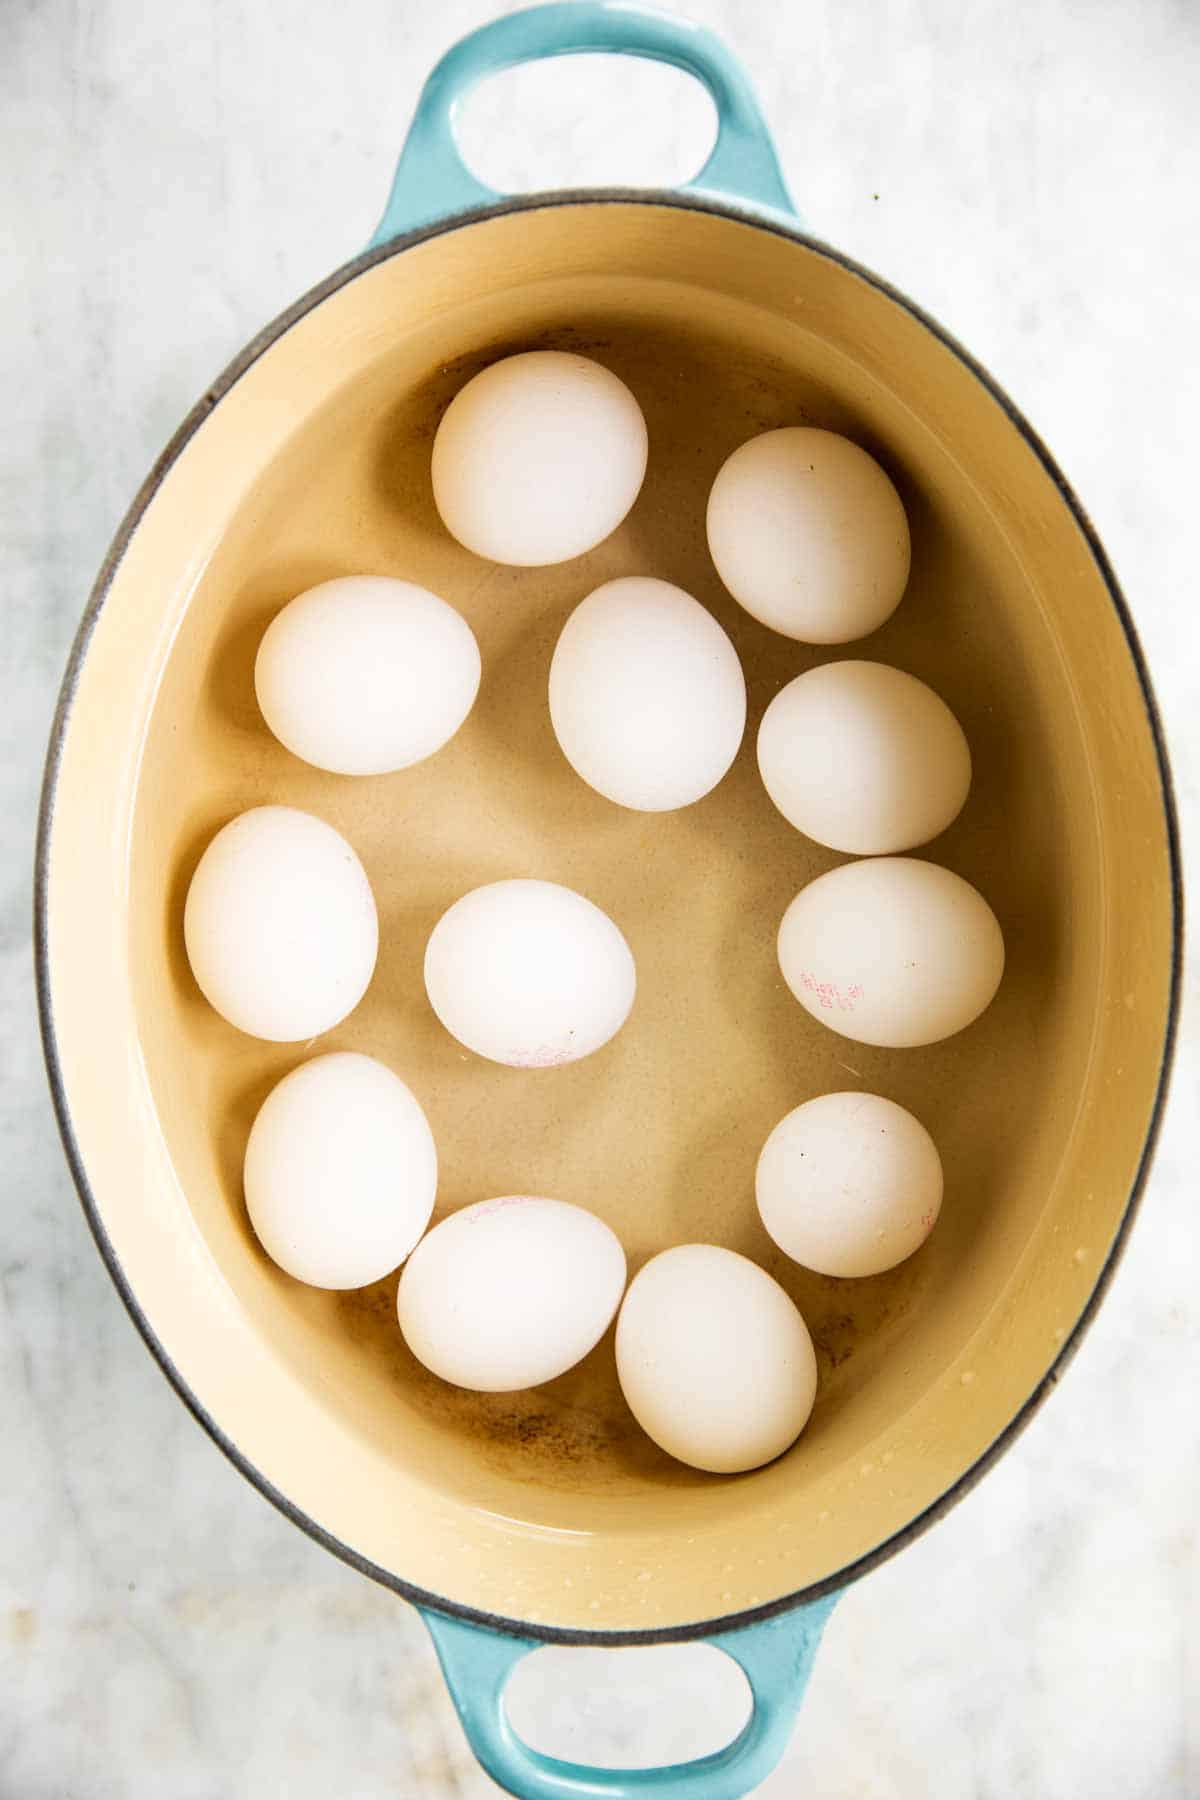
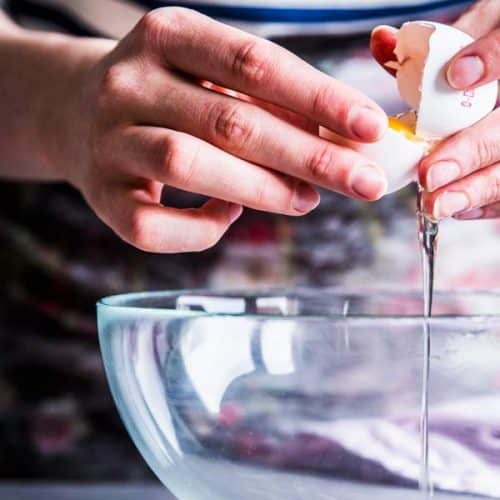
1. Carefully place the eggs in a large pot and cover them with cool water by one inch.
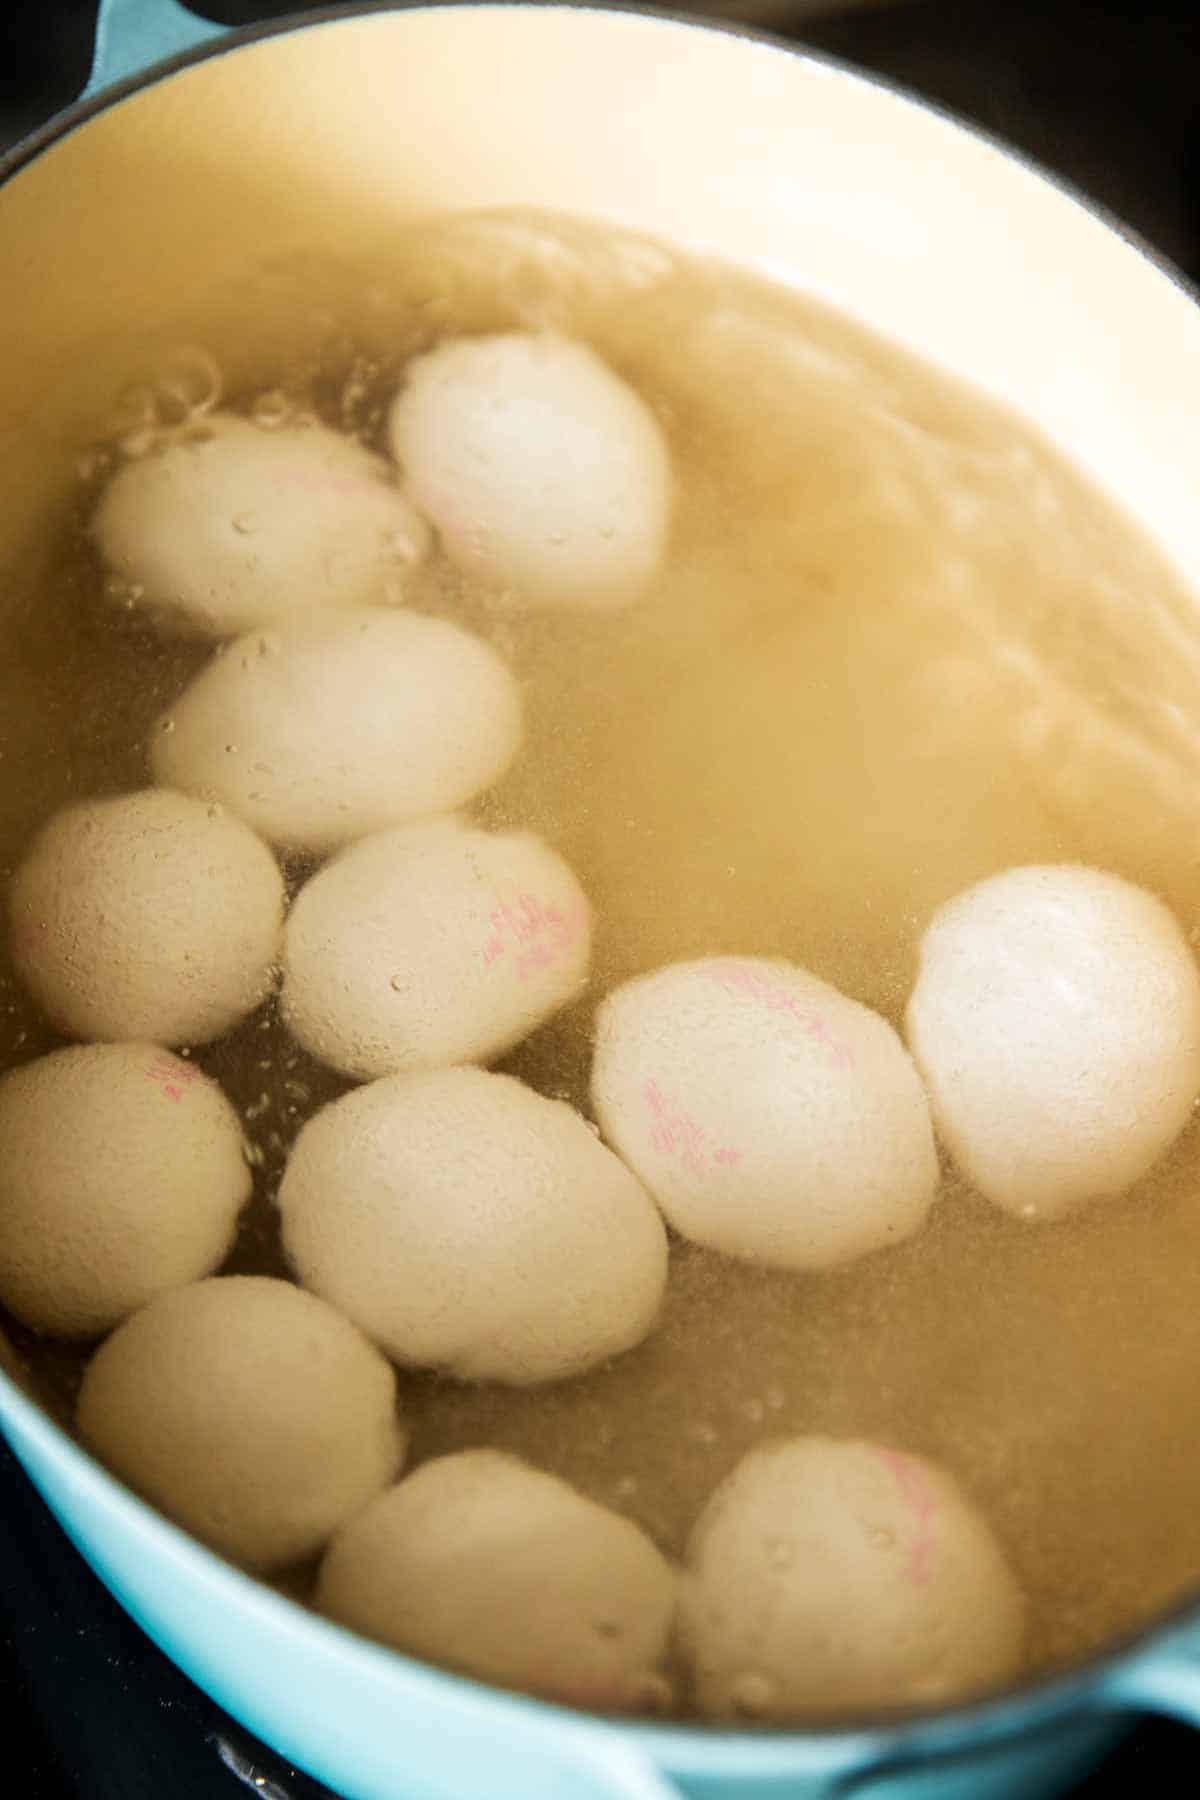
2. Place the pot over medium-high heat and bring the water to a rolling bowl.
I strongly recommend sticking to medium-high heat in order to keep the eggs from bouncing up and down too much (and thus increasing the chance of them breaking) in too-rapidly boiling water.

cover eggs with water bring to rolling boil
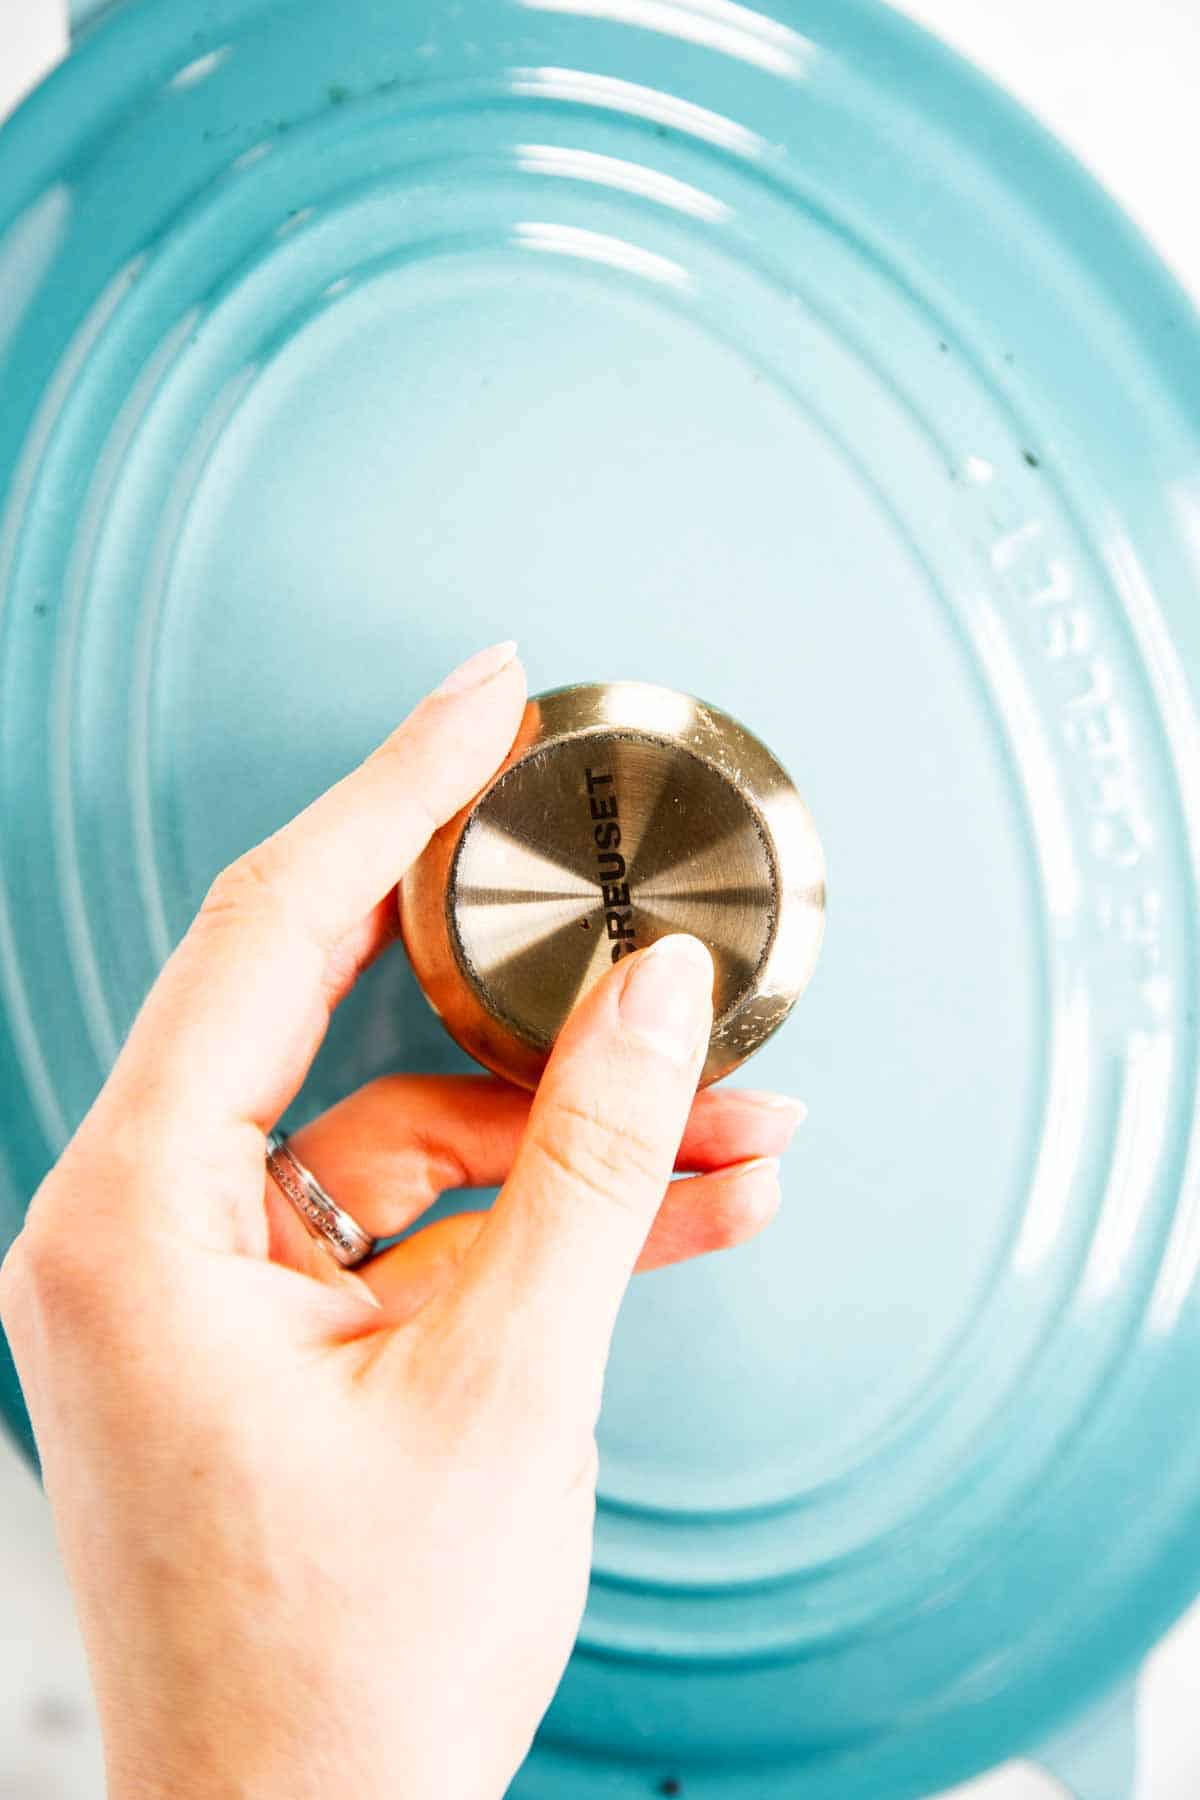
3. Once the water is at a rolling boil, switch off the heat but leave the pot on the burner. If you’re using a stove that doesn’t retain heat well (eg an induction stove), reduce the heat to the lowest setting for one minute before switching it off.
Cover the pot with a lid and allow the eggs to sit in the hot water for your desired length of time (see below for time chart).
let sit, covered transfer to ice water bath
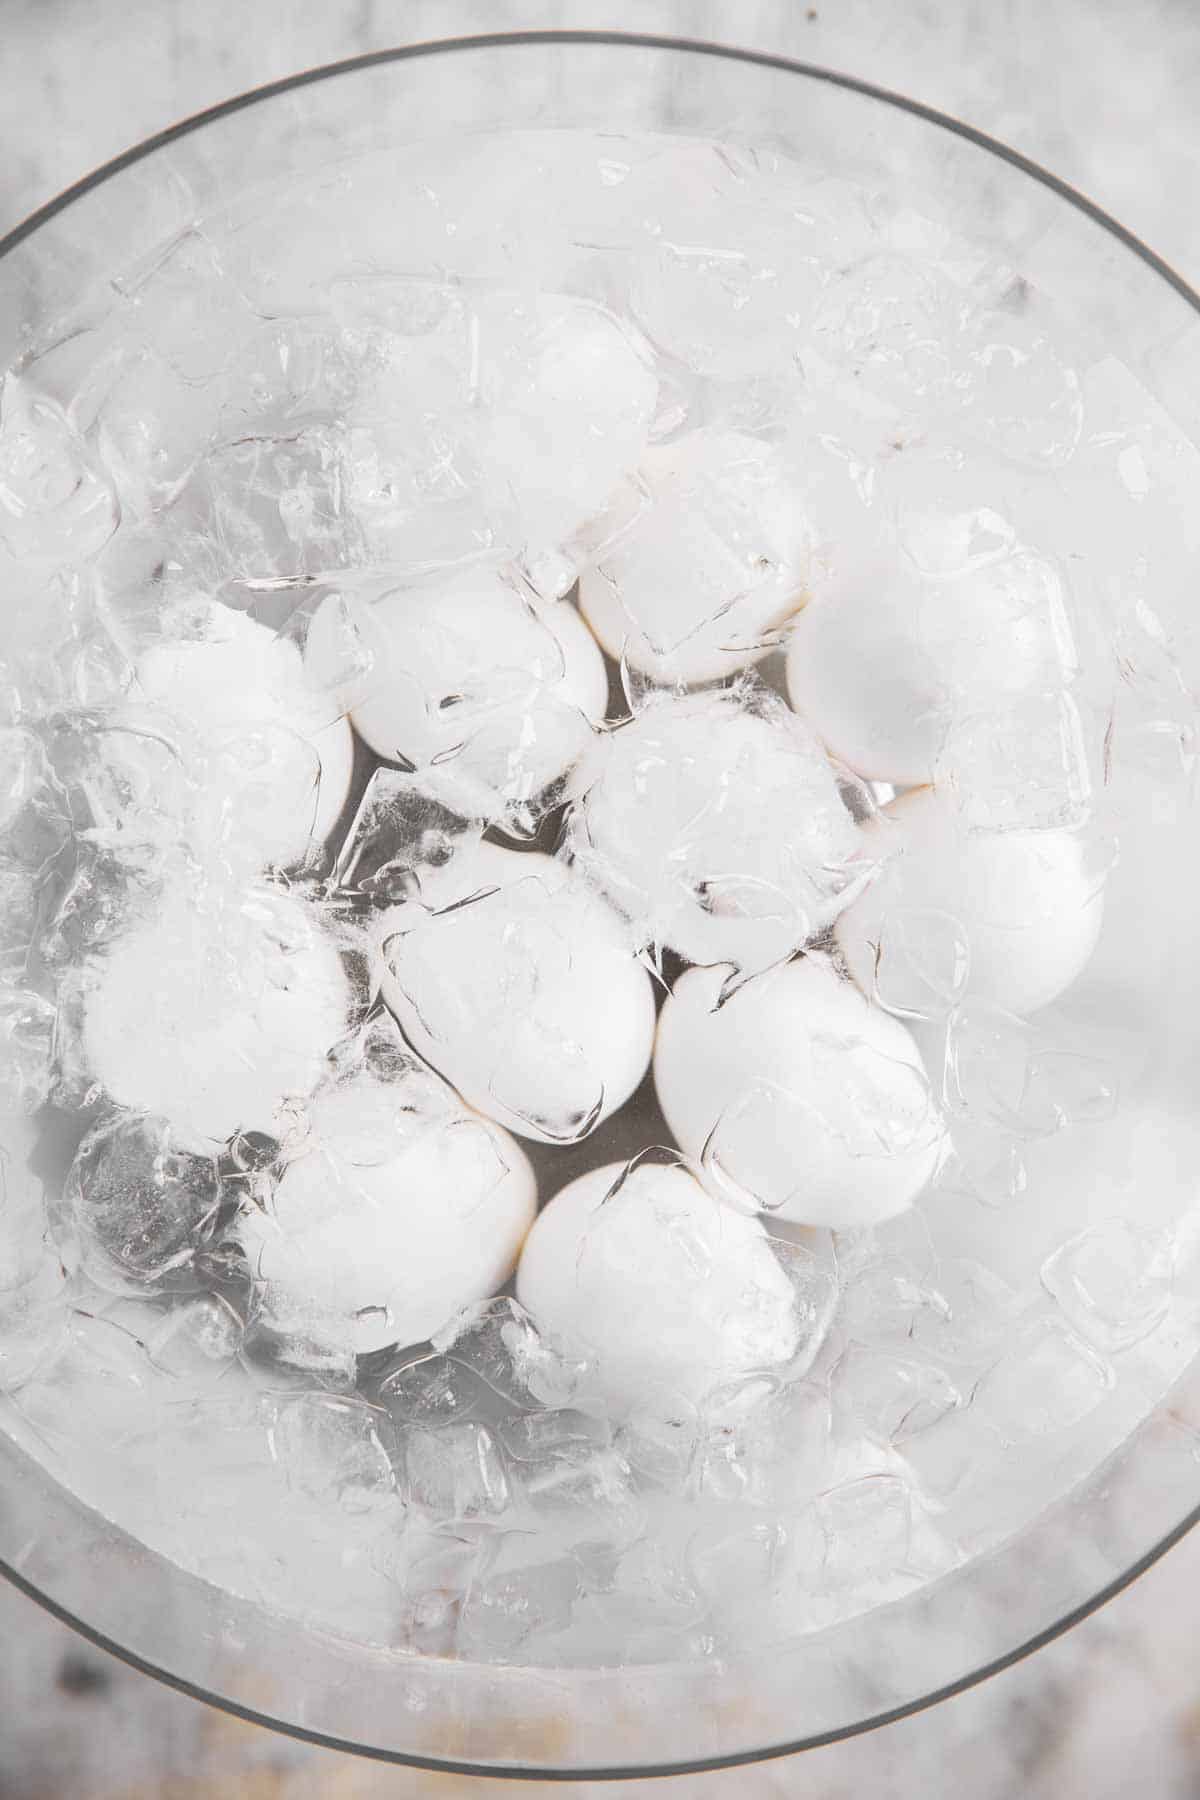
4. Once the time is up, immediately transfer the eggs to a large bowl filled with ice cubes and cold water. Allow them to sit in the ice bath for 5-10 minutes before removing them to either store or peel.
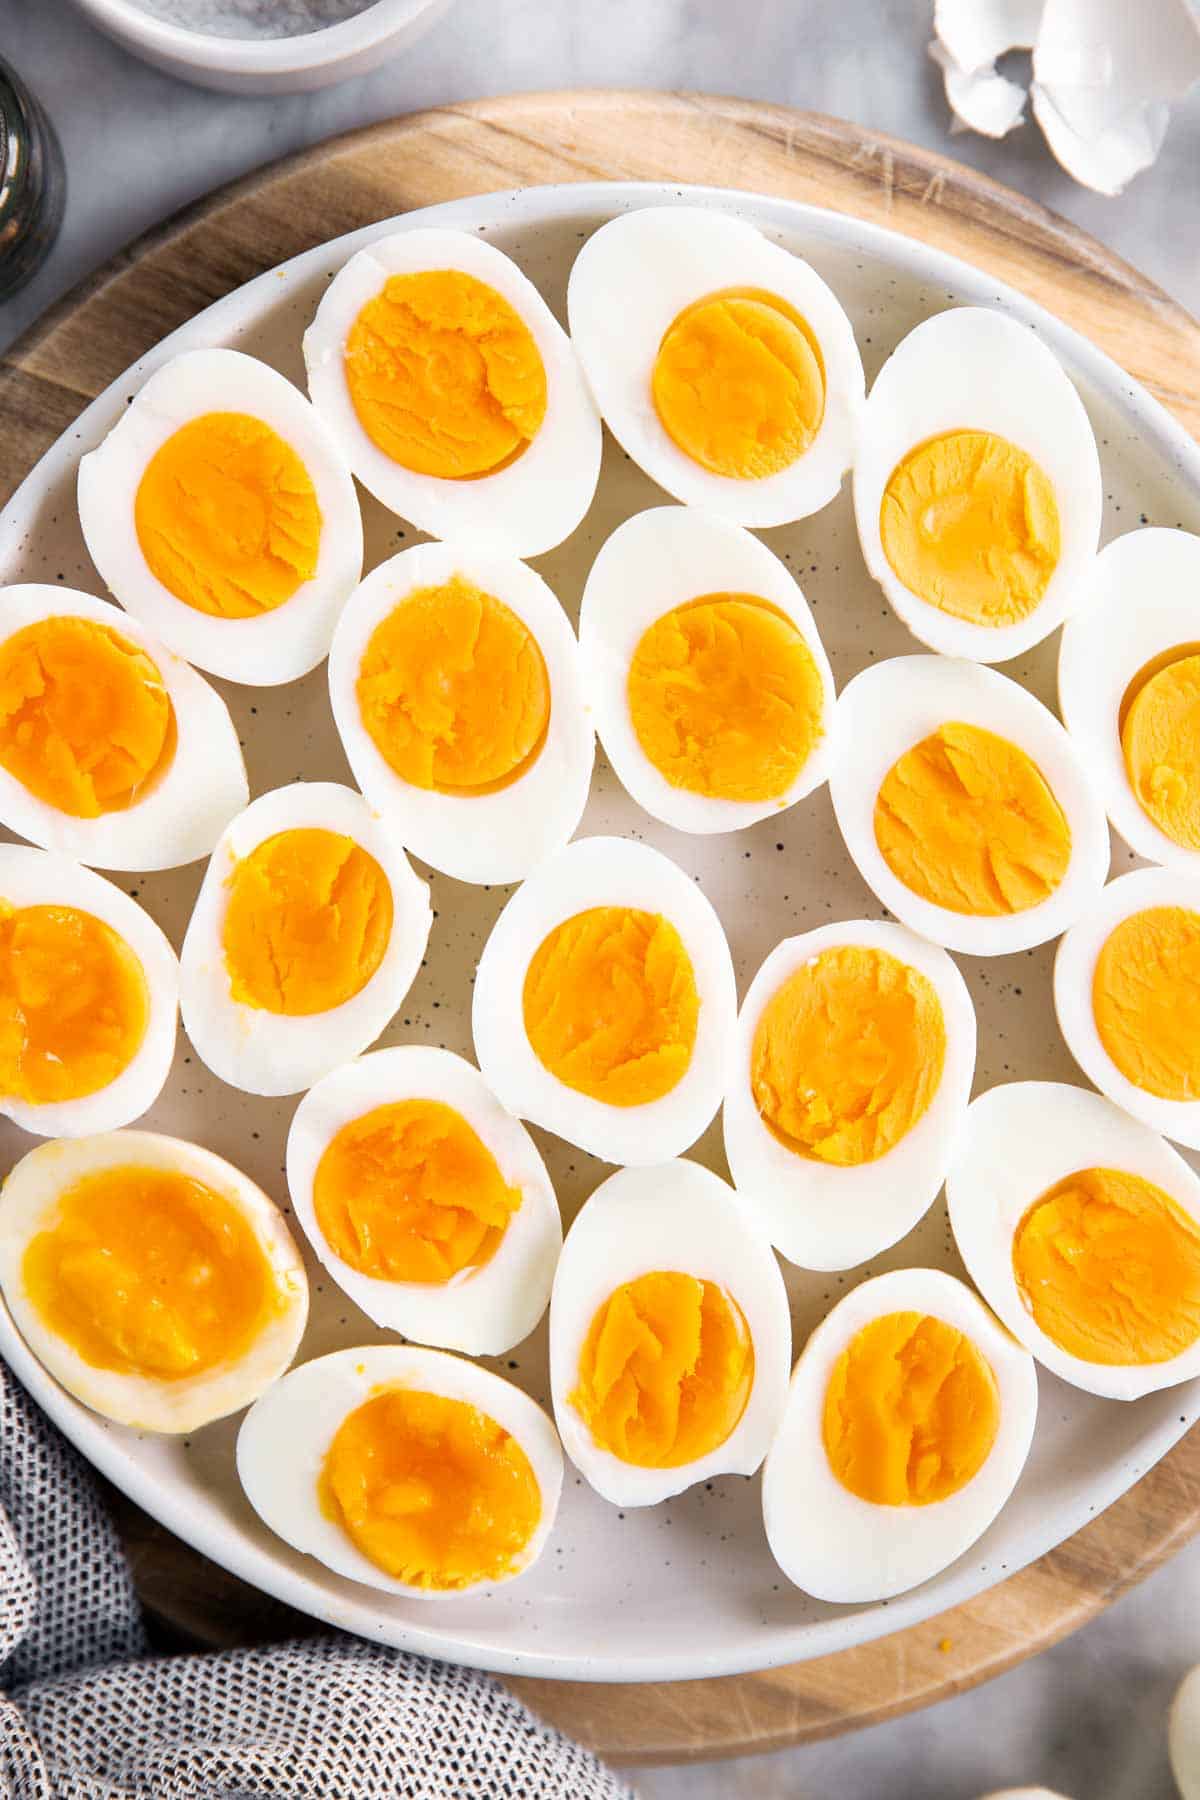
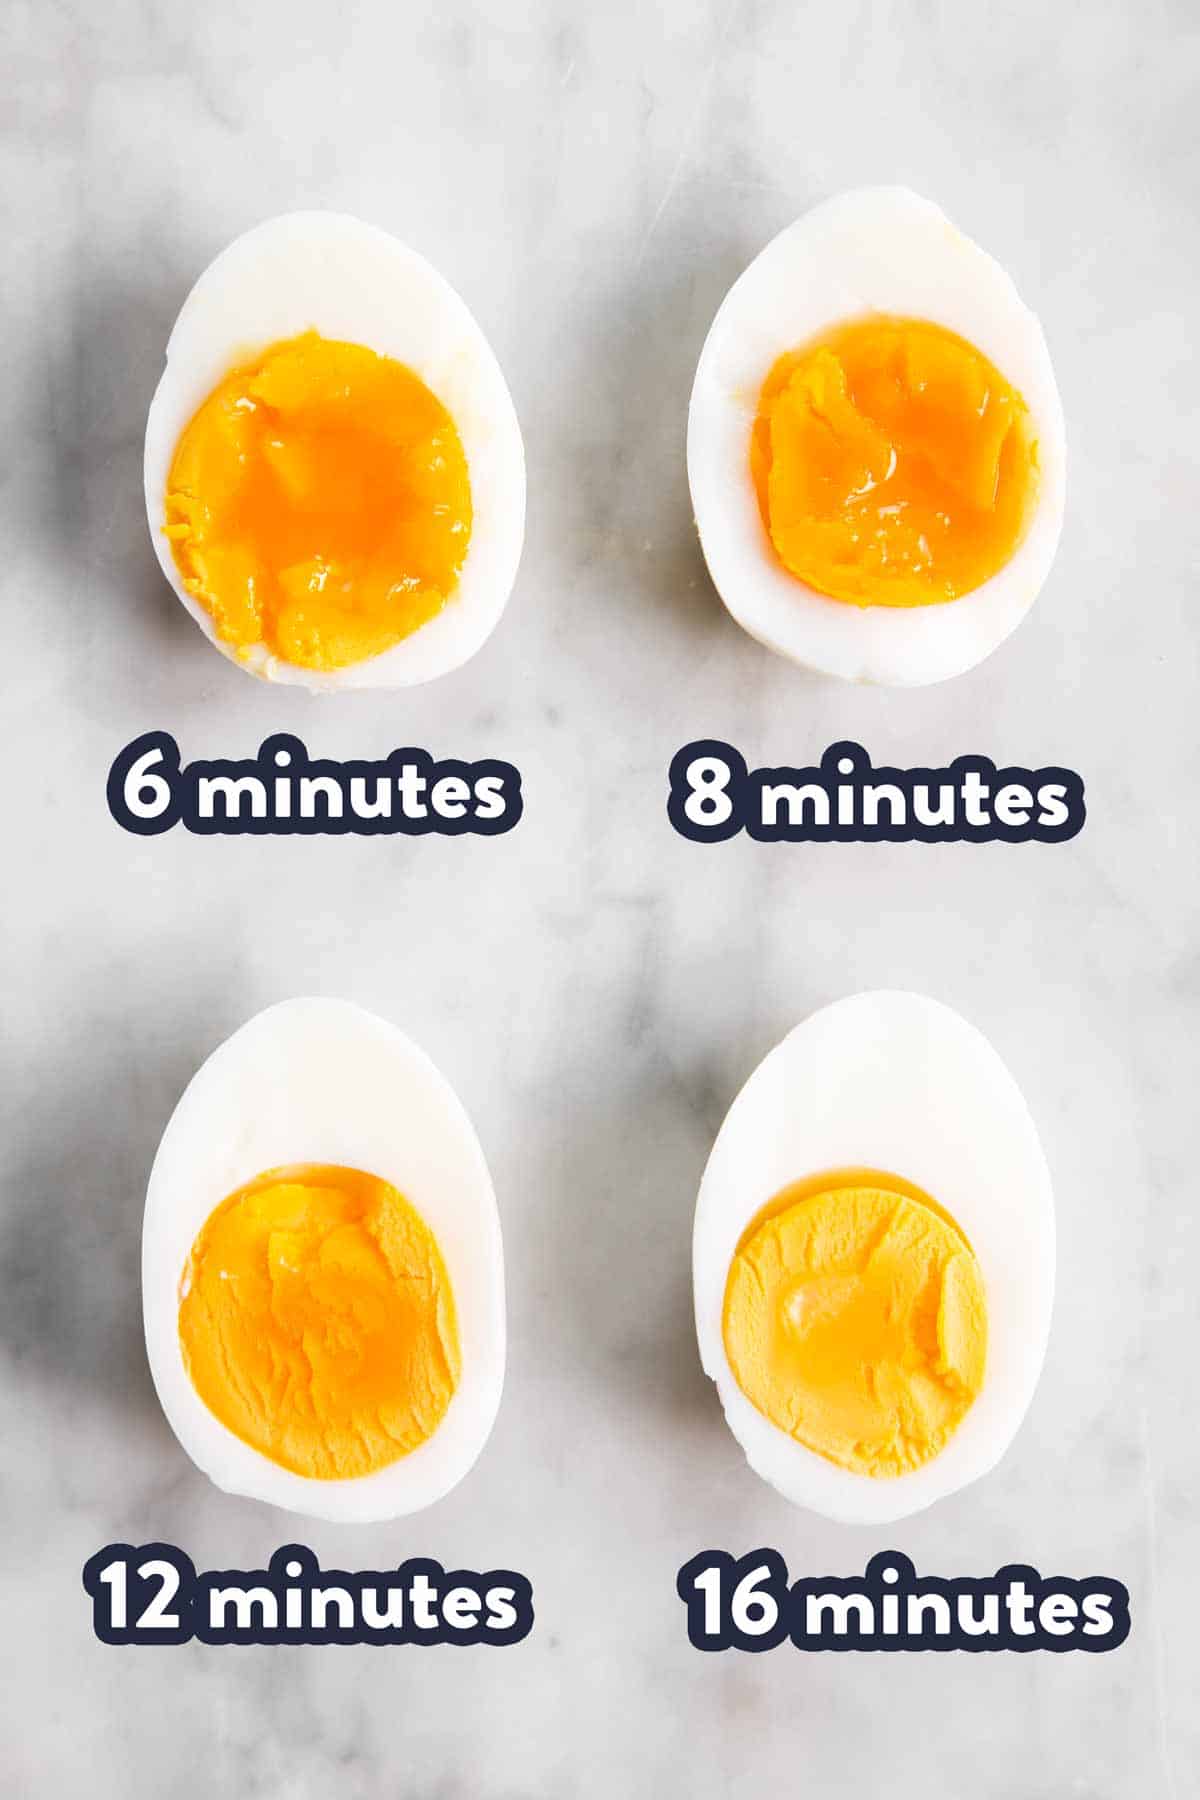
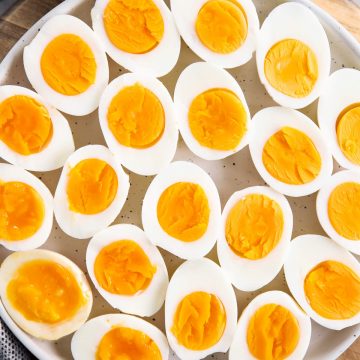
Cooking times
The time you allow the eggs to sit in the boiled water dictates how your egg yolks turn out. Please keep in mind that the exact size of your eggs and the exact pot used and the exact nature of your stove can slightly alter the outcome.
If you’re unsure, I highly recommend doing a “test egg” by itself before cooking a large batch.
These are the times that work well for me, using large eggs (each about 2 ounces in weight):
- 6 minutes yield egg with fully cooked white and partly cooked yolk, with runny center.
- 8 minutes yield egg with fully cooked white and yammy yolk center.
- 12 minutes yield egg with fully cooked white, fully set yolk but “fudgy” center.
- 16 minutes yield egg with fully cooked white and fully cooked yolk.
If you have differently sized eggs, here is how I personally alter the times to accommodate smaller or larger eggs:
- 1 extra minute for extra-large (about 2.25oz per egg)
- 1.5 – 2 extra minutes for jumbo (about 2.5oz per egg)
- 1 minute less for medium (about 1.75oz per egg)
- 1.5 minutes less for small (about 1.5oz per egg)
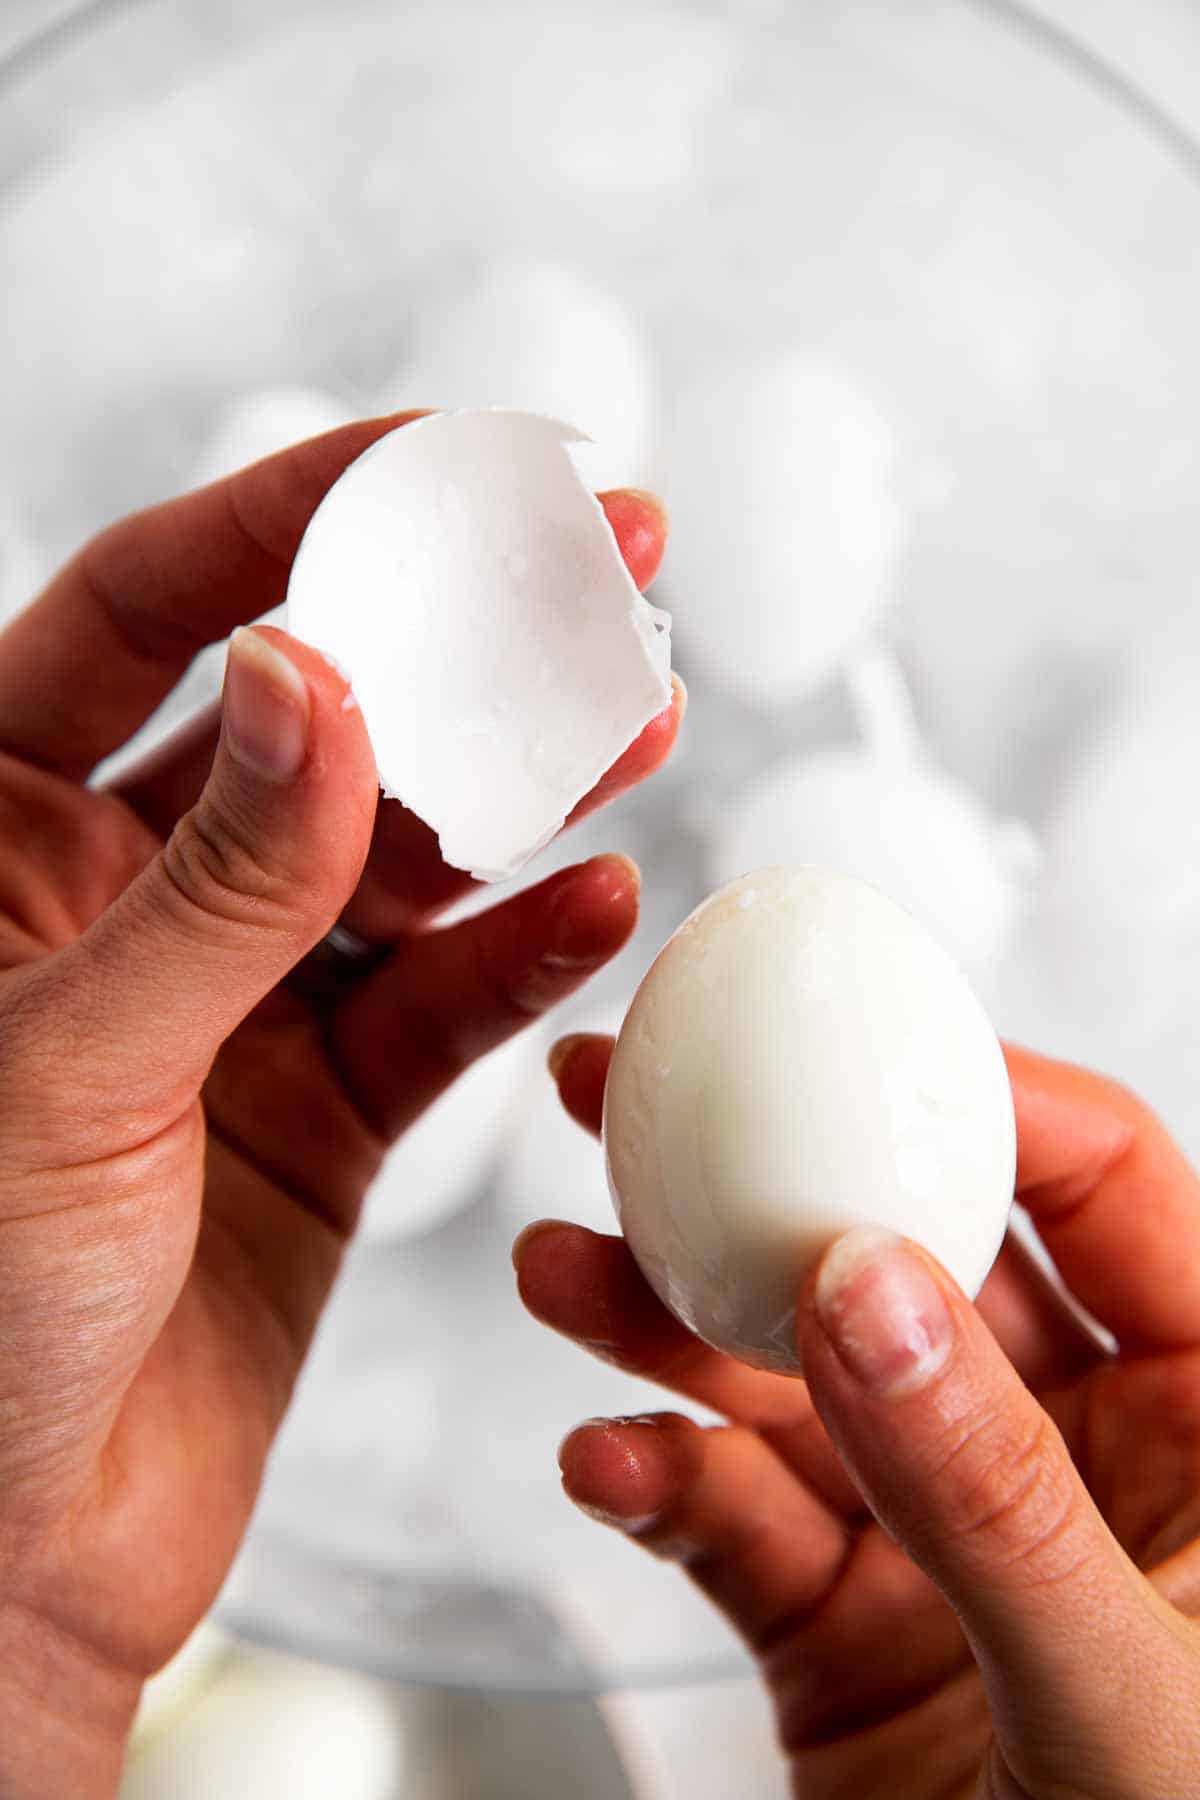
How to peel hard boiled eggs
Peeling hard boiled eggs is a bit of a chore, and many factors can affect how easy or hard they are to peel. Fresher eggs are generally harder to peel, and the longer you cook your eggs, the easier they are to peel.
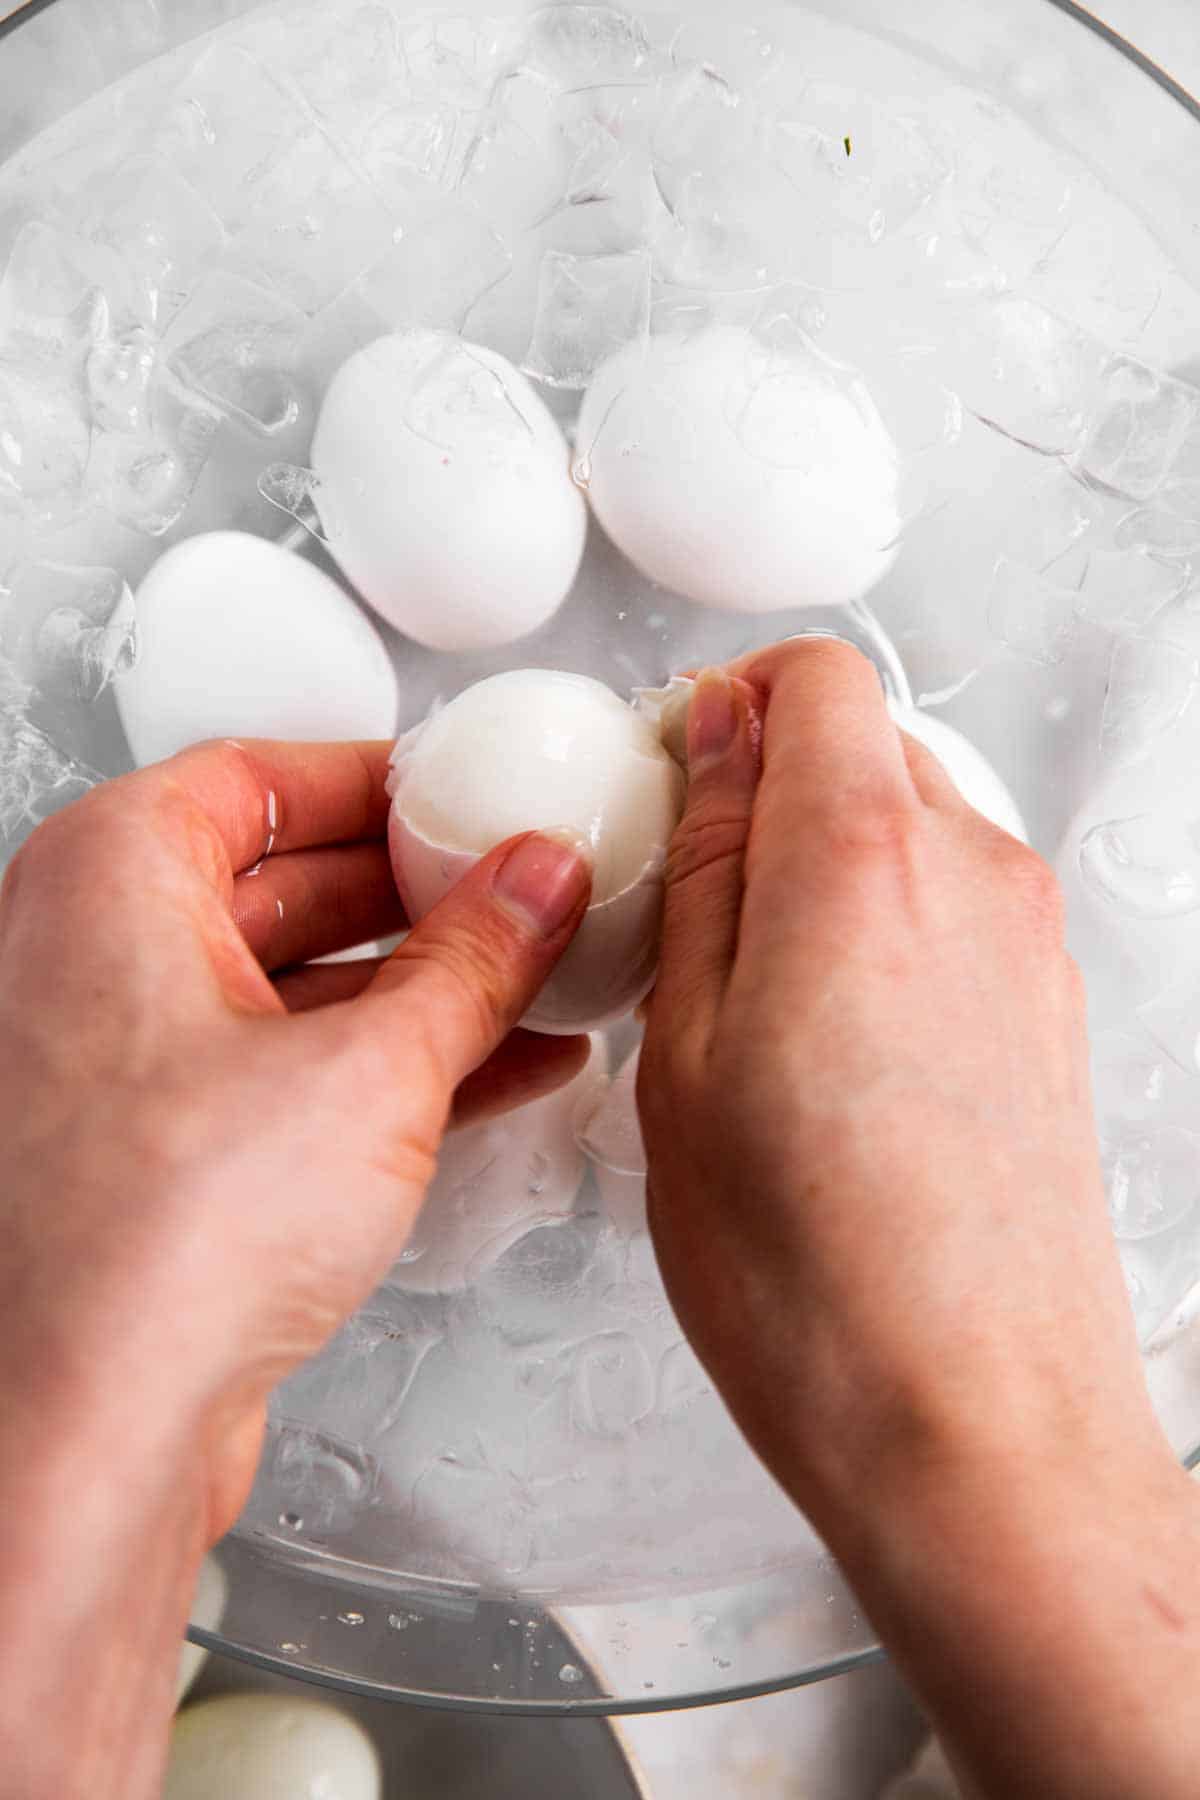
Either way, the method to peel eggs is to gently knock their rounded bottom on a firm surface. There is a small air bubble behind the rounded bottom, which makes it easier to break the shell and start peeling.
tap rounded bottom on firm surface peel away egg shell
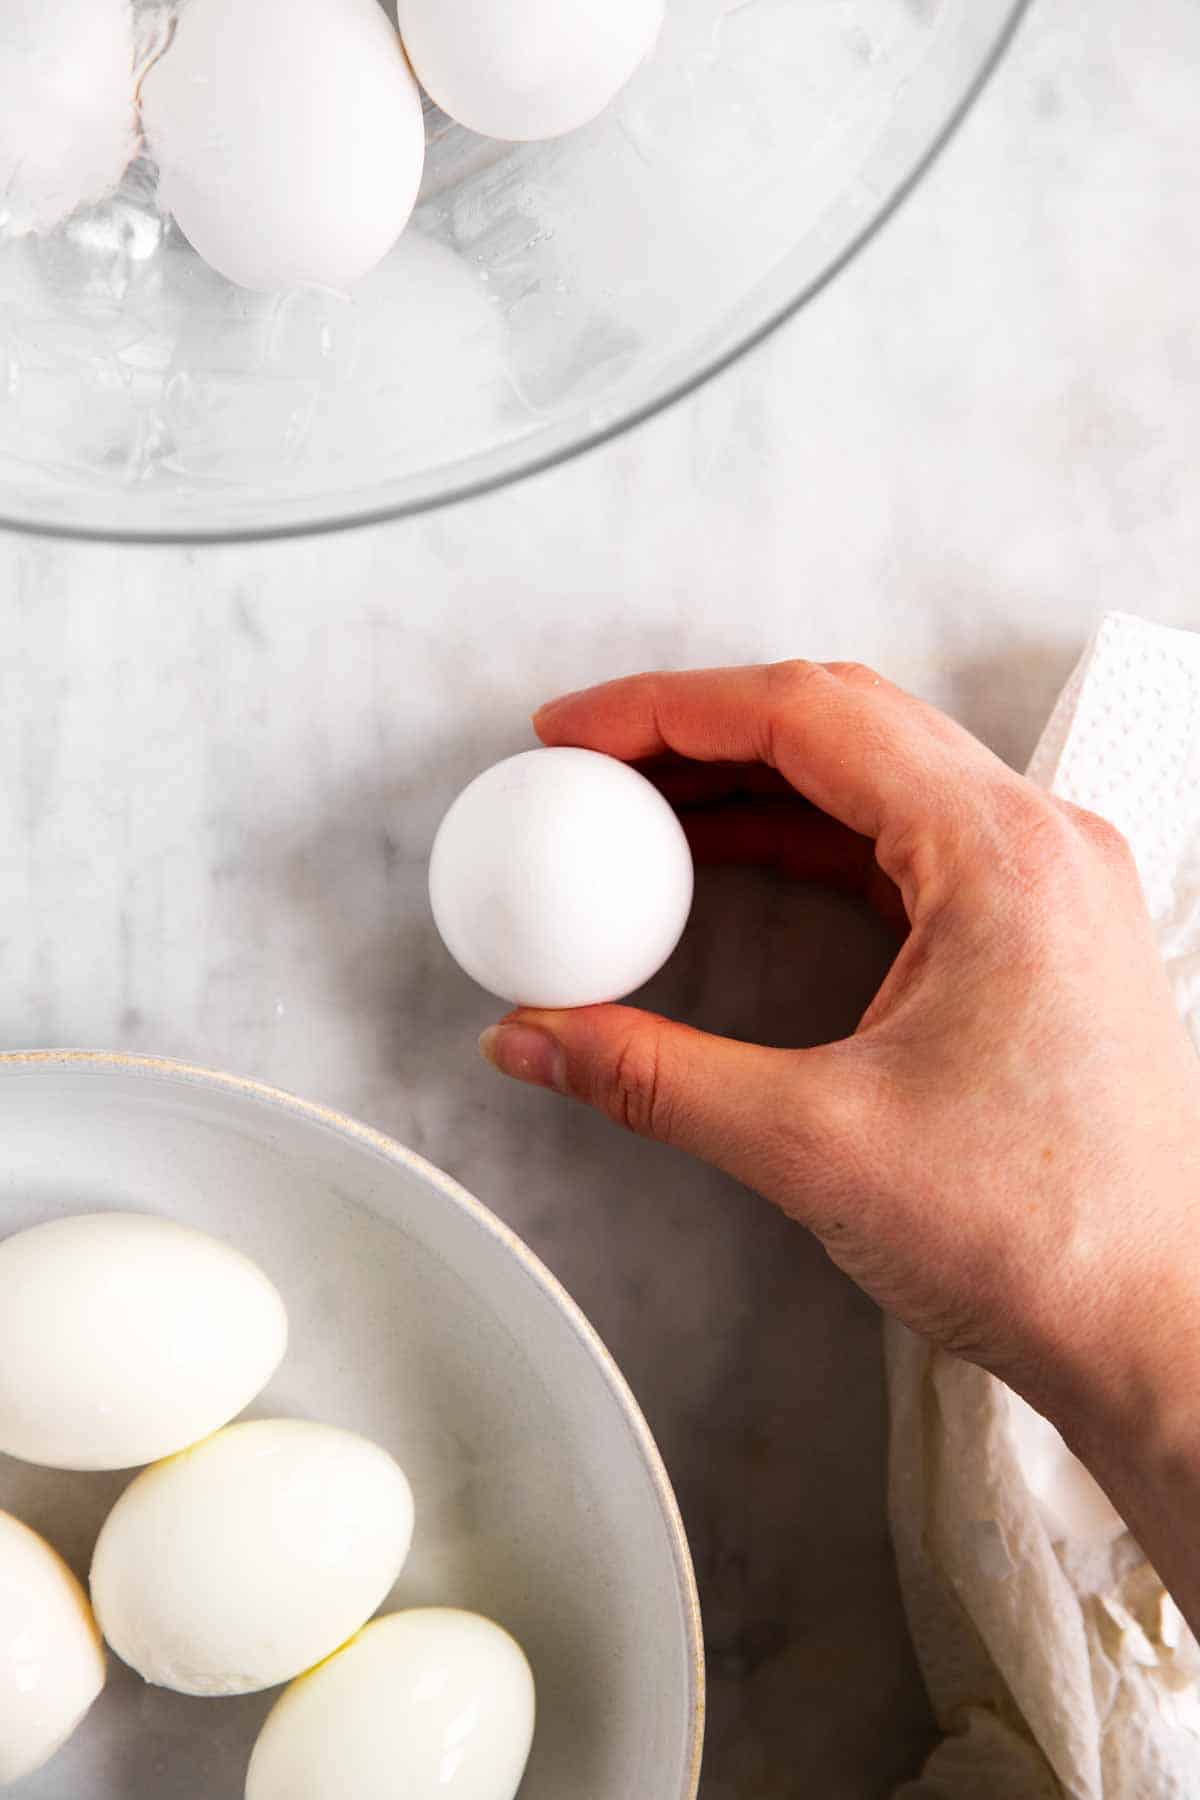

Once the shell on the bottom has been cracked, start peeling it away until you have fully peeled your egg.
Tip 1: Peel under water
One way to make peeling easier for hard-to-peel eggs is to peel them right in the bowl with water. Slightly wetting the egg and shell with water can help the shell to slip away easier.
peel in water bath for easier egg shell removal
Some people like peeling their eggs under running water, but I prefer doing it in the ice water from the water bath – less wasted water and very little accidental splashes.
Tip 2: The spoon trick
For eggs I have a particularly hard time with, I like to use a large spoon to help the shell slip off more easily.
I use the spoon to gently move it below the shell, then I very gently twist back and forth (always taking great care not to break into the egg – the spoon should always rest on the egg’s surface, not dig into it).
slip spoon under egg shell and gently twist shell releases easily
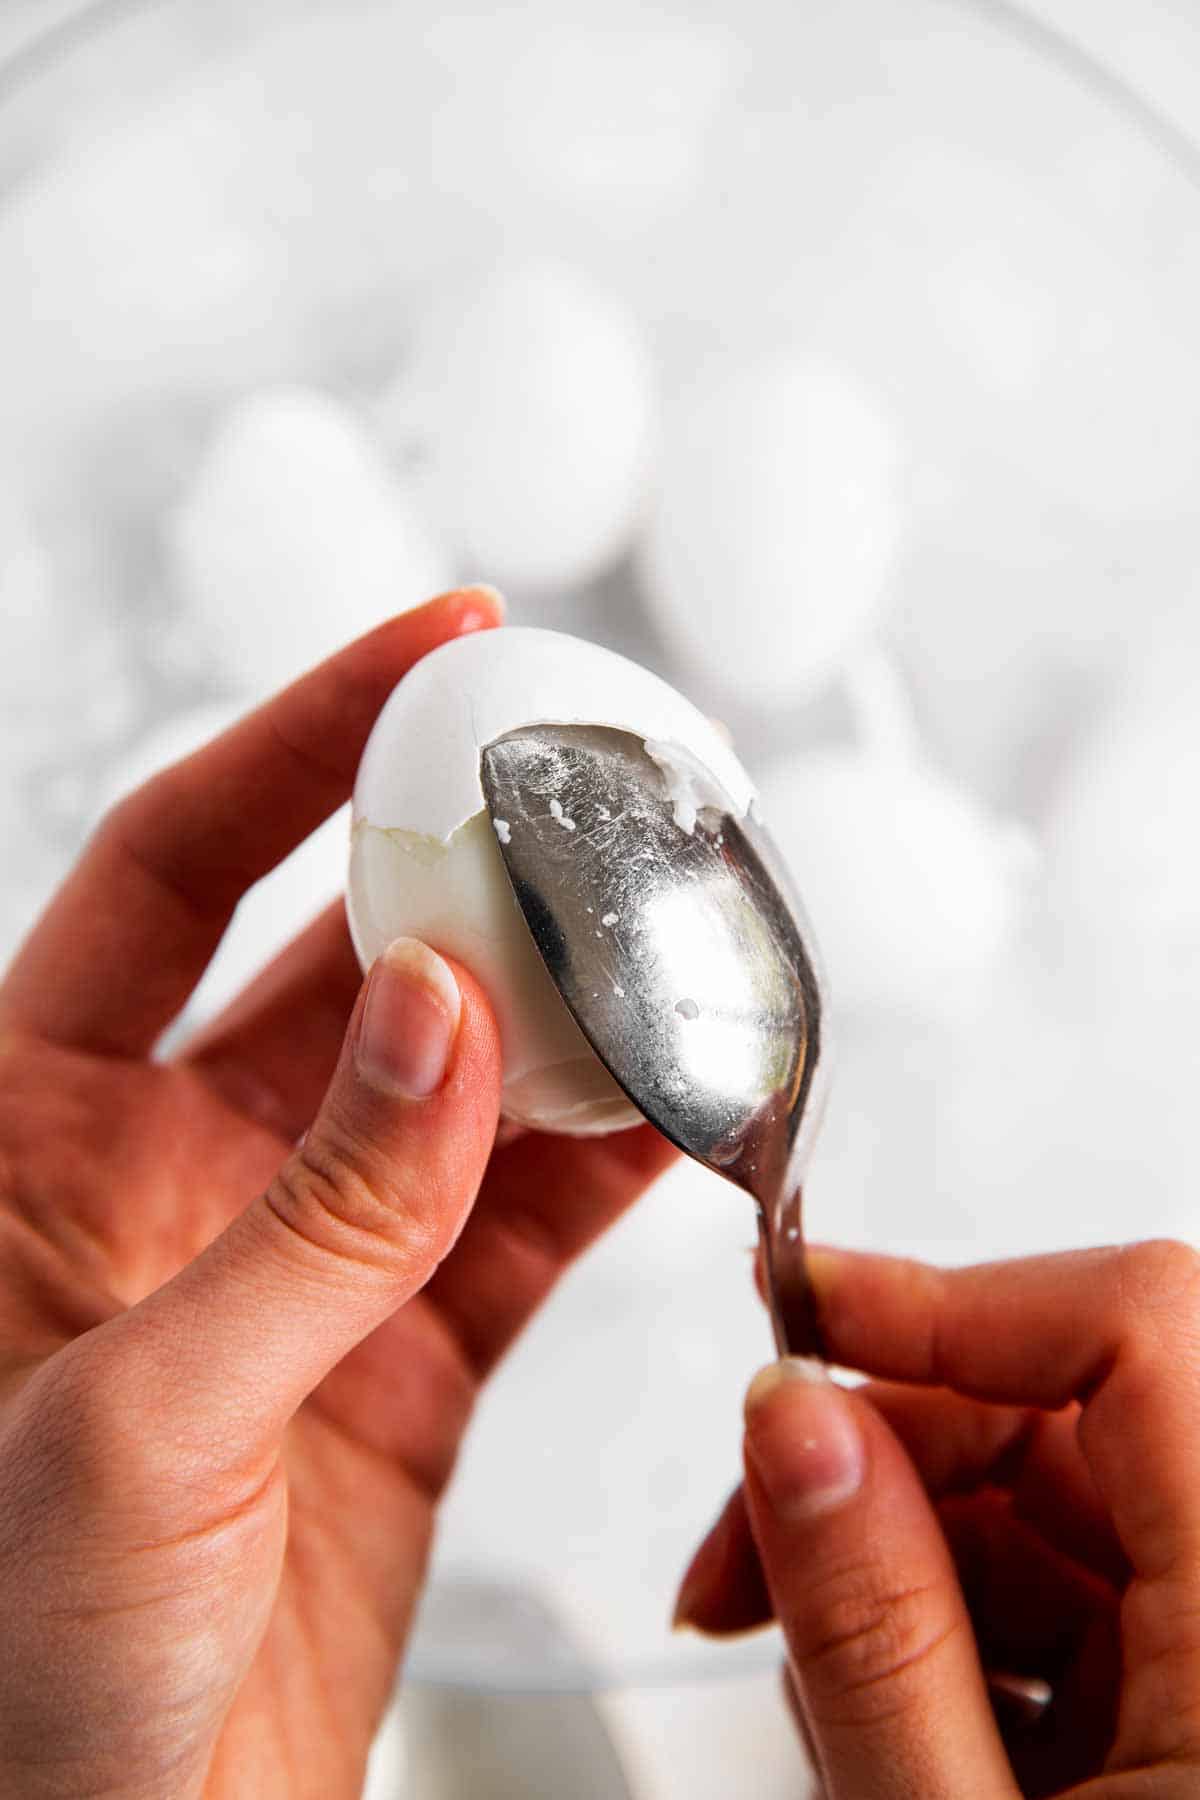
This can really help to release tricky parts and can help to release large parts of the shell without breaking up the egg underneath.
Recipe tips
- Make sure to handle the raw eggs very carefully and only bring the water to a boil over medium-high heat, not high heat. The shells crack easily before the egg whites are set, and you want to avoid this at all cost.
- If a shell does crack, some of the white will escape and cloud the water, The eggs are all still perfectly fine to eat (including the cracked one), but a cracked egg can seem quite rubbery in texture after it has been boiled. It isn’t spoilt, but it might not have the greatest taste/texture.
- Make sure to have a timer on hand before you start, in order to accurately time how long your eggs sit in the hot water.
- If you are unsure about the exact cooking time, add one or two additional eggs. Peel just one and slice it apart to see if the yolk has set to your liking before peeling the rest. If they haven’t yet set to your liking, return them to the hot water, bring to a boil again and then allow to sit in the water for a little longer.

Storage tips
Once the eggs have been cooled in the ice water, either peel and use them or dry them off with paper towels and refrigerate them immediately for up to 5 days.
I highly recommend storing the eggs in their shells, unpeeled. They keep better and stay fresh. Only peel them right before you’re ready to use them.
How to use hard boiled eggs
Hard boiled eggs are great to keep on hand in the fridge for quick snacks. But they are also great to make various dishes – some of our favorites are a classic egg salad (or a Greek yogurt egg salad or avocado egg salad for a lighter option) or deviled eggs.
I love them in a potato salad or to bulk up a macaroni salad – or simply with homemade mayonnaise and a salad for lunch (my favorites are a roasted beet salad or a tomato, cucumber and avocado salad).
PS If you try this recipe, please leave a review in the comment section and add a star rating in the recipe card – I appreciate your feedback! Follow along on Pinterest, Facebook or Instagram.
Hard Boiled Eggs
Recipe details
Ingredients
- 1 dozen eggs
- 1 cup ice
Instructions
- Gently place eggs in a large pot. Fill pot with cold water until eggs are covered by 1 inch.
- Place pot over medium-high heat and bring to a rolling boil.
- Switch off heat (if using a stove that doesn't retain heat well (eg induction), simmer on lowest heat setting for 1 minute before switching off) cover pot with a lid and let eggs sit on switched off burner for 6-16 minutes.6 minutes yield egg with fully cooked white and partly cooked yolk, with runny center.8 minutes yield egg with fully cooked white and yammy yolk center.12 minutes yield egg with fully cooked white, fully set yolk but "fudgy" center.16 minutes yield egg with fully cooked white and fully cooked yolk.
- While eggs are sitting, place ice in a large bowl and cover with 4-6 cups cold water.
- Once time for eggs is up, remove from hot water and immediately transfer to ice bath. Allow too sit in there for 5-10 minutes before removing to either store in shells, or to peel.
Notes
Ingredient notes
- Eggs: I used large eggs, each weighing about 2oz. If you use smaller or larger eggs, you will need to adjust the cooking time. The following are estimates I have figured out for myself over the years, but depending on your exact egg size, you may need to cook a “test egg” to see how much exactly you need to alter the timing.
- 1 extra minute for extra-large (about 2.25oz per egg)
- 1.5 – 2 extra minutes for jumbo (about 2.5oz per egg)
- 1 minute less for medium (about 1.75oz per egg)
- 1.5 minutes less for small (about 1.5oz per egg)
- Ice water: I highly recommend making a bowl filled with actual ice cubes and cold water to cool the eggs; but if ice is unavailable, just use the coldest water from the tap and chill it in the fridge as the eggs are cooking.
Recipe tips
- Make sure to handle the raw eggs very carefully and only bring the water to a boil over medium-high heat, not high heat. The shells crack easily before the egg whites are set, and you want to avoid this at all cost.
- If a shell does crack, some of the white will escape and cloud the water, The eggs are all still perfectly fine to eat (including the cracked one), but a cracked egg can seem quite rubbery in texture after it has been boiled. It isn’t spoilt, but it might not have the greatest taste/texture.
- Make sure to have a timer on hand before you start, in order to accurately time how long your eggs sit in the hot water.
- If you are unsure about the exact cooking time, add one or two additional eggs. Peel just one and slice it apart to see if the yolk has set to your liking before peeling the rest. If they haven’t yet set to your liking, return them to the hot water, bring to a boil again and then allow to sit in the water for a little longer.


Comments
No Comments