• Skip to primary navigation
  • Skip to main content
  • Skip to primary sidebar
  • Skip to footer

Savory Nothings logo

  • Recipe Index
    • Easy Dinner Recipes
      • Slow Cooker
      • One Pot Meals
      • Quick Meals
      • Instant Pot
    • Side Dishes
    • Breakfast
    • Dessert
    • Small Meals
  • Dinner Ideas
  • ☀️Summer Recipes☀️
  • About
menu icon
go to homepage
subscribe
search icon
Homepage link
  • Recipes
  • Dinner Ideas
  • Holidays & Occasions
  • About
  • Summer Recipes ☀️
×
Home / Recipes / Baking / Easy Homemade Bread

Easy Homemade Bread

3 hours hrs 45 minutes mins
| Leave a Comment |
4.75 from 4 votes
Jump to Recipe 05/22/20 | Updated: 01/16/24 | by Nora
Homemade Bread Image Pin

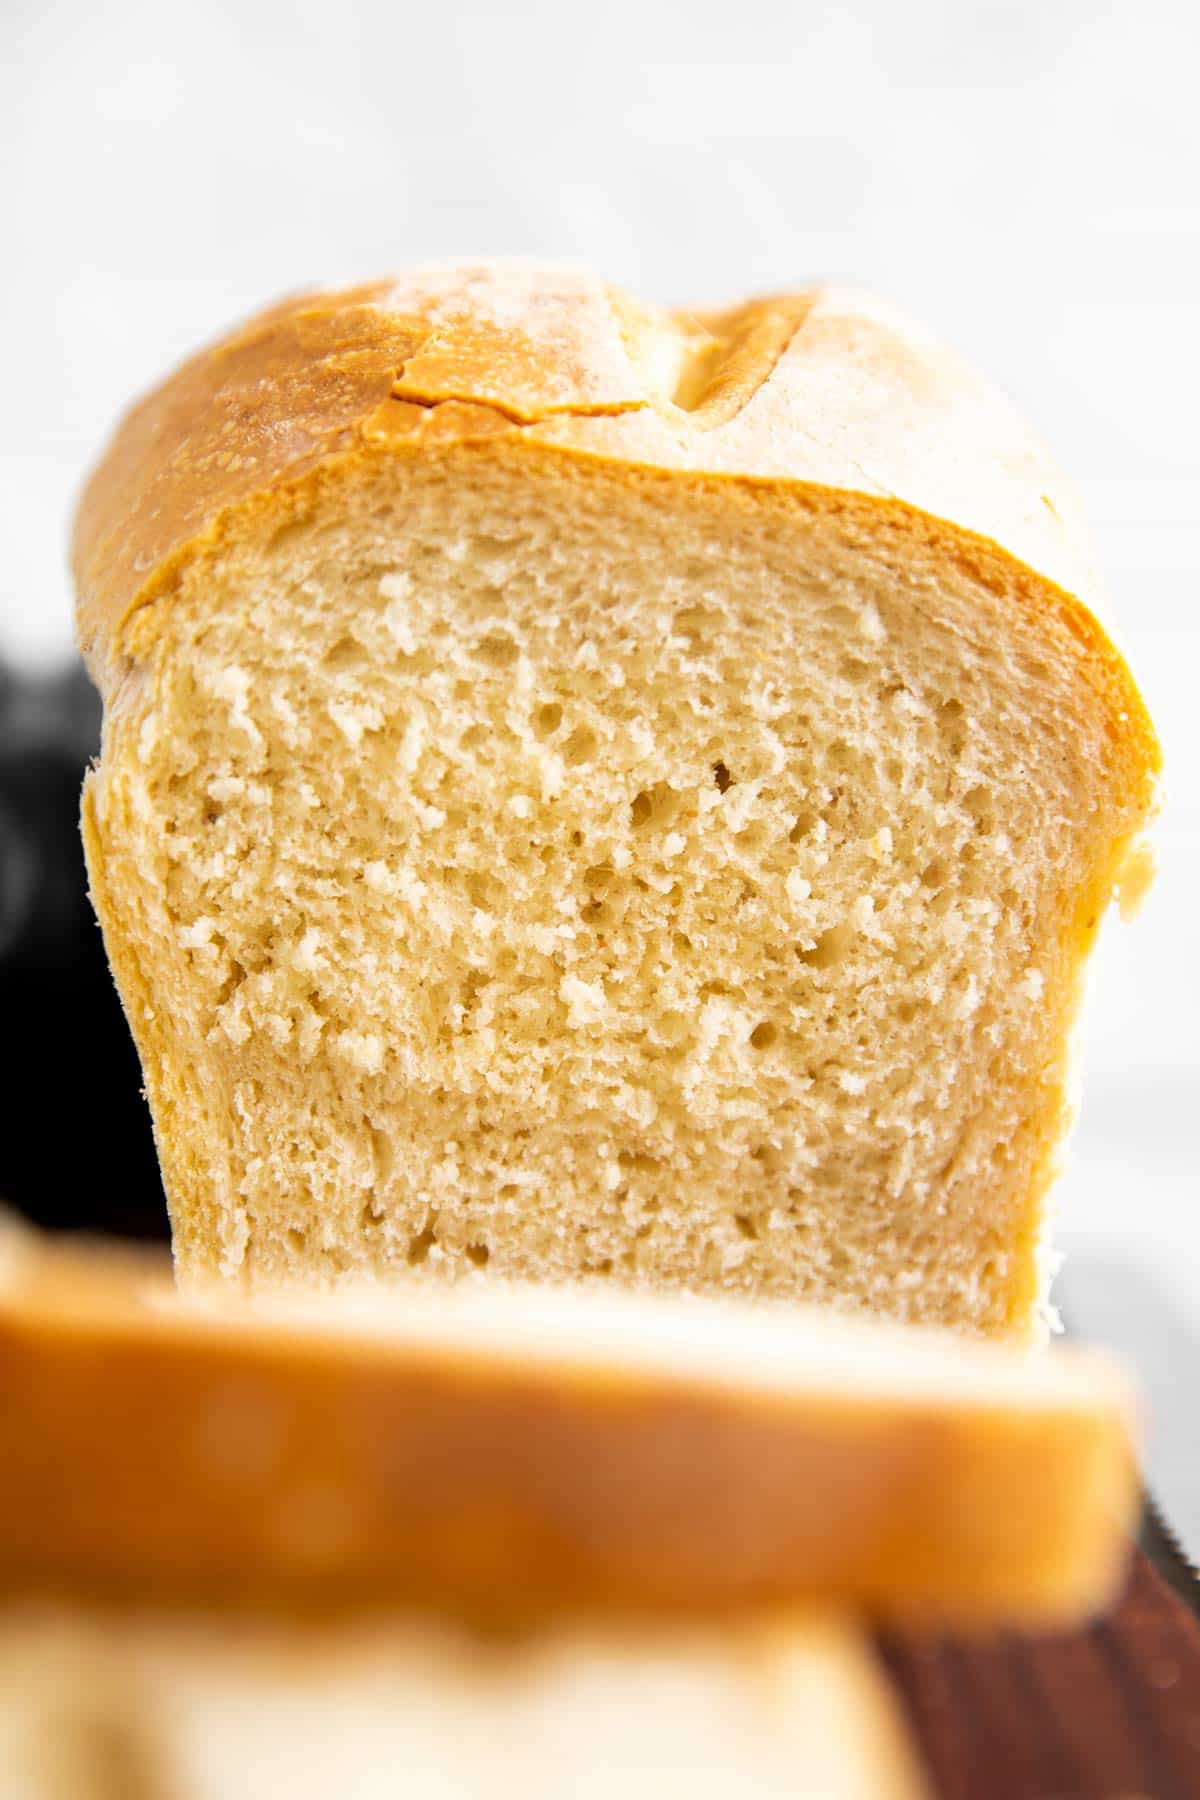
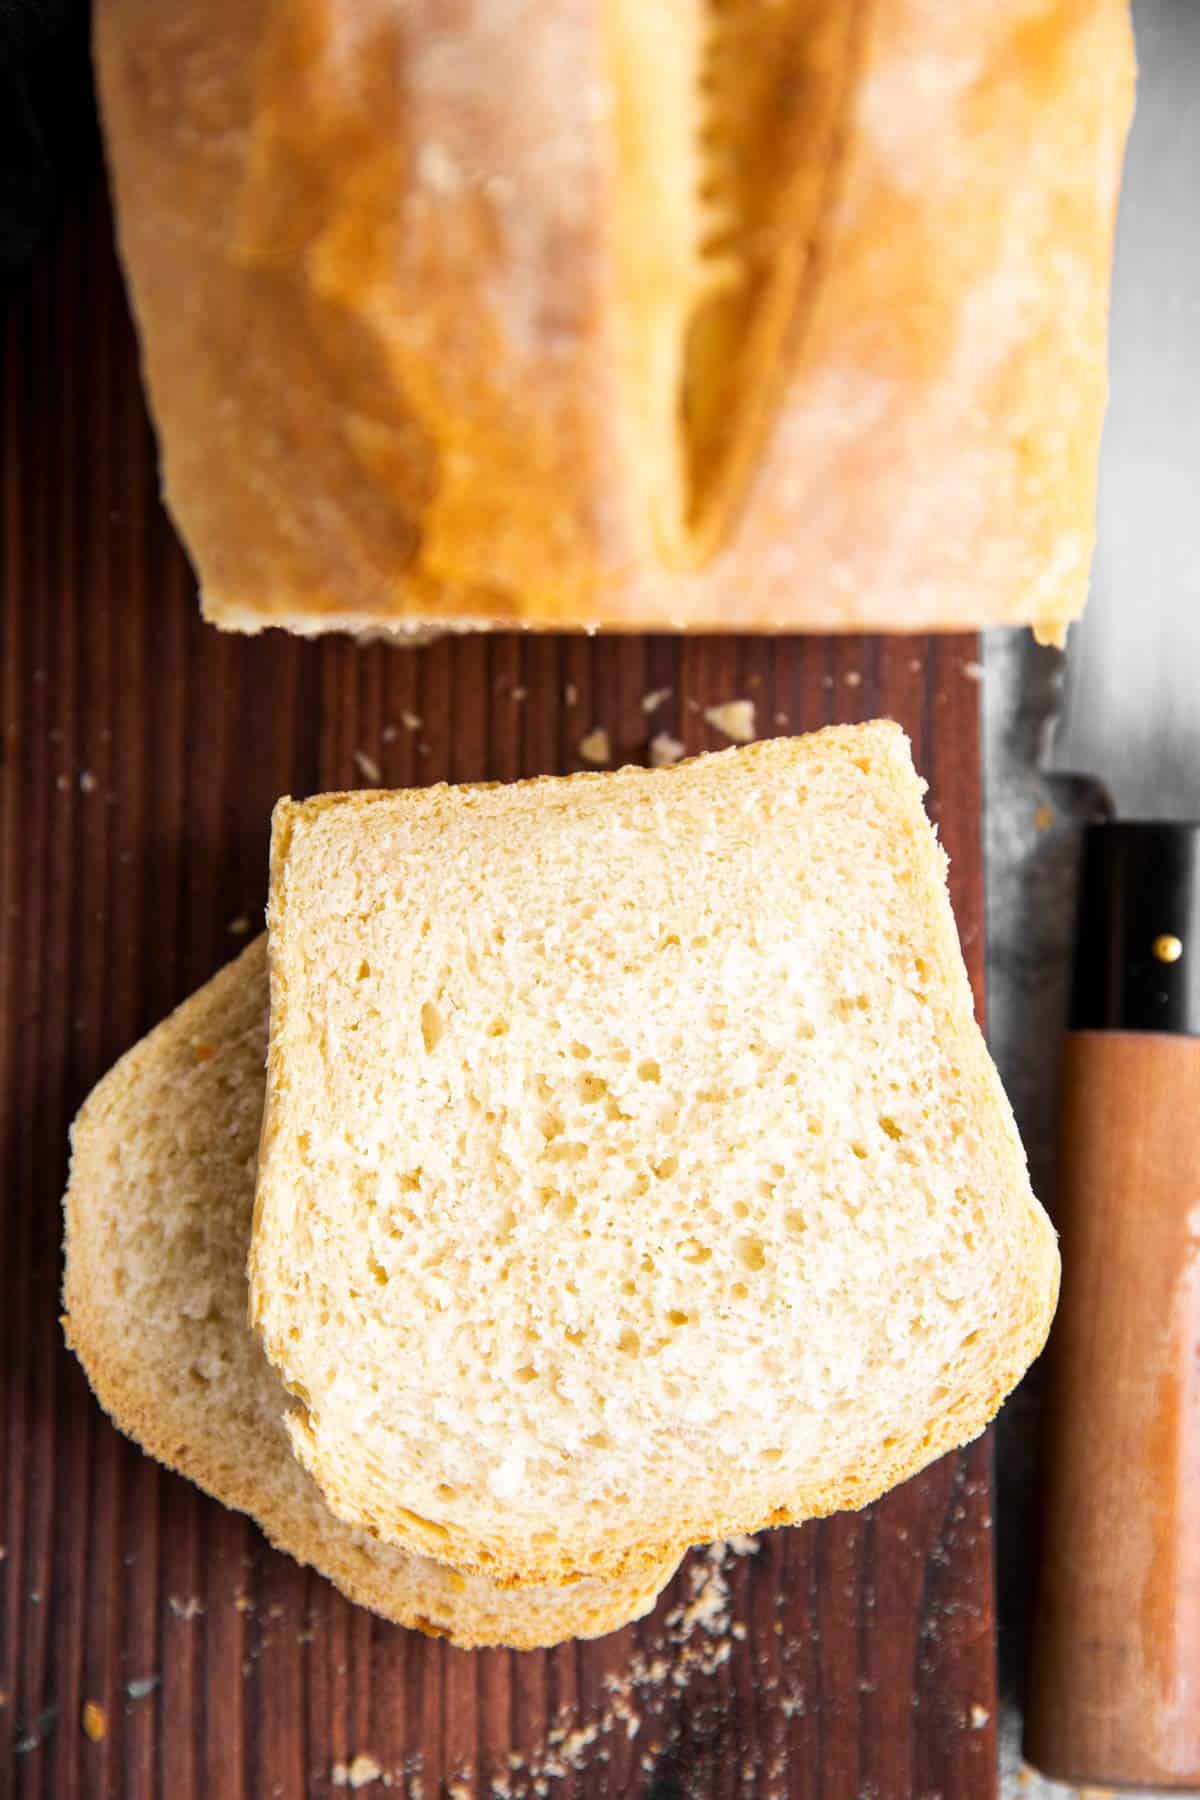
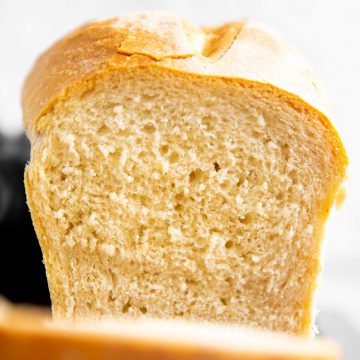
True story… We bake all of our bread at home, and this one is our go-to, no time for anything complicated recipe. It yields a fluffy, crusty, wonderfully flavourful white bread. It’s easy to bake in a loaf pan, so no need to worry about shaping a bread!

frontal view on sliced loaf of bread

Homemade white bread

I’m a complete and utter bread snob and 100% prefer homemade over store-bought! Be it for dinner rolls on a special occasion (click here for my dinner roll recipe) or our daily bread: I make my husband bake it for me ?

This one is his go-to loaf, the one he bakes pretty much weekly. It’s light and soft and fluffy – absolute perfection. My friend just baked it the other day, sent me a pic and told me it’s the best bread she’s ever made!

Ingredients you’ll need

Here is an overview of the ingredients in the recipe (great to use as a visual grocery list at the store!). Jump to Recipe for quantities.
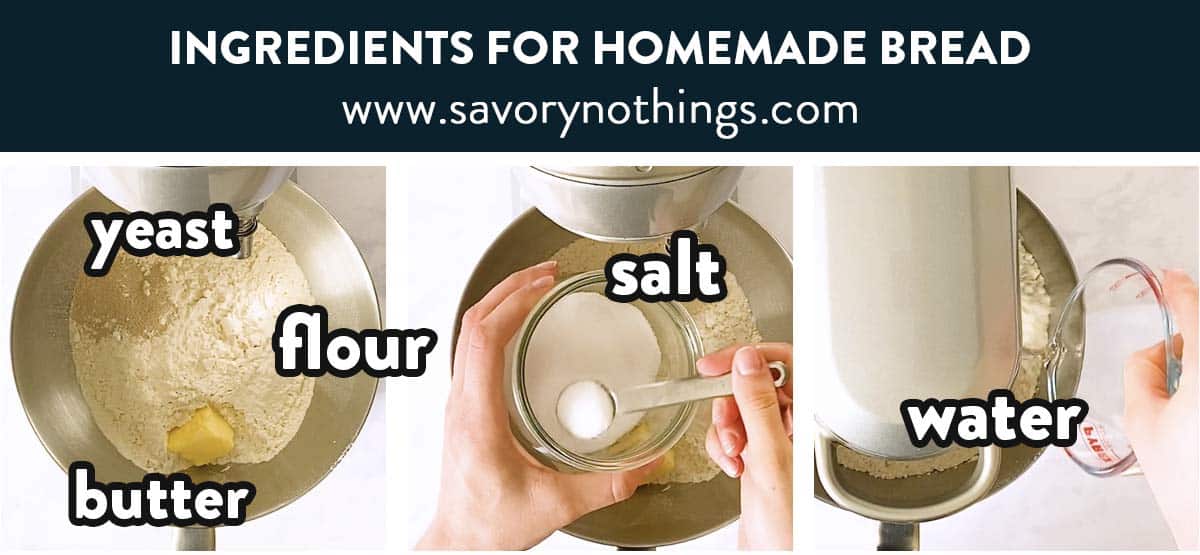
photo collage for ingredients to make homemade bread
Ingredients for homemade bread: Flour, yeast, butter, salt and water.

Ingredient notes

  • yeast: the type of yeast you use will greatly influence how fast your bread rises; e.g. instant yeast will be very fast while organic yeast will be the slowest.
  • butter: if you don’t have any/want the bread to be vegan and dairy free, you can substitute oil. I love the bread made with olive oil!
  • water: There is no need to use warm water here! A lot of people use water that’s too hot – this kills the yeast. It’s safer to give the dough more time to rest vs accelerating the yeast with warm water. Cool or tepid is fine; do not use water over 110°F – it would destroy the yeast.
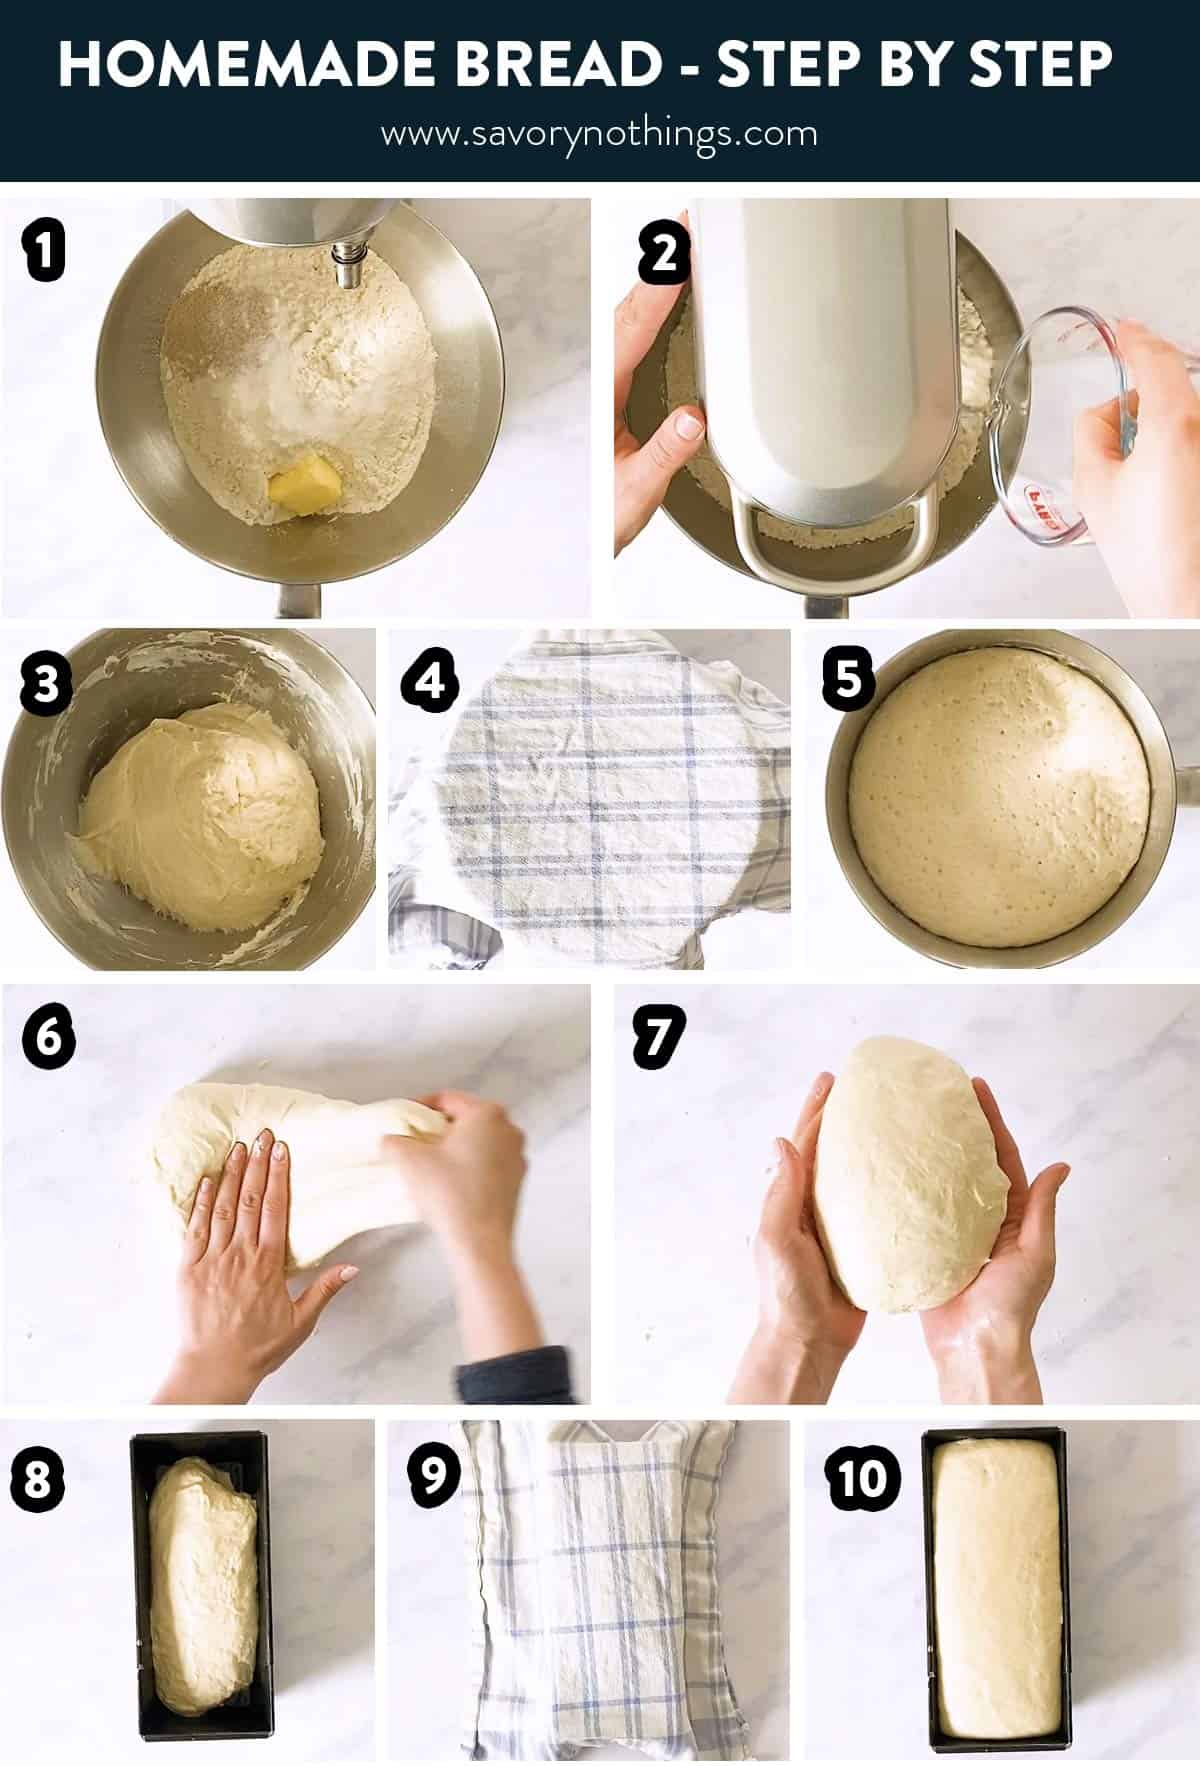
Step by step photos

photo collage to show the steps in making homemade bread
Steps to make homemade bread: Knead bread ingredients in mixer, set aside covered to double in size, then punch down and shape, place in loaf pan and rest again until bread reaches top of pan.

Tips and tricks

  • Knead the dough long enough; it needs 5-10 minutes in your stand mixer (depending on the strength of your mixer’s motor). If you want a visual for what it should look like, click here for my Guide to Baking with Yeast.
  • Use less yeast: If you want to use less yeast, you absolutely can. In fact, my husband pretty much always bakes the bread with half (or even a quarter) of the yeast the recipe calls for these days (to save yeast – it’s hard to come by right now). It actually gives the bread a nicer flavor, but the dough obviously needs to rest for much longer. But if you have the time and want to use less yeast, it works.
  • Give it time! I often get comments on my yeast recipes how people threw out the dough after waiting for 30 minutes. 30 minutes is nothing to yeast, my friends!

On resting time

The time the dough needs to rest and the yeast to grow depends on so many factors, it’s hard to put an exact time on it. Altitude makes a big difference (higher altitude = shorter resting time; if you’re at high altitude I actually recommend cutting the yeast in half for better flavor).

I outline all the possible factors I know in my yeast dough tutorial, click here to read it.

As a rule of thumb, when your dough is big and puffy and doubled in size – it’s ready to be shaped. When the shaped dough reaches the top of your pan – it’s ready to bake.

Bread making FAQs

Do I need bread flour to make bread?

No! You can absolutely make my bread recipe with regular all-purpose flour. If you want to use bread flour, add a few more tablespoons of water. The higher gluten content of bread flour makes it a “thirstier” dough.Why is my homemade bread so heavy?

Why is my homemade bread so heavy?

If you don’t knead you bread long enough, your bread can turn out heavy and dense.

Can you over prove bread?

Yes! You can. Over-proofed bread loses its stability and won’t spring back when poked – it will feel deflated. To rescue the bread, you’ll need to punch the dough down again, re-knead and re-proof for a little while.

What happens if you don’t put enough yeast in bread?

You’ll have to wait for longer! In return, you’ll also have a more flavourful bread, though. See my tips and tricks above where I outline how you can make my bread recipe with less yeast and a longer wait time.

Refer to my yeast tutorial here whenever you need help when baking with yeast!

top down view on homemade bread

Storage

The bread keeps well at room temperature wrapped in a clean tea towel for 1-2 days.

Freezer instructions

I recommend freezing the bread sliced, it’s easier to defrost. Separate slices with wax paper and place in a freezer bag. Label with the name and use-by date (up to 3 months) and freeze.Defrost single slices on a rack on the counter. Toast before serving for best flavor.

Serving ideas

This is a great all-round bread! Serve it with soup, as a sandwich, with butter and jam… The possibilities are endless!

Here some ideas for spreads and sandwiches:

  • small glass jar with homemade raspberry jam, fresh raspberries and raspberry leaves
    Freezer Raspberry Jam
  • overhead view of cinnamon butter in mason jar on wooden board
    Whipped Cinnamon Honey Butter
  • female hands pulling apart a grilled cheese sandwich
    Mushroom Grilled Cheese
  • greek yogurt egg salad sandwich on a platter
    Greek Yogurt Egg Salad

Watch the recipe video


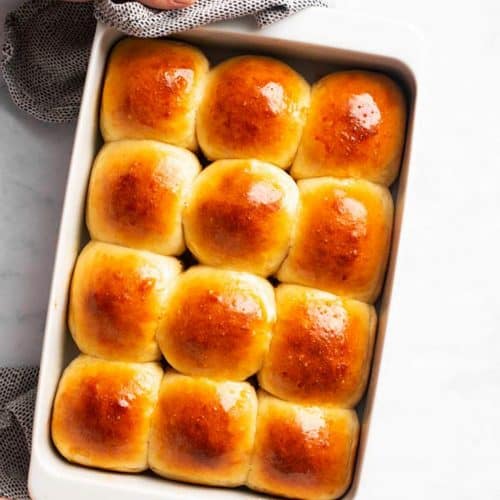
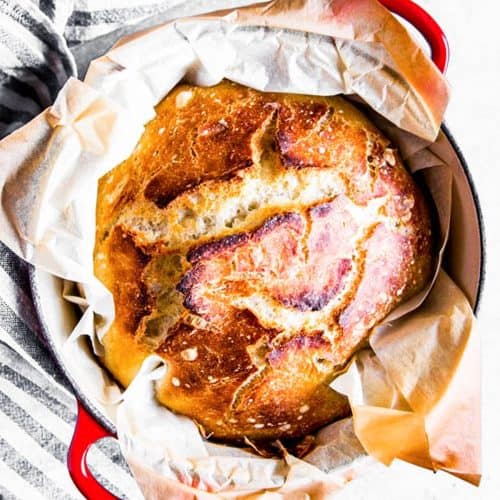
Truly our favorite bread! We switch it up sometimes by using half whole wheat flour, using olive oil instead of butter or by baking it in a round pan instead. On the weekends we often make a simple braided bread (click here for the recipe), it’s similar but has more butter and uses milk.

If you’re out of yeast – try a Soda Bread! What can I say, we’re a bread-y family.

top down view on two slices of bread next to an unsliced loaf

More bread recipes

  • female hands holding a white pan filled with dinner rolls
    Easy Homemade Dinner Rolls
  • Holding a sliced homemade French bread.
    No Knead Homemade French Bread!!
  • baked bread in red Dutch oven
    The Only No Knead Bread Recipe You’ll Ever Need
  • cinnamon roll sitting on white plate
    The Best Homemade Cinnamon Rolls

PS If you try this recipe, please leave a review in the comment section and add a star rating in the recipe card – I appreciate your feedback! Follow along on Pinterest, Facebook or Instagram.

Printable recipe

Printable Recipe Card
frontal view on sliced loaf of bread
Save Recipe Saved!

Easy Homemade Bread

Learn how to make your own bread – it's so easy, and this recipe turns out perfectly soft and fluffy with a great crust every time.
Recipe by Nora from Savory Nothings
made it? tap the stars to add your rating!
4.75 from 4 votes
Print Add Review

Recipe details

Prep 15 minutes mins
Cook 30 minutes mins
Resting 3 hours hrs
Total 3 hours hrs 45 minutes mins
Servings 10 slices
Difficulty Easy

Equipment

  • Stand Mixer
  • Loaf Pan

Ingredients
 

  • 4 cups all-purpose flour
  • 1 tablespoon active dried yeast
  • 2 tablespoons butter
  • 1 ½ teaspoons salt
  • 1 ¼ cups water

Instructions
 

  • Add flour, yeast, butter and salt to the bowl of a stand mixer fitted with the hook attachment.
  • Start the mixer on low, then slowly pour the water into the bowl. Knead on medium speed until dough is smooth, about 5-10 minutes.
  • Gather dough into a ball, then cover with a clean tea towel and let sit at room temperature until puffy and doubled in size (1-2 hours, depending on room temperature, altitude and humidity).
  • Turn dough out on clean, lightly floured countertop. Knead a few times, then shape into a log. Place in a lightly oiled 4×8 inch (OR 5×9 inch – bread will be slightly flatter) loaf pan. Cover with a clean tea towel and let sit at room temperature until puffed up to the top of the pan, about 30-60 minutes.
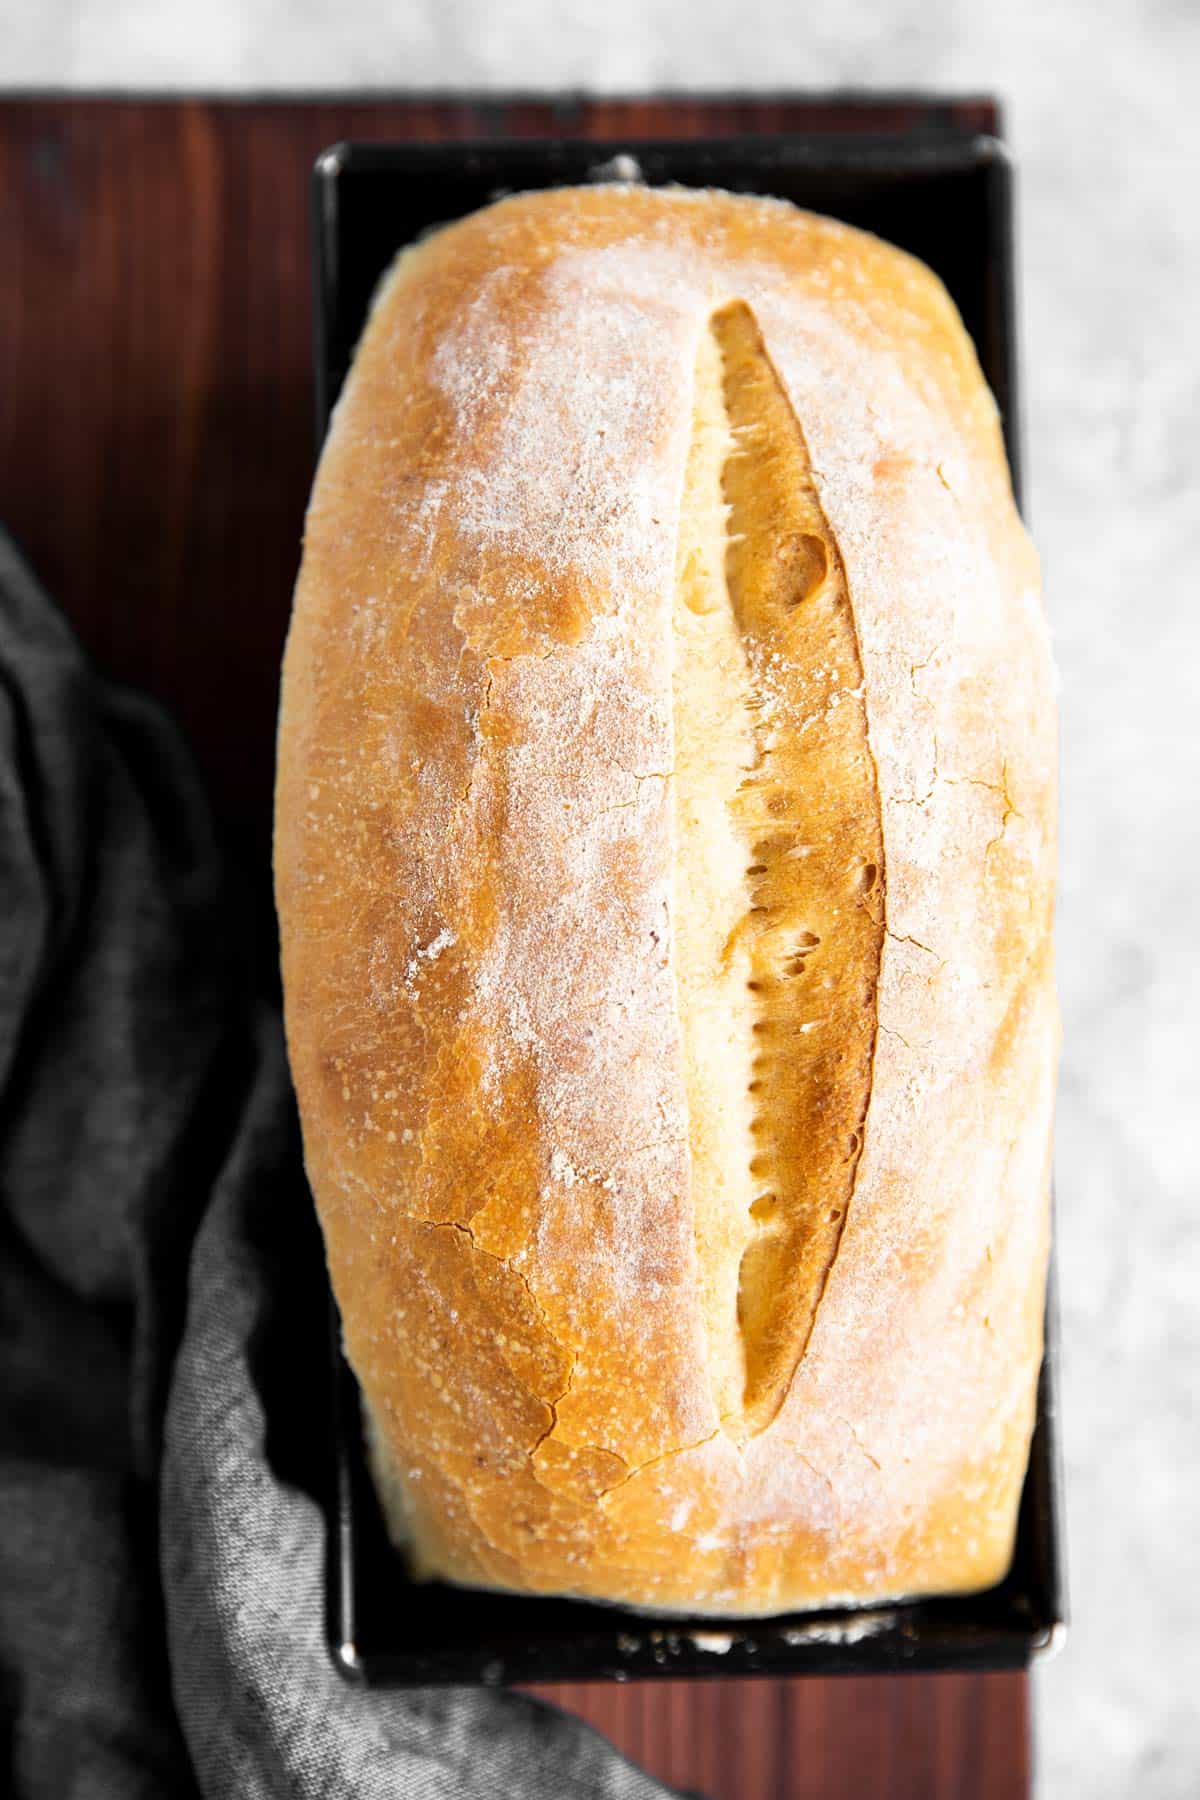
  • To bake, place a small-medium oven-safe dish filled with water in the oven. Heat the oven to 440°F. Slash the bread (kitchen shears work great if you're new to making insicions on bread), then bake around 30 minutes, until bread is golden. Turn bread out of the pan and place on a cooling rack to cool completely.

Notes

Baking tips

Yeast dough tutorial: If you want an in-depth guide with photos on general baking with yeast, I have a comprehensive tutorial here.
When to stop kneading: If you’re unsure if your dough is done kneading, try the windowpane test: Pull apart a small section of the dough. If you can stretch it paper-thin (almost see through) without it ripping apart, your dough is done kneading! If it rips easily, knead a little longer (photo in tutorial I linked above).
Water temperature: There is no need to use warm water here! A lot of people use water that’s too hot – this kills the yeast. It’s safer to give the dough more time to rest vs accelerating the yeast with warm water.
Use less yeast: If you want to use less yeast, you absolutely can. In fact, my husband pretty much always bakes the bread with half (or even a quarter) of the yeast the recipe calls for these days (to save yeast – it’s hard to come by right now). It actually gives the bread a nicer flavor, but the dough obviously needs to rest for much longer. But if you have the time and want to use less yeast, it works.
Rest time: The time the dough needs to rest and the yeast to grow depends on so many factors, it’s hard to put an exact time on it. Altitude makes a big difference (higher altitude = shorter resting time; if you’re at high altitude I actually recommend cutting the yeast in half for better flavor). I outline all the possible factors I know in the tutorial I linked above.
As a rule of thumb, when your dough is big and puffy and doubled in size – it’s ready to be shaped. When the shaped dough reaches the top of your pan – it’s ready to bake.

Ingredient notes

Flour: You can use half whole wheat, half white instead of all white. Use 1 extra tablespoon butter. Also, add more water as needed (1-4 tablespoons, depending on exact flour used and humidity).
Butter: Oil works just as well. We really love this recipe made with olive oil – makes for a more Mediterranean inspired bread.
Water: You can also use half milk, half water for a softer bread.

Storage

The bread keeps well at room temperature wrapped in a clean tea towel for 1-2 days.

Freezer instructions

I recommend freezing the bread sliced, it’s easier to defrost. Separate slices with wax paper and place in a freezer bag. Label with the name and use-by date (up to 3 months) and freeze.
Defrost single slices on a rack on the counter. Toast before serving for best flavor.

Nutrition

Serving: 1sliceCalories: 203kcalCarbohydrates: 38gProtein: 5gFat: 3gSaturated Fat: 2gCholesterol: 6mgSodium: 371mgPotassium: 57mgFiber: 1gSugar: 1gVitamin A: 70IUCalcium: 8mgIron: 2mg
Nutrition is an estimate.

More recipe information

Suitable for: Vegetarian
Course: Baking
Cuisine: Traditional

Nora Rusev from Savory Nothings
About Nora 
When I got married to my professional chef husband, I realized I had to step up my game in the kitchen. Now I share my favorite foolproof family recipes here on Savory Nothings: Chef-approved, kid-vetted and easy enough for everyday home cooks like you and me!   Learn more.

Reader Interactions

top down view on a skillet filled with beef and rice

< Previous Post

strawberry rhubarb crisp close up

Next Post >

Comments

No Comments

4.75 from 4 votes (4 ratings without comment)

Add a Review or Ask a Question Cancel reply

Your email address will not be published. Required fields are marked *

Made this recipe? Rate it:


Primary Sidebar

Nora Rusev from Savory Nothings

welcome to

logo for the Savory Nothings brand

Hi, I'm Nora! I wasn't always a good cook, but then I fell in love with a professional chef and learned my way around the kitchen. Now I share all my secrets to effortlessly great food here on my blog, bite-sized for home cooks just like me and you.

More about me →

Grilling & Potlucks🔥

  • dill pickle potato salad in bowl
    Dill Pickle Potato Salad
  • corn on the cob on platter
    Crock Pot Corn on the Cob
  • bow tie pasta salad with salami, vegetables, and cheese in colorful bowl
    Bow Tie Pasta Salad
  • grilled shrimp skewers on platter
    Marinated Grilled Shrimp Skewers

see all >

Popular

  • overhead close up view of fried chicken piece
    Crispy Oven Fried Chicken
  • overhead view of Italian meatballs and spaghetti on plate
    Easy Italian Meatballs
  • overhead close up view of beef stew in slow cooker
    Crock Pot Beef Stew
  • frontal view of shepherd's pie on white plate
    Homemade Shepherd’s Pie
  • overhead close up view of crock pot chicken tacos with toppings on wooden platter
    Southwestern Crockpot Chicken Tacos
  • overhead close up view of garlic parmesan oven fried chicken piece on black pan
    Garlic Parmesan Crispy Oven Fried Chicken
  • overhead view of three oven baked chicken breasts in white casserole dish
    Oven Baked Chicken Breast
  • overhead close up photo of chocolate chip baked oats
    TikTok Baked Oats: 6 Ways!

Trending on Pinterest

  • Balsamic Chicken Marinade
  • Swedish Meatballs
  • Mexican Beef and Rice Skillet
  • Instant Pot Pot Roast
  • Homemade Salisbury Steak
  • About
  • Contact

Footer

Footer

Follow Along


Recipes

Breakfast
Lunch
Dinner
Sides
Dessert
Appetizers

Instant Pot
Slow Cooker
One Pot
Casseroles
Ground Beef
Chicken

Featured On

different logos of publications Savory Nothings' content has been featured on

↑ back to top

About | Contact | Work with Us

Copyright Savory Nothings © 2025

Made with lots of love and spices ♥︎
PRIVACY POLICY | ACCESSIBILITY STATEMENT |
As an Amazon associate, I earn from qualifying purchases.

  • Facebook
  • Pinterest
  • Email
  • Mix

Rate This Recipe

Your vote:


Thank you for taking the time to review this recipe. I appreciate it! Your eMail will not be shared with anyone.

Let us know what you thought of this recipe:

This worked exactly as written, thanks!
My family loved this!
Thank you for sharing this recipe

Or write in your own words:

A rating is required
A name is required
An email is required

Recipe Ratings without Comment

Something went wrong. Please try again.