

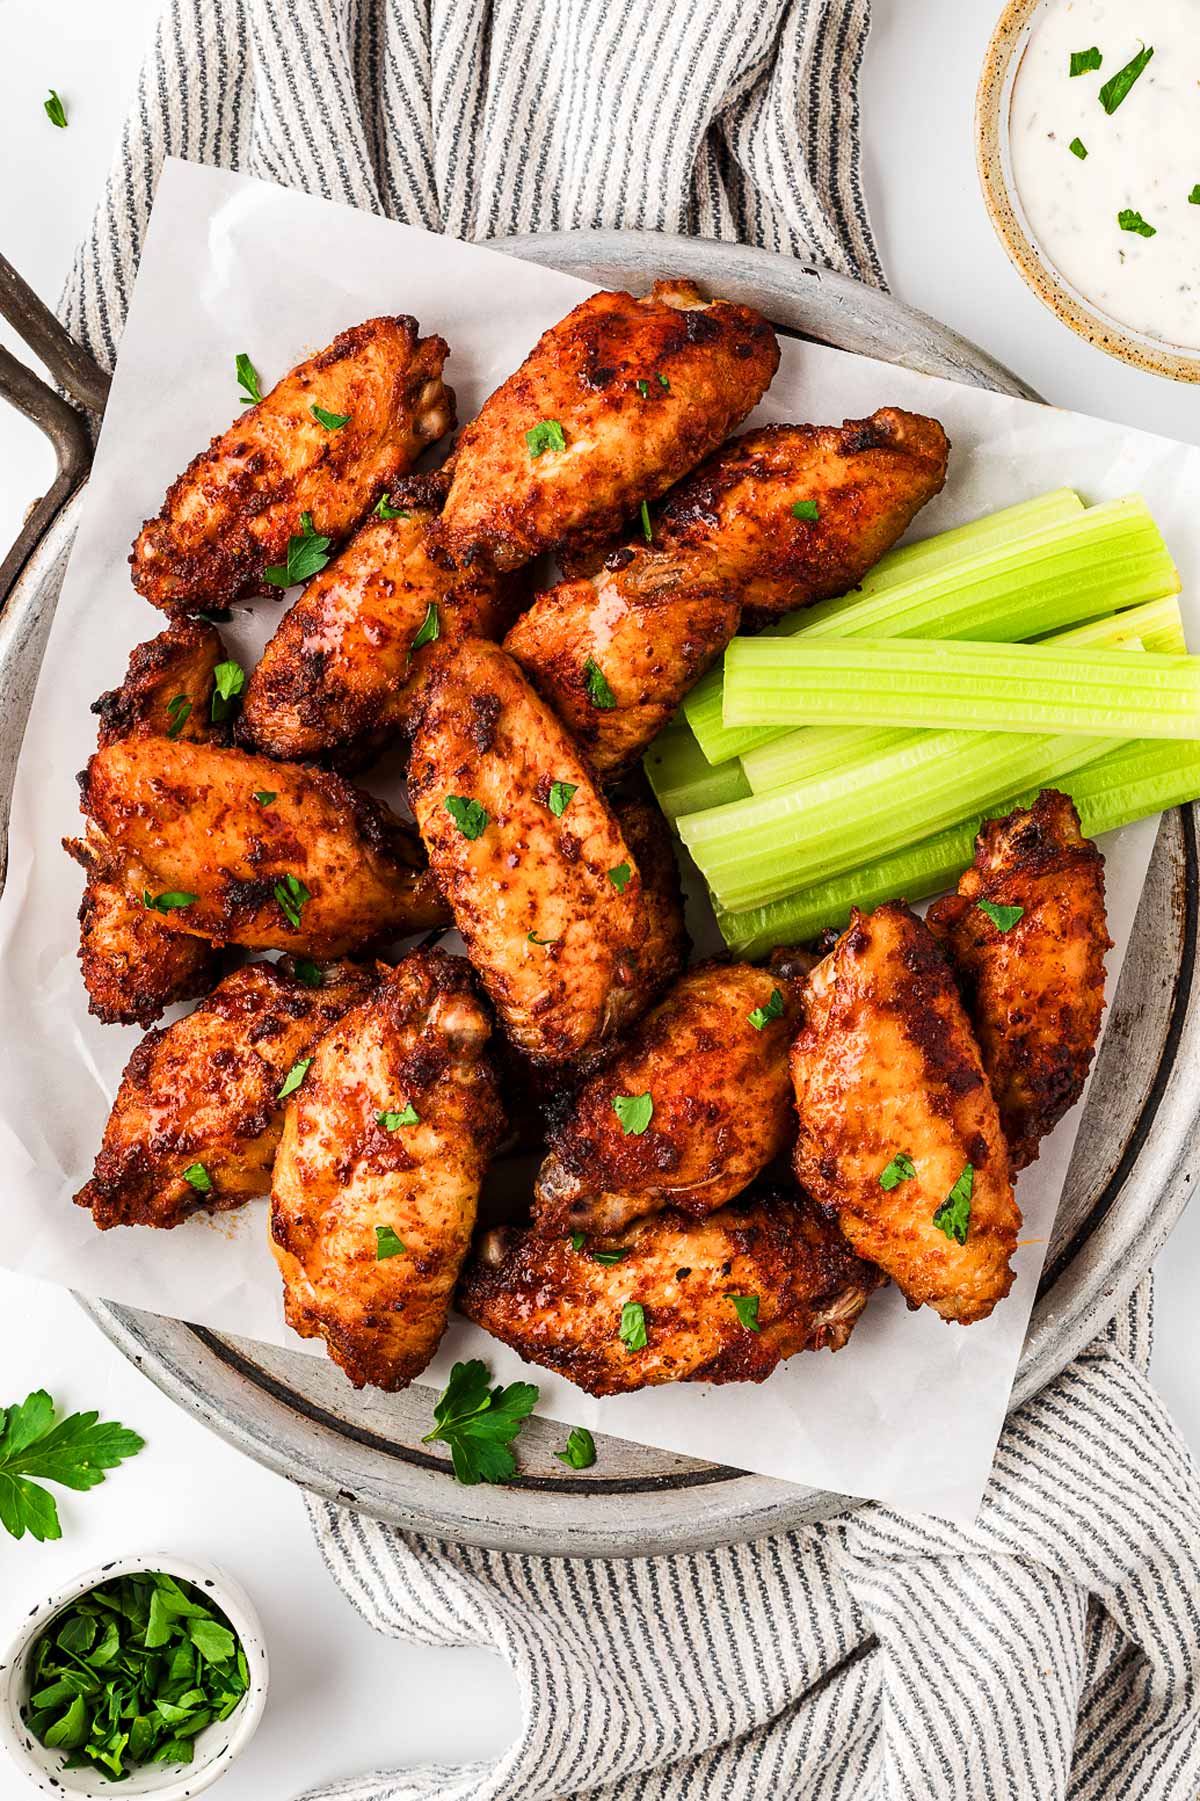
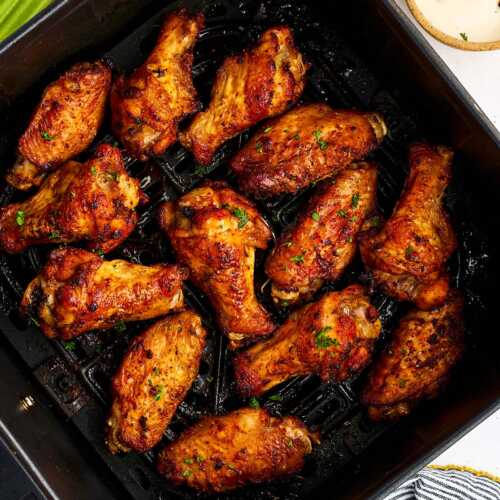
Crispy, flavorful, and ridiculously easy – these baked chicken wings are about to become your new go-to recipe! No deep frying, no complicated steps, just perfectly seasoned wings that come out golden brown and delicious every single time.
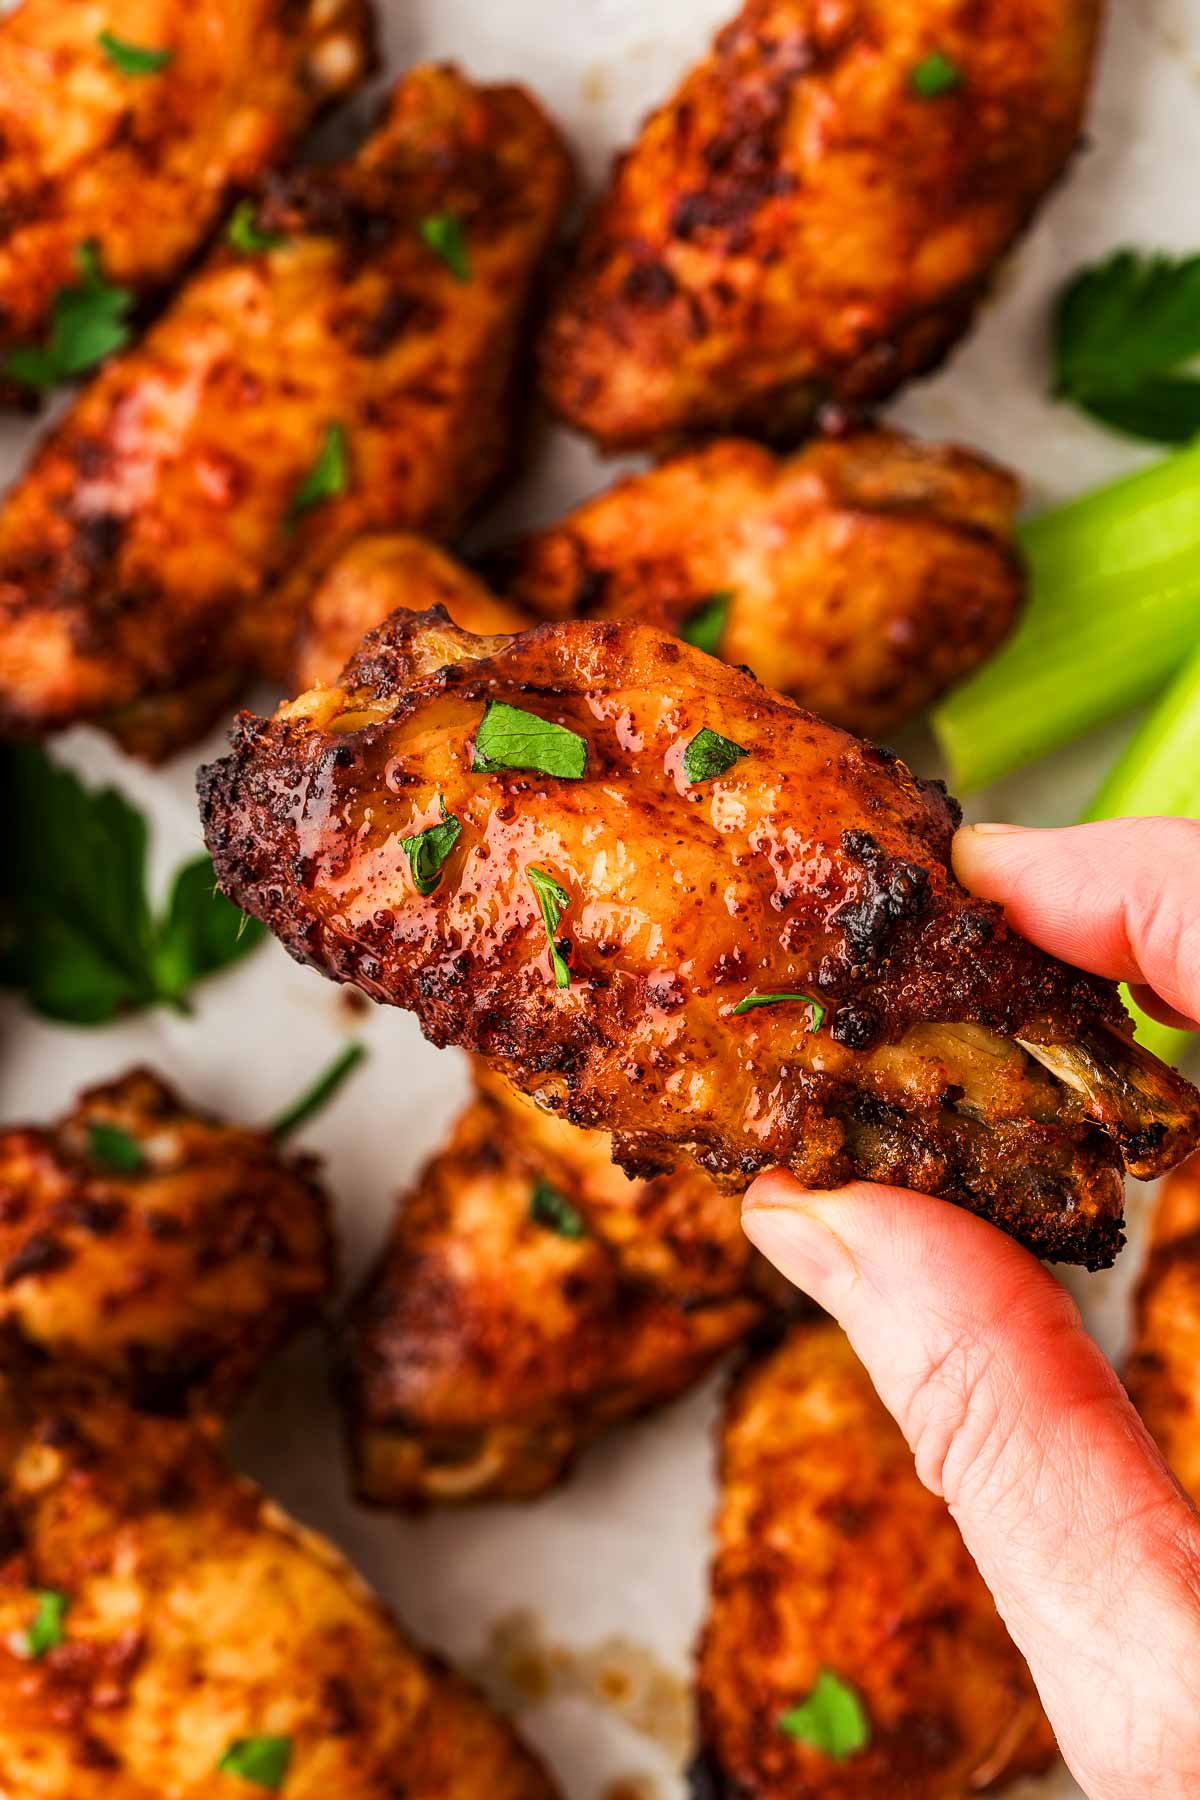
Whether it’s game day, a weeknight dinner, or just a “because wings are amazing” kind of night, this recipe delivers BIG on taste with minimal effort!
Why this recipe is the best
These baked wings are crispy, packed with flavor, and unbelievably easy – no deep frying, no mess, just pure wing perfection. Here’s why you’re going to love them:
- Crispy without frying – Thanks to a simple seasoning blend and the right oven method, these wings crisp up beautifully without a single drop of frying oil.
- Insanely flavorful – The mix of brown sugar, paprika, garlic, and just a hint of spice gives these wings an addictively delicious balance of sweet, smoky, and savory.
- Minimal effort, maximum results – No flipping, no babysitting, just toss them in the oven and let them work their magic while you handle literally anything else.
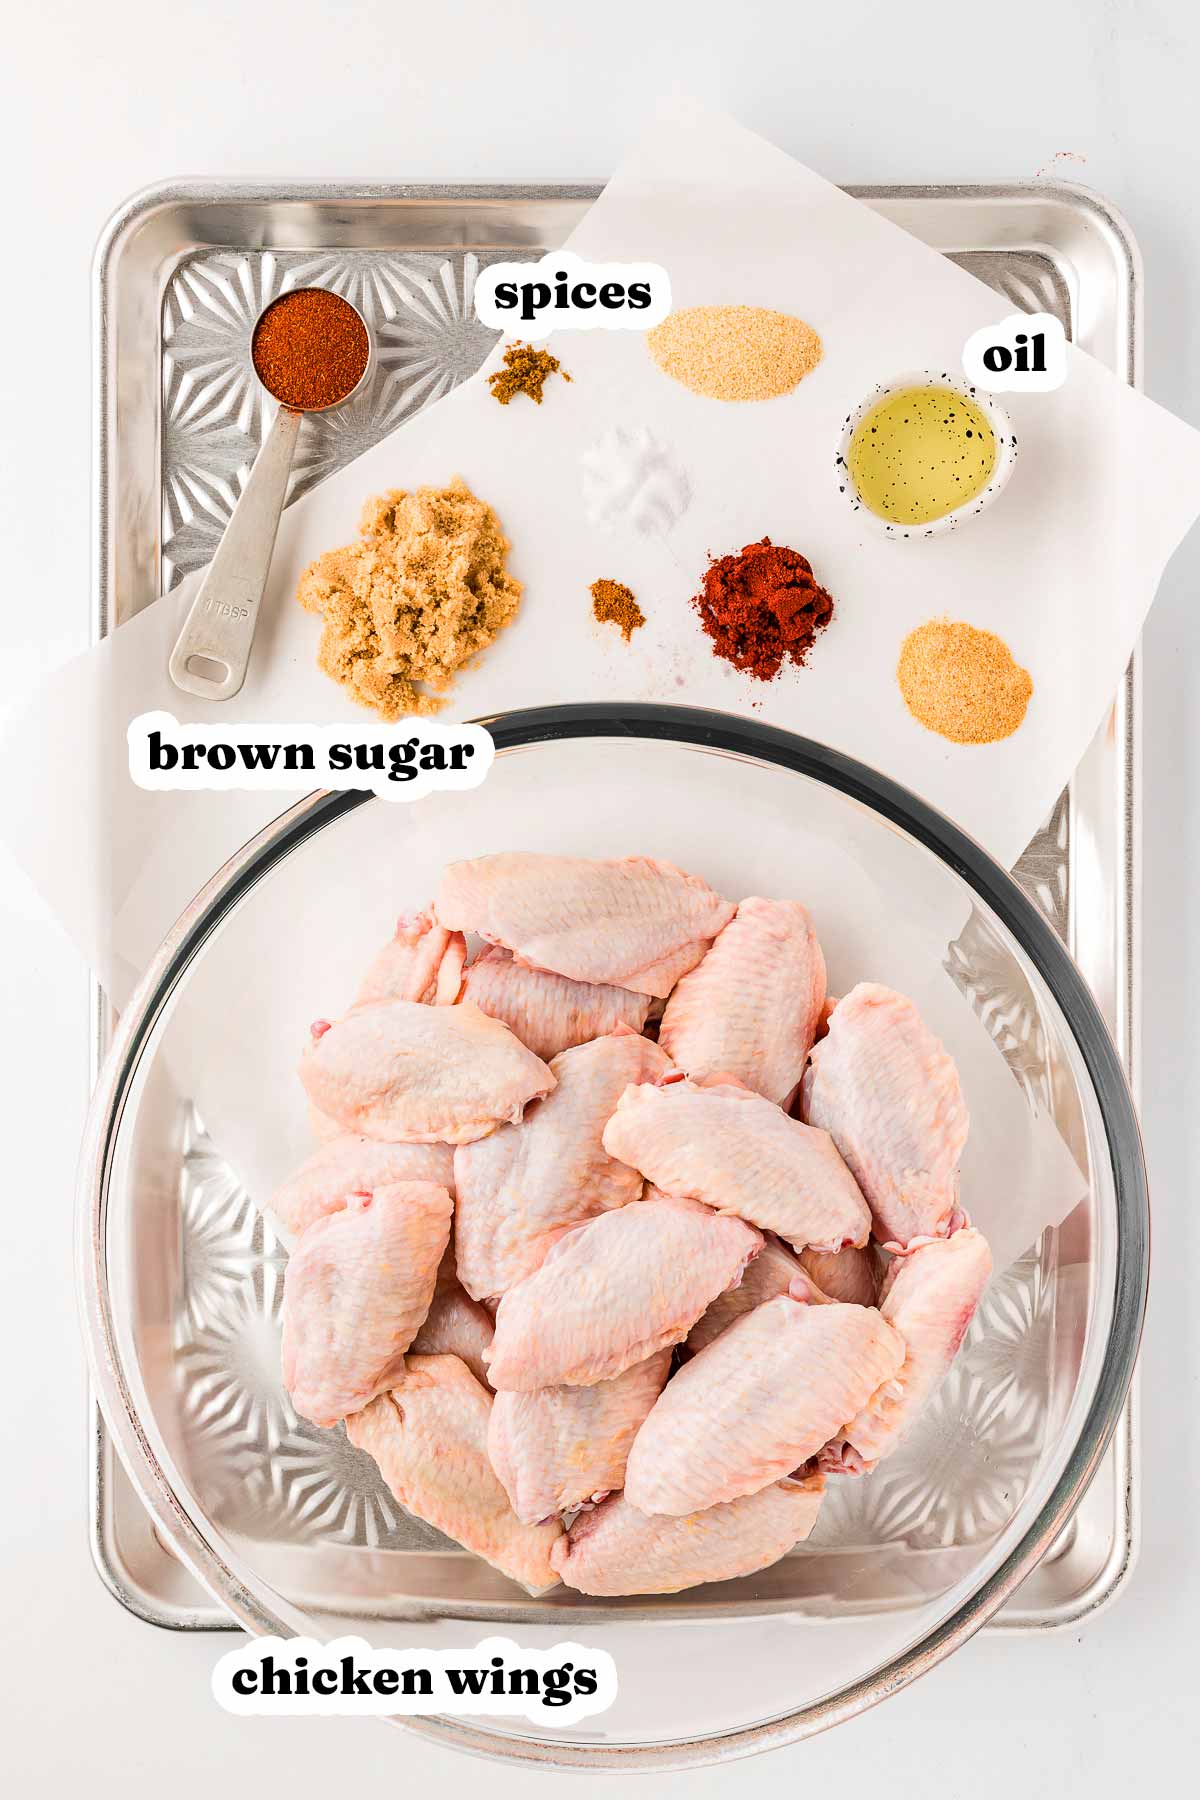
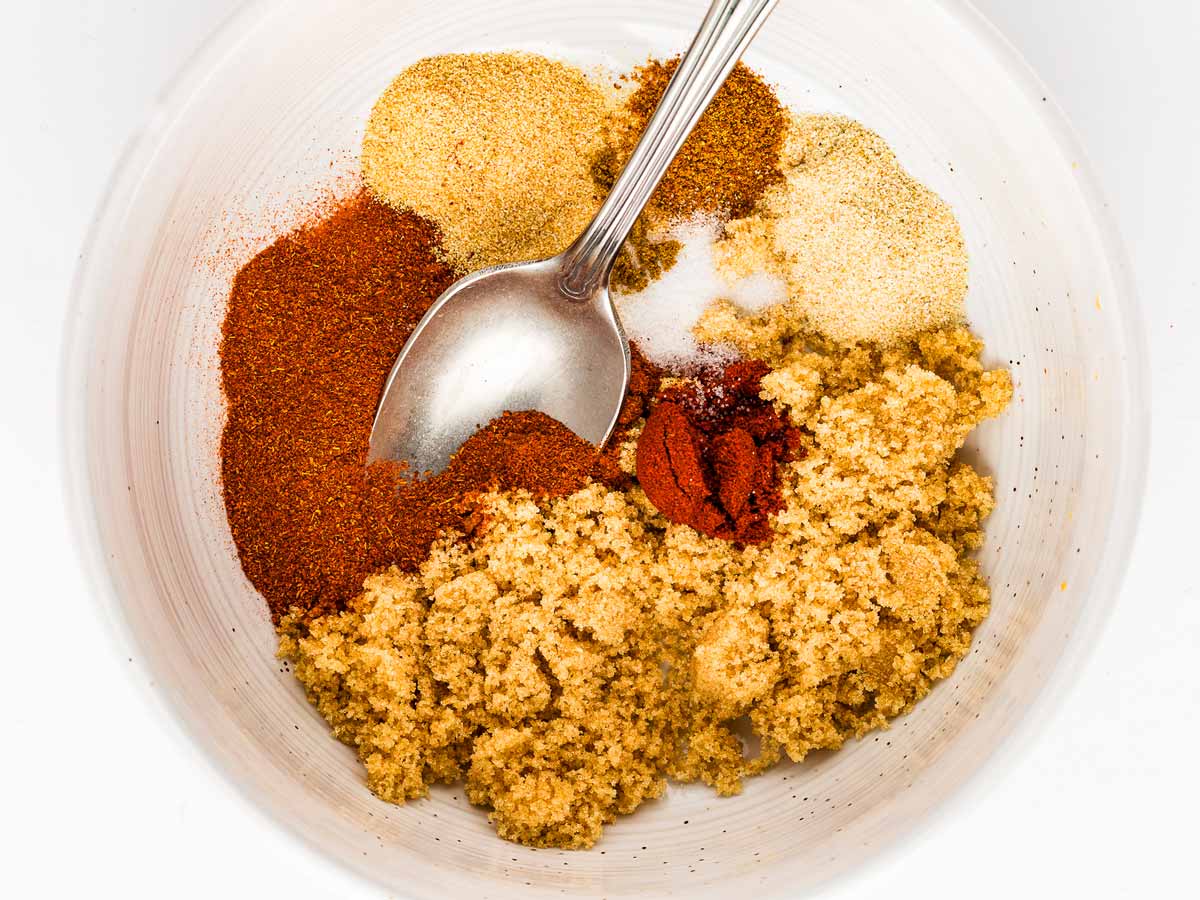
Ingredients you’ll need
Here is a visual overview of the ingredients in the recipe. Scroll down to the printable recipe card at the bottom of this post for quantities!
Ingredient notes
- Chicken wings – I prefer a mix of wingettes and drumettes because they cook evenly and have the perfect meat-to-crispy-skin ratio. If using frozen wings, make sure they’re fully thawed and patted dry – extra moisture = less crispiness.
- Vegetable oil – Helps the seasoning stick and promotes browning. You can swap it for avocado oil or canola oil, but I don’t recommend olive oil – it has a lower smoke point and can give the wings a slightly bitter taste.
- Brown sugar – Adds a touch of caramelized sweetness that balances the spices and enhances crisping. If you’re out, swap with white sugar and a drizzle of honey, or just skip it for a purely savory flavor.
- Paprika (regular & smoked) – This combo adds warmth and a hint of smokiness without overpowering the wings. If you don’t have smoked paprika, just use extra regular paprika.
- Garlic & onion powder – Essential for deep, savory flavor. Fresh garlic isn’t a great sub here – it can burn in the high heat.
- Salt – Just the right amount to bring out all the flavors. If using a different type (kosher, sea salt, etc.), adjust slightly since grain sizes vary.
- Cayenne & cumin (optional but recommended!) – A tiny pinch of cayenne gives a little kick, while cumin adds depth. Leave them out if you prefer milder wings, or go all in if you love bold flavors!
How to make crispy baked chicken wings
Let’s make some crispy, flavorful, absolutely irresistible baked chicken wings together! This is one of those recipes that looks fancy but is actually super simple – as long as you follow a few key steps. I’ll walk you through it so you get perfect wings every time.
1. Get your oven and baking setup ready
First, preheat your oven to 400°F. I like to get this going right away so it’s nice and hot when the wings go in. Next, line a large sheet pan with foil – this makes cleanup way easier (because who has time to scrub a baking sheet after dinner?).
On top of the foil, place an oven-safe wire rack and spray it generously with cooking spray. The wire rack is the secret to getting crispy wings because it lets the heat circulate around them, crisping up every side instead of steaming the bottoms.
2. Dry the wings really well
This is super important! Take your 2 pounds of chicken wings (wingettes and drumettes work best) and pat them dry really well with paper towels.
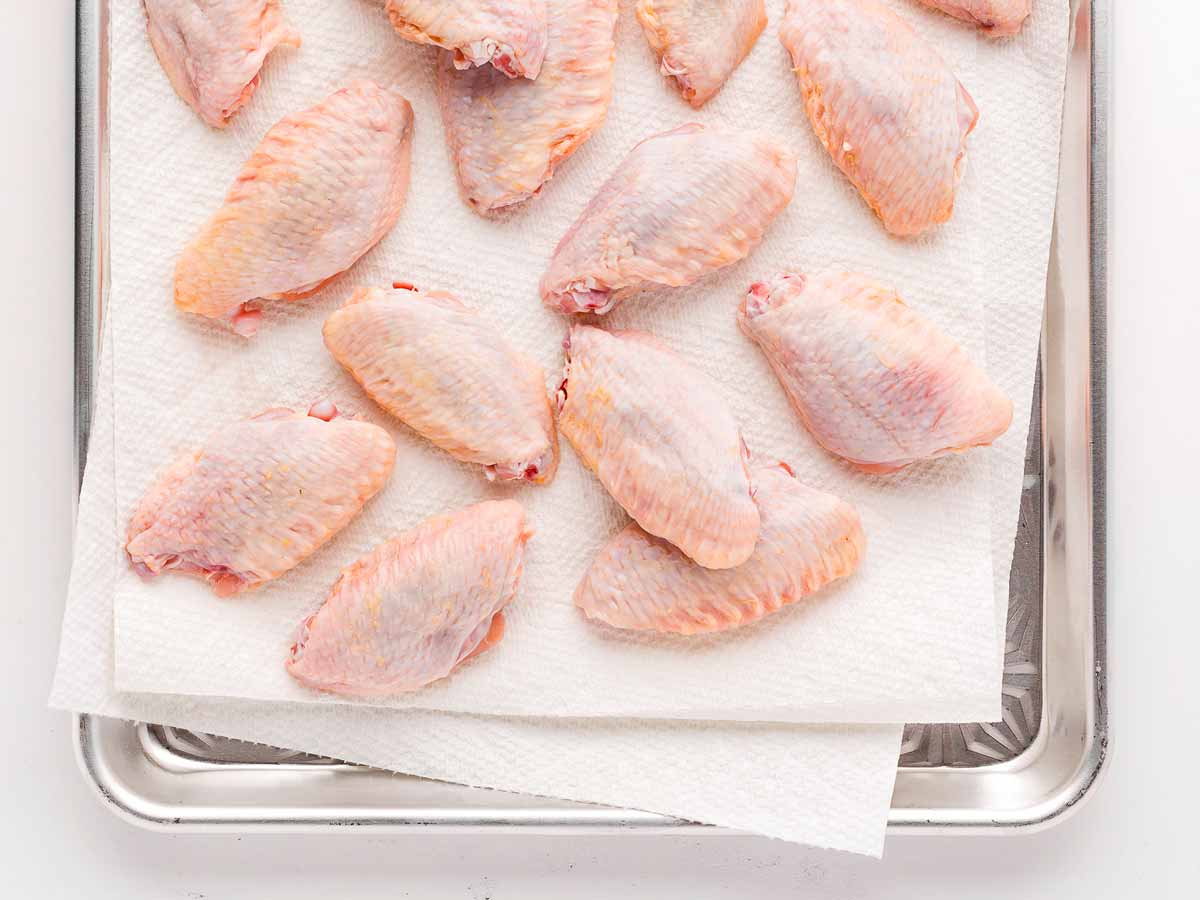
Any moisture left on the skin will prevent them from getting crispy, and nobody wants soggy wings. If your wings were frozen, make sure they’re fully thawed and drained before you start.
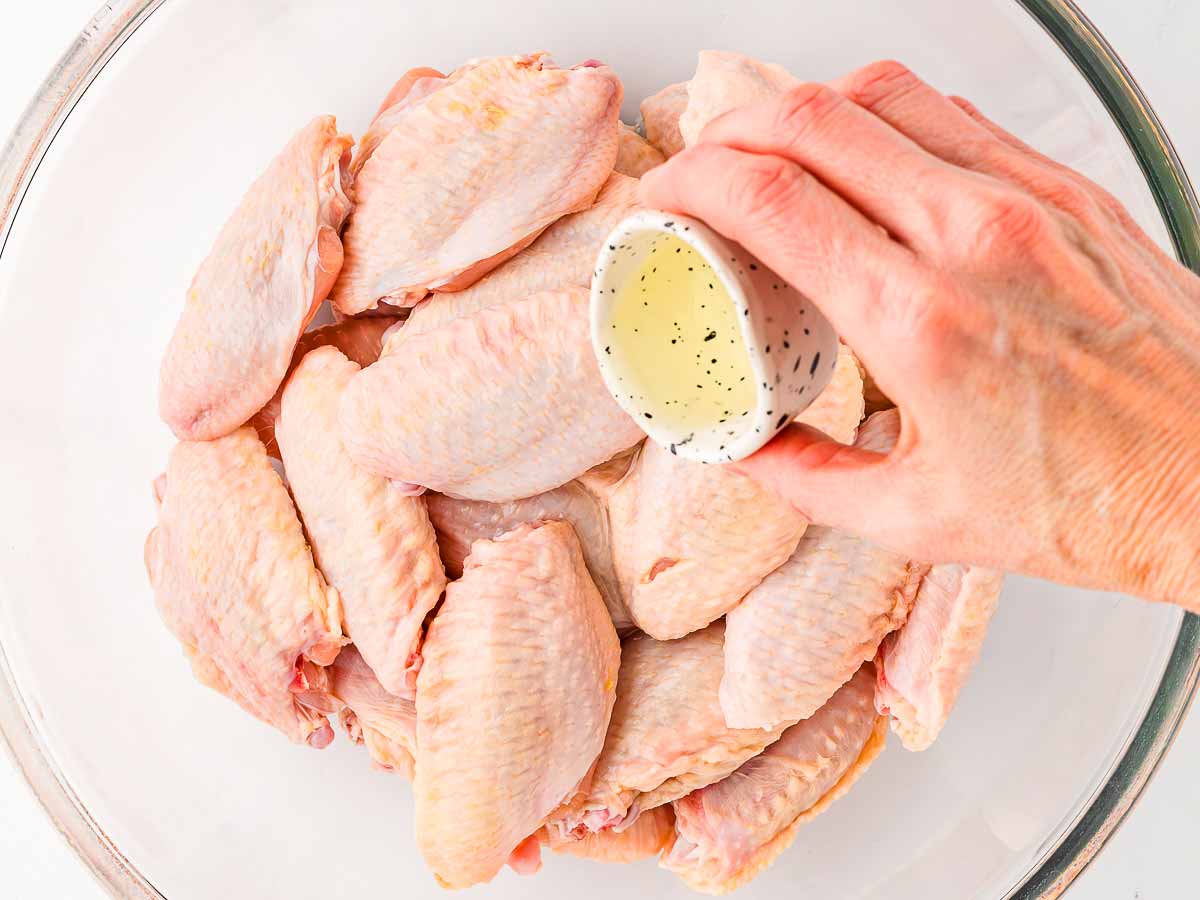
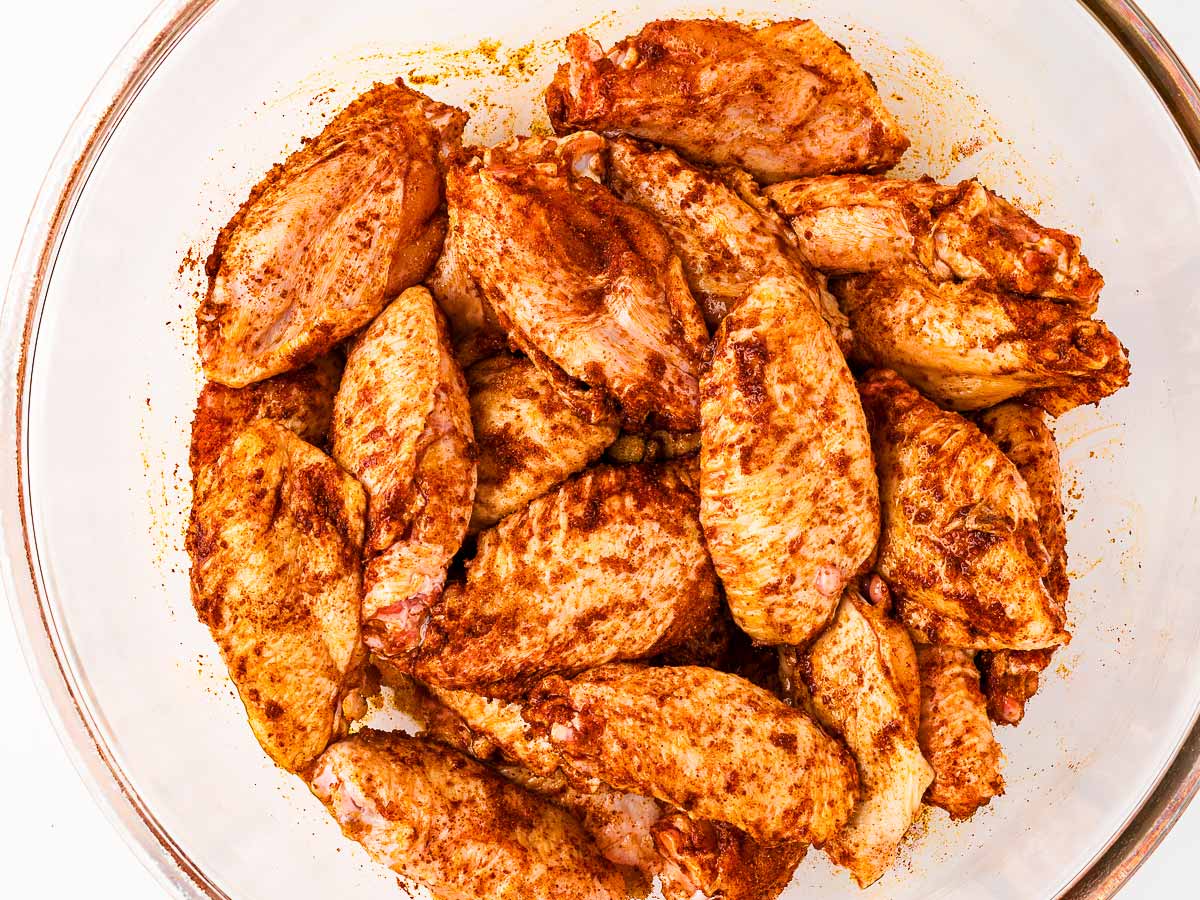
3. Coat with oil
Place the wings in a large bowl and add 3 tablespoons of vegetable oil. Toss them really well so each wing is coated.
This helps the seasoning stick and promotes that deep golden-brown color when they bake. If you want to get your hands in there and mix them up, go for it – it makes sure everything gets evenly coated!
4. Season generously
In a small bowl, mix together:
- 2 tablespoons light brown sugar (for a touch of caramelized sweetness)
- 1 tablespoon paprika
- 1 teaspoon smoked paprika (for a little smoky kick—if you don’t have it, just add more regular paprika)
- ¾ teaspoon salt (you need this to bring out all the flavors)
- ¾ teaspoon garlic powder
- ¾ teaspoon onion powder
- ⅛ teaspoon ground cumin (optional, but adds great depth)
- A pinch of cayenne pepper (optional, for just a little heat)
Now, evenly sprinkle this seasoning mix over the wings and toss really well to coat.
I like to do this in stages – sprinkle some, toss, sprinkle more – so every wing gets an even coating. You don’t want clumps of seasoning in some spots and none in others.
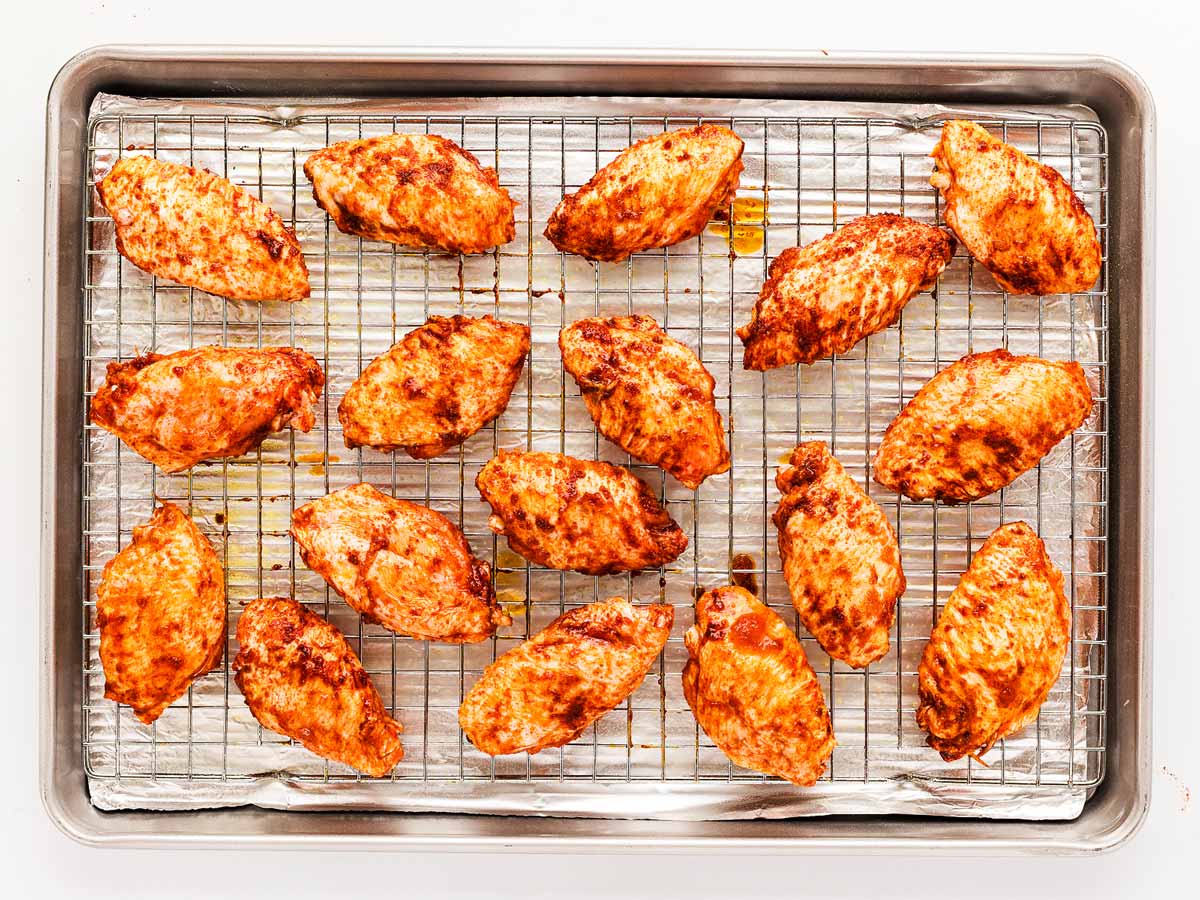
5. Arrange on the rack
Take each wing and place it in a single layer on the prepared wire rack. Try not to let them touch – if they’re too close together, they’ll steam instead of crisp up.
If you’re doubling the recipe (which I highly recommend if you’re feeding a crowd), use two baking sheets so they have enough space.
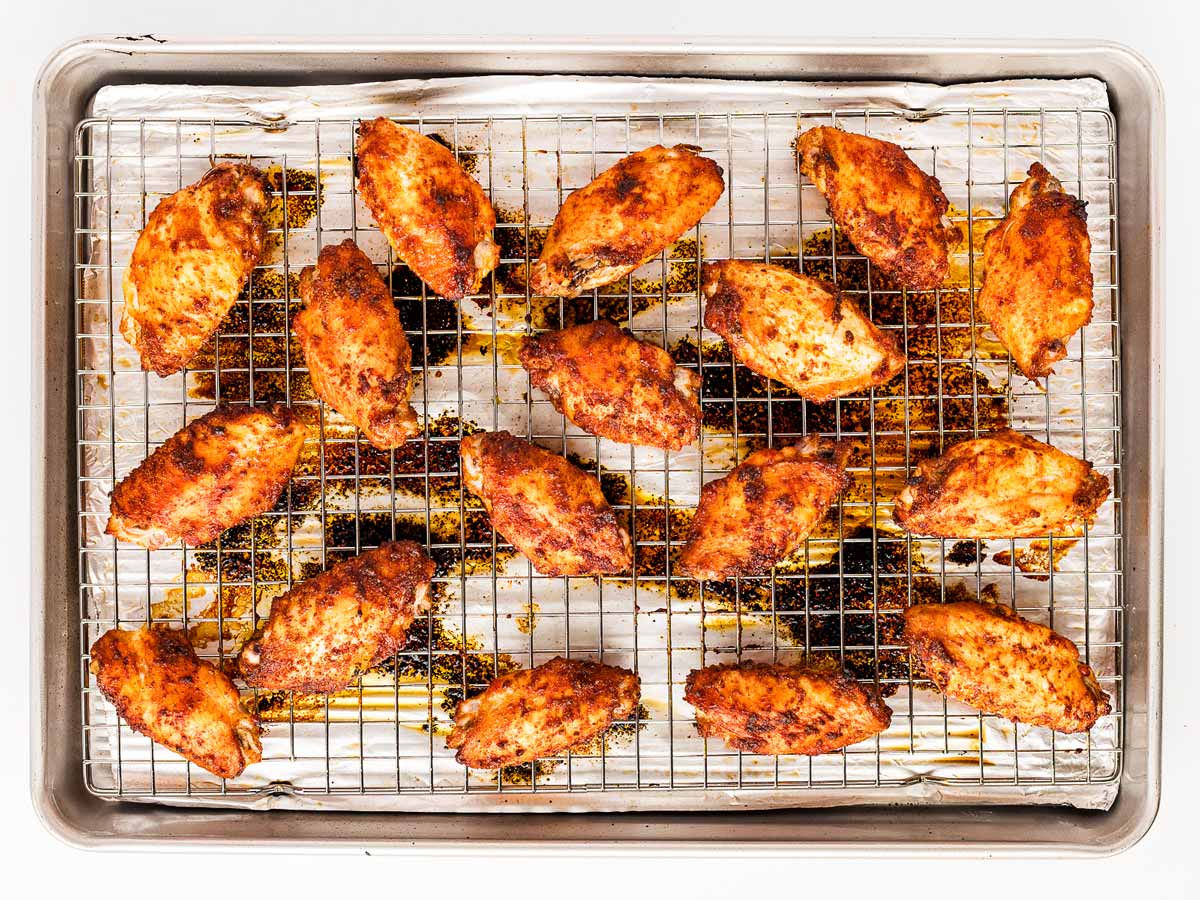
6. Bake to crispy perfection
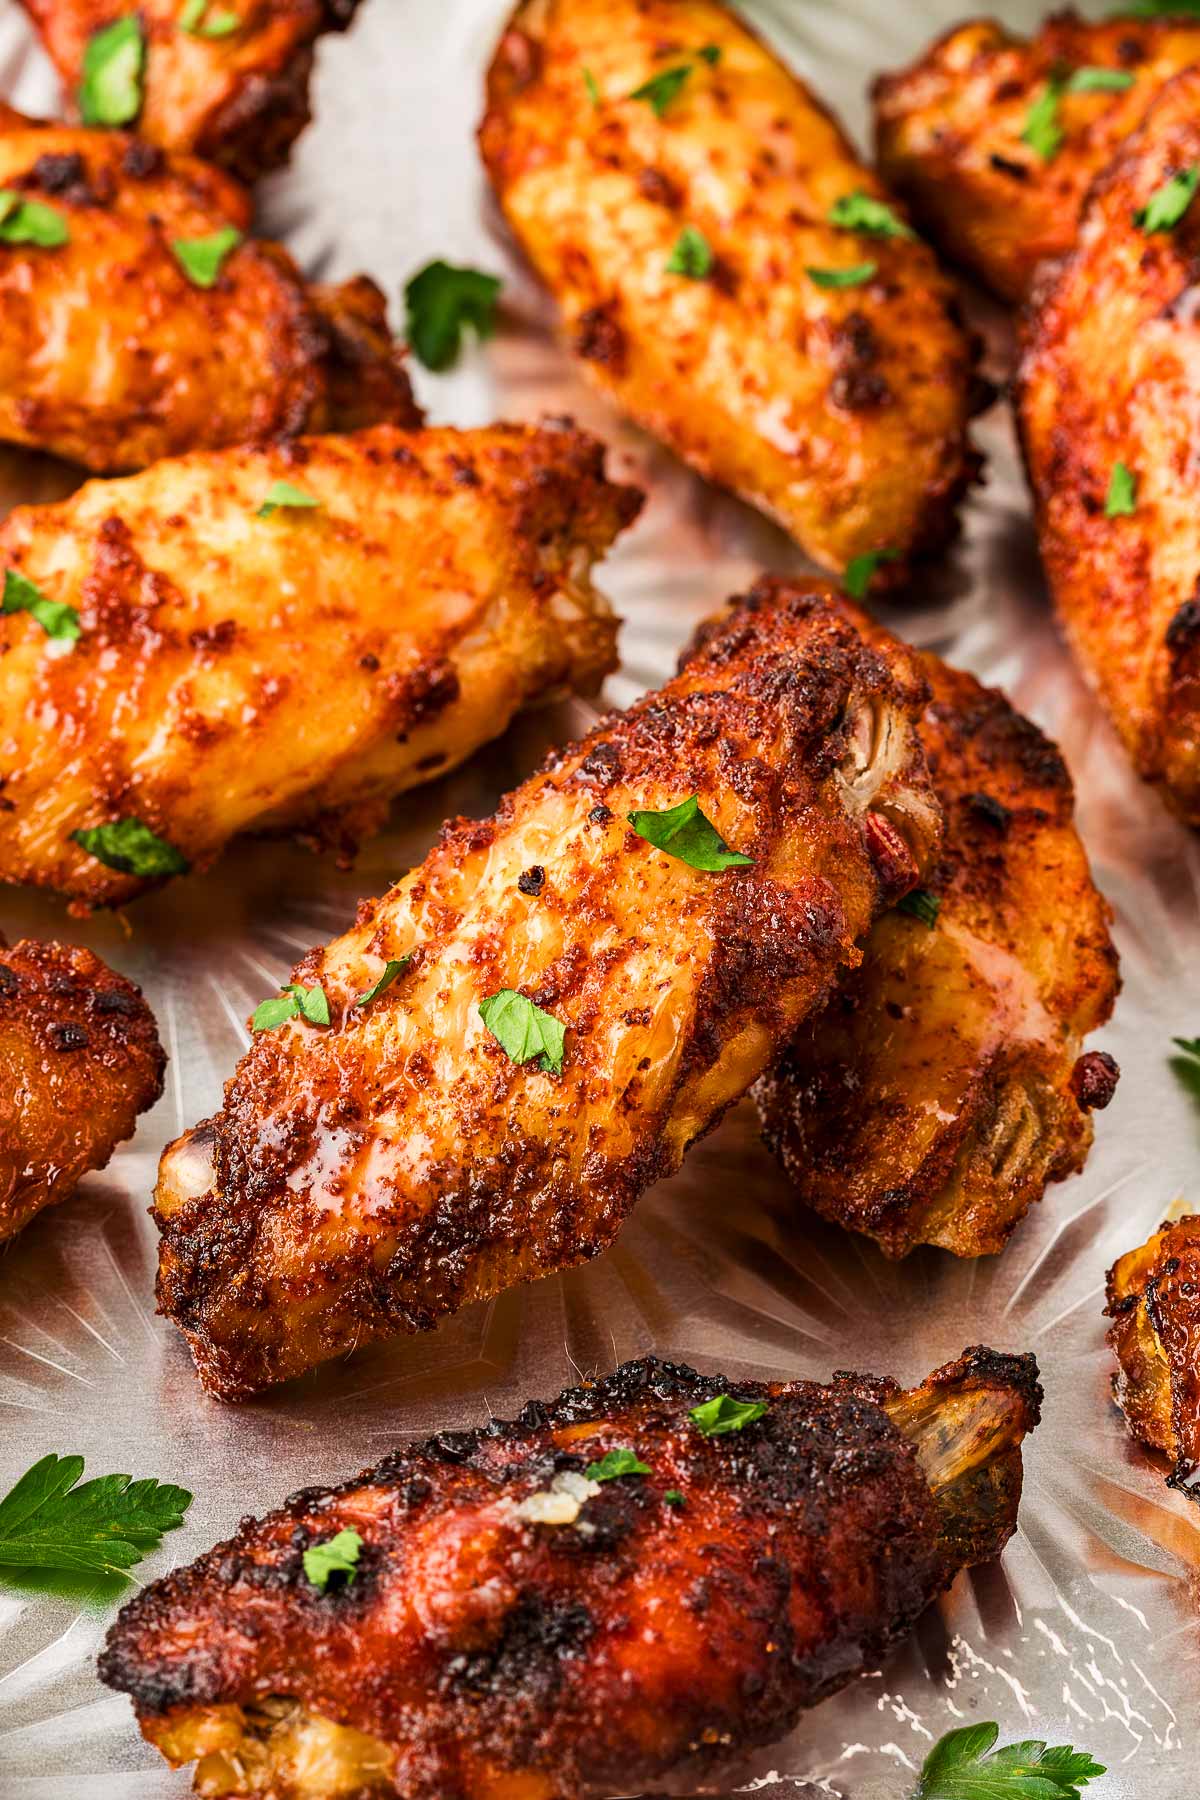
Pop the tray into your preheated 400°F oven and let them bake for 40-45 minutes. There’s no need to flip them – the heat from the wire rack will help them crisp up all around.
How do you know they’re done? They should be deep golden brown, crispy, and sizzling. If you want to double-check, use a meat thermometer – they should be at least 165°F inside.
7. Serve immediately
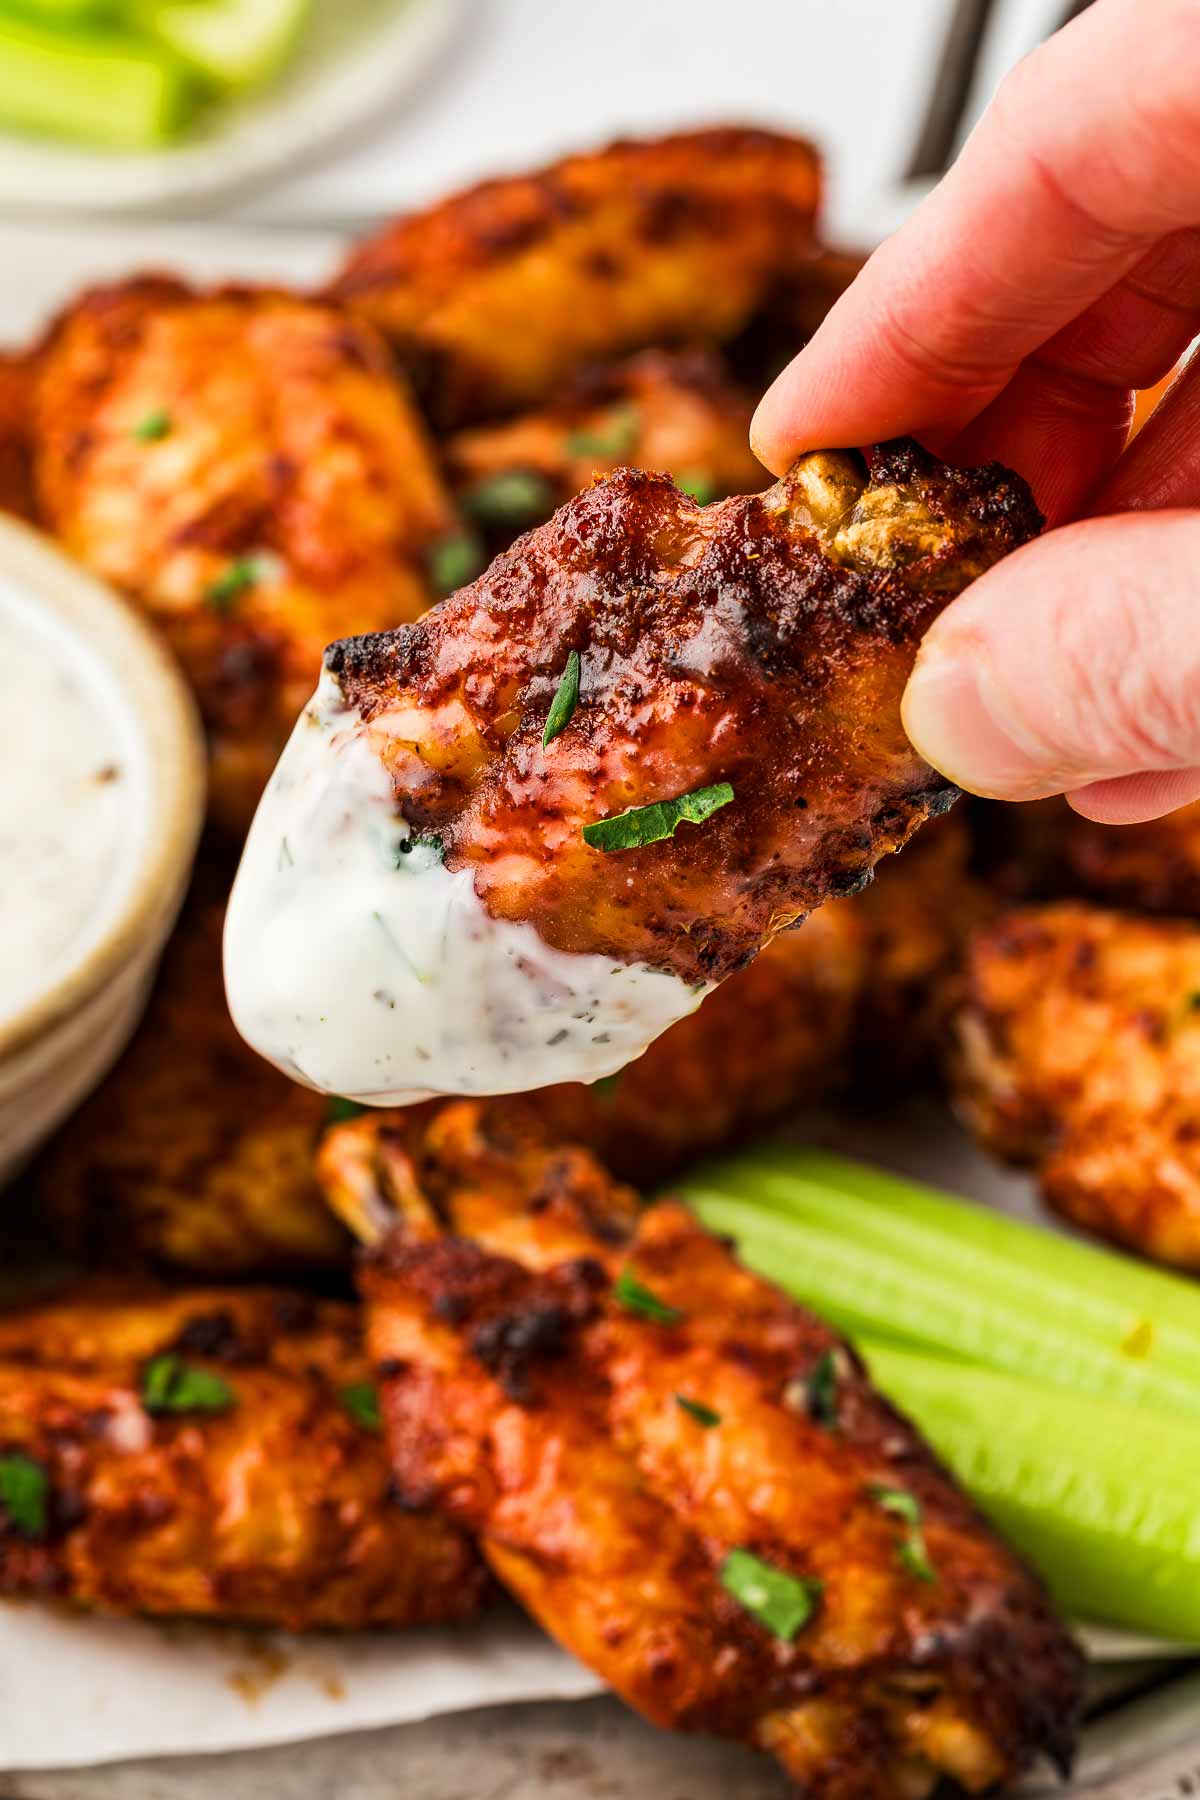
As soon as they come out of the oven, serve them up while they’re hot and crispy! These wings are packed with flavor on their own, but you can always pair them with ranch, blue cheese dressing, or your favorite dipping sauce.
And that’s it! Perfect baked chicken wings, no deep frying, no mess – just crispy, flavorful, foolproof wings that everyone will love.
Top tips for recipe success
- Pat the wings very dry – This is the #1 tip for crispy wings! Any moisture left on the skin will cause them to steam instead of crisp up, so use plenty of paper towels and really press down to soak up any excess.
- Use a wire rack – If you bake the wings directly on a sheet pan, the bottoms will end up soggy. The wire rack allows the heat to circulate all around, crisping them up evenly.
- Don’t skip the oil – A light coating of vegetable oil (or another high-heat oil) helps the seasoning stick and encourages that beautiful golden brown color. Don’t overdo it, though – too much oil can make them greasy instead of crispy.
- Season well and evenly – I like to sprinkle the seasoning mix on in batches, tossing the wings in between to make sure every piece gets coated. If you dump it all on at once, some wings might end up with too much seasoning while others get barely any.
- Don’t overcrowd the pan – The wings need space! If they’re too close together, they’ll steam instead of crisp. If you’re making a double batch, use two baking sheets so they have enough room.
- No need to flip! – Since we’re using a wire rack, the wings crisp up on all sides without needing to be turned over – one less thing to worry about!
- Bake until they’re truly crispy – Oven temperatures can vary, so check on your wings at the 40-minute mark. If they’re not deeply golden and crisp, give them another 5 minutes. You can even crank the oven to 425°F for the last 5 minutes if you want extra crispiness!
- Serve immediately – These wings are best right out of the oven. If they sit too long, they’ll lose some of their crispiness. If you need to keep them warm, place them back in a low oven (200°F) until serving.
Helpful recipe hints
Recipe variations
- Buffalo Wings – As soon as they come out of the oven, toss the hot wings in a mix of ¼ cup melted butter and ¼ cup buffalo sauce. Classic, tangy, and always a hit!
- BBQ Wings – Swap the brown sugar for a little extra smoked paprika, then brush the wings with your favorite BBQ sauce in the last 5 minutes of baking. Sticky, smoky, and delicious!
- Honey Garlic Wings – Mix 2 tablespoons of honey with 1 tablespoon of soy sauce and 1 teaspoon of minced garlic, then toss the baked wings in the mixture right before serving. The sweet and savory combo is so good!
Storage tips
Storing leftovers – Let the wings cool completely, then store them in an airtight container in the fridge for up to 3 days. To keep them from getting too soft, place a paper towel in the container to absorb any excess moisture.
Reheating for crispy wings – The best way to reheat wings is in the oven or air fryer at 375°F for 8-10 minutes. The air fryer really is amazing here – it brings back the crispiness in just 5-6 minutes! Avoid microwaving if possible – it makes them soft and rubbery.
Serving ideas
Pairing these baked chicken wings with the right sides and dips can turn a simple meal into a feast! Here are some of my favorite ways to serve:
- Dips that pair perfectly – Ranch, blue cheese, honey mustard, or even a spicy chipotle mayo – because wings and dips are meant to be together.
- Making wings a full meal – Serve them with crispy potato wedges, a crisp side salad with ranch dressing, or some rice for a no-fuss dinner that everyone loves.
- Appetizer spread – Pair them with a mix of crowd-friendly snacks like loaded nachos, soft pretzels, and a big bowl of guacamole for the ultimate party platter.
More easy appetizers

PS If you try this recipe, please leave a review in the comment section and add a star rating in the recipe card – I appreciate your feedback! Follow along on Pinterest, Facebook or Instagram.

Baked Chicken Wings
Recipe details
Ingredients
- cooking spray
- 2 pounds chicken wingettes OR wingettes and drumettes; defrosted if frozen
- 3 tablespoons vegetable oil
Seasoning mix
- 2 tablespoons light brown sugar
- 1 tablespoon ground paprika
- 1 teaspoon smoked paprika optional (use more regular ground paprika to substitute)
- ¾ teaspoon salt
- ¾ teaspoon garlic powder
- ¾ teaspoon onion powder
- ⅛ teaspoon ground cumin optional
- 1 pinch cayenne pepper optional
Instructions
- Prep: Preheat oven to 400°F. Line a large sheet pan with foil. Place an oven safe wire rack on top of foil. Coat rack well with cooking spray.
- Prepare chicken: Using paper towels, pat 2 pounds chicken wingettes dry very well.
- Oil chicken: Place chicken wings in a large bowl. Add 3 tablespoons vegetable oil, toss to coat each wing well.
- Season: Combine 2 tablespoons light brown sugar, 1 tablespoon ground paprika, 1 teaspoon smoked paprika, ¾ teaspoon salt, ¾ teaspoon garlic powder, ¾ teaspoon onion powder, ⅛ teaspoon ground cumin and 1 pinch cayenne pepper mix in a small bowl. Evenly sprinkle over chicken. Carefully toss wings to evenly coat.
- Bake: Place chicken wings in a single layer on prepared rack. Bake at 400°F for 40-45 minutes, or until crispy and golden brown. Serve immediately.
Notes
Ingredient notes
- Chicken wings – Use wingettes and drumettes for even cooking. Pat dry very well for crispiness.
- Vegetable oil – Helps seasoning stick and promotes browning; avoid olive oil.
- Brown sugar – Adds caramelized flavor; skip for a purely savory wing.
- Paprika & smoked paprika – Adds warmth and smoky depth; sub extra regular paprika if needed.
- Garlic & onion powder – Essential for deep flavor; fresh garlic burns in the oven so avoid.
- Cayenne & cumin – Optional, but add a subtle kick and depth.
Recipe tips
- Use a wire rack – Allows air circulation for even, crispy wings.
- Season evenly – Sprinkle in batches if needed and toss to coat every wing.
- Give them space – Overcrowding = steaming instead of crisping. Use two pans if needed; especially if making a double batch.
- No flipping required – The wire rack crisps them on all sides.
- Bake until crispy – If needed, bake 5 extra minutes or crank to 425°F at the end.
- Serve immediately – Best hot out of the oven!
Storage Tips
- Leftovers – Store in an airtight container in the fridge up to 3 days.
- Reheating – Best in a 375°F oven (8-10 min) or air fryer (5-6 min). Avoid microwaving.


Cathy says
I am not a fan of wings or drumsticks, but my husband bought some cut up chicken that included wings, drumsticks, and thighs. I used this recipe for the drumsticks and wings and everything came out so great and everyone loved it. I wasn’t going to eat it, but I took one bite of a drumstick and had to eat the whole thing and more. I continue to spice and cook my chicken this way! So delicious!
Lisa says
Really liked these. I will un-pin all of my other wing recipes saved!!
Nora says
I’m so glad, Lisa! That’s a big compliment 🙂