
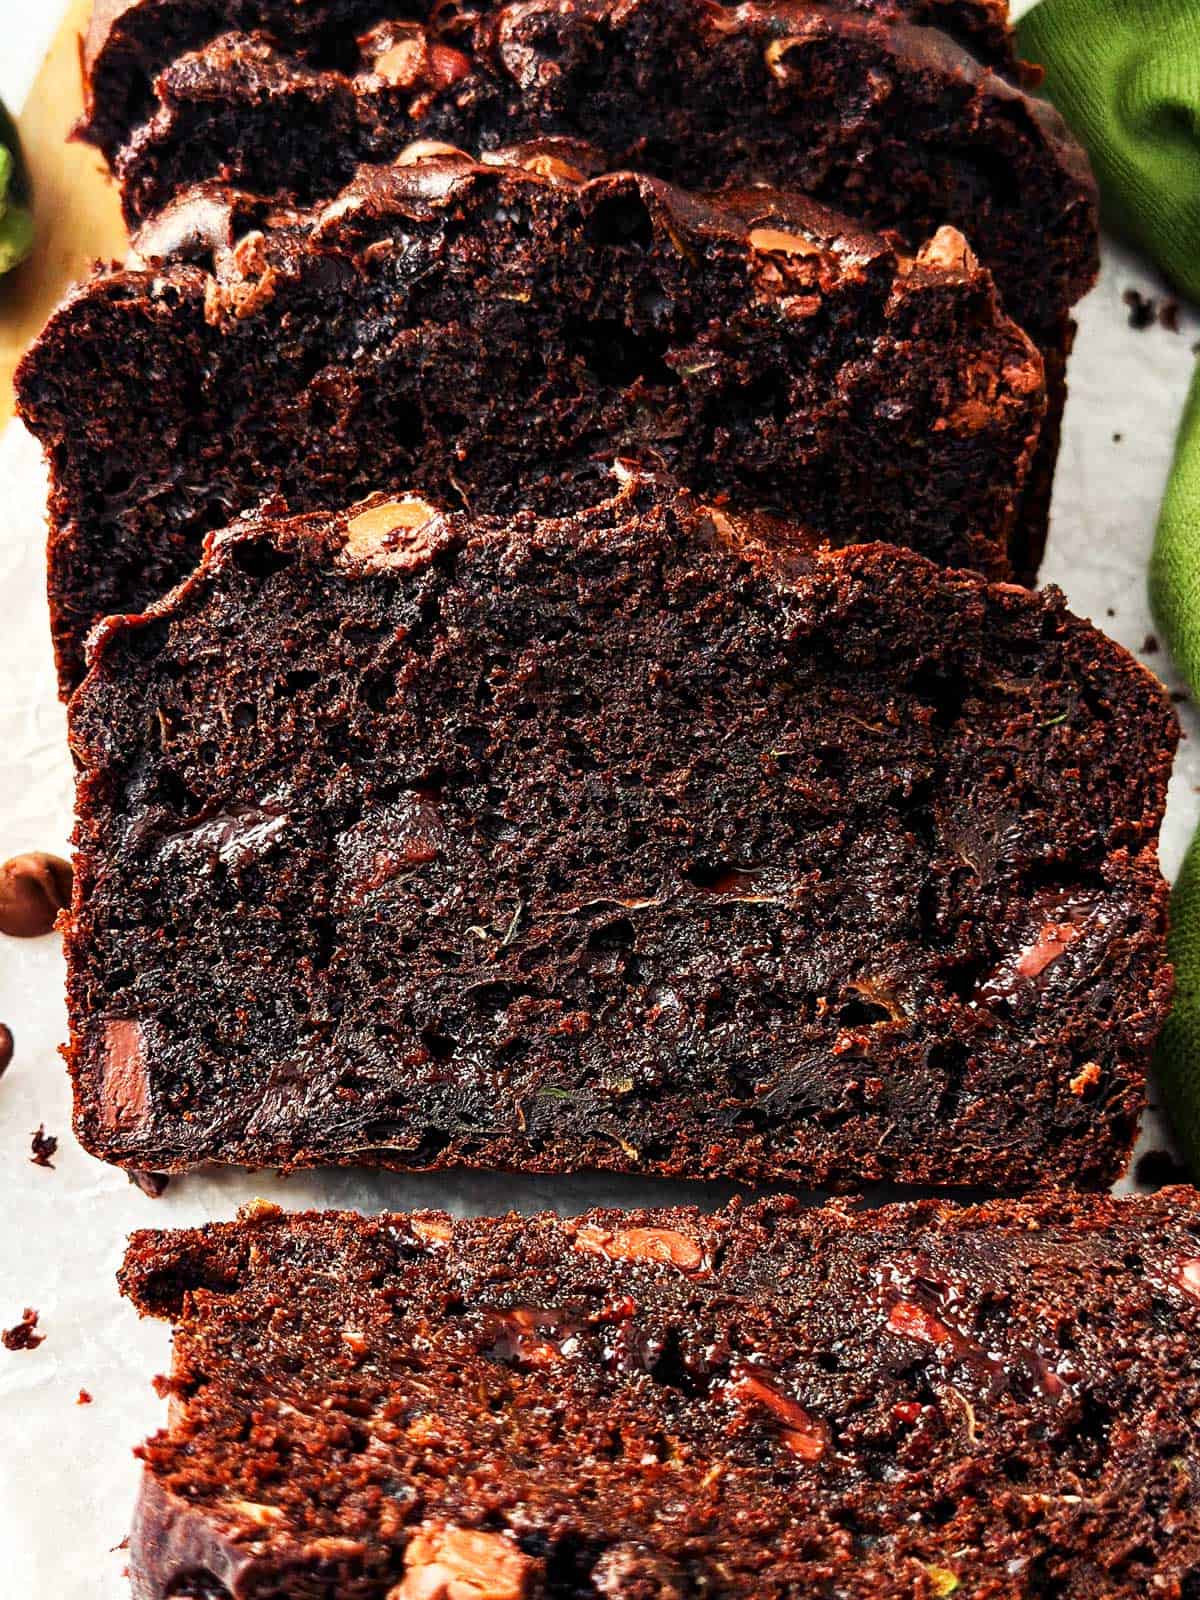
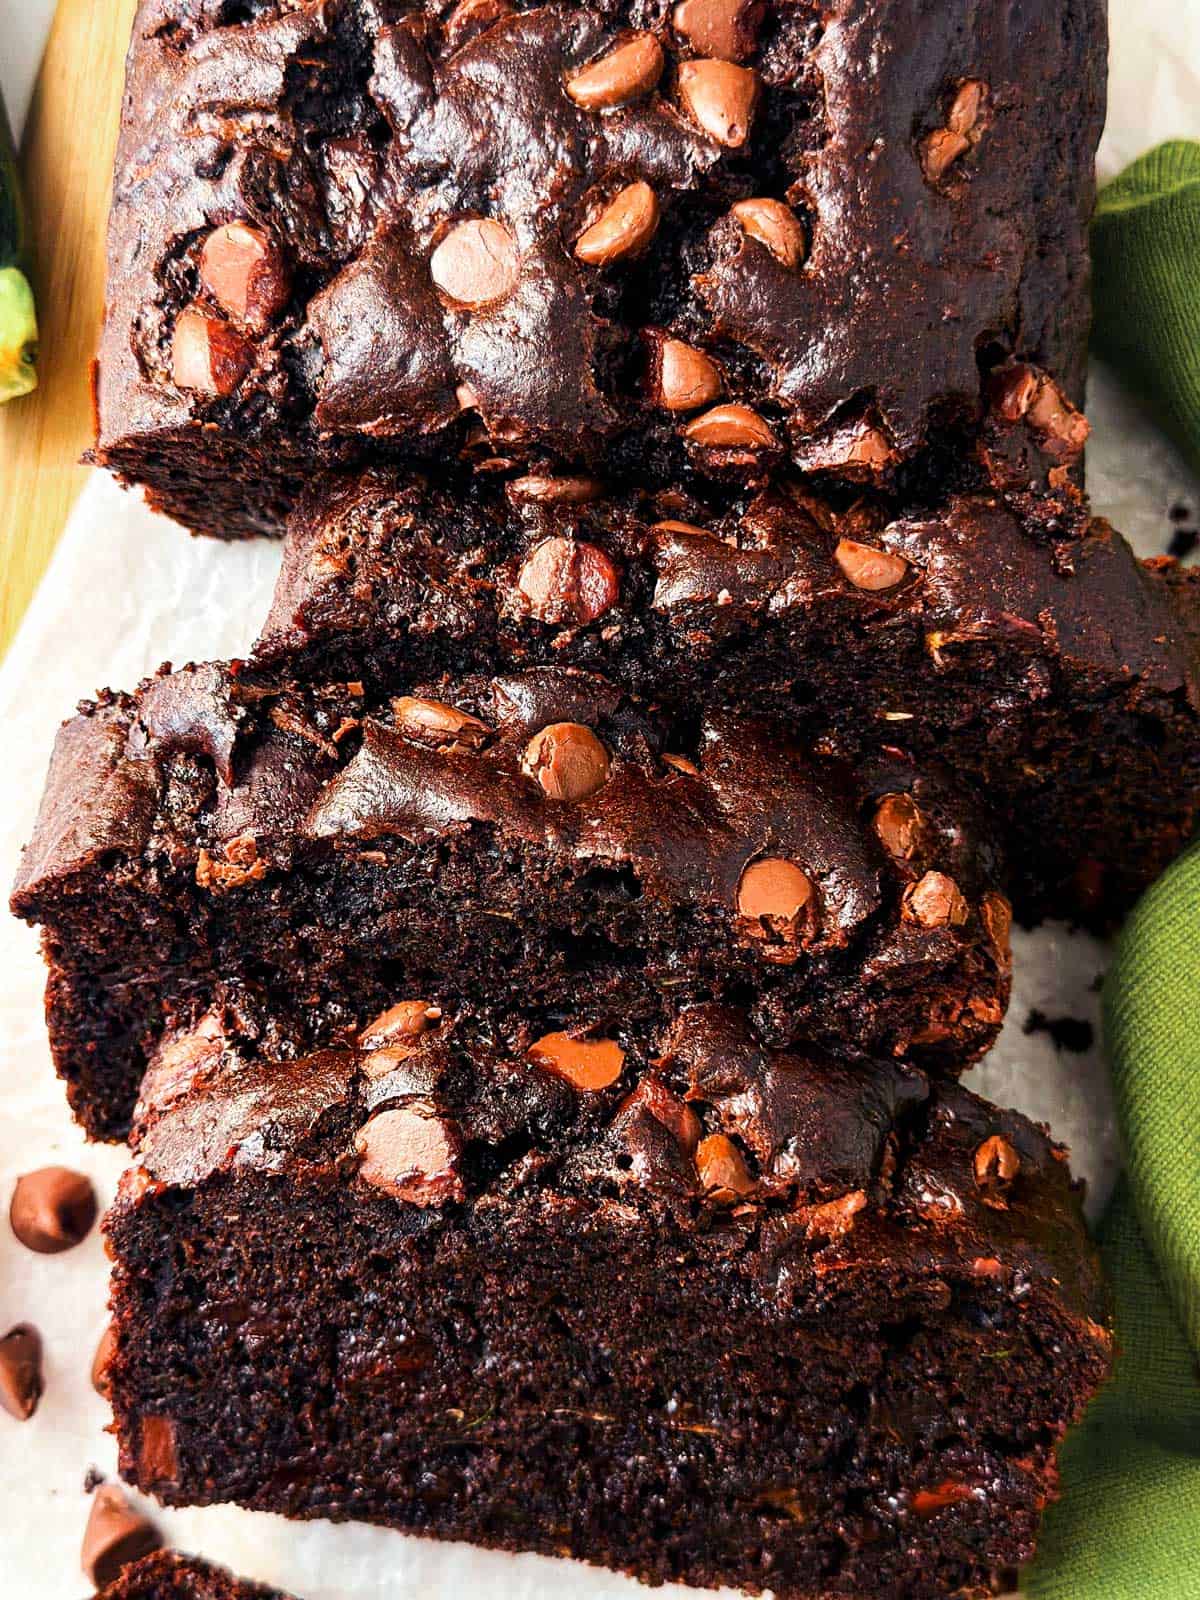
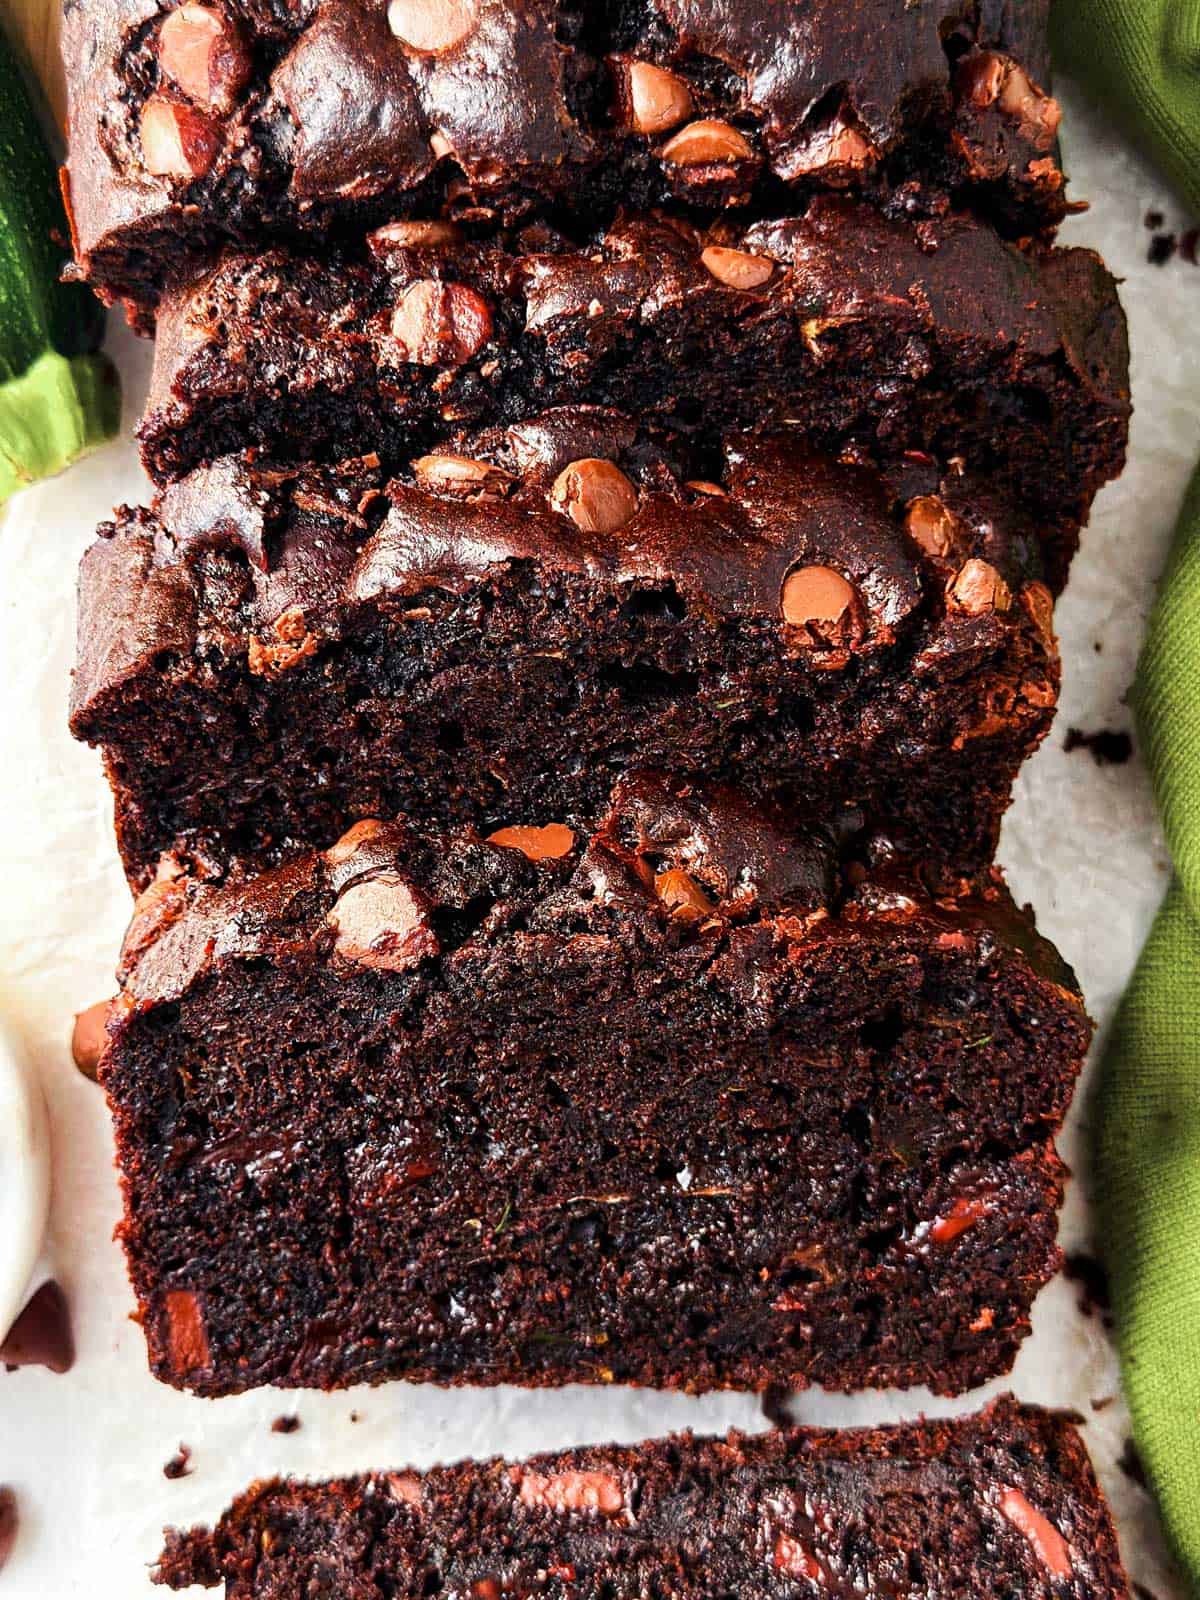
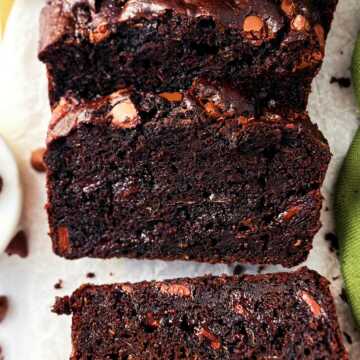
This easy Chocolate Zucchini Bread recipe is not only moist and chocolaty but also has a rich, decadent flavor that will remind you of your favorite chocolate cake.
The best part? You’d never guess it’s made with a vegetable! It’s the perfect way to sneak in some extra goodness without sacrificing taste. Whether you’re serving it for breakfast, a snack, or dessert, this bread is sure to be a hit with everyone who tries it.
Why you’ll love this recipe
- Quick and easy recipe: This batter comes together quickly and easily, making it perfect for those times when you want a delicious treat without spending too much time in the kitchen.
- Extra veggies: This recipe sneaks in veggies – you won’t even notice the zucchini, but you’ll definitely appreciate the added nutrition. And if you’re using Greek yogurt instead of sour cream, you’ll pack in even more goodness!
- Freezer friendly: One of the great things about this recipe is that it freezes well. When zucchini is available in abundance, you can make several loaves and pop them in the freezer to save for later. It’s a fantastic way to enjoy homemade goodness anytime you want!
I love baking with zucchini! I love it in my zucchini oatmeal muffins, in zucchini breakfast cookies and in zucchini bread. It’s the secret ingredient that adds incredible moisture and fluffiness by bulking up the batter – and it’s barely notable! Paired with rich chocolate? Even better!
The zucchini blends seamlessly into the batter, giving you all the benefits without anyone ever guessing it’s there. It’s the perfect way to add some extra goodness to your baking without compromising on taste or texture.
When I first told my kids they were getting chocolate zucchini bread for their snack, they all looked at me in shock and disbelief. Well, the first bite convinced them to trust mom’s baking, and this chocolate zucchini bread has been a regular summer staple for us ever since!
Ingredients you’ll need
Here is a visual overview of the ingredients in the recipe. Scroll down to the printable recipe card at the bottom of this post for quantities!
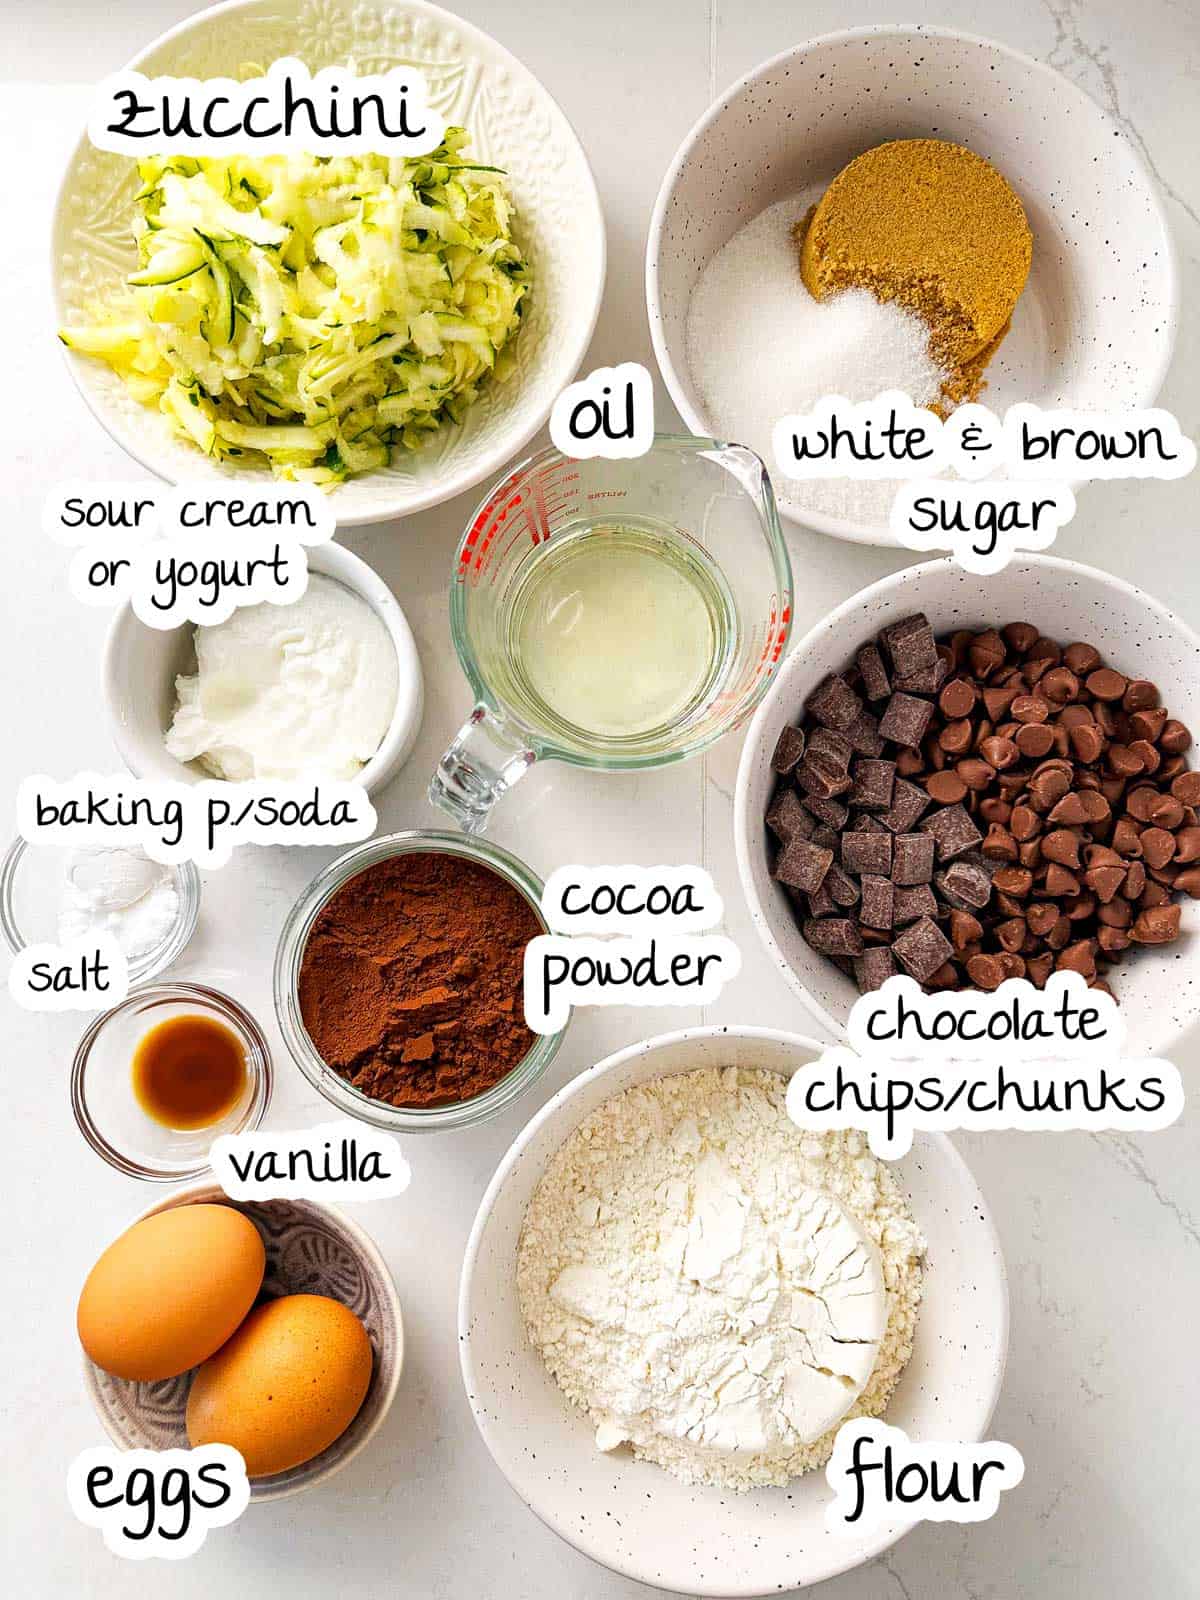
Ingredient notes
- Oil: I use a neutral vegetable oil for ease, but feel free to use melted butter for an even richer taste.
- Cocoa powder: Use regular unsweetened cocoa powder, not Dutch processed.
- Sour cream or yogurt? Use the one you have on hand, or where you know you’ll easily use up the leftovers! There’s no difference in taste, just a small difference in terms of protein and fat content.
- Zucchini: 1 medium zucchini, or just under ½ pound, is what you need here. I prefer using an actual medium zucchini vs a portion of a large one, because larger ones usually have more/larger seeds and may release too much water during baking.
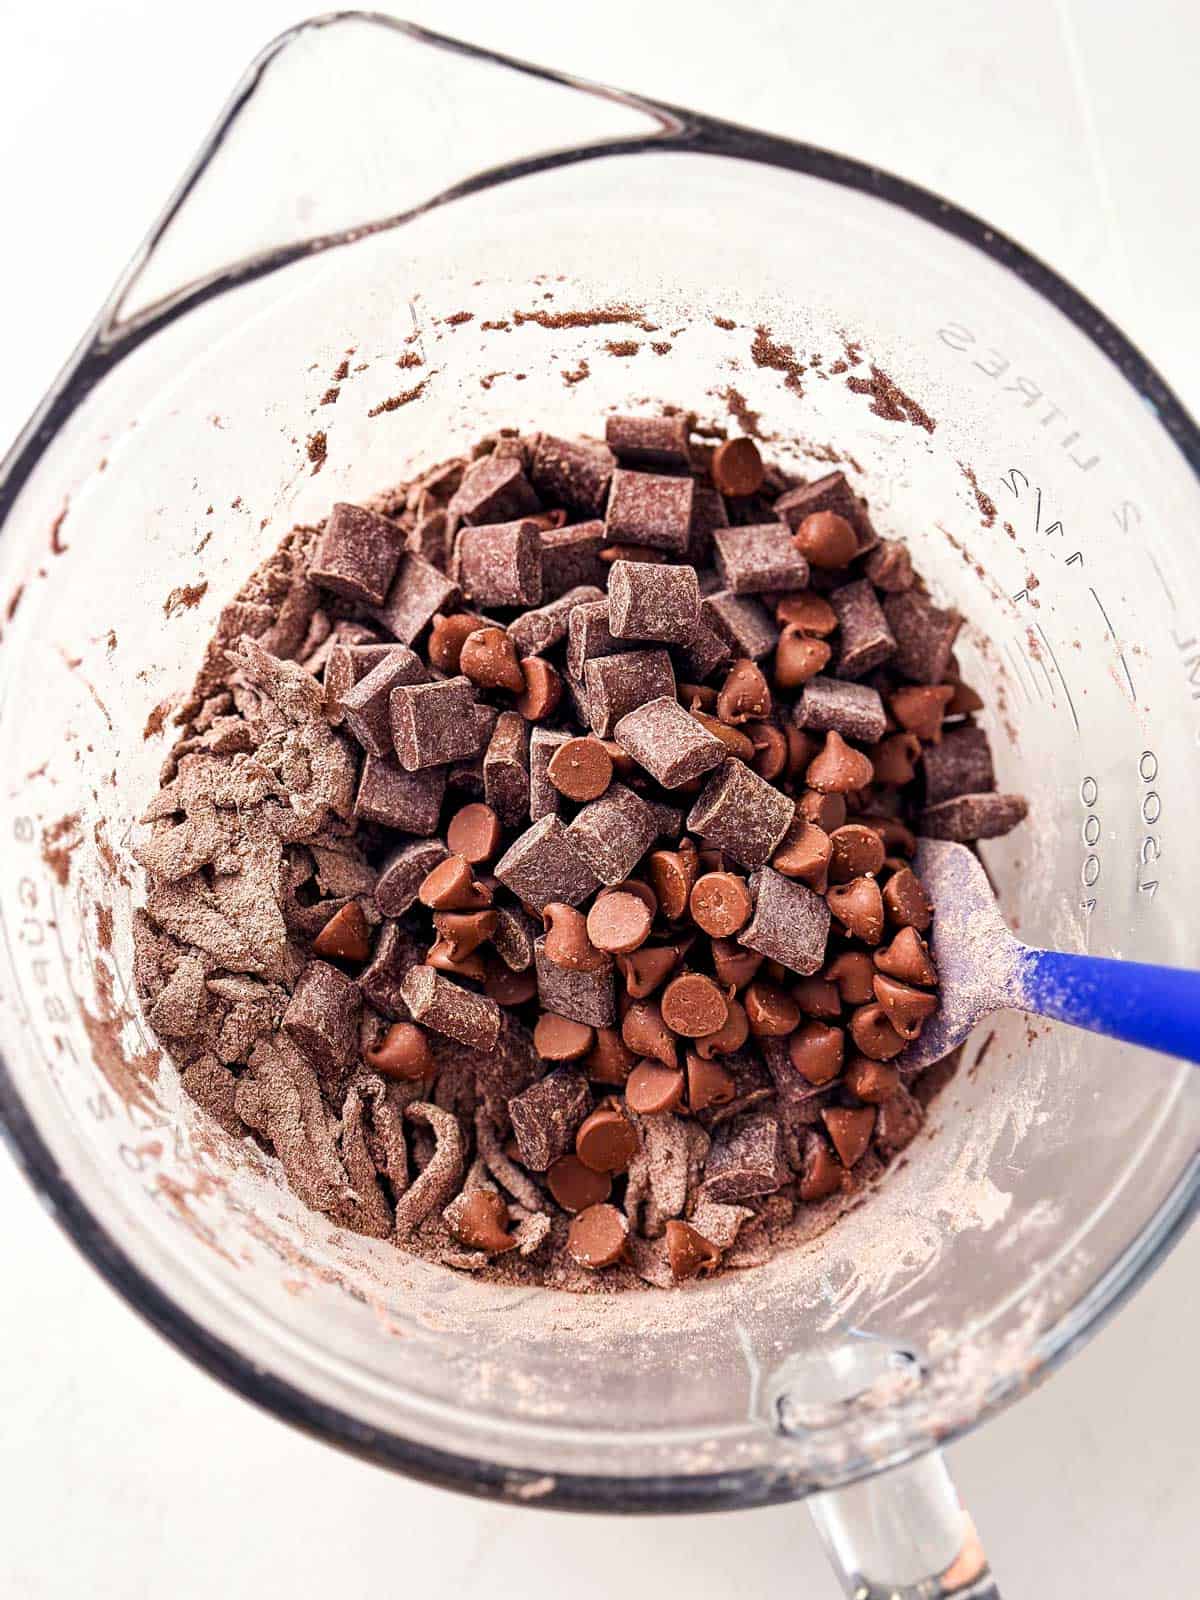
- Chocolate chips/chunks: I use a mix of semi-sweet chocolate chunks and milk chocolate chips, because that’s what we’ve come to like best. Feel free to use 1 cup of your favorite chocolate chips or chunks!
How to make chocolate zucchini bread
Here is the step by step process with photos of each step to help guide you:
Before you begin: First things first, you’ll want to preheat your oven to 350°F to ensure it’s nice and hot when you’re ready to bake.
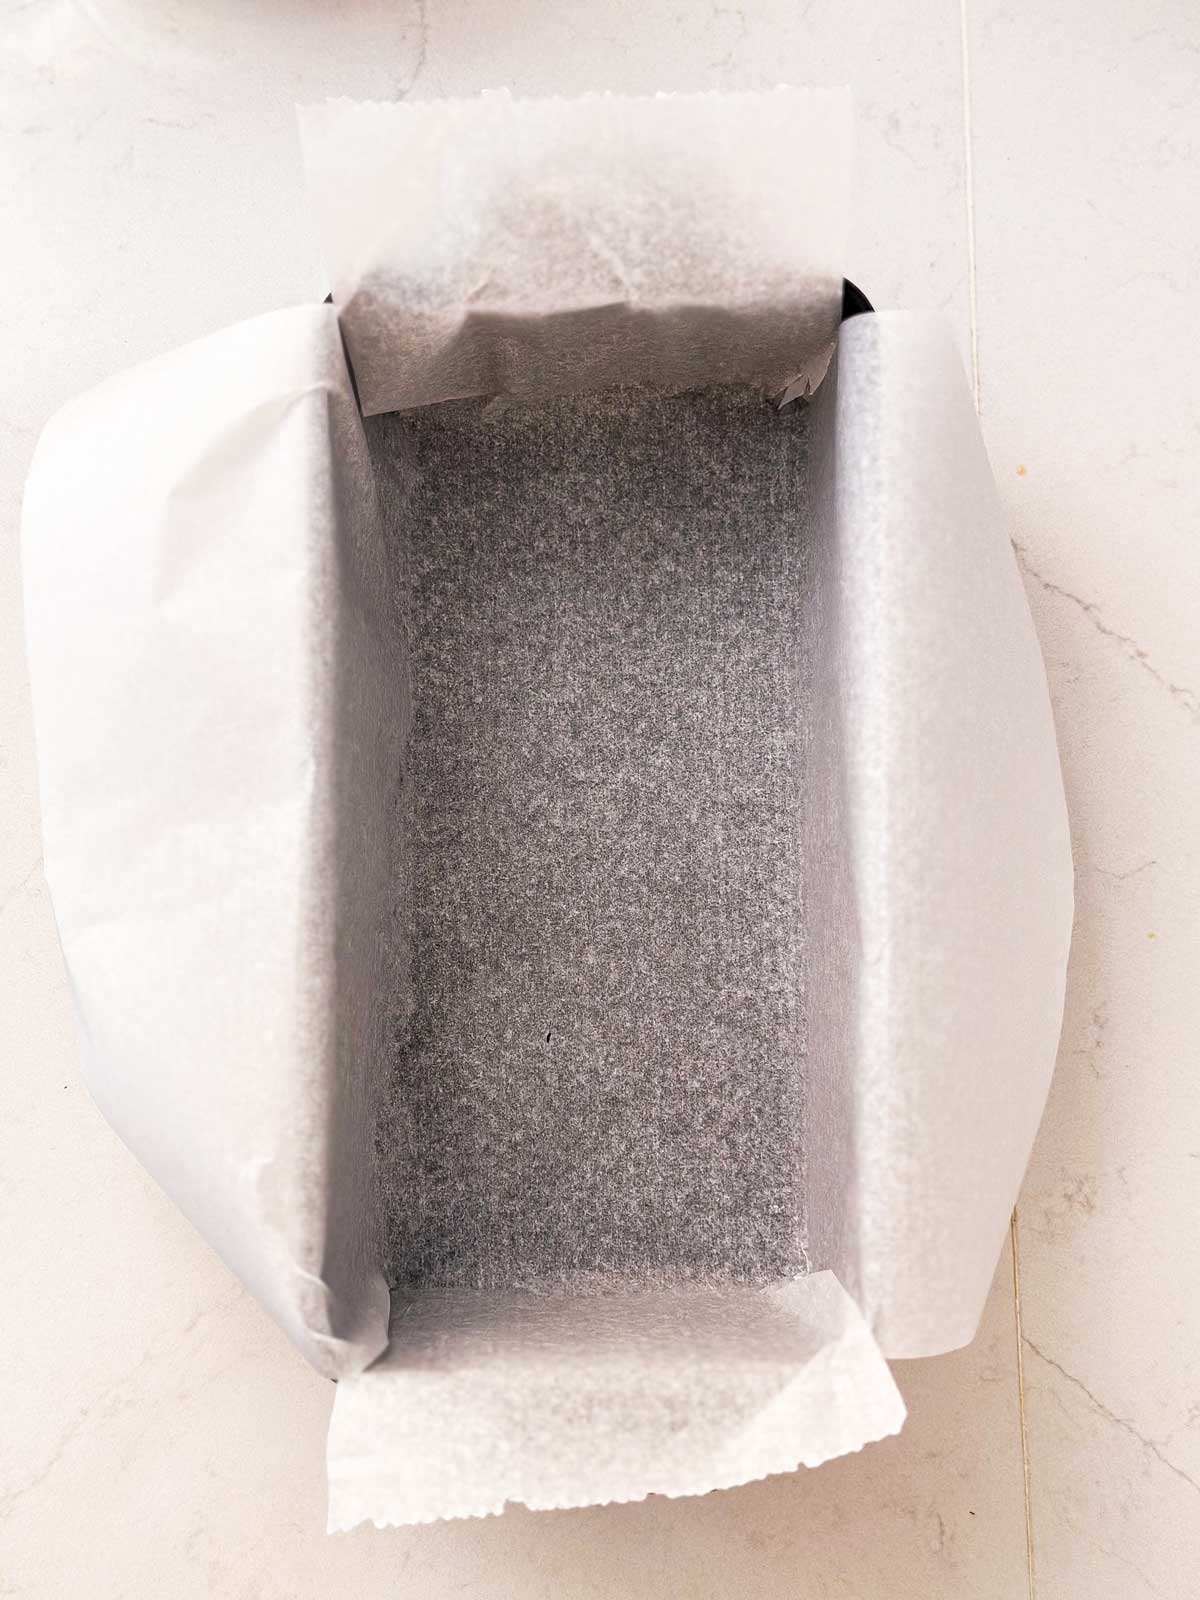
While the oven is warming up, take a moment to prepare your loaf pan. You can use either a 9×5-inch loaf pan or an 8×4-inch loaf pan if you prefer a taller loaf.
To prevent sticking and make sure your bread comes out easily, give the pan a good coating with nonstick spray or line with baking parchment (I always line my pan – makes it easy to lift out the bread even while the pan is still hot!).
Once that’s done, set the pan aside and you’re all set to start mixing up your delicious batter.
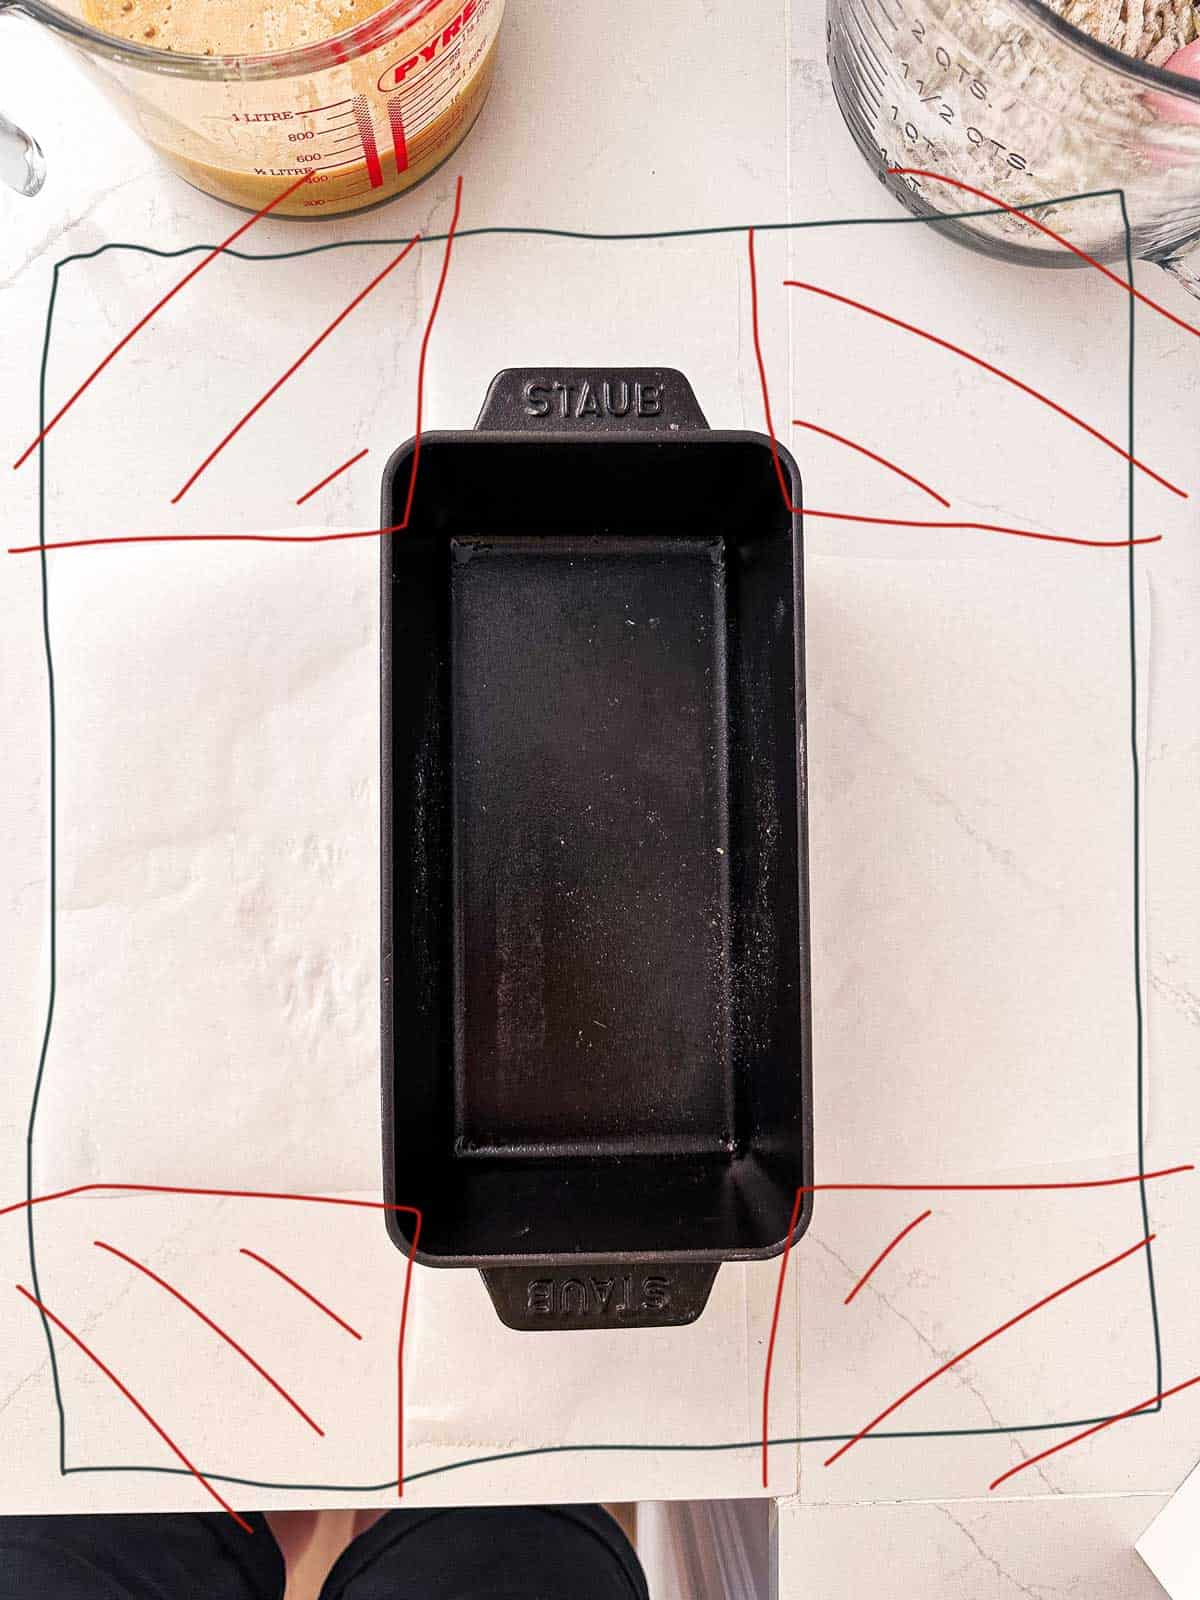
Pro tip: How to easily line a loaf pan: Just place your pan on your piece of parchment paper, cut away the four corners as shown in my very bad drawing below, and your paper will magically fit into your pan without any crumpling, folding or stuffing needed!
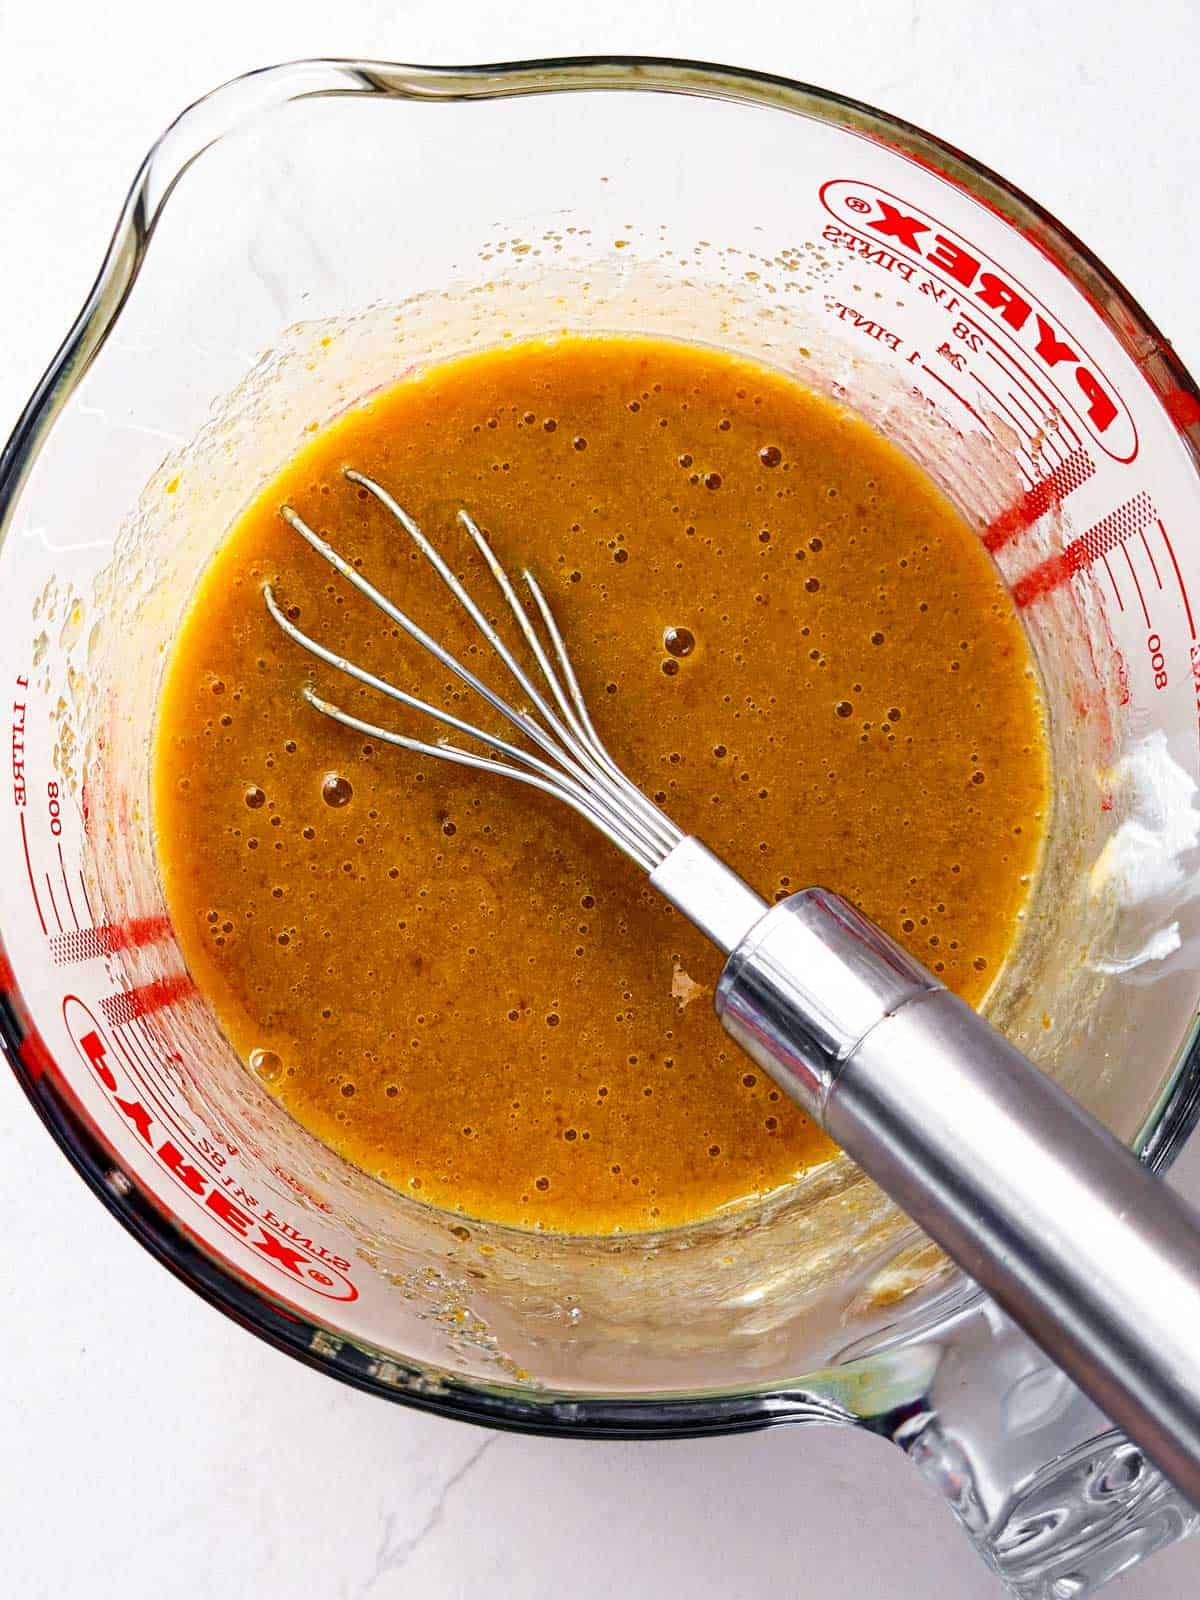
1. Combine the wet ingredients:
Grab a medium-sized measuring jug and let’s get started on mixing our wet ingredients.
First, crack the eggs into the bowl. Next, pour in the oil, followed by the yogurt or sour cream, which will help to keep the bread fudge and moist. Then add both sugar to bring in some sweetness. Finally, drizzle in the vanilla extract for that extra hint of flavor.
Whisk everything together until it’s well combined and smooth. You’ll know it’s ready when the mixture looks uniform and slightly frothy.

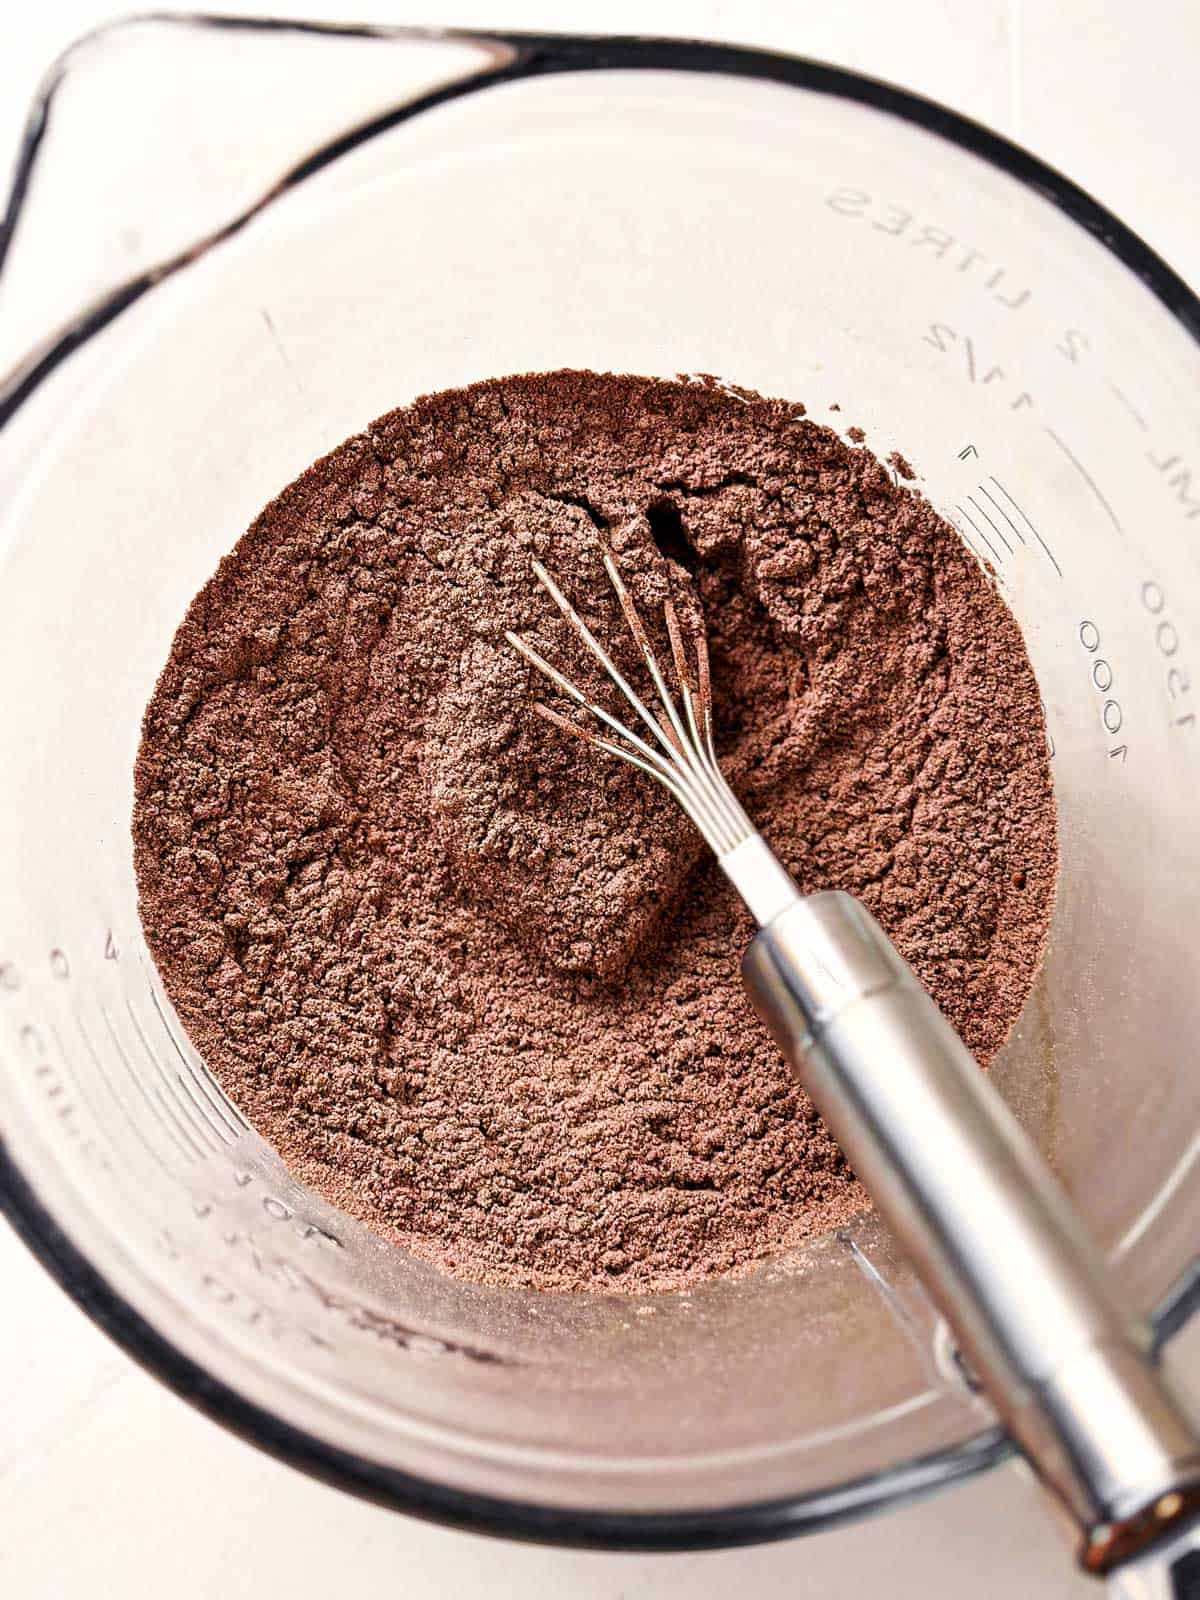
2. Combine the dry ingredients:
Use a separate medium-large mixing bowl for the dry ingredients. Start by measuring out the flour. Next, add the rich cocoa powder, which will give our bread its deep chocolate flavor and color. Then, sprinkle in the baking powder and baking soda – these are the magic ingredients that will help our bread rise beautifully in the oven. Don’t forget a pinch of salt to balance out the flavors and bring out the sweetness.
Whisk all these ingredients together until they’re thoroughly combined and you have a uniform, chocolaty mixture.

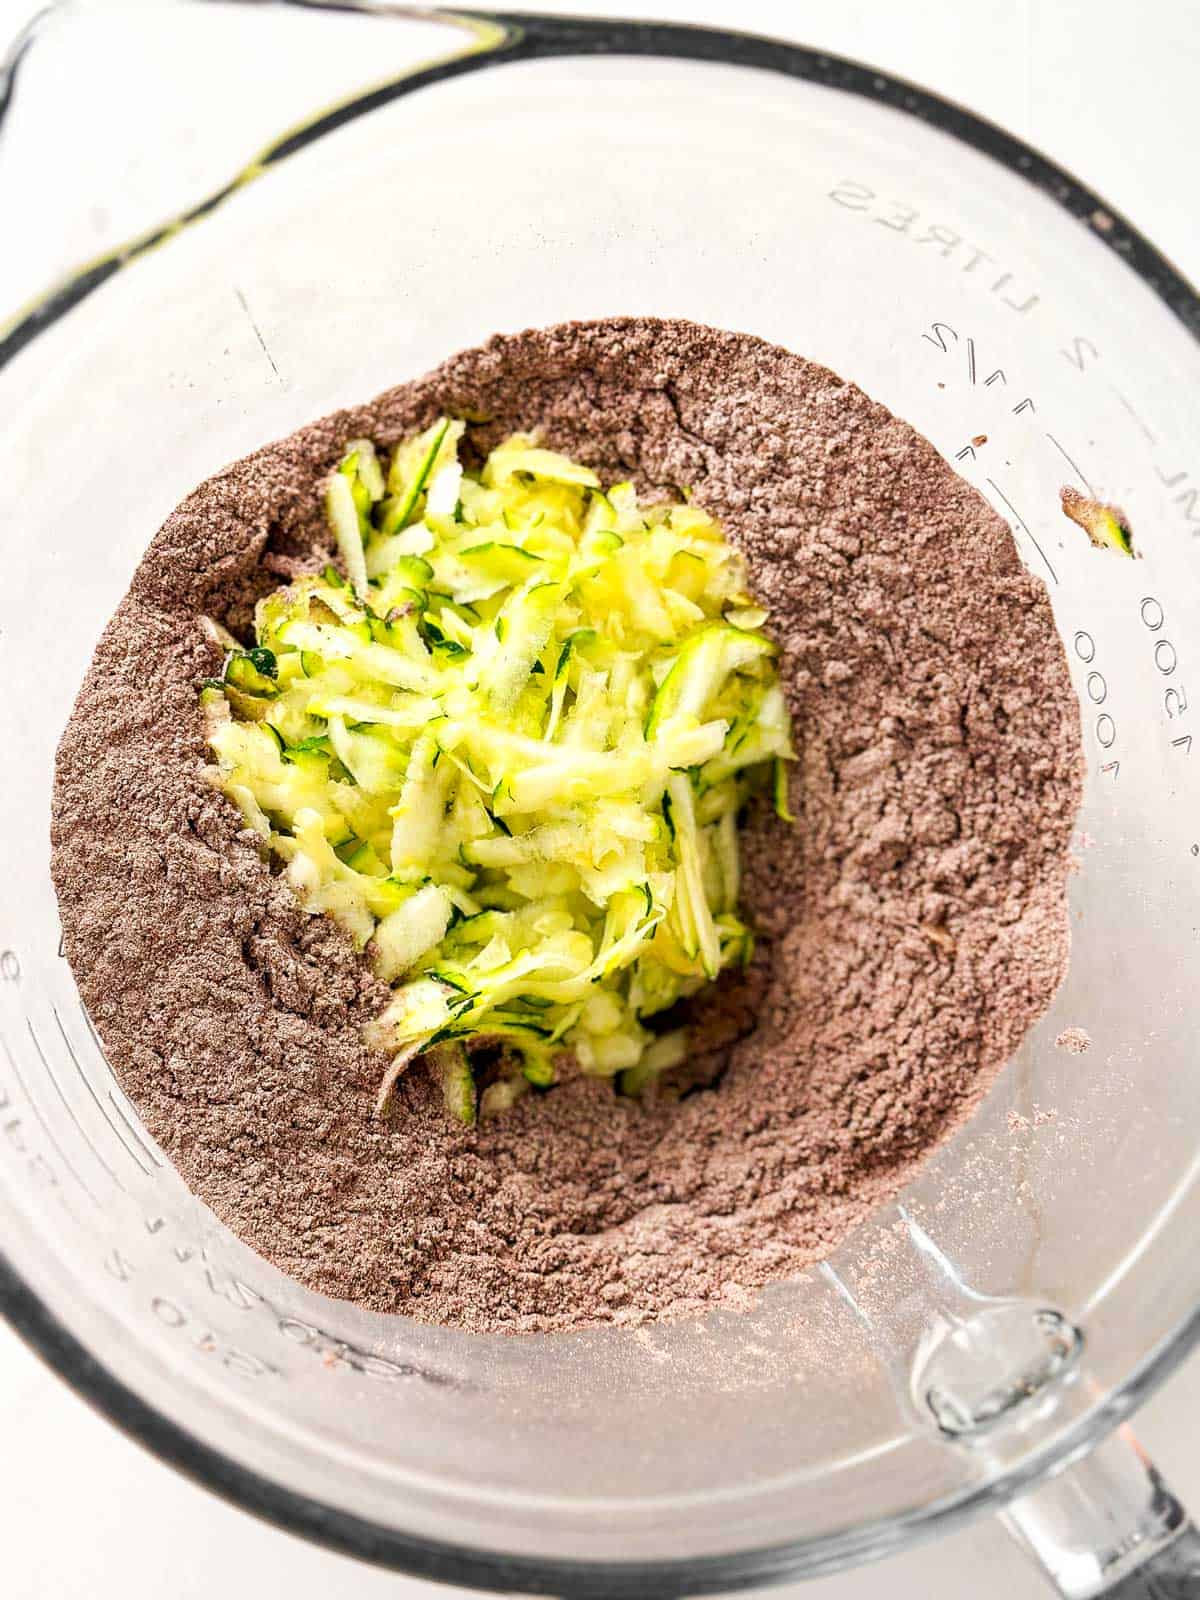
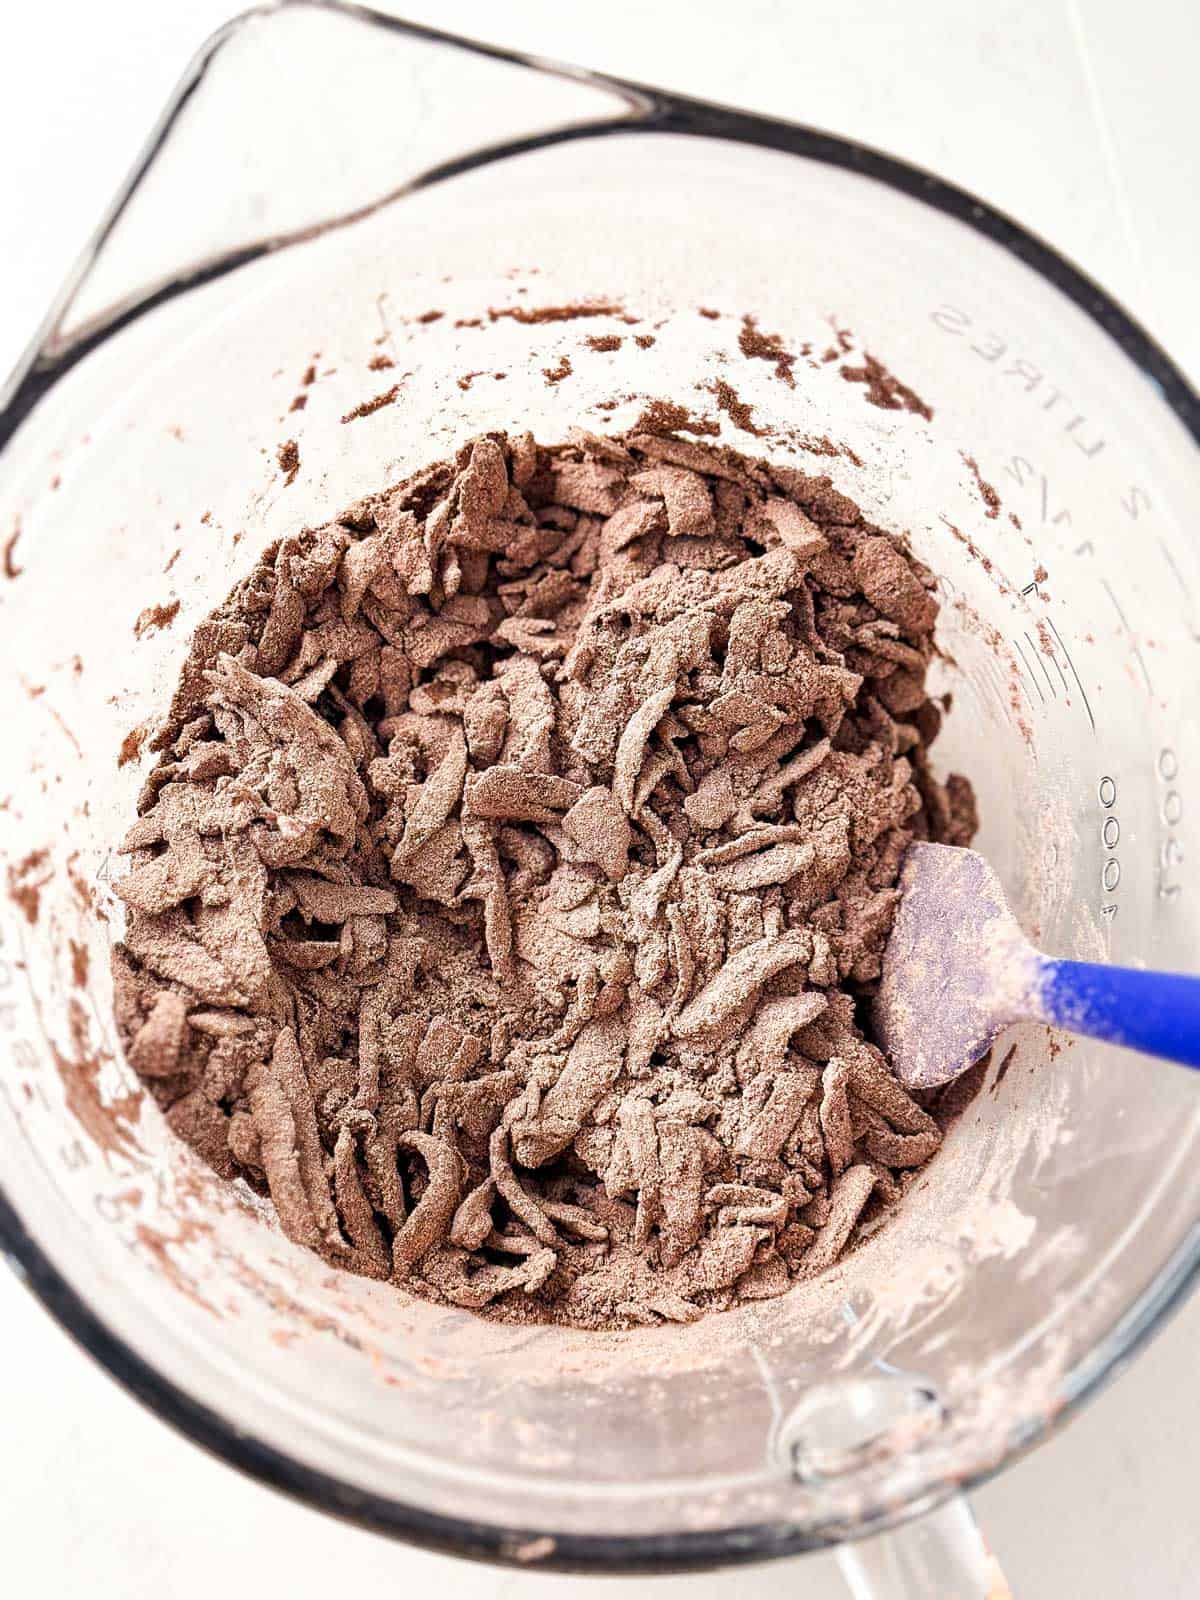
3. Fold in the zucchini and chocolate chips:
Now add the shredded zucchini to the bowl with the dry ingredients. It may seem strange and counter-intuitive to fold it into the flour mixture, but trust me: This is how you’ll end up with evenly distributed zucchini and a lovely fudgy texture without any soggy spots.
Work quickly here to keep the zucchini from clumping together. You’ll want it all evenly coated with flour mixture and evenly distributed. Use a rubber spatula or wooden spoon here for the best results – a whisk doesn’t work well for this step.
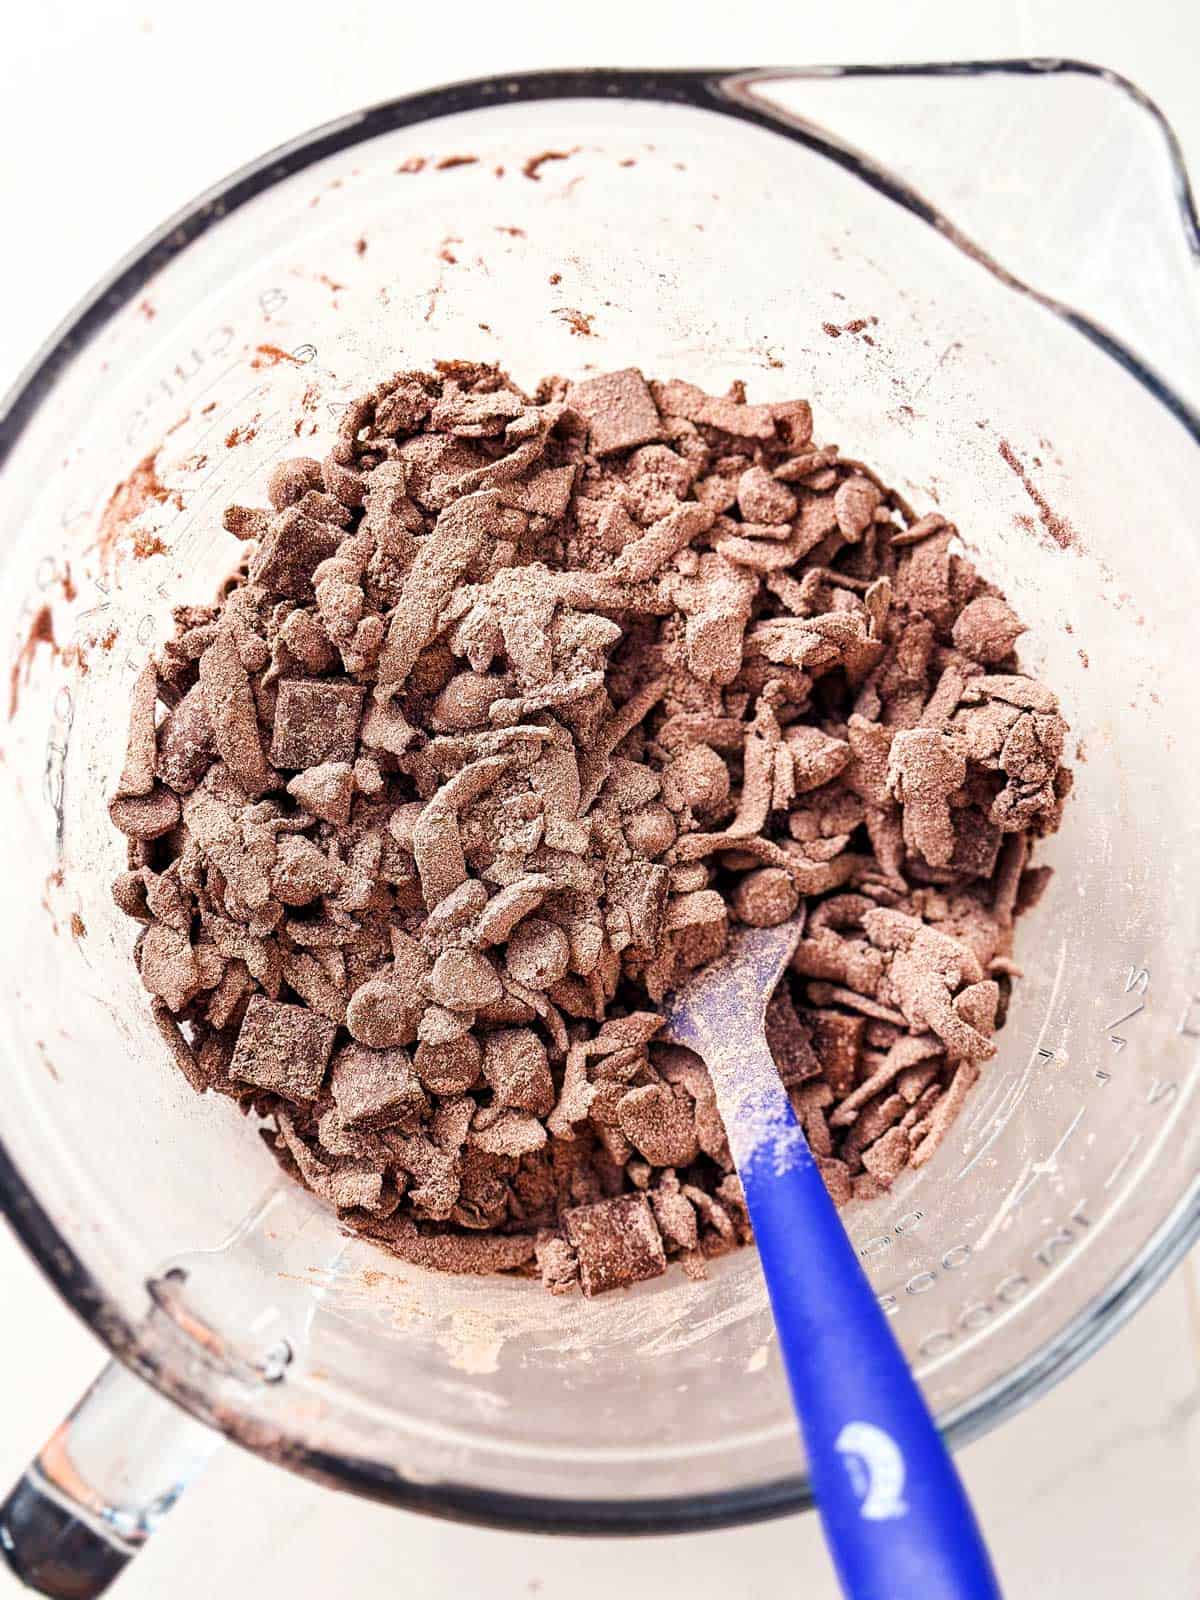
Once you’ve stirred in the zucchini, do the same with the chocolate chips. Again, adding them to the dry ingredients will help distribute them more evenly in your finished bread.
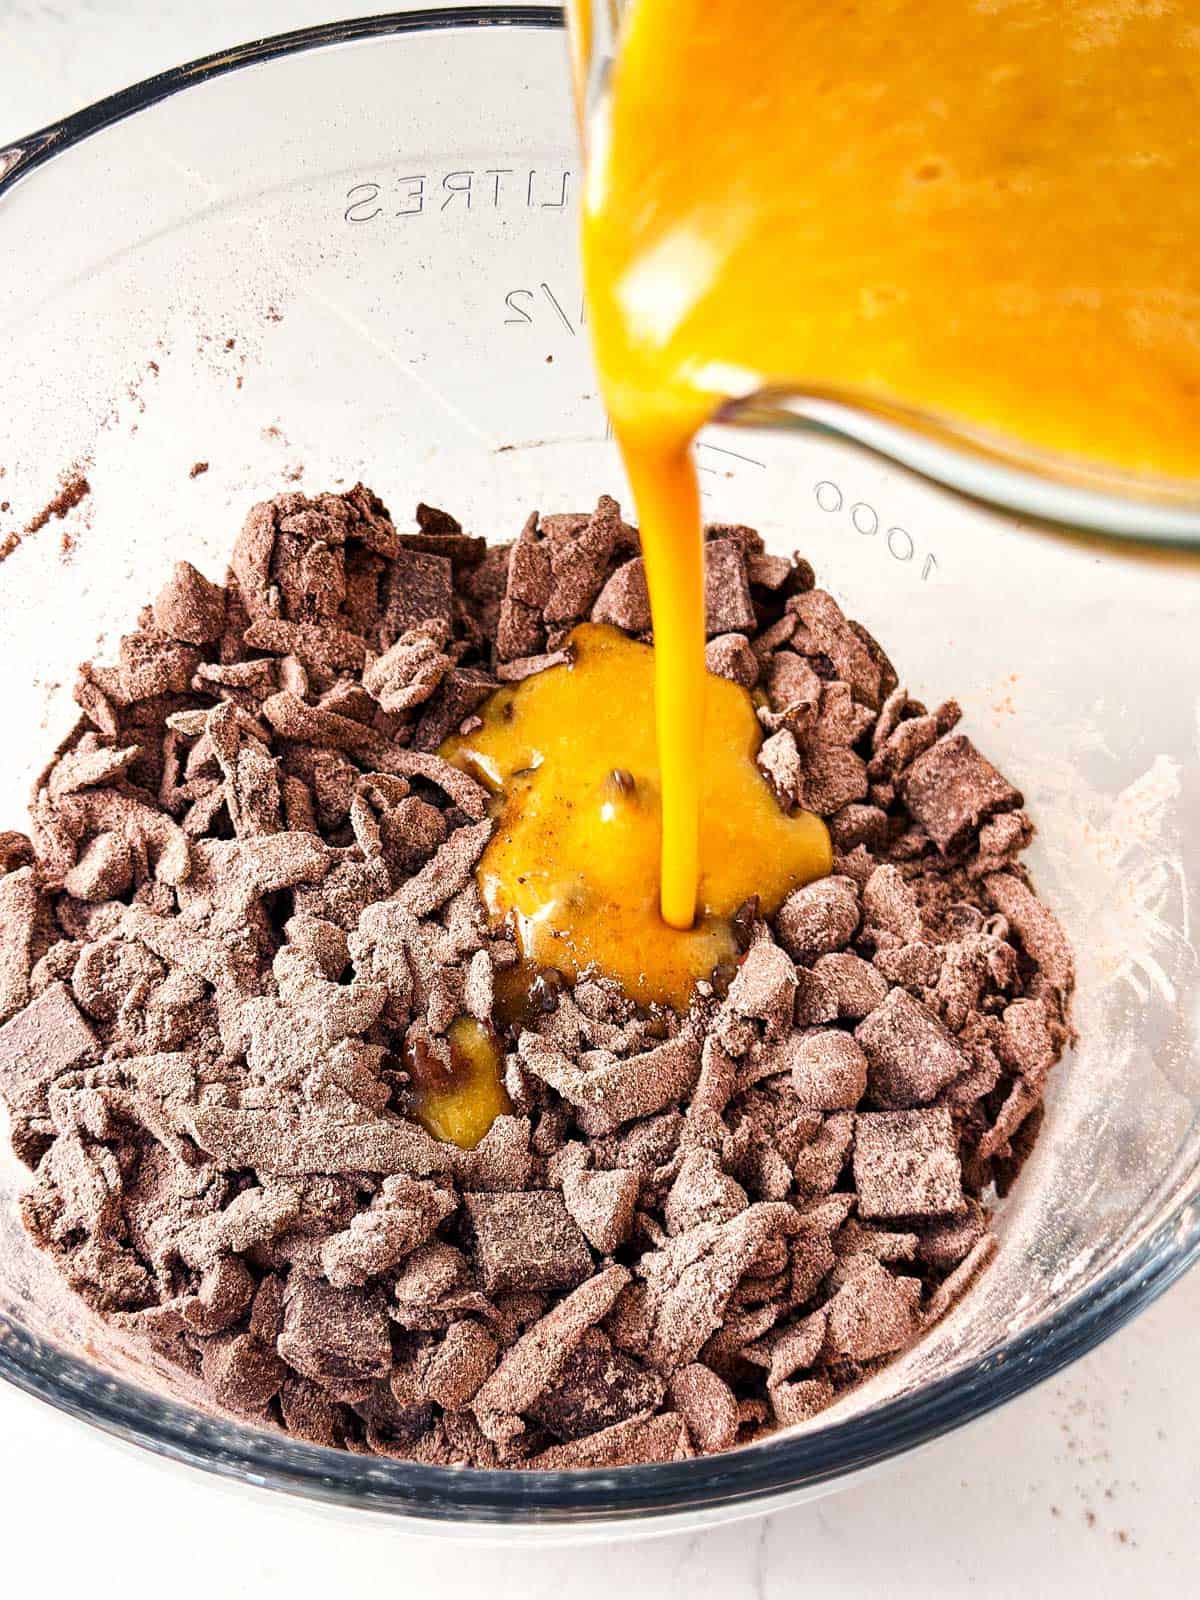
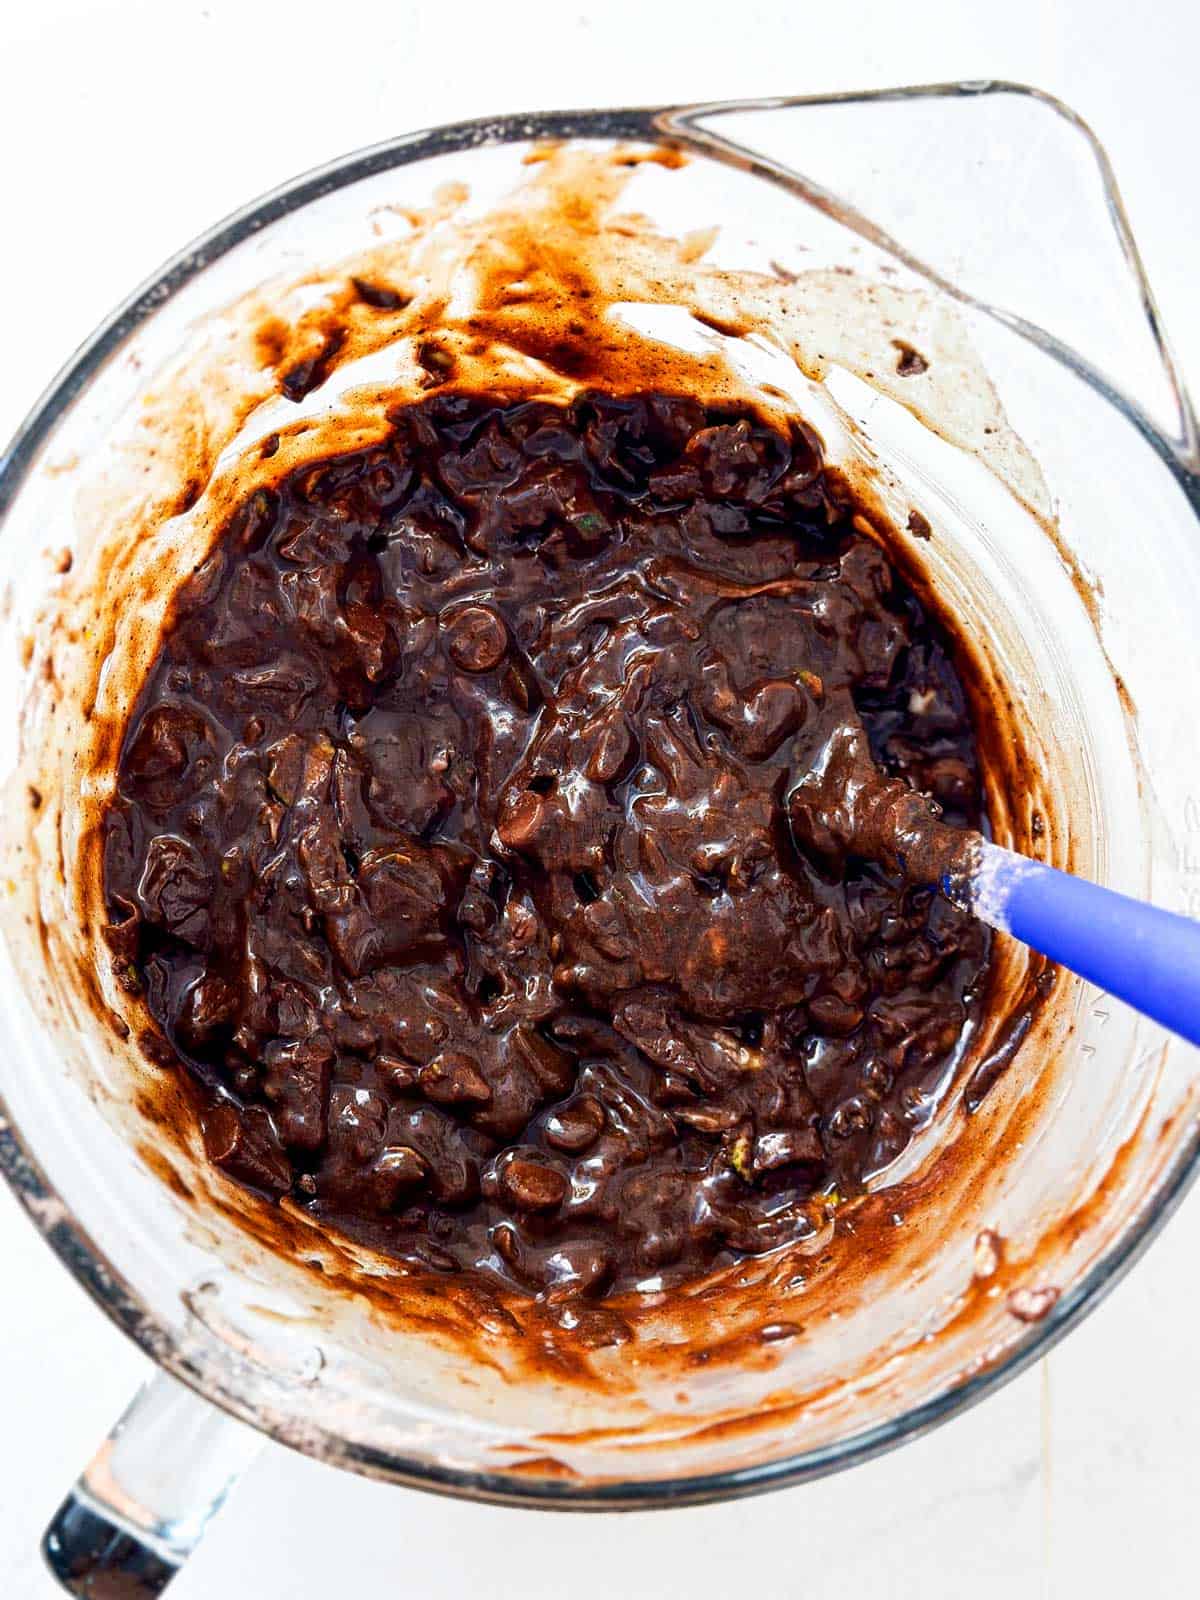
4. Combine the batter:
Now it’s time to bring everything together: Slowly pour the wet ingredients into the bowl with the dry ingredients. As you do this, gently stir the mixture using a wooden spoon or a rubber spatula to combine everything. You’ll start to see the batter come together into a thick, chocolaty mix.
The batter will be quite thick, but don’t worry; this is exactly how it should be. The zucchini will release moisture as it bakes, making sure your bread turns out perfectly moist and delicious. Keep folding until you see no more dry flour – some lumps are fine!
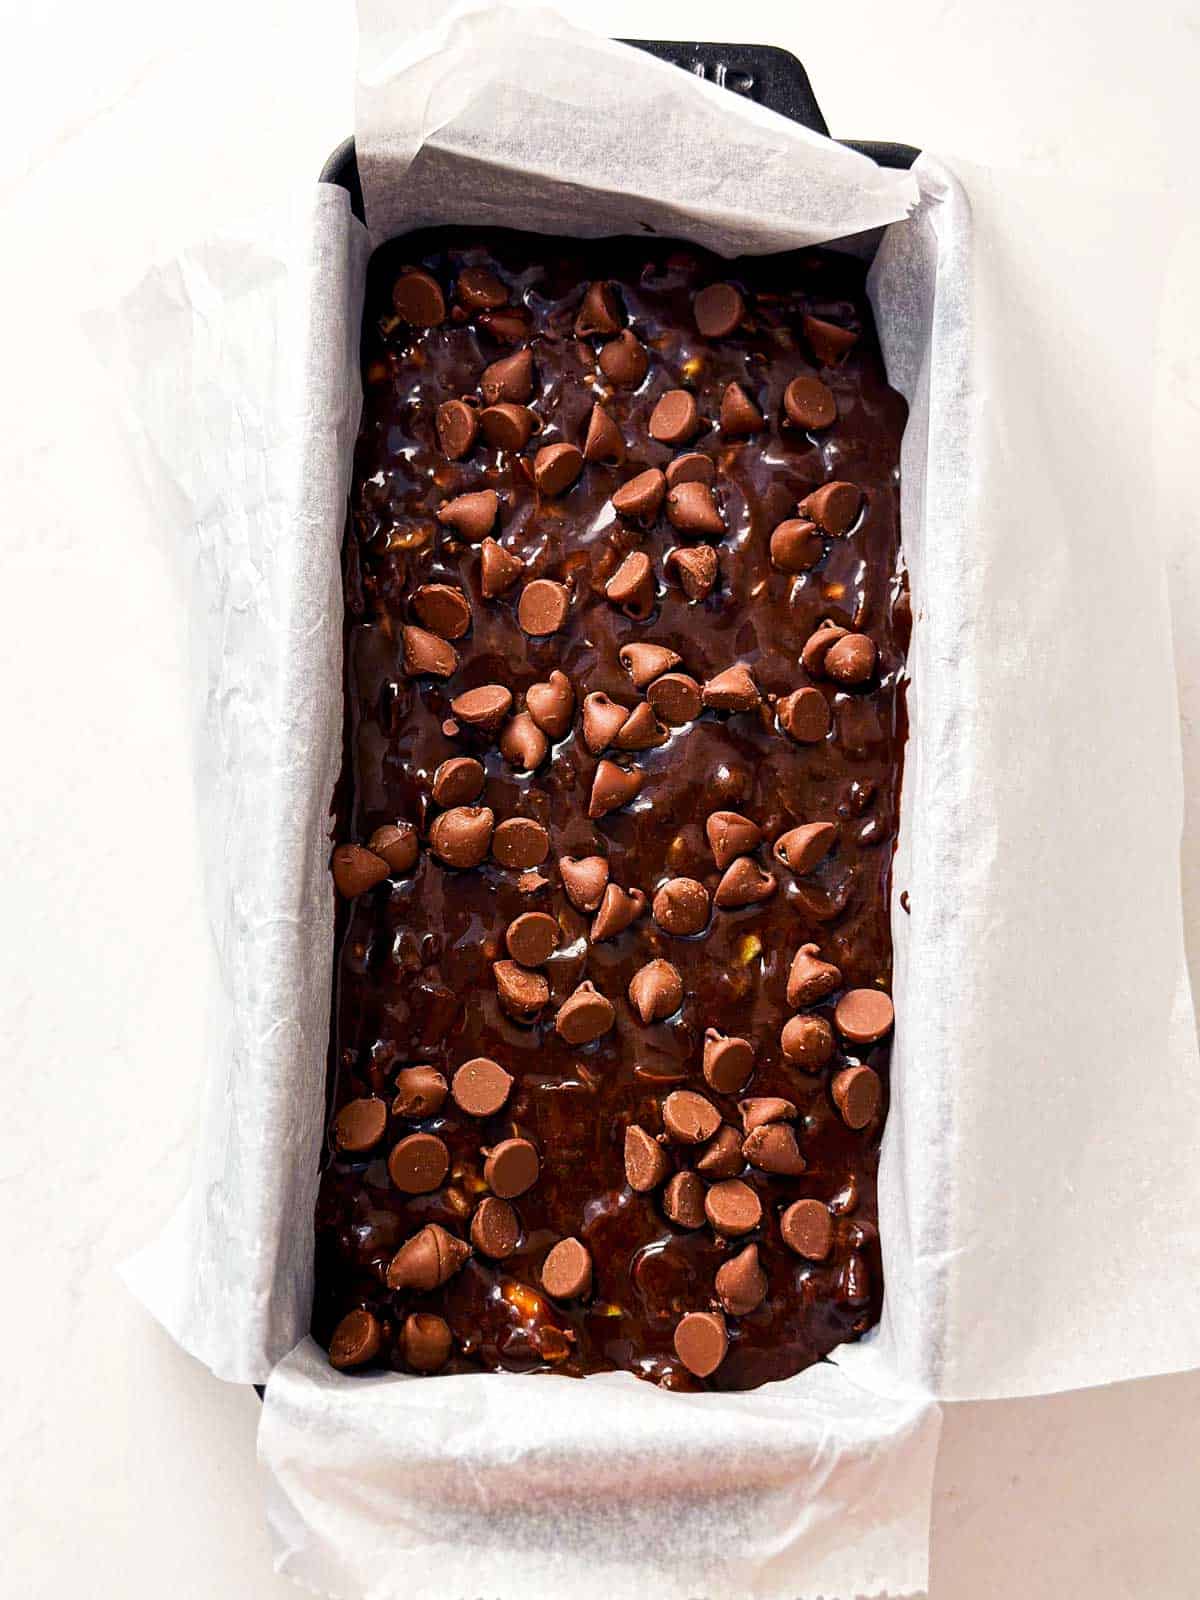
5. Bake and cool the bread
Spread the batter in your prepared loaf pan. Bake at 350°F in the preheated oven for 45-55 minutes, or until the bread is cooked all the way through and a toothpick inserted into the middle comes out without any liquid batter attached.
Depending on your oven, it may be necessary to loosely cover the top of your bread with a piece of aluminium foil after 25-30 minutes of baking time to keep the bread from getting too dark, so keep an eye on your bread!
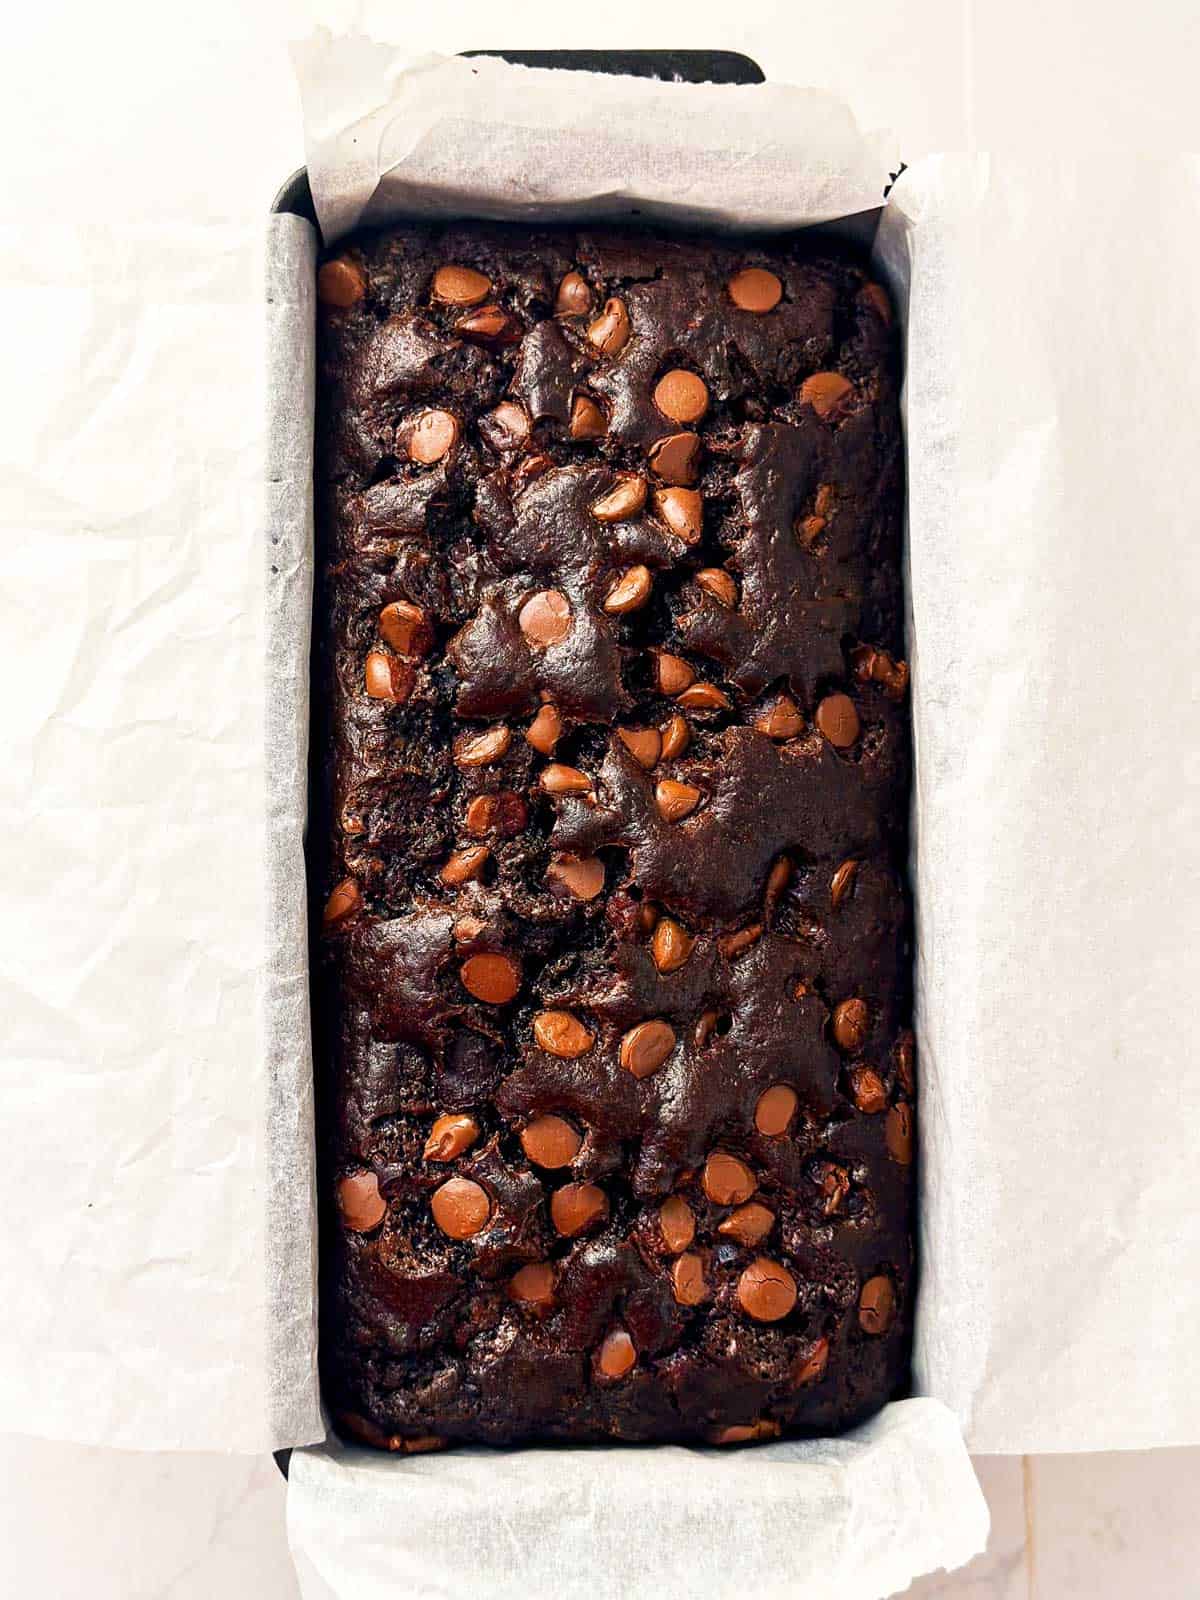
Once done, remove the bread from the oven and place it on a cooling rack in the pan for 5 minutes before lifting it out to cool completely on the rack.
Top tips
- Mixing: Don’t overmix the batter once the wet and dry ingredients have been combined. Only stir until no more dry flour is visible, or else the bread may come out dense. And don’t use a whisk for this step! First of all, the chocolate chips and zucchini will get stuck. But also, a whisk is too vigorous here.
- Batter thickness: If you check the photos above, you’ll see that the batter is quite thick. That’s fine! It’s supposed to be a thick batter, as the zucchini cooks in the oven it will release moisture and make the bread come out exactly right.
- Baking time and pan: The baking time will vary depending on the type of pan you use and your exact oven. I highly recommend using a metal pan for quick breads, glass pans bake differently. Even metal pans vary – when I use my cast iron pan (like I did for the photos) I will have to turn down the heat a little at some point, else the sides of the bread burn. The recipe instructions are written for a standard metal loaf pan. If you use and love a different pan and know what tweaks you have to make to make it work – feel free to do so!
- Cooling: I highly recommend waiting for the bread to cool completely before slicing it, for the best taste and texture.
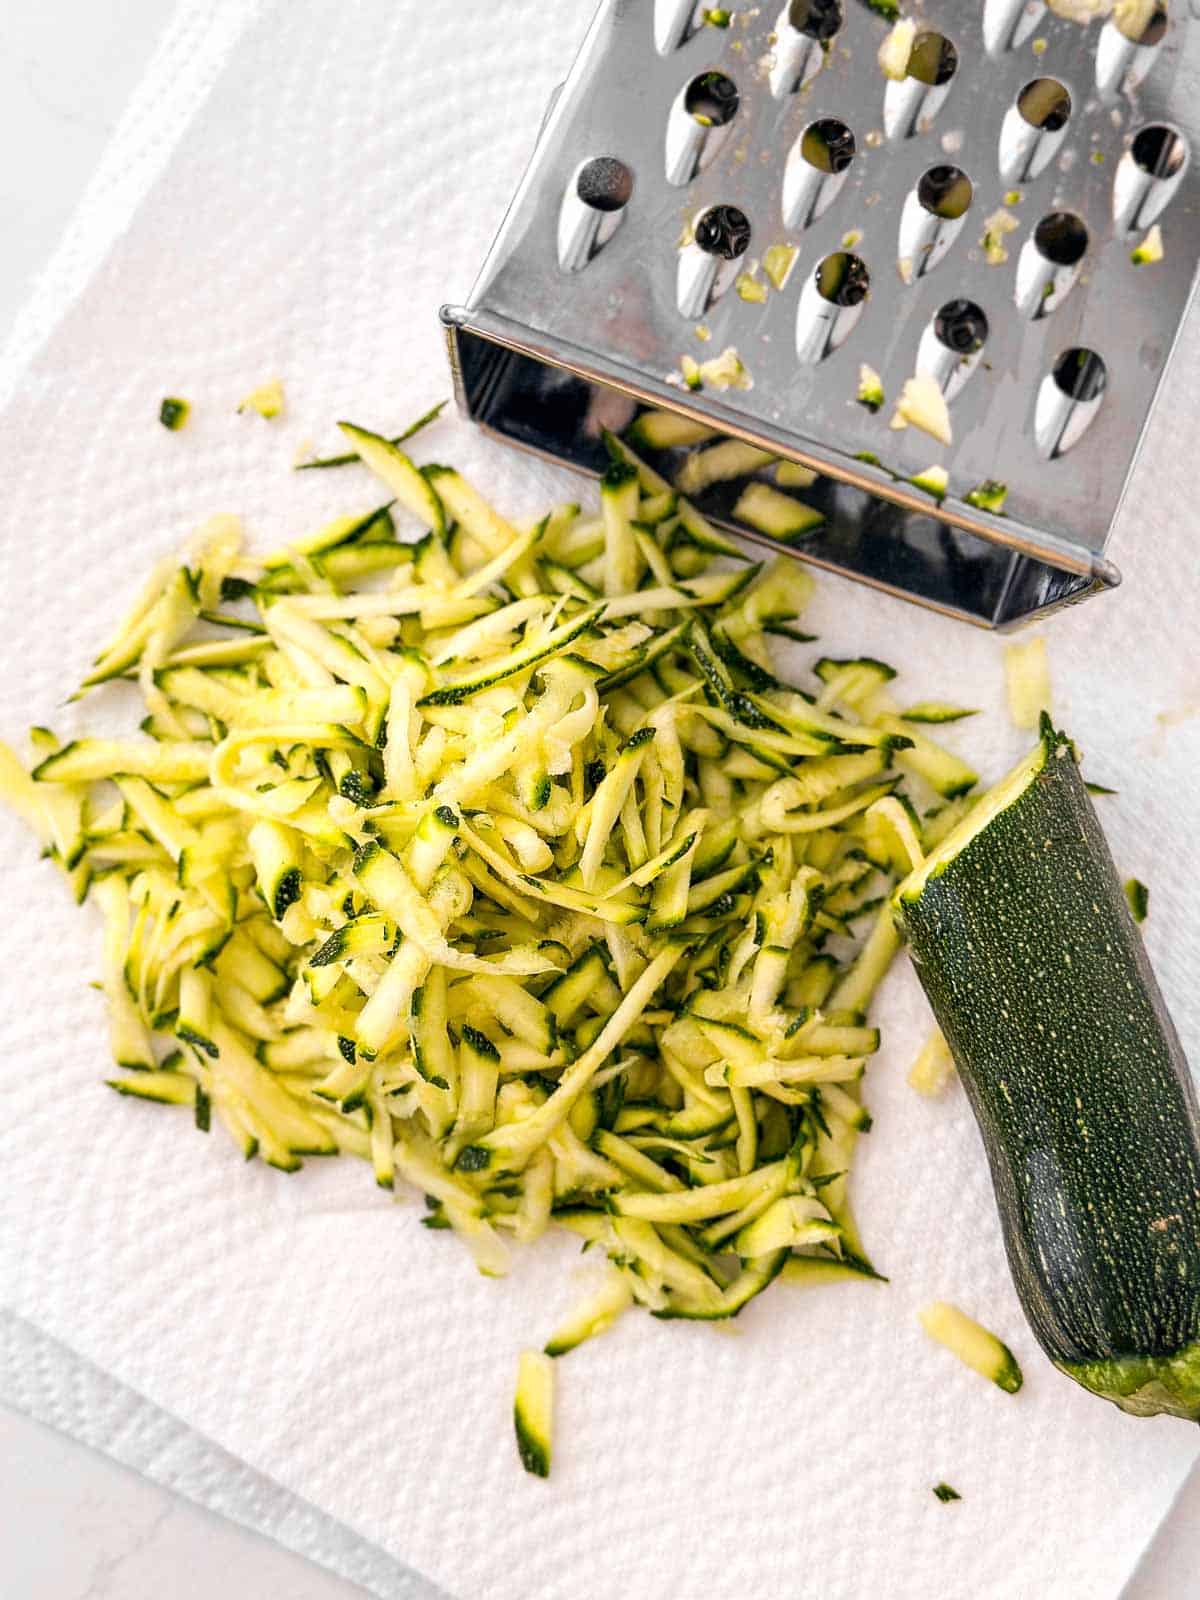
How to shred zucchini for baking
It’s easy to prepare your zucchini for baking! There’s no need to peel the zucchini, unless you’re feeding picky eaters and want to eliminate any hint of green. Otherwise, just trim one end, then use the coarse side of a box grater to shred it.
I recommend making short movements and to hold the zucchini straight vs angled, to get shorter shreds instead of very long ones.
Helpful hints
Recipe variations
- Double the recipe: Double all ingredients, divide the batter between 2 loaf pans and bake according to the recipe instructions.
- Make muffins: You can easily bake this batter in muffin cups instead of a loaf pan. Preheat your oven to 425°F. Divide the batter between 12 muffins cups. Lower the oven temperature to 400°F right before placing the muffins in the oven. Bake at 400°F for 5 minutes, then without opening the oven door, lower the heat to 350°F and finish baking for around 15 minutes or until a toothpick stuck into the middle of a muffin comes out without any liquid batter attached (crumbs or melted chocolate are fine).
- Add nuts: Add ⅓ cup chopped pecans or walnuts for some extra nutty crunch.
Storage
Leftovers:
Store the cooled bread loosely covered on the counter at normal room temperature for up to 3 days.
If you live in a hot/humid climate and your house gets warm, I highly recommend storing the bread wrapped in plastic wrap in the fridge for up to 4 days. We live in a place where it gets very hot in the summer and I don’t like running the AC all the time. I’ve had more than one zucchini bread go bad very quickly when I didn’t place it in the fridge, so make sure to take this precaution if this applies to you.
Freezer:
This bread freezes well. Allow it to cool completely on a cooling rack, then wrap well in plastic wrap and then in aluminium foil. Label with the name and use-by date, then freeze for up to 3 months.
Defrost the bread on the counter until it’s no longer frozen in the middle. Serve at room temperature.
Serving ideas
My kids like this bread by itself as a sweet afternoon snack on lazy summer days. If we’re having it for breakfast, I add a side of Greek yogurt for some protein. One kid likes it with a spread of peanut butter.
If you’re wanting to serve this as a simple dessert, a scoop of vanilla or chocolate ice cream certainly doesn’t hurt! You can also frost the bread with a quick whipped chocolate frosting, or serve it with a dollop of whipped cream!
PS If you try this recipe, please leave a review in the comment section and add a star rating in the recipe card – I appreciate your feedback! Follow along on Pinterest, Facebook or Instagram.
Chocolate Zucchini Bread
Recipe details
Ingredients
- 2 large eggs
- ⅓ cup neutral vegetable oil OR melted butter
- ¼ cup sour cream OR plain Greek yogurt
- ½ cup light brown sugar
- ¼ cup granulated sugar
- 1 teaspoon vanilla extract
- 1 cup all-purpose flour
- ½ cup natural unsweetened cocoa powder
- 1 teaspoon baking powder
- ¼ teaspoon baking soda
- ¼ teaspoon salt
- 1 ½ cups shredded zucchini about 1 medium or just under ½ pound
- ¾ cup chocolate chips OR chunks, milk or semi-sweet (plus more for garnish if desired)
Instructions
- Prep: Heat oven to 350°F. Line a 4×8 or 5×9 inch loaf pan with baking parchment or spray well with nonstick cooking spray.
- Combine wet ingredients: Using a whisk, blend 2 large eggs, ⅓ cup neutral vegetable oil, ¼ cup sour cream, ½ cup light brown sugar, ¼ cup granulated sugar, and 1 teaspoon vanilla extract in a large measuring jug until combined; breaking up any lumps of brown sugar.
- Combine dry ingredients: In a large bowl, whisk together 1 cup all-purpose flour, ½ cup natural unsweetened cocoa powder, 1 teaspoon baking powder, ¼ teaspoon baking soda and ¼ teaspoon salt.
- Add zucchini and chocolate chips: Using a rubber spatula, fold 1 ½ cups shredded zucchini into the flour mixture, taking care to make sure it's evenly distributed. Add ¾ cup chocolate chips and fold in as well. Continue with recipe quickly to keep zucchini from getting soggy!
- Make batter: Pour wet into dry ingredients, using a rubber spatula stir just until combined and no more dry flour is visible – some lumps are fine. Batter will be thick.
- Bake: Pour batter into prepared pan. Sprinkle with 2 tablespoons chocolate chips if desired. Bake at 350°F for 45-55 minutes, until top is risen and deep chocolatey in color and a toothpick inserted into the middle comes out without any liquid batter attached. Cover bread with foil after 25-30 minutes of baking time in case top gets too dark.
- Cool: Once baked, remove pan from oven and set on a cooling rack for 5-10 minutes before lifting bread out of pan to set on cooling rack until cooled enough to handle. Peel off parchment and place bread back on cooling rack to cool completely.
Notes
Ingredient notes
- Cocoa powder: Use regular unsweetened cocoa powder, not Dutch processed.
- Zucchini: I prefer using an actual medium zucchini vs a portion of a large one, because larger ones usually have more/larger seeds and may release too much water during baking.
- Chocolate chips/chunks: I use a mix of semi-sweet chocolate chunks and milk chocolate chips, because that’s what we’ve come to like best. Feel free to use 1 cup of your favorite chocolate chips or chunks!
Recipe tips
- Mixing: Don’t overmix the batter once the wet and dry ingredients have been combined. Only stir until no more dry flour is visible, or else the bread may come out dense.
- Baking time and pan: The baking time will vary depending on the type of pan you use and your exact oven. I highly recommend using a metal pan for quick breads, glass pans bake differently. Even metal pans vary – when I use my cast iron pan (like I did for the photos) I will have to turn down the heat a little at some point, else the sides of the bread burn. The recipe instructions are written for a standard metal loaf pan. If you use and love a different pan and know what tweaks you have to make to make it work – feel free to do so!
- Cooling: I highly recommend waiting for the bread to cool completely before slicing it, for the best taste and texture.
- Storage: Store the cooled bread loosely covered on the counter at normal room temperature for up to 3 days. (Store bread wrapped in fridge if indoor temperature is hot/humid to prevent any spoiling!)
- Freezer: Wrap cooled bread well in plastic wrap and then in aluminium foil. Label with name and use-by date, then freeze for up to 3 months. Defrost on counter until no longer frozen in the middle. Serve at room temperature.


Comments
No Comments