

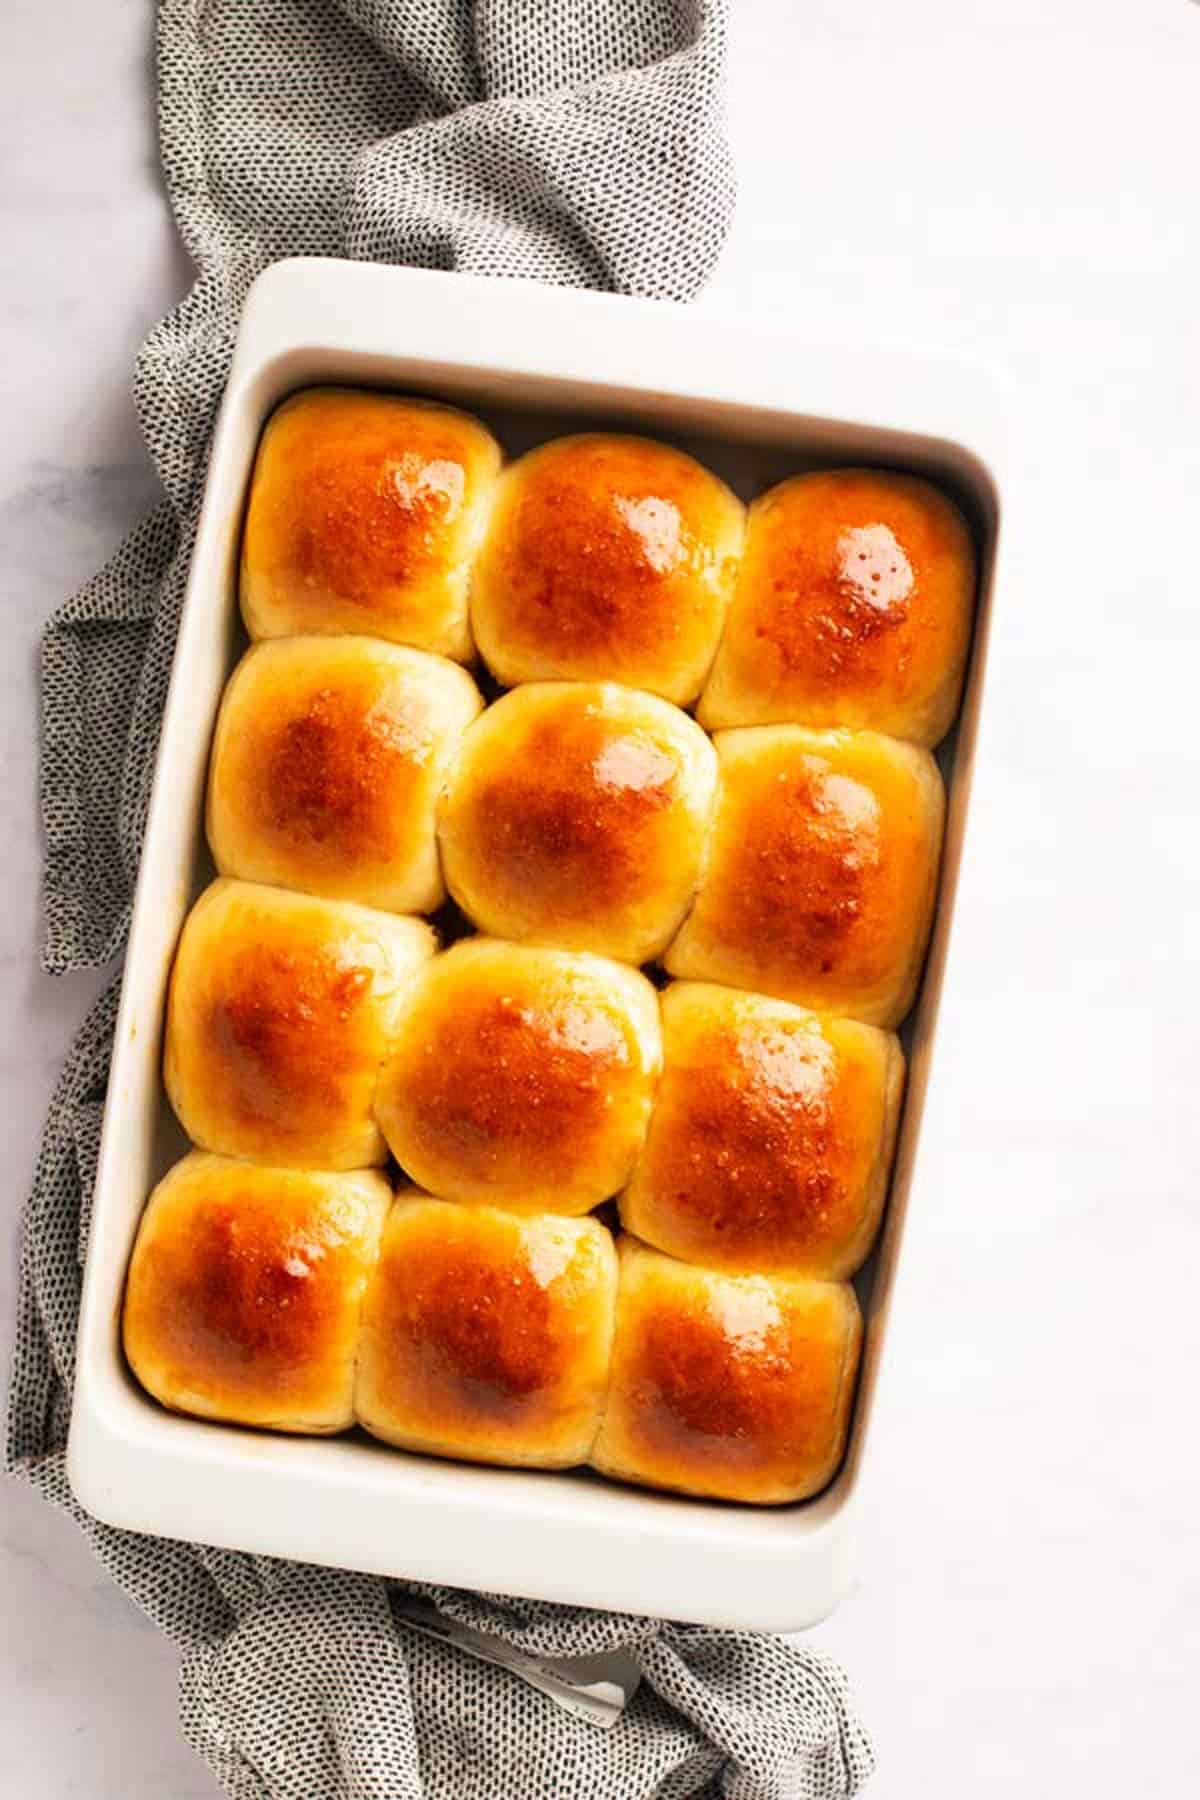
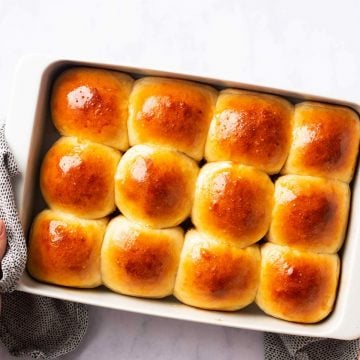
This is my way of making fluffy, light and buttery dinner rolls. My recipe is EASY and quick to prep, and the rolls turn out absolutely beautiful.
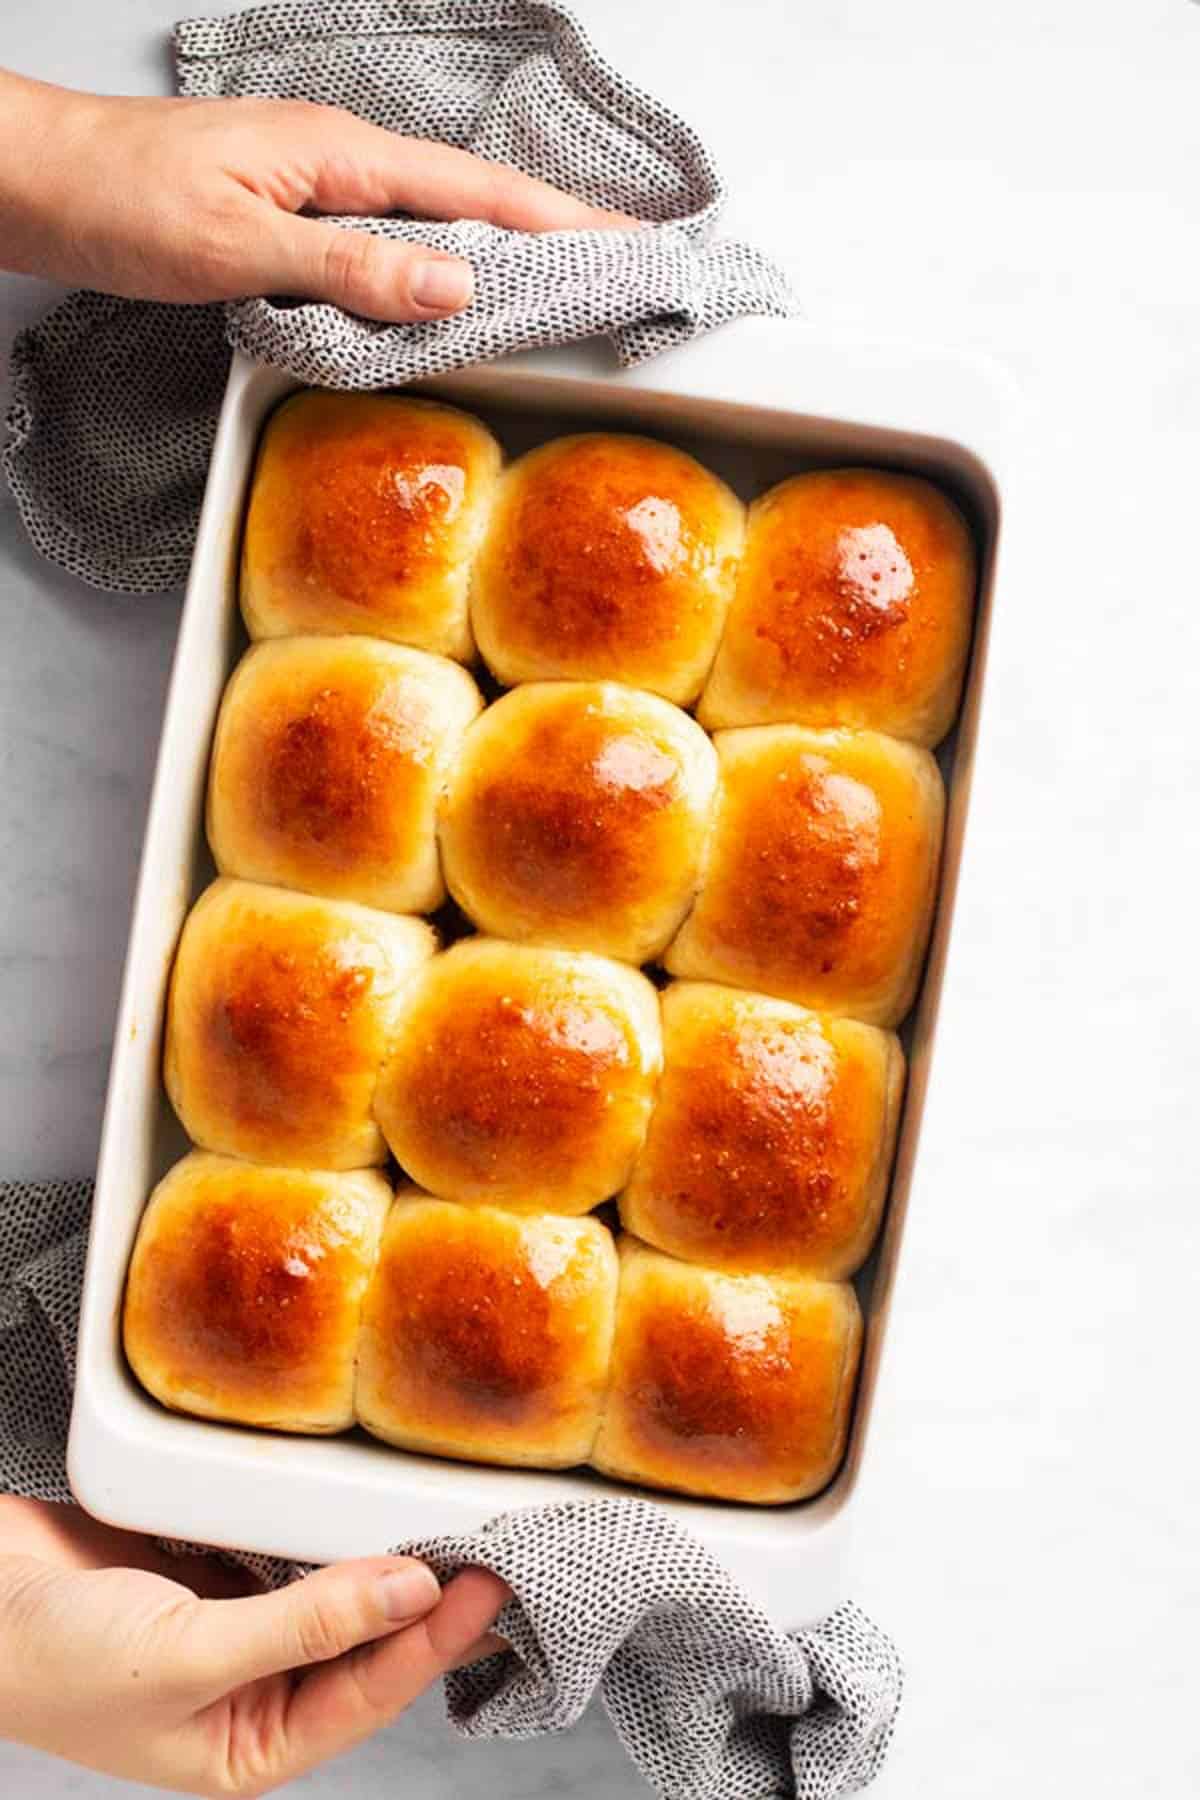
This is how I make my homemade dinner rolls – with an easy dough that’s quick to put together, and with the perfect result!
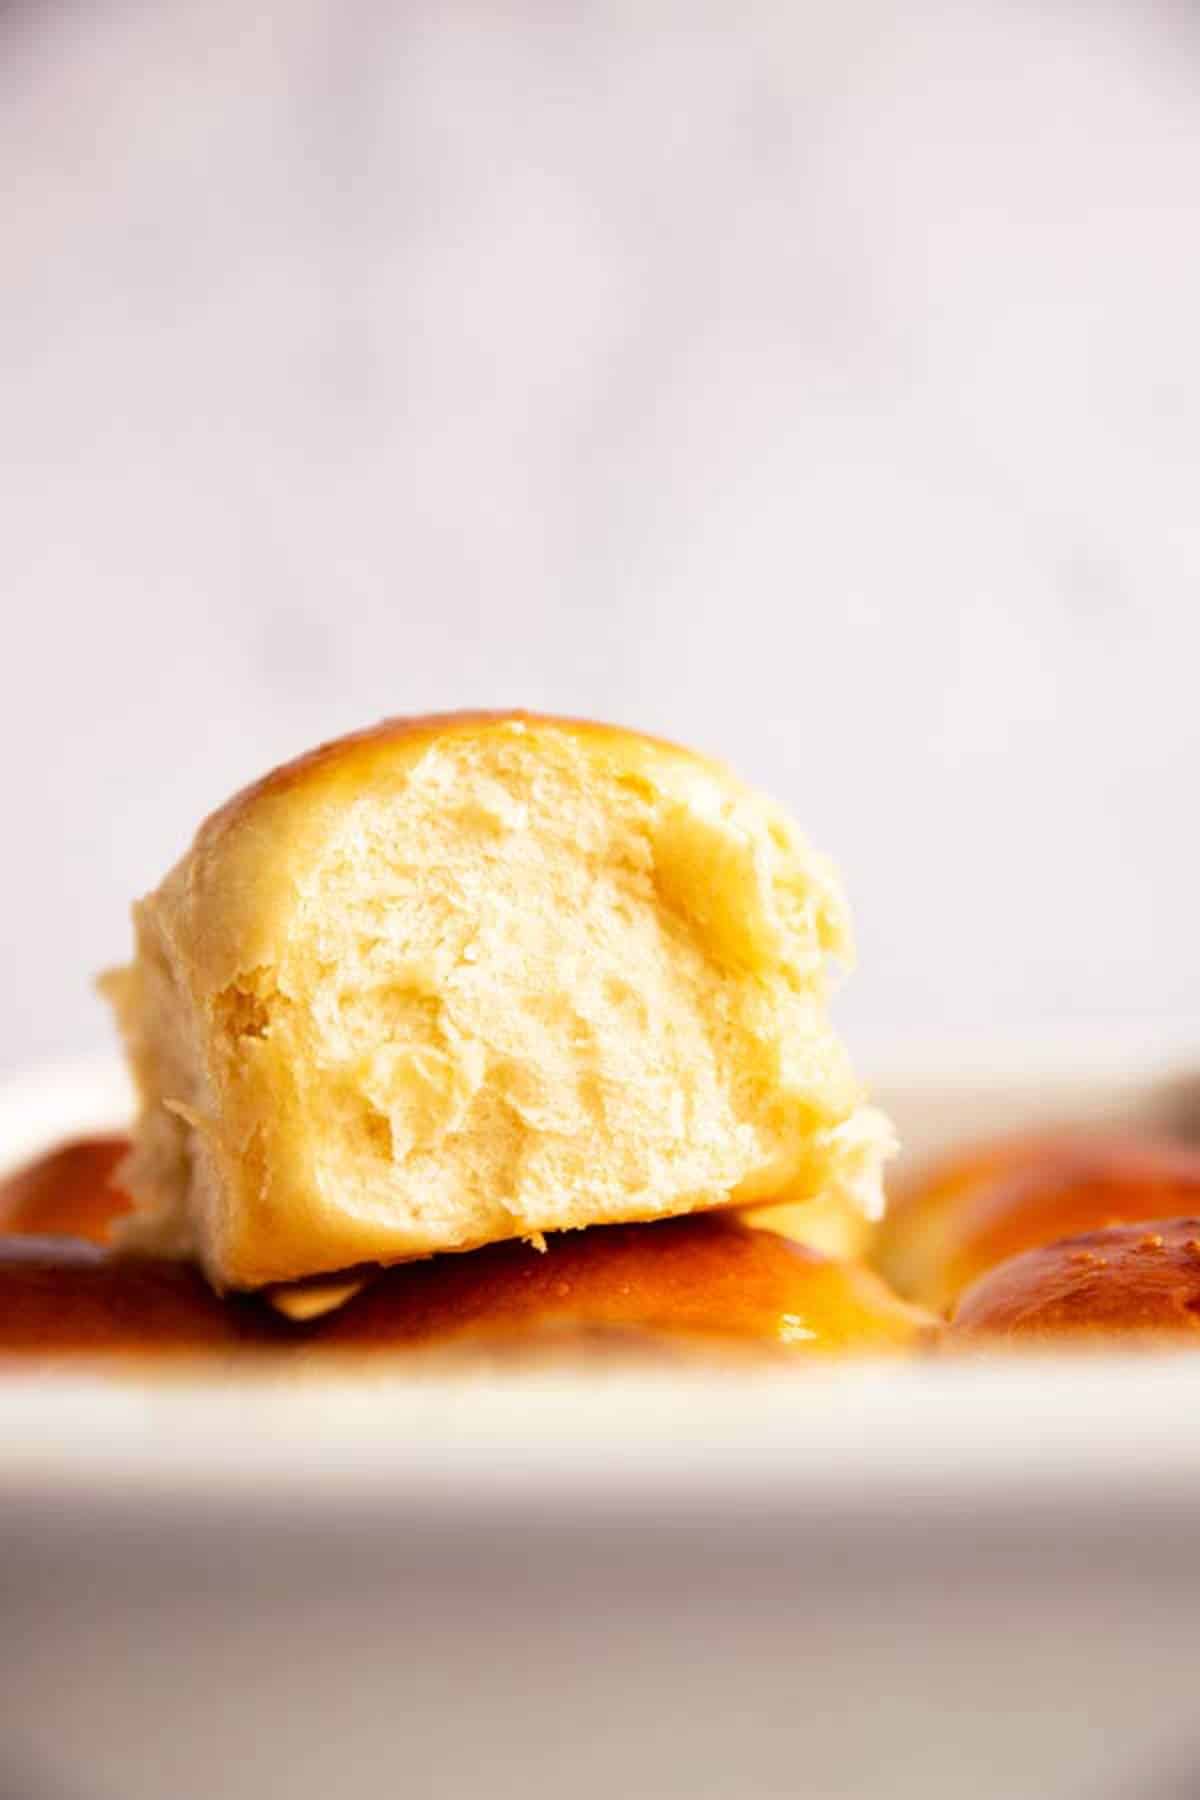
The dough is very soft, just like when making Cinnamon Rolls – this makes the rolls turn out wonderfully soft and fluffy, and you can either brush them with regular butter or with garlic butter after baking for a more savory variety.
These are best eaten warm slathered in butter (or Honey Butter!), but they keep for a day in case you have leftovers. We make them for every holiday – Easter, Thanksgiving, Christmas, you name it! They are perfect to make sliders with, too.
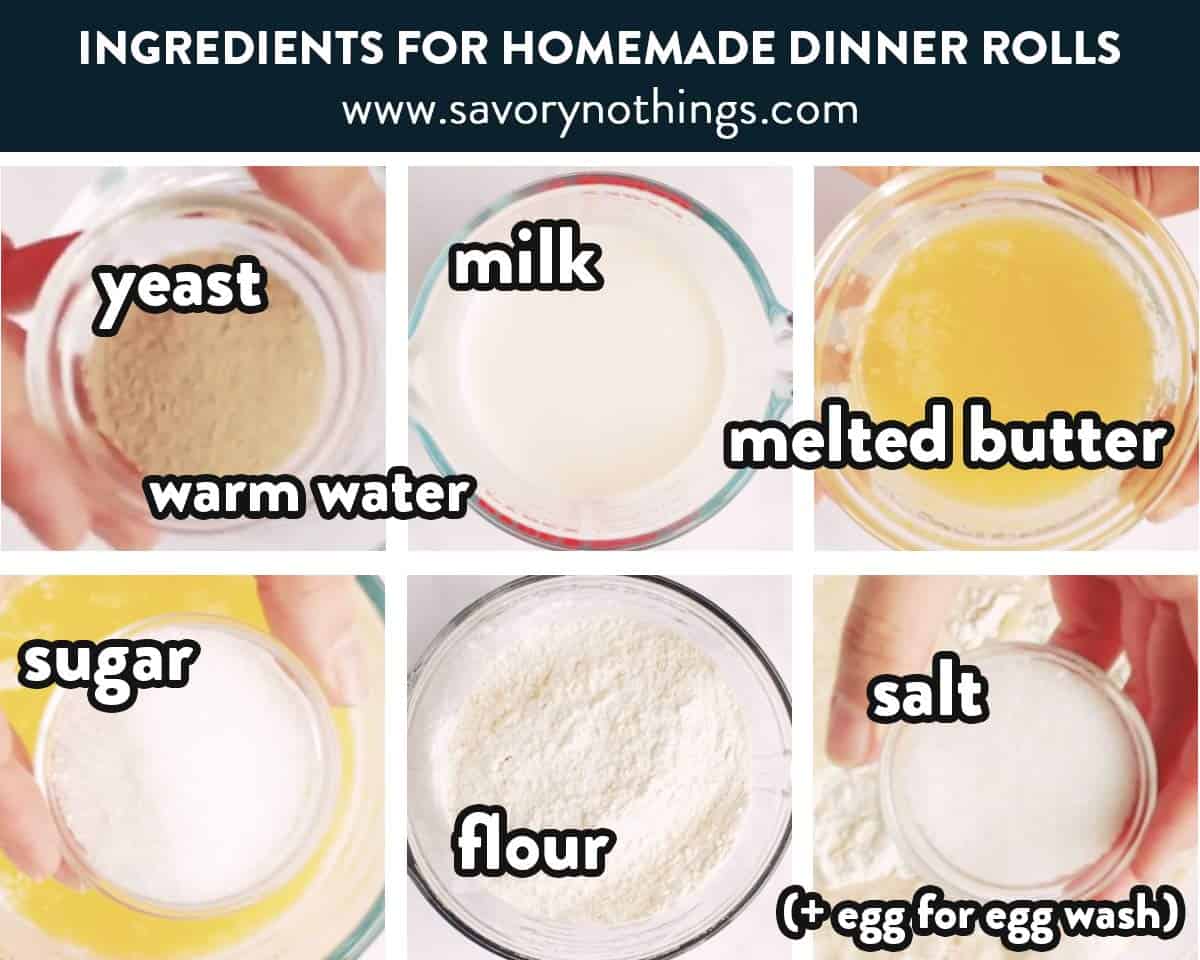
Ingredients you’ll need
Here is a visual overview of the ingredients in the recipe. Scroll down to the printable recipe card at the bottom of this post for quantities!
Ingredient notes
- Yeast: If using organic yeast, the dough may need more time to rise. Instant yeast can be used in place of the active yeast, the dough will rise faster.
- Milk: I prefer whole milk, but any milk can be used.
- Sugar: The sugar helps the yeast to grow and helps with the soft texture of the rolls, it doesn’t make the rolls overly sweet. You can reduce it to 1 tablespoon if you’re concerned about too much sweetness.
- Flour: I have made these with 2 cups whole wheat flour and 2 cups white flour before, they are a little denser and need a bit longer to rise. But they’re still very soft and fluffy! I don’t know if they work with gluten free flour, but if you try, please let me know!
- Egg: If you can’t have eggs or don’t have any on hand, you can instead brush the rolls with half-and-half or with milk. They will not get as shiny or browned, but they’ll still be perfectly pretty and delicious.
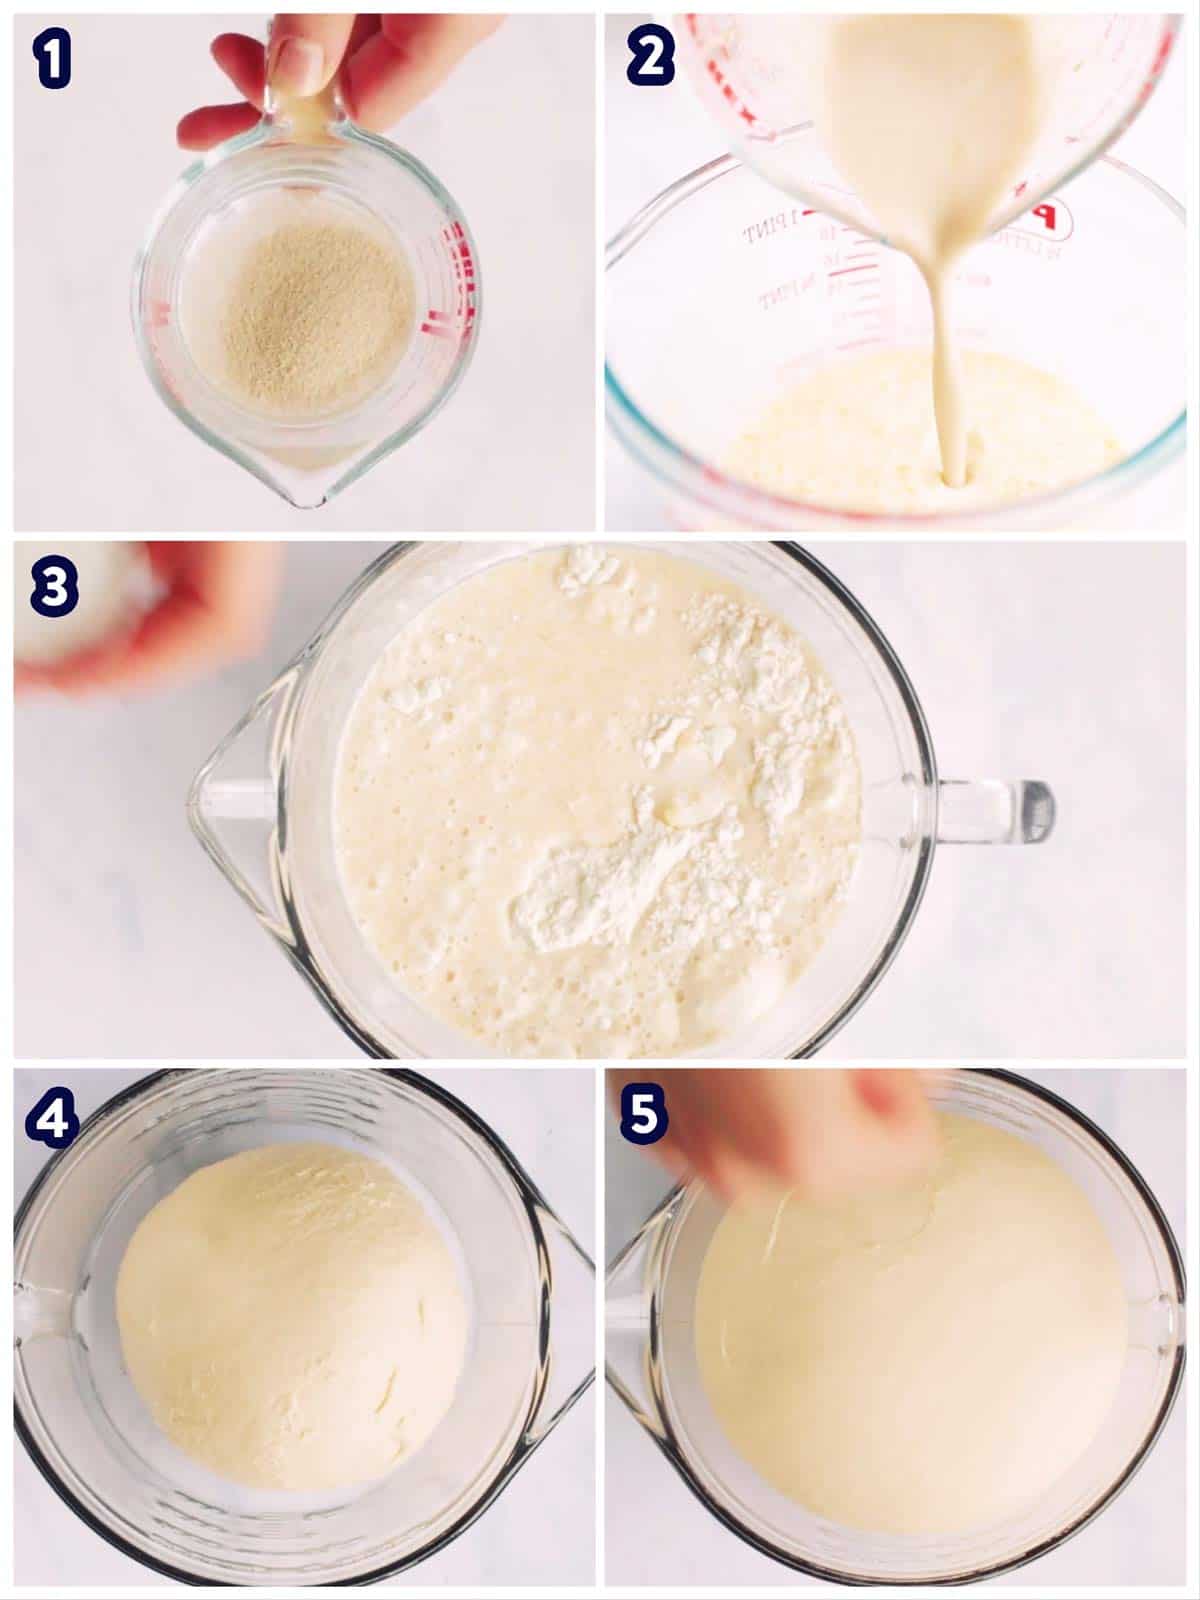
How to make homemade dinner rolls – step by step
First, you’ll need to “bloom” the yeast. Just stir it into warm water and leave it until bubbles appear. Do NOT use hot water, it should be just lukewarm, or the yeast will die (1).
While the yeast sits, combine the milk, melted butter and sugar. Once the yeast is bubbly, add it to the milk mixture and combine well (2).
Add this yeast mixture to 4 cups of flour, add salt (3) and then knead the dough until it’s soft and very pliable (4). Let the dough sit under a clean tea towel in a warm spot until it has doubled in size (5).
Once the dough is ready, punch it down (6) divide it into 12 equal pieces (7) and shape each into a roll. Place in a 9×13 inch dish (8) and let rise until puffy, then brush with egg wash (9) and bake. I like to brush these with melted butter right as they come out of the oven for some extra decadence (10).
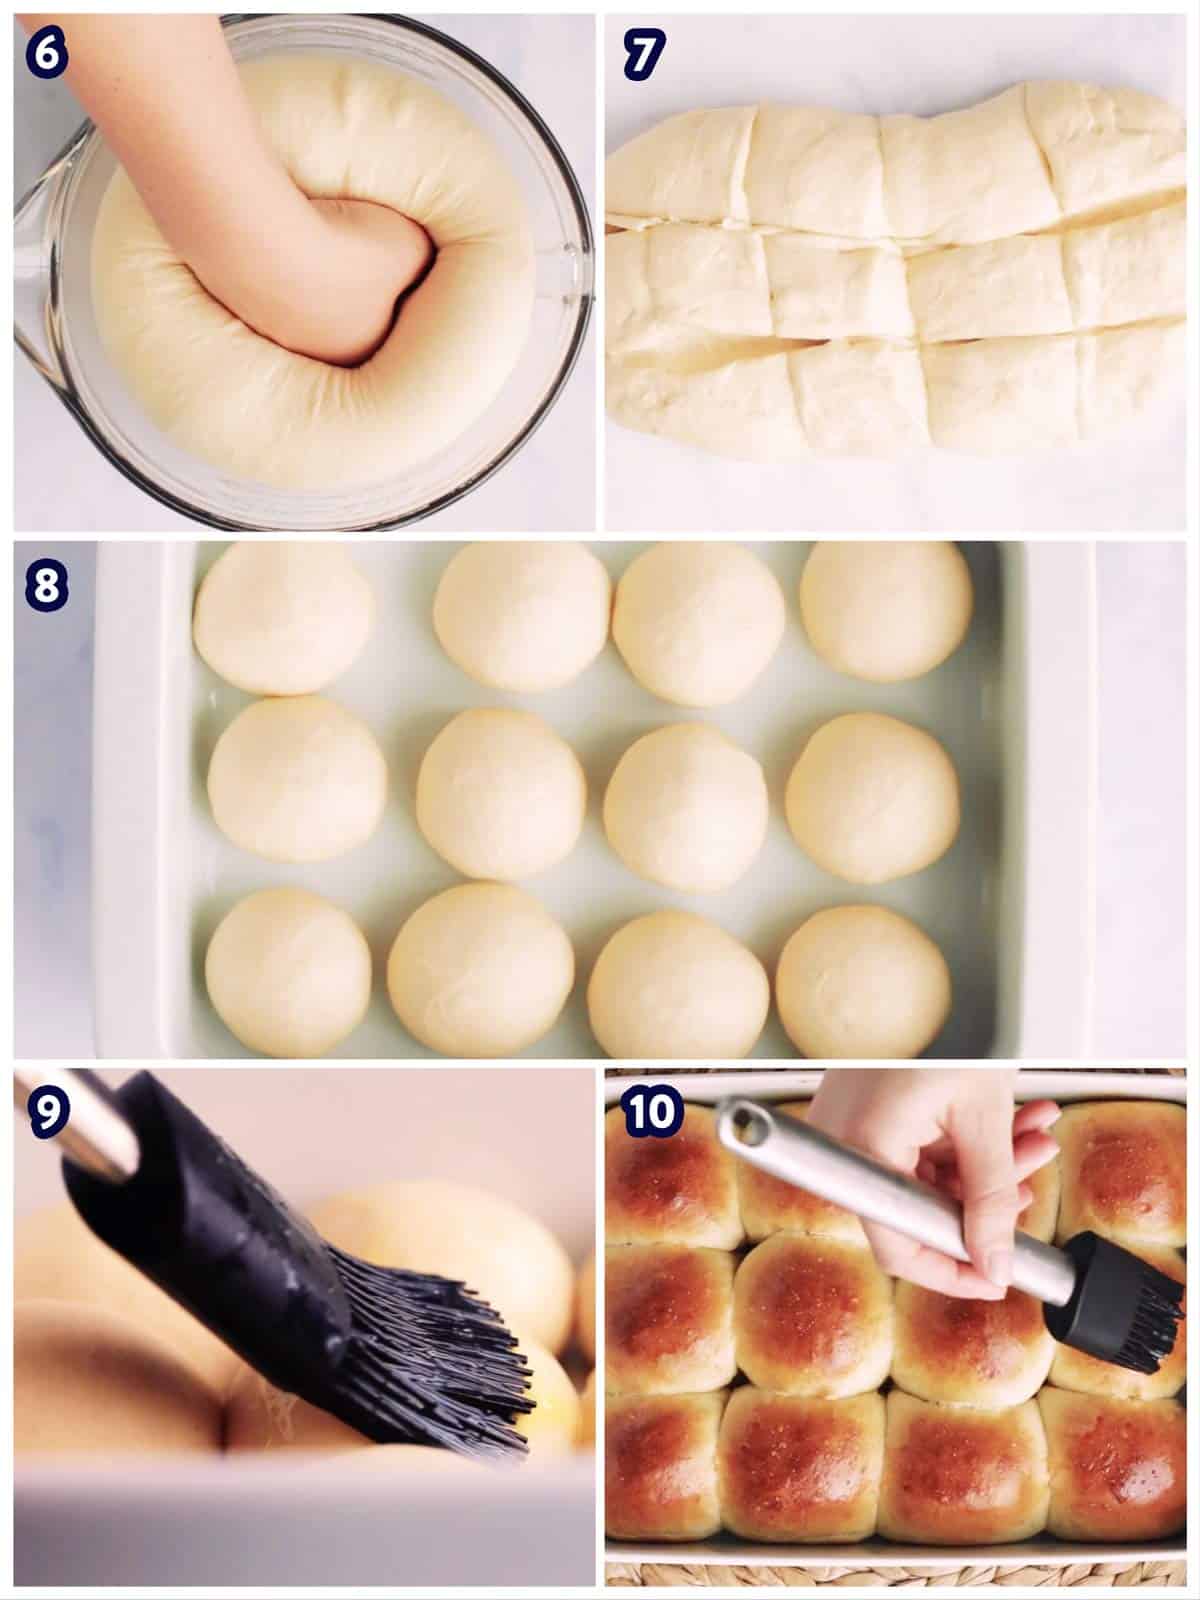
Just don’t burn your fingers when you try to pull a still-too-hot roll from the dish (been there, done that – too many times to count!).
Recipe tips
- Water temperature: Make sure the water you use doesn’t exceed 115°F. Otherwise it will kill off the yeast and your dough will not rise. Also, there’s no need to heat up the milk.
- Flour amount: Make sure to measure your flour correctly (spoon it into a measuring cup until heaping full, then level with a knife). If you add too much flour, your rolls will not turn out soft/fluffy but crumbly like a biscuit.
- Kneading: Knead the dough long enough. It’s hard to overwork yeast dough, so don’t worry about that. With yeast doughs, under-kneading is generally worse than kneading for a little bit too long. It should feel smooth and elastic, and you should be able to pull it a little without it tearing.
- Shaping the rolls: I pinch the dough at the bottom and then roll it in the hollow of my hand on the countertop. Watch the video to see how I shape my rolls to make them look nicely rounded.
- Baking: Make sure to not undertake the rolls, or they’ll sink back and turn out dense. The internal temperature of bread should be around 200°F, so if you have a kitchen thermometer you can check that way.
Freezer instructions
To make these rolls ahead and freeze, I like to freeze the dough, not the baked rolls (they taste much better that way).
- knead the dough as directed in the recipe, then let it rest for just 15 minutes.
- shape into rolls and freeze spaced apart on a lined baking sheet for a couple of hours. Once solid, transfer them to a freezer bag and label with the name and use-by date (use within 3 months) before placing in the freezer.
- to bake, place the rolls in a greased 9×11 pan and let them thaw and rise for 4-6 hours (depends a lot on your altitude and room temperature). Then egg wash and bake as directed!
More homemade bread recipes

PS If you try this recipe, please leave a review in the comment section and add a star rating in the recipe card – I appreciate your feedback! Follow along on Pinterest, Facebook or Instagram.
Easy Homemade Dinner Rolls
Recipe details
Equipment
- Stand Mixer
- 9×11 Inch Baking Dish
Ingredients
For the rolls:
- 1 envelope active dried yeast see notes below!
- ½ cup water about room temperature warm, see notes
- 1 cup milk whole milk or 2% preferred
- 4 tablespoons butter melted
- 2 tablespoons sugar
- 4 cups all-purpose flour or more if needed; spooned and levelled! (too much flour will yield a dense, biscuit-like texture)
- ½ tablespoon salt
For brushing:
- 1 egg for egg wash
- melted butter to brush on the hot rolls
Instructions
- Activate yeast and combine liquid ingredients:Whisk the yeast into the warm water in a small bowl and set aside until bubbles start to appear on the surface. In the meantime, whisk together the milk, melted butter and sugar. Add the activated yeast mixture and whisk until combined.
- Make dough:Add the flour and salt to the bowl of your stand mixer fitted with the hook attachment. Add the milk mixture, then knead on medium-low speed for 5-6 minutes, or until you have a smooth ball of dough. Add an extra tablespoon of flour if your dough feels too sticky!
- Rise:Cover the bowl with a clean kitchen towel and let stand at room temperature for 1 hour, or until doubled in size. Punch down, then divide dough into 12 equal pieces; shape into balls. Place in greased 9×11 inch baking pan. Cover and let rise at room temperature until big and puffed up, about 20-30 minutes.
- Bake:Heat the oven to 375°F. Beat the egg and egg wash the top of the rolls (you will most likely not use the entire egg; don't add too much or you'll have scrambled eggs on top of your rolls). Bake for around 20 minutes or until done. Brush with additional melted butter right as they come out of the oven, if you like. Remove from the pan and serve warm.
Notes
Ingredient Notes:
Yeast: If using organic yeast, the dough may need more time to rise. Instant yeast can be used in place of the active yeast, the dough will rise faster. If you’re concerned about your yeast not activating, stir the 2 tablespoons of sugar into the water and yeast mixture to move things along. Sugar: The sugar helps the yeast to grow and helps with the soft texture of the rolls, it doesn’t make the rolls overly sweet. You can reduce it to 1 tablespoon if you’re concerned about too much sweetness. Flour: I have made these with 2 cups whole wheat flour and 2 cups white flour before, they are a little denser and need a bit longer to rise. But they’re still very soft and fluffy! Egg: If you can’t have eggs or don’t have any on hand, you can instead brush the rolls with half-and-half or with milk. They will not get as shiny or browned, but they’ll still be perfectly pretty and delicious.Baking Tips:
Water temperature: Make sure the water you use doesn’t exceed 115°F. Otherwise it will kill off the yeast and your dough will not rise. Also, there’s no need to heat up the milk. Flour amount: Make sure to measure your flour correctly (spoon it into a measuring cup until heaping full, then level with a knife). If you add too much flour, your rolls will not turn out soft/fluffy but crumbly like a biscuit. Kneading: Knead the dough long enough. It’s hard to overwork yeast dough, so don’t worry about that. With yeast doughs, under-kneading is generally worse than kneading for a little bit too long. It should feel smooth and elastic, and you should be able to pull it a little without it tearing. Shaping the rolls: I pinch the dough at the bottom and then roll it in the hollow of my hand on the countertop. Watch the video to see how I shape my rolls to make them look nicely rounded. Baking: Make sure to not undertake the rolls, or they’ll sink back and turn out dense. The internal temperature of bread should be around 200°F, so if you have a kitchen thermometer you can check that way.Freezer Instructions:
To make these rolls ahead and freeze, I like to freeze the dough, not the baked rolls (they taste much better that way).- knead the dough as directed in the recipe, then let it rest for just 15 minutes.
- shape into rolls and freeze spaced apart on a lined baking sheet for a couple of hours. Once solid, transfer them to a freezer bag and label with the name and use-by date (use within 3 months) before placing in the freezer.
- to bake, place the rolls in a greased 9×11 pan and let them thaw and rise for 4-6 hours (depends a lot on your altitude and room temperature). Then egg wash and bake as directed!


Amy says
Followed the recipe exactly and they turned out perfect! These will be great with our Thanksgiving leftovers! it’s a keeper! I will definitely check out her other recipes!!!
sls says
Lovely rolls and very easy to make.
Miranda says
I have not baked bread much and the ones I did turned out just okay…I was looking to make rolls for dinner and tried your recipe! These rolls were the best bread I have made, super light and fluffy and perfectly delicious!
Esther Courville says
I made these. It did take a lot more flour than the recipe called for in the kneading process, and I used instant yeast with the same amount of water. I cooked them at 355 for 25 minutes and they came out slightly doughy and amazing. I strongly recommend adding much more salt into the dough.
Lori says
Can the recipe be doubled for a crowd?
Nora says
Lori – yes! Make sure to use a stand mixer that can handle double the dough. Bake in two pans. Hope this helps!
Maggie Nakachi says
They came out soft and delicious! The video was helpful especially with shaping the rolls. They looked so professional and were easy to make. I will make these a part of my dinner rotation.
Stacey says
These were awesome! I’m not a bread maker at all and these turned out really well and were fairly easy to make for a beginner! Will make again. Thanks!
Laura says
These rolls were AMAZING! Planning to make more dough and freeze. You could say I am an amateur baker, but this recipe wasn’t hard at all.
Maria Serrano says
these are one if the best recipes, I love using this my kids go crazy. I have tried adding garlic salt instead of just salt and I have topped the melted butter with everything bagel seasoning. I have made them with parsley and garlic inside my next goal is with a cube of cheese in the middle. thank you for sharing I love these.
Nora says
I love your tips for seasoning, Maria! Glad the recipe is such a hit with your kids!
Linda says
Made these today on Ash Wednesday, oh my they were delicious! Have never made homemade rolls before. Will be making these again for sure! Thanks
Nora says
I’m so glad, Linda! Wishing you a peaceful Lent, if you observe.
Candice says
Made these to go with soup. They were so yummy! Definitely will be making them again soon.
April Smith says
Made one and a half times recipe as written. It made 8 / 3oz Burger buns and 12 / 2.3oz Dinner rolls. Recipe is perfect- everything came out light and fluffy. Follow directions and you won’t be sorry.
Kimberly says
I have been trying all sorts of bread recipes and this is by far my fave!!! Wow, it’s perfect texture is wayyy better than any store bought and not to mention with obviously no b.s. ingredients. Thank you for sharing! One question: can this recipe be used to make a bread loaf as well while keeping in mind the length of bake time needing to be adjusted a bit?
Bob says
The recipe is well explained and easy to follow. The rolls came out of the oven looking great but the insides were a bit too “doughy” for my liking. The texture looked just fine when breaking apart a roll but the aroma and taste had that dough scent and taste to it. Any ideas the how or the why? Thanks very much
Lori W says
raised and baked these in muffin ton. beautiful roll that was soft, fluffy and amazingly tasty.
Michael says
Easy recipe. No fuss. made a loaf instead of rolls. It took extra time to rise and an added 15 minutes to bake but came out perfect.
Cindy says
Delicious buns and super easy. I don’t have a stand mixer so I just used my hands to knead it around for a while. My yeast didn’t bubble properly and I thought perhaps it was because the sugar wasn’t added to the yeast?? I will try that next time. Slow to rise but eventually did rise enough to bake. I was pleasantly surprised at the lightness, taste(slight sweetness, buttery, good crumb). I would recommend this recipe.
Nora says
I’m glad you enjoyed the recipe, Cindy! The dough is definitely a slow riser, mostly because of the milk/butter in there. You can definitely try adding a spoonful of sugar to the yeast, it often doesn’t really make a difference to the outcome – it’s mostly to test if the yeast is still good.
Janet says
Made these tonight, really good. Thanks for the recipe !
Nora says
I’m so glad, Janet!
Loree says
Just made these for supper tonight and they were FANTASTIC! This recipe was so easy to follow and the process was not intimidating at all. I did back off the sugar a touch (1.5T vs 2T) and maybe used slightly more salt than called for. The rolls came out of the oven soft and tender and so delicious.
Nora says
I’m so glad, Loree!
Ashley says
I would have given 5 stars but for aome reason my rolls taste bland. I’ll probably add more salt and sugar next time. But theybare super soft and great in every other way!
Samantha Wiedmar says
I dont have time to freeze the rolls but id like to premake and shape the dough and refrigerate for thanksgiving. Will that work? How long will they be ok in the fridge?
Nora says
Samantha, I would say it will be fine for 24 hours, tops. Hope this helps!
Jacqueline says
On that note. Do you still have to let rise for 4-6 hours after taking them out of the refrigerator?
Nora says
Jacqueline, do you mean after freezing? Yes, remove from the freezer and let sit in the dish, covered, at room temperature, for 4-6 hours. If you made the dough ahead and kept it in the fridge (NO freezing), it will only take 1-2 hours of rising on the counter. Hope this helps!
Iris says
My go to. Made them last Thanksgiving and can’t wait to make this year. They were perfection!!! Yay!!!!
Nora says
I’m so glad, Iris!
Iris says
And I’m not a baker!!! You make it so easy and approachable!!
Iris says
Love to send you a pic! Not quite sure how
Caroline says
Amazing, I did it yesterday and they all gone, I’m repeating it today !!
Nora says
I’m so glad, Caroline!
Goldie says
Delicious rolls and great recipe. I’m making these rolls for a party and want them to be the same size. How many ounces is one roll?
Nora says
Goldie, for me one roll usually end up with 2 3/4 ounces – 3 ounces of dough each. I highly recommend weighing your final dough. Divide the weight by 12, and you will know exactly how much dough to use per roll. I usually experience small fluctuations in dough weight (due to humidity etc) so weighing yours is the best way to get perfect rolls. Hope this helps!
Nancy says
my new favorite roll recipe
easy to make and were a hit
I did cook them in a cast iron skillet instead
Laurie says
This recipe was well written, easy to follow and delicious! My family gobbled them up and asked about when I was going to make them again. Thank you for sharing this with us!
Nora says
I’m so glad, Laurie!