

Are you looking for the best no bake cheesecake recipe? This is an easy, creamy recipe that’s quick to pull together!
I enjoy my baking recipes… But especially as the days get hotter, I enjoy my no-baking recipes even more!
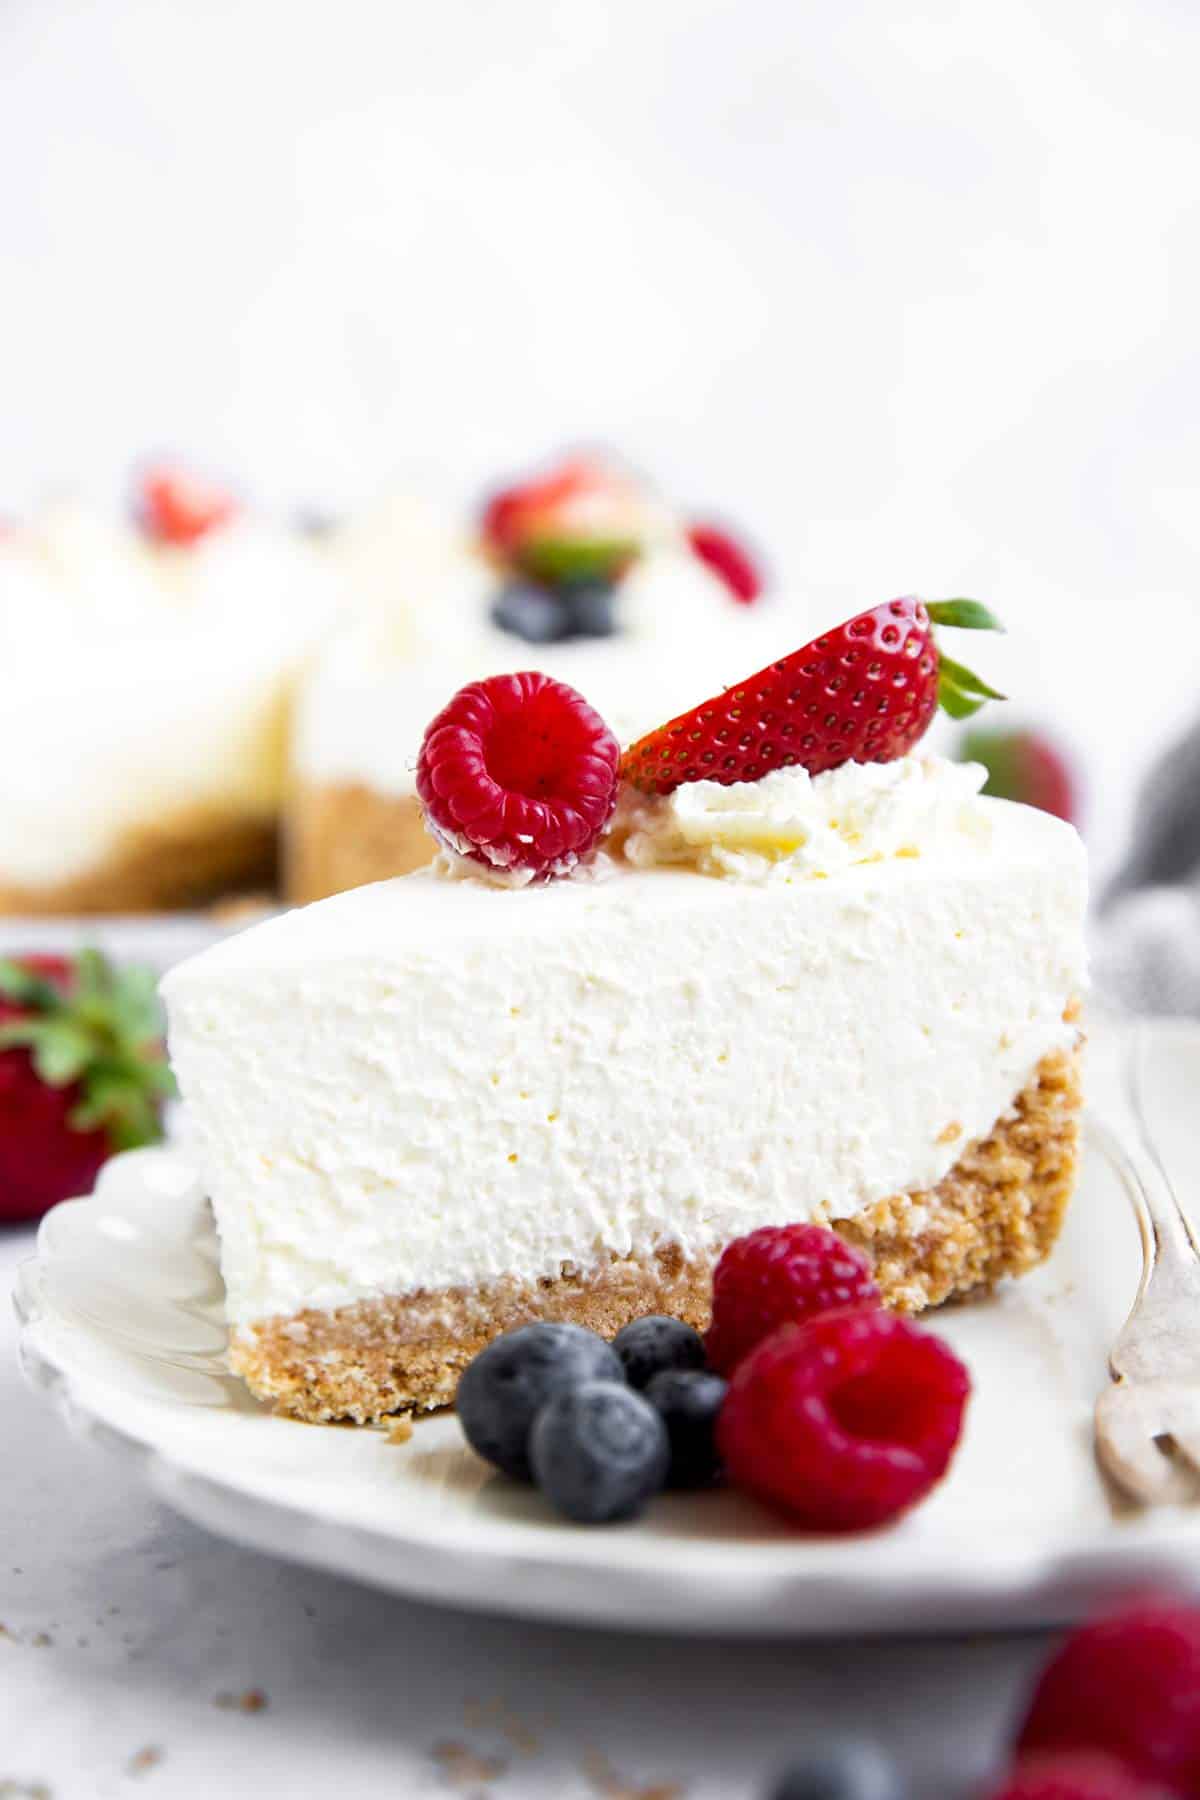
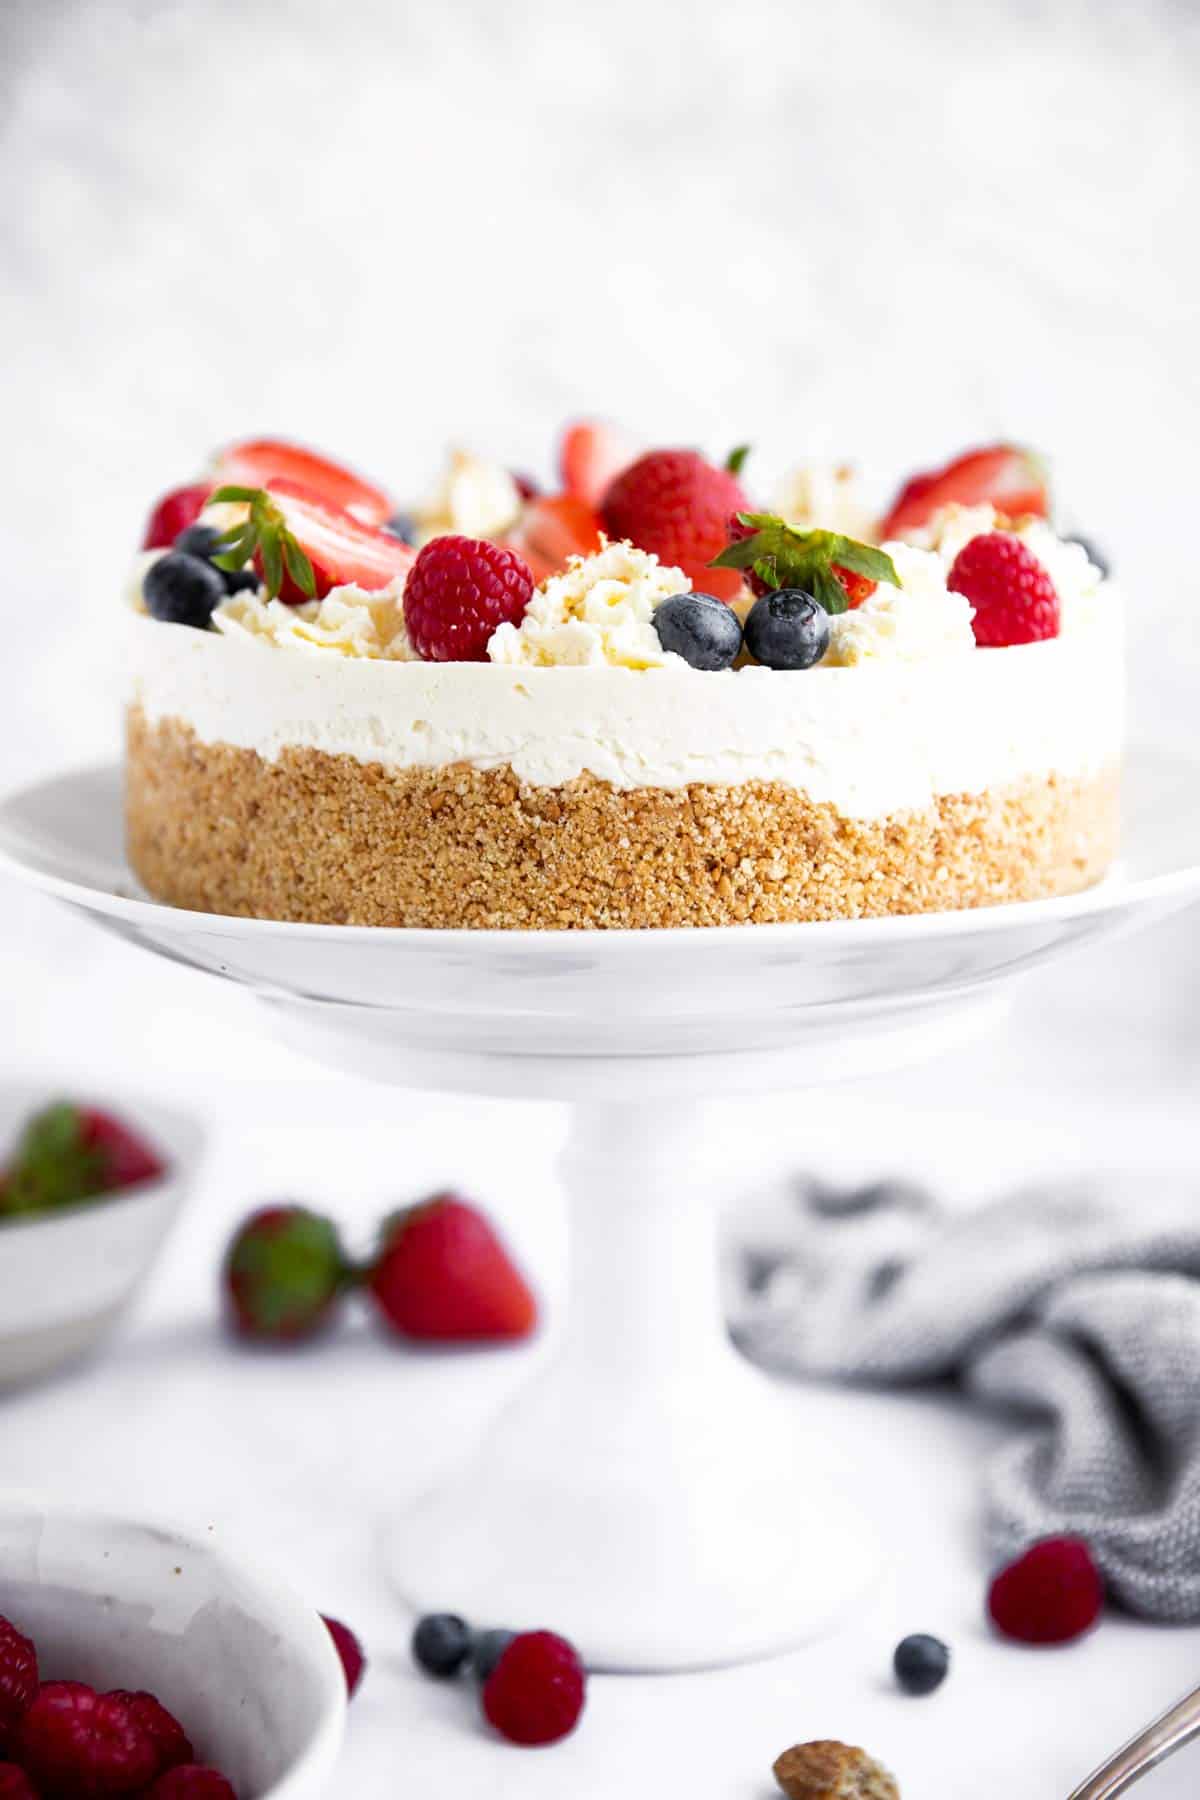
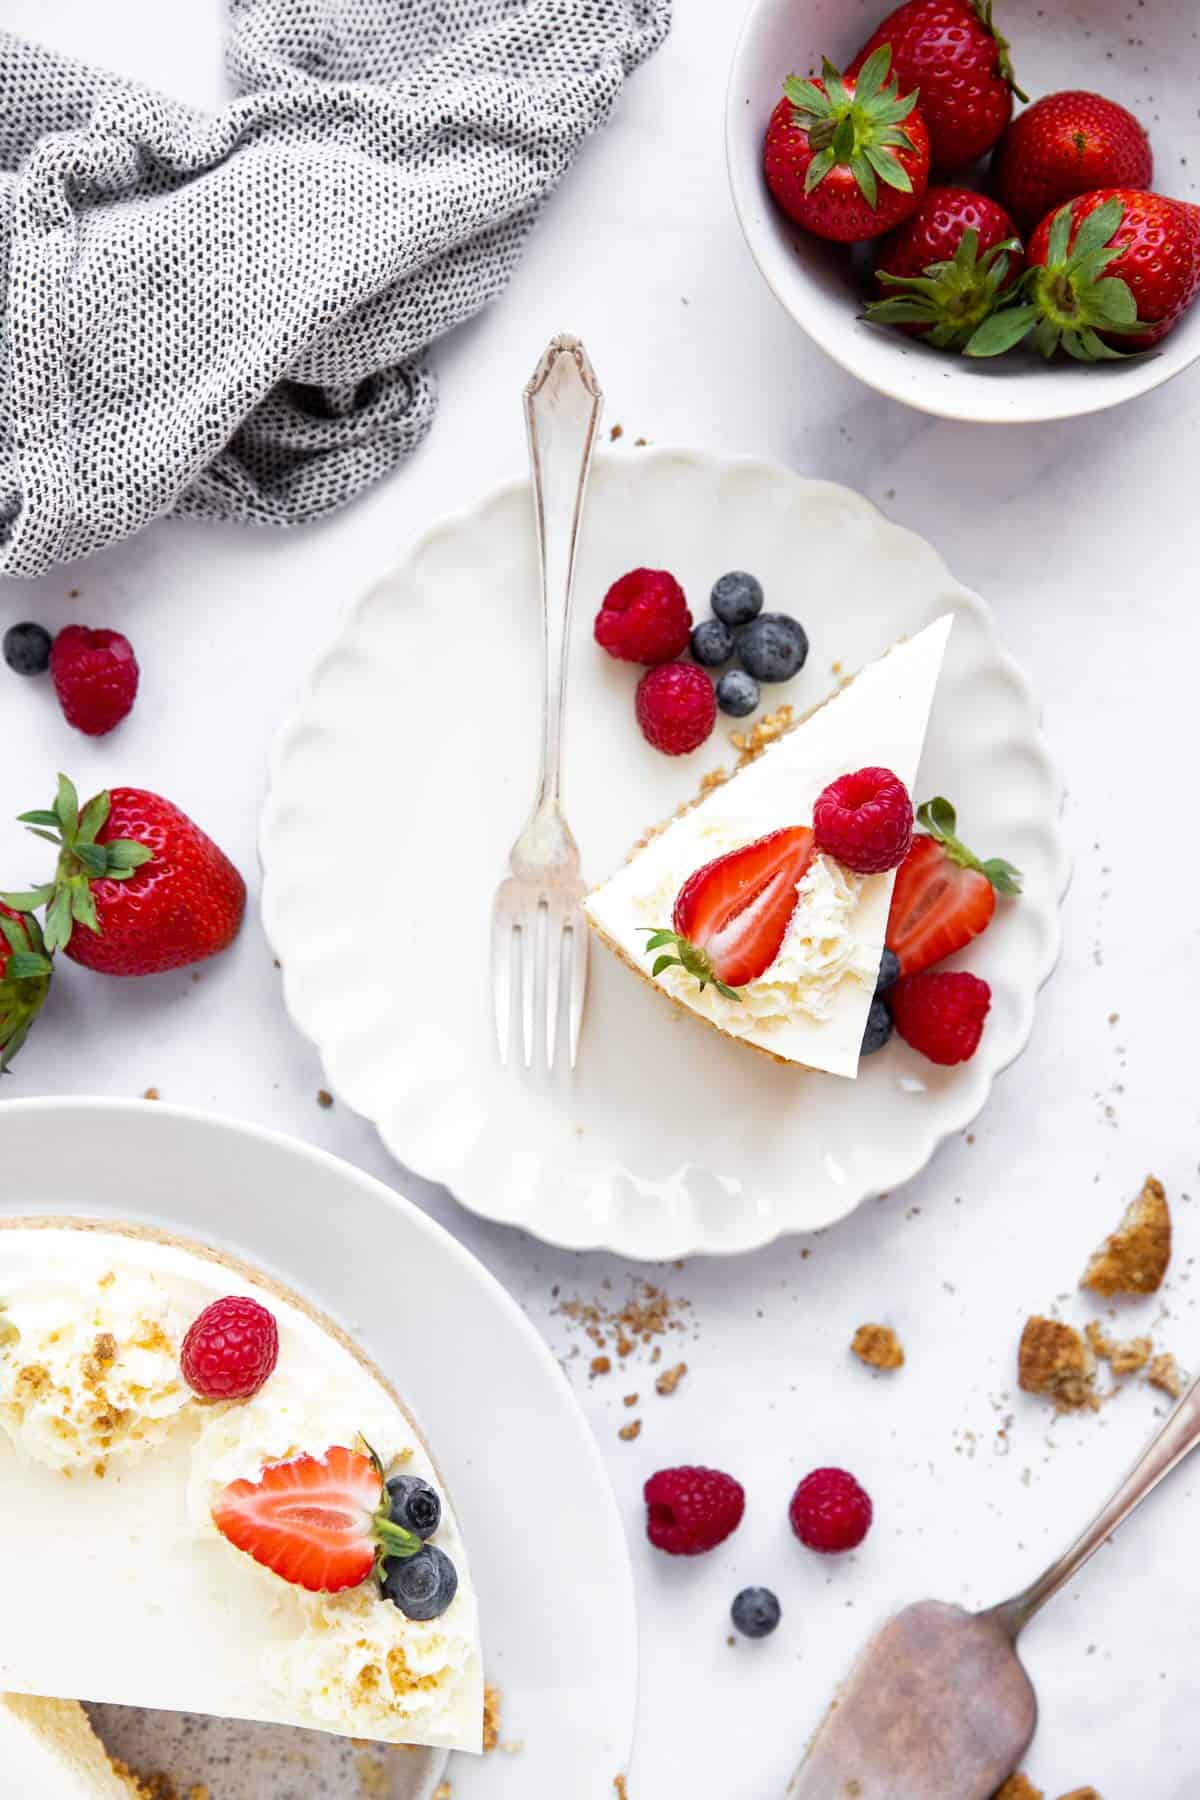
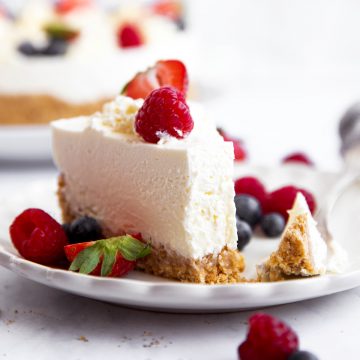
This easy cheesecake recipe comes together in a snap. My family goes crazy for it! I love garnishing with extra whipped cream and fresh berries. Not only pretty, but also very appropriate for a patriotic summer party – think Memorial Day, 4th of July, Labor Day…
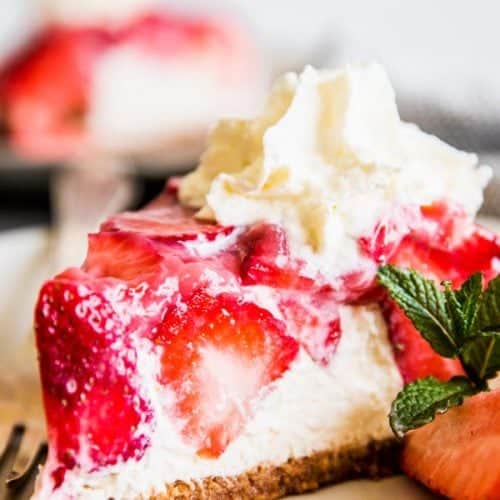
You could also garnish with just strawberries for Valentine’s Day, or with shaved chocolate for that cheesecake craving on a random Tuesday ? Any way you serve this, it’s sure to be a total hit!
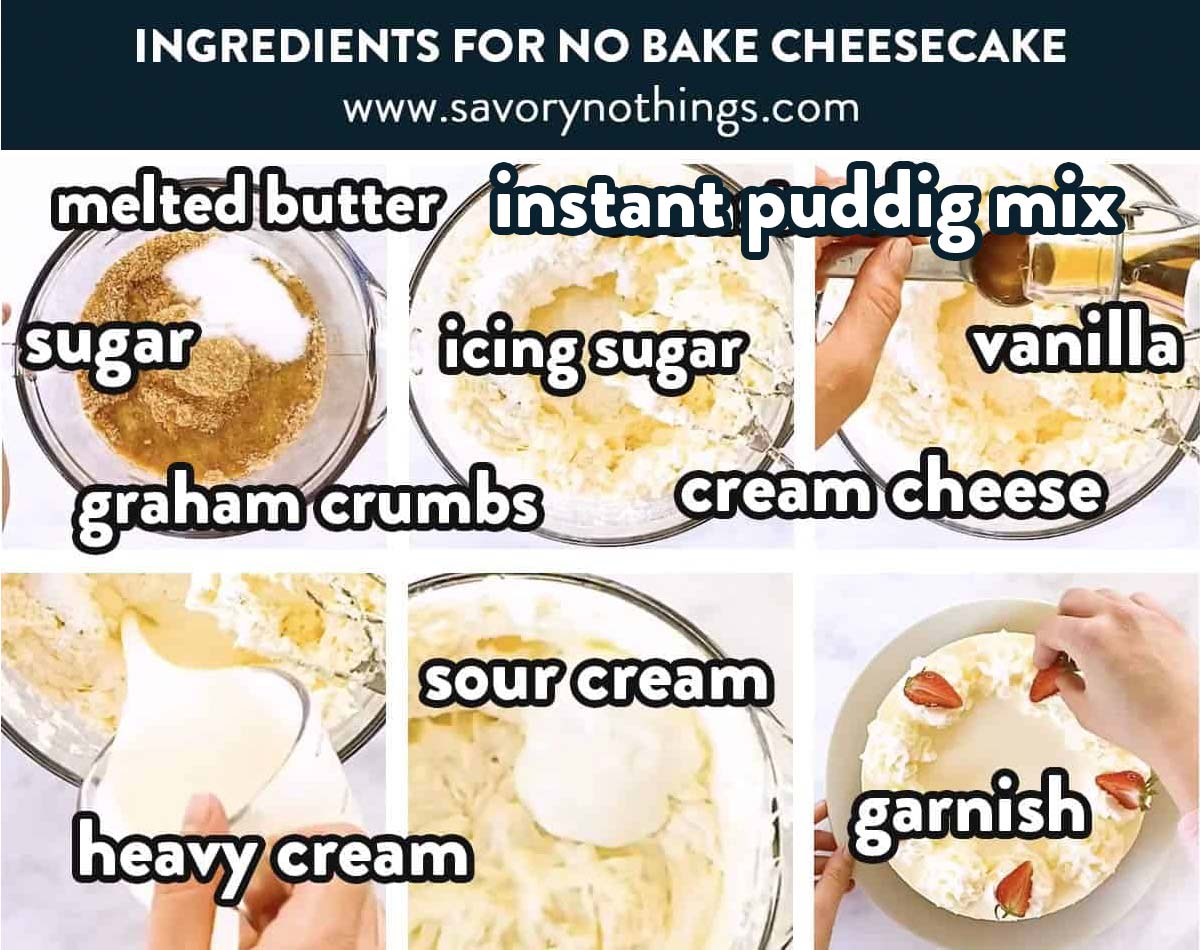
Ingredients you’ll need
Here is a visual overview of the ingredients in the recipe. Scroll down to the printable recipe card at the bottom of this post for quantities!
Ingredient notes
- Graham crackers: Feel free to use a different cookie for the base. Vanilla Wafers or Chocolate Digestives are also delicious!
- Cream: If you’d rather use whipped topping, feel free to skip the heavy whipping cream, icing sugar, cornstarch and vanilla extract. Instead, use one 12-oz container frozen whipped topping (thawed).
- Sour cream: Can substitute plain yogurt if you prefer.
- Instant pudding mix: This helps to stabilize the cheesecake filling. If you don’t want to use processed ingredients, just skip it. The filling will be a little softer, but still fine. I previously used cornstarch in this recipe, but due to some reader concerns over using raw cornstarch I researched this swap to ease concerned minds. If you have no issue with the cornstarch, it’s obviously your personal choice to keep using it in this recipe if you’re previously made it this way.
Step by step photos
1) Add ingredients for crust to a bowl and 2) combine well. 3) Press into lined pan.

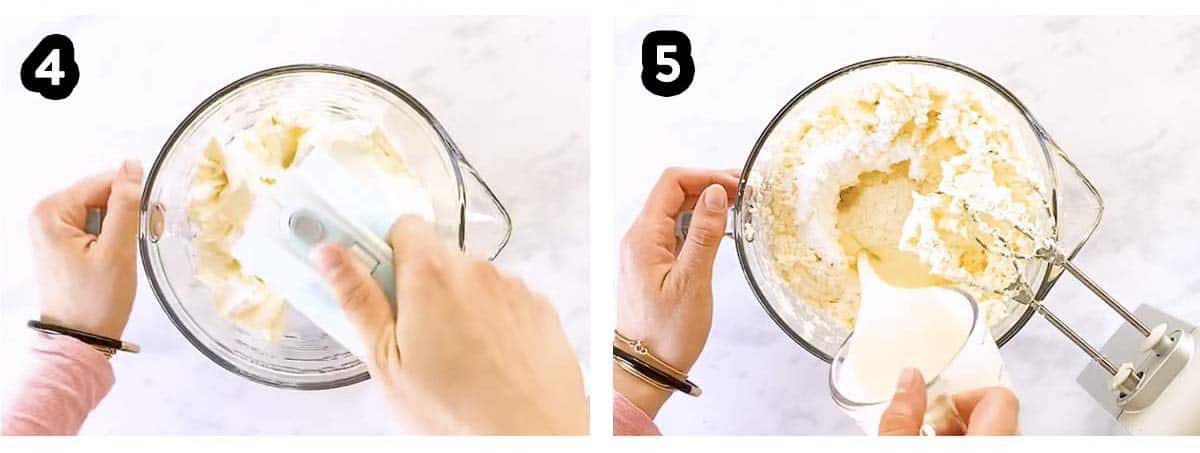
4) Beat cream cheese for filling, then 5) add pudding mix, icing sugar, vanilla and heavy cream.
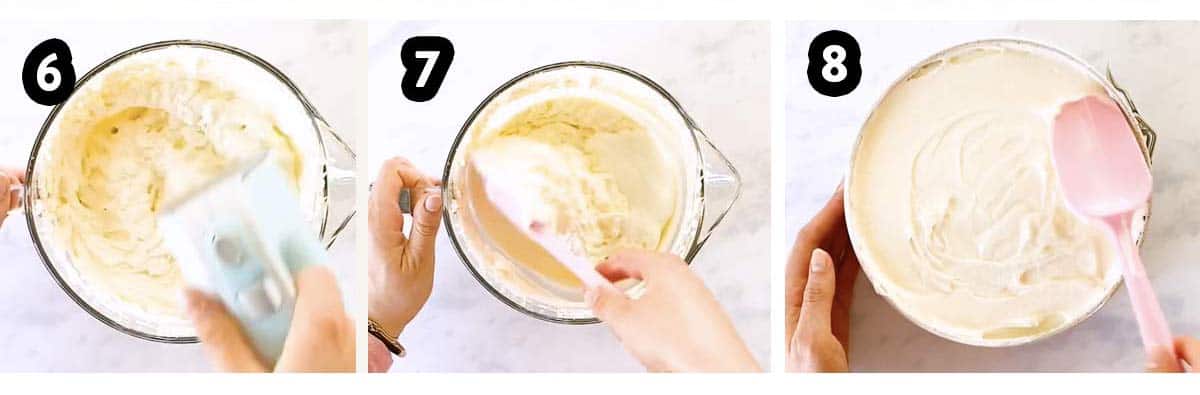
6) Beat until fluffy, then 7) fold in sour cream and spread on crust. Chill well.
I like to garnish the cheesecake with fresh berries and more whipped cream – such a neat look!
Recipe tips
- Cheesecake base: The base may seem too dry/crumbly, but if you press it firmly into the pan, it will set well in the fridge.
- Cream: It’s important to use heavy whipping cream. Make sure the carton says “heavy whipping cream”! Also, chill it very well right up to using it; otherwise it will not whip.
- Beating the filling: The filling needs to be beaten well on high speed, around 3-4 minutes. If you don’t beat it enough, you’ll be eating a brick of plain cream cheese mixed with runny cream. Use a spoon to scrape a little filling out of the bowl to test – it should sound and look whipped and lightly fluffy.
Storage tips
Keep the cheesecake refrigerated at all times. It will “melt” a little if it gets too warm. Keep the cheesecake for no longer than 2 days in the fridge.You can also freeze any leftovers well wrapped for up to 3 months. Thaw in the fridge and eat immediately once it’s defrosted. Do not keep, do not re-freeze.
More no bake desserts


PS If you try this recipe, please leave a review in the comment section and add a star rating in the recipe card – I appreciate your feedback! Follow along on Pinterest, Facebook or Instagram.
Easy No Bake Cheesecake
Recipe details
Ingredients
Cheesecake base
- 2 cups graham cracker crumbs around 14 full sheets
- 2 tablespoons granulated sugar
- ½ cup butter melted
Cheesecake filling
- 3 (8-oz) blocks full fat cream cheese
- 1 cup heavy whipping cream well chilled
- 1 cup icing sugar
- 1 tablespoon instant pudding mix optional; vanilla or cheesecake is best (see notes for substitutes)
- 1 teaspoon vanilla extract
- ¼ cup sour cream OR Greek yogurt
Garnish
- whipped cream, fresh berries
Instructions
- Prep: Line the bottom of a 7-8 inch springform pan with baking parchment.
- Base: Combine graham cracker crumbs, sugar and butter well in a mixing bowl. Add to the prepared pan and press into the bottom and a little up the sides (press firmly, or the base will not hold together). Chill in the fridge until ready to use.
- Filling: Beat cream cheese in a large mixing bowl with an electric mixer until creamy. Add heavy whipping cream, icing sugar, pudding mix and vanilla extract. Beat on high speed until thick and fluffy, about 4 minutes. Add sour cream (or yogurt); carefully fold in.
- Finish: Spread filling evenly in prepared crust. Cover and chill in the refrigerator for at least 6 hours, better overnight. To finish, carefully remove the outer ring of the pan (run a hot knife along the side if it's stuck). Garnish as you like and serve chilled.
Notes
Tips
- the base may seem too crumbly, but press it well into the pan and it will set in the fridge
- it’s important to use heavy whipping cream. Make sure the carton says “heavy whipping cream”! Also, chill it very well right up to using it; otherwise it will not whip.
- beat the filling until it’s thick and fluffy, otherwise the cheesecake won’t be as airy as it should be
Ingredient substitutions
- Graham crackers: Feel free to use a different cookie for the base. Vanilla Wafers or Chocolate Digestives are also delicious!
- Cream: If you’d rather use whipped topping, feel free to skip the heavy whipping cream, icing sugar, cornstarch and vanilla extract. Instead, use one 12-oz container frozen whipped topping (thawed).
- Instant pudding mix: This helps to stabilize the cheesecake filling. If you don’t want to use processed ingredients, just skip it. The filling will be a little softer, but still fine. I previously used cornstarch in this recipe, but due to some reader concerns over using raw cornstarch I researched this swap to ease concerned minds. If you have no issue with the cornstarch, it’s obviously your personal choice to keep using it in this recipe if you’re previously made it this way.


Amina says
Hi! I’m about to make this and I was wondering if adding raw corn starch is safe?
Nora says
Amina, I never really thought about this, to be honest. Cornstarch has never, ever been the cause for a recall where I live, and the only recall I’ve just found with a quick search was in Canada due to metal pieces being in the cornstarch – which would obviously make no difference if used cooked vs raw.
Thank you for asking this question though, it’s always good to know what readers might be concerned about. If you aren’t comfortable with it, then PLEASE skip the cornstarch. You can use 1 tablespoon instant pudding mix, I suggest cheesecake or vanilla flavor. This would yield pretty much the same result without the worry of raw cornstarch. I’ll add this to the recipe for other users with the same concern. Hope this helps, and thank you again for bringing this issue to my attention.