

If you’re on the hunt for the ultimate (no chill!) cut-out sugar cookie recipe, stop scrolling – you’ve just hit the jackpot! These cookies are buttery, perfectly sweet, and hold their shape like a dream, making them ideal for all your festive cookie-cutting fun.

Whether you’re baking with little ones, prepping for a cookie exchange, or just indulging your inner cookie queen, this recipe will become your go-to for the holidays and beyond!
Why you’ll love this recipe
- Perfectly soft and buttery texture: These cookies are melt-in-your-mouth delicious with just the right amount of crispness around the edges. No more bland, cardboard-like sugar cookies!
- Easy to make and work with: The dough comes together effortlessly and rolls out like a dream – no tearing, no sticking, and no frustration.
- Holds its shape beautifully (and no chilling needed!): Whether you’re making stars, snowflakes, or adorable little trees, these cookies won’t spread or lose their design in the oven!


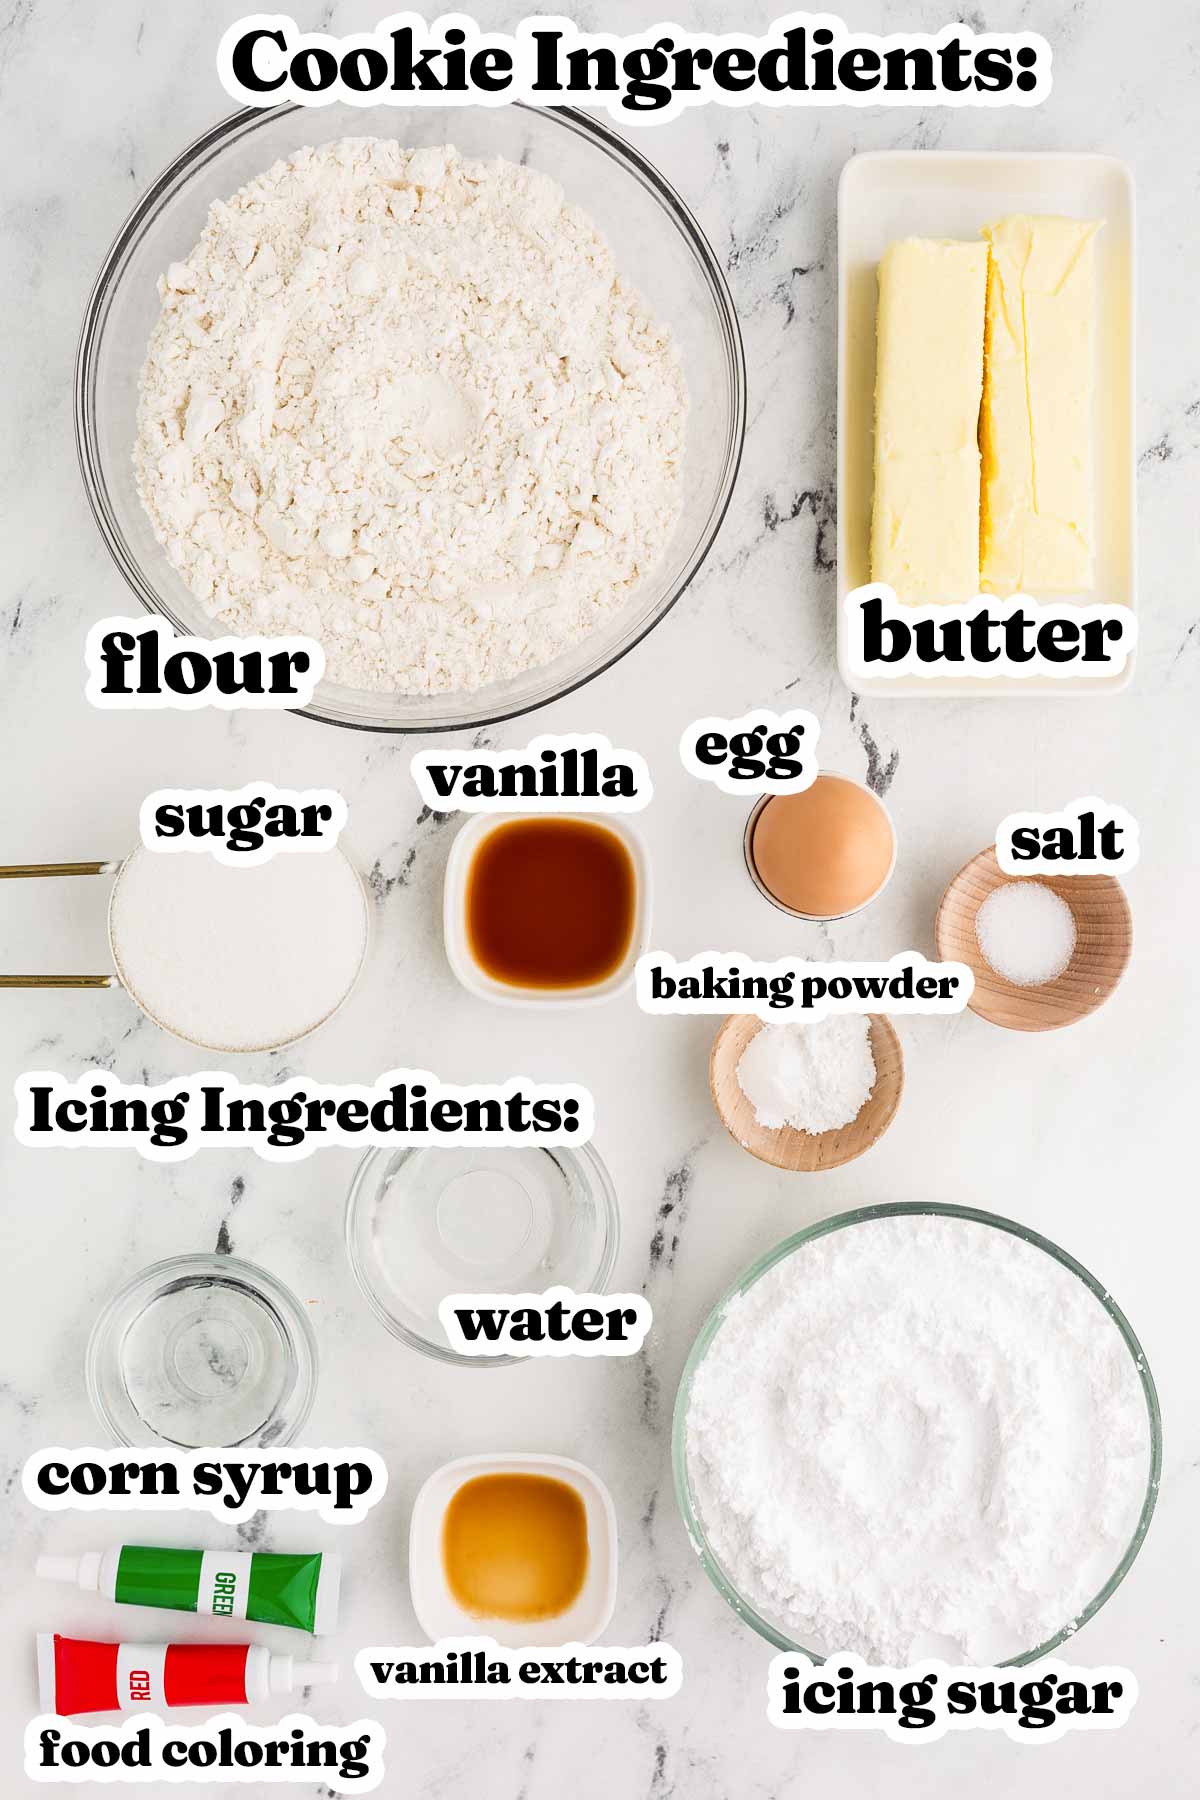
Ingredients you’ll need
Here is a visual overview of the ingredients in the recipe. Scroll down to the printable recipe card at the bottom of this post for quantities!
Ingredient notes
- Butter: Use unsalted butter for better control over the saltiness of your cookies. Make sure it’s softened (but not melted!) to ensure a creamy dough. If you only have salted butter, reduce the added salt to a pinch.
- Sugar: Stick with granulated sugar for the perfect sweetness and structure. Avoid using powdered or brown sugar, as they’ll change the texture of the cookies.
- Egg: Use a large egg at room temperature to help the dough come together smoothly. Forgot to take it out of the fridge? Let it sit in warm water for 5 minutes.
- Vanilla extract: Pure vanilla extract is best for rich flavor, but vanilla bean paste or almond extract can add a fancy twist.
- All-purpose flour: Measure your flour correctly by spooning it into the cup and leveling it off to avoid dense cookies.
- Baking powder: Fresh baking powder is crucial for a slight lift – check the expiration date to ensure your cookies don’t fall flat.
- Salt: A pinch of salt enhances the flavors, so don’t skip it! For a gourmet touch, sprinkle a tiny bit of flaky sea salt on the cookies before baking.
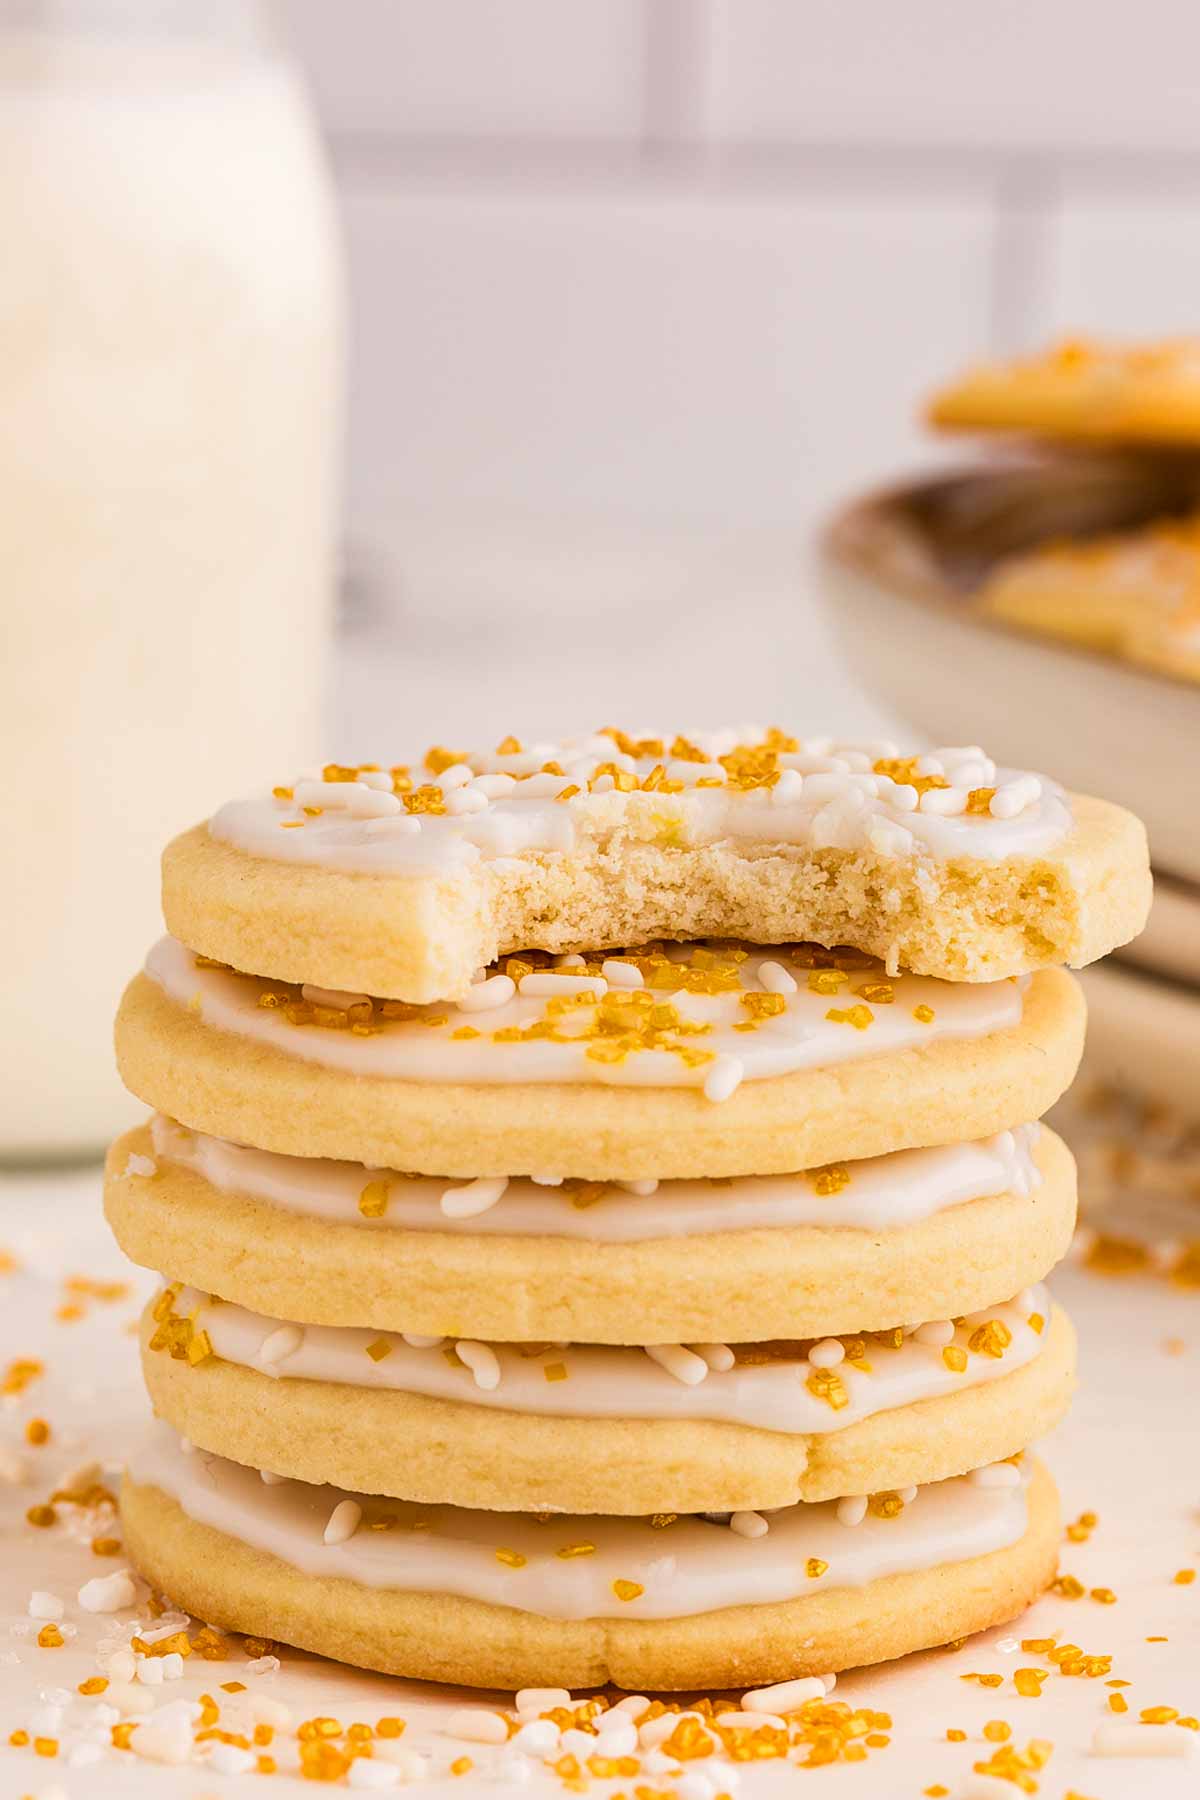
- Light corn syrup (in the icing): This key ingredient gives the icing a glossy, professional finish and helps it set firm enough for stacking. If you prefer, you can substitute honey or agave syrup, but note that the icing may not dry as shiny or firm.
How to make sugar cookies
Making these cut-out sugar cookies is easy and fun! Follow these steps, and you’ll have a batch of cookies that’s ready to wow your family, friends, or anyone lucky enough to try them.
1. Preheat and prepare: First things first – let’s get the oven going! Preheat it to 350°F and grab two large baking sheets. Line them with parchment paper or silicone baking mats to prevent sticking.
Trust me, this small step makes cleanup a breeze and keeps your cookies picture-perfect.
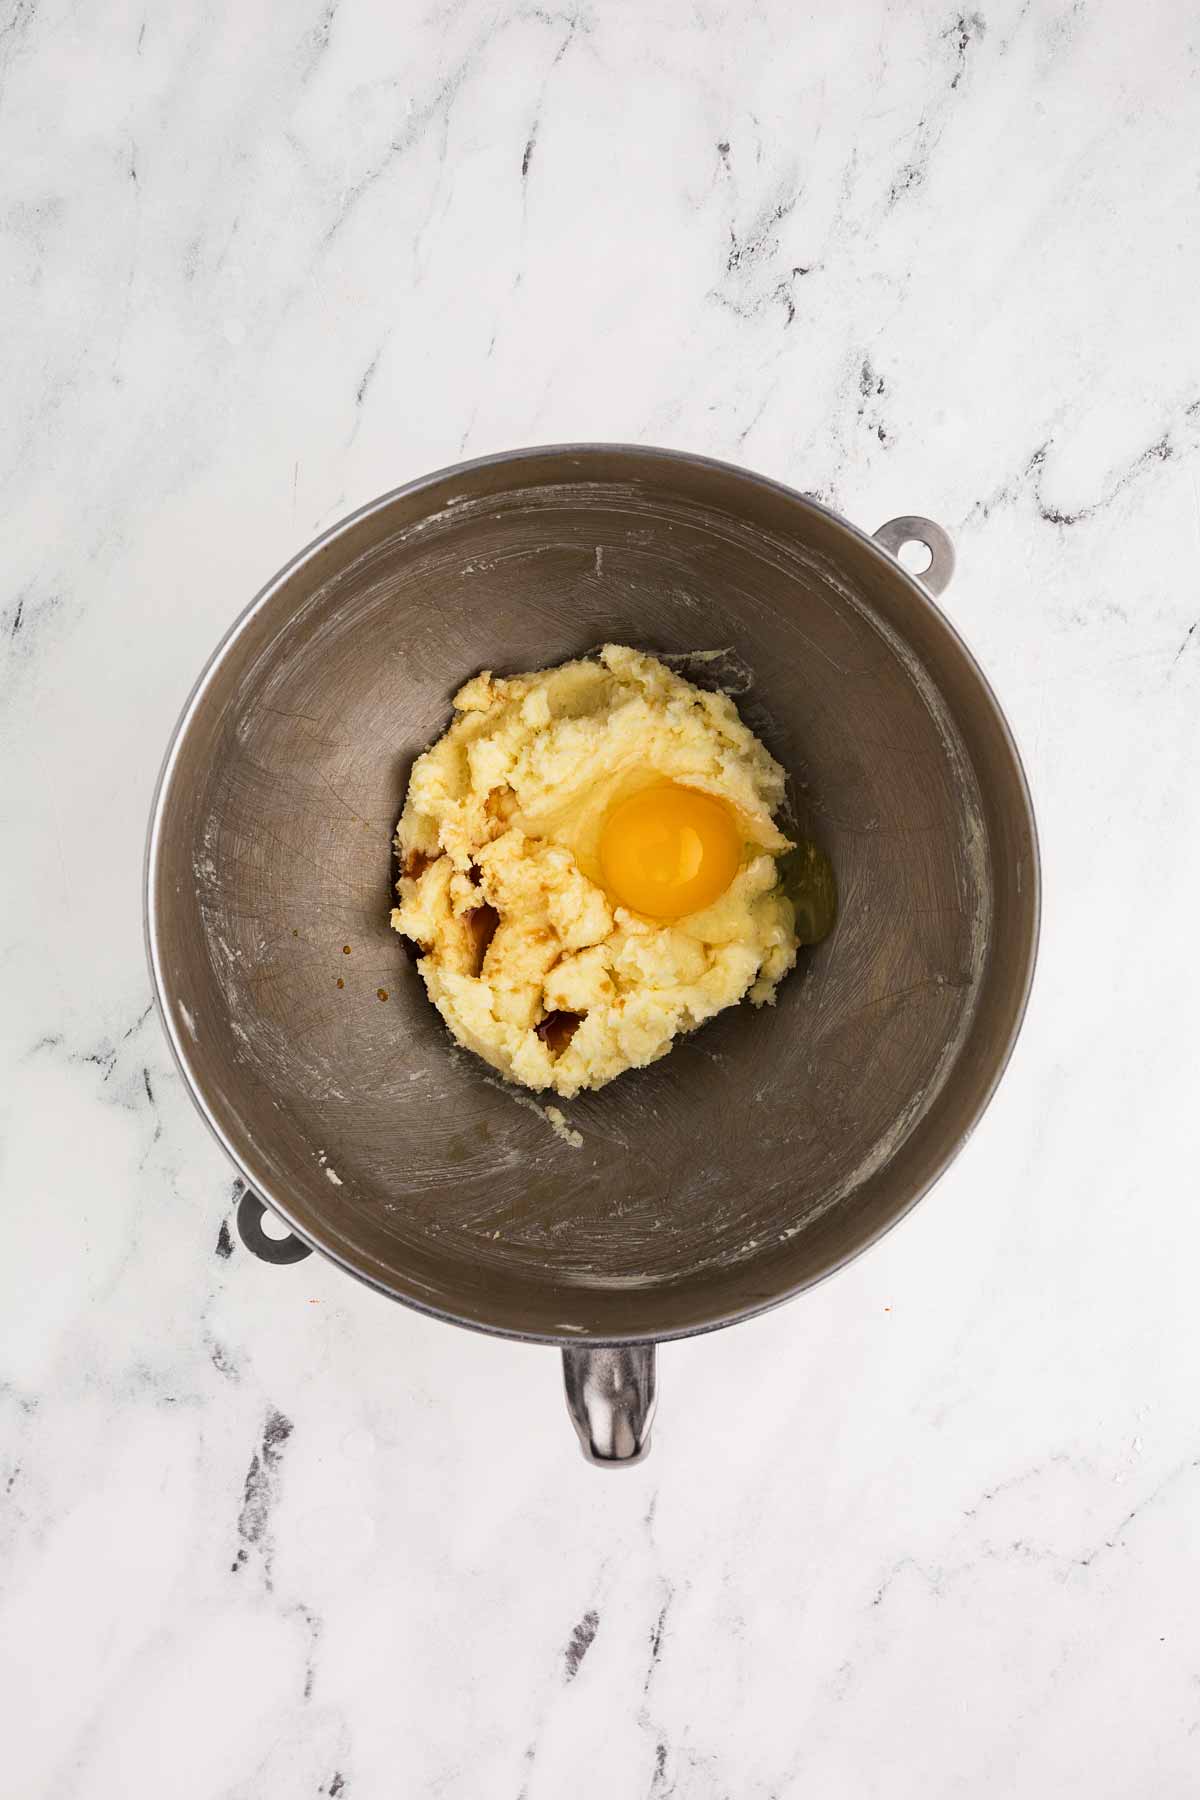
2. Cream the butter and sugar: In a large mixing bowl, toss in your softened butter and sugar. Using an electric mixer, whip them together until they’re creamy – like a fluffy cloud of sweetness. This step is where all that buttery magic starts!
Now, crack in the egg and pour in the vanilla extract. Mix JUST until everything comes together. It might look a little rough, but don’t worry, that’s exactly how it should be.


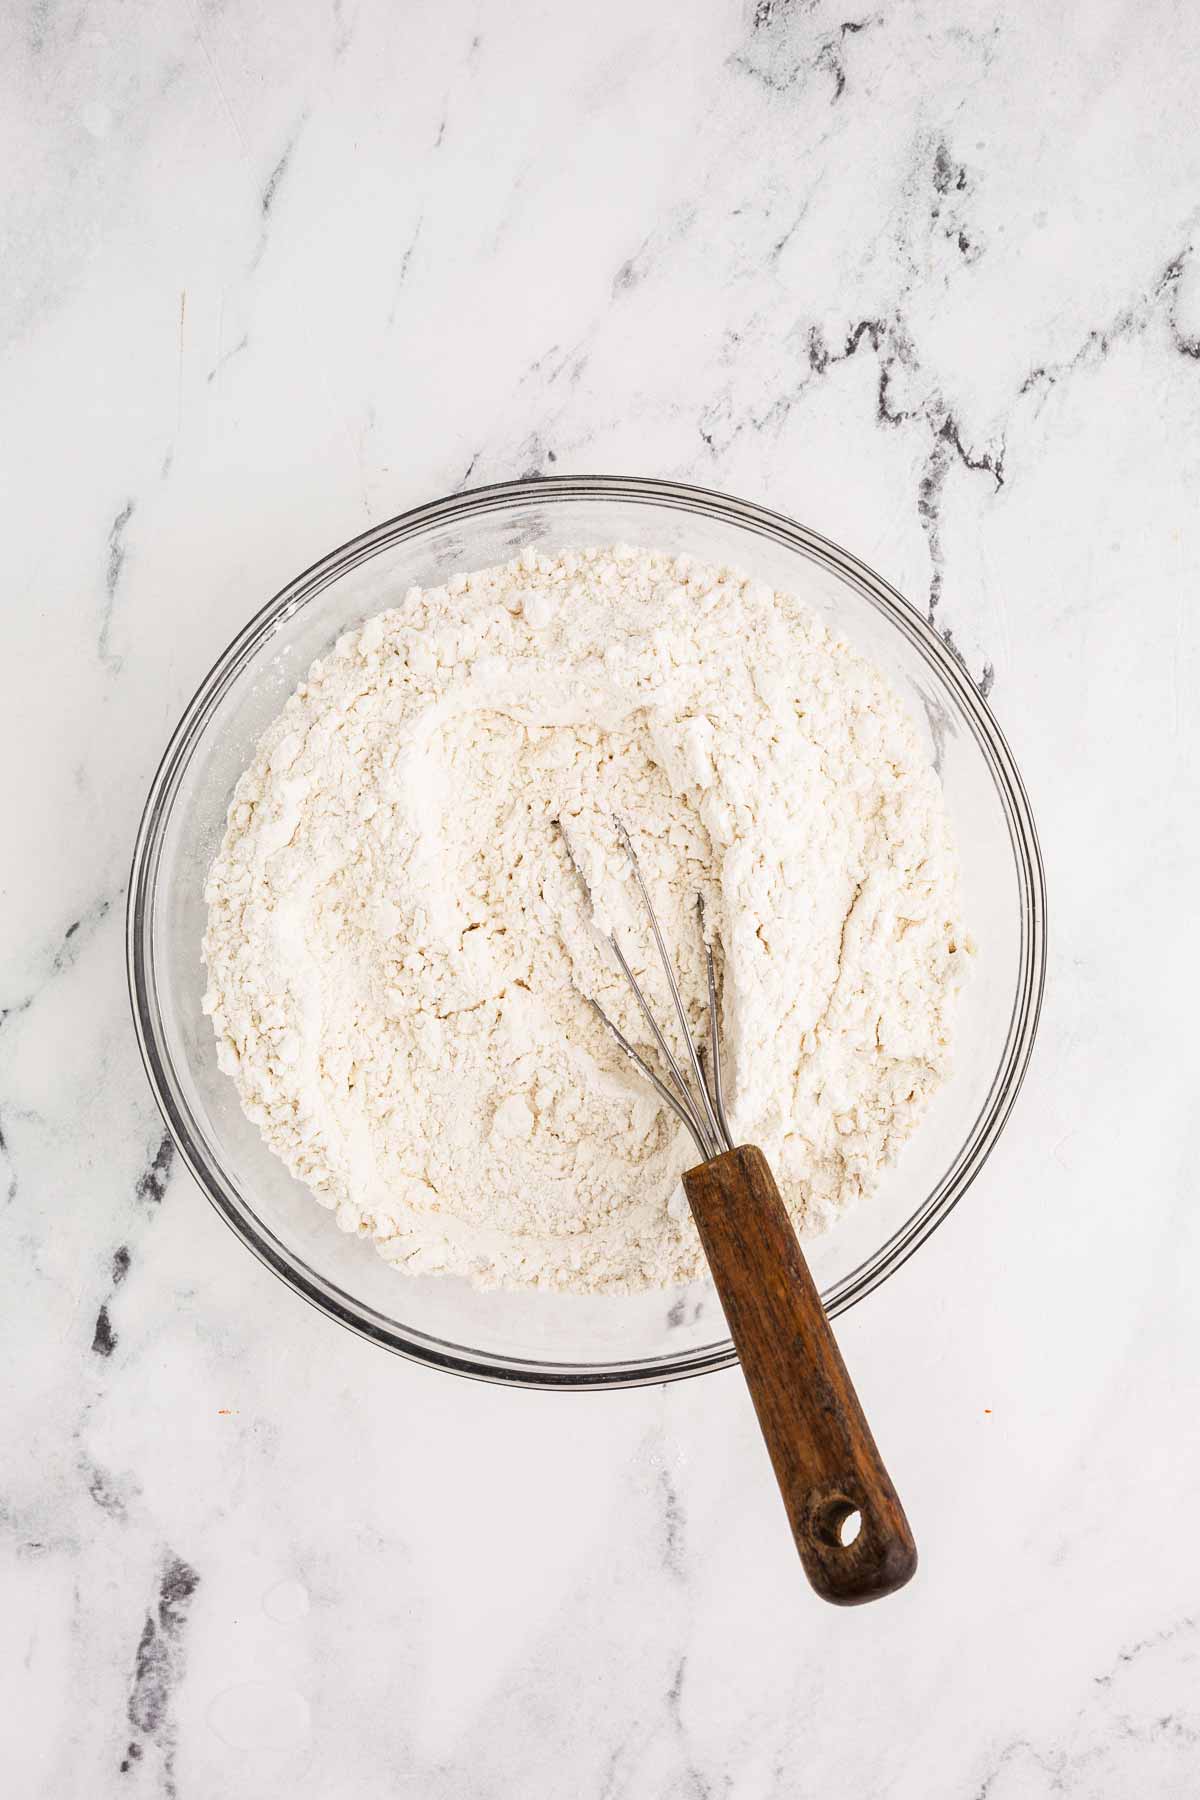
3. Mix in the dry ingredients: In a separate bowl, whisk together the flour, baking powder, and salt. Slowly add this dry mix to the butter mixture. Go low and slow with your mixer to avoid flour flying everywhere (we’ve all been there!).
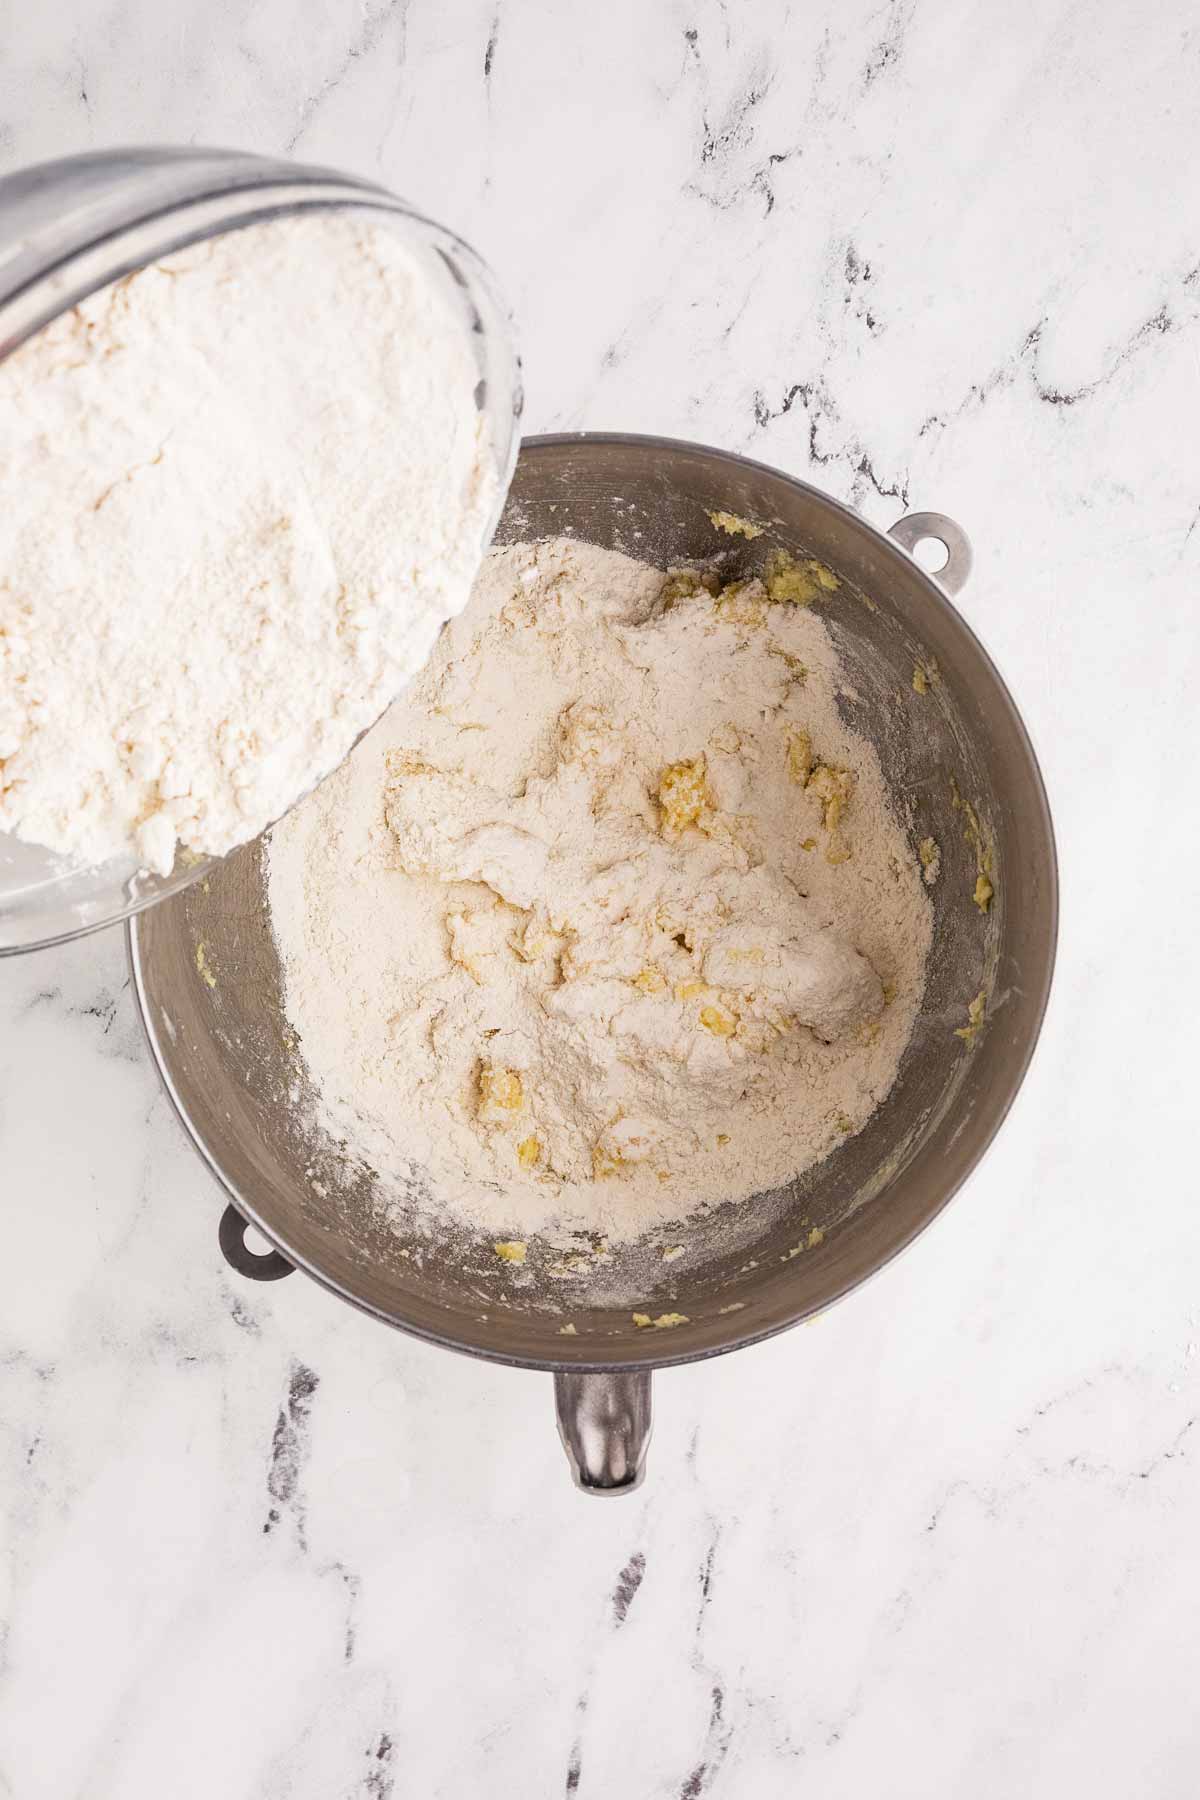
Once it’s all combined, you’ll notice the dough coming together. Don’t overmix – just stop when it starts to look like cookie dough perfection.
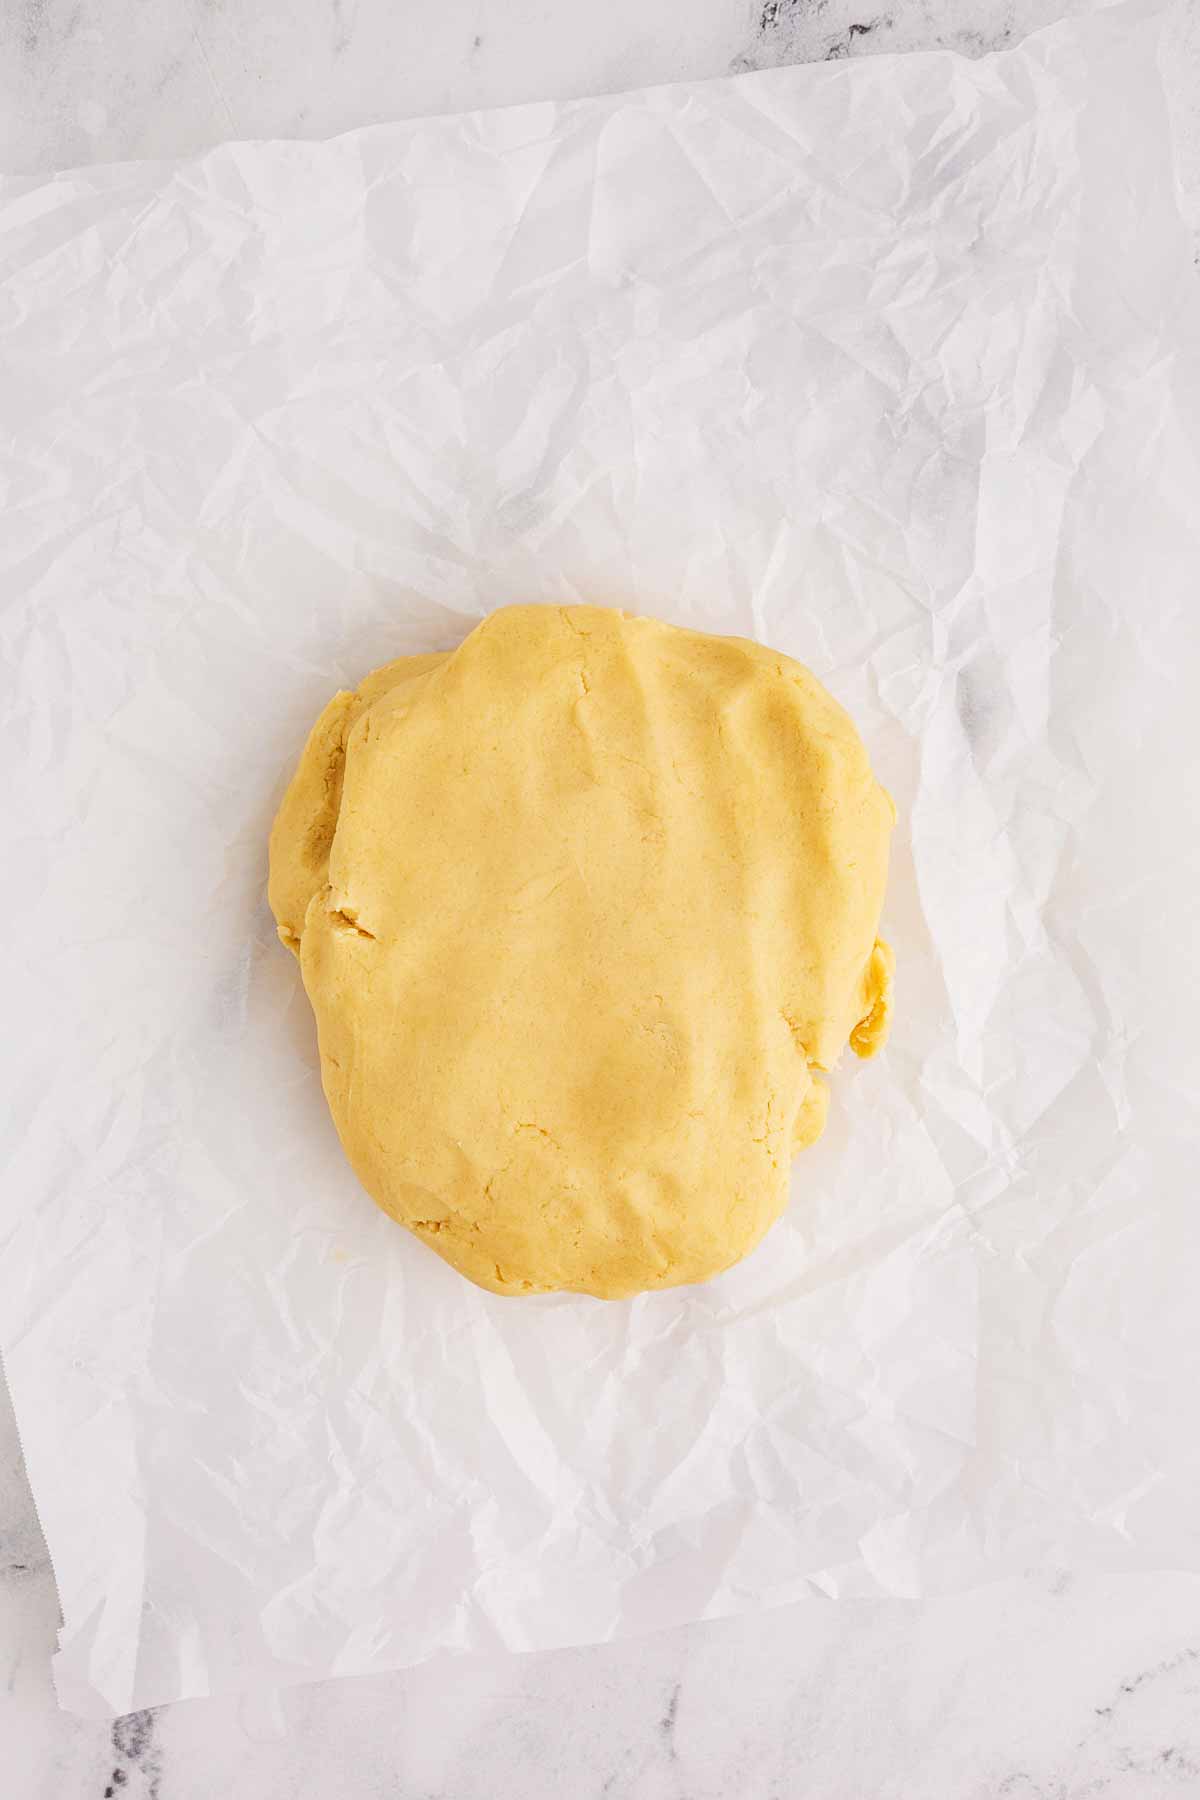
4. Shape the dough: Take the dough out of the bowl and onto a clean work surface. Now’s the time to get hands-on! Gently press and fold it together a few times until it forms a smooth ball of dough. Be careful not to knead it too much – we’re aiming for soft and tender cookies, not tough ones.
Divide the dough in half to make rolling easier.

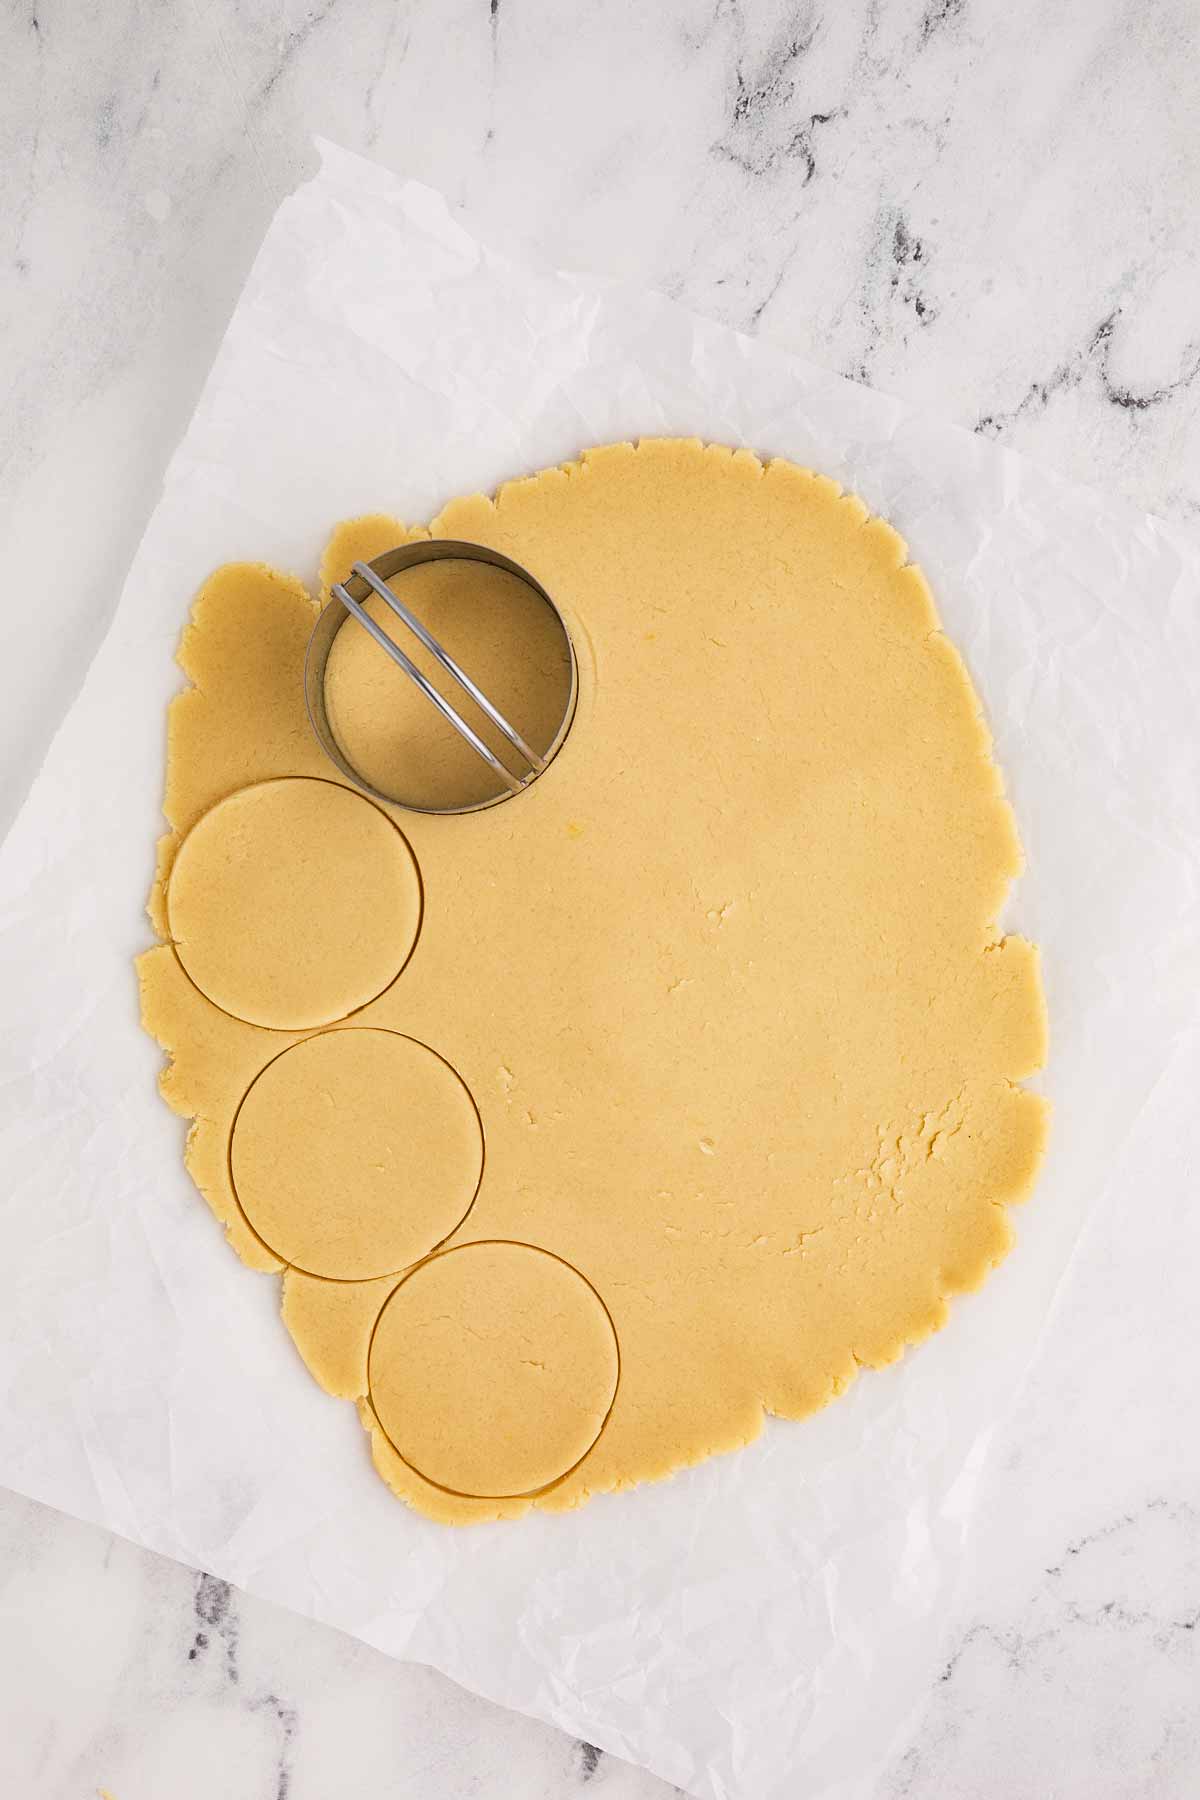
5. Roll and cut: Lightly flour your work surface (and rolling pin!) and roll out each half of the dough to about ¼-inch thick.
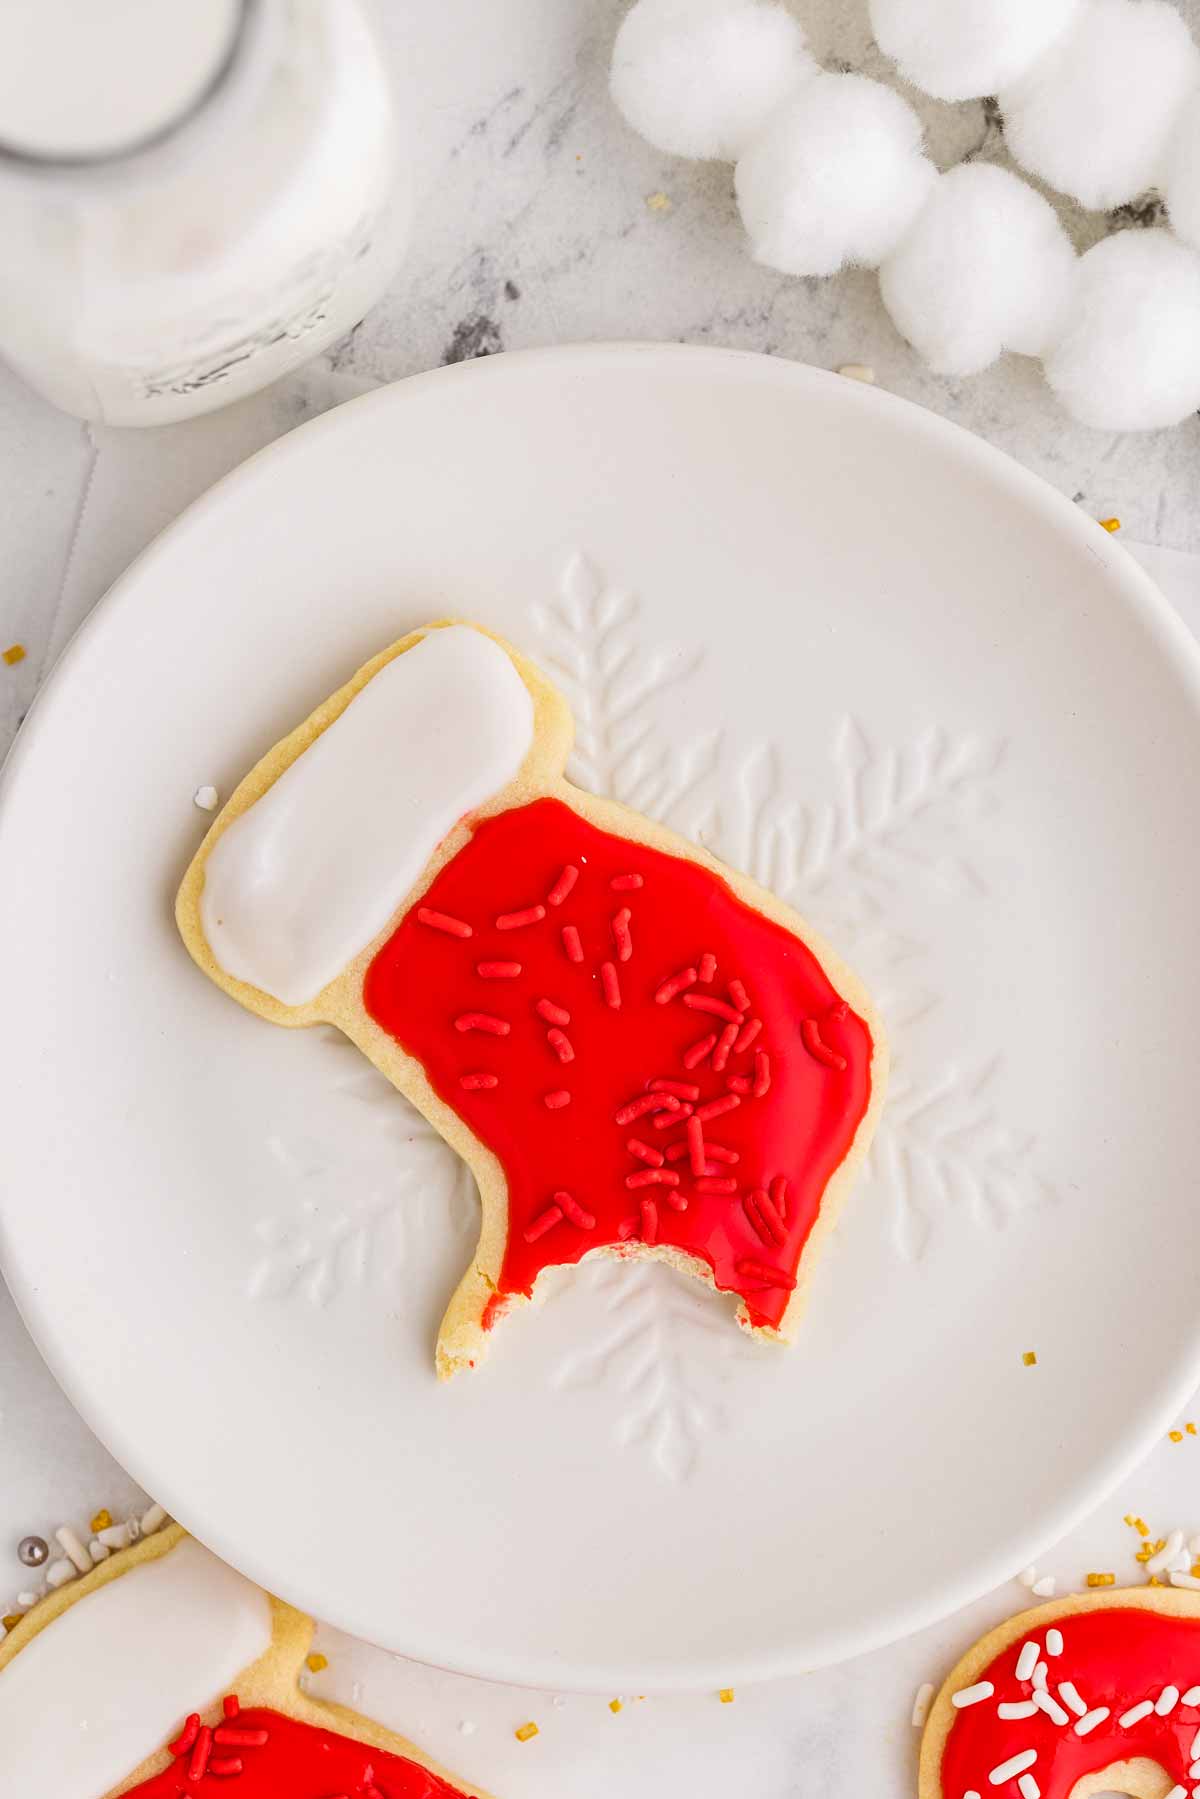
This is the fun part – grab your favorite cookie cutters and start creating! Stars, hearts, trees, or even dinosaurs – let your imagination (and cookie cutters) run wild. Don’t forget to gather up the scraps and re-roll them so you can get every last cookie out of this delicious dough.
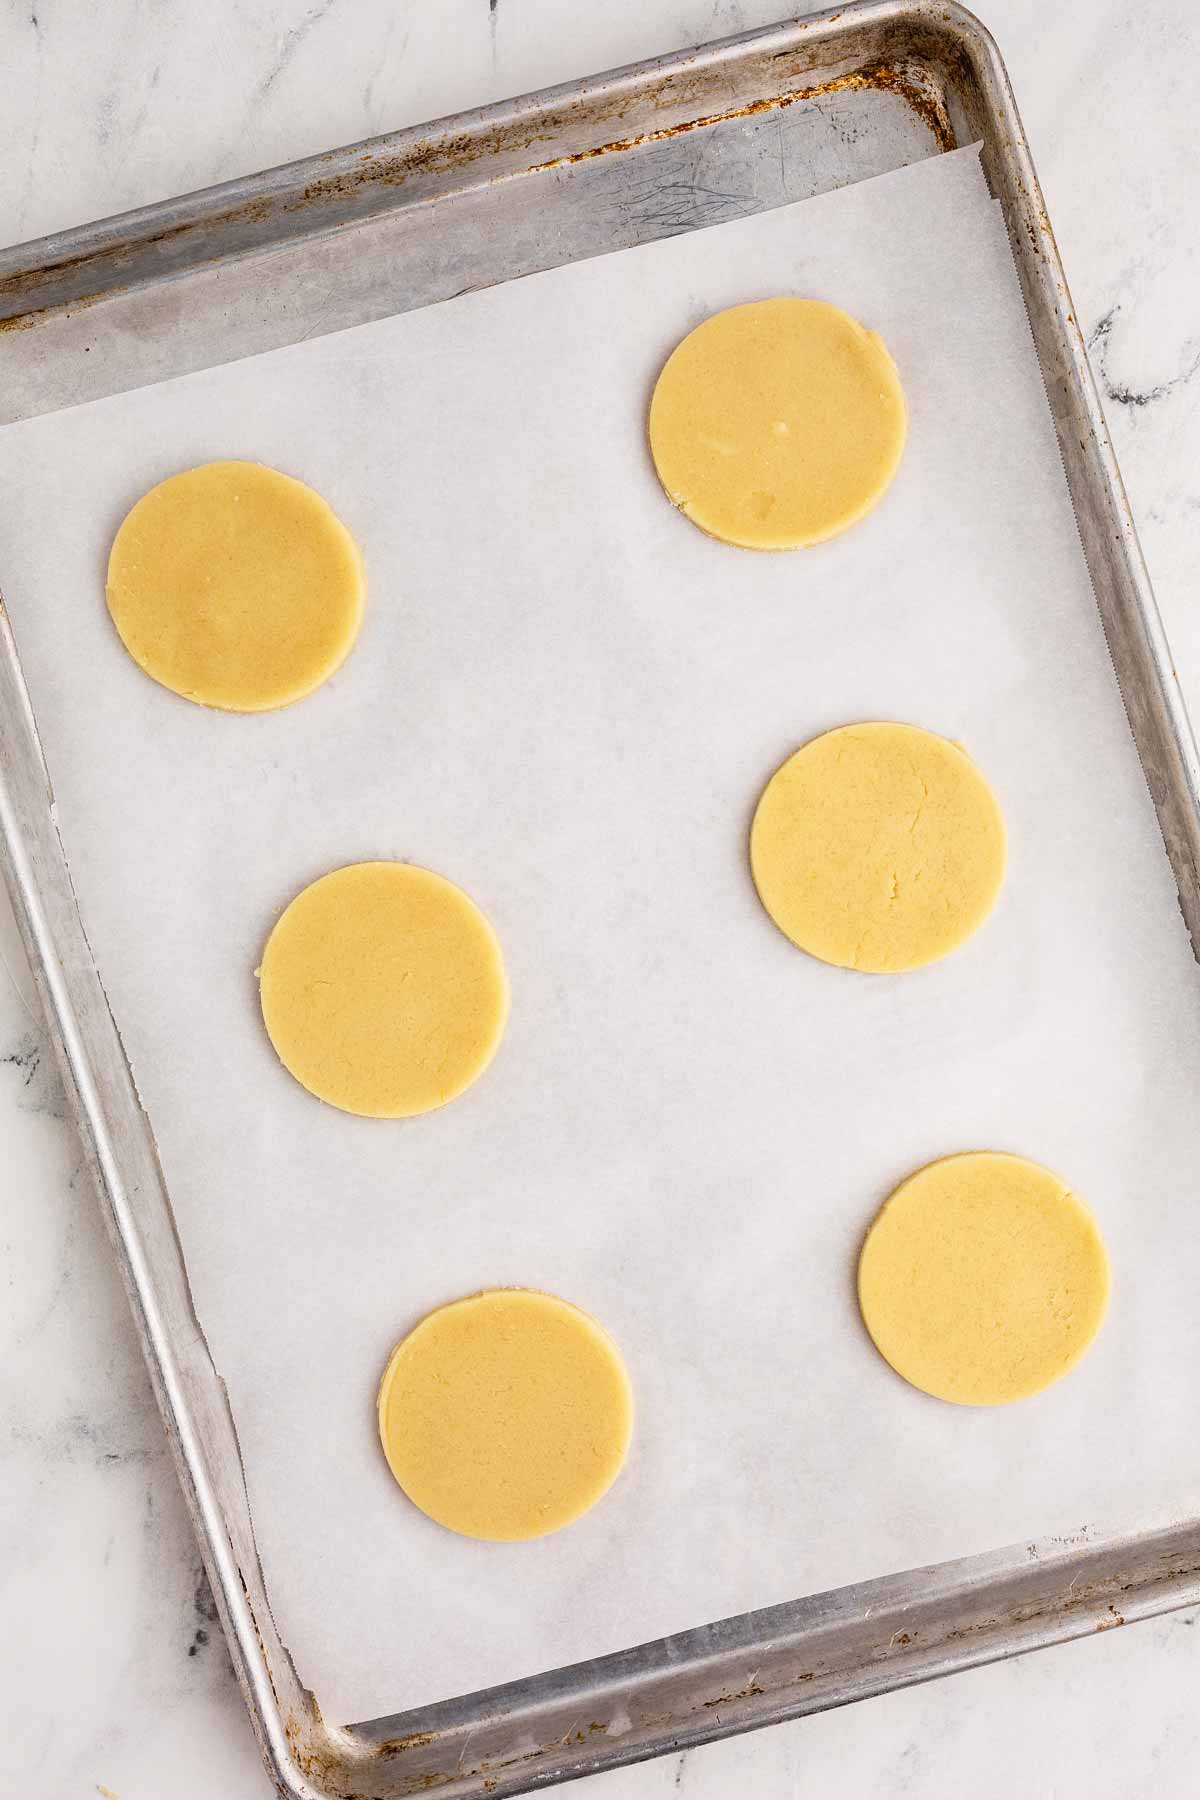
6. Bake to perfection: Carefully place your cut-out cookies onto the prepared baking sheets, leaving about 2 inches between them. Pop them into the oven and bake for 8-10 minutes.
Keep a close eye on them – you want them to just start turning a soft golden brown around the edges. The tops should spring back if you give them a gentle poke. Overbaking will take away that soft, melt-in-your-mouth texture, so err on the side of slightly underbaked.
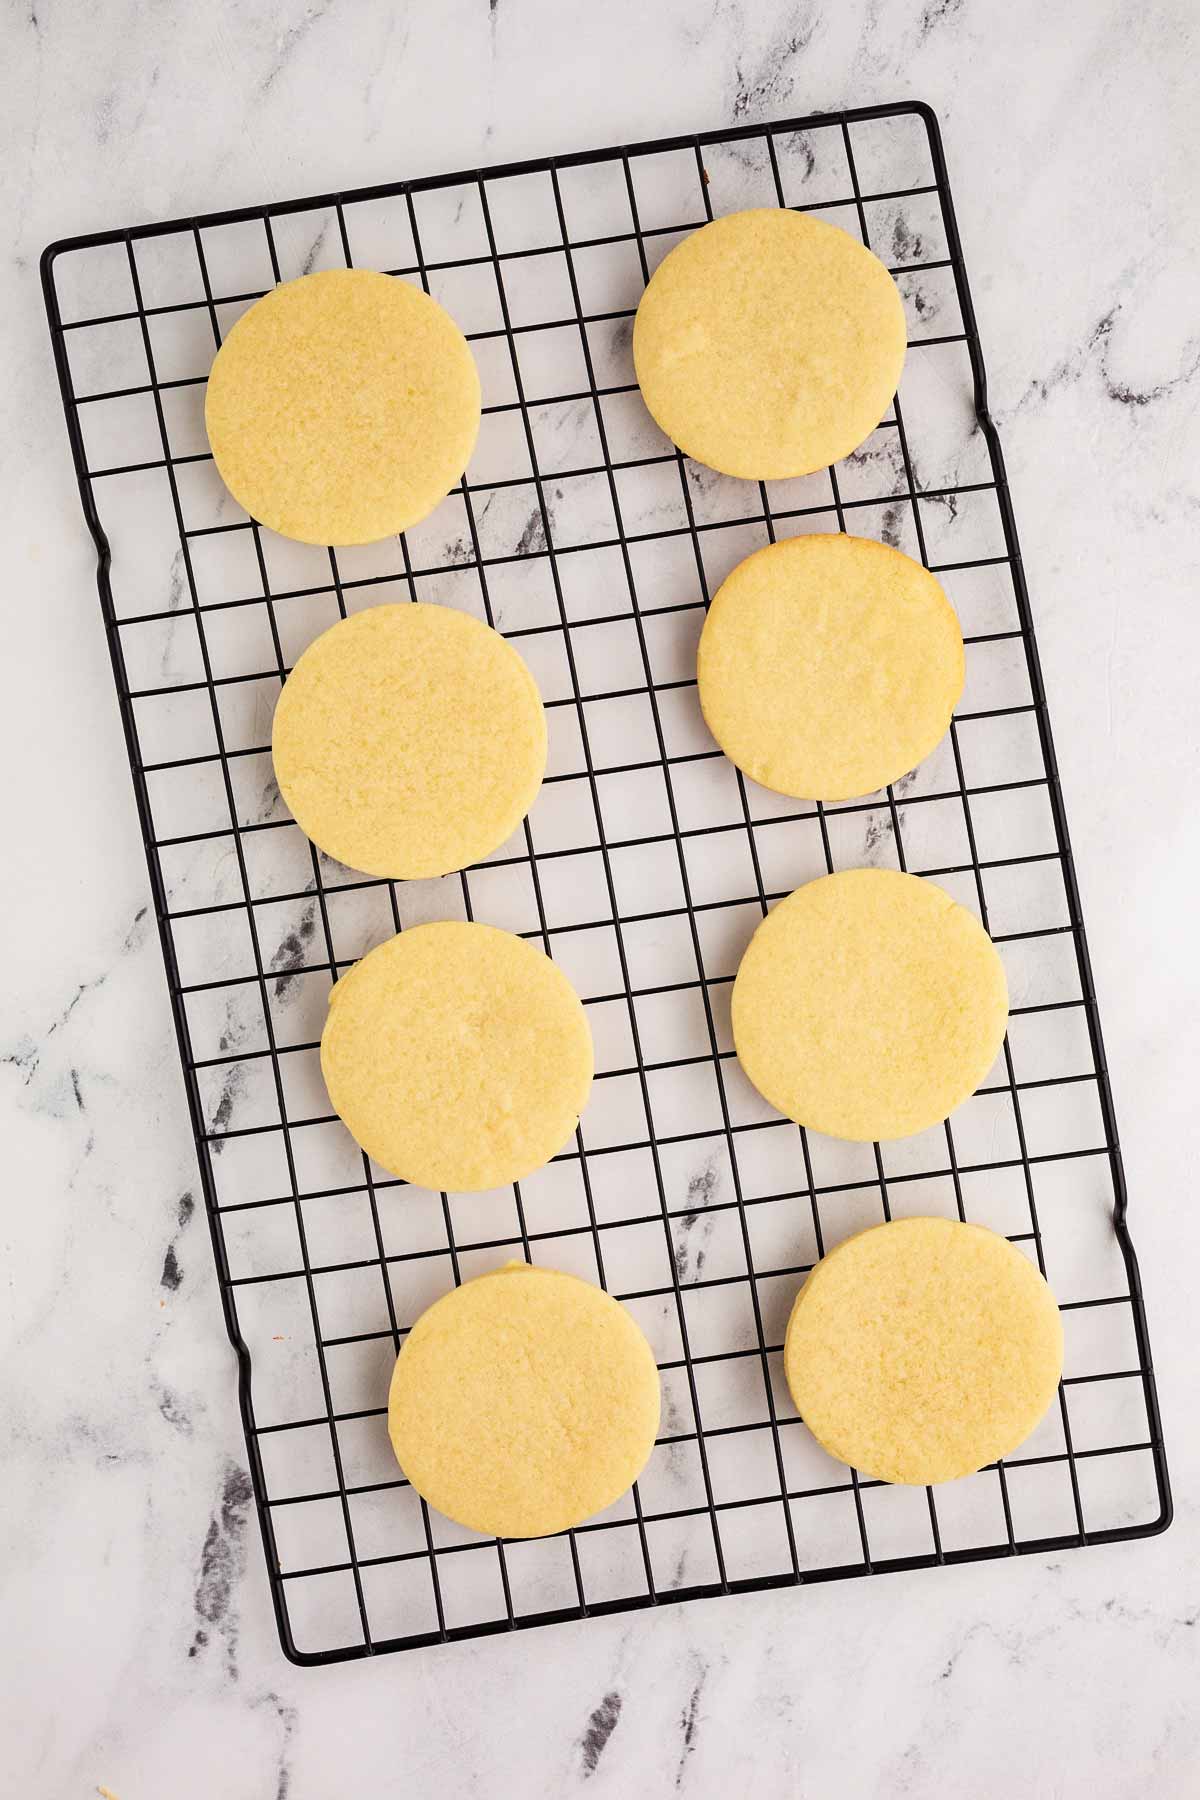
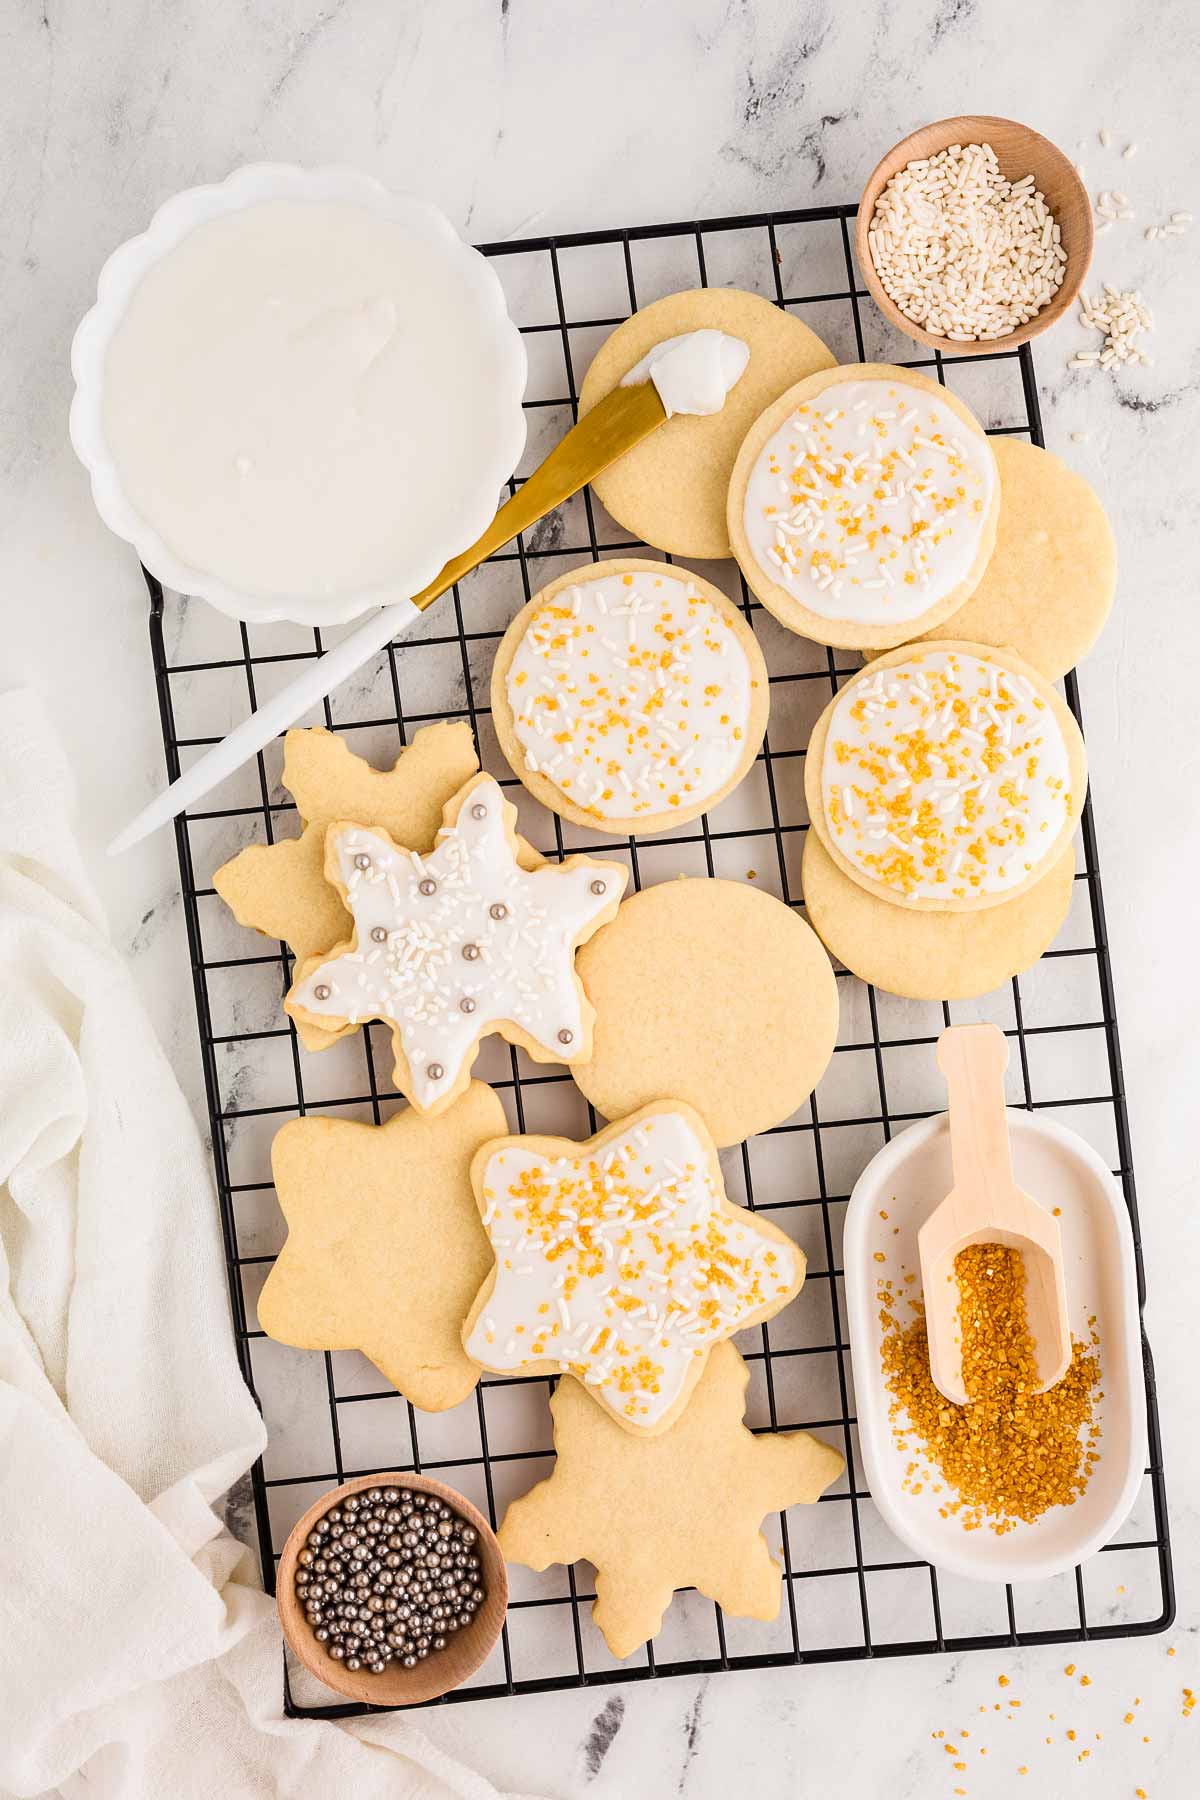
7. Cool and decorate: Let the cookies cool on the baking sheets for 5-10 minutes – they’re still fragile when hot! Then, move them to a wire rack to cool completely before decorating. Once cool, it’s time to bring out your inner artist with icing, sprinkles, or whatever your heart desires.

And there you have it! A batch of the most delightful, buttery, perfectly-shaped sugar cookies you’ll ever make. Enjoy every bite – and don’t forget to share (or not!).
Top tips for recipe success
- Don’t overwork the dough: I already noted this in the instructions above, but it’s really crucial not to overwork cookie dough. You want it to be well combined and smooth to roll out, but don’t knead it like bread dough or mix it for too long. This will develop the gluten in the flour and turn out tough cookies.
- Chill the dough if needed: If your kitchen is warm and the dough feels sticky, pop it in the fridge for 15-20 minutes before rolling it out. This makes it much easier to handle and ensures your cookies hold their shape.
- Roll evenly: Aim for a consistent ¼-inch thickness when rolling out the dough. This ensures your cookies bake evenly, avoiding some being underdone while others are overbaked.
- Re-roll scraps carefully: Gather leftover dough scraps and re-roll them gently. Avoid overworking the dough, or the re-rolled cookies might turn out tougher than the first batch.
- Thickness: Make sure you don’t roll the cookies too thin, or they won’t be soft. If you prefer, you can dust your work surface with powdered sugar instead of flour.
- !! If it takes a long time to cut out the cookies !! If it’s taking you a relatively long time to cut out the cookies (it does for me with the kids), place the cut out cookies on the baking sheet in the fridge (or outdoors if it’s cold where you are) for 5-10 minutes before baking.
- Don’t overbake: These cookies are best when they’re just set and lightly golden at the edges. If you wait for them to brown all over, they’ll lose their soft, tender texture.
- Use parchment or silicone mats: This not only prevents sticking but also helps the cookies bake evenly without browning too much on the bottom.
- Cool before decorating: Make sure your cookies are completely cool before icing, or the heat will melt your decorations and make a sticky mess.
- Test your icing consistency: For decorating, your icing should be thick enough to hold its shape but thin enough to pipe easily. Add water or lemon juice a tiny bit at a time until it’s just right.
- Have fun with decorating! Whether it’s icing, sprinkles, or edible glitter, make this part enjoyable – it’s where you can get creative and even involve little helpers. I keep sugar cookie decorating simple – cutting them out is tiring enough. I just whip up a thick powdered sugar icing. Then the kids cover them in sprinkles. So easy, and a lot of fun for all involved – even mom!
Helpful recipe hints
Recipe variations
- Add a citrus twist: Mix in 1-2 teaspoons of finely grated lemon or orange zest to the dough for a bright, zesty flavor.
- Make it festive: Add ½ teaspoon of cinnamon and a pinch of nutmeg to the dough for a warm, spiced holiday version. Or try some gingerbread spice!
- Switch up the extracts: Try almond extract instead of vanilla for a nutty, bakery-style flavor. You could also experiment with peppermint or coconut extracts for something unique!
- Chocolate lovers’ dream: Stir in mini chocolate chips or drizzle melted chocolate over the decorated cookies for an indulgent treat.
Storage tips
- Make-ahead dough: Prepare the cookie dough up to a day ahead and store it tightly wrapped in plastic wrap in the fridge. When ready to bake, let it sit at room temperature for 10-15 minutes to soften slightly before rolling out.
- Leftover cookies: Store baked and decorated cookies in an airtight container at room temperature for up to 1 week. If stacking them, place a sheet of parchment or wax paper between layers to protect the decorations.
- Freezer-friendly:
- Cookie dough: Tightly wrap the cookie dough in plastic wrap, then label with the name and use-by date (freeze for up to 3 months) before freezing. When ready to bake, remove the cookie dough from the freezer and thaw in the fridge overnight (I recommend placing it on a plate to catch any water drips). Once thawed, roll out and bake as directed in the recipe.
- Unbaked cookies: Cut out the shapes, place them on a parchment-lined tray, and freeze until solid. Transfer to a freezer bag and store for up to 3 months. Bake straight from frozen, adding 1-2 minutes to the baking time.
- Baked cookies: Let them cool completely, then freeze undecorated cookies in a single layer. Once frozen, transfer to a freezer bag or container for up to 3 months. Thaw at room temperature before decorating or serving.
Serving ideas
These sugar cookies are a treat on their own, but they can shine even brighter as part of a dessert spread or paired with other homemade delights:
- Santa-style: Serve a plate of sugar cookies with a glass of cold milk – it’s Santa’s favorite!
- Cookie decorating party: Set up an icing and sprinkles station for a fun, interactive dessert activity – perfect for kids and adults alike!
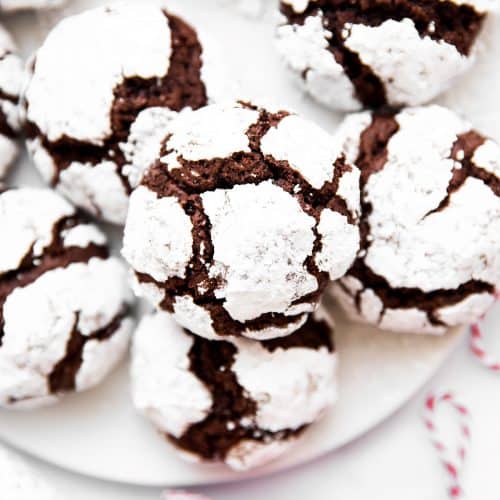
- Holiday dessert tray: Pair these cookies with Chocolate Crinkle Cookies and Soft Gingerbread Cookies for a festive spread.
- After-dinner treat: Serve these alongside a warm cup of homemade Hot Chocolate or as a sweet finish to a holiday meal.
- Make it a tea party: Pair the cookies with a batch of Gingerbread Muffins and a pot of tea or some hot apple cider for a cozy afternoon treat.
- Birthday celebrations: Decorate cookies in themed shapes and colors to complement a birthday cake.
More Christmas cookie recipes


PS If you try this recipe, please leave a review in the comment section and add a star rating in the recipe card – I appreciate your feedback! Follow along on Pinterest, Facebook or Instagram.

Soft Sugar Cookies
Recipe details
Ingredients
- 1 cup butter softened
- 1 cup granulated sugar
- 1 large egg
- 2 teaspoons vanilla extract
- 3 cups all-purpose flour
- 2 teaspoons baking powder
- ½ teaspoon salt
Optional icing
- 4 cups powdered sugar sifted
- 4 tablespoons water OR lemon juice; more as needed
- 1½ tablespoons light corn syrup
- ½ teaspoon pure vanilla extract
- gel food coloring optional
Instructions
- Prep: Preheat the oven to 350°F and line two large baking sheets with baking parchment or silicone baking mats and set aside.
- Cream ingredients for cookie dough: Place 1 cup butter and 1 cup granulated sugar in a large mixing bowl and cream with an electric mixer until well combined. Then add 1 large egg and 2 teaspoons vanilla extract and cream until the egg is fully combined – do not mix any longer than necessary, or your cookies may turn out tough. It will look scraggly, but that's fine
- Add dry ingredients to cookie dough: Combine 3 cups all-purpose flour, 2 teaspoons baking powder and ½ teaspoon salt in a medium bowl, then gradually add to the butter mixture and mix on low until combined.
- Roll out cookie dough: Remove the cookie dough from the bowl and onto a clean work surface. Push it together with your hands a few times until it forms a smooth cookie dough – do not knead or overwork it, or your cookies will turn out tough. Divide the dough in half and roll out each half on a lightly floured work surface to ¼ inch thickness.
- Cut out cookies: Cut out cookies (2-3 inch cutters work best), re-rolling any scraps of dough. Arrange cookies 2 inches apart on the prepared baking sheets and bake in batches for 8-10 minutes, or until the cookies are just starting to turn a light brown. The tops should spring back if lightly prodded, but you do not want to overbake these!
- Cool the cookies: Allow the cookies to cool on the baking sheet for 5-10 minutes, then transfer them to a wire rack to cool completely before decorating.
To ice cookies
- Combine 4 cups powdered sugar, 4 tablespoons water, 1½ tablespoons light corn syrup and ½ teaspoon pure vanilla extract until smooth. Adjust consistency if needed – icing should the thick and spreadable, not runny. Add gel food coloring as desired. Decorate cookies with icing and sprinkles as desired.
Notes
Ingredient notes
- Butter: Use unsalted, softened butter for better control over saltiness. If using salted butter, reduce added salt to a pinch.
- Sugar: Stick with granulated sugar for the perfect sweetness and structure.
- Egg: Use a large, room-temperature egg for smoother dough. To quickly warm a cold egg, place it in warm water for 5 minutes.
- Vanilla: Use pure vanilla extract, or swap for almond extract or vanilla bean paste for variety.
- Flour: Measure carefully to avoid dense cookies.
- Baking powder: Ensure it’s fresh for proper lift and shape.
- Salt: Enhances flavor – don’t skip! For a gourmet touch, sprinkle flaky sea salt on top before baking.
- Corn syrup (in icing): Adds gloss and helps the icing set firmly. Substitute honey or agave for a softer finish.
Recipe tips
- Mixing: Avoid overmixing to prevent tough cookies.
- Chill dough: Refrigerate sticky dough for 15-20 minutes to make rolling easier.
- Roll evenly: Keep dough at ¼-inch thickness for uniform baking.
- Don’t overbake: Remove cookies as edges turn light golden; they’ll stay soft and tender.
- Cool before decorating: Let cookies cool completely to avoid melted icing.
- Re-roll carefully: Gently gather scraps and re-roll to avoid tough cookies.
Storage tips
- Make-ahead dough: Wrap tightly and refrigerate for up to 3 days. Let soften slightly before rolling.
- Leftover cookies: Store baked, decorated cookies in an airtight container for up to 1 week. Use parchment between layers to protect decorations.
- Freezing:
- Cookie dough: Wrap tightly in plastic, label with the name and date, and freeze for up to 3 months. Thaw in the fridge overnight (place on a plate to catch drips), then roll out and bake as directed.
- Unbaked: Freeze cut-out shapes on a tray, transfer to a bag, and bake straight from frozen with 1-2 extra minutes.
- Baked: Freeze cooled, undecorated cookies in a single layer, then transfer to a bag. Thaw before decorating.
More recipe information
Recipe first published on 12/18/2020. Updated with new photos and better text on 12/15/2024. The cookie recipe has stayed the same, the icing has been improved.


Jodie says
Delicious cookies! Thank you for sharing.
Nora Rusev says
Thank YOU for making them, Jodie! Happy holidays to you and yours.