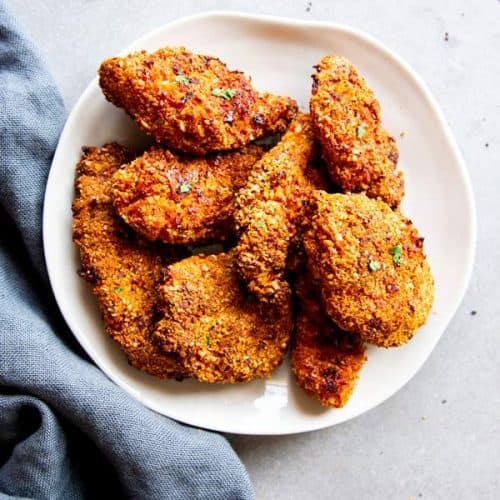
You won’t be disappointed by this recipe! Made using a simple technique, this chicken gets so crispy in the oven – it’s hard to believe it isn’t deep fried!
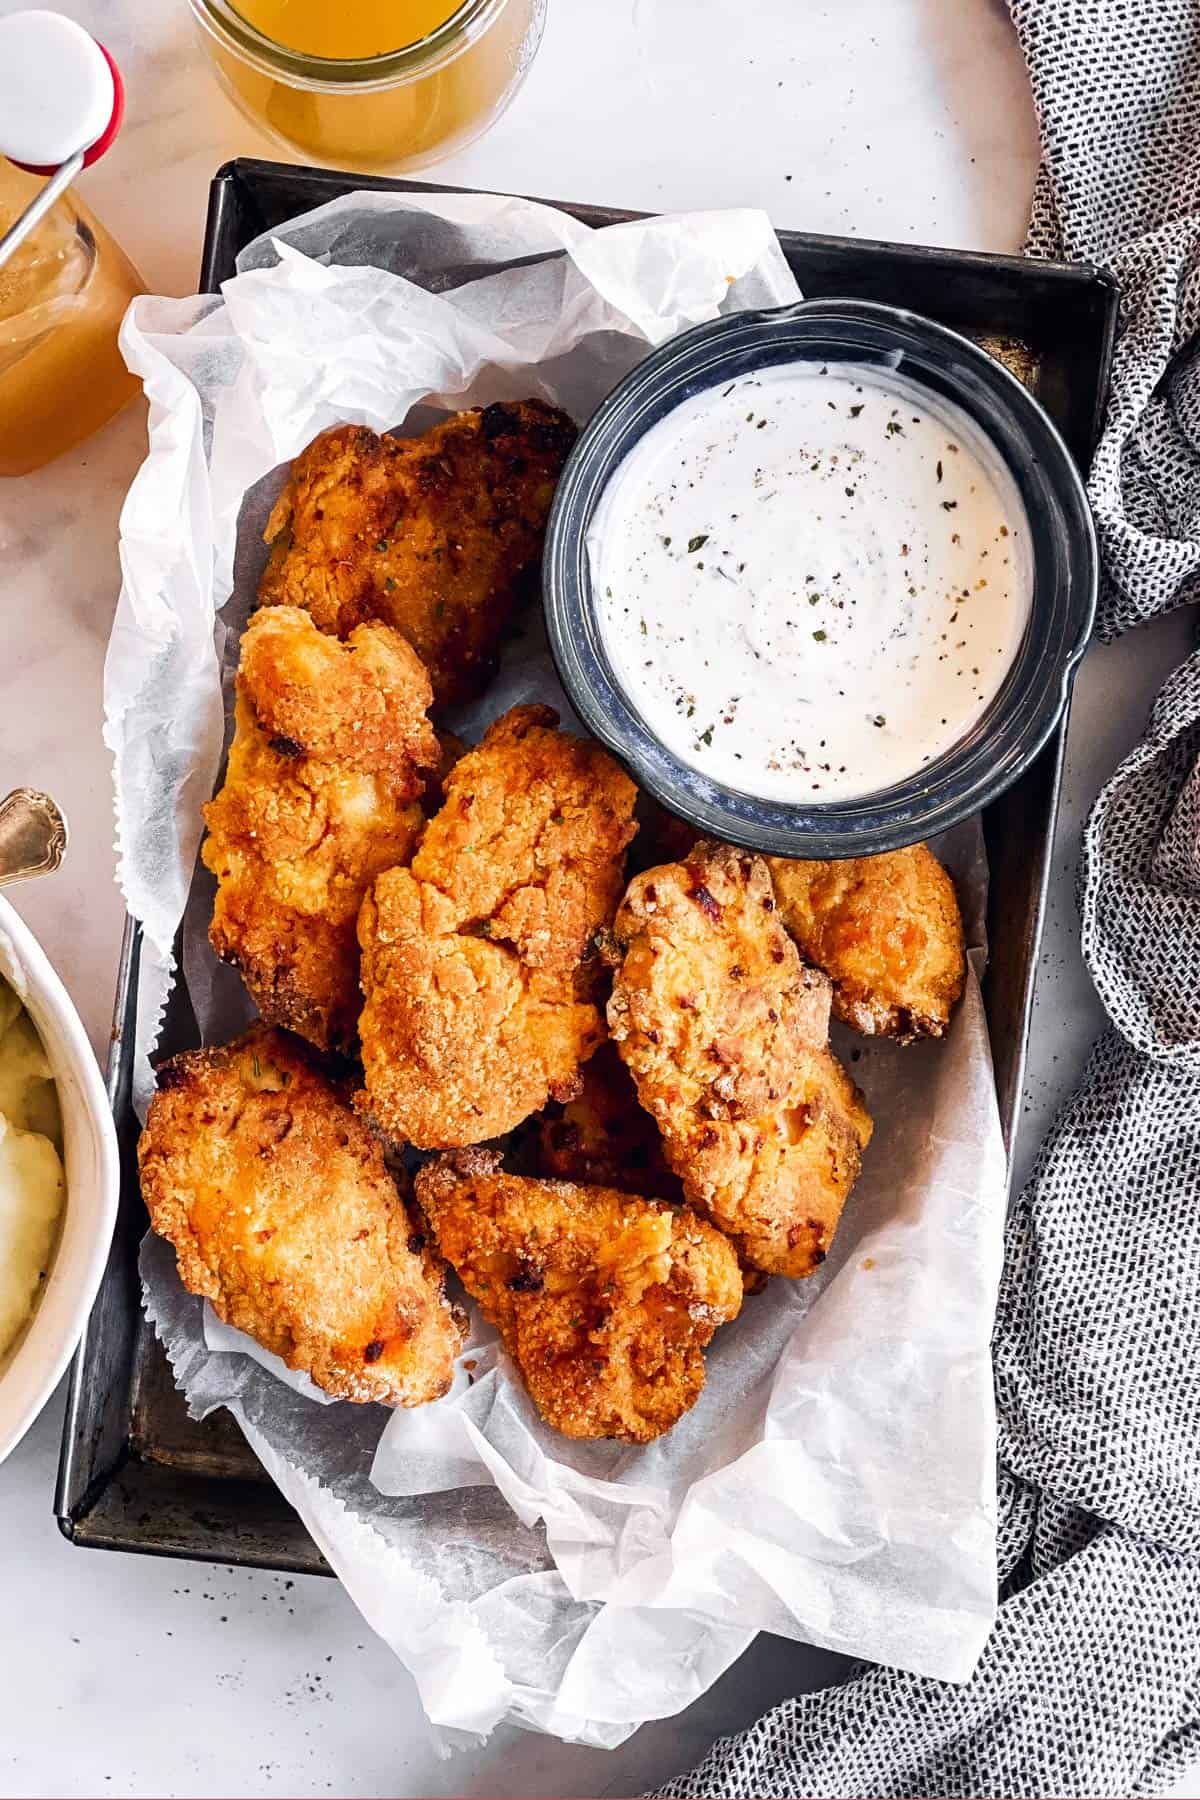
My family has a complete and utter love affair with oven fried everything. The kids will eat homemade chicken nuggets any day of the week, and the husband considers himself the luckiest guy in the world whenever I make my oven fried fish.
I won’t lie – breading is probably my least favorite cooking technique, right next to rolling an endless pile of homemade meatballs… Either way, this chicken comes out supremely delicious. Is it a little tedious to make? You bet. Worth every second spent in the kitchen? Oh, but yes.
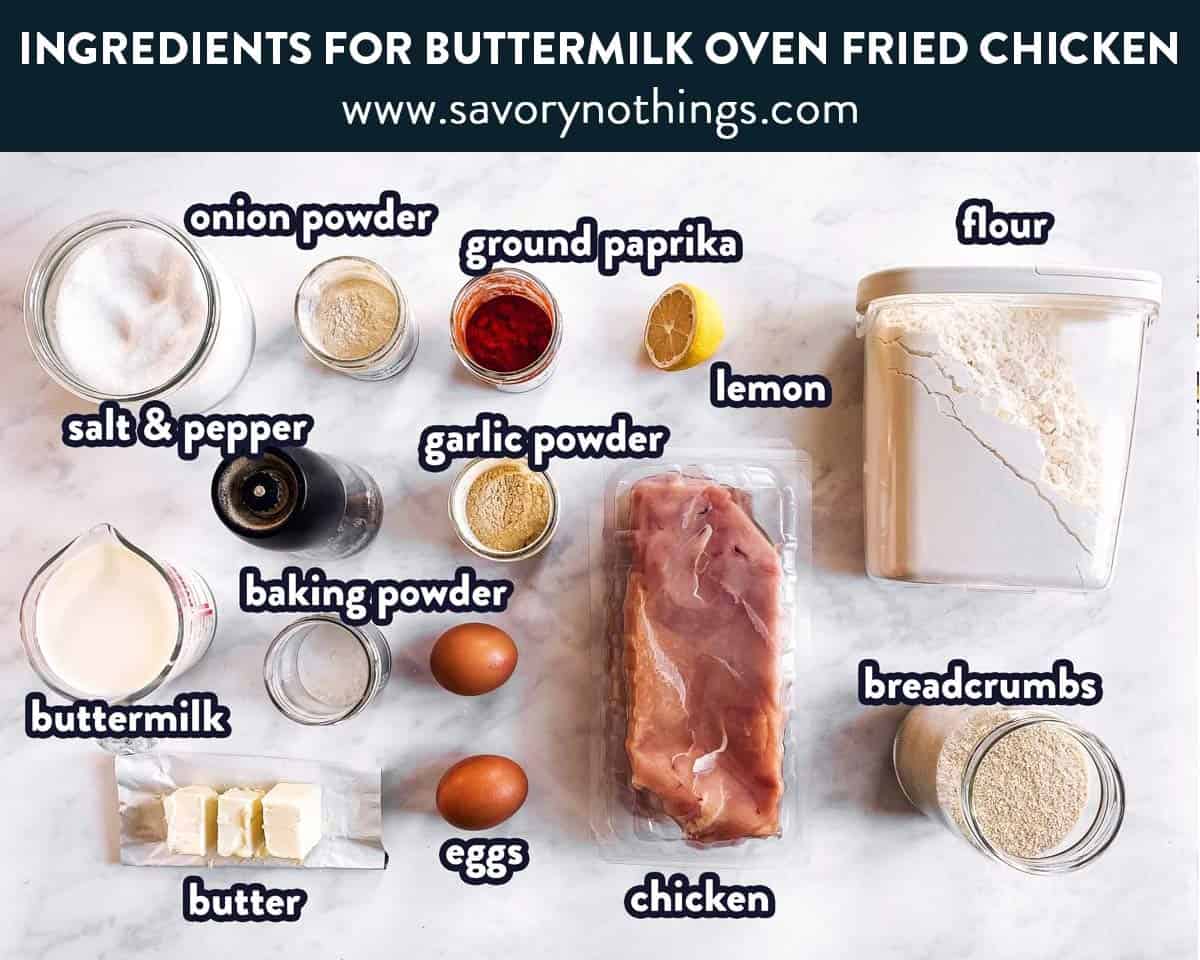
Ingredients you’ll need
Here is a visual overview of the ingredients in the recipe. Scroll down to the printable recipe card at the bottom of this post for quantities!
Ingredient notes
- Chicken: I used chicken breast cut up into pieces, but chicken tenders work just as well. This also works with other chicken pieces – many readers have reported great success using wings, drumsticks or even thighs. Some cuts will take longer in the oven (especially bone-in thighs). Make sure to check with a food thermometer to fully cook the chicken (it should reach an internal temperature of 165°F according to this governmental safe minimum cooking temperature chart).
- Buttermilk: Make an easy substitute by using regular milk mixed with 1 tablespoon white vinegar. Let it sit on the counter for 5-10 minutes, then use in the recipe.
- Breadcrumbs: I just use regular plain breadcrumbs, but Panko is also great.
- Salt: The amount of salt needed depends a lot on your specific salt. Whenever I use a natural sea salt, I’ve come to notice it’s not very “salty” compared to table salt. If you’re in doubt, make the recipe with less salt the first time and see if you need to increase it in the future. You can always season the chicken once it’s cooked, but you can’t take away too much salt.
- Flour: I know from a few readers who have successfully made this recipe gluten free with gluten free flour (and gluten free breadcrumbs).
How to make buttermilk oven fried chicken – step by step
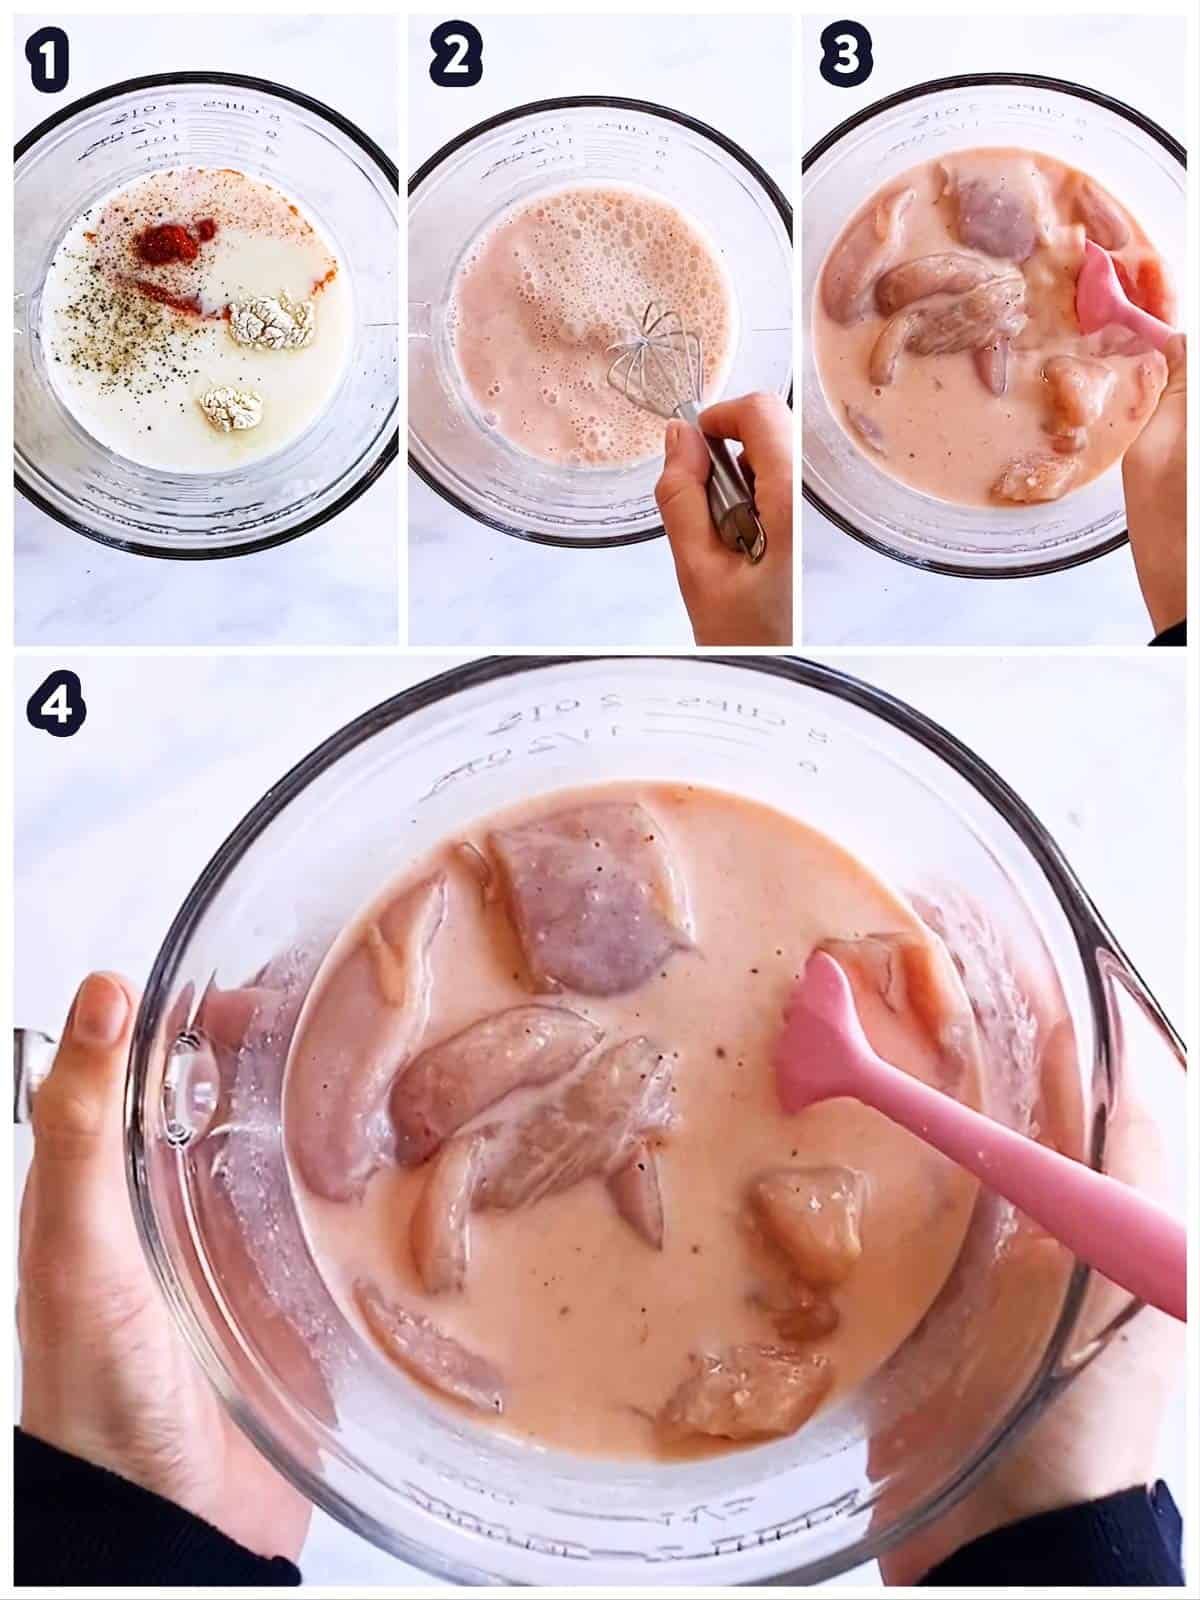
The first step is to marinate the chicken. To do this, you need to combine all of the marinade ingredients (1) in a bowl (2). Then add the chicken, stir well (3) and chill for at least one hour and up to overnight (4).
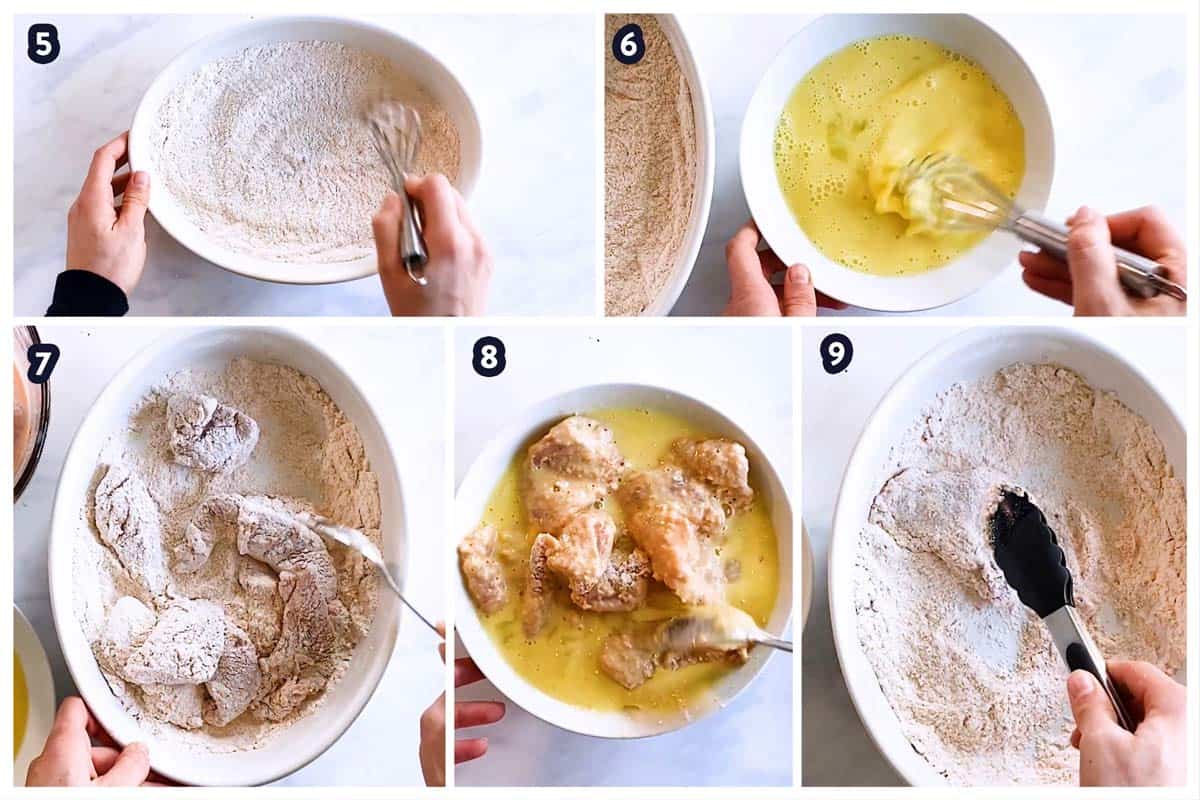
Once the chicken is ready, you need to prepare the breading ingredients. All of the dry breading ingredients are mixed in a large dish (5), and the egg wash in a medium bowl (6).
Shake any excess marinade off the chicken, then thinly coat it with the dry breading mix (7). Toss the coated chicken in the egg wash (8). Finally, dredge each chicken piece through the dry mix again, thickly coating the chicken this time (9).
Make sure to press the breading on the chicken at this point, or it will fall off during baking!
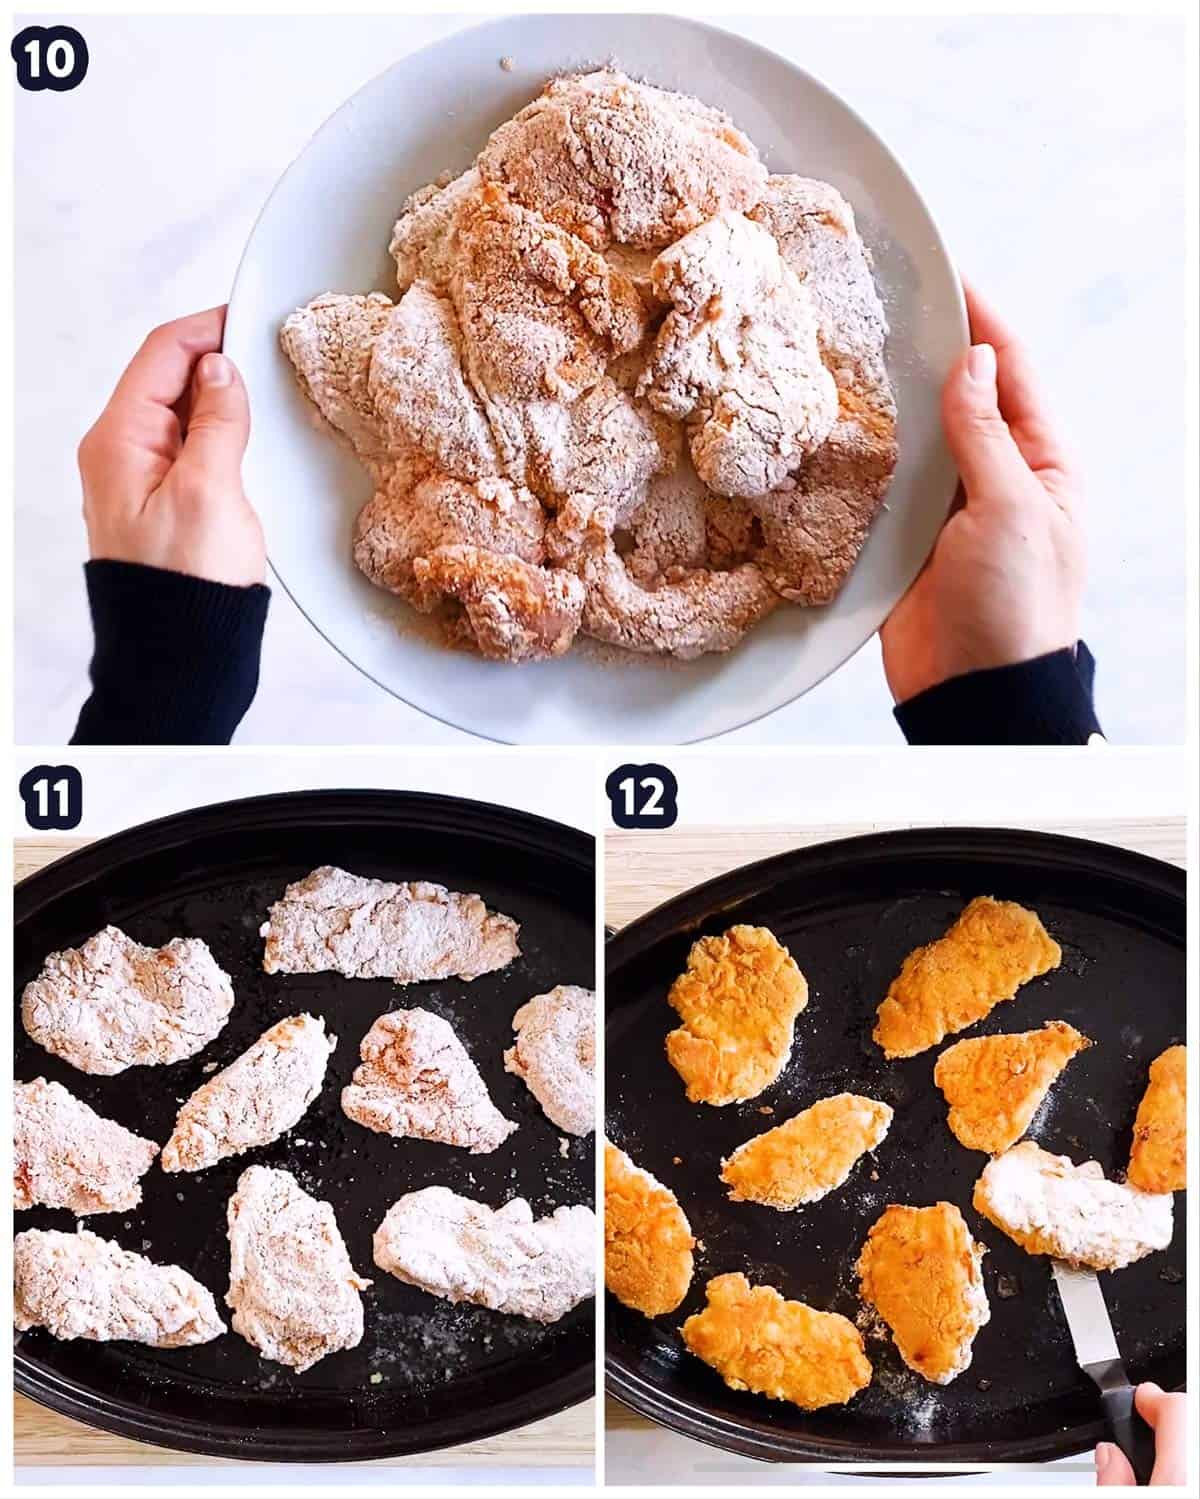
Once all of the chicken is breaded (10), melt butter on a preheated dark roasting pan. Spread out the chicken pieces on the pan (11) and bake for 10-12 minutes. Then gently release from the pan with a spatula, flip and finish baking (12).
You can finish the chicken under the broiler for 2-3 minutes to crisp it up even more, if you like! I don’t always bother, but it adds a little extra delicious finishing touch.

Recipe tips
Breading tips
- Make sure to use separate dishes for the dry breading ingredients and the wet breading ingredients as instructed in the recipe, do not mix them together.
- I use large enough dishes to hold about ⅓ of the chicken at a time. This way I can toss several chicken pieces in the first dry coating and in the egg wash at a time. Then I do the final dry coating piece by piece – still tedious, but a little faster.
- Be sure to firmly press on the final coating, in order for it to stick to the chicken during baking.
What kind of pan to use
It’s very important to use the right kind of pan for this recipe. It needs to have the following features:
- It needs to be dark to better reflect heat back onto the chicken
- It has to have a rim to hold in the melted butter
- It needs to be preheated in the oven before placing the chicken on top
Preheating the pan is a VERY important step – I do it with everything I want to get crispy in the oven, from oven fried chicken to homemade chicken nuggets to oven fried shrimp and even baked potato wedges.
Baking tips
- Make sure to preheat the pan and use enough butter – otherwise the chicken will not crisp up as much as it should.
- Be careful when you flip the chicken. Slide a spatula underneath each piece to make sure the breading doesn’t rip off.
Side dish ideas
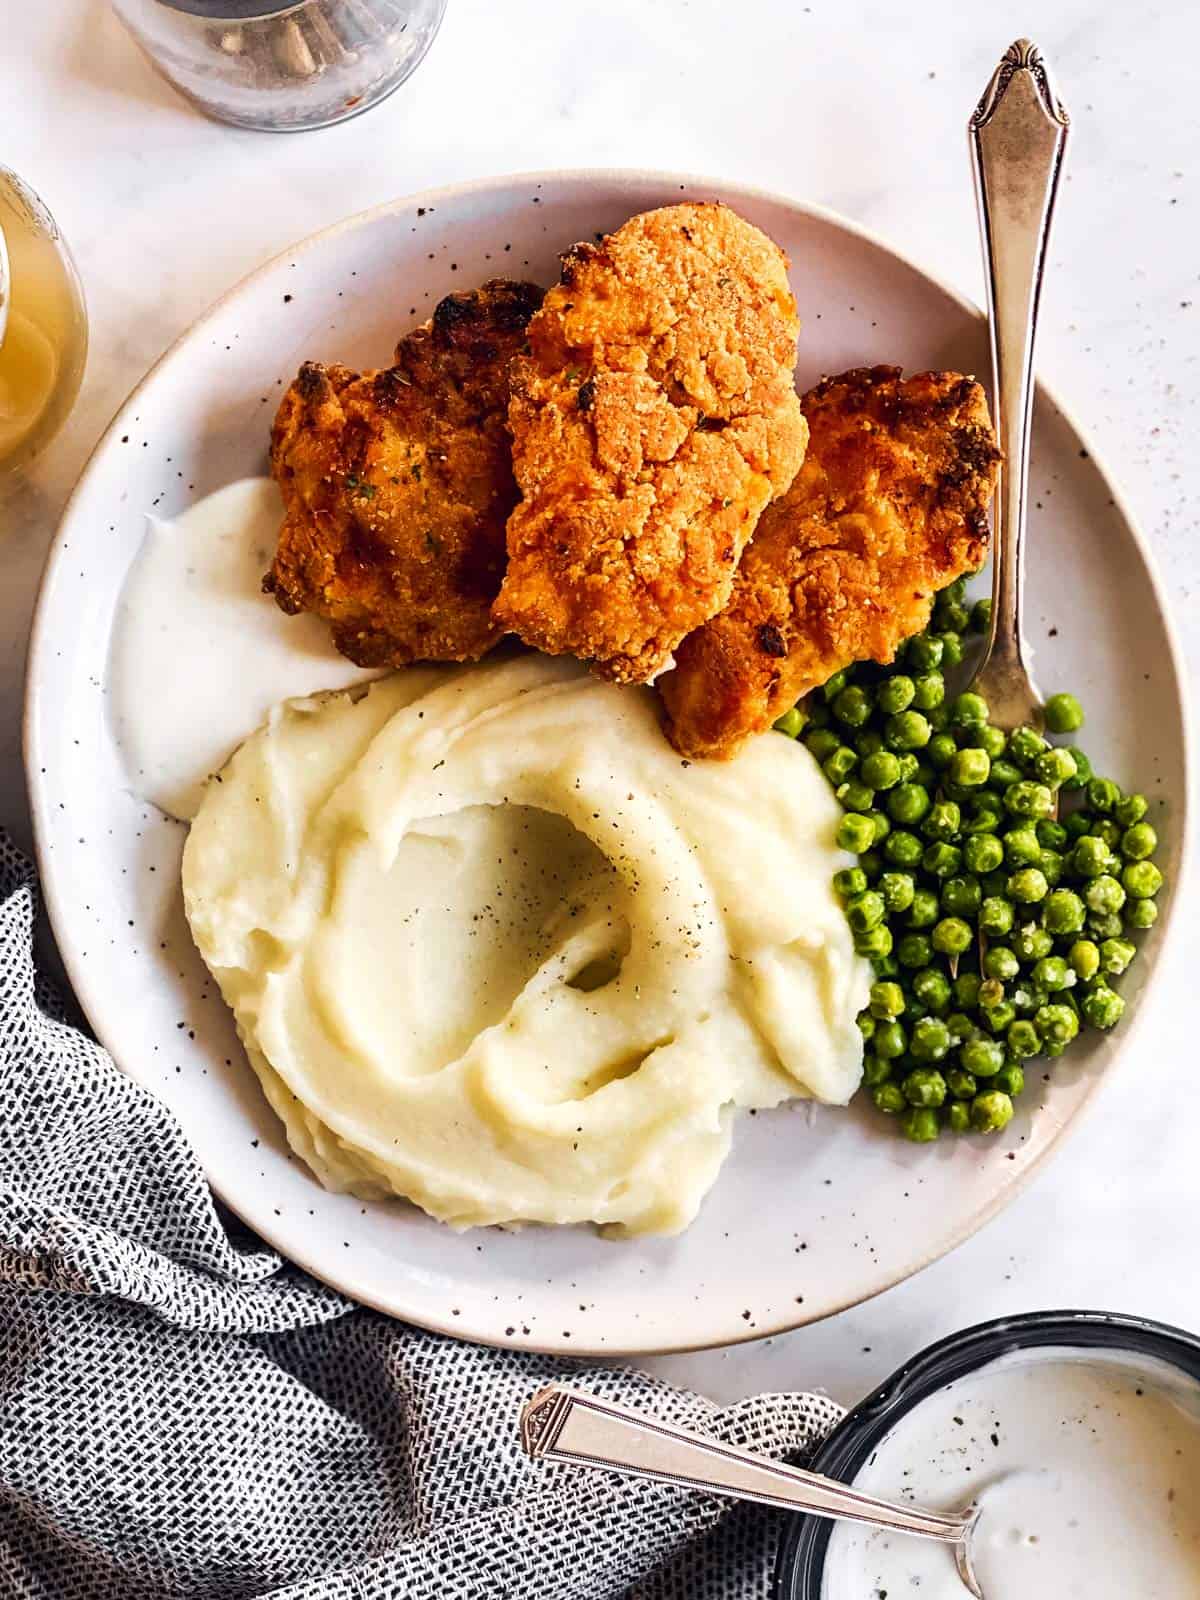
Wondering what to serve with your oven fried chicken? We enjoy it with mashed potatoes or slow cooker mac and cheese – or baked mac and cheese if I forgot to set the crockpot version!
We love them dipped in honey mustard or a homemade ranch dip. And plenty of coleslaw! Other side dishes we enjoy are baked beans, sautéed green beans or simple frozen peas.
Oh and P.S: Here’s how to reheat any leftovers so they crisp up again!
More oven fried chicken recipes
PS If you try this recipe, please leave a review in the comment section and add a star rating in the recipe card – I appreciate your feedback! Follow along on Pinterest, Facebook or Instagram.
Printable recipe
Truly Crispy Buttermilk Oven Fried Chicken
Recipe details
Equipment
- roasting pan (dark colored preferred)
Ingredients
For the marinade:
- ½ teaspoon salt
- ½ teaspoon ground paprika
- ¼ teaspoon garlic powder
- ¼ teaspoon onion powder
- freshly ground black pepper to taste
- 1 cup buttermilk
- ½ lemon juice only
- 2 pounds chicken breast cut into strips (or use tenders)
For the dry coating:
- 1 ¼ cups white flour
- 4 tablespoon plain bread crumbs panko or regular both work
- ½ teaspoon baking powder
- ½ tablespoon salt or less to taste
- 2-3 teaspoons garlic powder
- 1 teaspoon ground paprika
- 1 teaspoon onion powder
- ½ teaspoon ground black pepper
For the wet coating:
- 2 large eggs
- ⅔ cup buttermilk
For the pan:
- ⅓ cup butter
Instructions
Prep the chicken:
- Marinate: Whisk together all ingredients for the marinade (except for the chicken) in a large bowl. Add the chicken pieces, making sure they're all well coated. Cover and place in the fridge for one hour up to overnight. (If your'e short on time, simply place all the ingredients in a zip-loc bag and massage the chicken for a few minutes. Let it sit in the fridge for 10 minutes before using.)
Preheat oven and pan:
- Prep the pan and oven:Preheat the oven to 410°F (210°C). While the oven is preheating, place a dark, rimmed roasting or baking pan in the oven to heat up (more info in the post).
Bread the chicken:
- Mix the dry coating:Place all ingredients for the dry coating in a large bowl. Mix well.
- Mix the wet coating: To a separate bowl, add the eggs and ⅔ cup buttermilk. Whisk very well.
- Coat the chicken pieces: Shake off any excess marinade. Dredge the chicken through the flour mix, shaking off any excess. Dip in the egg mix, making sure the chicken is evenly covered. Dredge through the flour mix once more, making sure the chicken is evenly covered, shaking off any excess.
- Bake the chicken:
- Place butter and chicken on pan: Carefully remove the hot pan from the oven, using oven gloves. Melt the butter on it, then place the chicken pieces on top without overcrowding the pan.
- Bake: Bake for 10-12 minutes, carefully flip and bake for another 5-10 minutes (depending on how thick your chicken pieces are). Finish by broiling for a few minutes, until golden and crispy.
- Serve: The chicken will feel soft right as it comes out of the oven. Let it sit for 2 minutes before serving, it will crisp up. Don't let it sit for a long period of time before you eat it, or it will start turning soggy.
Notes
Nutrition
More recipe information
Check out our Oven Fried Chicken Breast Recipes collection for more ideas!








Lisa says
I made this for the first time tonight. Recipe is delicious! For the breadcrumbs, I used my meat mallet to crush some Caesar croutons. Worked wonderfully!
I also used my cast iron skillet. I found everything straightforward also.
Thank you for sharing.
Nora says
That’s a great idea with the croutons, Lisa!
Jessica says
Can you use a cast iron skillet? If so baking times the same? Also any benefits to using convection versus regular baking?
Nora says
Yes, a cast iron skillet has been used many times by readers for this recipe. The baking time should be the same. And hm, good question. I think convection here would mainly be a plus if you baked the chicken on a rack vs on a pan. It definitely won’t hurt if you try it, and I’d love to hear your thoughts!
Thuy Patton says
Recipe looks great, I can’t wait to try it! Read the reviews and also don’t understand the negative complaints on steps. Pretty straightforward to me!
Nora says
I’m glad, Thuy!
Nori says
This was so good! My family couldn’t get enough. The only problem I had was some of breading on the chicken came off, how do I stop that.
Nora says
Nori, glad your family like it! When you bread the chicken, you’ll want to use the back of a spoon or a firm spatula to kind of carefully pound the breading onto the chicken. You want a firm, even coating around it, this will create almost a “shell” of breading around the chicken that doesn’t fall off. Hope this helps!
Maria Wendy says
Hello Nora! In Spain, using buttermilk is something new; no, we do not use it and due to the globalization of computer media it has arrived relatively recently. I must admit that it is a very good ingredient and the chicken is much softer. great recipe take care. Greetings
Amy says
This is my go to chicken thigh recipe. The only change I have made to it is that I cook them in our air fryer. Fifteen minutes on each side and they turn out perfectly crispy on the outside nice and juicy in the centre. My husband absolutely loves this!!! Thank you so much for sharing the recipe!
Nora says
I’m so glad, Amy! I mostly make this in the air fryer now, too, if I’m being honest 😉
Monica says
Made this tonight. Very easy and tasty. Buttermilk marinade is everything! Thanks!
Nora says
I’m so glad, Monica!
Jolene Clayborn says
Are you reusing the buttermilk you marinated chicken in?
Thanks
Nora says
Jolene, no, absolutely not. Please use fresh buttermilk for the coating.
Susan Hall says
It sounds good. You are missing a very crucial step. You dredge wet into dry, cool, but you forgot to add the panko/bread crumb to your mix. Please proof read your recipes before posting, we are wasting money on your steps. There is a definate texture from normal bland bread crumbs seasoned to panko. I want the texture of kfc breaded without the 11 spices. Please clarify to your readers. Thank you.
Nora says
Susan, that’s simply not true and nobody needs to be wasting money when making this recipe. The breadcrumbs are listed as part of the dry breading mix. “Place all ingredients for the dry coating in a large bowl. Mix well.” I don’t know how this can be any more clear or how this is missing the breadcrumbs.
For the record, I proof read all of my recipes numerous times, and also have my husband read them to me, read them to my husband AND have him proofread as well. Please don’t complain about someone’s hard work if you’re not going to do the legwork first.
Leesa Hamilton says
Flavor was delicious. I hadn’t pre- read the recipe and didn’t realize I needed to chill it an hour. Will make it again.
Nora says
I’m glad you enjoyed the recipe nonetheless, Leesa!
jane says
the panko is included in the mix.
April Oldham says
I can’t for the life of me understand people that act like this.
Nora says
Same here, April. Same here.
Susan Miazga says
I had leftover buttermilk and was searching for recipes and chose yours! No regrets here! Easy to make and truly crispy and tasty!! I added some Tabasco to the egg wash and used my cast iron because, you know, cast iron! Definitely making this again; thank you!!
Nora says
I’m so glad, Susan!
amanda says
hi! this recipe sounds great and i love that it’s baked not fried. could i use either a cast iron casserole dish that’s light coloured or a cast iron dutch oven that’s dark? i’m afraid i don’t have a dark roasting pan
Nora says
Amanda, I know other readers successfully made it in a dark dutch oven, so that’s definitely worth a try!
Tamara Lovell says
I really wish you had measurements and oven temperatures listed, as well as which seasonings go into which thing, and in what amounts.
Nora says
The printable recipe with all measurements is at the bottom of the post, Tamara. This is indicated several times, most notably in the large “jump to recipe” button right at the top.
M says
I have tried making fried chicken a few times but can never get it right. This one was literally perfect and way easier than the stove-top version. Will be my go to recipe for fried chicken moving forward.
Nora says
I’m so glad to hear it!
Susan M says
Made this tonight with a couple of personal tweaks, like a little honeyracha in the marinade and the liquid dredge, and some crushed potato chips in the dry. I used a big cast iron skillet and browned the butter before adding the chicken, it was perfect!
Nora says
I’m so glad, Susan!
Barbara says
I will never fry chicken again! I also added sesame seeds and it was delicious!
Nora says
I’m so glad, Barbara!
Julie Harrison says
I only have glass or light colored pans. Will this spoil the crunchiness?
Nora says
Julie, I would not do the glass pan. You can use a light-colored metal pan, I’ve done it recently when I didn’t have my usual baking trays available and it worked out fine. A little less crisped up, but still perfectly delicious.
Liza says
Unfortunately, I missed the butter step, as I used the printer friendly recipe instructions, and ended up with everything stuck to the pan.
Better luck next time.
Nora says
Liza, I’m sorry this didn’t work out for you, but I’m a little confused – which instructions did you use? Melting the butter on the hot pan is clearly mentioned both in the post and in the printable recipe card at the bottom. Did I forget to mention it anywhere else? Please let me know so I can make sure this doesn’t happen to anyone else again.
Bethany says
We’ve made this recipe to celebrate southern living. We love this healthier version!
Nora says
I’m so glad, Bethany!
Jules says
Can’t wait to try this recipe! I use to skip recipes that call for buttermilk because no one in my family likes it so I never had it around. I’ve since found a powder buttermilk and it’s opened a whole bunch of new recipes to me. Can’t wait to try this one as I always have boneless chicken breast in my freezer. Thanks again!
Alicia says
I haven’t made the chicken yet, but hopefully it comes out right. I’ll change my scoring when I make the food. I also want to give you a heads up on the ingredients. It looks like you forgot what the serving is for the lemon juice. It only says 1/2 lemon juice.
Nora says
Alicia, sorry for the confusion about the lemon juice. It means you need 1/2 lemon, of which you need only the juice (and not the zest or whole segments). I wish I could insert this ingredients in a different way, but unfortunately that’s just how the recipe card template works. I hope this helps, and I hope you’ll enjoy the chicken!
Nettie ? says
Well! This was so simple and soooo tastie!! It was quite a quick meal to cook once it all got going! And Yes, yu have to be careful when flipping as to not tear the coating. But I loved the flavours! My husband kept saying Hhmmm ?! I had marinated my chicken for a full afternoon from frozen so I was pleased with the degree of flavour that infused in the chicken! Will definitely make this again! Cos I LOVE fried chicken!! ? I chose to do this dish in my cast iron! It worked perfectly!
Nora says
I’m so glad, Nettie!
John says
Hi. If I’m using bone-in chicken thighs with the skin left on, which side goes face-down into the roasting pan first? (i.e., does the skin side go face-down at first, so it can be finished under the broiler?)
Thanks!
Nora says
John, if you bread it, I don’t think it really matters all that much. The skin may not get overly crispy, but the coating around it certainly will. I would still do face-down at first like you suggested. Hope this helps!
Tanya says
Delicious! My only issue was the batter falling off during cooking.
Nora says
I’m glad you enjoyed the flavor, Tanya! If you try pressing the breading firmly onto the chicken next time, the batter shouldn’t fall off during cooking. Hope this helps!
Neisha says
Could I use a cast iron pan for this recipe?
Nora says
Neisha, yes I think that would work well – as long as it’s large enough to comfortably hold the chicken pieces. Make sure to bake them in batches otherwise. Hope that helps!
Nettie ? says
Yes! Yu can! It worked like a charm!!
Christine says
The ingredients are amazing together. I do feel like there needs to be a bit more detail with how long to broil at the end. I ruined the entire meal by guessing what a “few” minutes should be. I should have went with my gut that said “a few is 3….” but I kept thinking “well some people say few but mean more than that.” I choose wrong. ?
Nora Rusev says
I’m so sorry Christine! I’ll add a note to the recipe to clarify it should only be 2-3 minutes.